How to Control ES08MA Servo with Arduino: 0-180 Degree Rotation
How to Control ES08MA Servo with Arduino: 0-180 Degree Rotation
ES08MA is a compact servo motor with metal gears and 2.0 kg-cm torque at 6V. It rotates from 0 to 180 degrees and is commonly used in robotics and mechanical control projects.

Required Components
- Arduino UNO R3
- ES08MA Servo Motor
- Power Adapter 5V 4A with 5.5x2.5mm jack
- DC Jack female 2.1x5.5mm
- Jumper wires (male-male)
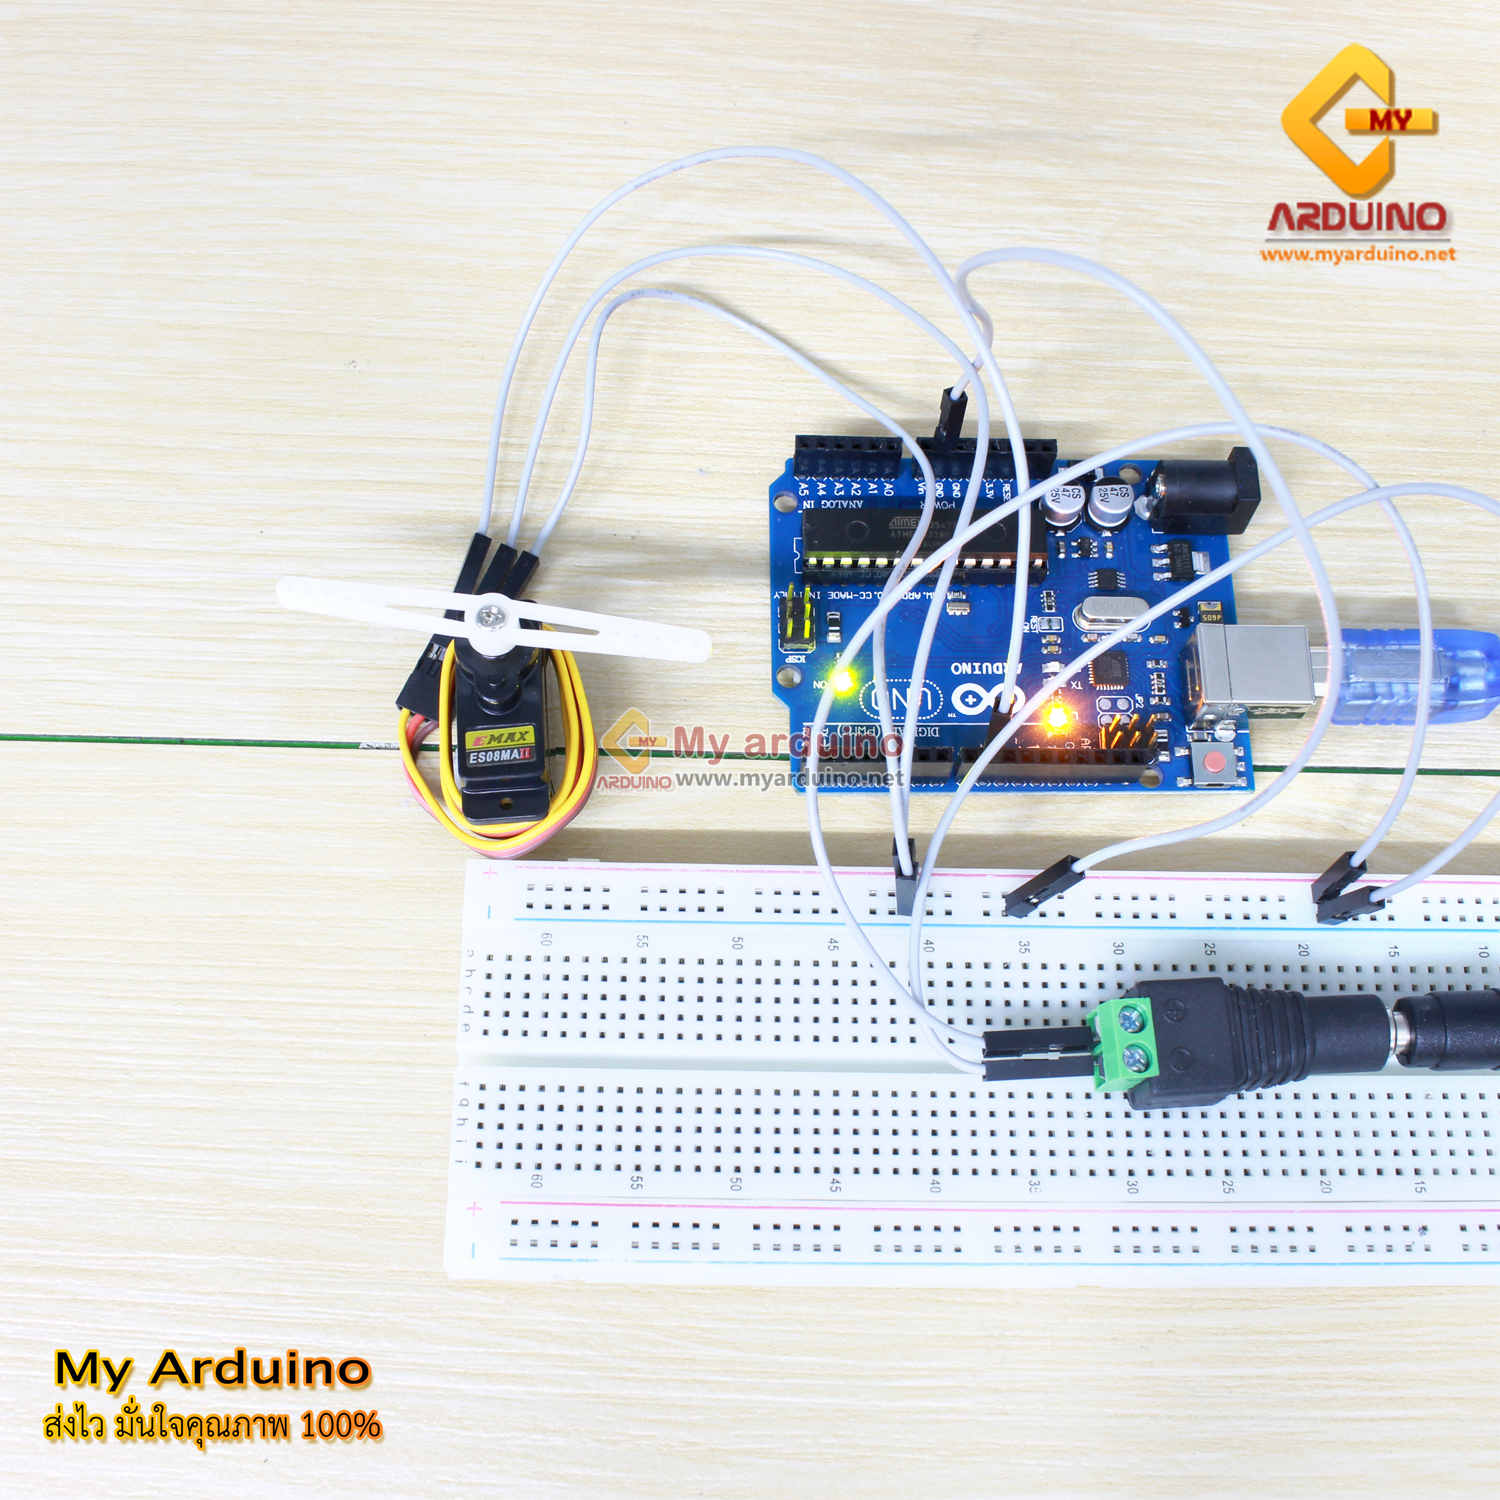
Wiring ES08MA Servo to Arduino
The key point: power the servo from an external adapter, not from Arduino’s 5V pin. Servo motors draw significant current during rotation, which can reset or damage the Arduino board if powered from it.

Wiring details:
- Arduino Pin 9 → Yellow wire (signal)
- Arduino GND → Brown wire (GND) and negative (-) terminal of adapter
- Red wire → Positive (+) terminal of adapter via DC Jack
Arduino Code for Servo Sweep 0-180 Degrees
#include <Servo.h>

Servo myServo;

void setup() {
  myServo.attach(9);  // Pin 9 as servo control pin
}

void loop() {
  // Rotate from 0 to 180 degrees
  for (int angle = 0; angle <= 180; angle += 1) {
    myServo.write(angle);
    delay(15);  // Wait for servo to reach position
  }

  delay(1000);  // Hold for 1 second

  // Rotate back from 180 to 0 degrees
  for (int angle = 180; angle >= 0; angle -= 1) {
    myServo.write(angle);
    delay(15);
  }

  delay(1000);
}
This code sweeps the servo from 0° to 180°, pauses for 1 second, sweeps back to 0°, pauses again, and repeats continuously.
How to Upload Code to Board
- Open Arduino IDE and paste the code above
- Connect Arduino to computer via USB cable
- Go to Tools → Port and select the COM port connected to your board
- Go to Tools → Board and select Arduino UNO
- Click the Upload button (right arrow icon)
Customization Tips
Hold a fixed angle: Replace the sweep loop with myServo.write(desired_angle). Example:
#include <Servo.h>

Servo myServo;

void setup() {
  myServo.attach(9);
  myServo.write(90);  // Start at 90 degrees
}

void loop() {
  // Add other control code here
}
Adjust speed: Change the delay(15) value. Smaller delay = faster rotation, larger delay = slower rotation.
Safety Notes
- Always power the servo from the external 5V adapter, never from Arduino’s 5V pin directly
- Connect all GND pins together (Arduino, servo, adapter) or the servo may behave erratically
- If the servo vibrates or doesn’t move, double-check wire connections and colors
Reference Video
อยากทำโปรเจคแบบนี้?
รับทำโปรเจค Arduino / IoT จบงานไว ส่งงานครบ พร้อมสอน
If you need Arduino project service or urgent IoT development, see full service details on the home page
จ้างทำโปรเจคเลย