Last updated on
How to Use DFPlayer Mini with Arduino to Play MP3 Audio Files
How to Use DFPlayer Mini with Arduino to Play MP3 Audio Files
This guide walks you through playing MP3 audio files using the DFPlayer Mini module with Arduino UNO, from wiring to testing.
Required Components
- Arduino UNO R3
- DFPlayer Mini MP3 Player Module
- Micro SD Card (8-16GB recommended)
- Speaker 3-5W, 4-8 ohms
- Jumper wires
- Breadboard MB-102 (optional)
- Power Adapter 9V 2A for separate power supply
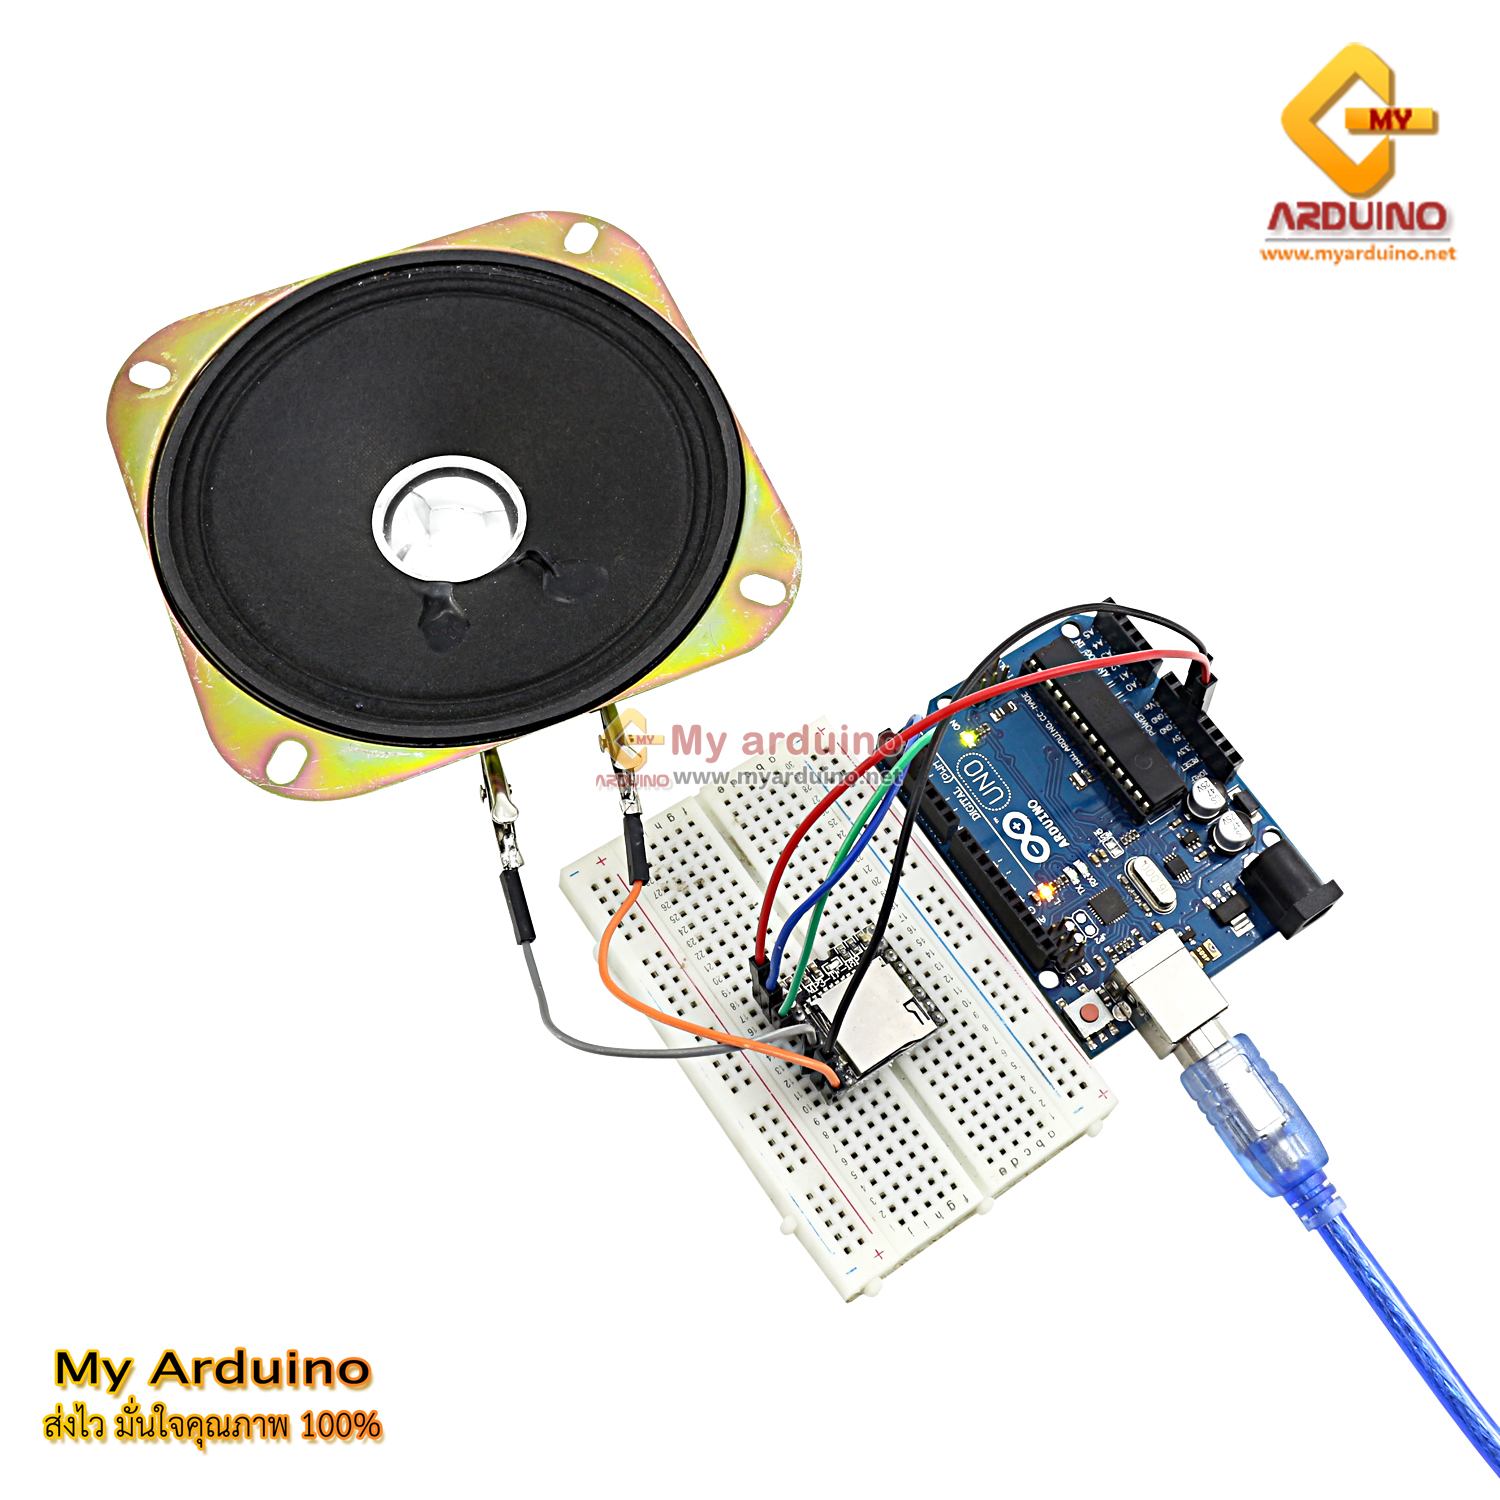
Wiring
Connect as follows:
| Arduino | DFPlayer Mini |
|---|---|
| 5V | VCC |
| GND | GND |
| Pin 2 (RX) | TX |
| Pin 3 (TX) | RX |
Connect speaker to SPK_1 and SPK_2 pins (no polarity, can be swapped)

Install Library
Use the DFRobotDFPlayerMini library via Arduino IDE:
- Open Arduino IDE
- Go to Tools > Manage Libraries…
- Search for DFRobotDFPlayerMini
- Click Install
Prepare Micro SD Card
- Format SD Card as FAT32
- Name audio files as 001.mp3, 002.mp3, 003.mp3
- Place files at Root of SD Card (no subfolders)
[image: SD Card displaying files 001.mp3, 002.mp3, 003.mp3 in Root folder]
Example Code
/*
 * DFPlayer Mini with Arduino
 * - Type 1 to play track 1
 * - Type 2 to play track 2
 * - Type 3 to play track 3
 * - Type 0 to stop
 */

#include <Arduino.h>
#include <SoftwareSerial.h>
#include <DFRobotDFPlayerMini.h>

SoftwareSerial mySoftwareSerial(2, 3);  // RX, TX
DFRobotDFPlayerMini myDFPlayer;

void setup() {
  mySoftwareSerial.begin(9600);
  Serial.begin(115200);

  Serial.println(F("DFPlayer Mini Demo"));
  Serial.println(F("Initializing DFPlayer ... (May take 3~5 seconds)"));

  if (!myDFPlayer.begin(mySoftwareSerial)) {
    Serial.println(F("Unable to begin:"));
    Serial.println(F("1. Please recheck the connection!"));
    Serial.println(F("2. Please insert the SD card!"));
    while (true) {
      delay(0);
    }
  }
  Serial.println(F("DFPlayer Mini online."));

  myDFPlayer.volume(20);  // Volume 0-30
}

void loop() {
  while (Serial.available()) {
    char inChar = (char)Serial.read();
    if (inChar == '1') {
      myDFPlayer.play(1);
    }
    if (inChar == '2') {
      myDFPlayer.play(2);
    }
    if (inChar == '3') {
      myDFPlayer.play(3);
    }
    else if (inChar == '0') {
      myDFPlayer.stop();
    }
  }
}
How to Use
- Upload the code above to Arduino
- Open Serial Monitor (Baud Rate 115200)
- Insert SD Card with audio files into the module
- Type 1-3 to play tracks, type 0 to stop
[image: Serial Monitor showing “DFPlayer Mini online.” message ready for commands]
Notes
- If using a different Arduino board with multiple Hardware Serial ports, you can switch from SoftwareSerial to Hardware Serial
- If speaker volume is too low, increase the volume value in code (maximum is 30)
Reference Video
อยากทำโปรเจคแบบนี้?
รับทำโปรเจค Arduino / IoT จบงานไว ส่งงานครบ พร้อมสอน
If you need Arduino project service or urgent IoT development, see full service details on the home page
จ้างทำโปรเจคเลย