
Using Arduino with Infrared Obstacle Sensor (1-100 cm range)
Using Arduino with Infrared Obstacle Sensor (1-100 cm range)
This guide walks through wiring an Infrared Obstacle Avoidance Sensor (1-100 cm range) to an Arduino UNO, then writing code to read the digital output via Serial Monitor. Suitable for robotics projects, obstacle detection systems, or anyone starting with IR sensors.
Required Components
- Arduino UNO R3 with USB cable
- Infrared Obstacle Avoidance Sensor 1-100 cm (KY-032 style or equivalent)
- Breadboard MB-102 (830 points)
- Male-to-male jumper wires, 20 cm, 10-20 pcs
- Male-to-female jumper wires, 20 cm, 5-10 pcs
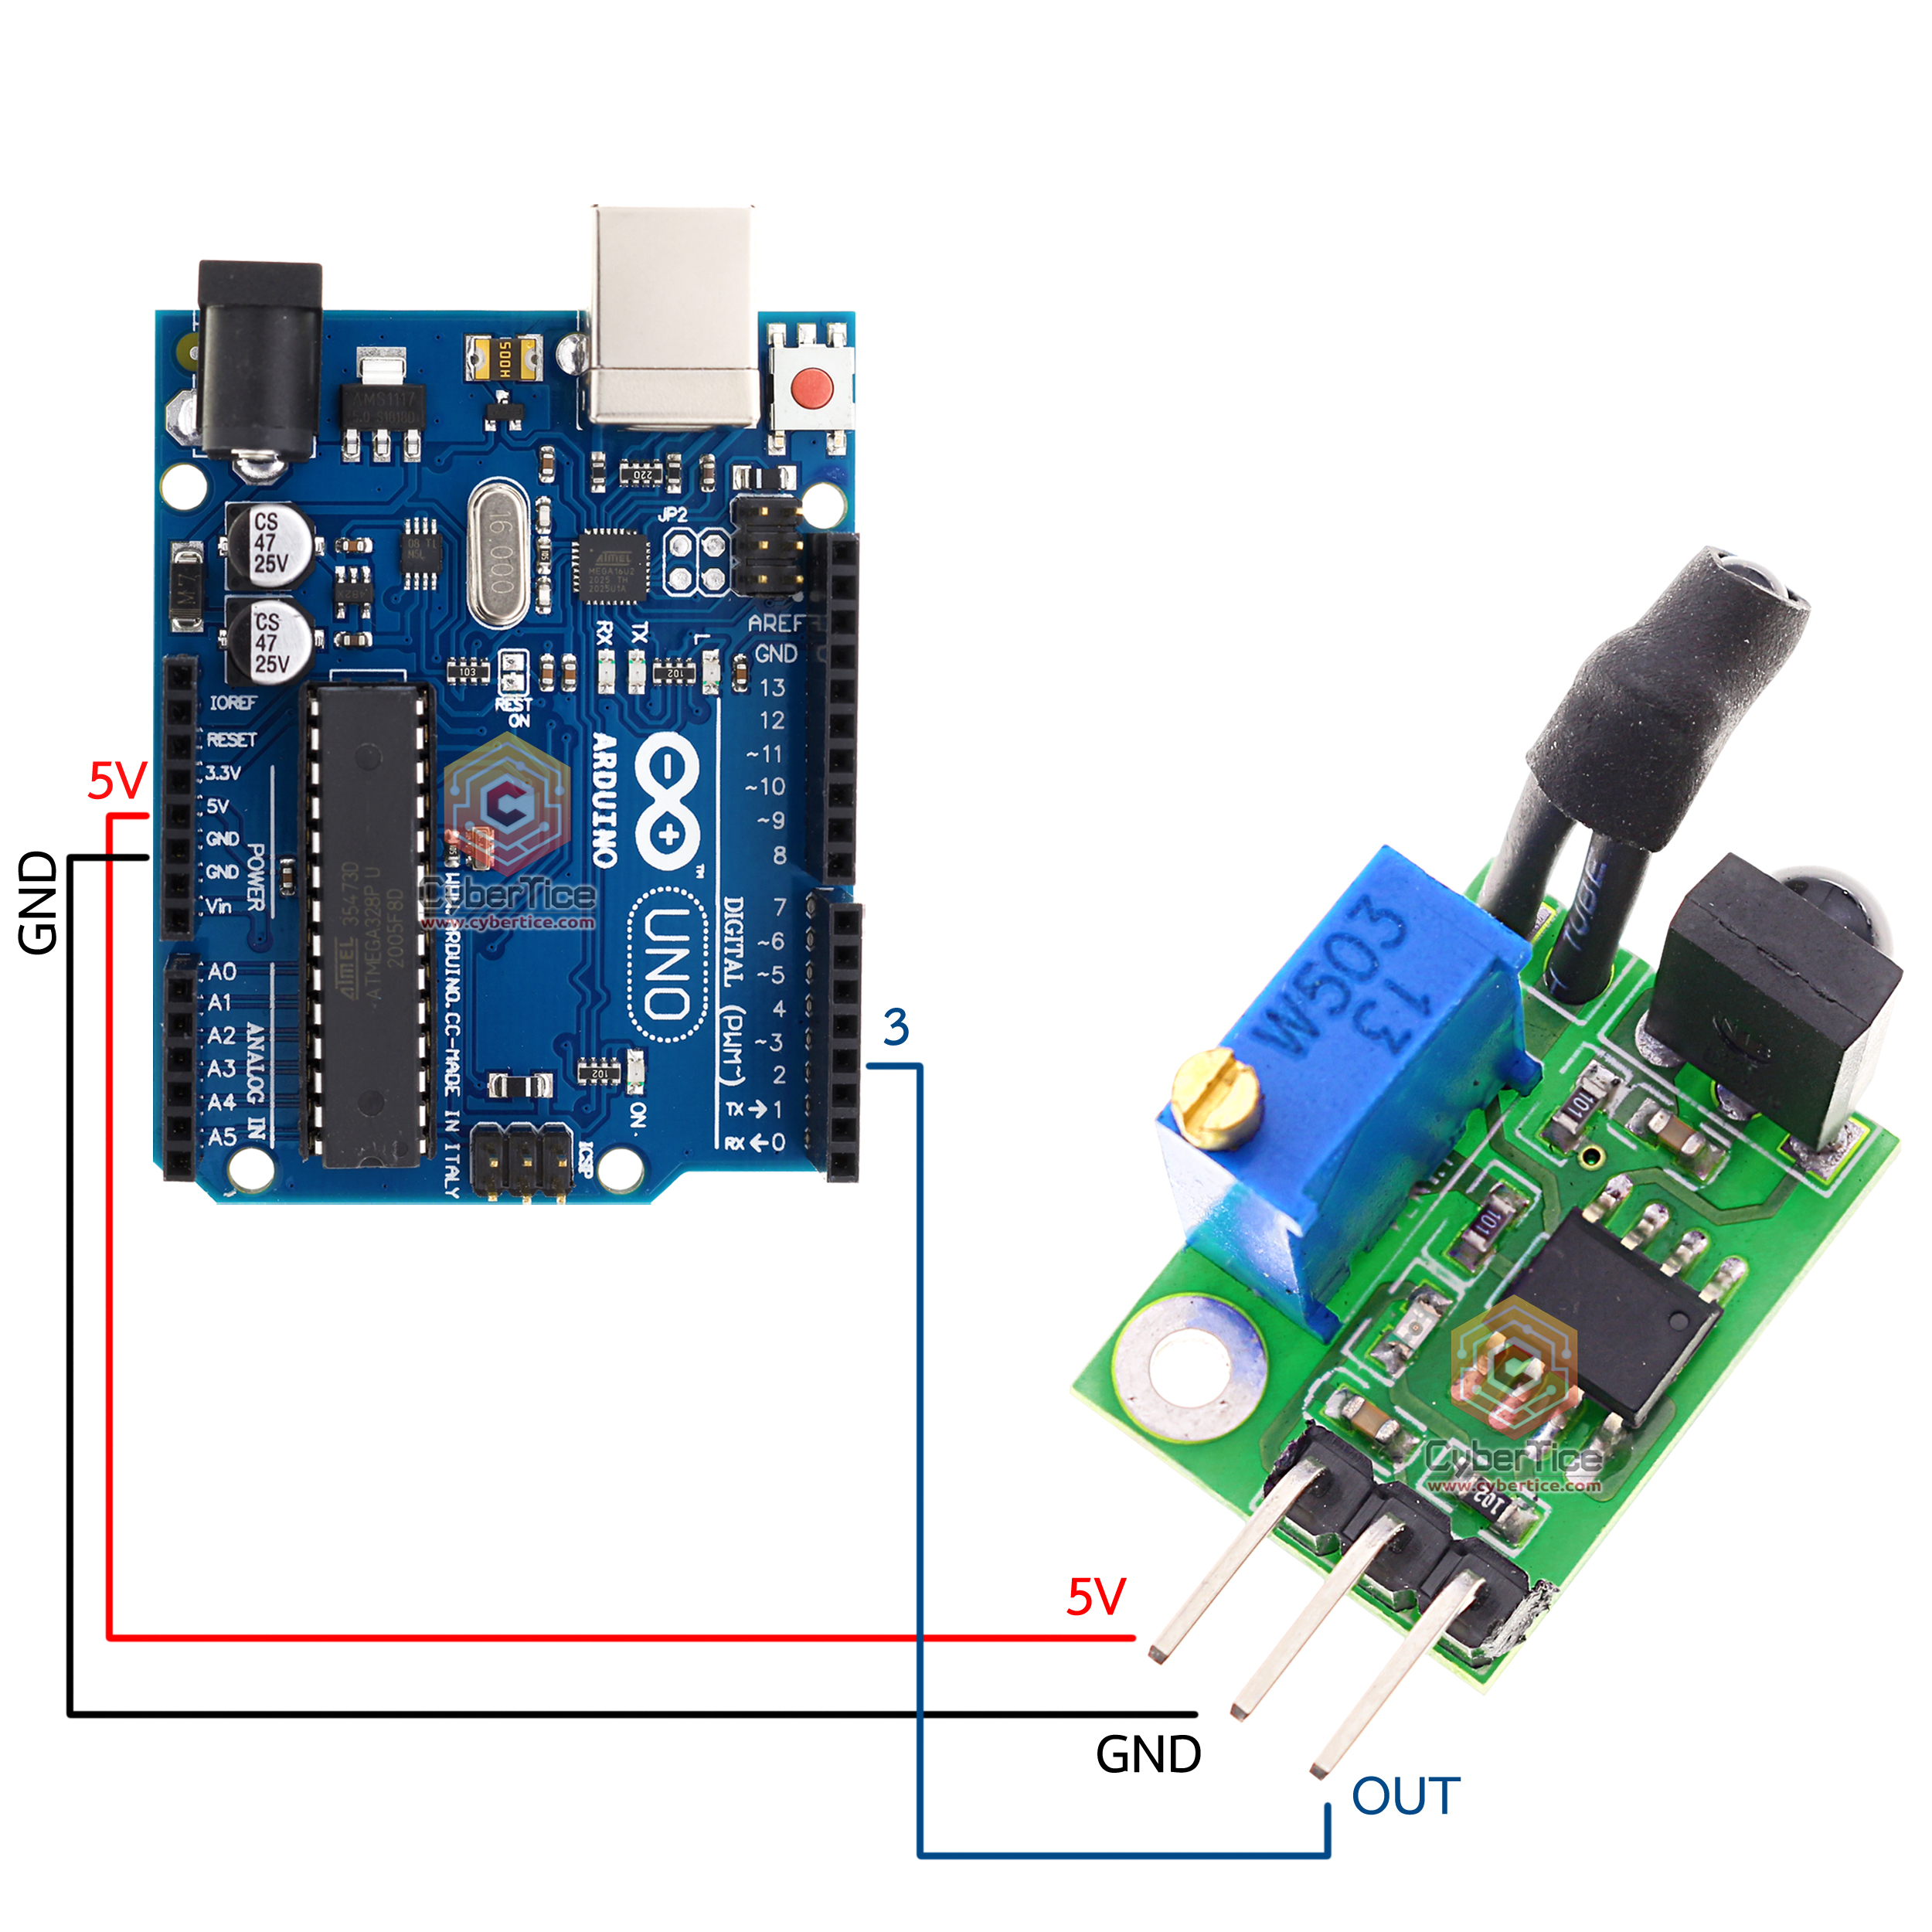
Wiring Diagram
The wiring is straightforward since this sensor only has 3 pins: VCC, GND, and OUT.
| Arduino UNO | Infrared Obstacle Sensor |
|---|---|
| 5V | VCC (leftmost pin) |
| GND | GND (middle pin) |
| Pin 3 | OUT (rightmost pin) |
Arduino Code for Reading Digital Output
// Arduino Infrared Obstacle Sensor - Digital Output Read
// Wiring: 5V-VCC, GND-GND, Pin 3-OUT

const int sensorPin = 3;  // Pin connected to OUT of sensor

void setup() {
  Serial.begin(9600);          // Start Serial Monitor at 9600 baud
  pinMode(sensorPin, INPUT);   // Set sensor pin as input

  Serial.println("=== Infrared Obstacle Sensor ===");
  Serial.println("0 = Object detected");
  Serial.println("1 = Clear path");
  Serial.println("----------------------------");
}

void loop() {
  int sensorValue = digitalRead(sensorPin);  // Read digital value from sensor

  // Display the read value
  Serial.print("Sensor: ");
  Serial.println(sensorValue);

  // If object is detected (value is 0)
  if (sensorValue == 0) {
    Serial.println(">> Object in range!");
  } else {
    Serial.println(">> Area clear");
  }

  delay(200);  // 200 ms delay between readings
}
Steps to Upload and View Results
- Open Arduino IDE and paste the code above
- Go to Tools → Port, select the port your board is connected to
- Go to Tools → Board, select Arduino UNO
- Click the Upload button (right arrow icon)
- Wait for “Done uploading” message
- Open Serial Monitor (Tools → Serial Monitor)
- Set baud rate to 9600

Expected Results
- Value = 1 → No object detected within 1-100 cm range
- Value = 0 → Object is present within detection range
Try placing your hand or a piece of paper in front of the sensor. The value should change from 1 to 0. If it does, your wiring is correct.
Additional Notes
Sensitivity Adjustment - The sensor board has a trimmer potentiometer to adjust detection range. Turning it clockwise increases sensitivity (longer range), counterclockwise decreases it.
Surface Properties - Light-colored objects reflect IR better and can be detected at greater distances than dark objects.
Ambient Lighting - Sunlight or fluorescent lighting may cause interference. Test the sensor in the same lighting conditions where you plan to use it.
Reference Video
อยากทำโปรเจคแบบนี้?
รับทำโปรเจค Arduino / IoT จบงานไว ส่งงานครบ พร้อมสอน
If you need Arduino project service or urgent IoT development, see full service details on the home page
จ้างทำโปรเจคเลย