How to Use HC05 Bluetooth Module with Arduino via Mobile App
How to Use HC05 Bluetooth Module with Arduino via Mobile App
HC05 is a Bluetooth module that is easy to use, inexpensive, and can communicate with Arduino directly through Serial Port. This module is suitable for anyone who wants to control electronic devices via a mobile phone, whether it’s turning lights on/off, controlling motors, or receiving sensor values.

HC05 Features
HC05 has a key advantage over HC06 in that it can be configured for either:
- Slave Mode — allows other devices (like a smartphone) to connect to it
- Master Mode — allows HC05 to actively search for and connect to other devices
Various settings like device name and password can be configured via AT Command by holding down the button on the module before powering on, then releasing.
Required Components
| Component | Quantity |
|---|---|
| Arduino UNO R3 | 1 board |
| Bluetooth Module HC05 | 1 unit |
| Breadboard MB-102 | 1 unit |
| Jumper wires Male-to-Female | 4 pieces |
| Power Adapter 9V 2A | 1 unit (for external power) |
Wiring HC05 to Arduino
Connect according to the table below:
| HC05 | Arduino |
|---|---|
| VCC | 5V |
| GND | GND |
| TX | Pin 2 (RX) |
| RX | Pin 3 (TX) |
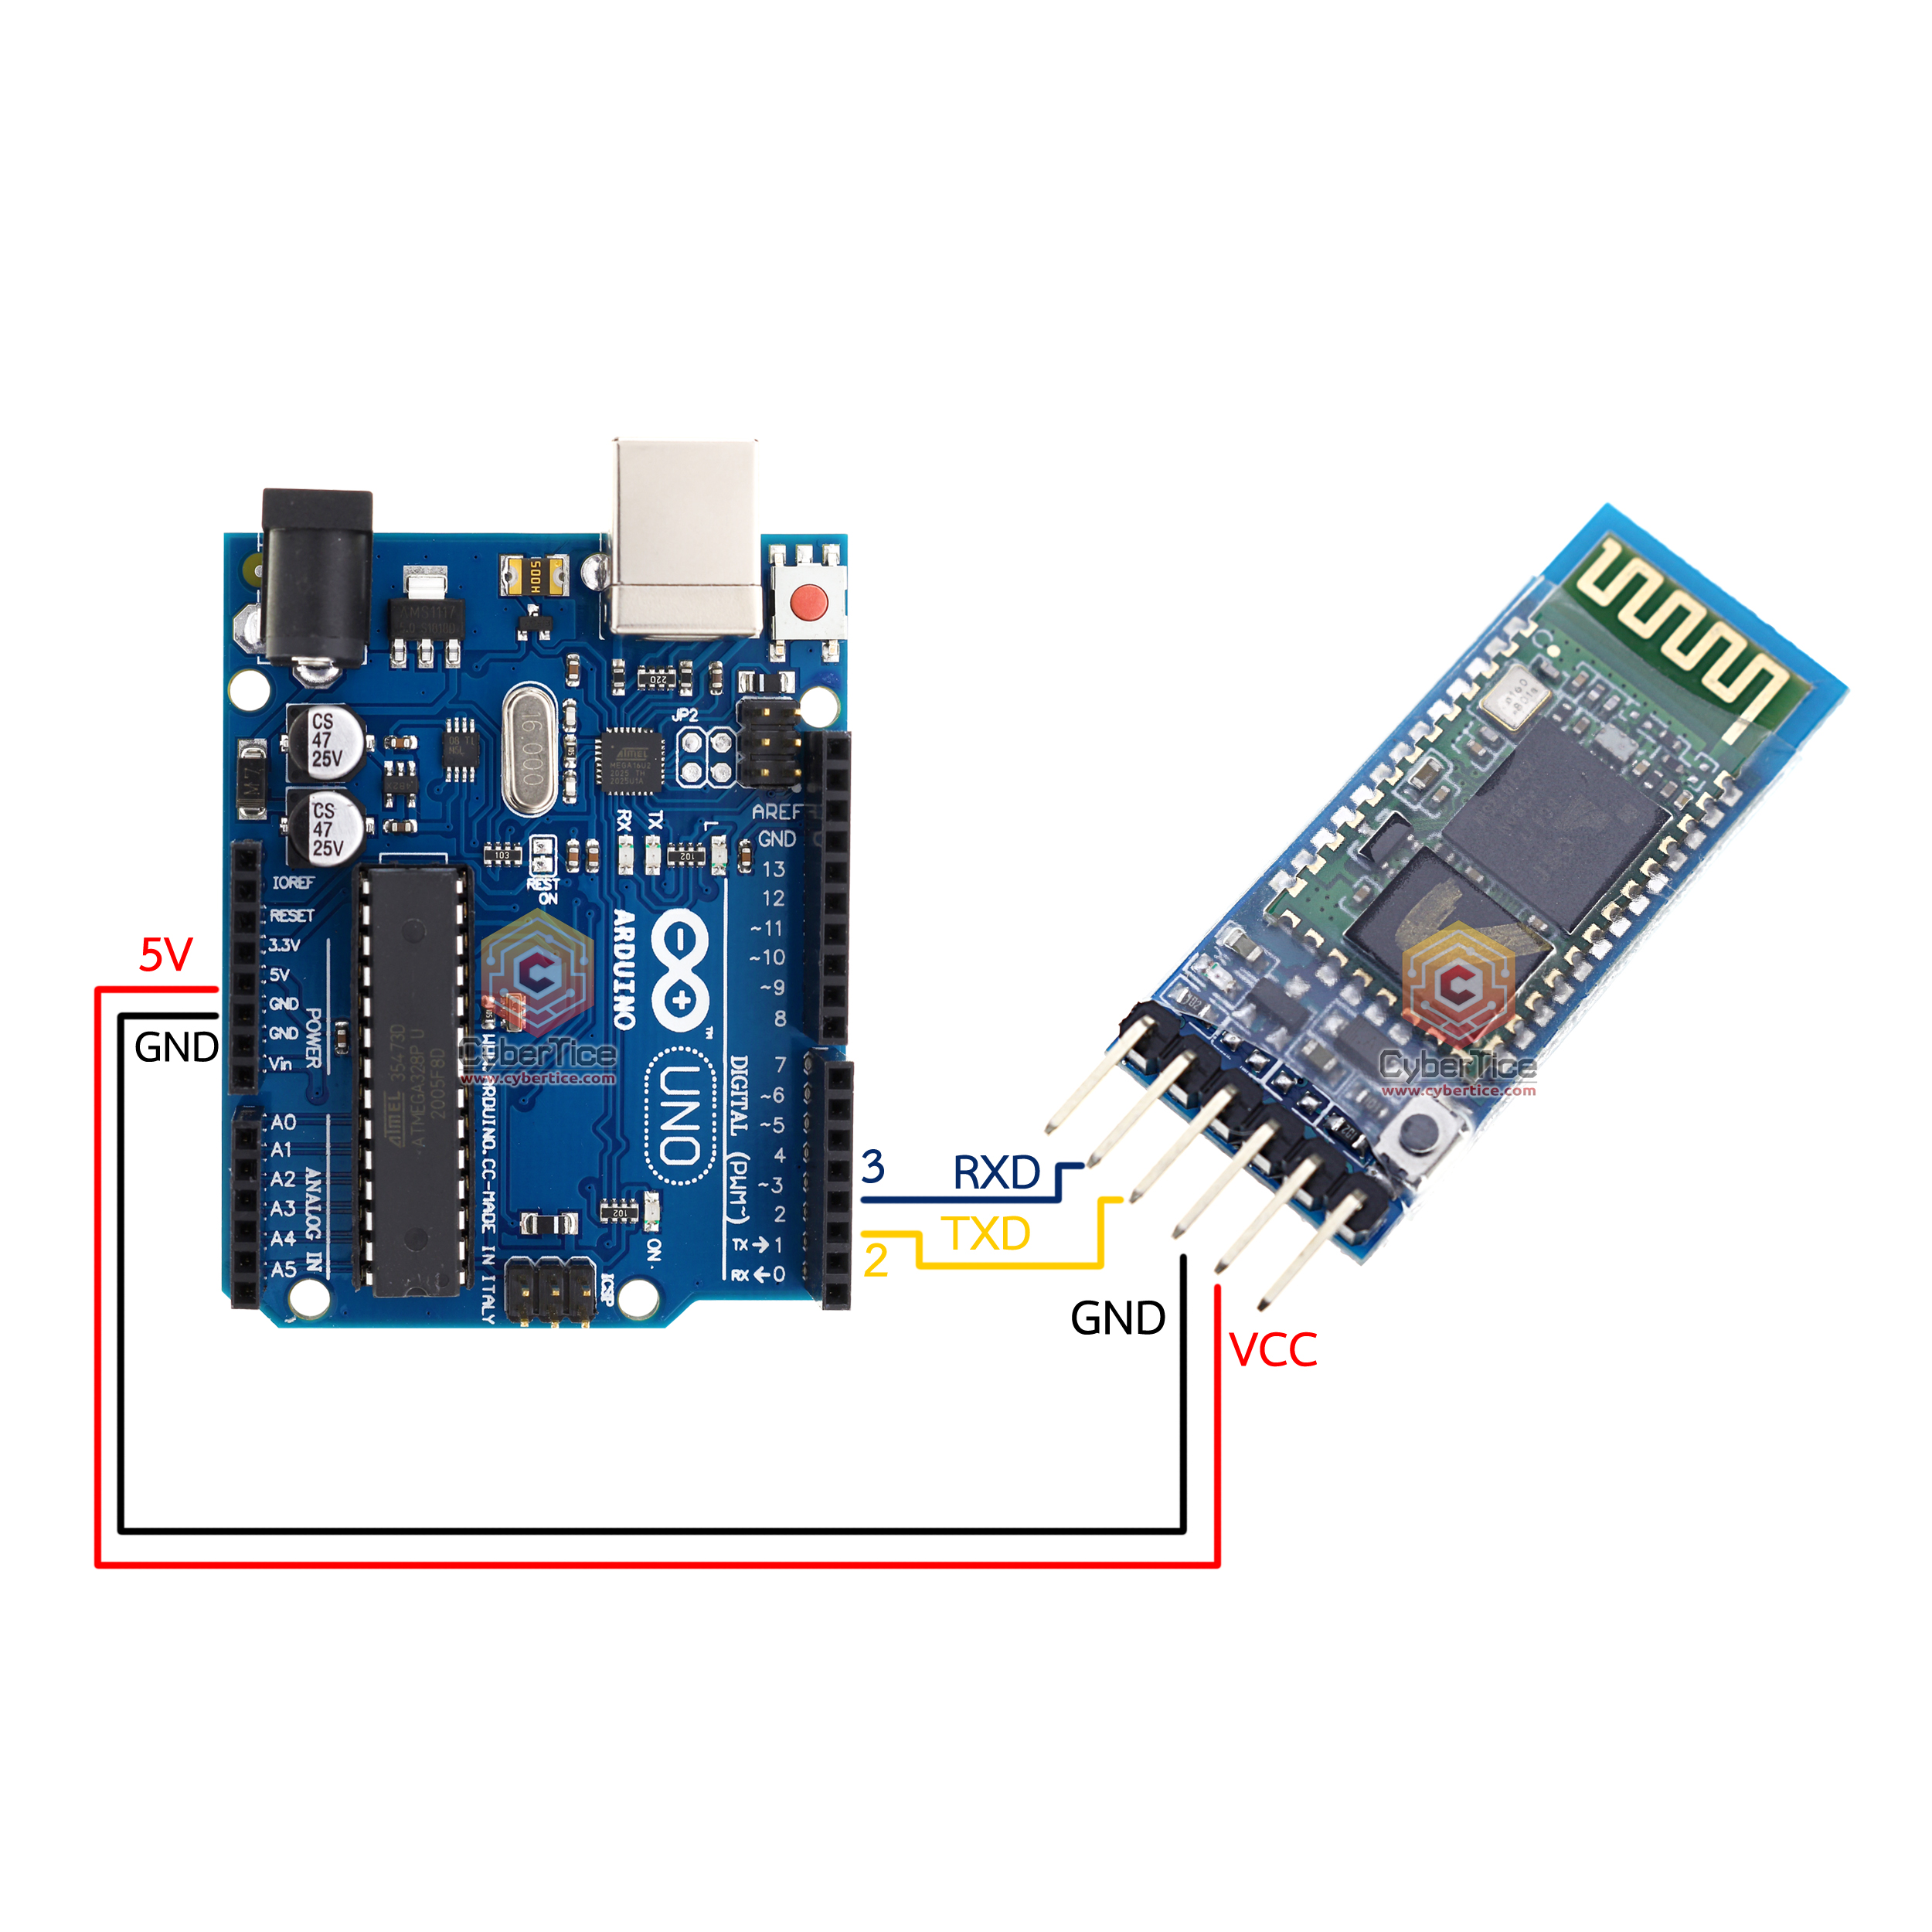
An important note is that HC05 operates at 3.3V on its RX pin, but its TX pin outputs 3.3V signal which Arduino UNO can read (since 3.3V HIGH is above the threshold). Therefore, no voltage divider is needed for this setup.
Arduino Code for Reading HC05 Data
#include <SoftwareSerial.h>

// RX = Pin 2, TX = Pin 3
SoftwareSerial mySerial(2, 3);

void setup() {
  Serial.begin(9600);
  while (!Serial) ; // Wait for Serial to be ready (for Leonardo)
  mySerial.begin(9600);
}

void loop() {
  // If data comes from HC05, send to Serial Monitor
  if (mySerial.available()) {
    Serial.write(mySerial.read());
  }
  // If data comes from Serial Monitor, send to HC05
  if (Serial.available()) {
    mySerial.write(Serial.read());
  }
}
This code bidirectional forwards data between HC05 and Arduino’s Serial Monitor. When you press a button in the mobile app, the value appears in Serial Monitor so you can see what the app is sending.
How to Use HC05 Data for Applications
From the example code, mySerial.read() stores the character sent from the mobile phone. You can write conditions to control devices based on this value, for example:
void loop() {
  if (mySerial.available()) {
    char data = mySerial.read();
    if (data == 'A') {
      digitalWrite(13, HIGH);  // Turn on LED
    } else if (data == 'B') {
      digitalWrite(13, LOW);   // Turn off LED
    }
    // Display received value at Serial Monitor
    Serial.println(data);
  }
}
To control a relay for turning house lights on/off, connect the relay’s Signal pin to your desired pin and modify the conditions in the code based on the button pressed in the app.

Installing Ardroid App on Mobile
The app used with this tutorial is called Ardroid, downloadable from Play Store:
App usage steps:
- Open Ardroid app, tap the 3-dot menu at top-right
- Select Bluetooth and pair with HC05 (default PIN is 1234)
- When connected successfully, the status LED on HC05 changes from fast blinking to steady
The app has several pages for testing:
- Digital page — press Pin1 Pin2 Pin3 to send numeric values to Arduino
- Analog page — drag the slider bar to send continuous numeric values
- Data page — type a message and press send, e.g., type “myarduino” and press Send. That value appears in Serial Monitor
[image: Ardroid app interface showing Pin1 Pin2 Pin3 buttons for testing]
Reference Video
Summary
HC05 is a good choice for Arduino projects that need mobile phone control. Advantages include easy circuit wiring, works with 5V from Arduino, and communication via Serial Port which keeps code simple. The key thing to watch out for is connecting HC05 TX to Arduino RX and HC05 RX to Arduino TX — if reversed, no data will transfer.
อยากทำโปรเจคแบบนี้?
รับทำโปรเจค Arduino / IoT จบงานไว ส่งงานครบ พร้อมสอน
If you need Arduino project service or urgent IoT development, see full service details on the home page
จ้างทำโปรเจคเลย