Intermediate
Arduino Controlled Delta Robot
It is about a delta robot that can grab and move objects. It is connected to a Raspberry Pi to play Tic Tac Toe using computer vision.

It is about a delta robot that can grab and move objects. It is connected to a Raspberry Pi to play Tic Tac Toe using computer vision.
▶ Click to play project demo
Project Supporter Team
Posted by
This is a delta robot that comes to life due to an Arduino Mega board. It has an electromagnet at its head in order to be able to grab and move ferromagnetic objects.
At its control panel, there are buttons, swithes and potensiometers in order to be able to move its head to the desired position and turn on and off the electromagnet. Moreover it can be controlled remotely using the UART serial port 1 (PINs 18 and 19). It can receive coordinates and the desired state of the magnet via Serial port. Consequently with the use of a Bluetooth Adaptor such as HC-05 or HC-06 it can be controlled wirelessly by another Bluetooth device. So it can be used at a lot of applications according to the remote device which is connected to it.
The message that must be sent to Arduino Mega is @xxxx, yyyy, zzzz, m$ where xxxx, yyyy and zzzz are the ASCII codes of the digits of the x, y and z coordinates respectively and m is the desired magnet status which can be either '0' or '1' in order to turn it off or on respectively. All these numbers are actually the ASCII codes of each digit, not integers, so the Serial1.parseInt() function is used to read these numbers. The symbols '@' and '$' denote the start and the end of message respectively so that the Arduino Mega can indetify what each number represents and whether the message is complete or not. When it is done, it sends the character '@' to the remote device to say that everything is OK and to ask for the next message.
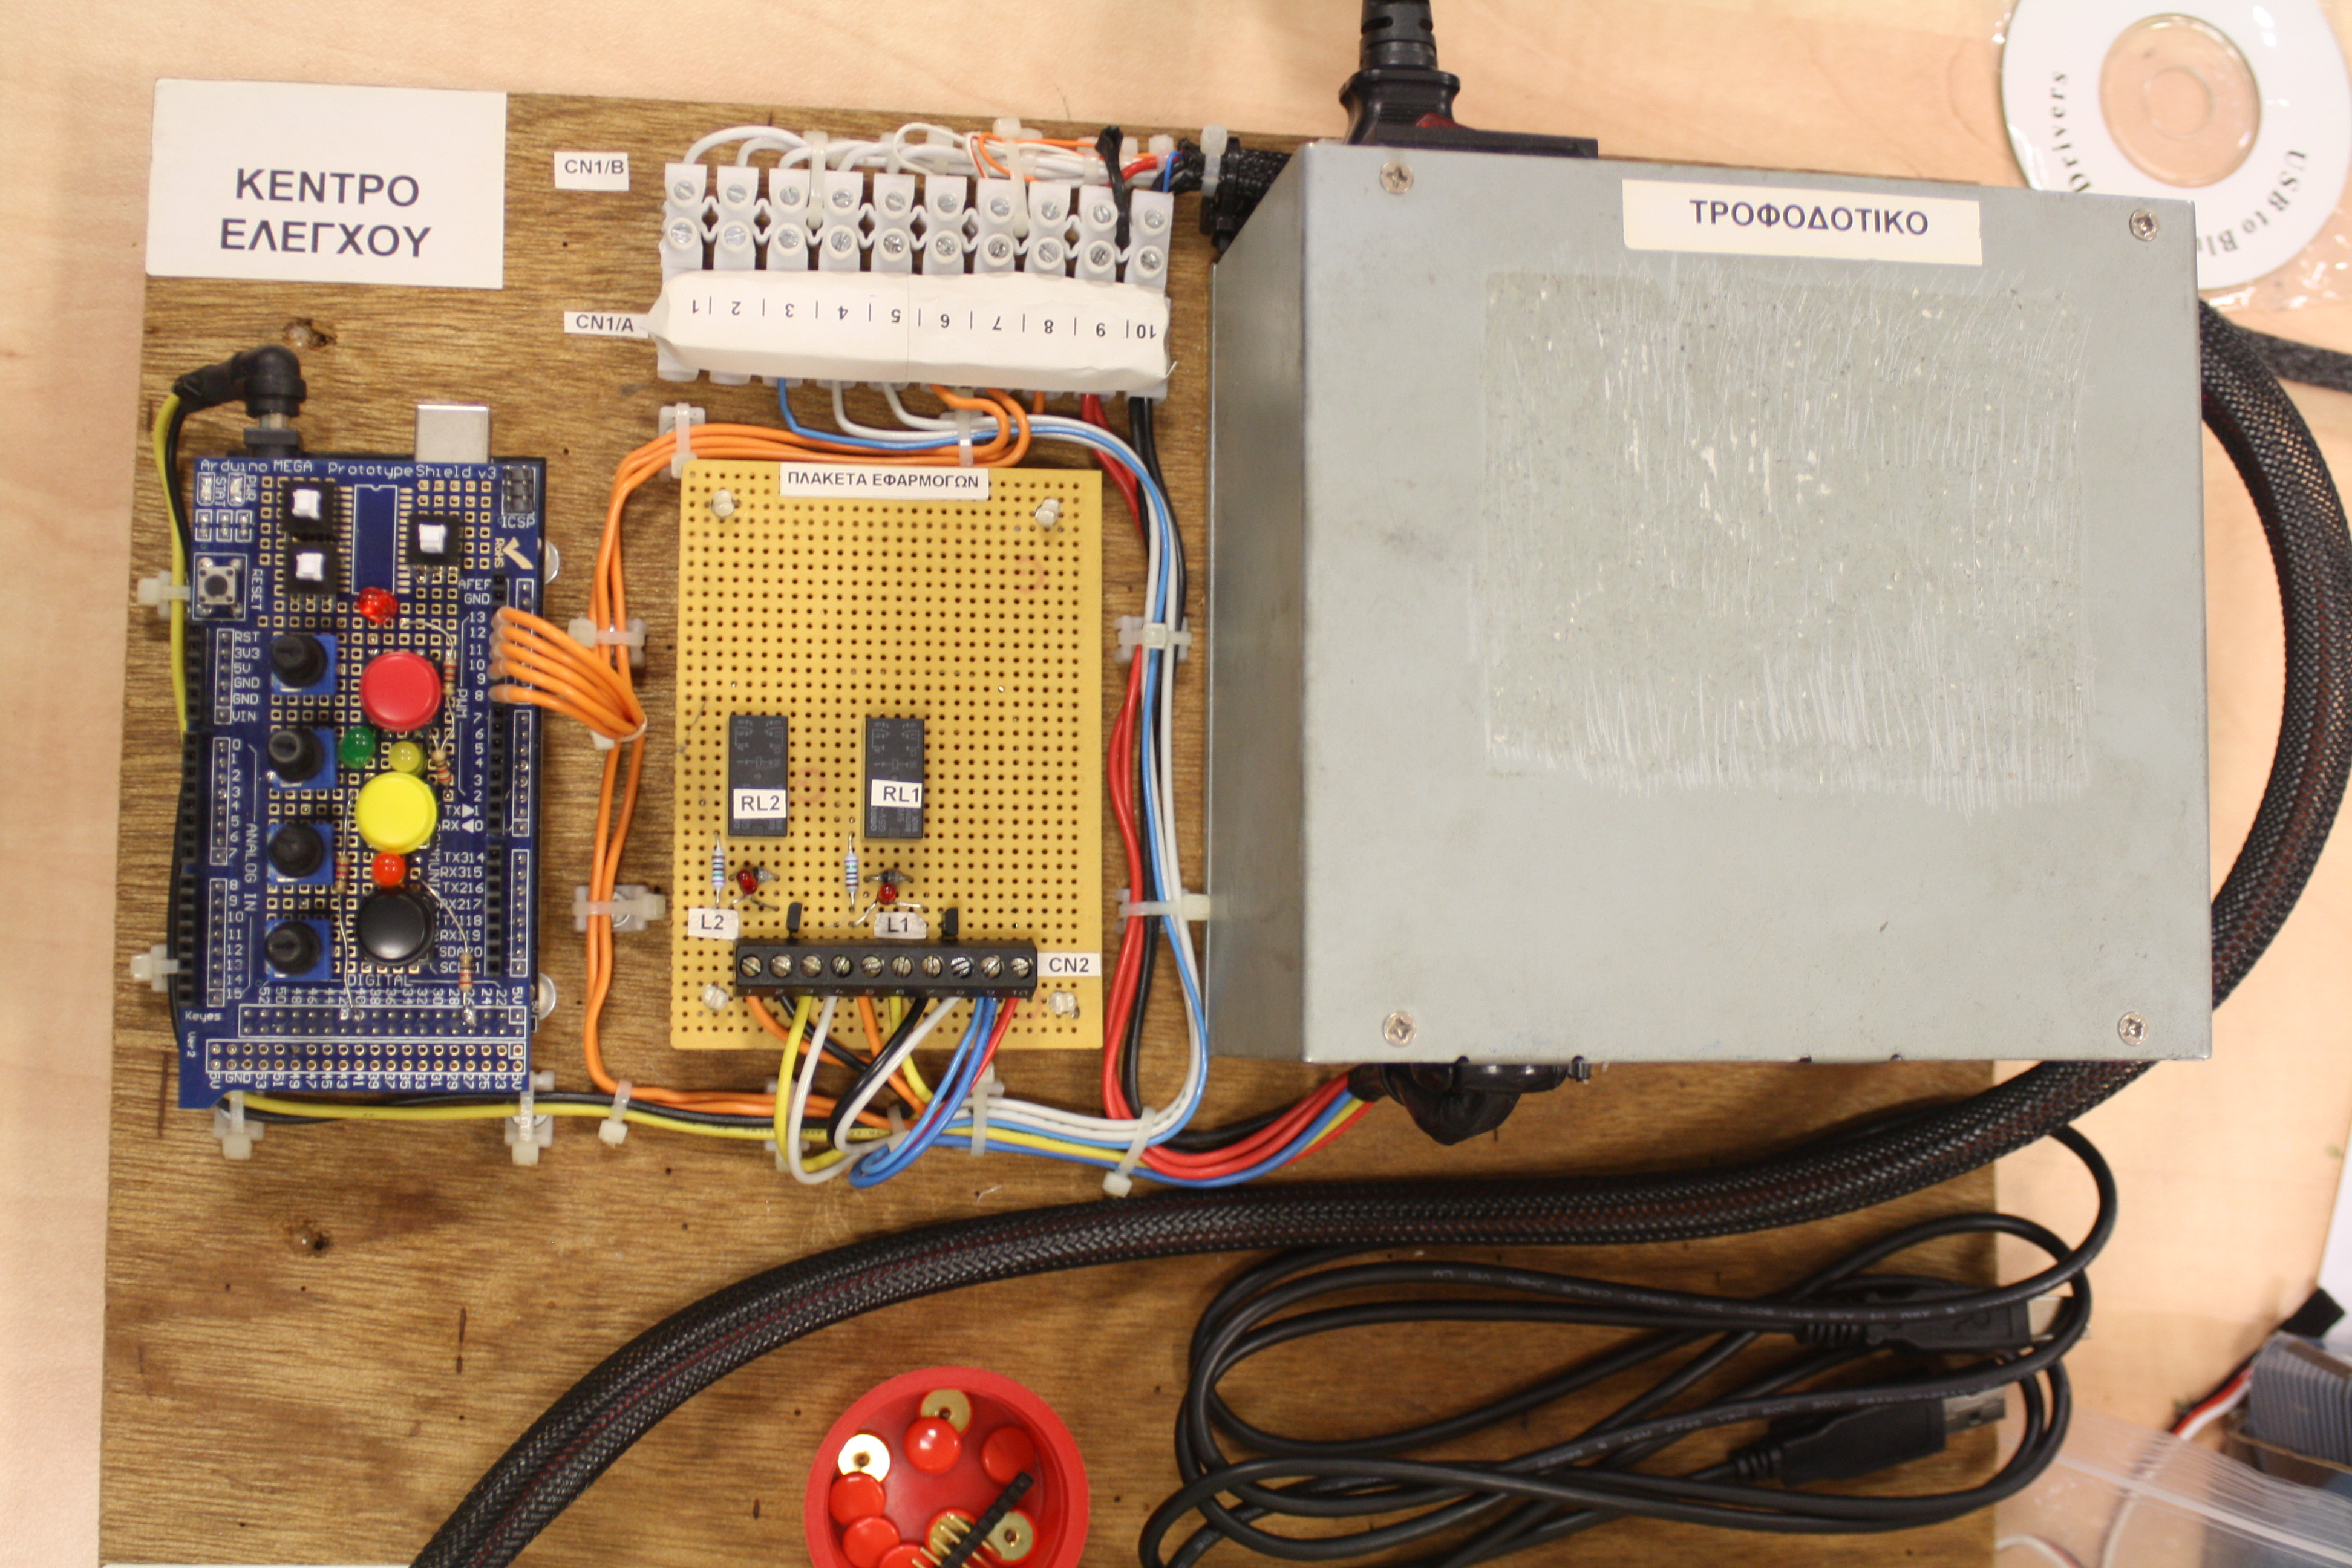
In the following picture there is an overview of the entire structure with the Arduino and the power supply:

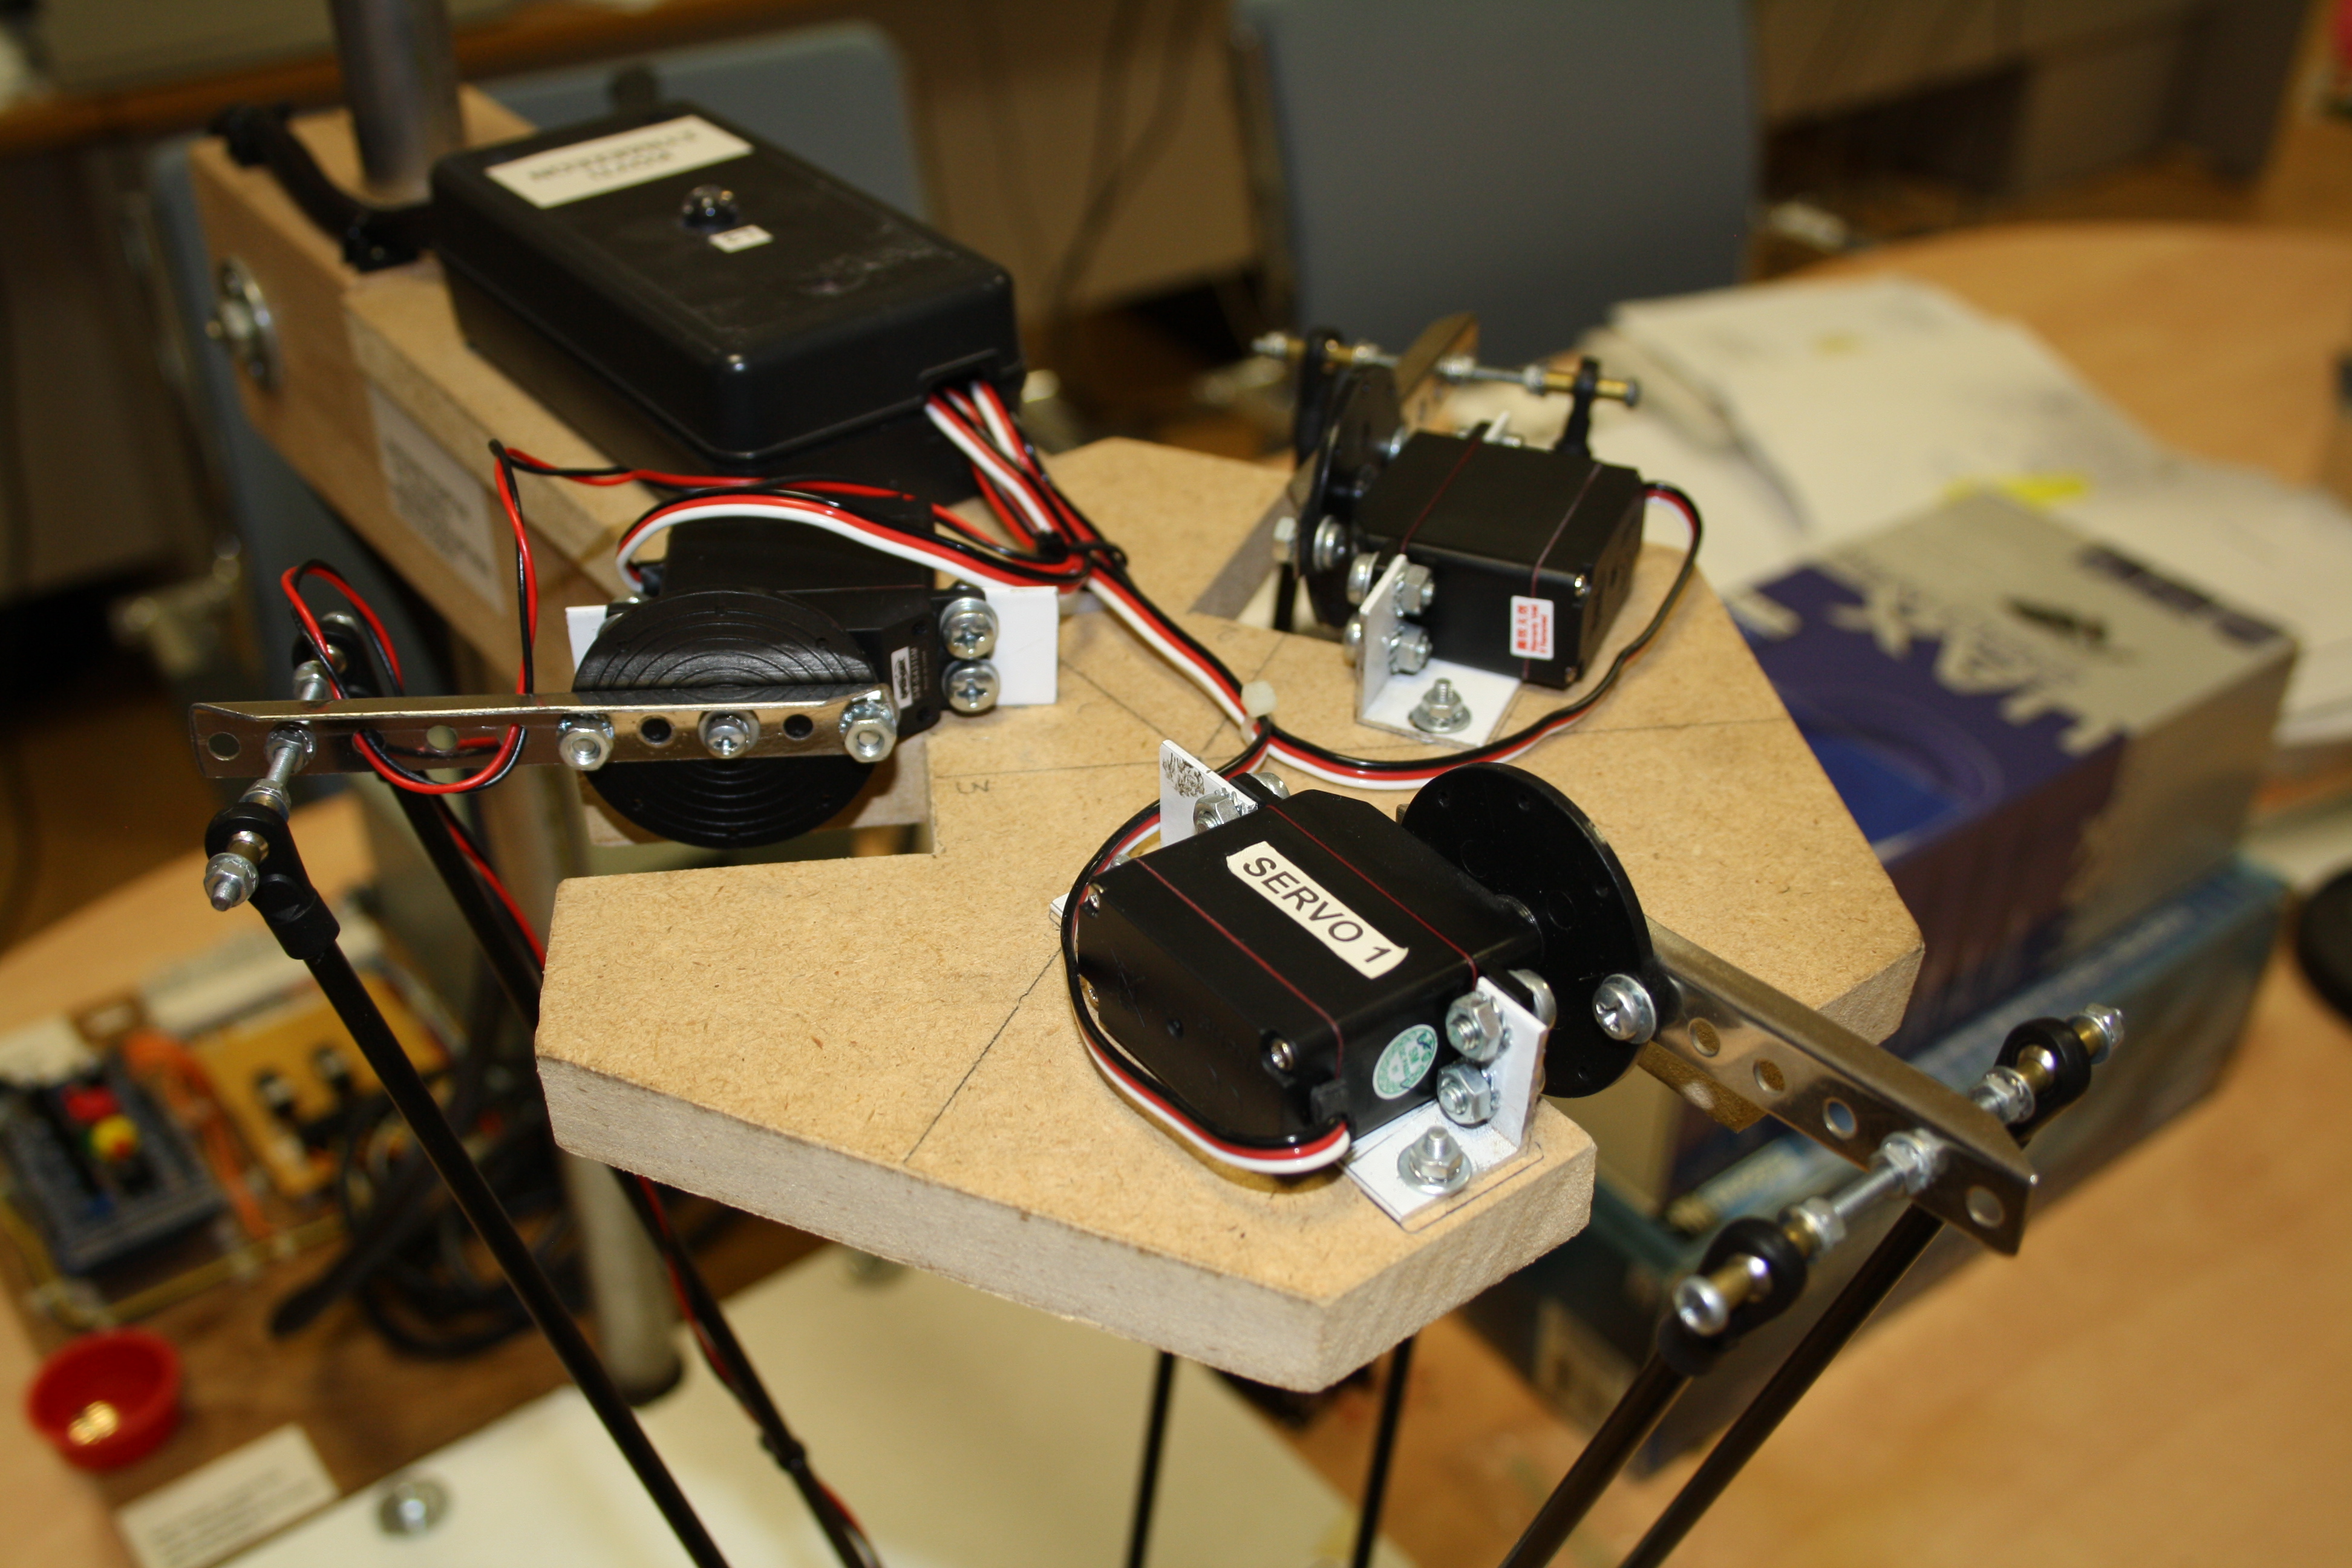
In the next two pictures the control panel with the power supply and the servomotors are shown:
Additionally, it sends its current coordinates and current status to an external device via the UART port 0 (PINs 0 and 1) which is also connected to the USB port. Thus the user can see the output on the serial terminal of the Arduino IDE or on any other device with serial port such as another Arduino.
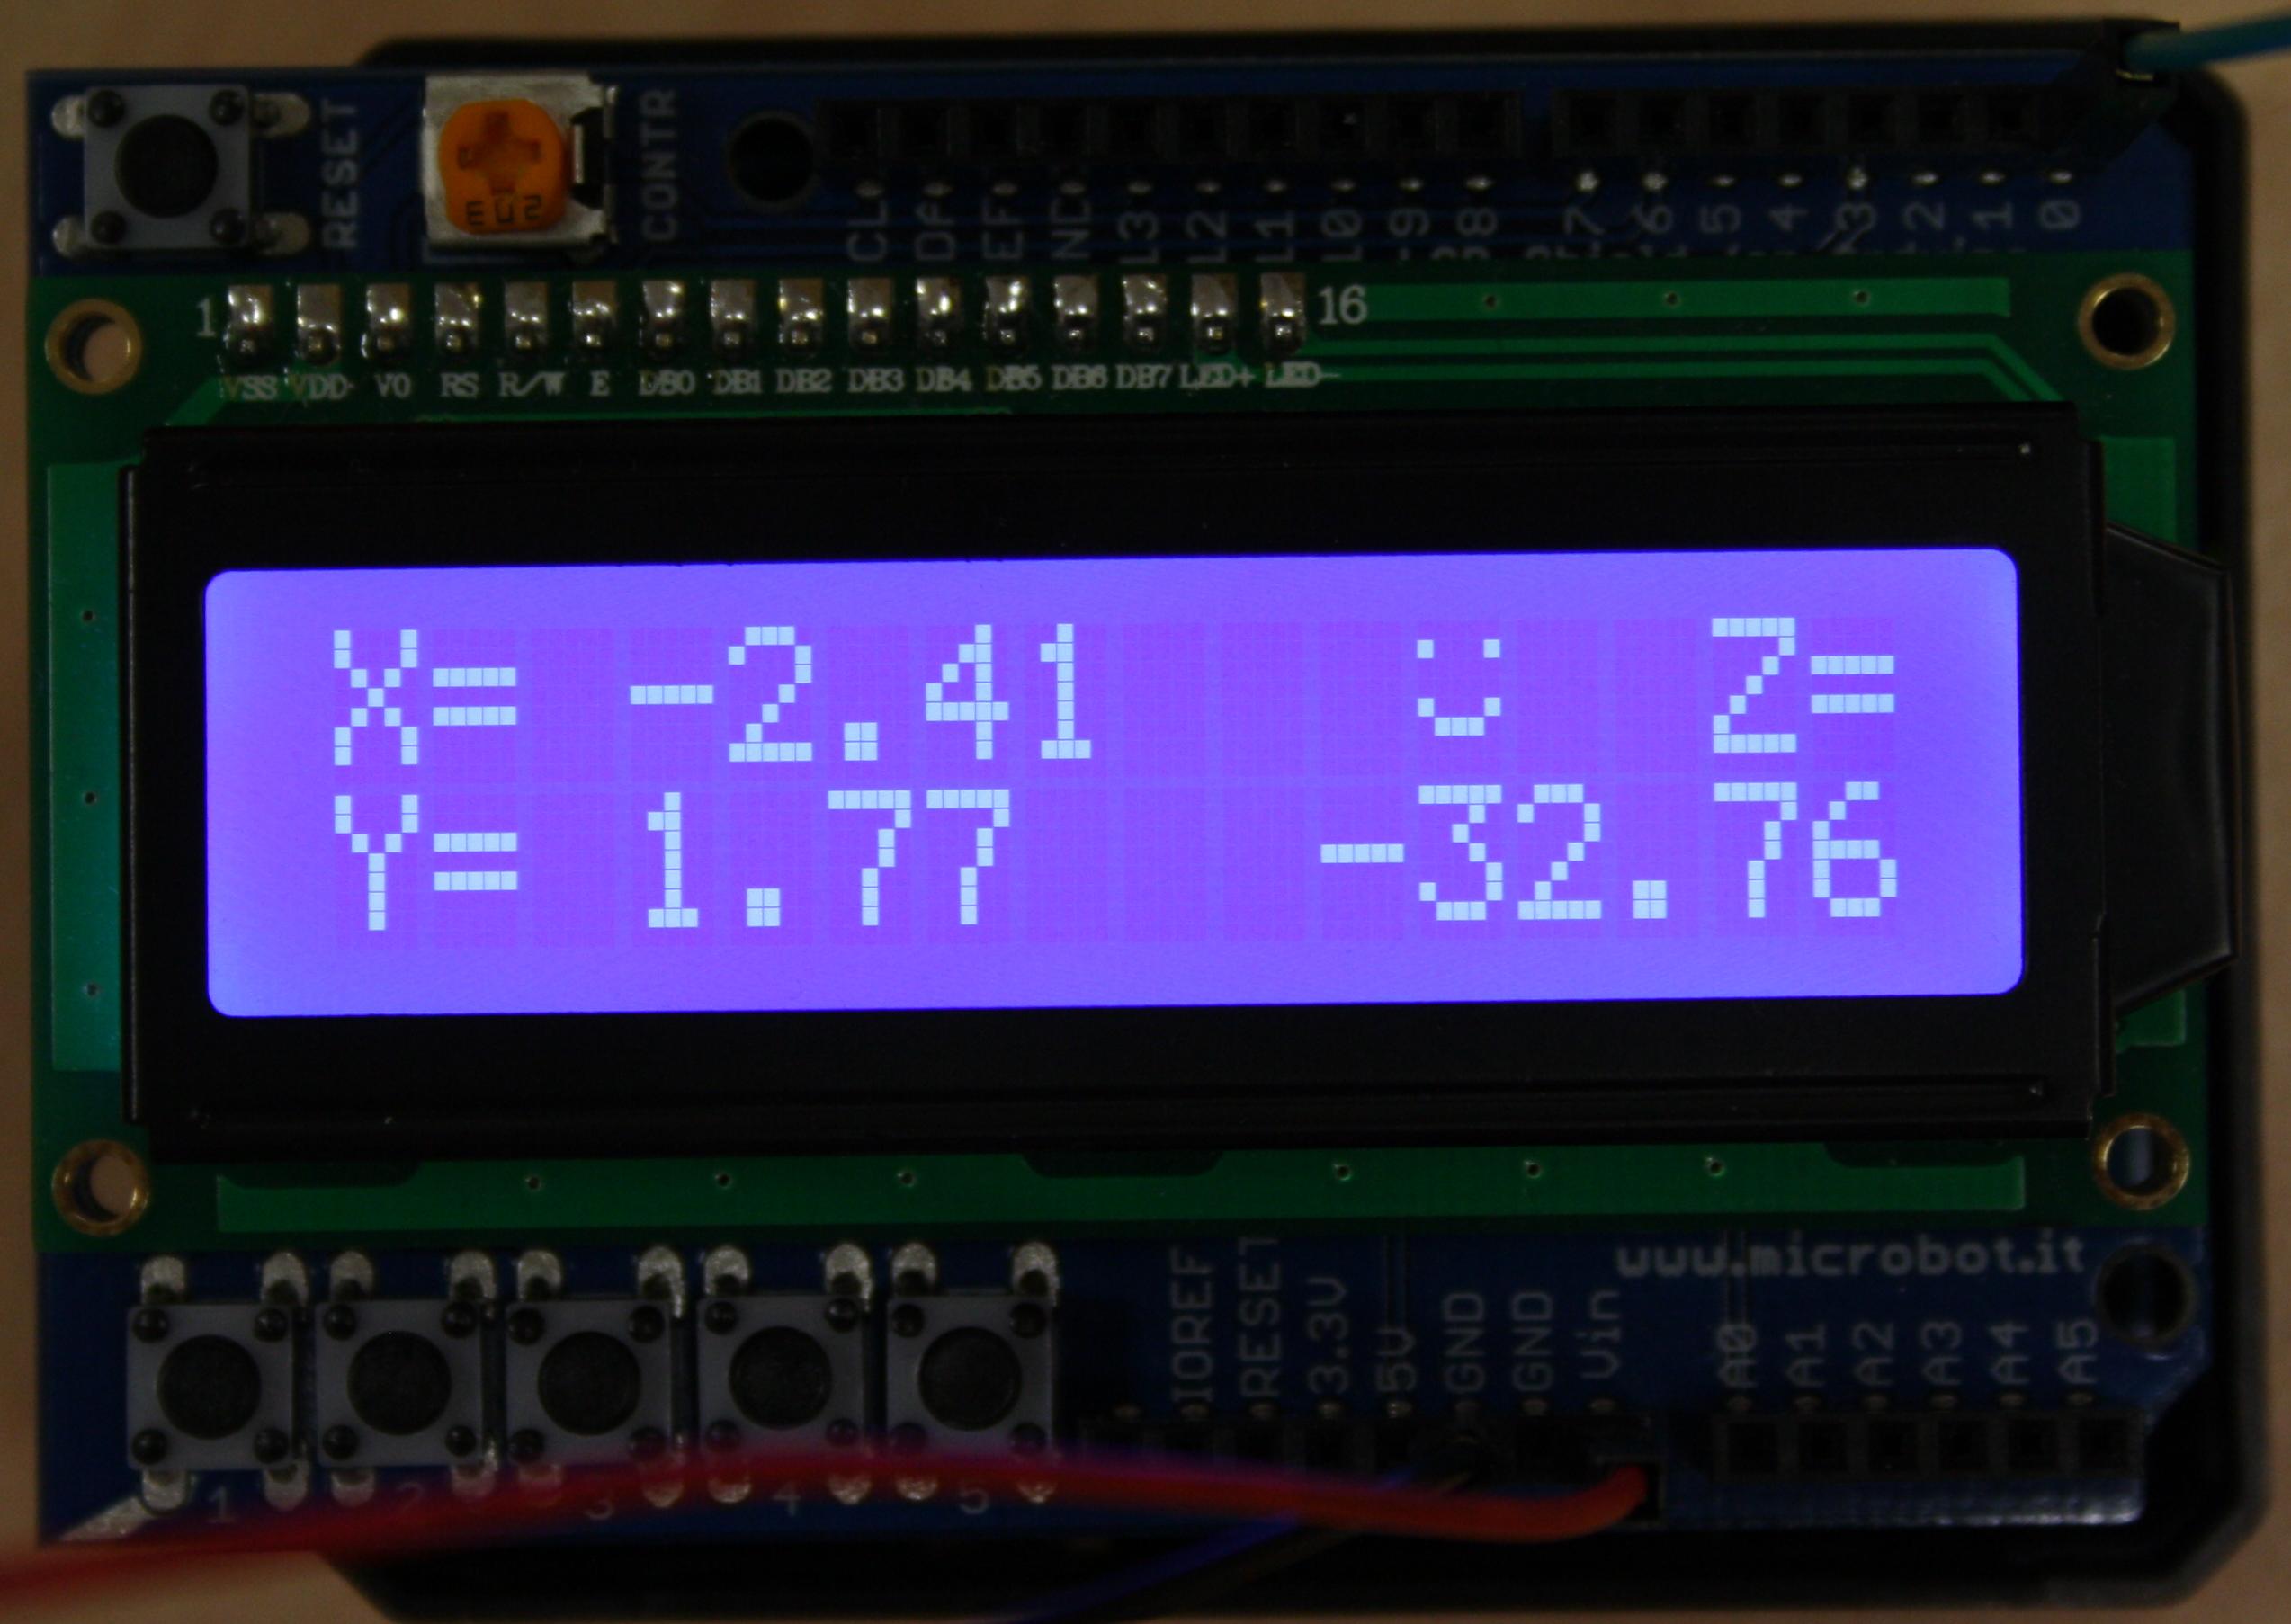
To capture the output, I have used an Arduino UNO with an LCD screen shield for UNO, where one can see the coordinates of the delta robot's head. Moreover it shows either a happy face if everything is OK or a sad face if the coordinates sent by the remote device to the robot were outside the region its head can reach. In such case, namely if the remote device sends to the Arduino Mega invalid position, the Robot does not move and it sends as an output this condition which can be capured by the code that runs on the Aduino UNO.
In the following picture the Arduino UNO with the LCD screen shield on top of it is shown:
In order to control it by an Android tablet via Bluetooth using a Bluetooth adapter such as HC-05 or HC-06, I have developed an Android application that can be found at the following link:
https://play.google.com/store/apps/details?id=com.georgdag.arduinobaseddeltarobotremotecontroller
It uses the touch screen of the tablet to convert touch gestures into coordinates and send them via Bluetooth to the Arduino. Of course this app can be used to control every other similar project. Here is a screenshot of this app:

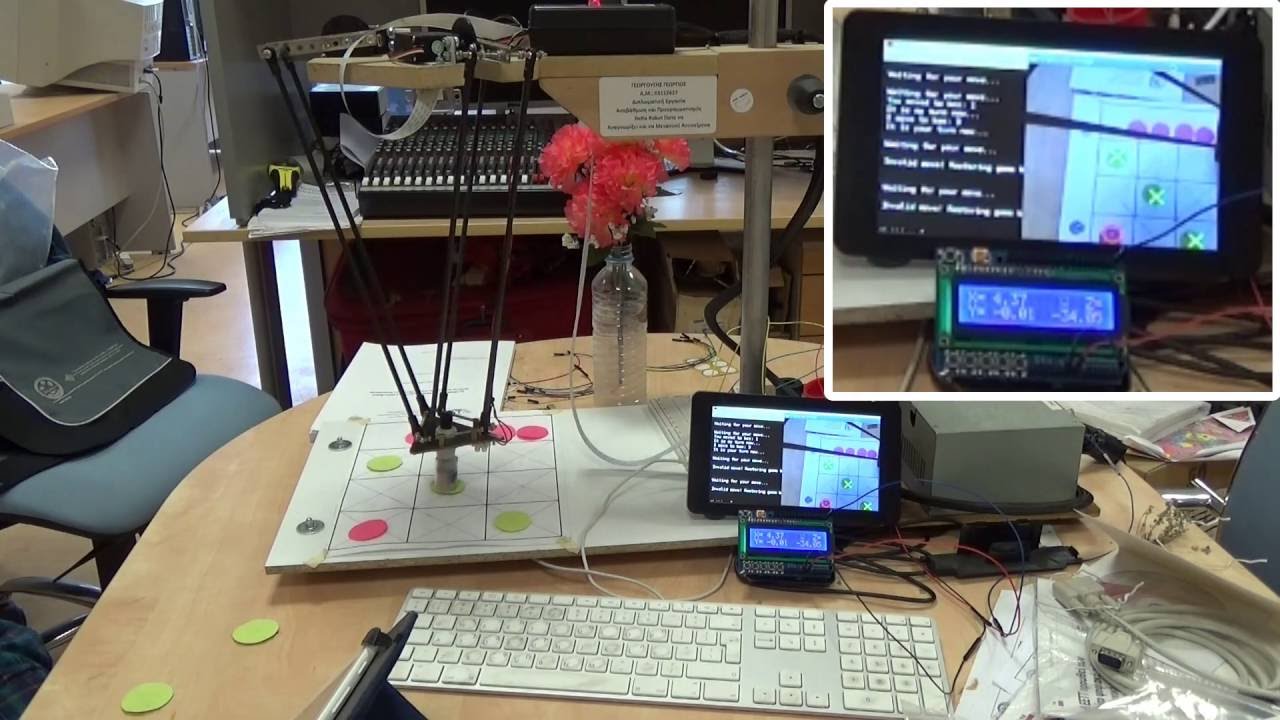
To demostrate here the robot I have uploaded a video which shows it playing Tic Tac Toe against human using tokens. For that reason I have used a Raspberry Pi 2 B+ board which runs Raspbian OS (derived from Debian Linux). The Tic Tac Toe game code runs on the Raspberry and is written in C++ with the help of OpenCV library for the camera use. Using a Pi Camera fixed on the top of the robot looking down, it can recognize opponent's moves. Then it decides its next move. If the player has cheated, it moves the tokens back to their last valid positions and asks the opponent to play again. When the Raspberry has decided to move the head of the robot or to switch the magnet on or off, then it sends the coordinates and the desired status of the electromagnet to the delta robot, namely to the Arduino Mega, via the UART port. Maybe I have to give more thorough details about that project in a future post, although the Tic Tac Toe game is not a pure Arduino project as it runs entirely on the Raspberry. Here I want to focus on the Arduino part of the project, that's why I stick to the robot, while the Tic Tac Toe game is referred in order to demonstrate the robot's capabilities and its ability to communicate with external devices and follow orders.
For that demonstration, here follows a Youtube video showing delta robot in action playing Tic Tac Toe:
Support to get the Source Code for this project
Verified user reviews
ล็อกอินด้วยบัญชีบนเว็บนี้แล้วให้คะแนนหรือคอมเมนต์ได้เลย ระบบเก็บผ่าน Supabase ไม่ต้องใช้ GitHub แล้ว
ยังไม่มีรีวิวที่อนุมัติแล้ว เป็นคนแรกที่มาให้ความเห็นได้เลย