Easy
โปรเจกต์ Obstacle Avoiding Robot
หุ่นยนต์หลบหลีกสิ่งกีดขวางตัวนี้ หรือเรียกอีกอย่างว่า NT1 จะหลบหลีกสิ่งกีดขวางที่อยู่ข้างหน้า โดยใช้ ultrasonic ranging sensor รุ่น HC-SR04

หุ่นยนต์หลบหลีกสิ่งกีดขวางตัวนี้ หรือเรียกอีกอย่างว่า NT1 จะหลบหลีกสิ่งกีดขวางที่อยู่ข้างหน้า โดยใช้ ultrasonic ranging sensor รุ่น HC-SR04

▶ กดเพื่อดูวิดีโอสาธิตโปรเจกต์
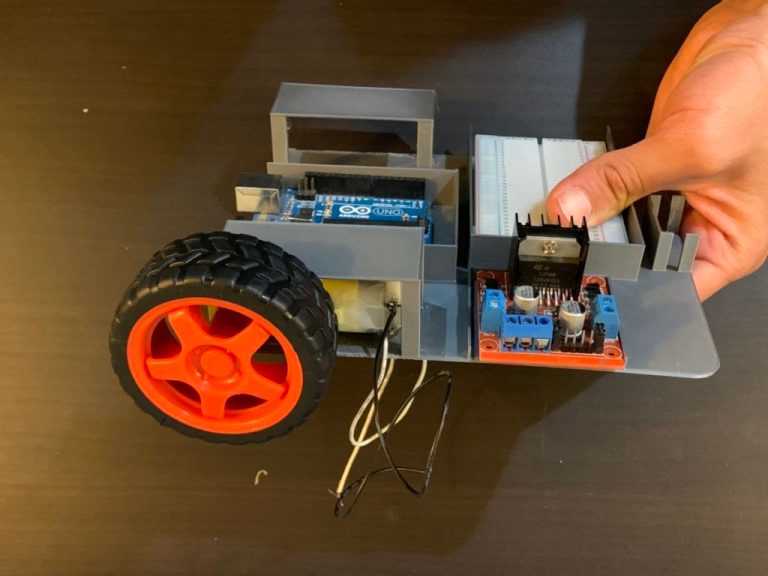
หุ่นยนต์หลบหลีกสิ่งกีดขวางนี้ หรือที่รู้จักกันในชื่อ NT1 ทำหน้าที่หลบสิ่งกีดขวางในเส้นทางโดยใช้ Sensor วัดระยะแบบ Ultrasonic รุ่น HC-SR04 โดย Sensor นี้ช่วยให้หุ่นยนต์สามารถตรวจจับวัตถุที่อยู่ข้างหน้าได้ และผมได้ใช้ L298N H-Bridge เพื่อควบคุมล้อของหุ่นยนต์ เมื่อตรวจพบวัตถุในระยะใกล้ หุ่นยนต์จะหยุด ถอยหลัง และมองหาเส้นทางที่ว่างด้วยความช่วยเหลือจาก Sensor วัดระยะ ทั้งนี้ค่าพารามิเตอร์ของระยะทางและการตรวจจับทั้งหมดสามารถปรับเปลี่ยนได้ใน Code ของ Arduino เพื่อให้หุ่นยนต์ทำงานได้หลากหลายมากขึ้น
ในการออกแบบฐานที่พิมพ์จาก 3D printer ผมได้ใช้ Fusion 360 และพิมพ์โมเดลออกมาด้วย 3D printer ของผมเอง
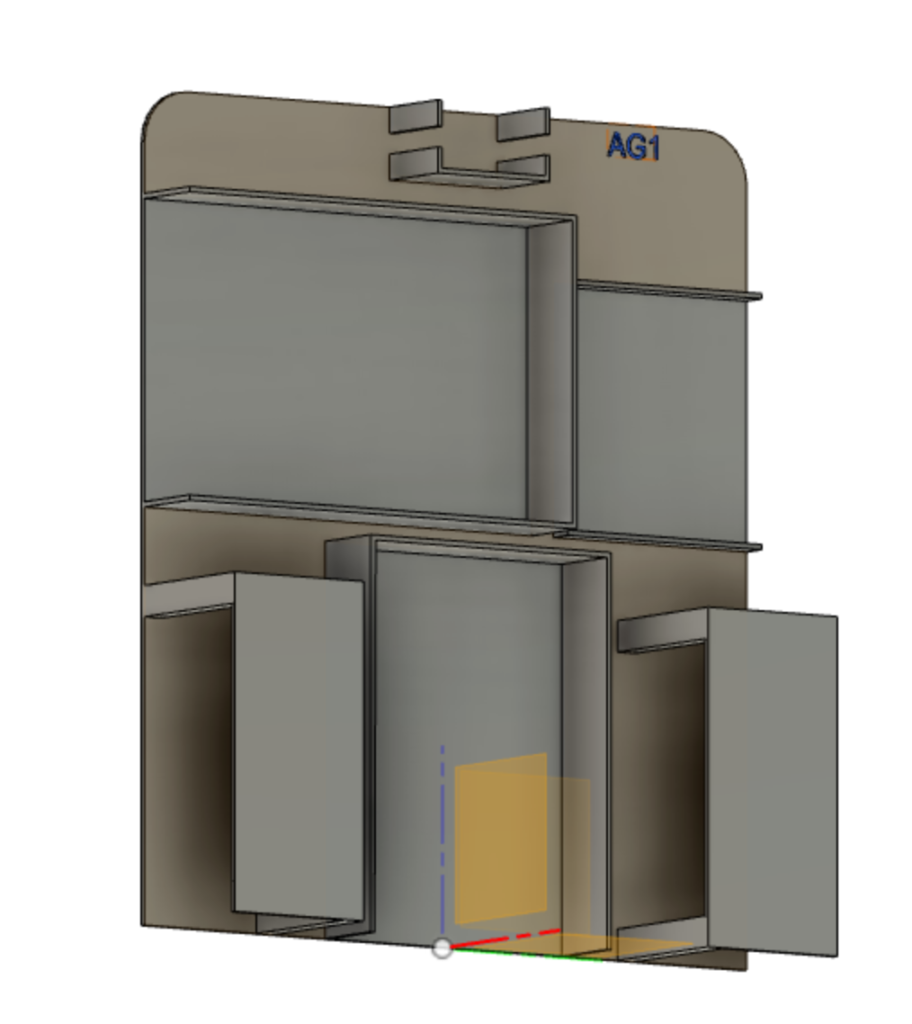
ไฟล์ STL อยู่บนเว็บไซต์ของผม ผมไม่สามารถโพสต์ไว้ที่นี่ได้ด้วยเหตุผลบางประการ
https://baltmaker.com/obstacle-avoiding-robot/

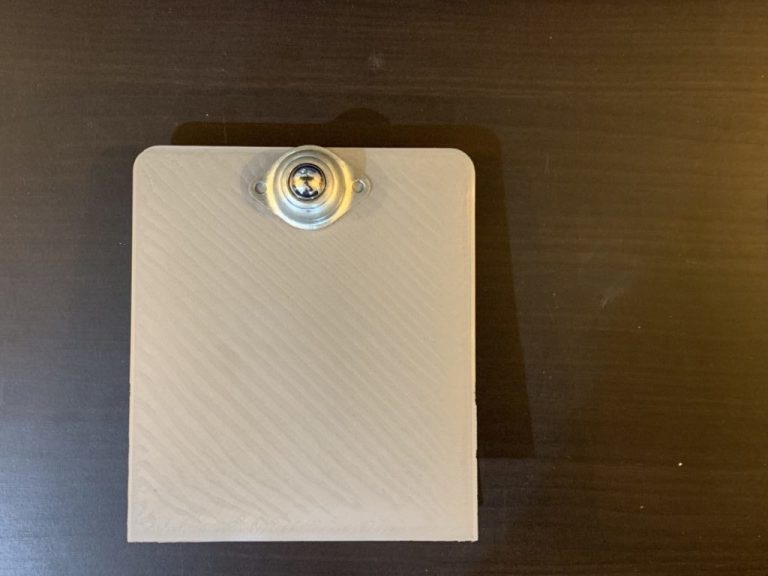
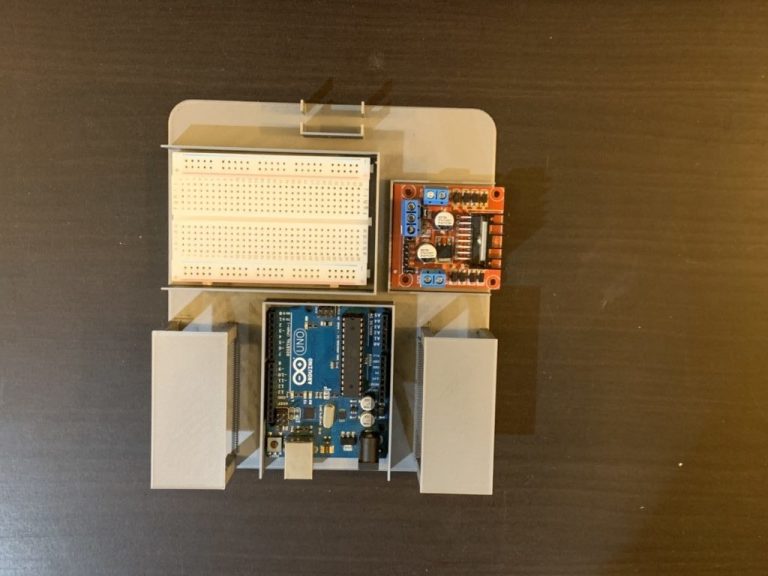
Step by Step Building Gallery:

ก่อนอื่นเราต้องรวม Library NewPing เข้ามา โดยทำตามขั้นตอนดังนี้:
https://playground.arduino.cc/Code/NewPing/
ย้าย Folder NewPing ไปยัง Folder libraries ซึ่งอยู่ภายใน Folder Arduino ในเครื่องคอมพิวเตอร์ของคุณ
#include <Servo.h> //Include the servomotorlibrary
#include <NewPing.h> //This library needs to be downloaded and included so that we can use the HC-SR04 sensor
//L298N (Motor driver)control pins
const int LeftMotorFwd = 7;
const int LeftMotorBwd = 6;
const int RightMotorFwd = 4;
const int RightMotorBwd = 5;
//ultrasonic sensor pins
#define trig_pin A1 //analog input 1
#define echo_pin A2 //analog input 2
#define maximum_distance 200
boolean goesFwd = false;
int distance = 100;
NewPing sonar(trig_pin, echo_pin, maximum_distance); //sensor function
Servo servo_motor; //our servo name
void setup(){
pinMode(RightMotorFwd, OUTPUT);
pinMode(LeftMotorFwd, OUTPUT);
pinMode(LeftMotorBwd, OUTPUT);
pinMode(RightMotorBwd, OUTPUT);
servo_motor.attach(10); //our servo pin
servo_motor.write(115);
delay(2000);
distance = readPing();
delay(100);
distance = readPing();
delay(100);
distance = readPing();
delay(100);
distance = readPing();
delay(100);
}
void loop(){
int distanceRight = 0;
int distanceLeft = 0;
delay(50);
if (distance <= 20){
moveStop();
delay(300);
moveBackward();
delay(400);
moveStop();
delay(300);
distanceRight = lookRight();
delay(300);
distanceLeft = lookLeft();
delay(300);
if (distance >= distanceLeft){
turnRight();
moveStop();
}
else{
turnLeft();
moveStop();
}
}
else{
moveForward();
}
distance = readPing();
}
int lookRight(){
servo_motor.write(50);
delay(500);
int distance = readPing();
delay(100);
servo_motor.write(115);
return distance;
}
int lookLeft(){
servo_motor.write(170);
delay(500);
int distance = readPing();
delay(100);
servo_motor.write(115);
return distance;
delay(100);
}
int readPing(){
delay(70);
int cm = sonar.ping_cm();
if (cm==0){
cm=250;
}
return cm;
}
void moveStop(){
digitalWrite(RightMotorFwd, LOW);
digitalWrite(LeftMotorFwd, LOW);
digitalWrite(RightMotorBwd, LOW);
digitalWrite(LeftMotorBwd, LOW);
}
void moveForward(){
if(!goesForward){
goesForward=true;
digitalWrite(LeftMotorFwd, HIGH);
digitalWrite(RightMotorFwd, HIGH);
digitalWrite(LeftMotorBwd, LOW);
digitalWrite(RightMotorBwd, LOW);
}
}
void moveBackward(){
goesForward=false;
digitalWrite(LeftMotorBwd, HIGH);
digitalWrite(RightMotorBwd, HIGH);
digitalWrite(LeftMotorFwd, LOW);
digitalWrite(RightMotorFwd, LOW);
}
void turnRight(){
digitalWrite(LeftMotorFwd, HIGH);
digitalWrite(RightMotorBwd, HIGH);
digitalWrite(LeftMotorBwd, LOW);
digitalWrite(RightMotorFwd, LOW);
delay(500);
digitalWrite(LeftMotorFwd, HIGH);
digitalWrite(RightMotorFwd, HIGH);
digitalWrite(LeftMotorBwd, LOW);
digitalWrite(RightMotorBwd, LOW);
}
void turnLeft(){
digitalWrite(LeftMotorBwd, HIGH);
digitalWrite(RightMotorFwd, HIGH);
digitalWrite(LeftMotorFwd, LOW);
digitalWrite(RightMotorBwd, LOW);
delay(500);
digitalWrite(LeftMotorFwd, HIGH);
digitalWrite(RightMotorFwd, HIGH);
digitalWrite(LeftMotorBwd, LOW);
digitalWrite(RightMotorBwd, LOW);
}
สนับสนุนเพื่อรับ Source Code หรือแอปพลิเคชันสำหรับโปรเจกต์นี้