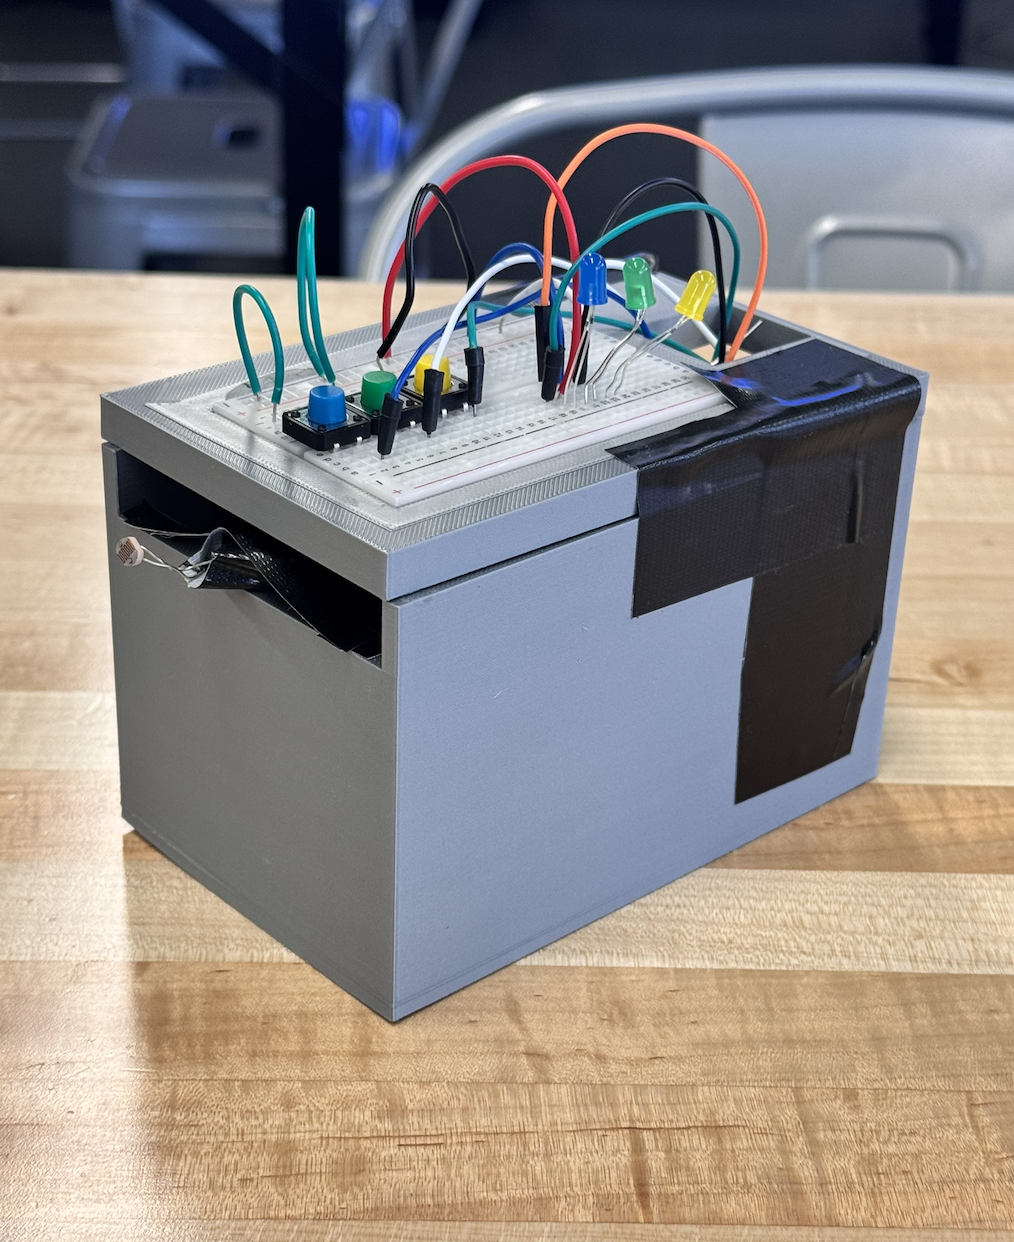
The 3 Note Piano Box lets you play 3 natural notes (F,G and A), along with 3 sharp notes, (F#, G#, and A#).
The natural and sharp notes are both played by pressing the 3 buttons along the top. By default, the natural notes play; to play the sharp notes, you cover the photoresistor at the front of the piano box with your palm.
The 3 Note Piano Box introduces the concept of polyphony and interactive state machines. While earlier buzzer projects focus on playing pre-programmed songs automatically, this project turns the Arduino into a playable musical instrument.
Multi-Button Input Reading
The challenge here lies in constantly monitoring multiple inputs without the code getting stuck.
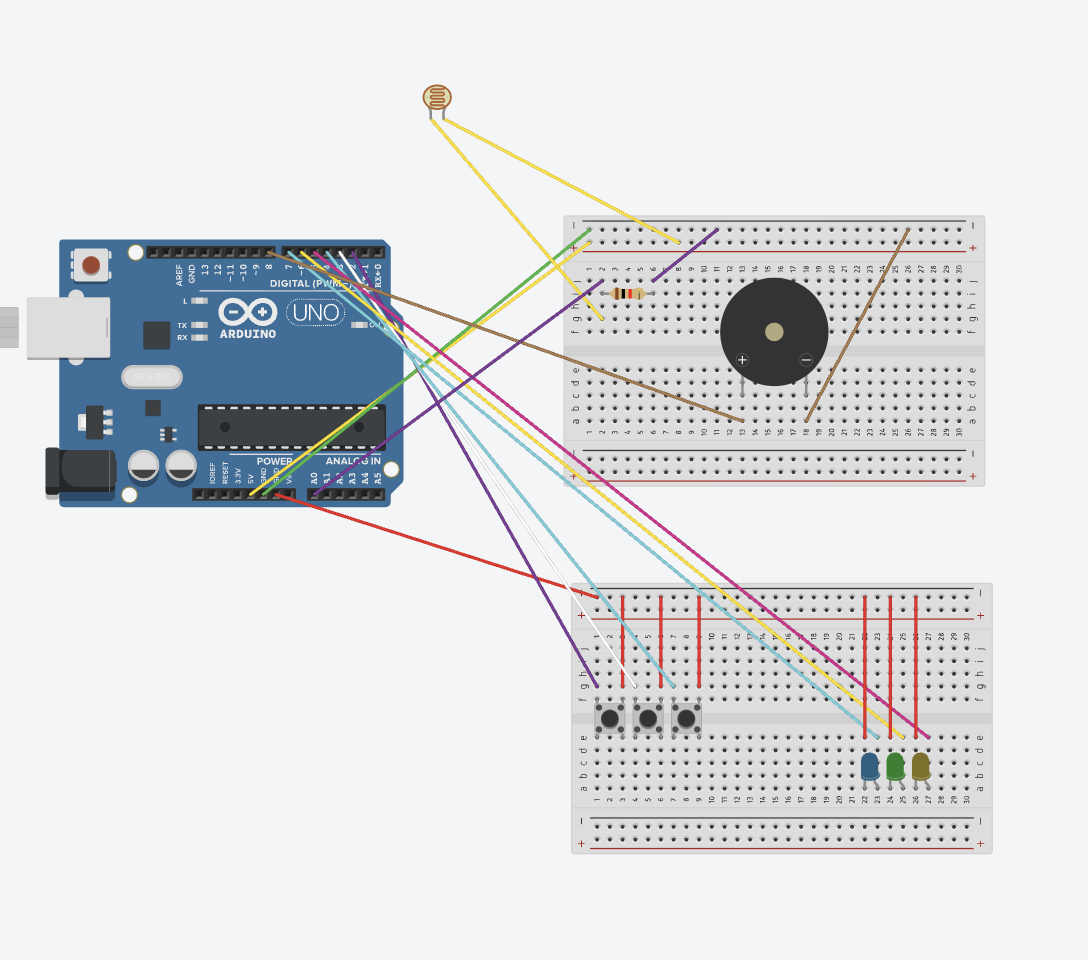
- The Setup: You wire three push buttons to digital pins
2, 3, 4. By utilizing the Arduino's internal pull-up resistors (pinMode(2, INPUT_PULLUP)), you can eliminate all messy external 10k resistors on your breadboard—wiring the buttons directly to Ground. - The Main Loop: The Arduino checks all three buttons in rapid succession (millions of times a second).
- The Frequency Trigger:
if (digitalRead(button1) == LOW) { tone(buzzerPin, 261); }(Plays Middle C: 261 Hz)... (button2)-> Plays E (329 Hz)... (button3)-> Plays G (392 Hz)
- The Silence: Critically, you must include an
else { noTone(buzzerPin); }statement at the very end. Otherwise, if you let go of the button, the buzzer will scream Middle C forever!
Required Hardware
- Arduino Uno/Nano: The synthesizer core.
- Three Tactile Push Buttons.
- Active or Passive Piezo Buzzer.
- A Small Enclosure: (Optional) To mount the buttons and hide the messy wiring, creating a neat "Piano Box".
This project is the perfect stepping stone to building full 8-key octave synthesizers and learning to use the Mozzi audio generation library.
How to Build:
1: 3D print the enclosure .stl file. Make sure you put one breadboard on the top of the box, and keep the second one on a flat surface (like your table) to begin with.
2: Wire the photoresistor and the buzzer from the Arduino Uno (pinout also works for Arduino MEGA) to the breadboard that's not on the box.
3: Plug wires for breadboard on box into Arduino, but do not connect them to breadboard yet.
____
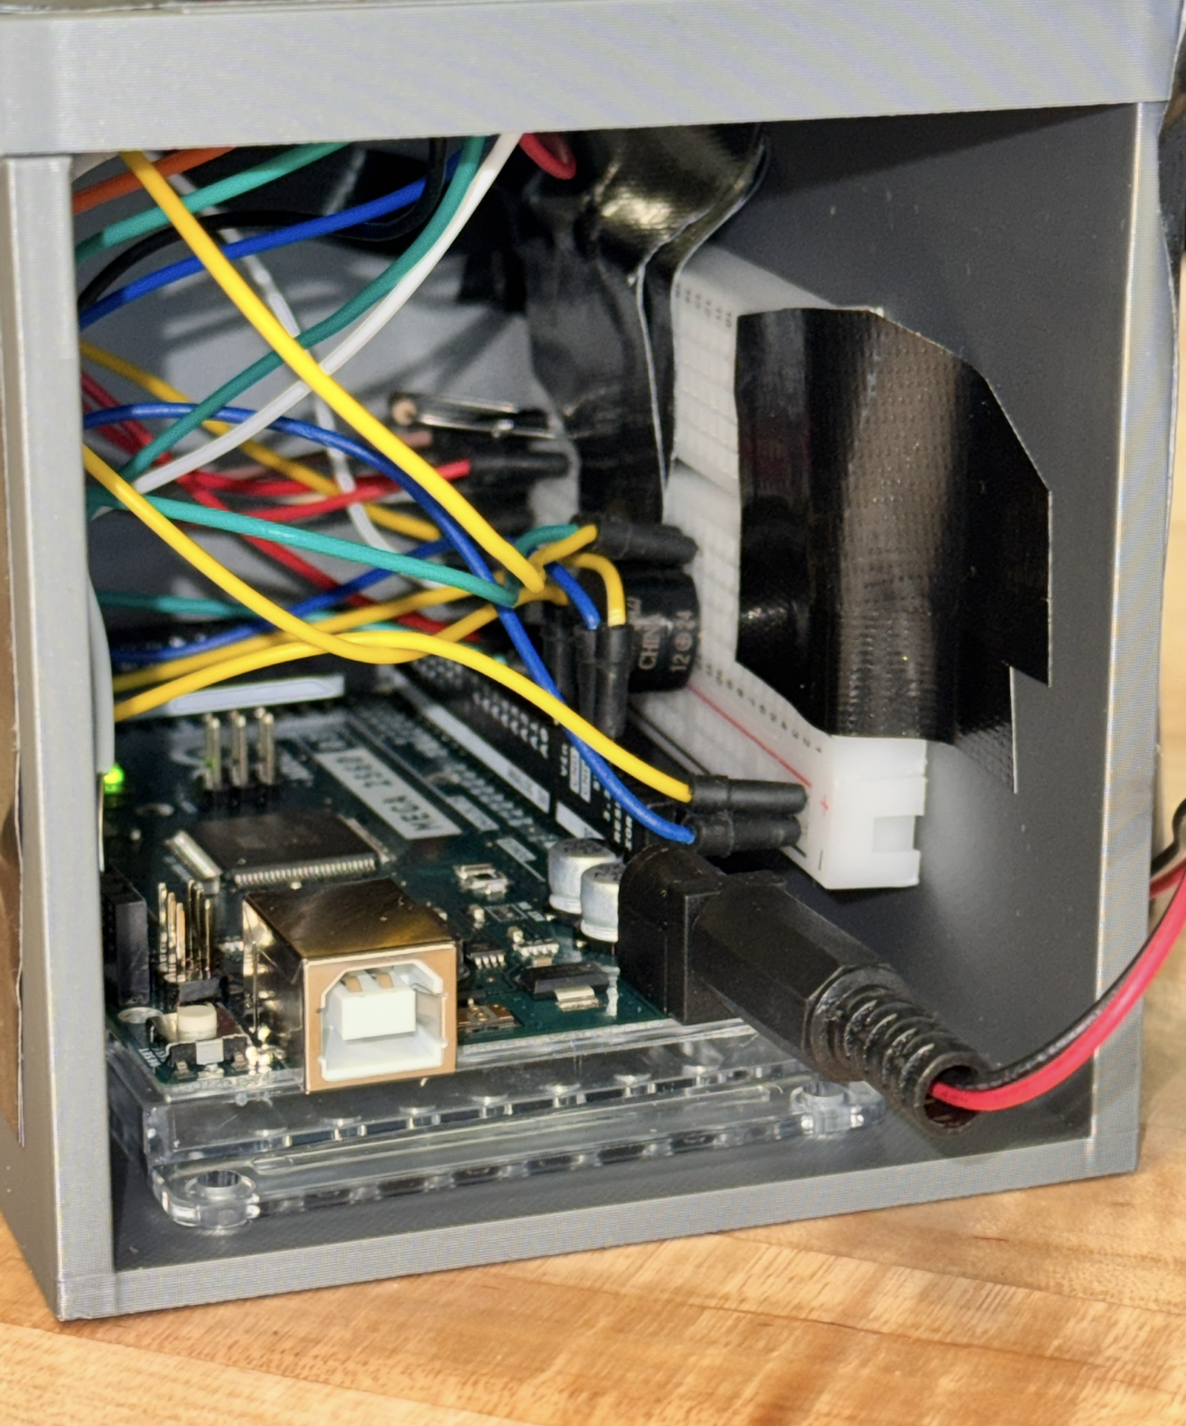
4: Tape or glue second breadboard and arduino uno inside of the box (see reference images below)
5: Bring photoresistor out through the front of the box.
6: Finally, bring the wires that for breadboard on top through the hole on the top of the box and wire them to their respective locations on the breadboard.