This is a step-by-step guide that I have created for beginners and arduiNOOBS like me.
In this tutorial, we would be discussing some pretty basic knowledge about the 8-bit shift register called 74HC595. Learn how to daisy-chain them together and use some codes from an HC595 Library.
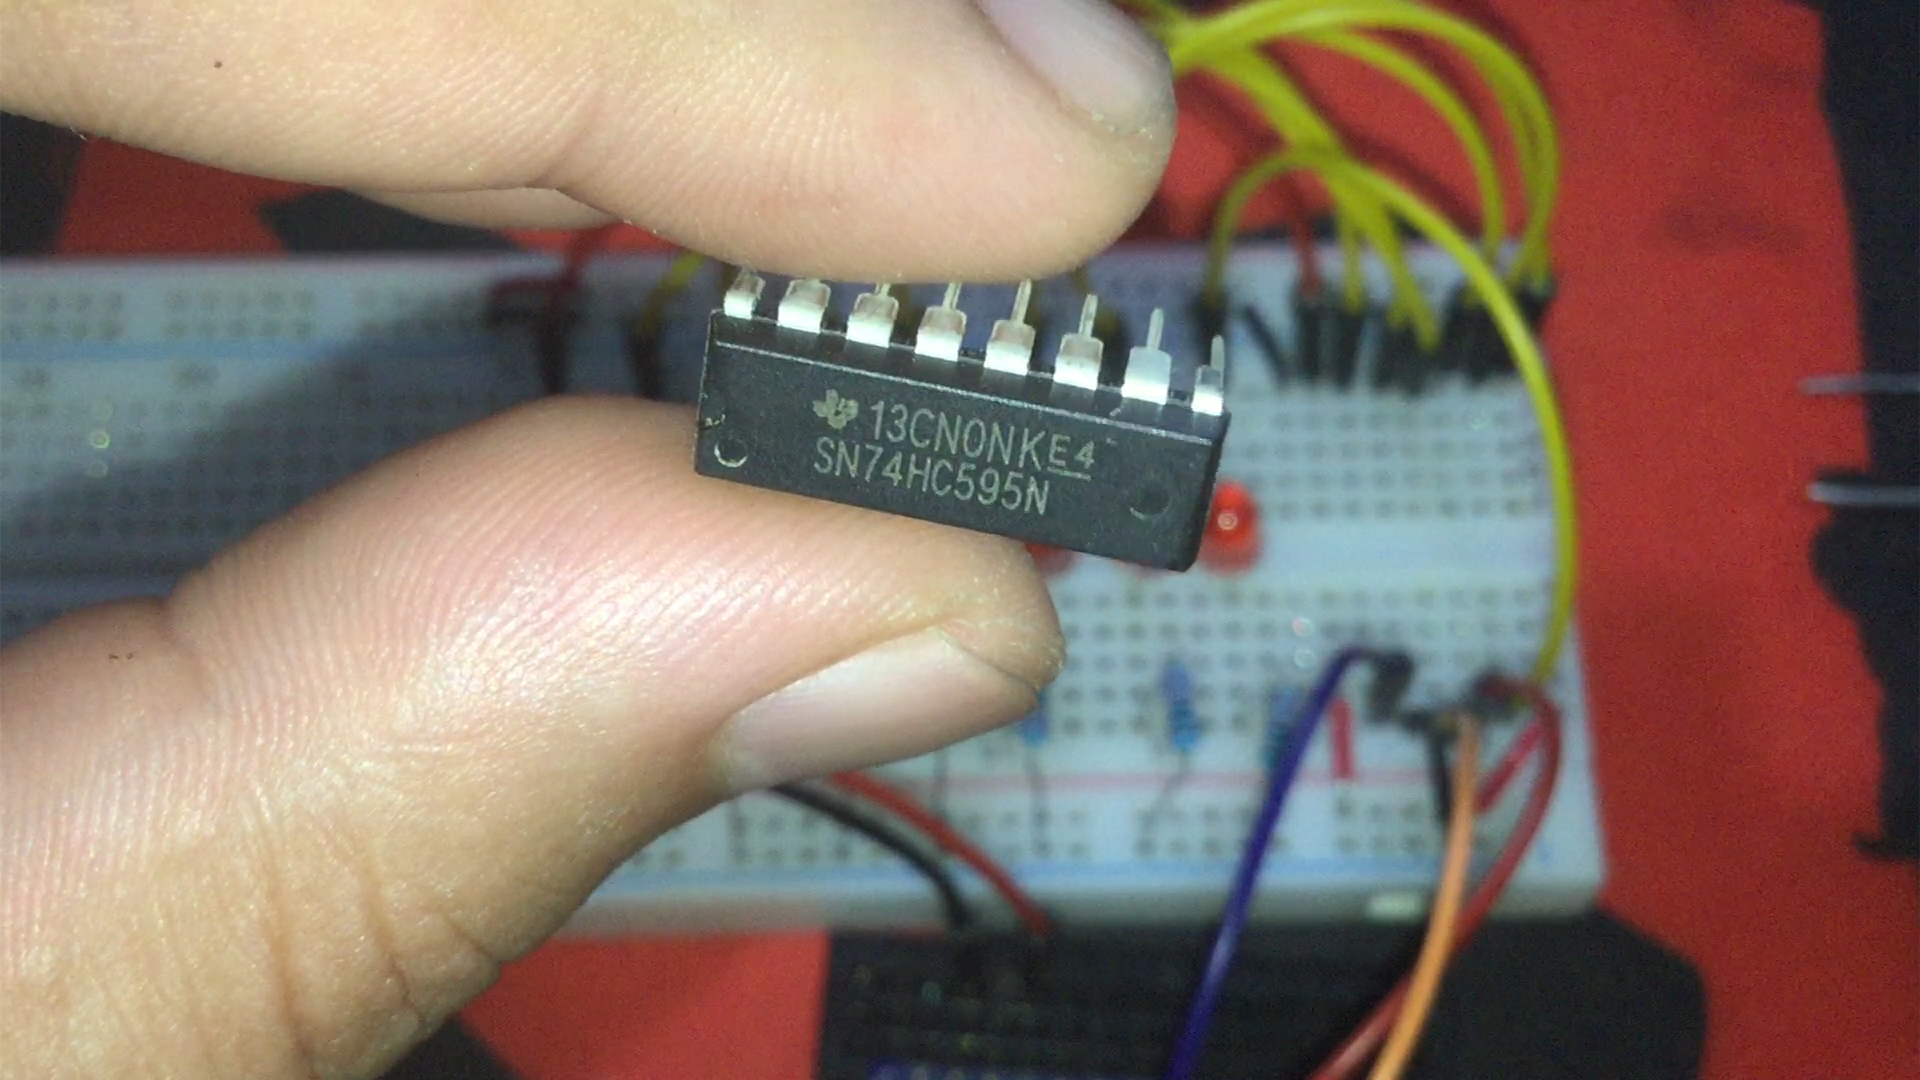
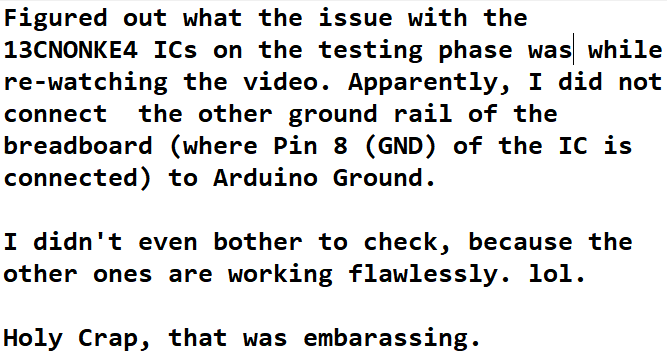
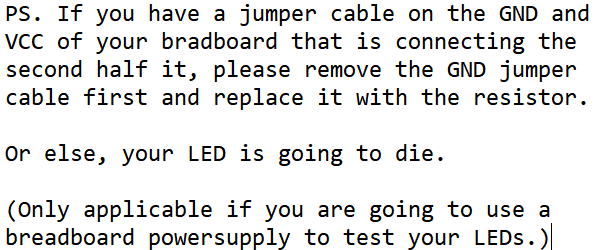
Also, I encountered a problem with some of the shift registers. I don't know why. Was it because of lack of power?
NECESSARY LINKS:
HC595 Library - https://github.com/j-bellavance/HC595
Datasheet - http://www.ti.com/document-viewer/SN74HC595/datasheet/specifications#SCLS0419845
More Information: https://rastating.github.io/using-a-74hc595-shift-register-with-an-arduino-uno/
For Loop Iteration: https://www.arduino.cc/en/Tutorial/ForLoopIteration
Social Media Links To Follow (I mean, if you want to):
Facebook - https://fb.me/HeathenHacks
Twitter - https://twitter.com/HeathenHacks
Instagram - https://instagr.am/HeathenHacks
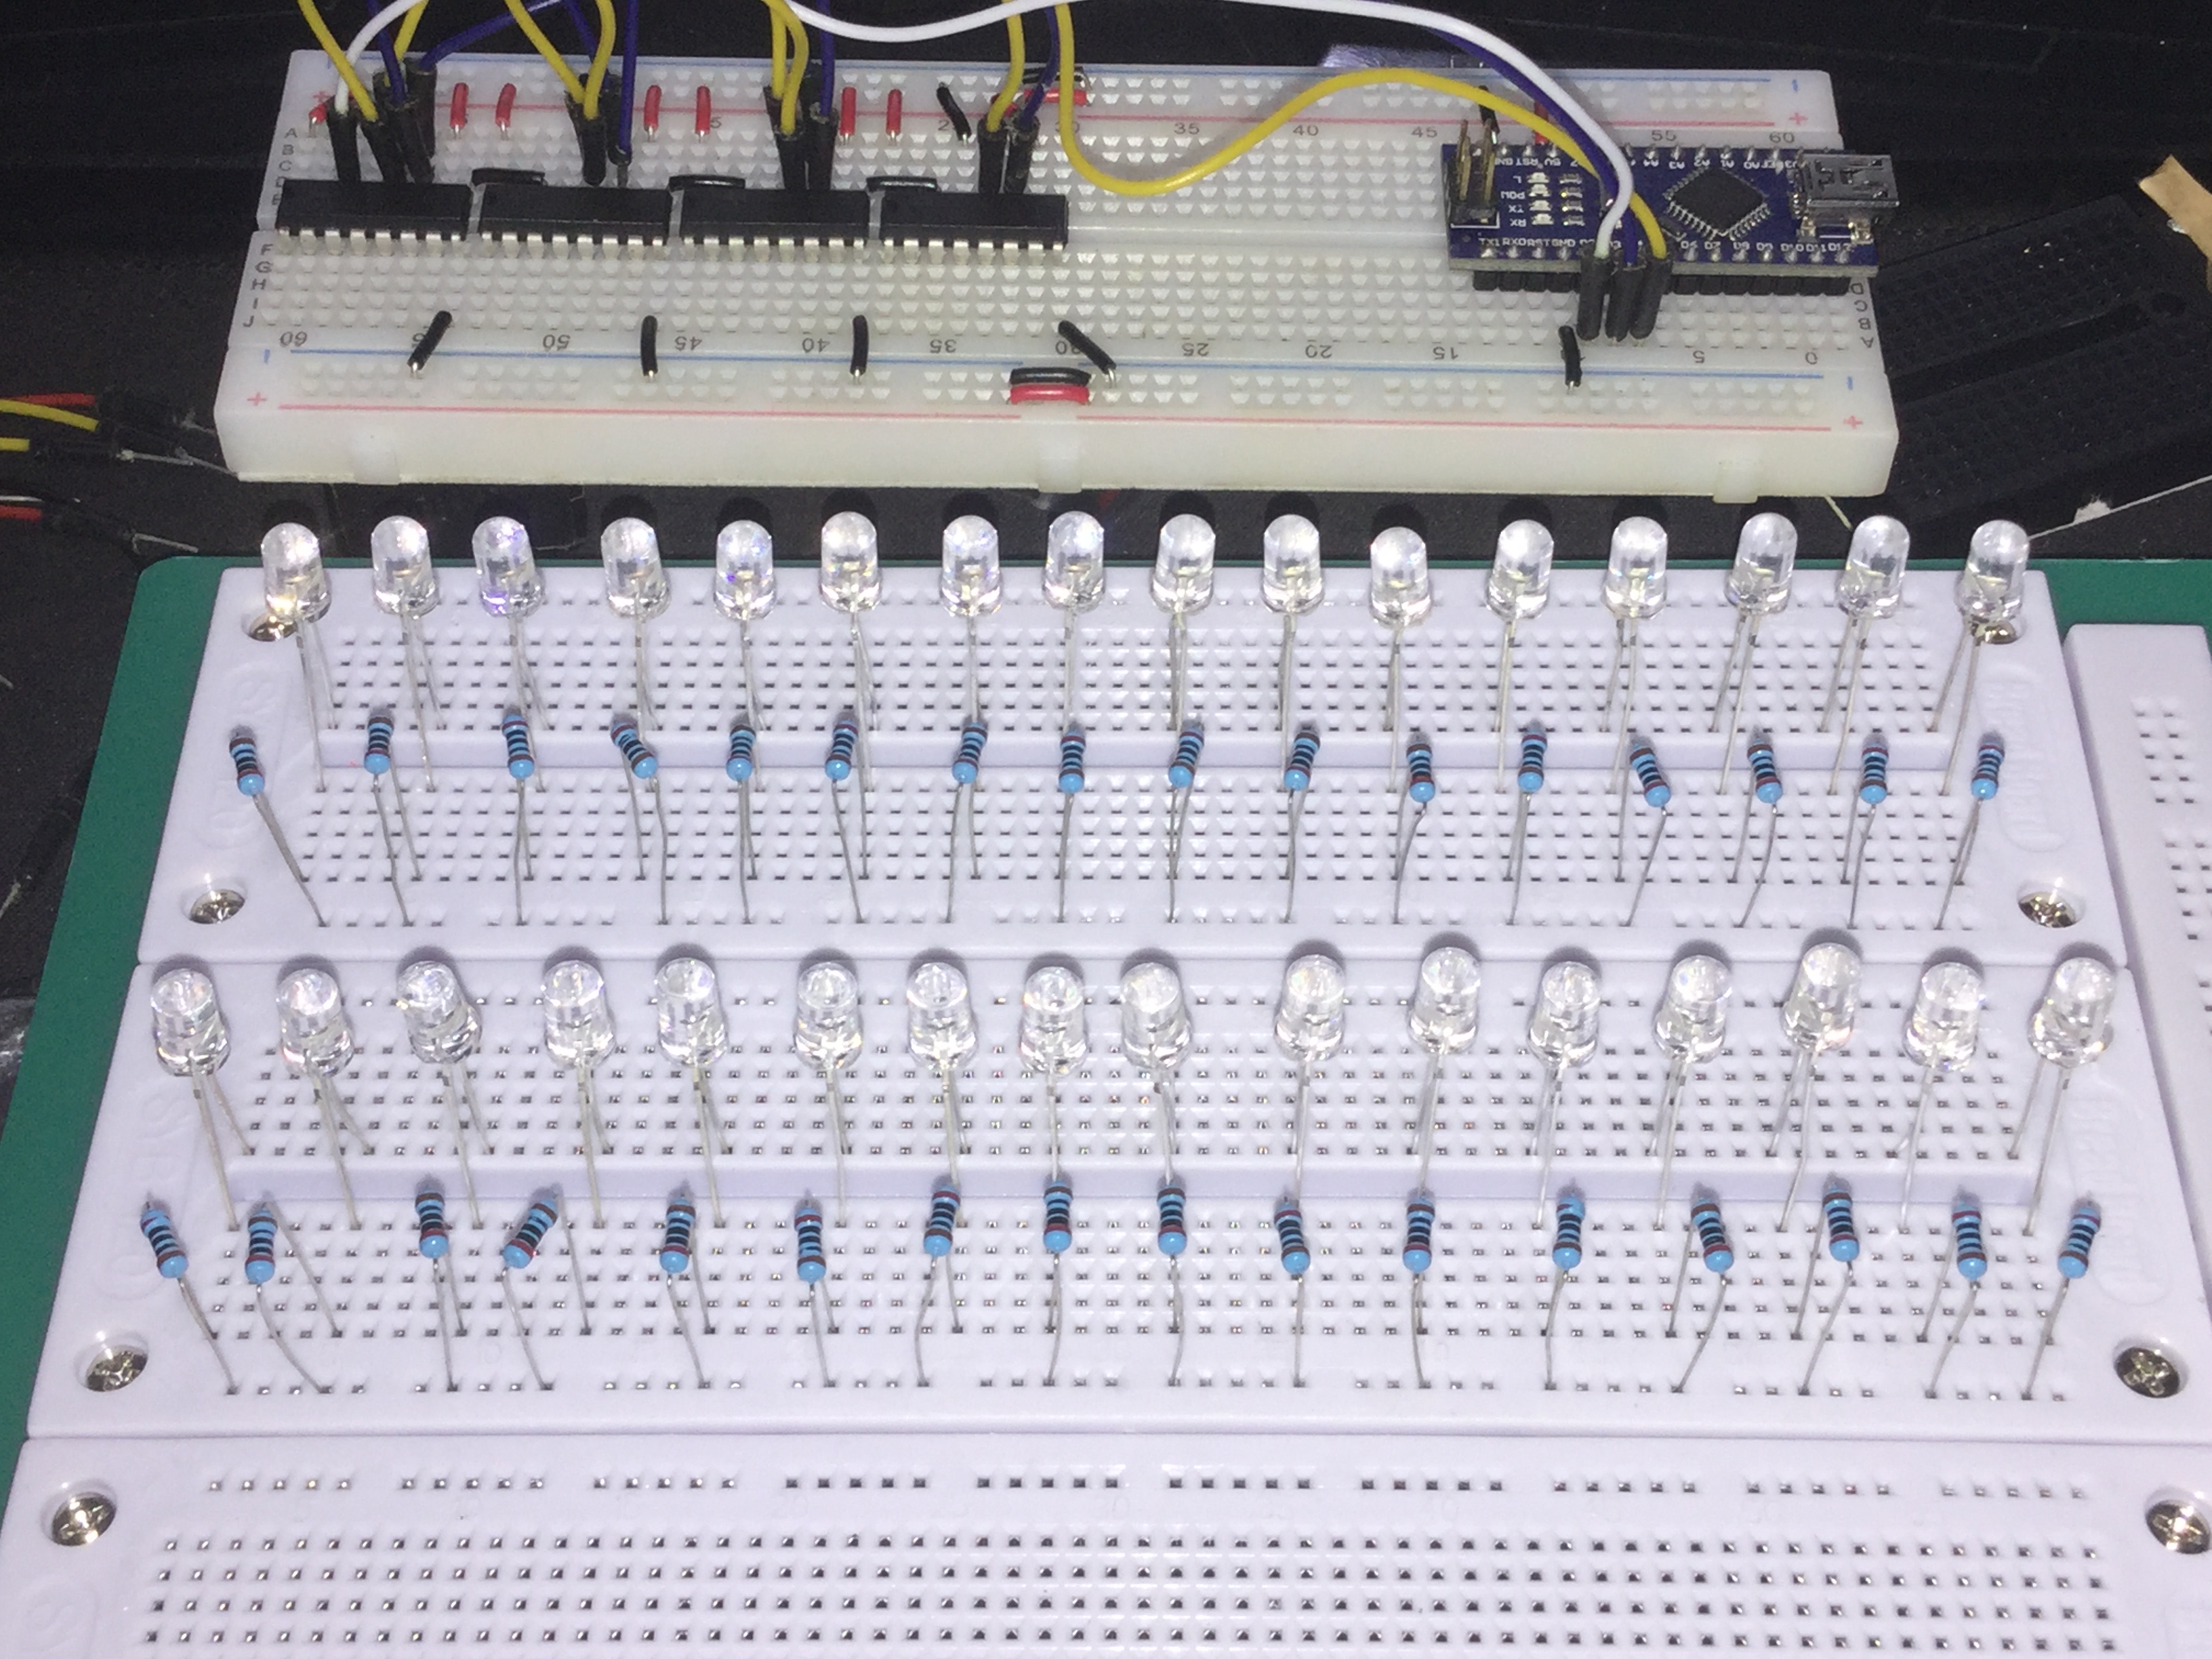
Deep Daisy-Chaining: Shift Register Expansion
An Arduino Uno has 14 Digital pins. If you want to light up 32 separate LEDs independently (like for a massive LED cube or a flight-simulator dashboard), you physically cannot. This project introduces the foundational computer science concept of Serial-To-Parallel conversion, cascading to massively expand output limits using only 3 physical pins from the Uno!
The Synchronous Cascade Protocol
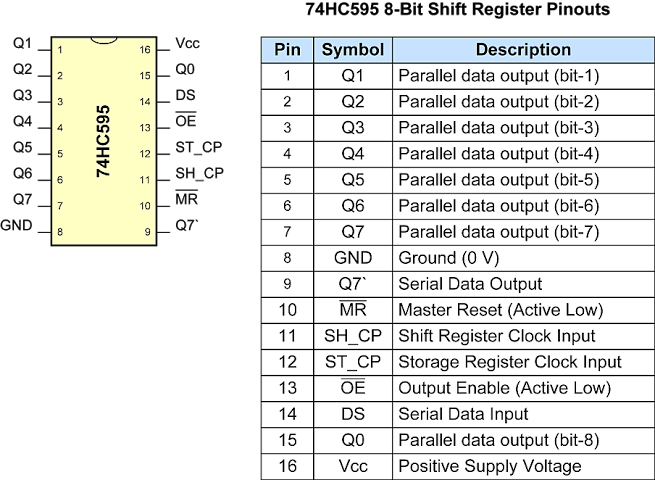
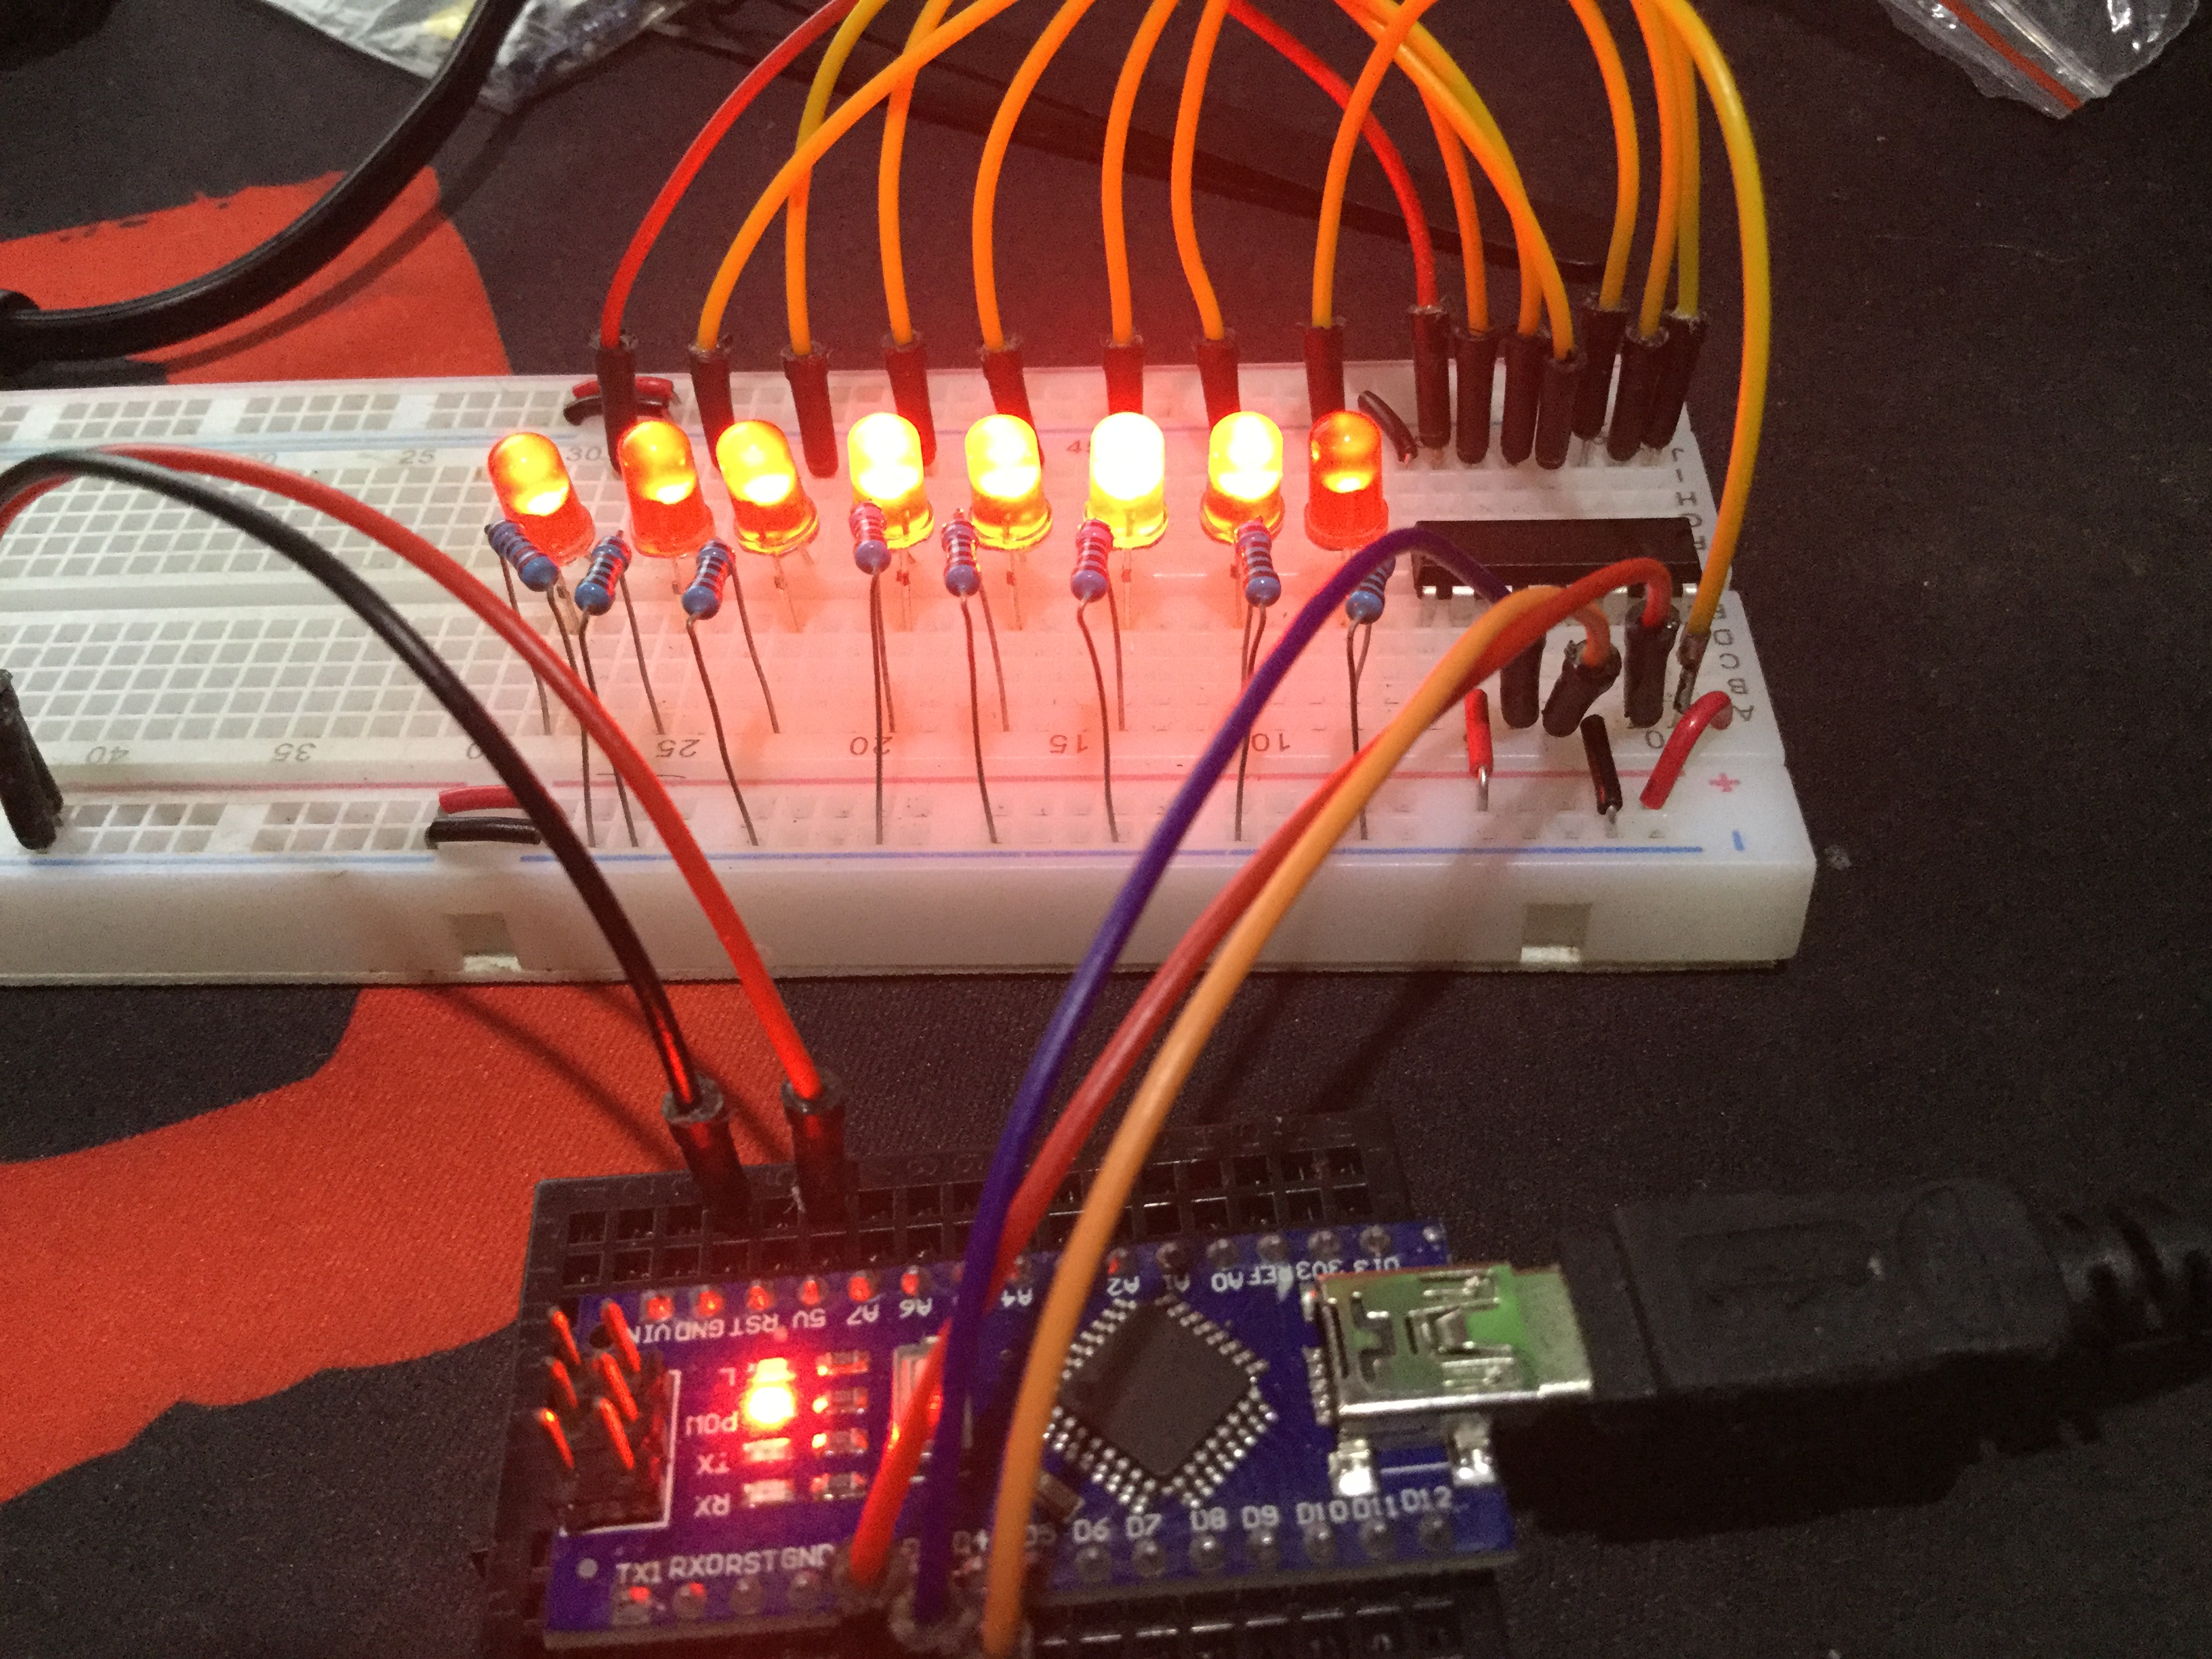
The 74HC595 chip has 8 Output pins (Q0-Q7), but uses 3 Input pins (Data, Clock, Latch).
- The Daisy-Chain Physics: You physically wire the
Q7'(Serial Out) of Chip #1 directly into theData Pinof Chip #2! - You tie all 4
Clocklines together, and all 4Latchlines together. You now have a unified 32-bit hardware block! - The Data Pipeline execution: To turn on LED #32, the Uno must physically pump
1down the line. It goes into Chip 1. Then we push thirty-one0s. The1is mathematically shoved exactly all the way down the electronic pipe into Chip 4, position 8!

The shiftOut() Register Bit-Masking
You cannot send decimal numbers trivially; you must use shiftOut().
- The
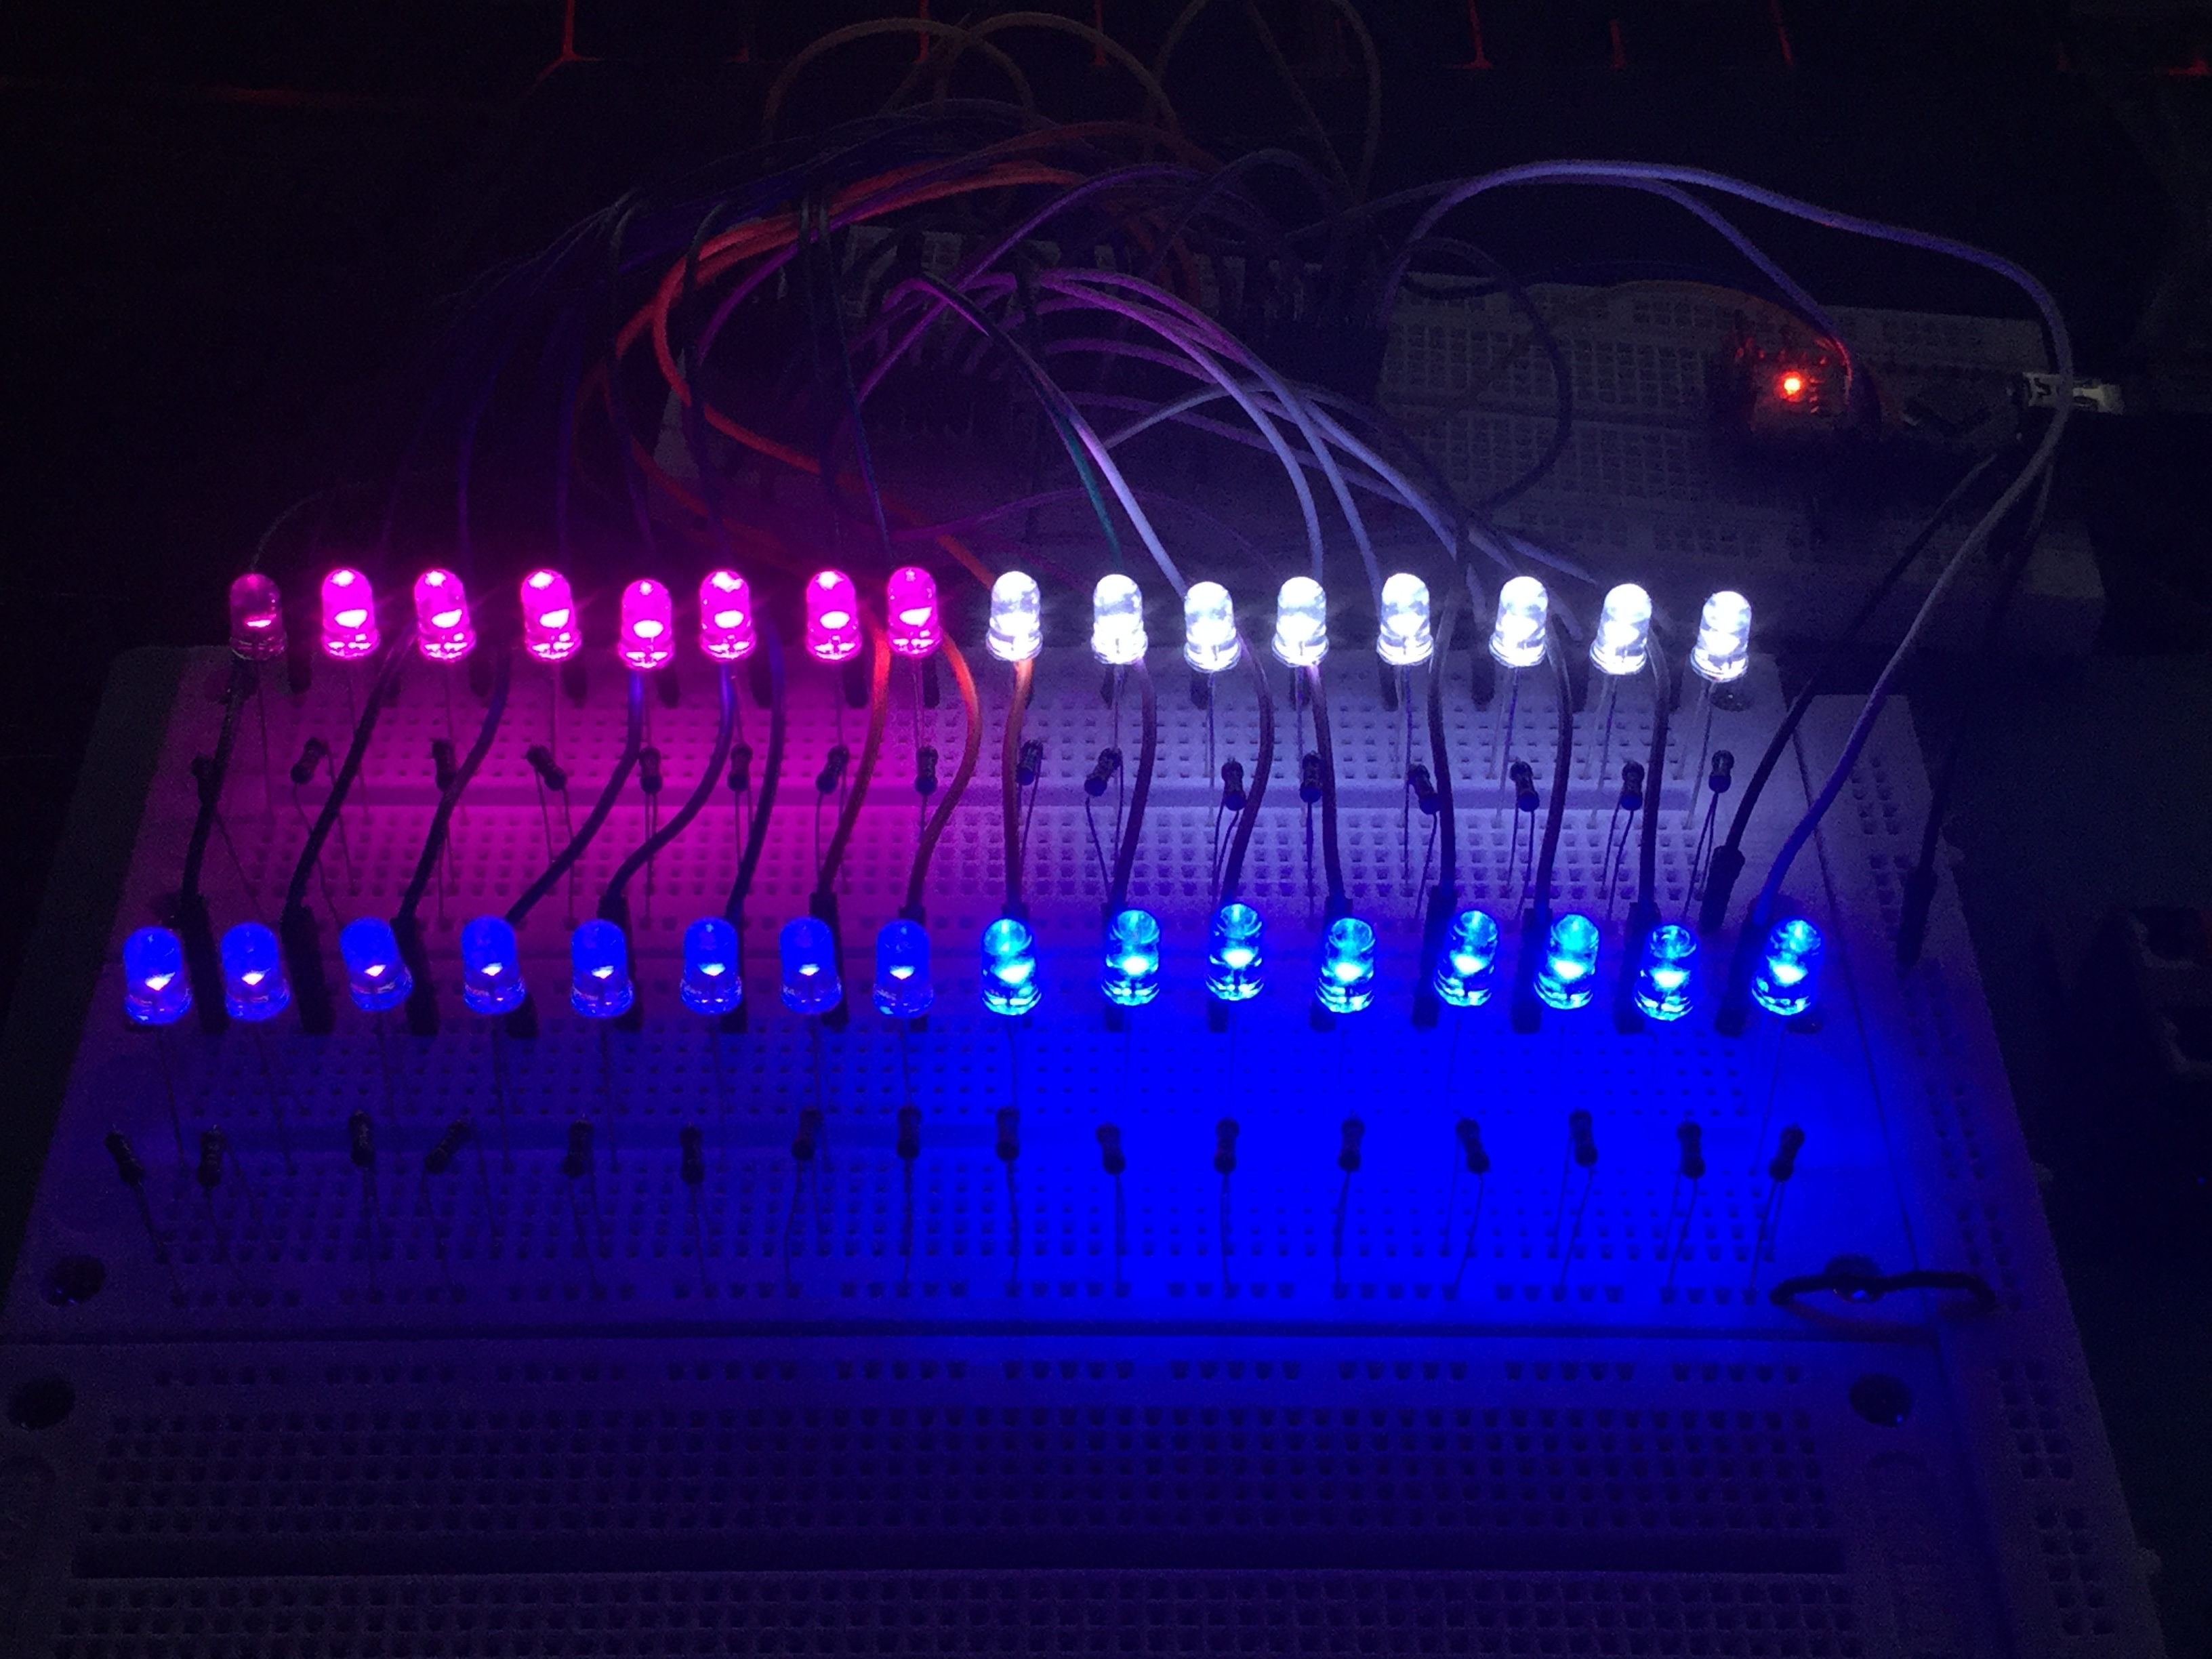
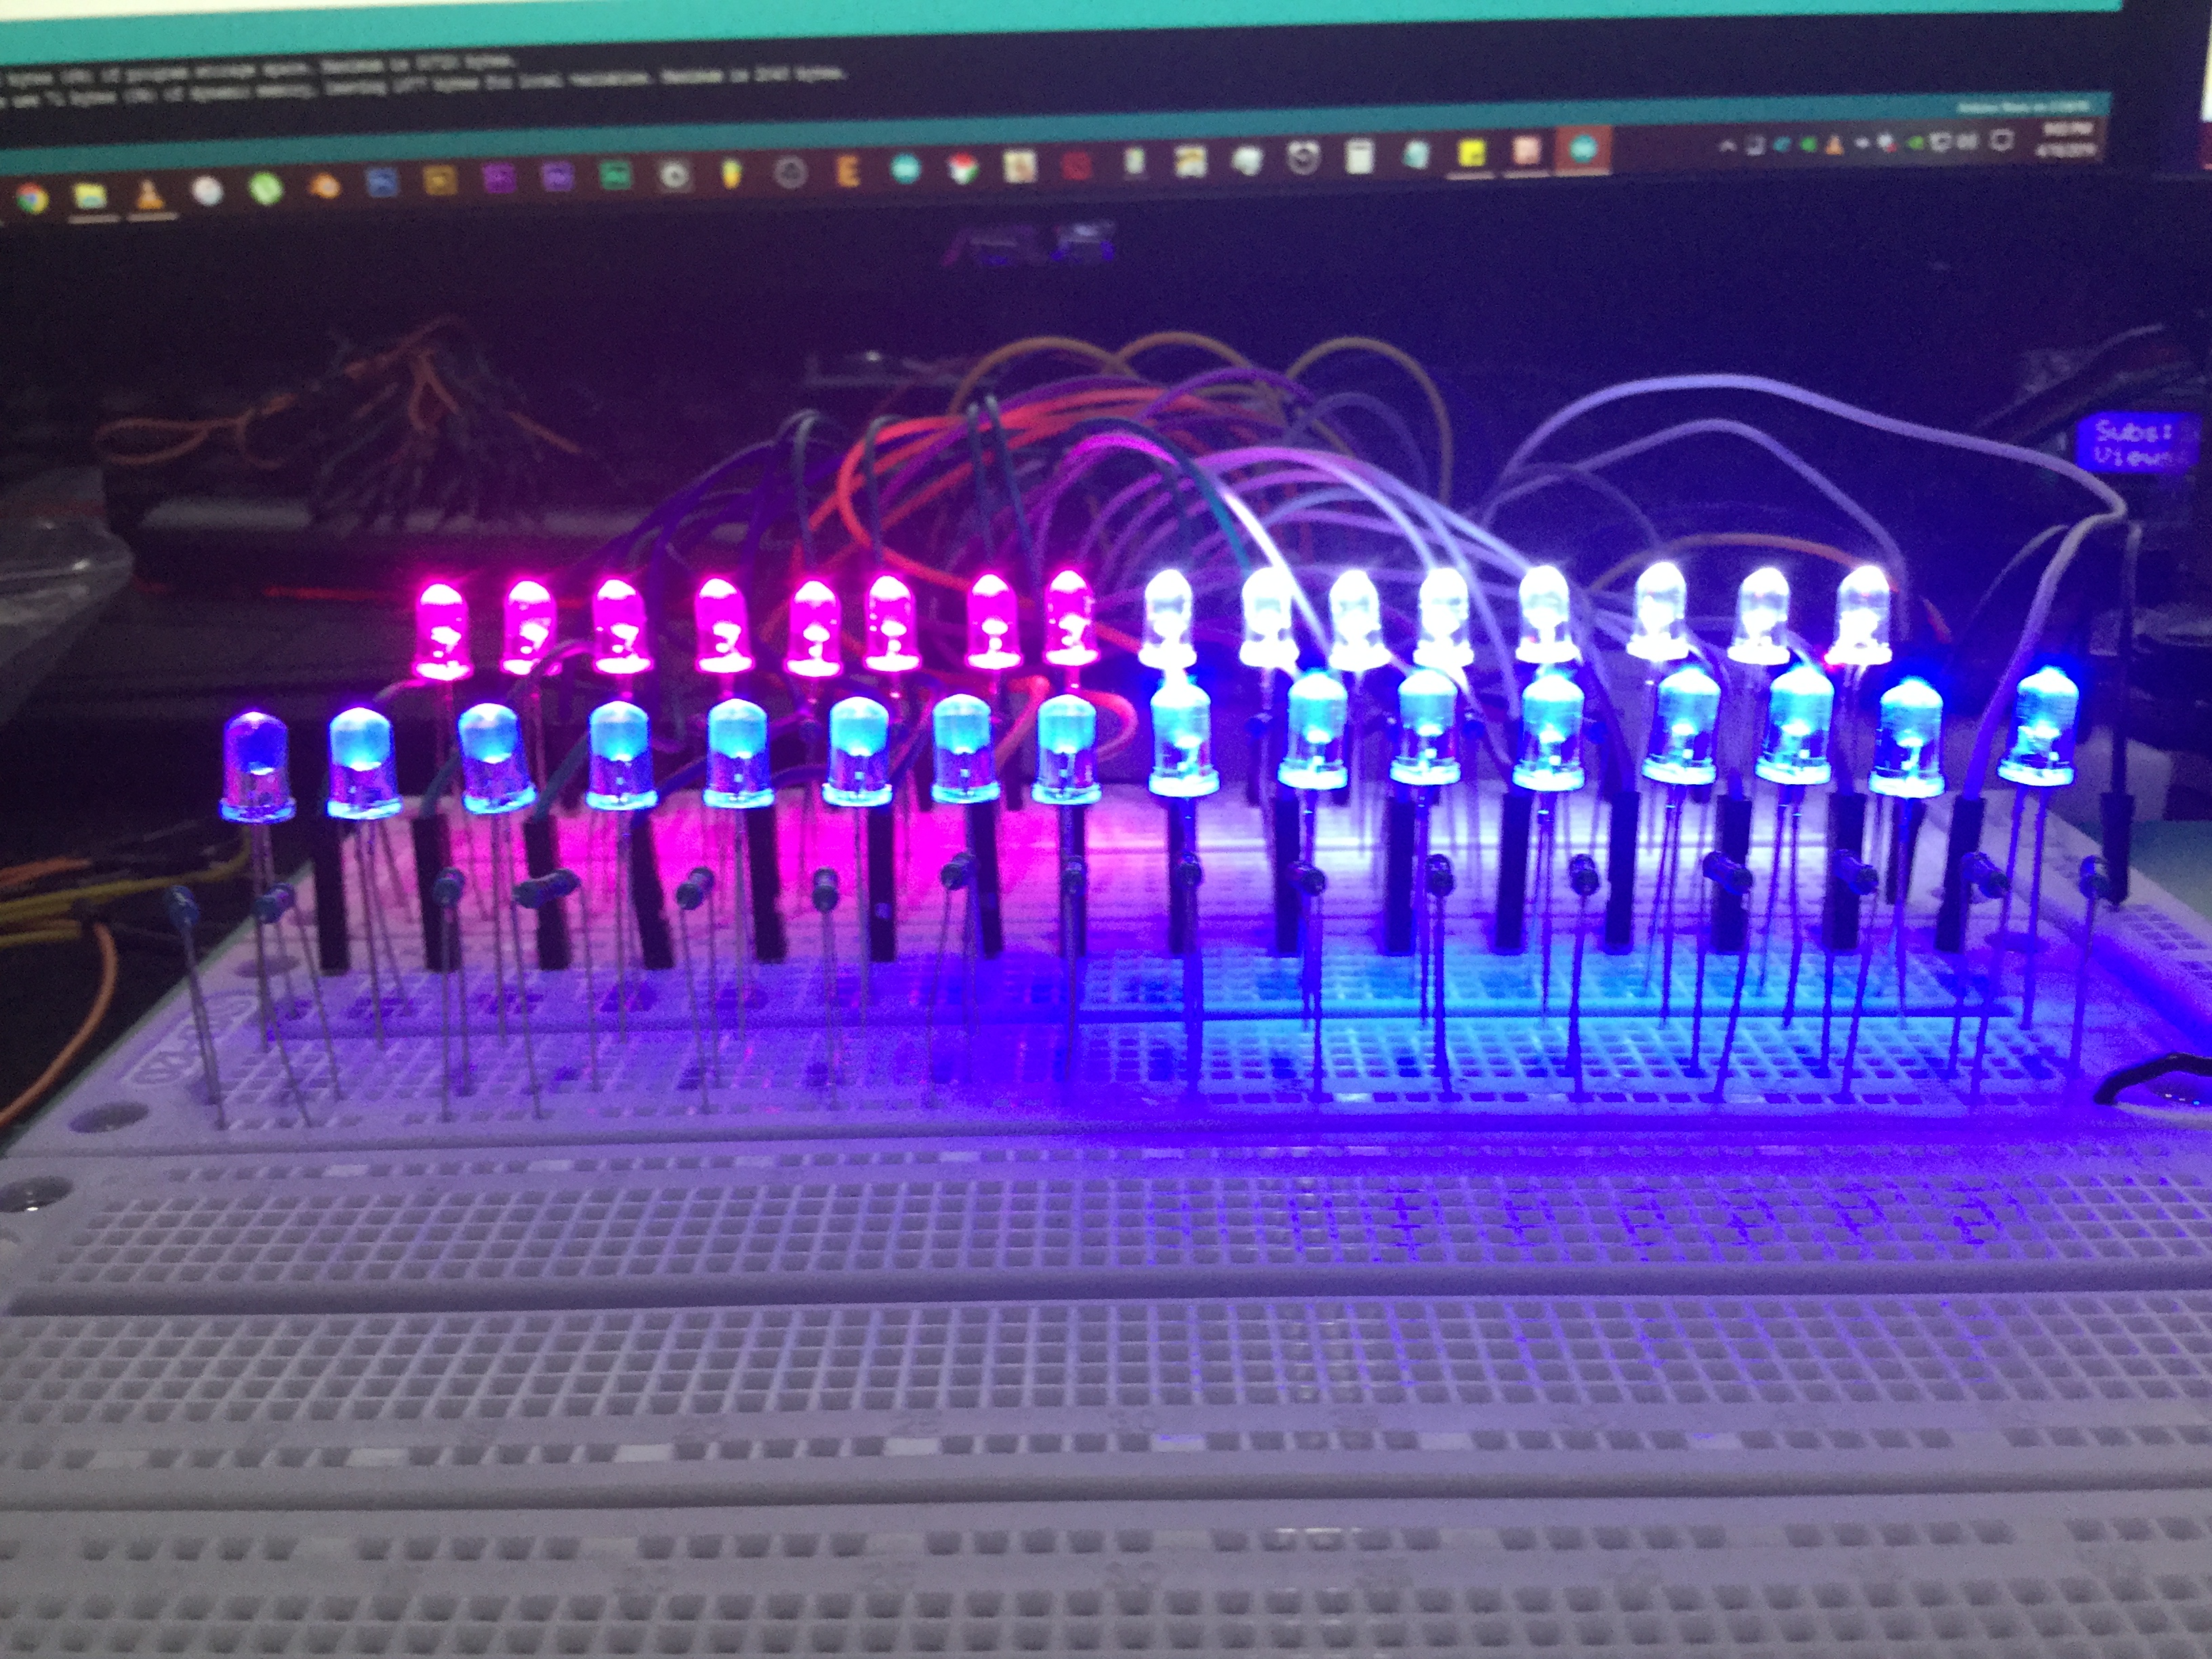
loop()uses a massive 32-bit unsigned integer (or four 8-bit Bytes)!uint32_t ledMatrix = 0b10000000000000000000000000000001; // Lights the FIRST and LAST LED! digitalWrite(latchPin, LOW); // Pause the physical output! Freeze the LEDs! // You must split the massive 32-Bit integer into Four 8-Bit chunks to send down SPI! shiftOut(dataPin, clockPin, MSBFIRST, (ledMatrix >> 24)); // Shift Chip 4! shiftOut(dataPin, clockPin, MSBFIRST, (ledMatrix >> 16)); // Shift Chip 3! shiftOut(dataPin, clockPin, MSBFIRST, (ledMatrix >> 8)); // Shift Chip 2! shiftOut(dataPin, clockPin, MSBFIRST, ledMatrix); // Shift Chip 1! digitalWrite(latchPin, HIGH); // The shift is done! Violently blast the 32 LEDs on! - The execution is so unbelievably fast that it appears perfectly instantaneous to the human eye, enabling you to run huge Knight-Rider sweeping arrays seamlessly across all 32 LEDs!
Cascading Hardware Demands
- Arduino Uno/Nano (Standard functionality).
- Four 74HC595 Shift Register Integrated Circuits (DIP Packages).
- 32 Red/Green/Blue 5mm LEDs.
- 32 Generic 220 Ohm Resistors.
- A 5V 3-Amp Power Brick (If you blast all 32 LEDs to maximum brightness simultaneously, the Uno's internal regulator will instantly crash!).