Accessing and Displaying the Portenta Vision Shield - LoRa Image
The Importance of Remote Sensing and Distributed Processing
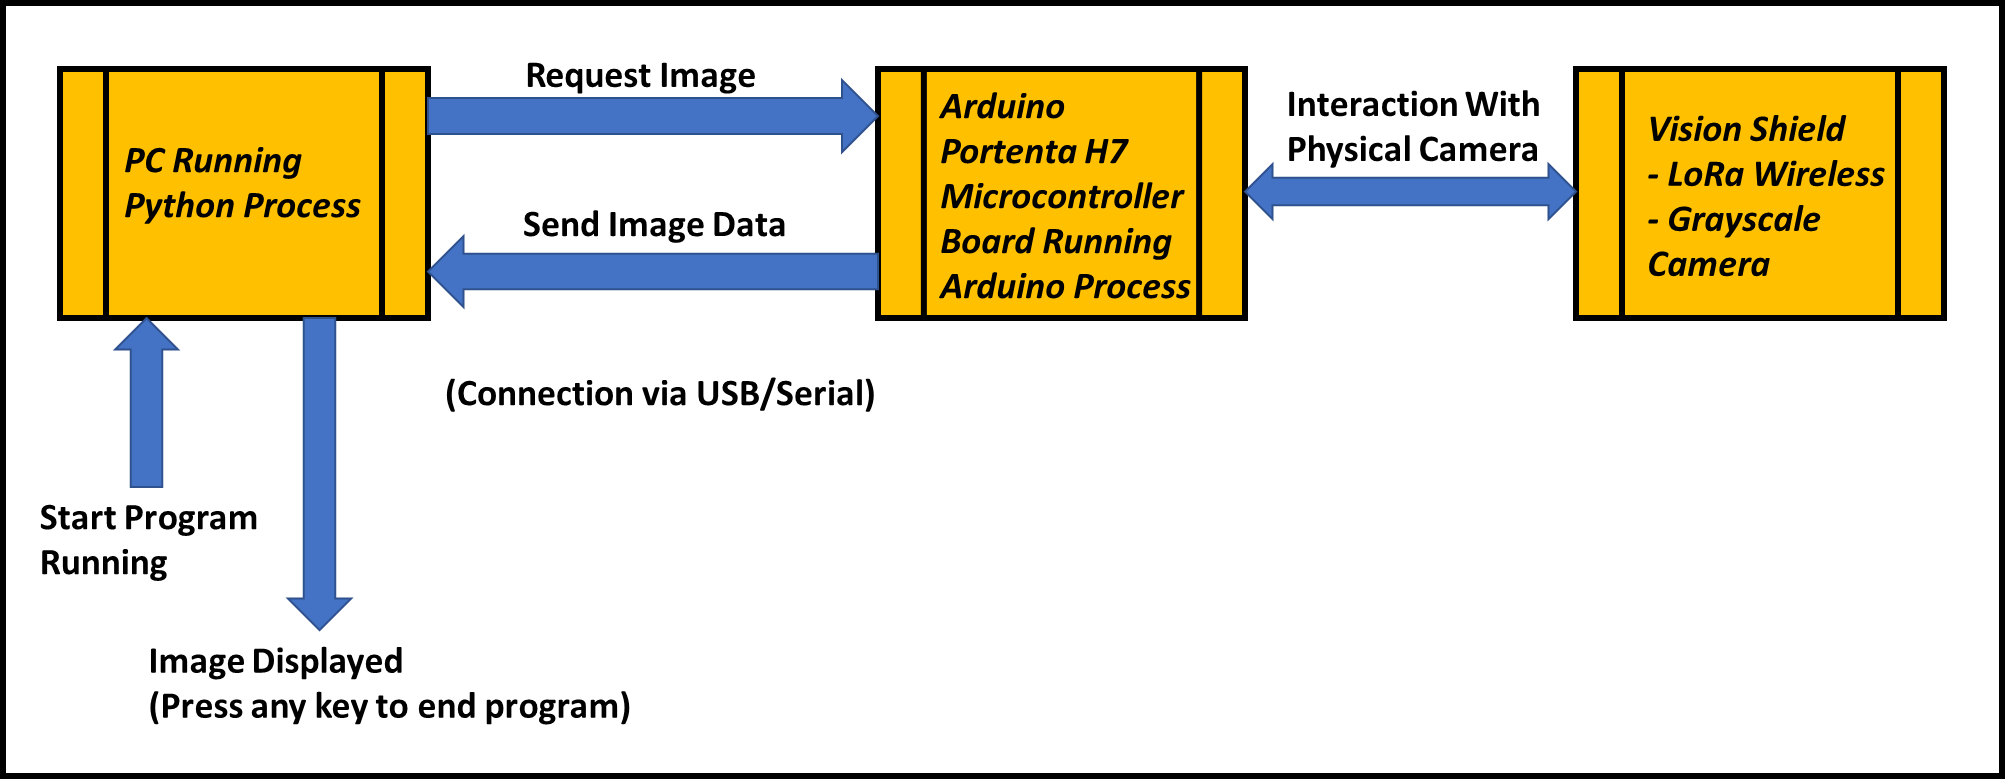
Currently, applications requiring sensors in remote locations critically need data access without physical travel to the site. This is at the heart of the growth in Remote Sensing technology. Pairing high-performance microcontroller boards like the Arduino Portenta H7 with the Vision Shield – LoRa allows developers to easily create remote imaging systems and transmit data via LoRa radio waves.
The core of this project is Query/Response style Distributed Processing, where the Arduino acts as an endpoint Node, awaiting commands (Requests) to capture images and send data back. Meanwhile, another process running on a computer via Python v3.10 serves as the commander, receiving Raw Data and processing it to display images on screen. Choosing Python with an IDE like PyCharm Community Edition in a Windows 11 environment (or other OSs) allows for faster and more flexible management of large data from the camera sensor than programming solely on the microcontroller.
Although this project initially focuses on USB/Serial data transmission for debugging stability, this infrastructure is designed to support LoRa communication in the future. This will enable Low Frame Rate image transmission over several kilometers without relying on LoRaWAN or any Third-party services.
In-depth on the Arduino Side (Embedded System Process)
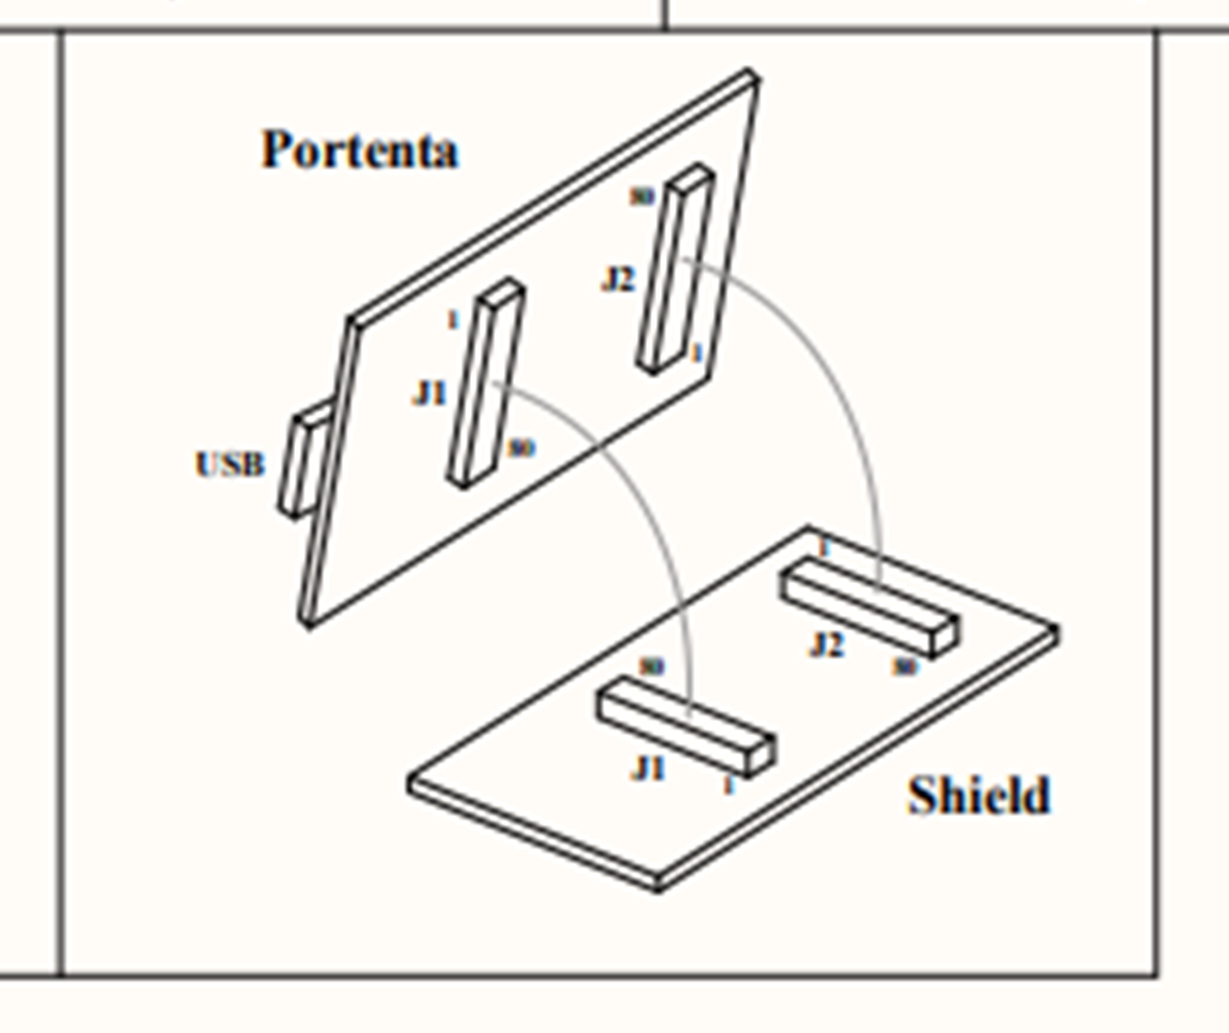
Hardware assembly begins by connecting the Vision Shield to the Portenta H7 board via High-density Connectors. If you are using the LoRa version, the area to the left of connector J1 will have a horseshoe shape, whereas the Ethernet version will have an RJ45 port installed instead. This connection requires special care as the pins are highly delicate. Gentle pressure should be applied until a "click" sound is heard, indicating the connector is fully seated.
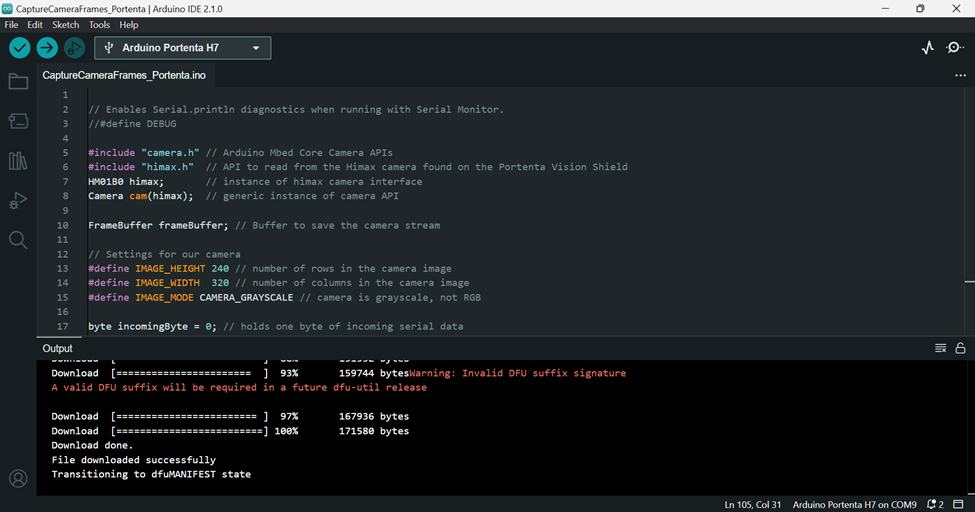
For software development, we chose Arduino IDE v2.1 with the latest Portenta Core installed. The camera on the Vision Shield is a Himax HM01B0 sensor, an Ultra-low Power Grayscale camera specifically designed for Computer Vision applications.
Arduino Code Logic:
- Initialization: The code executes
Camera.begin()to configure the camera sensor, setting the Resolution and pixel format to suit the Portenta H7's memory. - Waiting for Command: The program enters an Idle state, awaiting a special Byte signal via the Serial Port (USB) from the computer.
- Frame Capture: Upon receiving a command, the controller instructs the Himax sensor to capture an image and store it in the Frame Buffer.
- Data Transmission: Image data is transmitted directly as a Byte Stream via
Serial.write(). This method is more efficient than converting to a String, as it reduces Overhead and maintains data transmission speed.
Once the code is uploaded, the Portenta H7 will be ready to operate immediately, awaiting Request commands from the Python script we will run on the Host machine.
Image Processing with Python (Host Process)
On the computer (PC) side, we use Python to act as the "front-end brain" for receiving and displaying data. This process begins by opening the Serial Port corresponding to where the Portenta H7 is connected, then sending a trigger signal to the board.
Python Script Logic:
- Serial Communication: Uses the
pyseriallibrary to establish a connection pipe. Data flowing from the Arduino will be a long series of Bytes without image structure. - Data Reconstruction: Since the received data is Raw Bytes, the script uses
numpyto "Reshape" or rearrange the received 1-dimensional array back into a 2-dimensional array (Width x Height) according to the camera's configured Resolution. - Image Rendering: Once the pixel Matrix is obtained, we use the OpenCV (
cv2) library to display the image in a Windows window. This method allows us to immediately apply filters or other AI algorithms in the future.
Don't forget to install the necessary libraries via the requirements.txt file (e.g., pyserial, numpy, opencv-python) in your Virtual Environment for smooth system operation.
Conclusion and Engineering Perspective
This project represents a significant step in understanding the synergy between high-end Hardware like the Arduino Portenta H7 and image data management. We successfully accessed the camera sensor, controlled image Orientation, and transmitted data precisely via a Serial Connection.
Understanding the Data Structure of raw images from the Himax camera is a crucial foundation. If we wish to expand to data transmission via LoRa, which has limited Bandwidth, we might need to consider Image Compression or Edge AI analysis before transmitting only essential data. Deep access to Header files like camera.h and himax.h will help developers extract maximum sensor performance, which will be central to our subsequent projects in building a complete Remote Vision system.