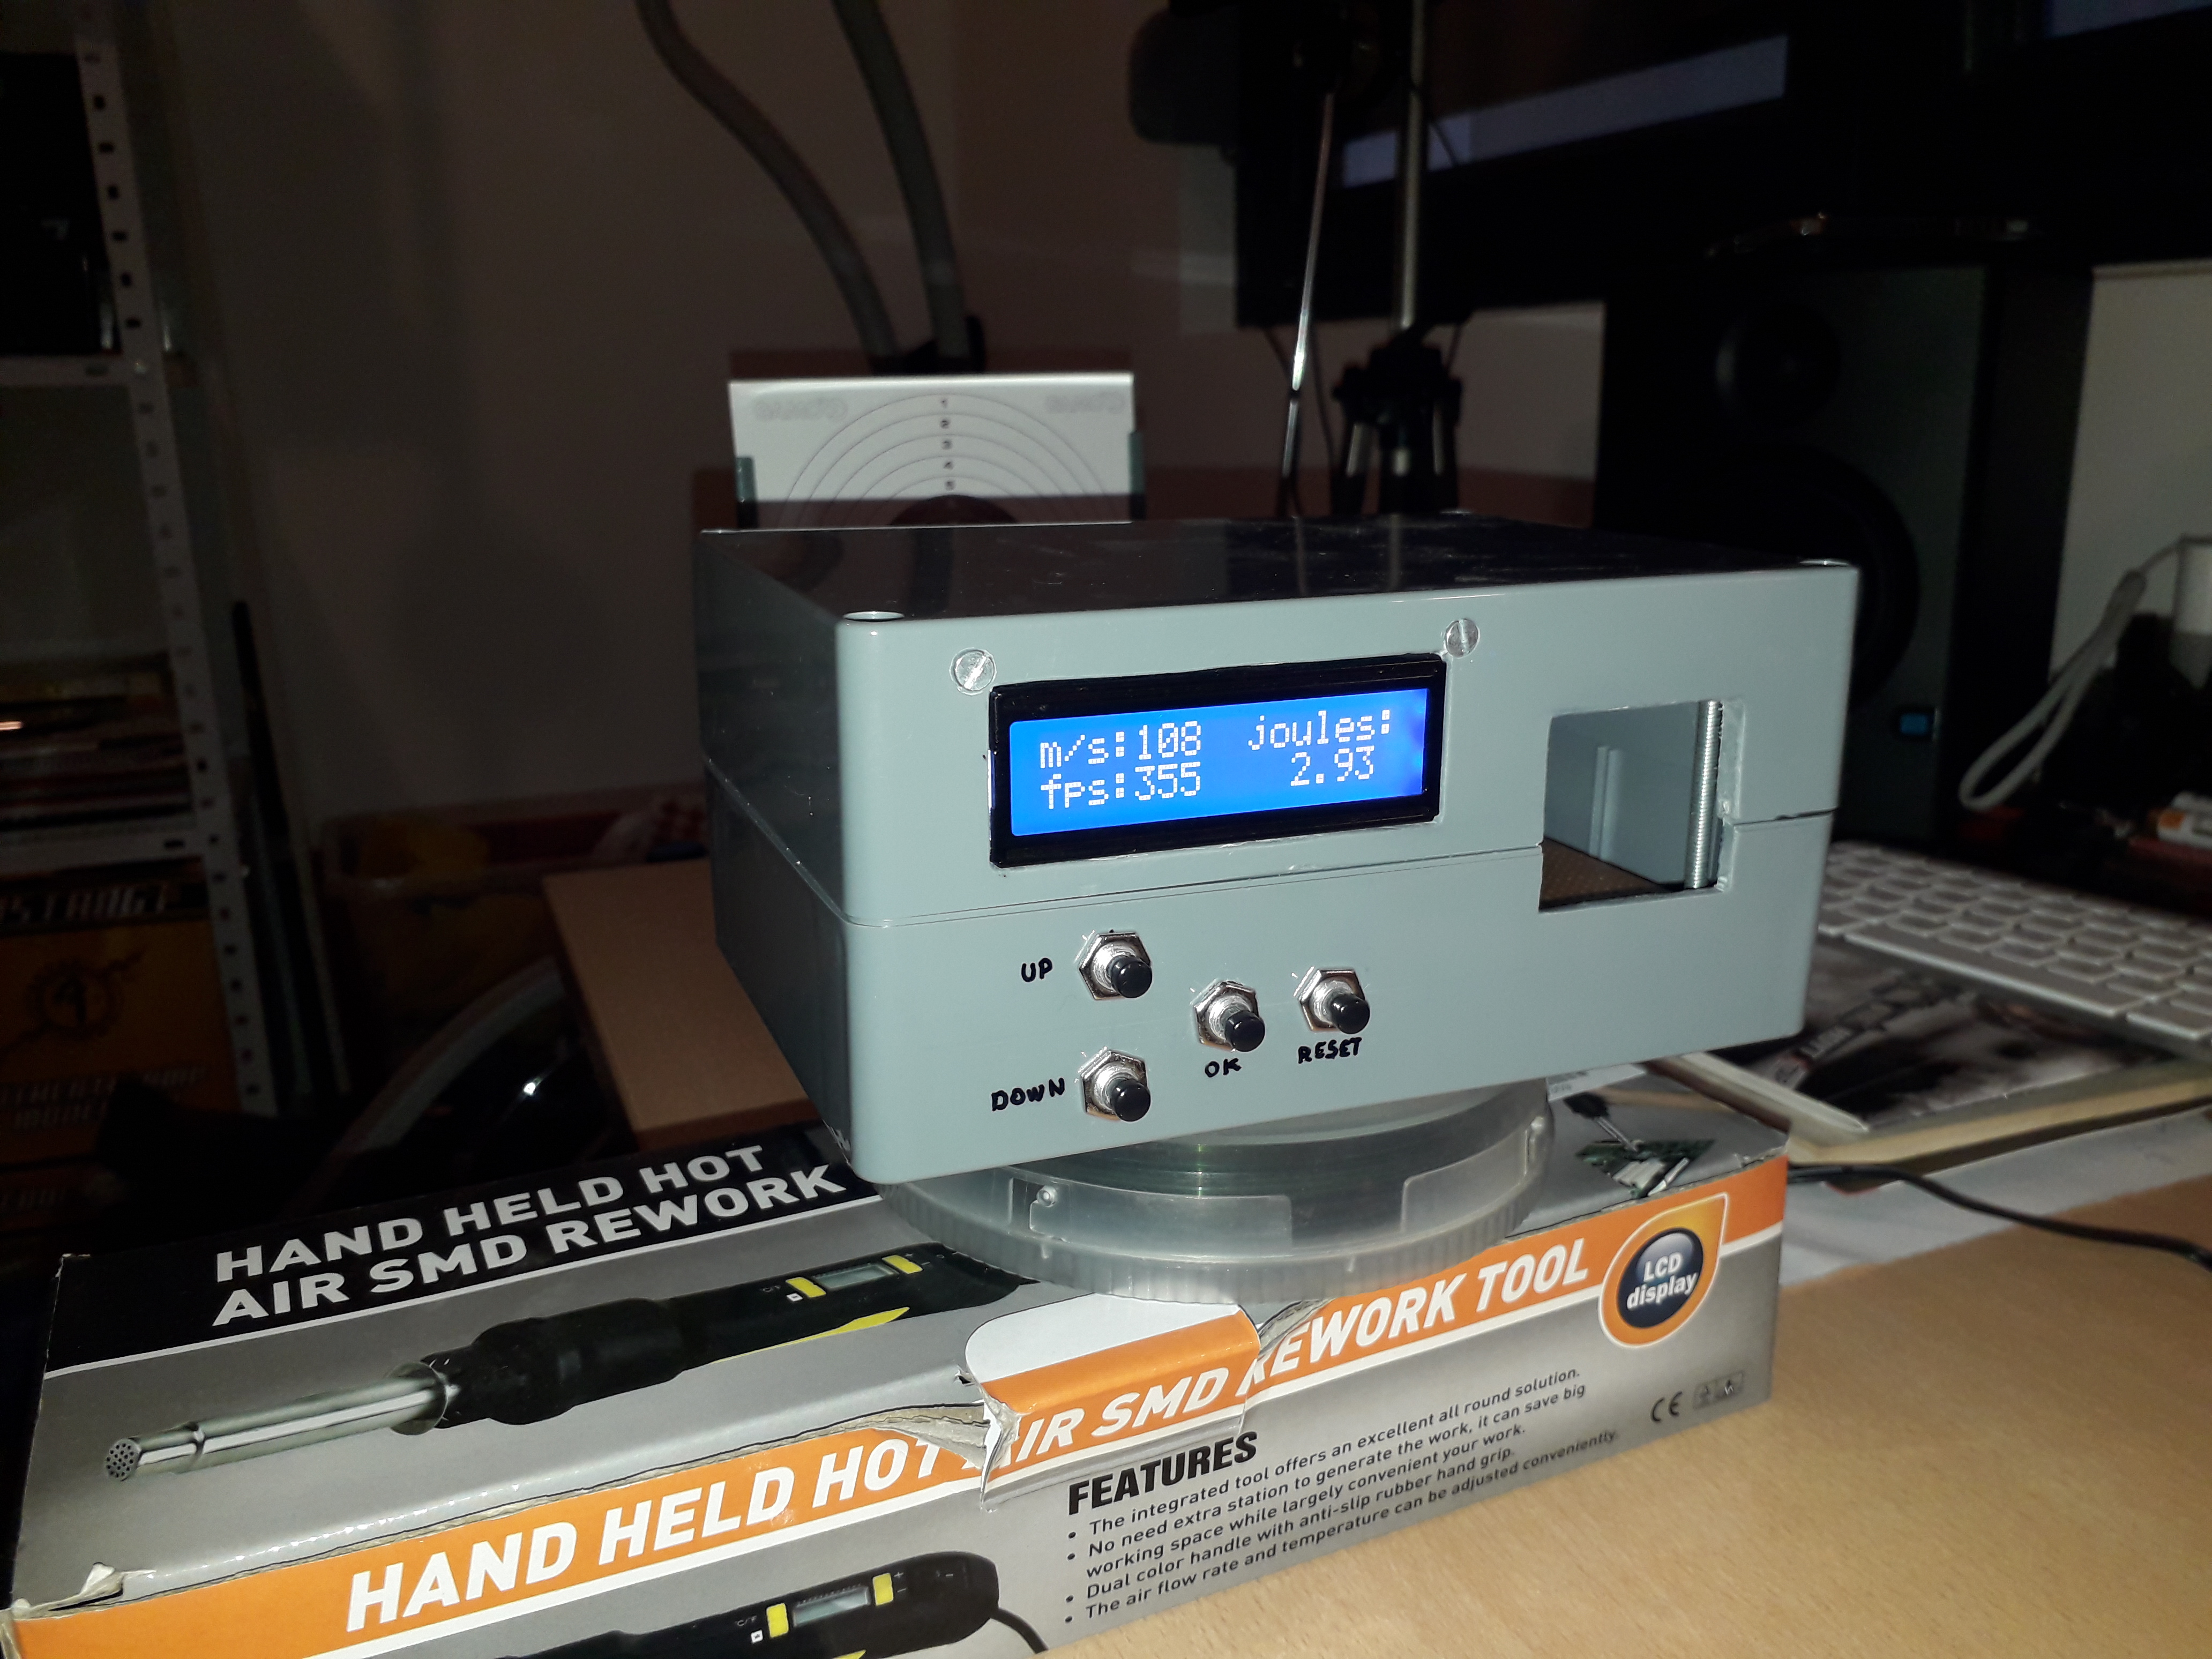
As a man with many hobbies including electronics and airguns I decided to use an old Arduino board laying around and make something useful. I always wanted to know what the real speed of my airguns was but never had a real chronograph, so I decided to make one using the mentioned Arduino board.
And here is the finished product:
Engineering Principles
The core of this project is measuring the "Time of Flight" (the time an object takes to travel a specified distance) to calculate velocity using the fundamental physics formula $v = s/t$.
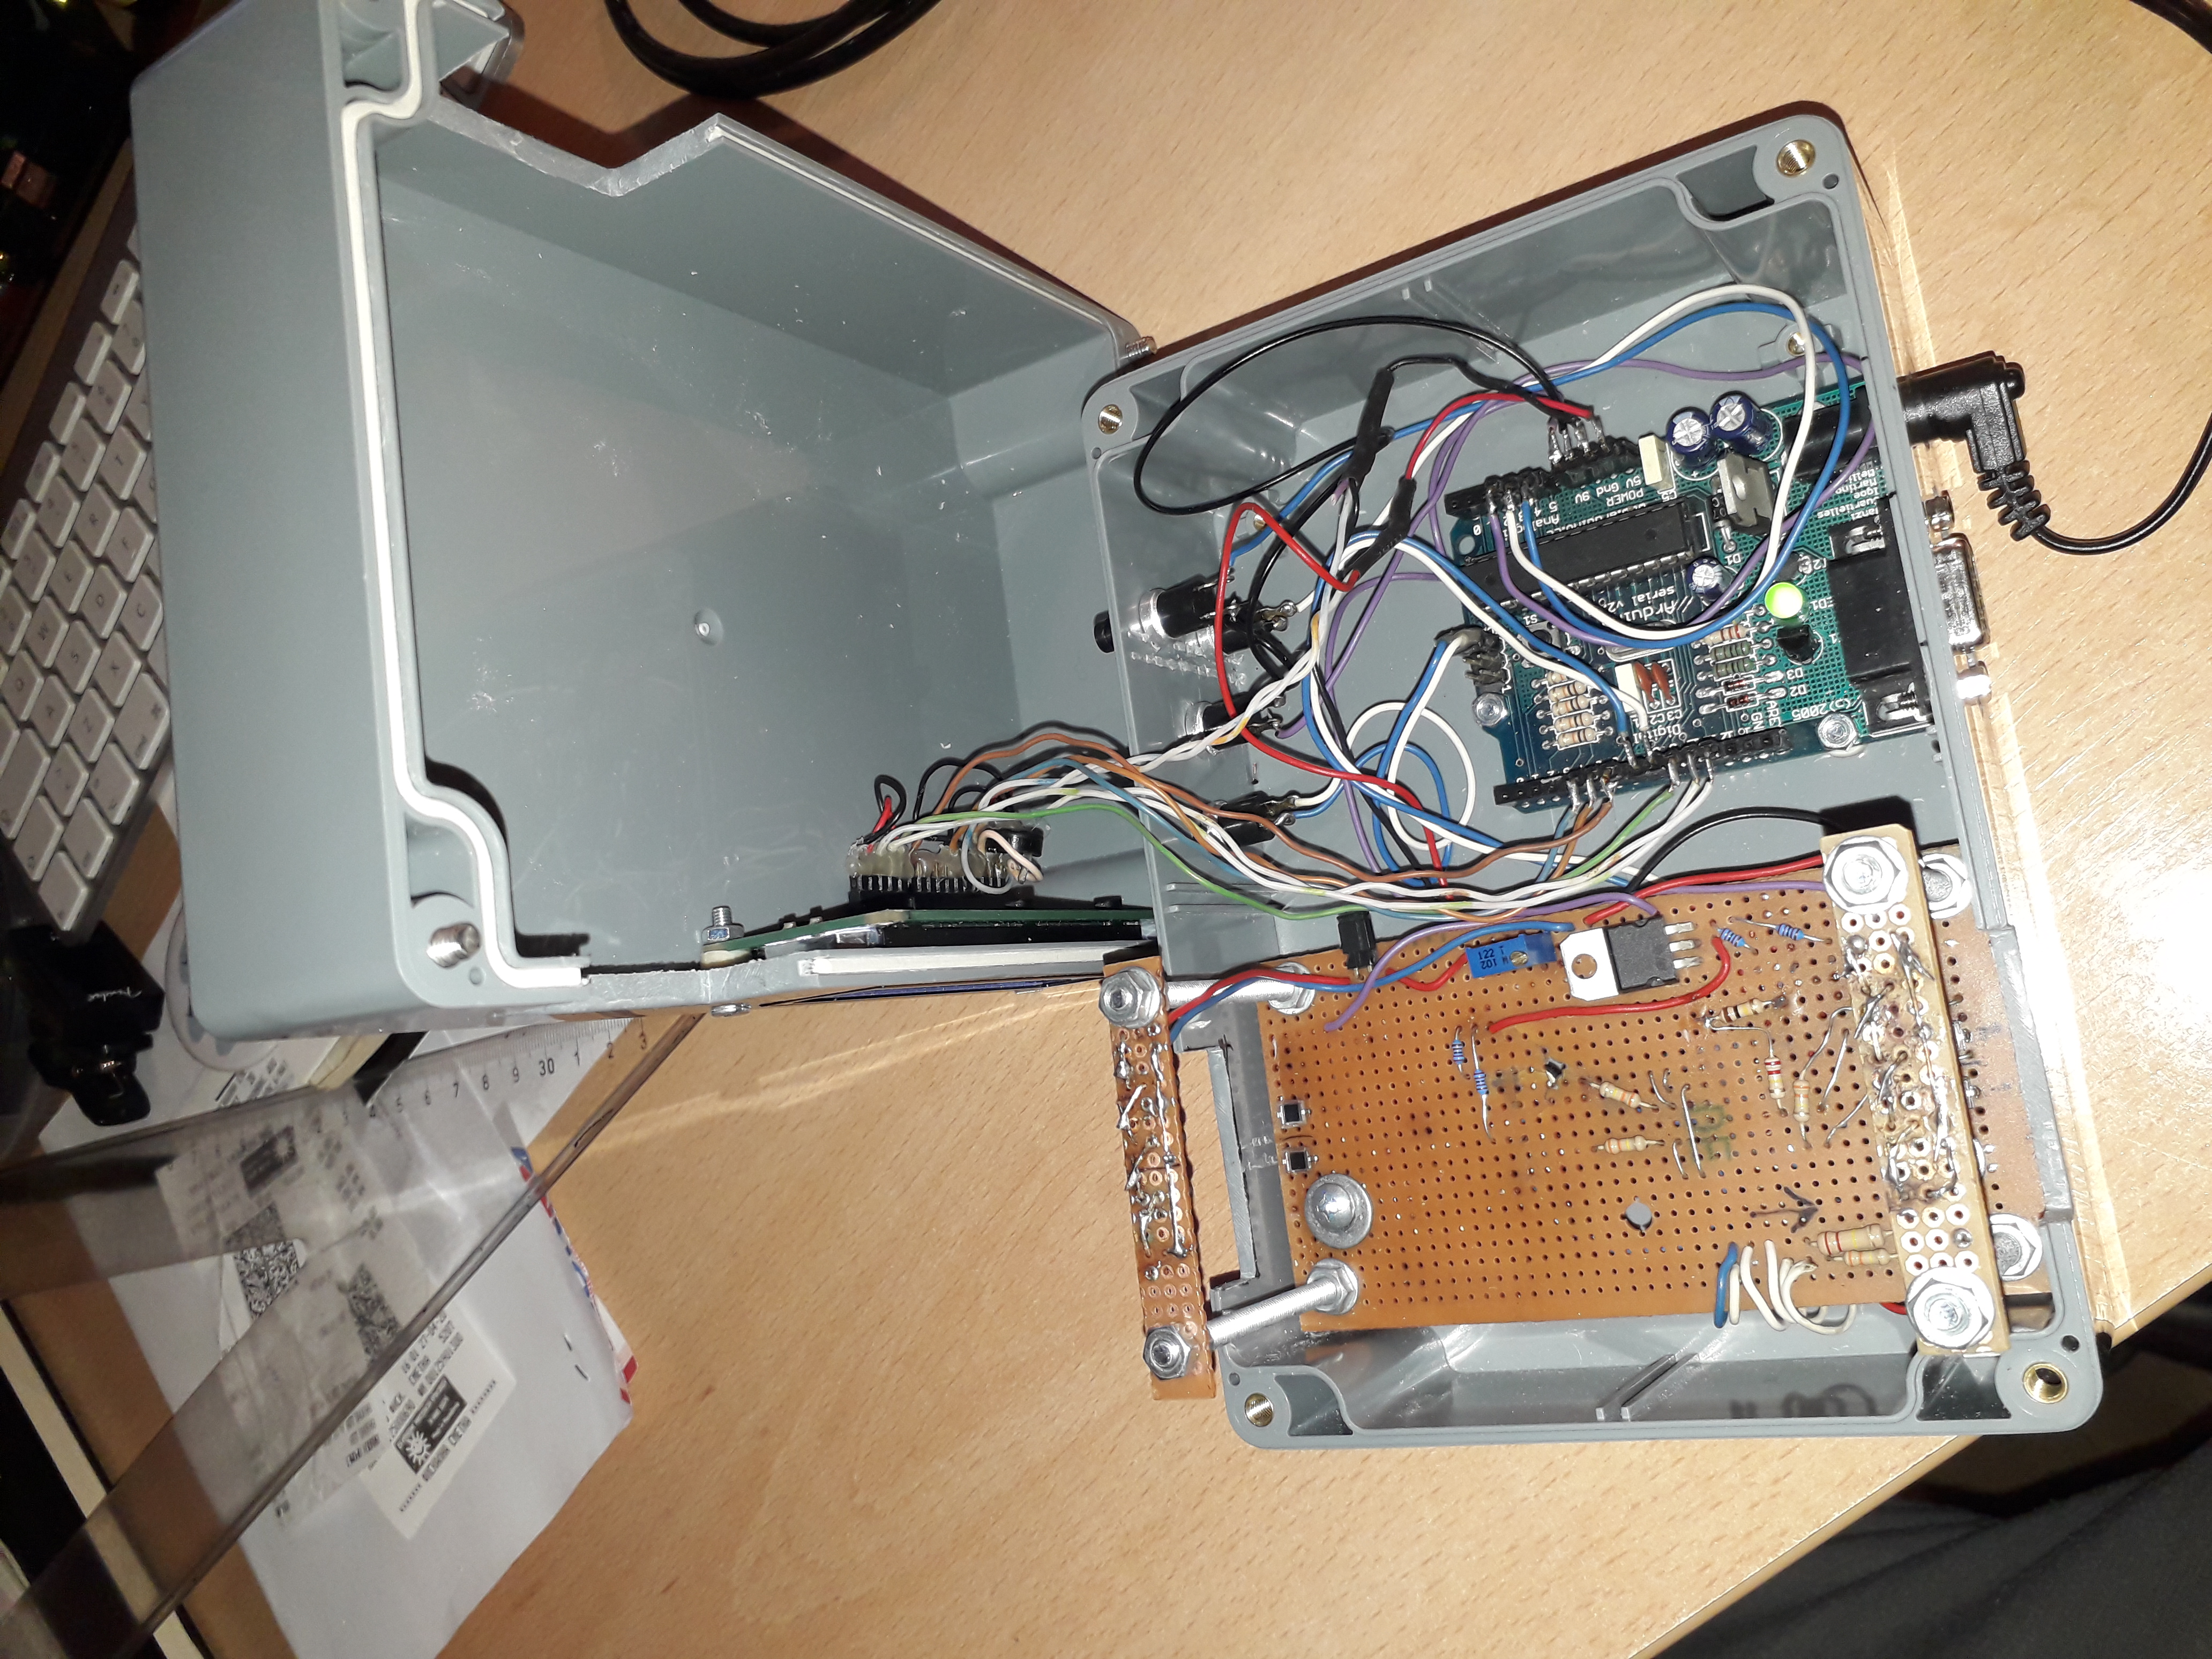
1. Sensor Detection System (Optical Gate)
The design is based on photodiodes, each triggering an LM339 comparator. There are two photodiodes (cheap chinese photo diodes) on both in and out sensors and they work as Inclusive OR logic. The photodiodes are illuminated with 4 IR leds each (8 in total) creating kind of 4x2 beam mesh. This 4x2 Beam Mesh configuration creates a comprehensive beam network to ensure detection even if a pellet passes through only a portion of the light beams.
2. Signal Processing with LM339 Comparator
When there is a difference in the light received by the photodiode/s a high signal is sent to the input pins on the Arduino. Signals from photodiodes are typically continuous analog signals. Using the LM339 (Quad Differential Comparator) IC provides crucial signal conditioning:
- Inclusive OR Logic: Each photodiode pair operates with OR logic, meaning if any sensor within the same set is blocked, an output signal is immediately sent.
- Signal Conditioning: The LM339 compares the voltage from the photodiode with a reference voltage set via a potentiometer, sending a crisp digital (High/Low) signal to the Arduino for microsecond-level accuracy.
Software Logic (Code Logic)
The Arduino program was written with a primary focus on response speed:
- Waiting for Start: The system waits for an interrupt signal or a change of state on the first input pin. When the pellet passes the first sensor, the
micros()function is immediately called to record the start time. - Waiting for Stop: The system waits for a signal from the second sensor. When the pellet passes this point, the current time is recorded again.
- Calculation: The time difference ($\Delta t$) is divided by the fixed distance between the sensors. The result is the velocity, which can be converted to meters per second (m/s) or feet per second (fps) as desired.
- Display: The result is shown on an LCD screen so the user can see the value immediately.
Challenges and Calibration
The hardest part is adjusting the sensitivity of the sensors to get reliable results. It is done by adjusting the potentiometer for each photodiode. This process involves "tuning the sensitivity" to be sensitive enough to detect tiny pellets, but not so sensitive that electrical noise causes false triggers. It took some trial and error but once set you don't need to touch it again. So far it works perfectly every time if the shot is not way off center.
Check it out and feel free to ask for help if you want to build something similar. If anyone is interested in building their own velocity measuring device or encounters problems with component selection and IR light layer arrangement, I'm happy to provide advice!