All-In-One-Clock-2.0
This is the second version of my old project: All In One Clock 1.0 This project will have similar functions but have a touch screen and more information.
Project Goals:
- Display Time (current time and date)
- Alarm clock
- Temperature right now
- Full temperature info (pressure, humidity, etc..)
- Forecast 3 days (today, tomorrow, and the day after tomorrow)
- Current weather Icon
- Timer
To be able to do all of this, we will need a connection to the internet. I chose for this project to use the Arduino RP2040 Connect. To use the RP2040, I will be using the https://create.arduino.cc/iot This official Arduino tool is very easy to use, and it's great for using the internet across multiple devices.
we have an Arduino that is connected to the internet, but how will we get the information? Well, let's divide the information we need into two categories:
- Temperature: To get the temperature, we will use something called an API. In short, an API is some kind of server that, when I "call it" I get JSON information back. For example, go to this link to use the NASA API that shows you the international space station location right now. http://api.open-notify.org/iss-now.json . For this project, I will use https://www.weatherapi.com . This API will have a lot of information for this project, but I will only use some of it because the Arduino cannot get so much information (we are talking about 20000 characters), so in the API settings, I changed it to only get some of the information. The API will also give me an image link, for example, cdn.weatherapi.com/weather/64x64/day/116.png . To get the image, I need to do a couple of things: get the image number, and determine if it's day or night.
All of the information mentioned above will be sent through the ISP. The Arduino will get it and decode it.
temperature = doc.containsKey("tw") ? doc["tw"] : temperature;
In this example, the Arduino will read the incoming data, and if the data has the keyword "tw" (it will be encoded as JSON) then the data will be saved in the temperature variable.
I also sent the image number and Day/Night but how will I show the image? Well, on the SD Card that is connected to the screen, there are two folders of all the images from day/night as bmp(bit map images). So I go to the SD Card and show the image by number or time.
In this project, I show icons in two ways. The first is by using a .h script, which is faster, but I can't have a lot of images like that because it takes a lot of MB. The second way is by using the SD card.
Dashboard:
The Arduino IoT Cloud allows us to use a dashboard. What is a dashboard? is a way for me to see the data from anywhere and on any device.
In the dashboard, there are a lot of widgets; we will use some to show the data. We will use the button widget to have a button that will update the temperature (usually for debugging) and a couple of other widgets to show the data (temperature, humidity, pressure, and time).
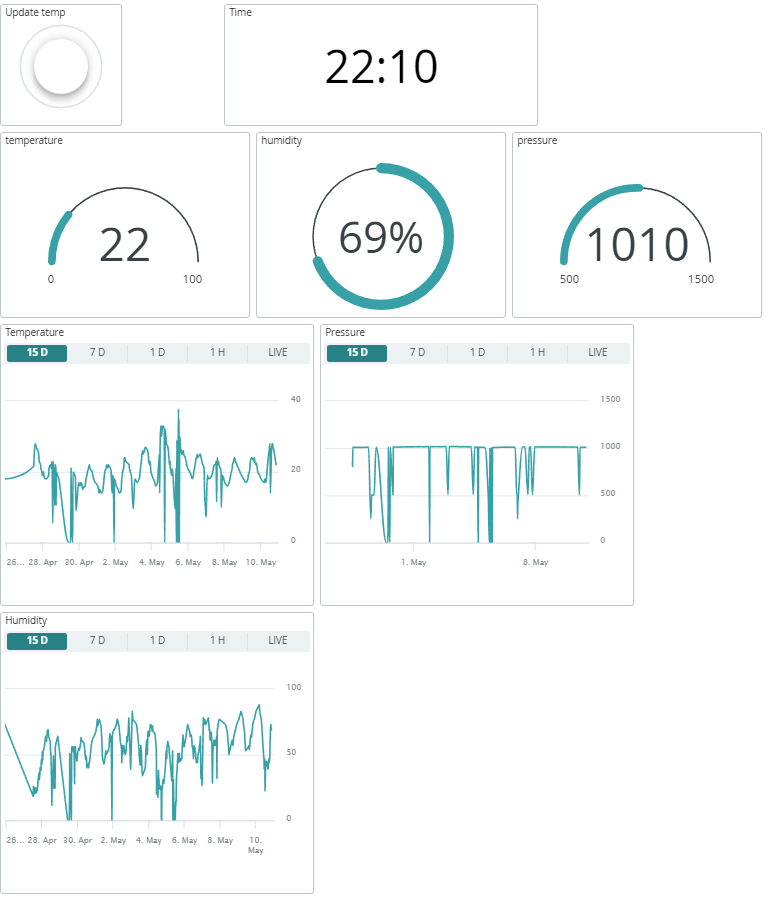
Do note that if the Arduino will receive a data of a null reading(0) or will restart it can update the graph as you see(I will add in the future a way to stop that from happening).
Fonts:
I used a couple of extra fonts that I will include in the download files.
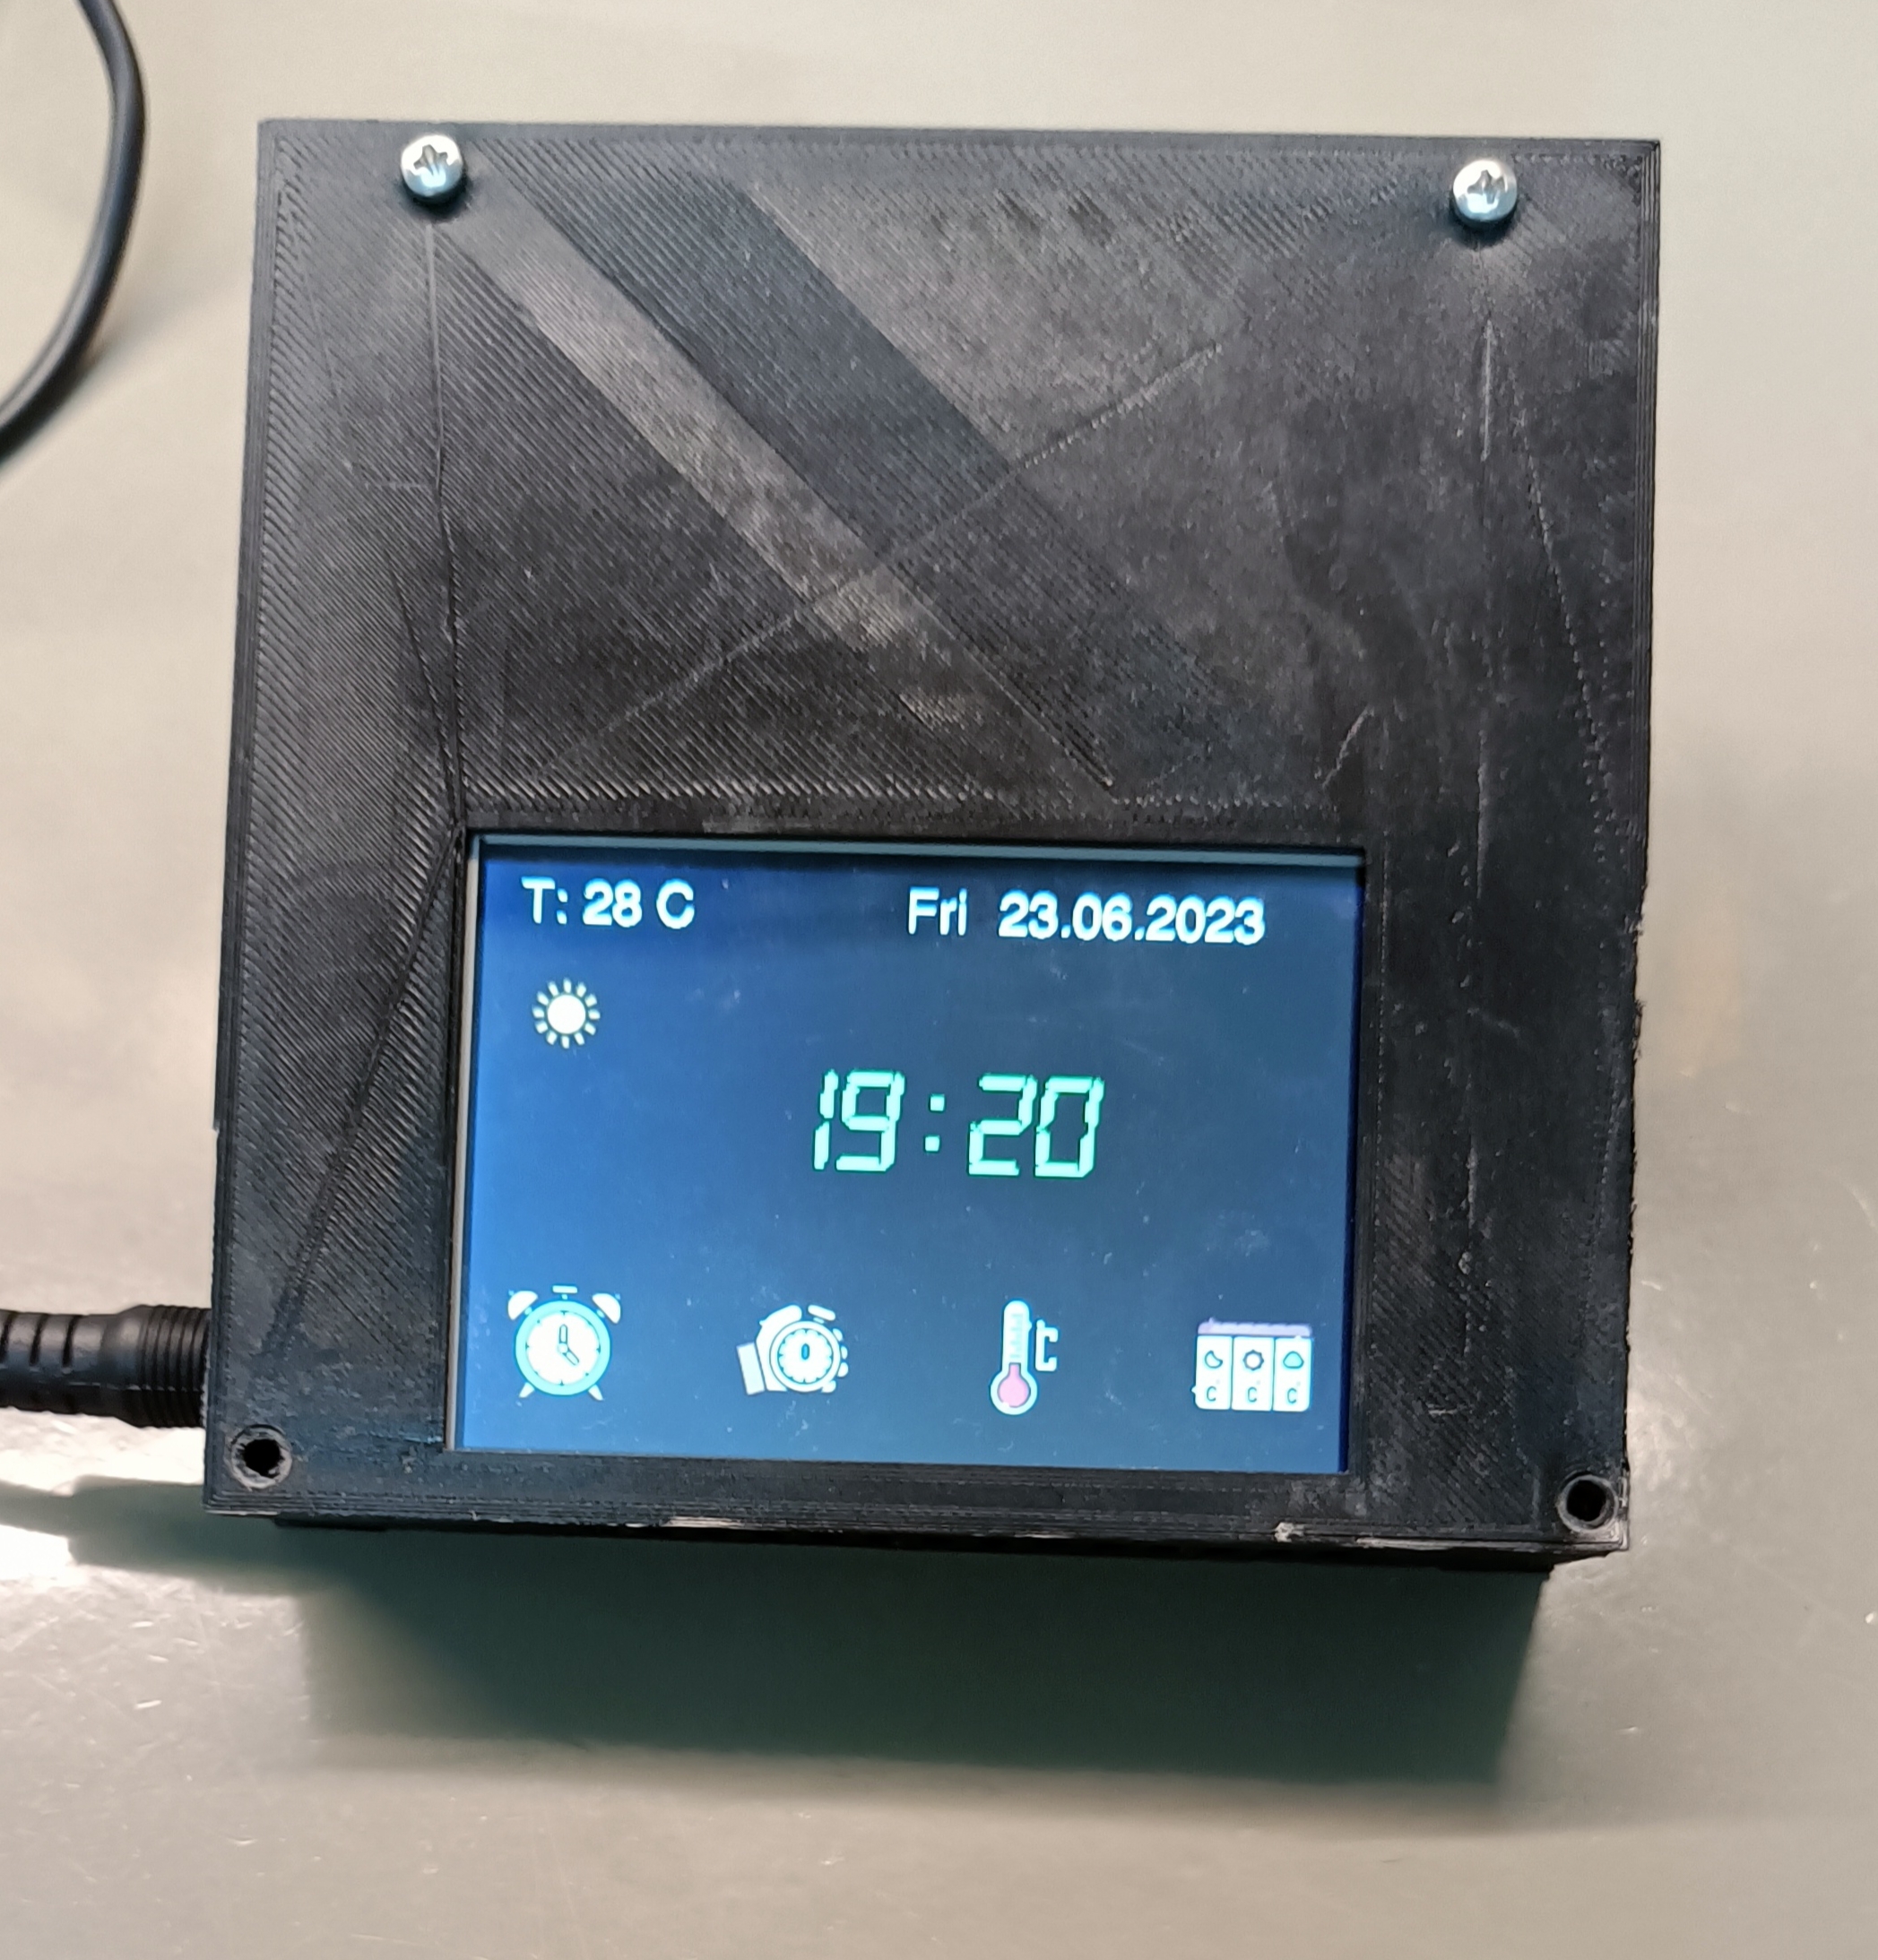
The screen:
I am using a 3.5-inch TFT screen; this is a touch screen. To use it, I am using the MCUFRIEND_kbv library.
We have 5 different screens; let's go through them one by one:
- Main Screen: On this screen, we can find the current time and date, the temperature, and an icon that shows the weather. Also, we have the buttons for all of the other screens.
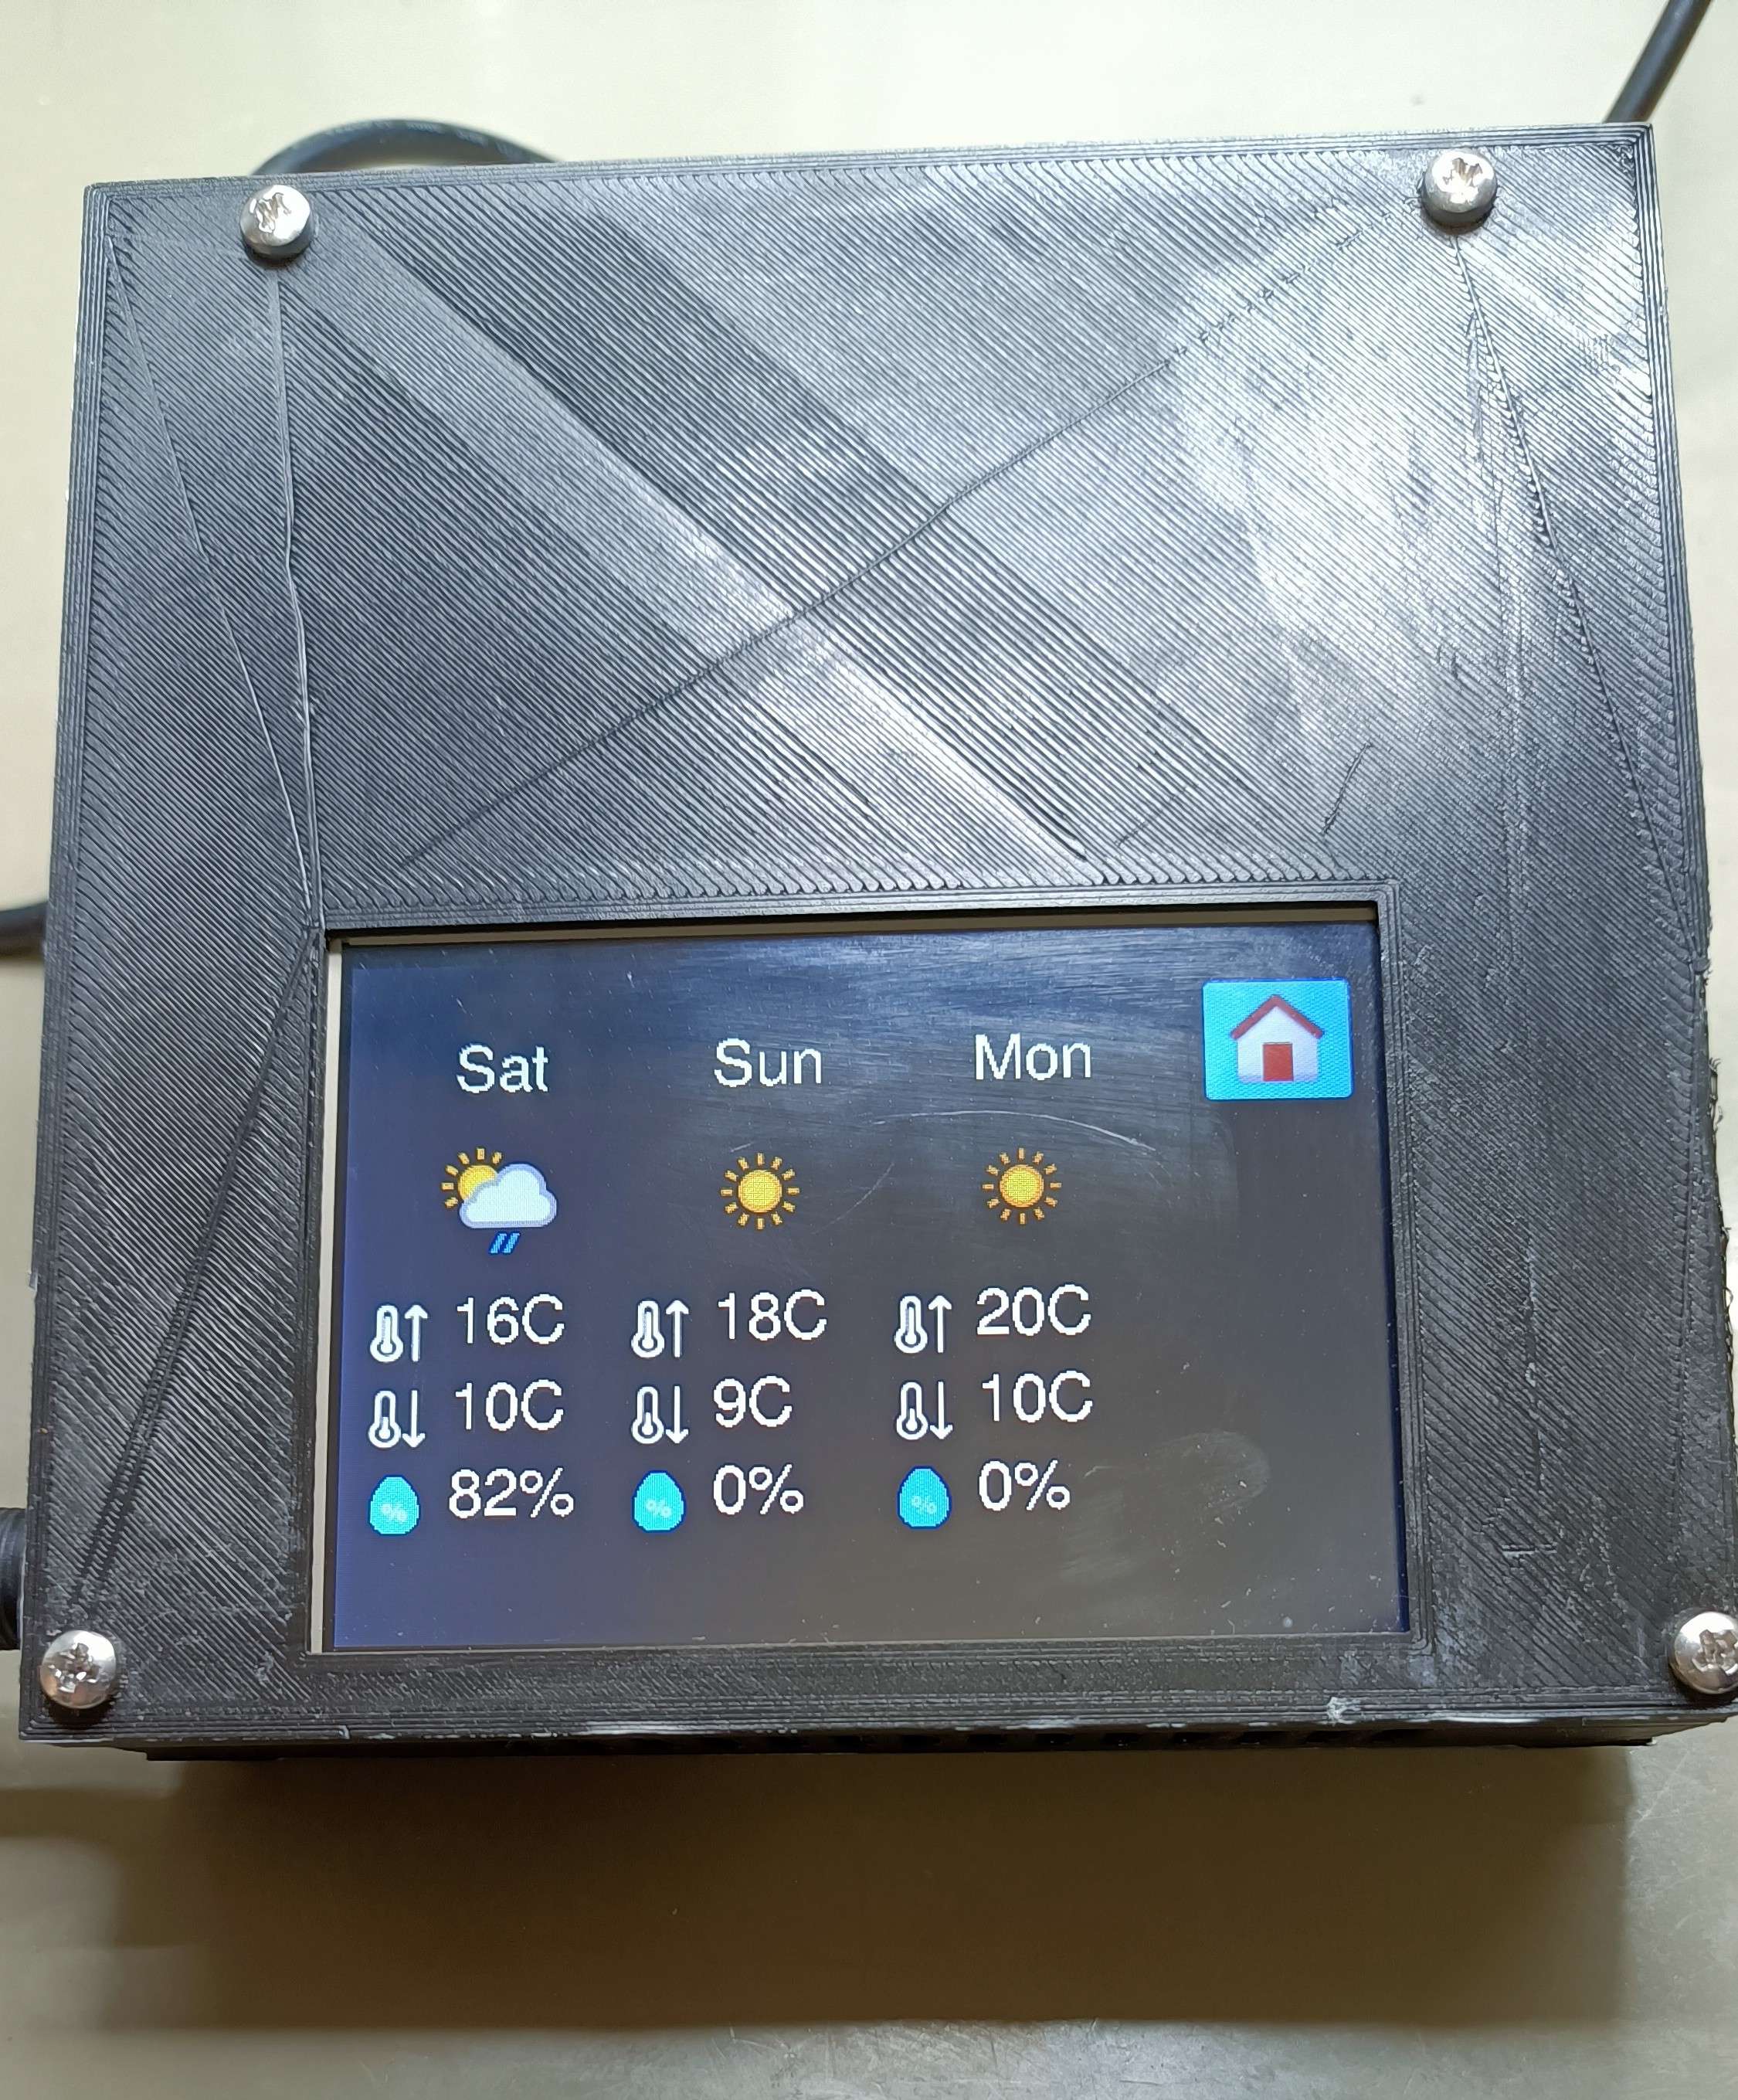
- Forecast Screen: In this screen, we can see the forecast for the current day, tomorrow, and the day after tomorrow. For each day, there is an icon and a minimum and maximum temperature.
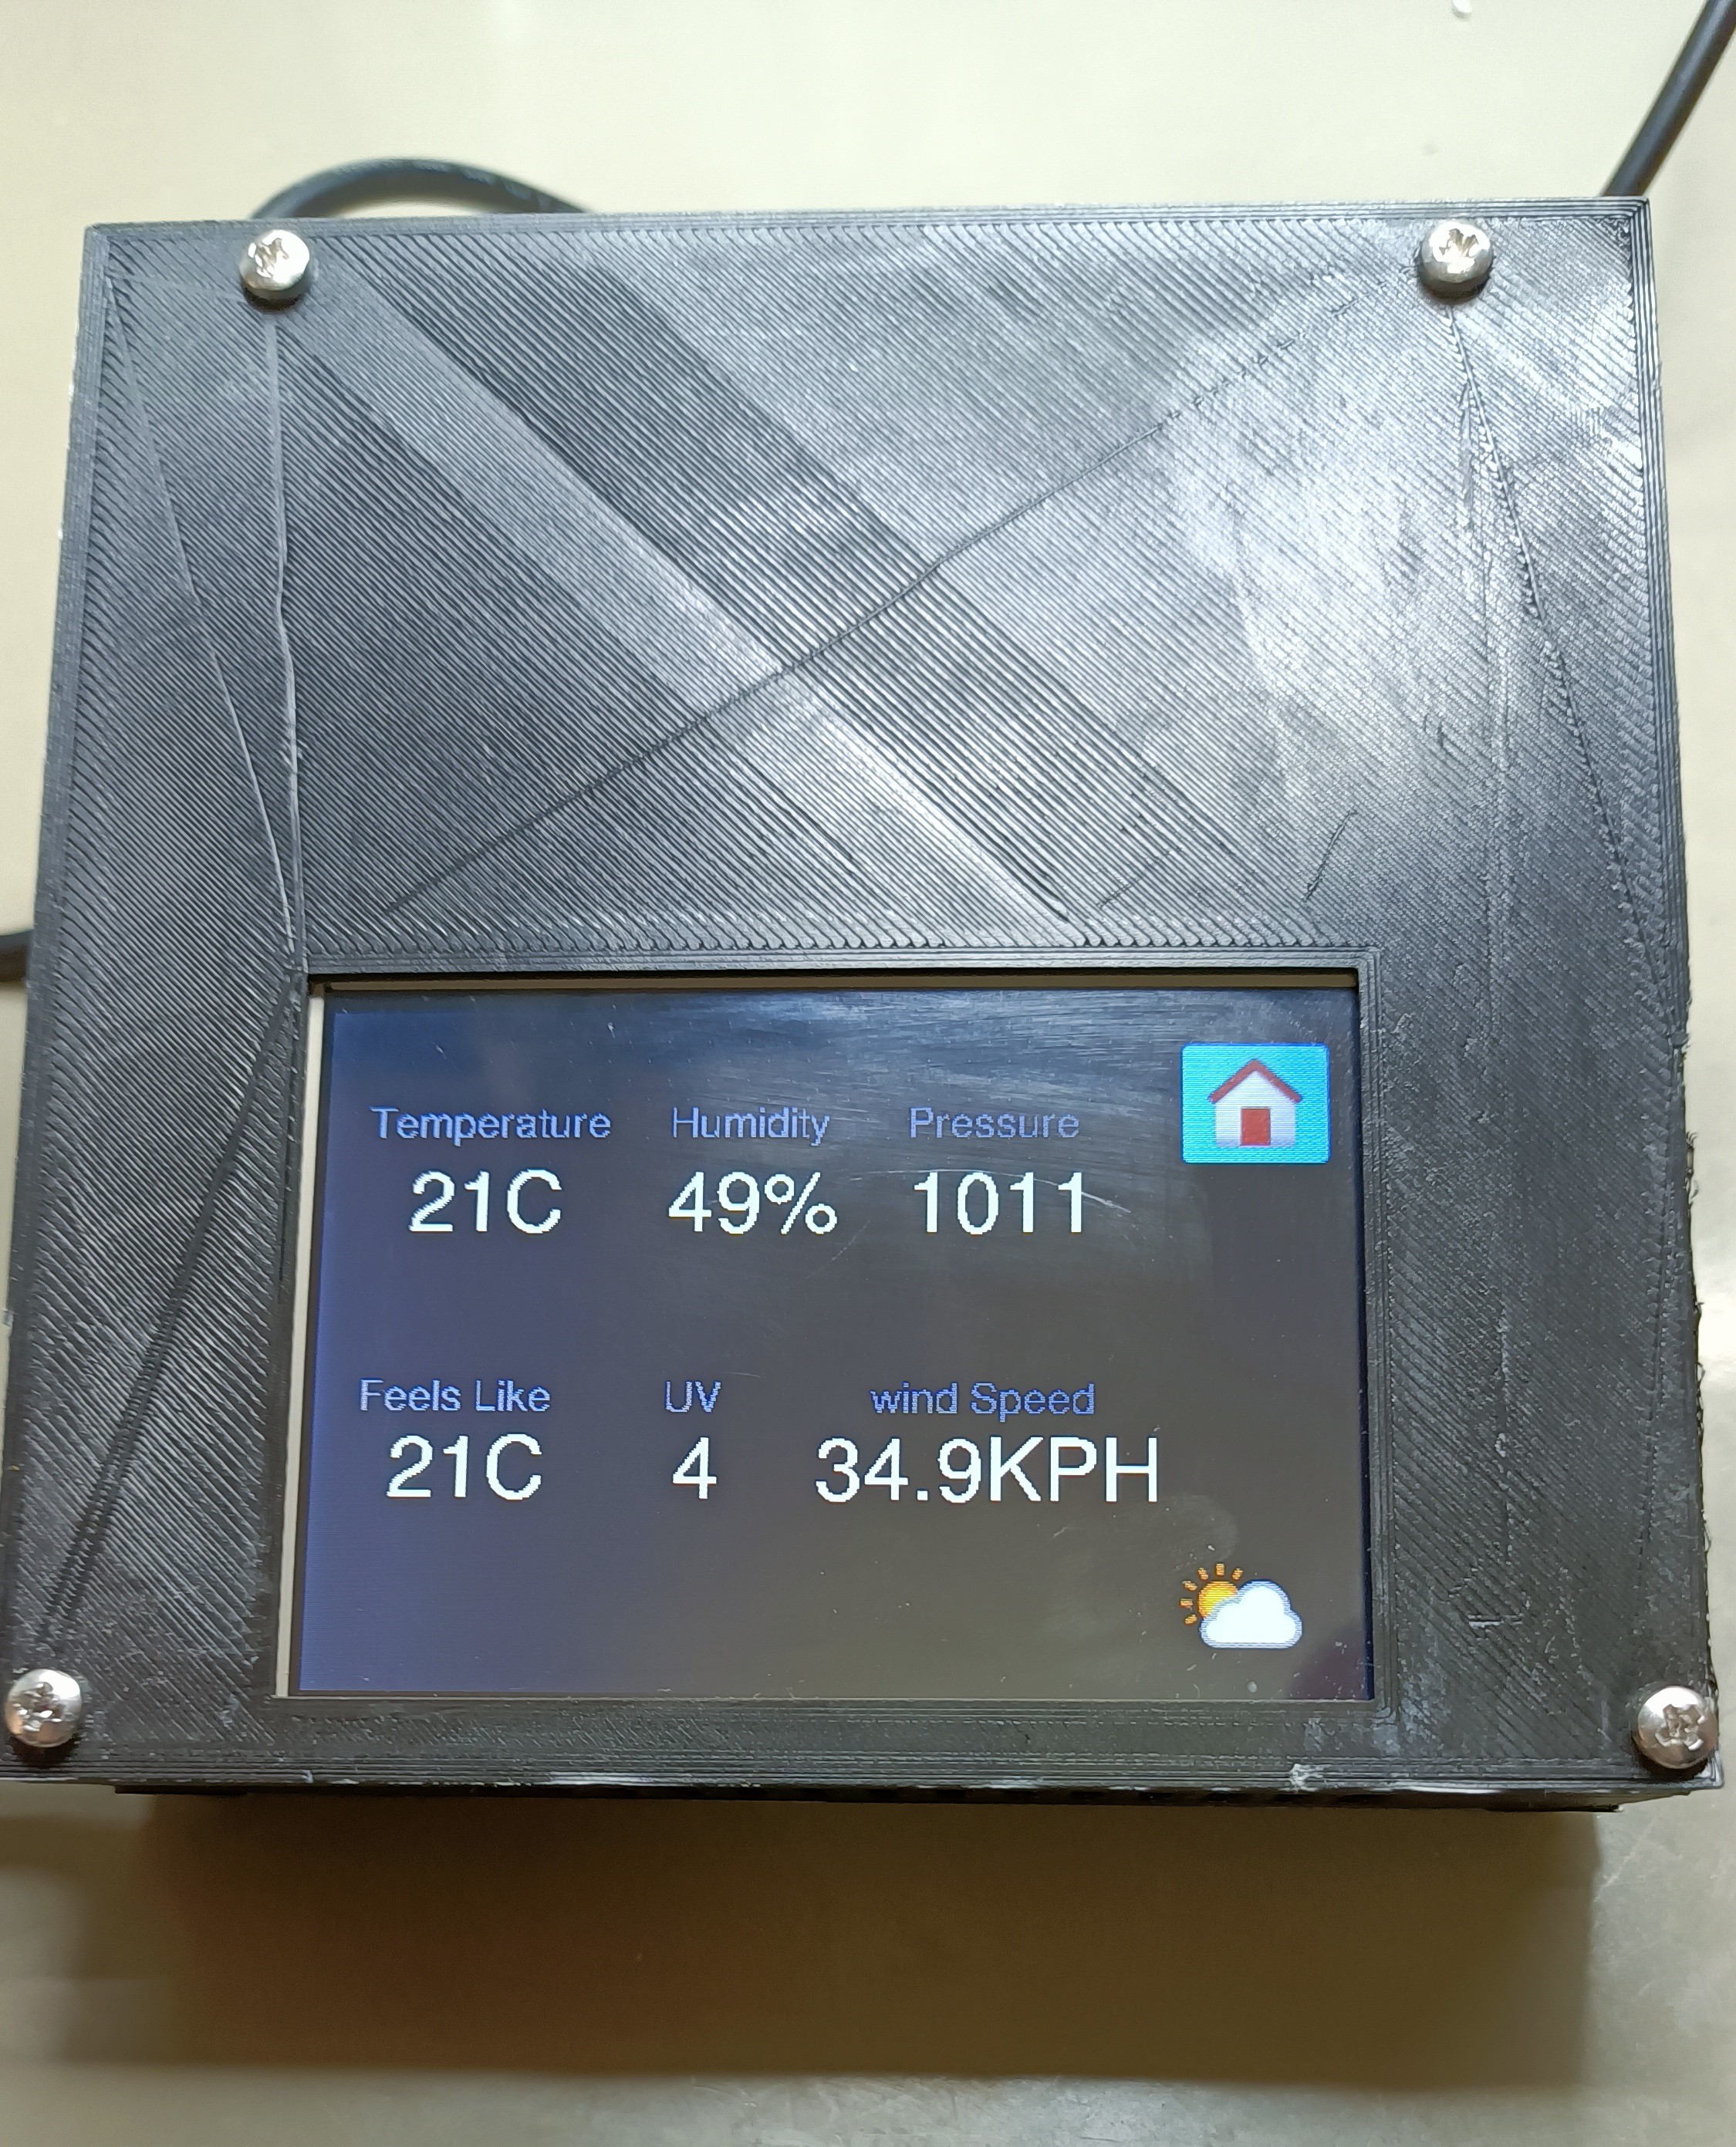
- Temperature Screen: In this screen, we have a lot of information that includes: temperature, humidity, pressure, UV, wind speed, Feels like
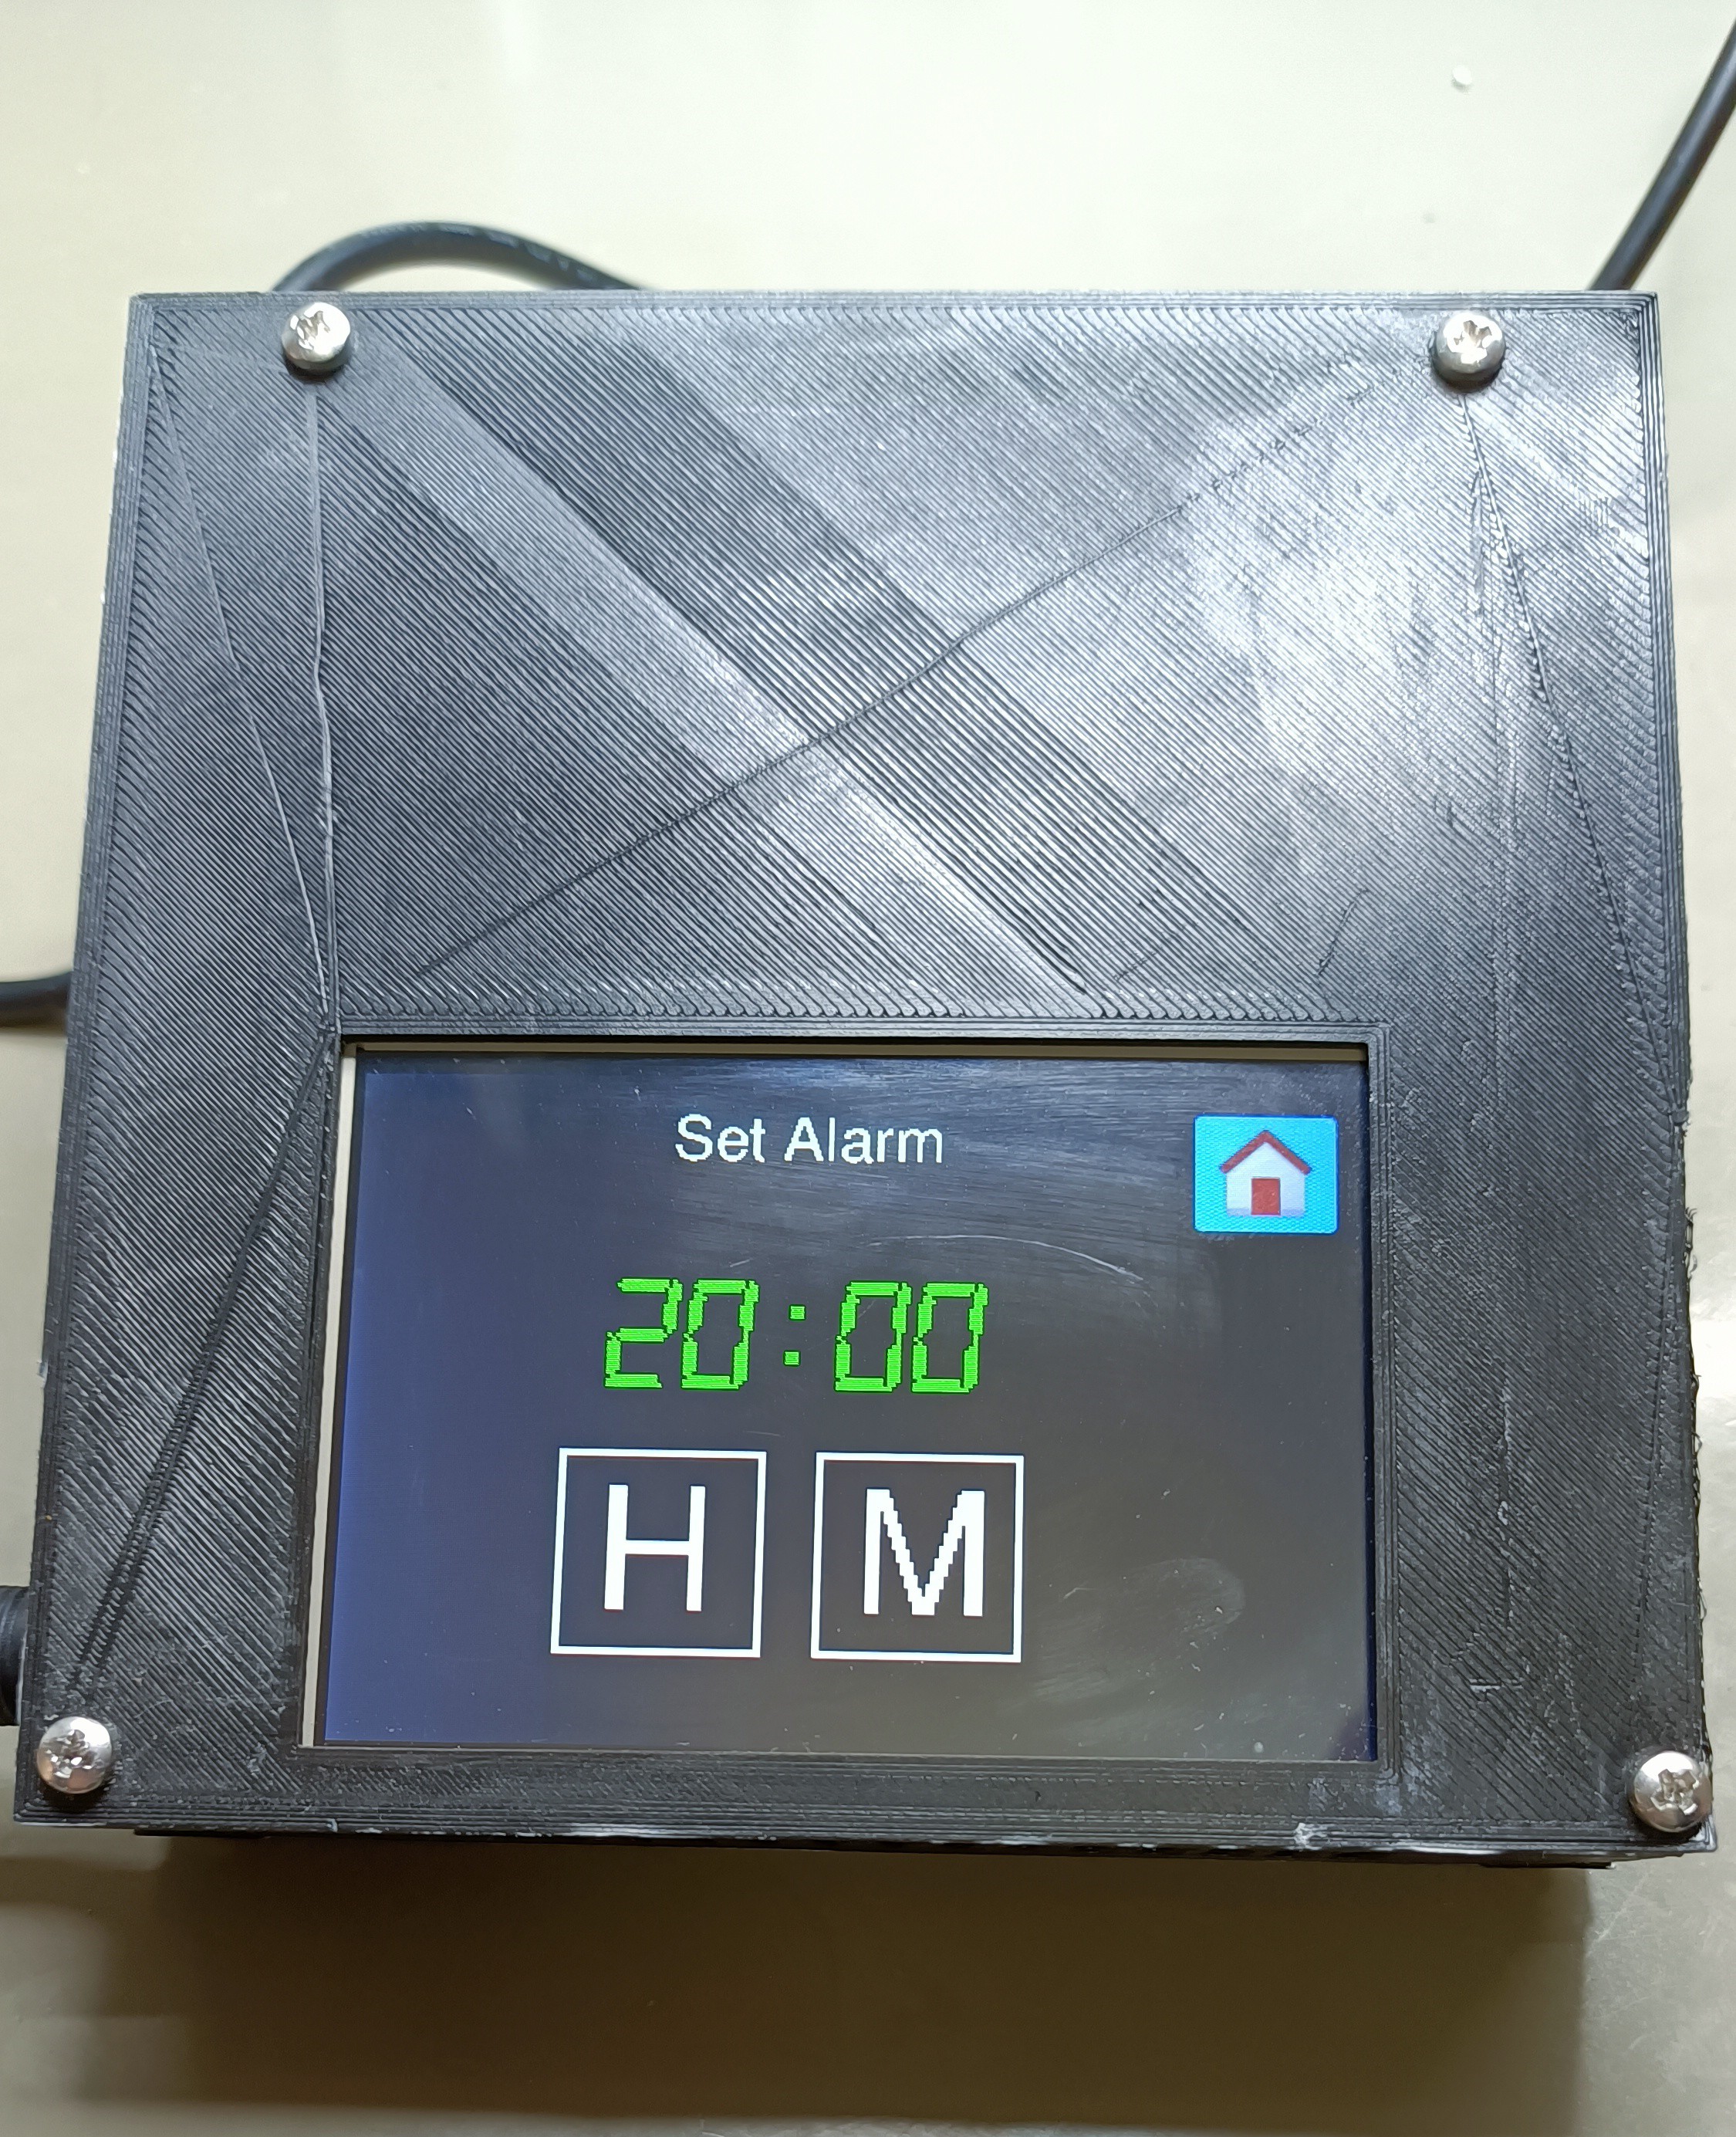
- Alarm Screen: In this screen, we can set the alarm time by using two buttons.
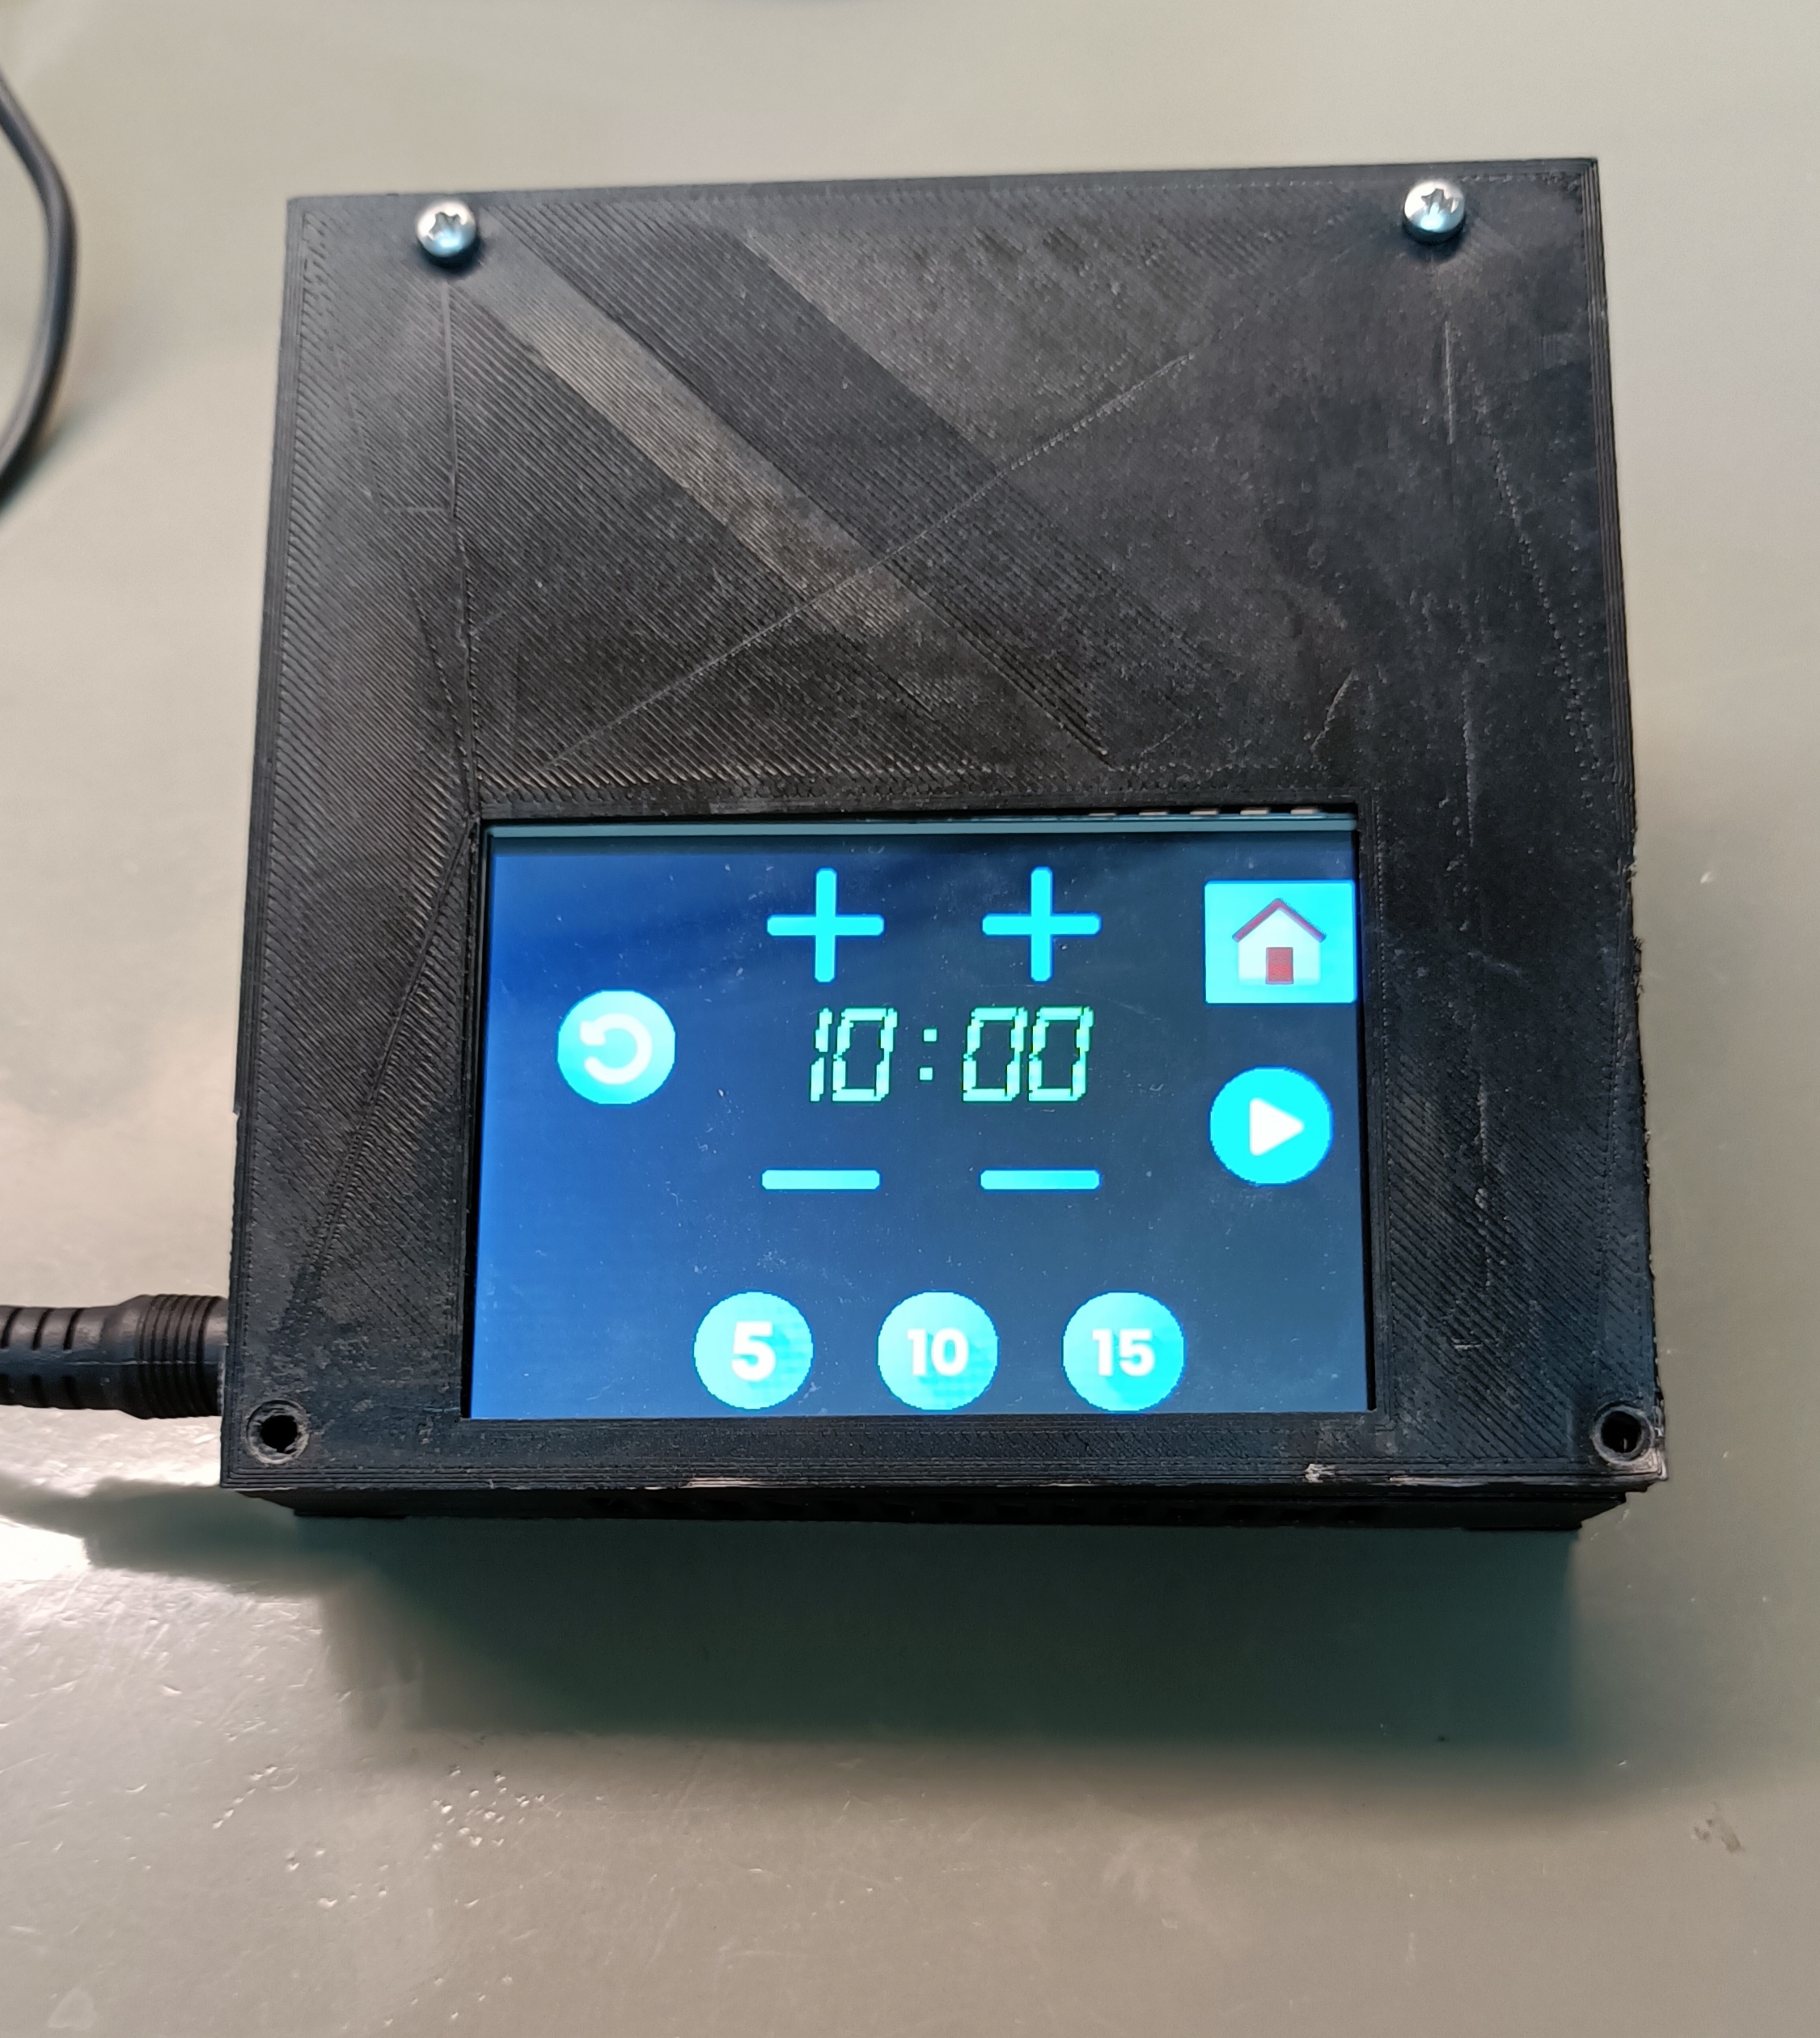
- Timer Screen: On this screen, we have a timer display where you can set the desired time and start the countdown.
Hardware Synchronization
The **All In One Clock 2.0** is an aggregation of multiple smaller projects. It takes RTC timekeeping, climate sensing, and interactive menus, compiling them into one massive, highly functional block of code.
- The Brain: An Arduino Mega or ESP32 is required due to the massive code size and library requirements.
- The Timekeeper (DS3231 RTC): Unlike the basic `delay()` function, an RTC module has an internal battery. Even if you unplug the Arduino for a year, the RTC remembers the exact second and year.
- The Climate Monitor (DHT22 or BME280): Reads the room temperature.
- The User Interface: A 20x4 Text LCD or a 3.5" TFT touchscreen displaying all data beautifully formatted.
- The Inputs: 4 push buttons (Menu, Up, Down, Select) to navigate the settings menu and set alarms.
Advanced Menu Structures
To combine all these features, the code uses a complex State Machine.
State 0 (Home): Displays Time and Temp.State 1 (Menu): Displays "1. Set Time, 2. Set Alarm, 3. Settings".State 2 (Set Alarm): Blinks the cursor over the hour, waiting for the user to press 'Up' or 'Down'.
Building the switch/case logic for a multi-tiered menu system is one of the most frustrating but rewarding software exercises in embedded systems programming!
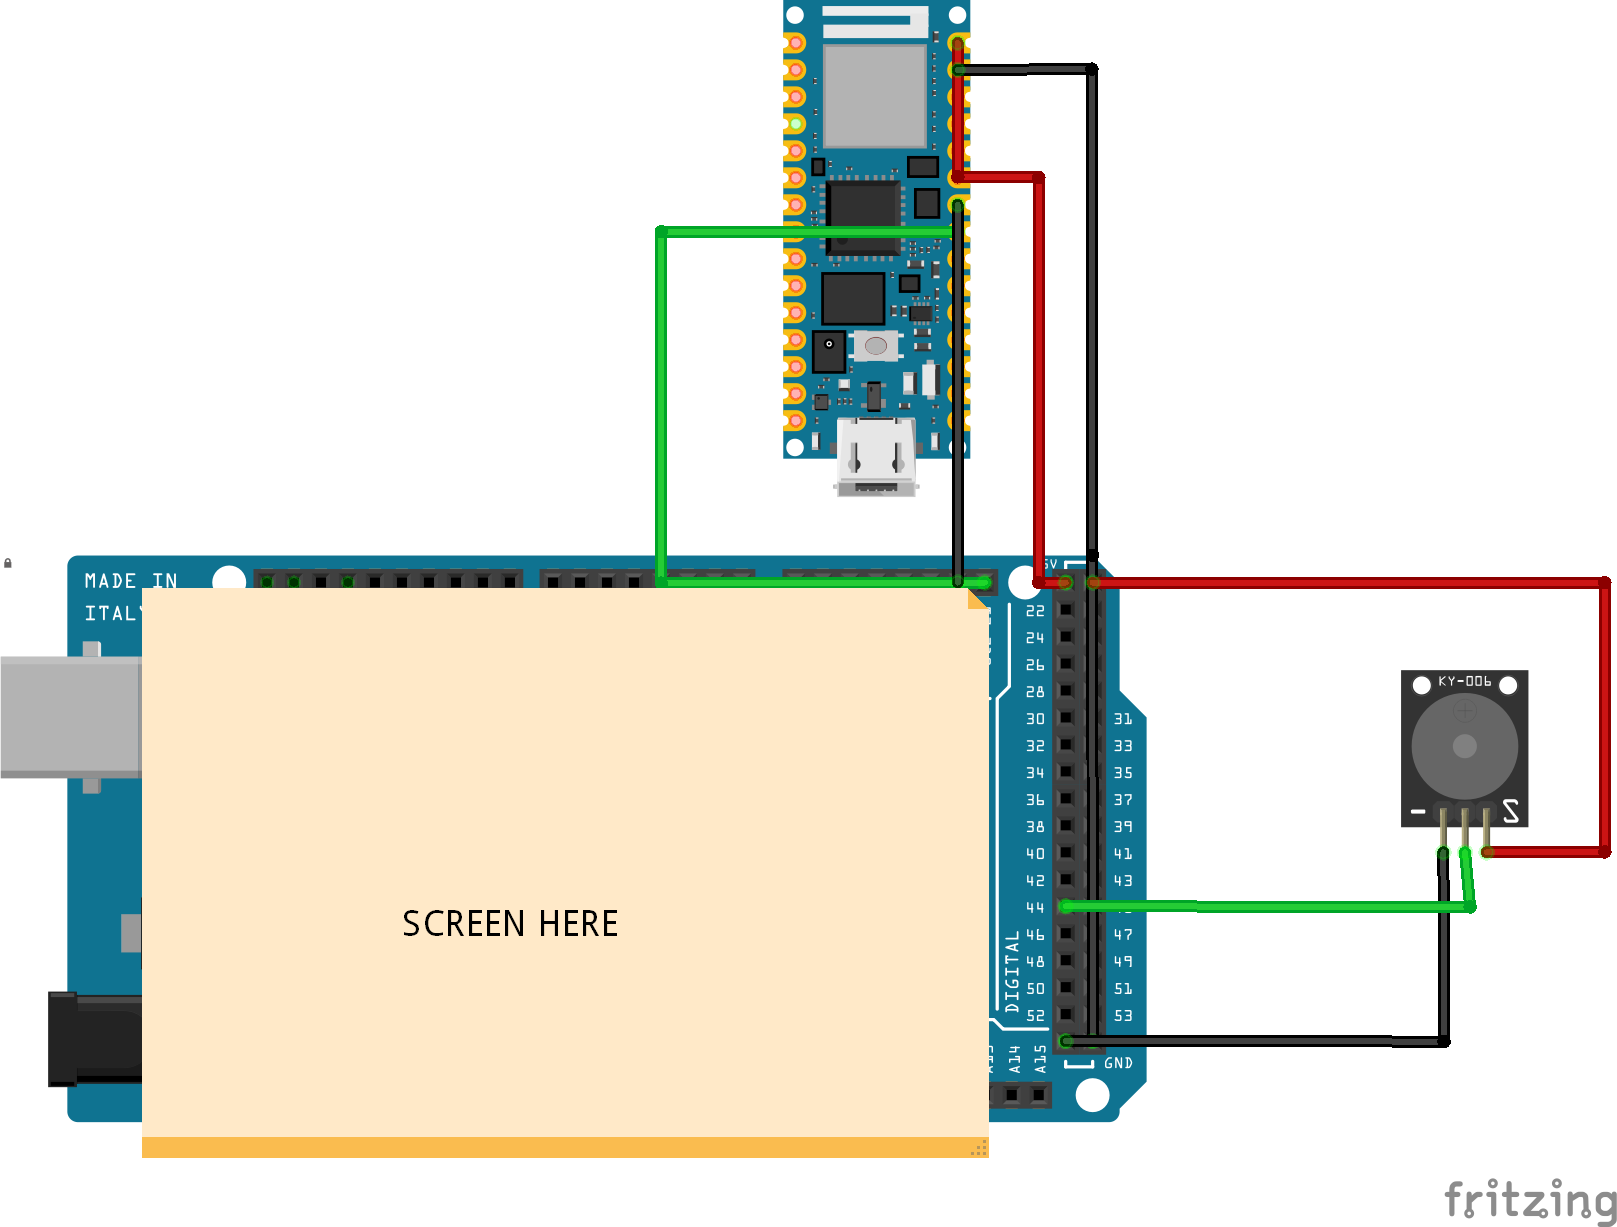
Connections:
In this project we don't connect a lot of thing but we do connect some:
- Connect both Arduino's Using ISP. From the rp2040 A4-D21 and A5-D20.
- From the mega 5v to RP2040 VIN
- From the mega gnd to RP2040 GND
- From the mega 5v to vcc buzzer
- From the mega gnd to gnd buzzer
- From the mega D44 to buzzer
Box:
There is an extra 3d model for the box I used for the screen.
GitHub:
You can find all of the codes and files in my GitHub