Backstory
Building electronics is a fun and creative process, but one must also be mindful of some of the dangers that come with it. Specifically, when soldering electronics fumes are released which should not be inhaled. The solution is a solder fan, a simple way to capture those fumes.
My issue with using a solder fan is simply a fault of my own. Often times I'll be in my own head, thinking about the next connection or about the project and I'll forget to turn the fan on. Other times, I'll only need to fix one connection here or solder a wire or two there and it doesn't seem worth the extra time to reach towards my fan, turn it on, do my work, and turn it off. Is it lazy of me? Perhaps!
On the other hand, someone might just leave their fan on for the duration of their work, and while this solves the issue, the added noise to the environment can be distracting. I'd rather be listening to my music than hearing my solder fan run for the next 30 min.
So, is there a solution?! Yes! A DIY Automatic Solder Fan!
Building the Project
A DIY Automatic Solder Fan is essentially a way to automatically have our solder fan run every time our iron is removed from its stand and then automatically turn off when its placed back in the stand. This way we never have to mess with turning our fan on and off and we will always be removing those solder fumes! Lets take a look at the project!
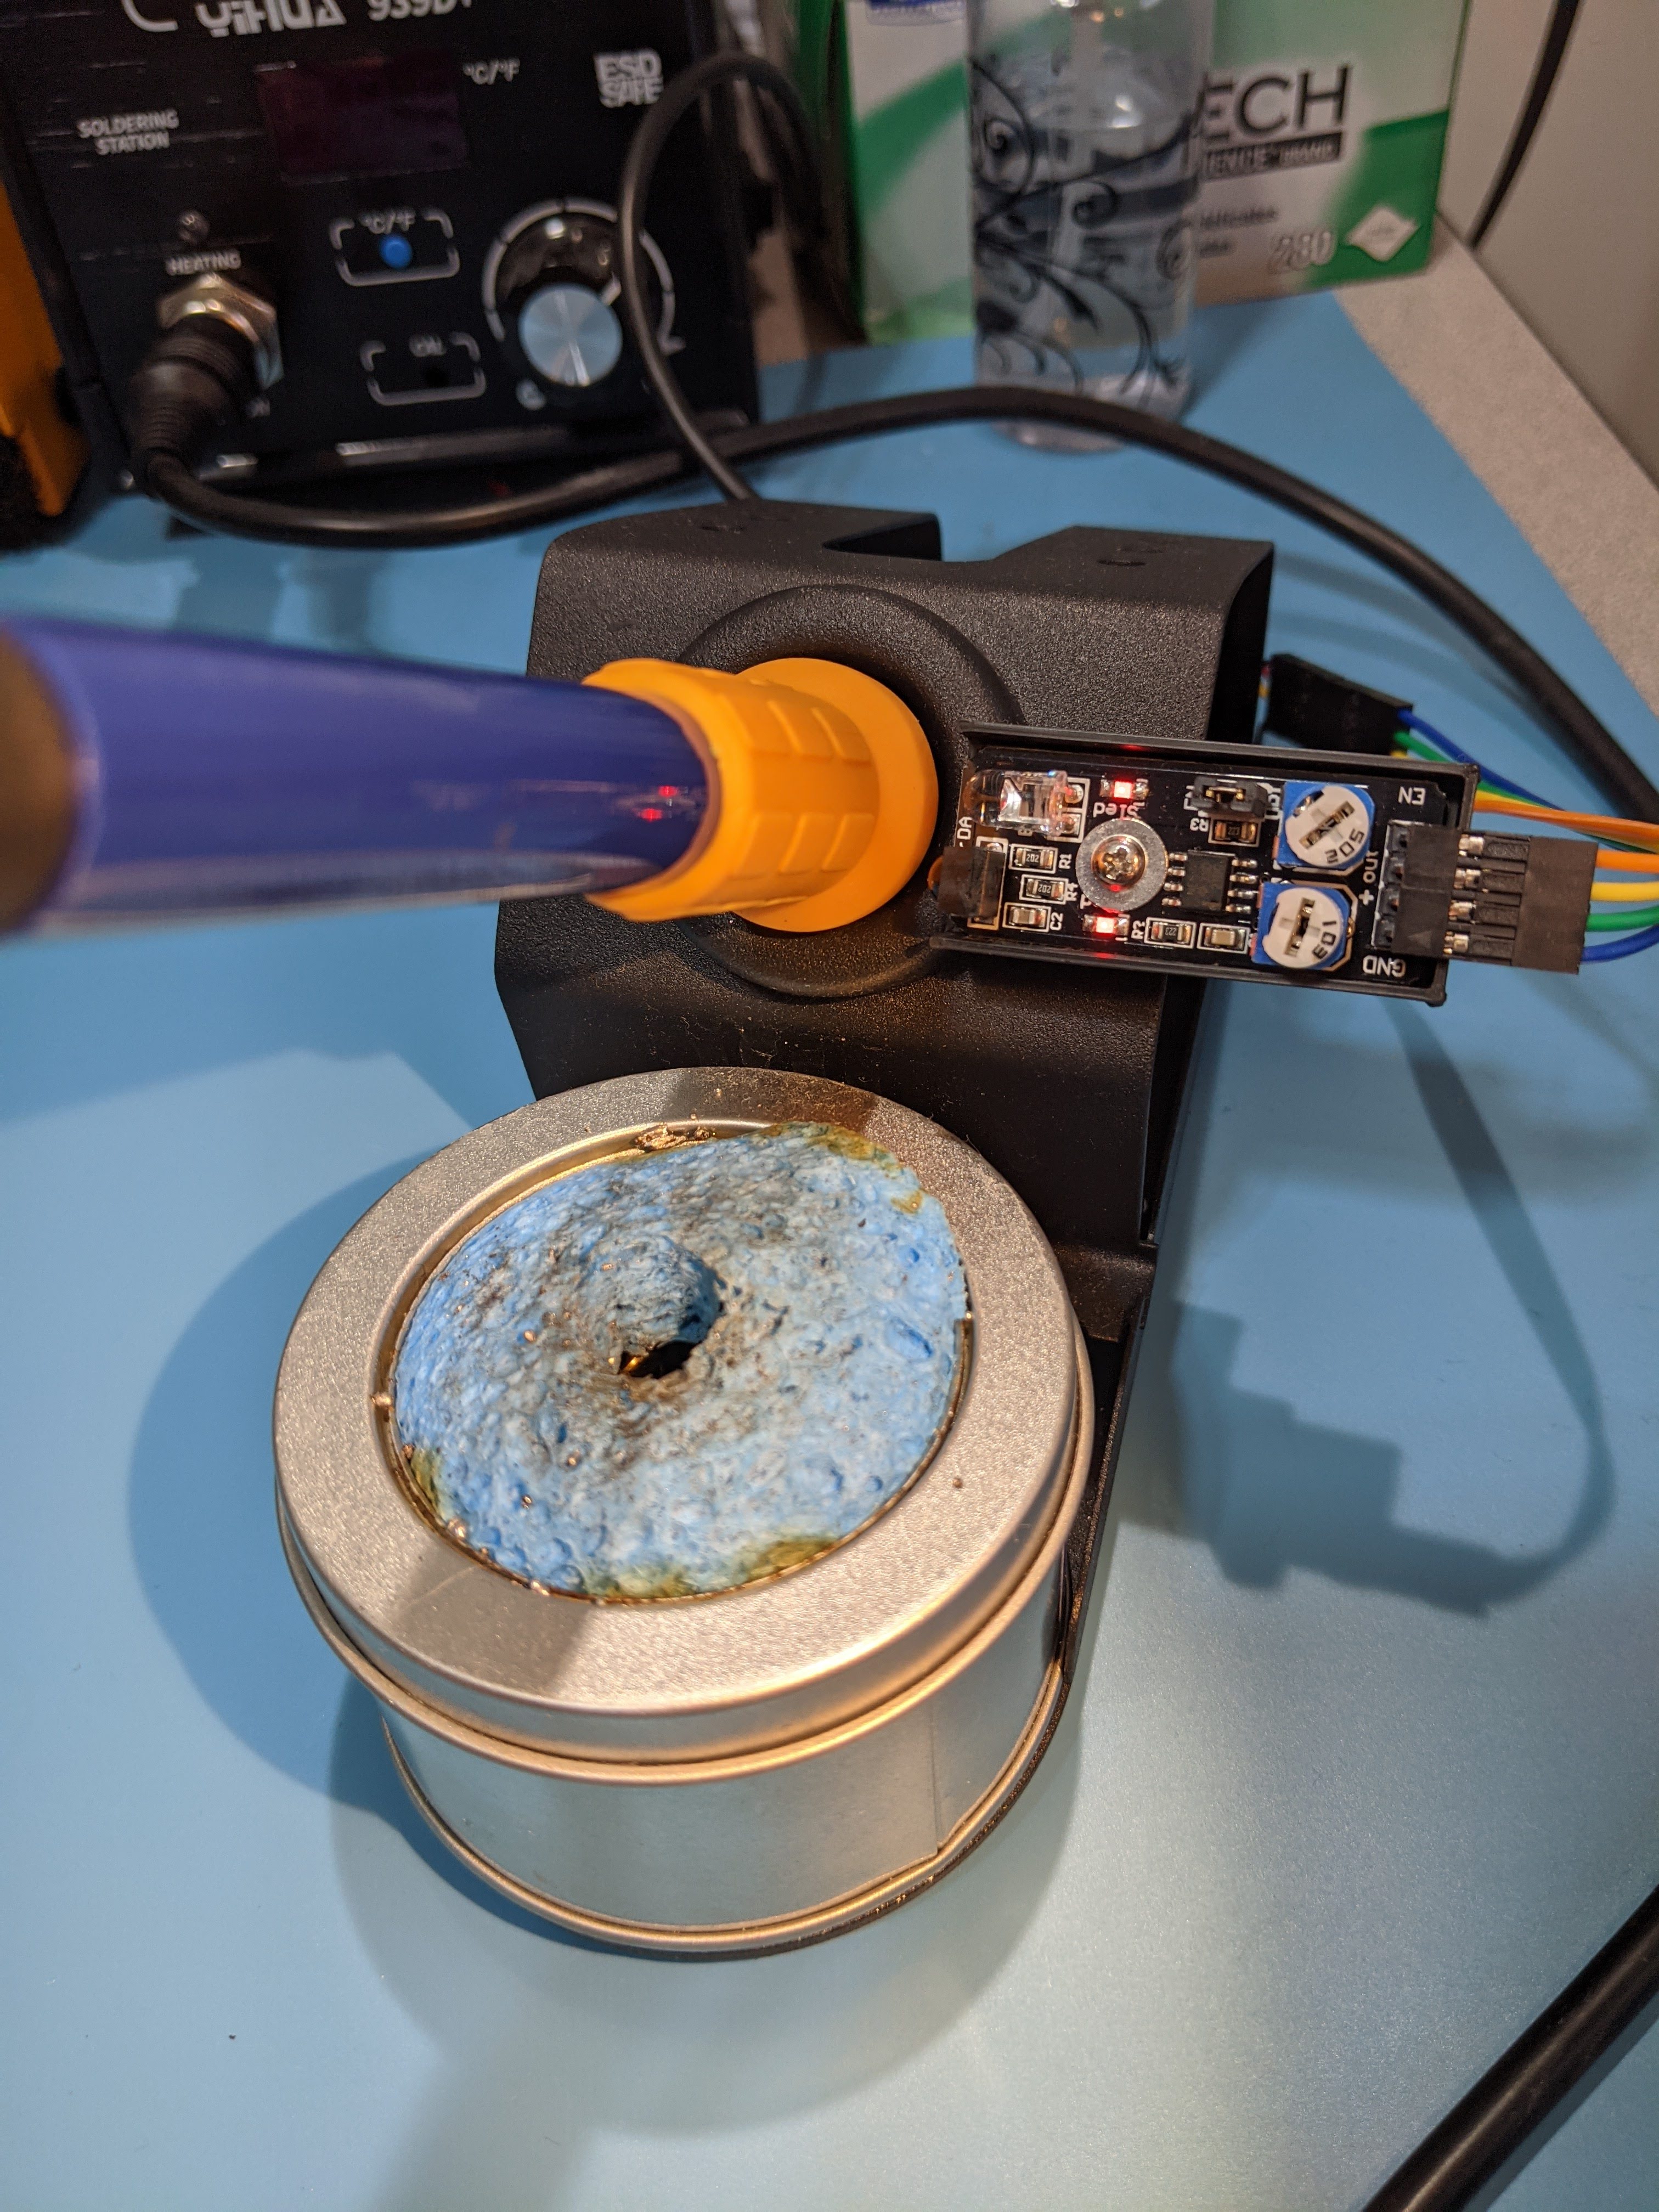
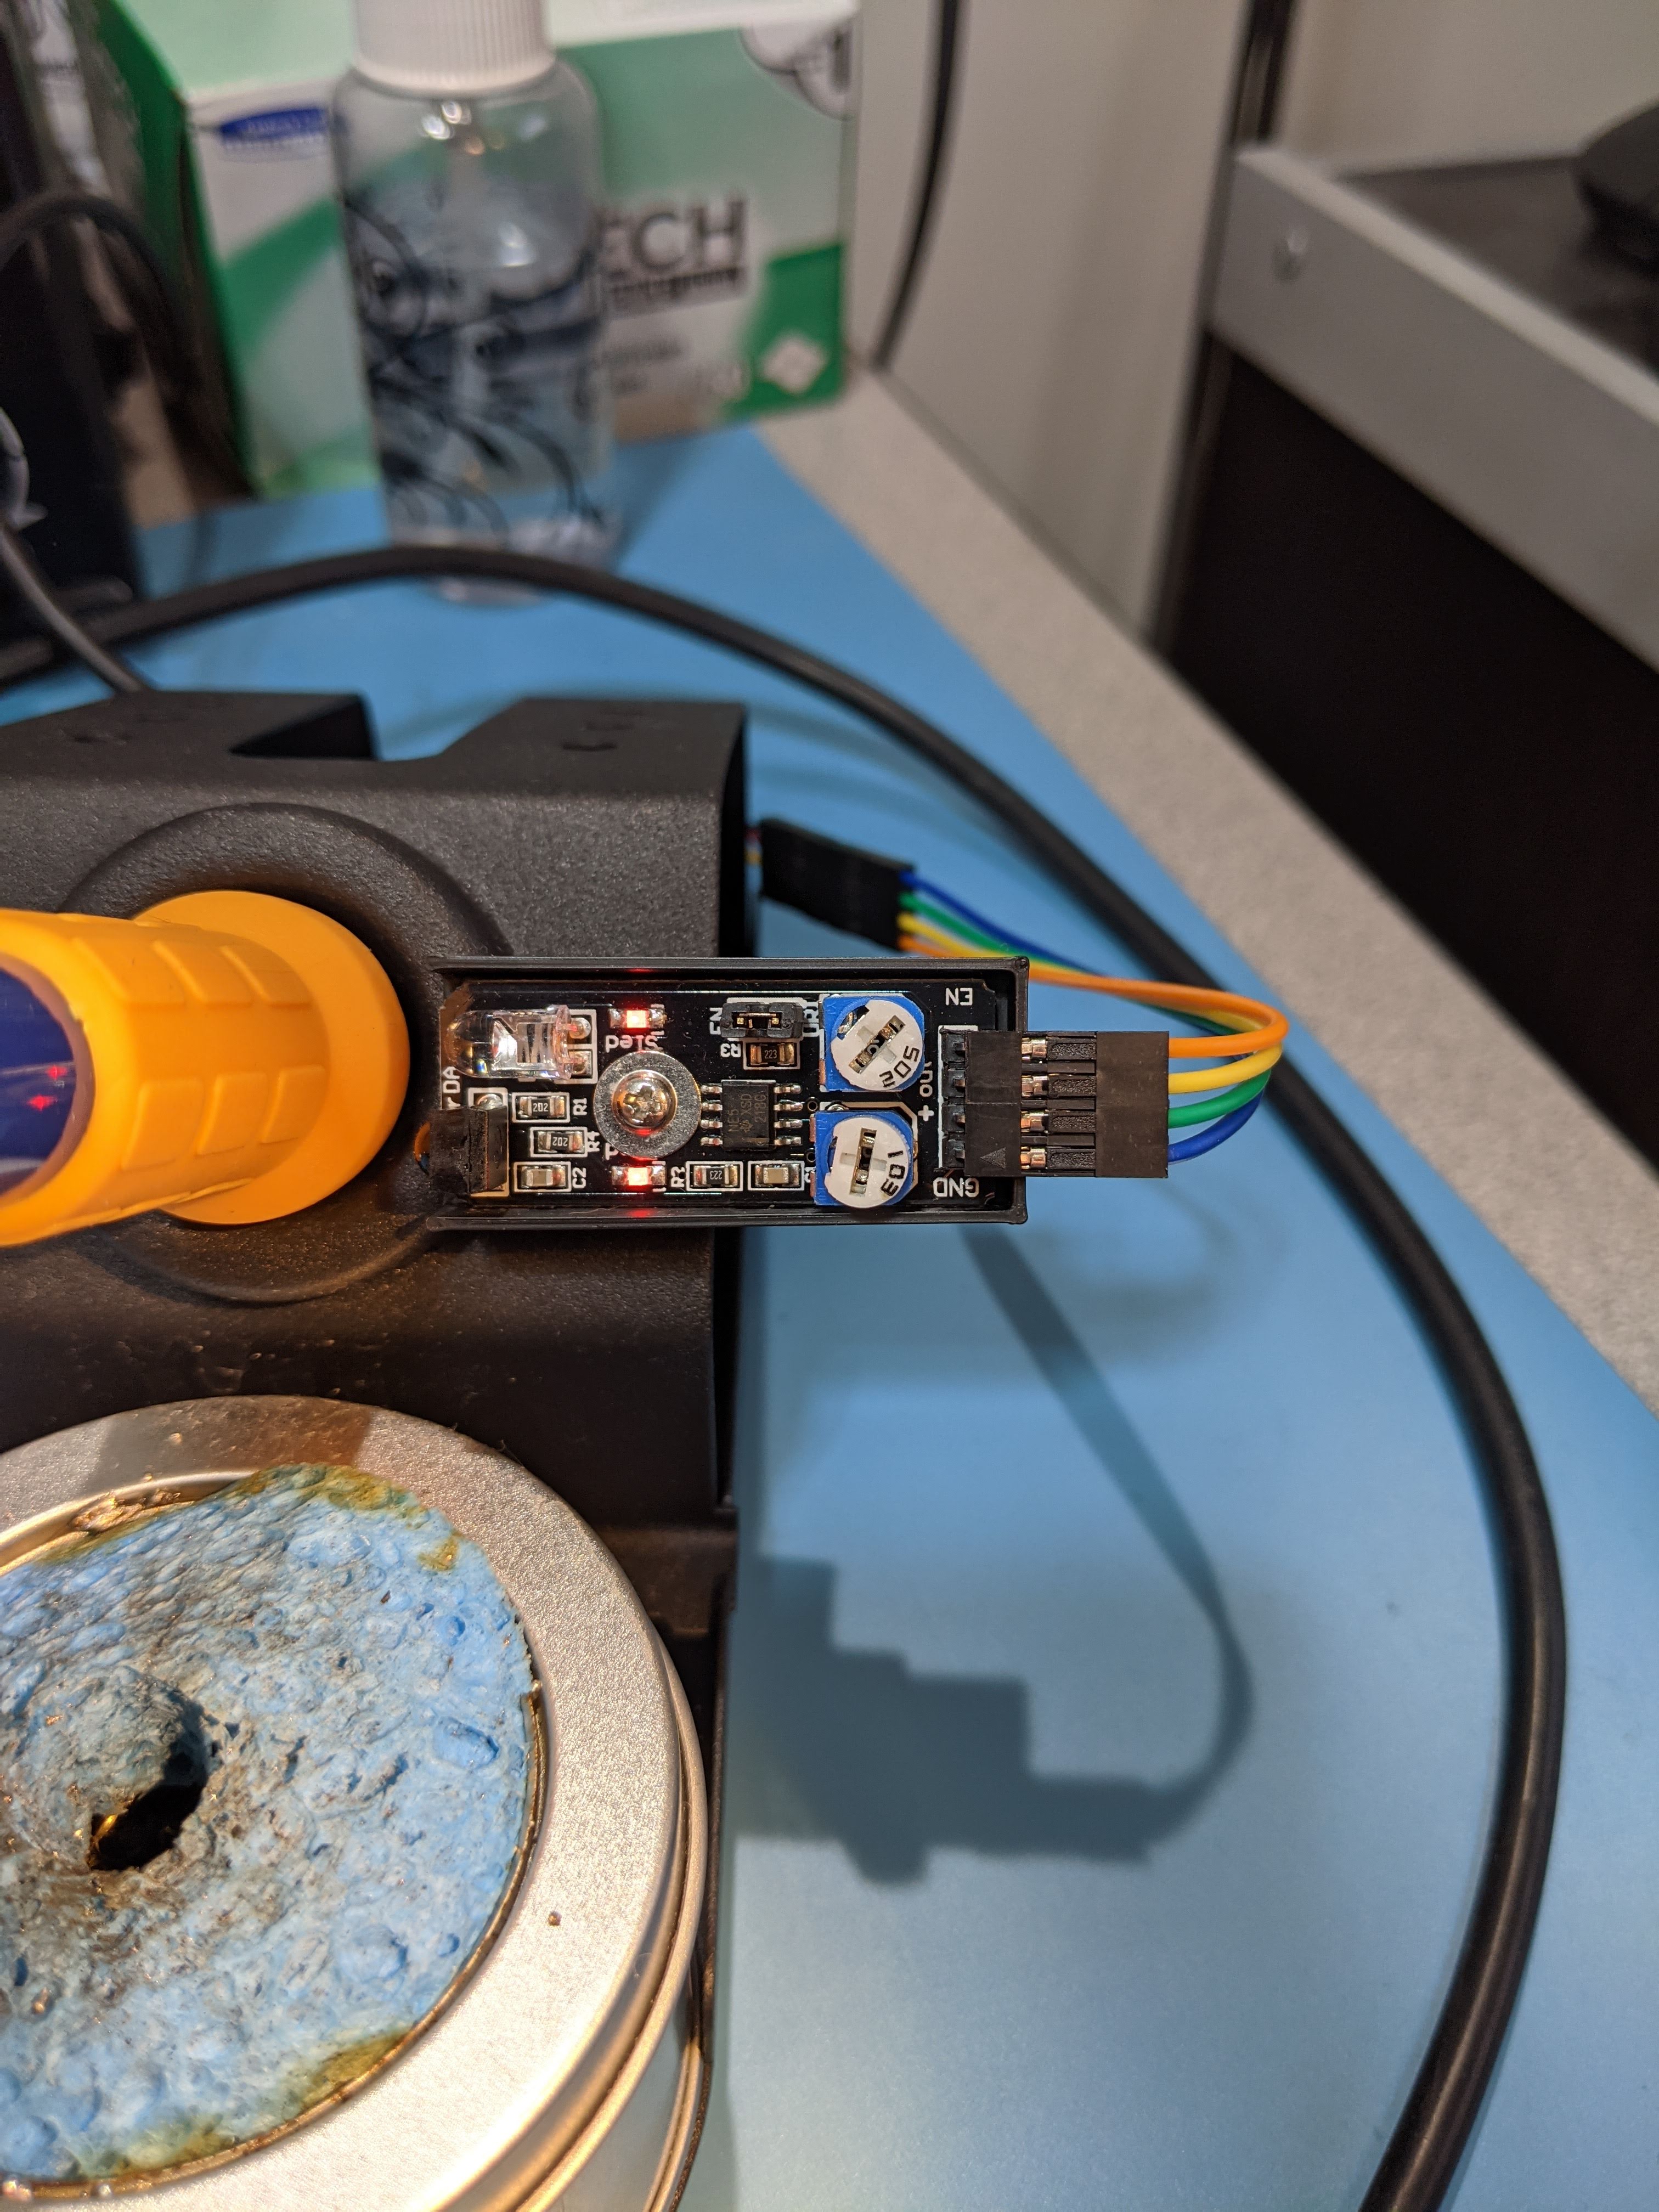
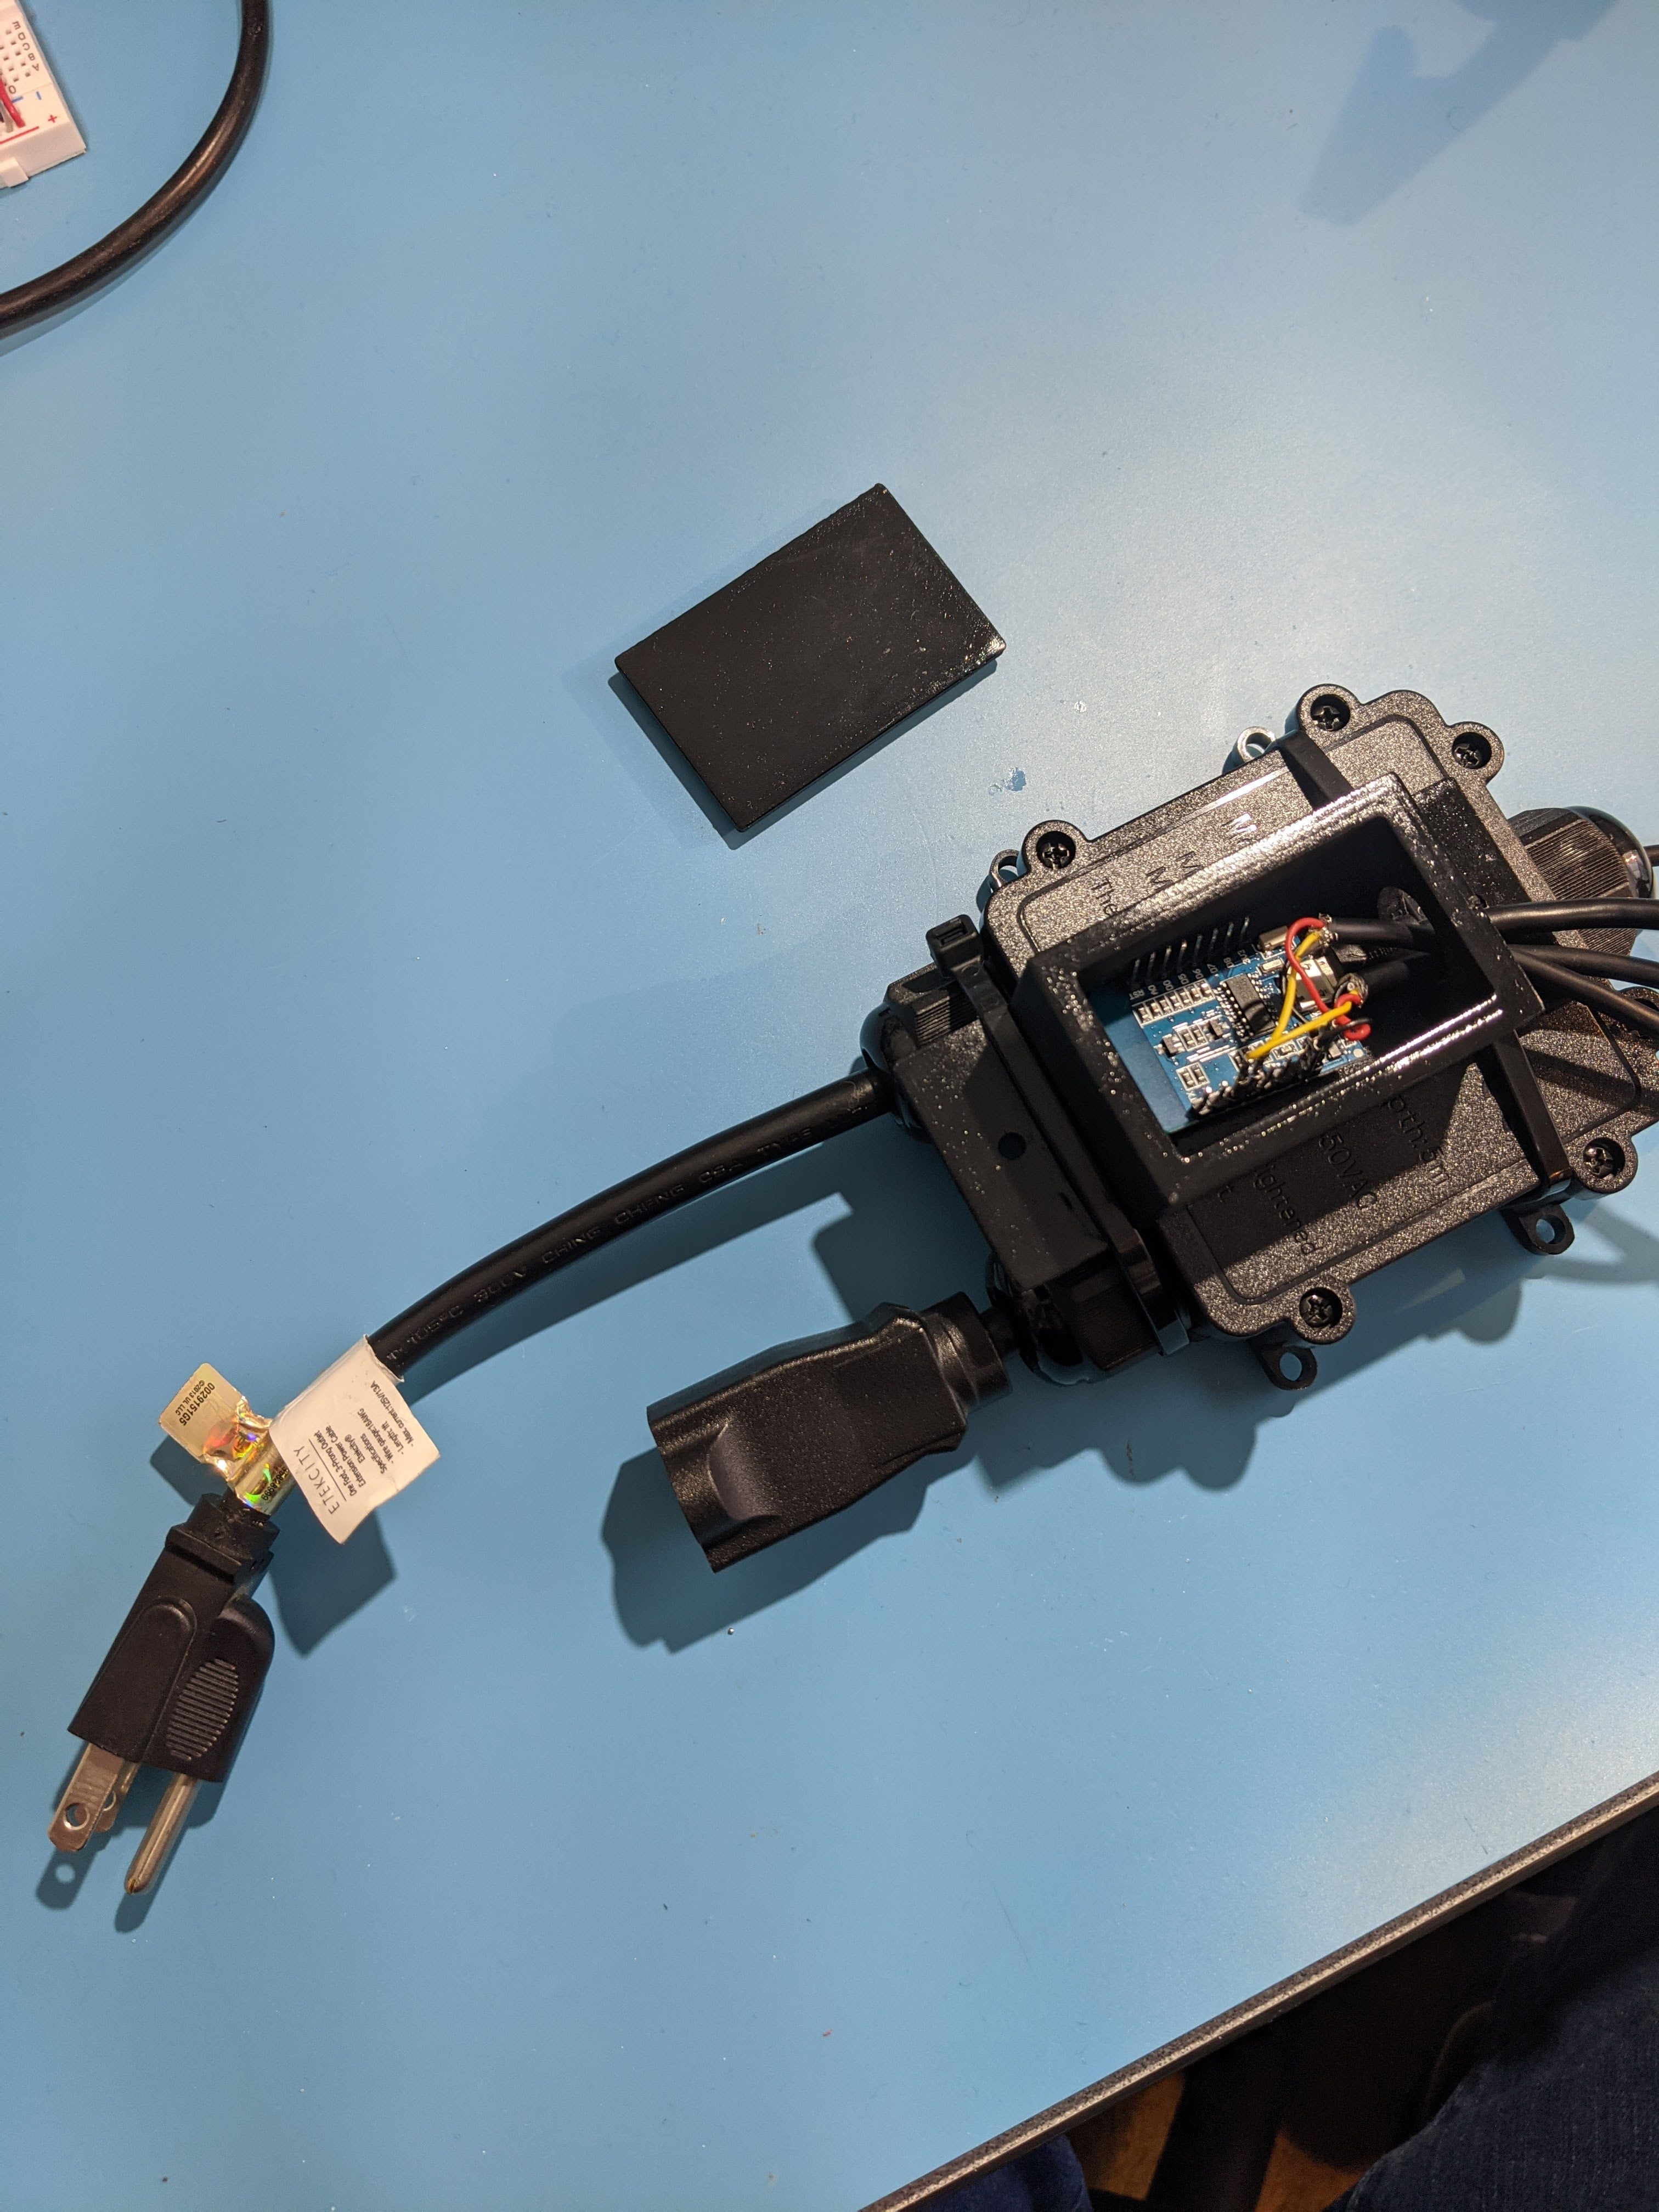
The heart of the project is the KY-032 Infrared obstacle sensor. Often used for obstacle avoidance, I found through testing that it performs well at simply detecting any object, including our soldering iron. We will use this sensor to detect if the soldering iron is in front of the sensor, or if it has been removed from the stand.
Step 1
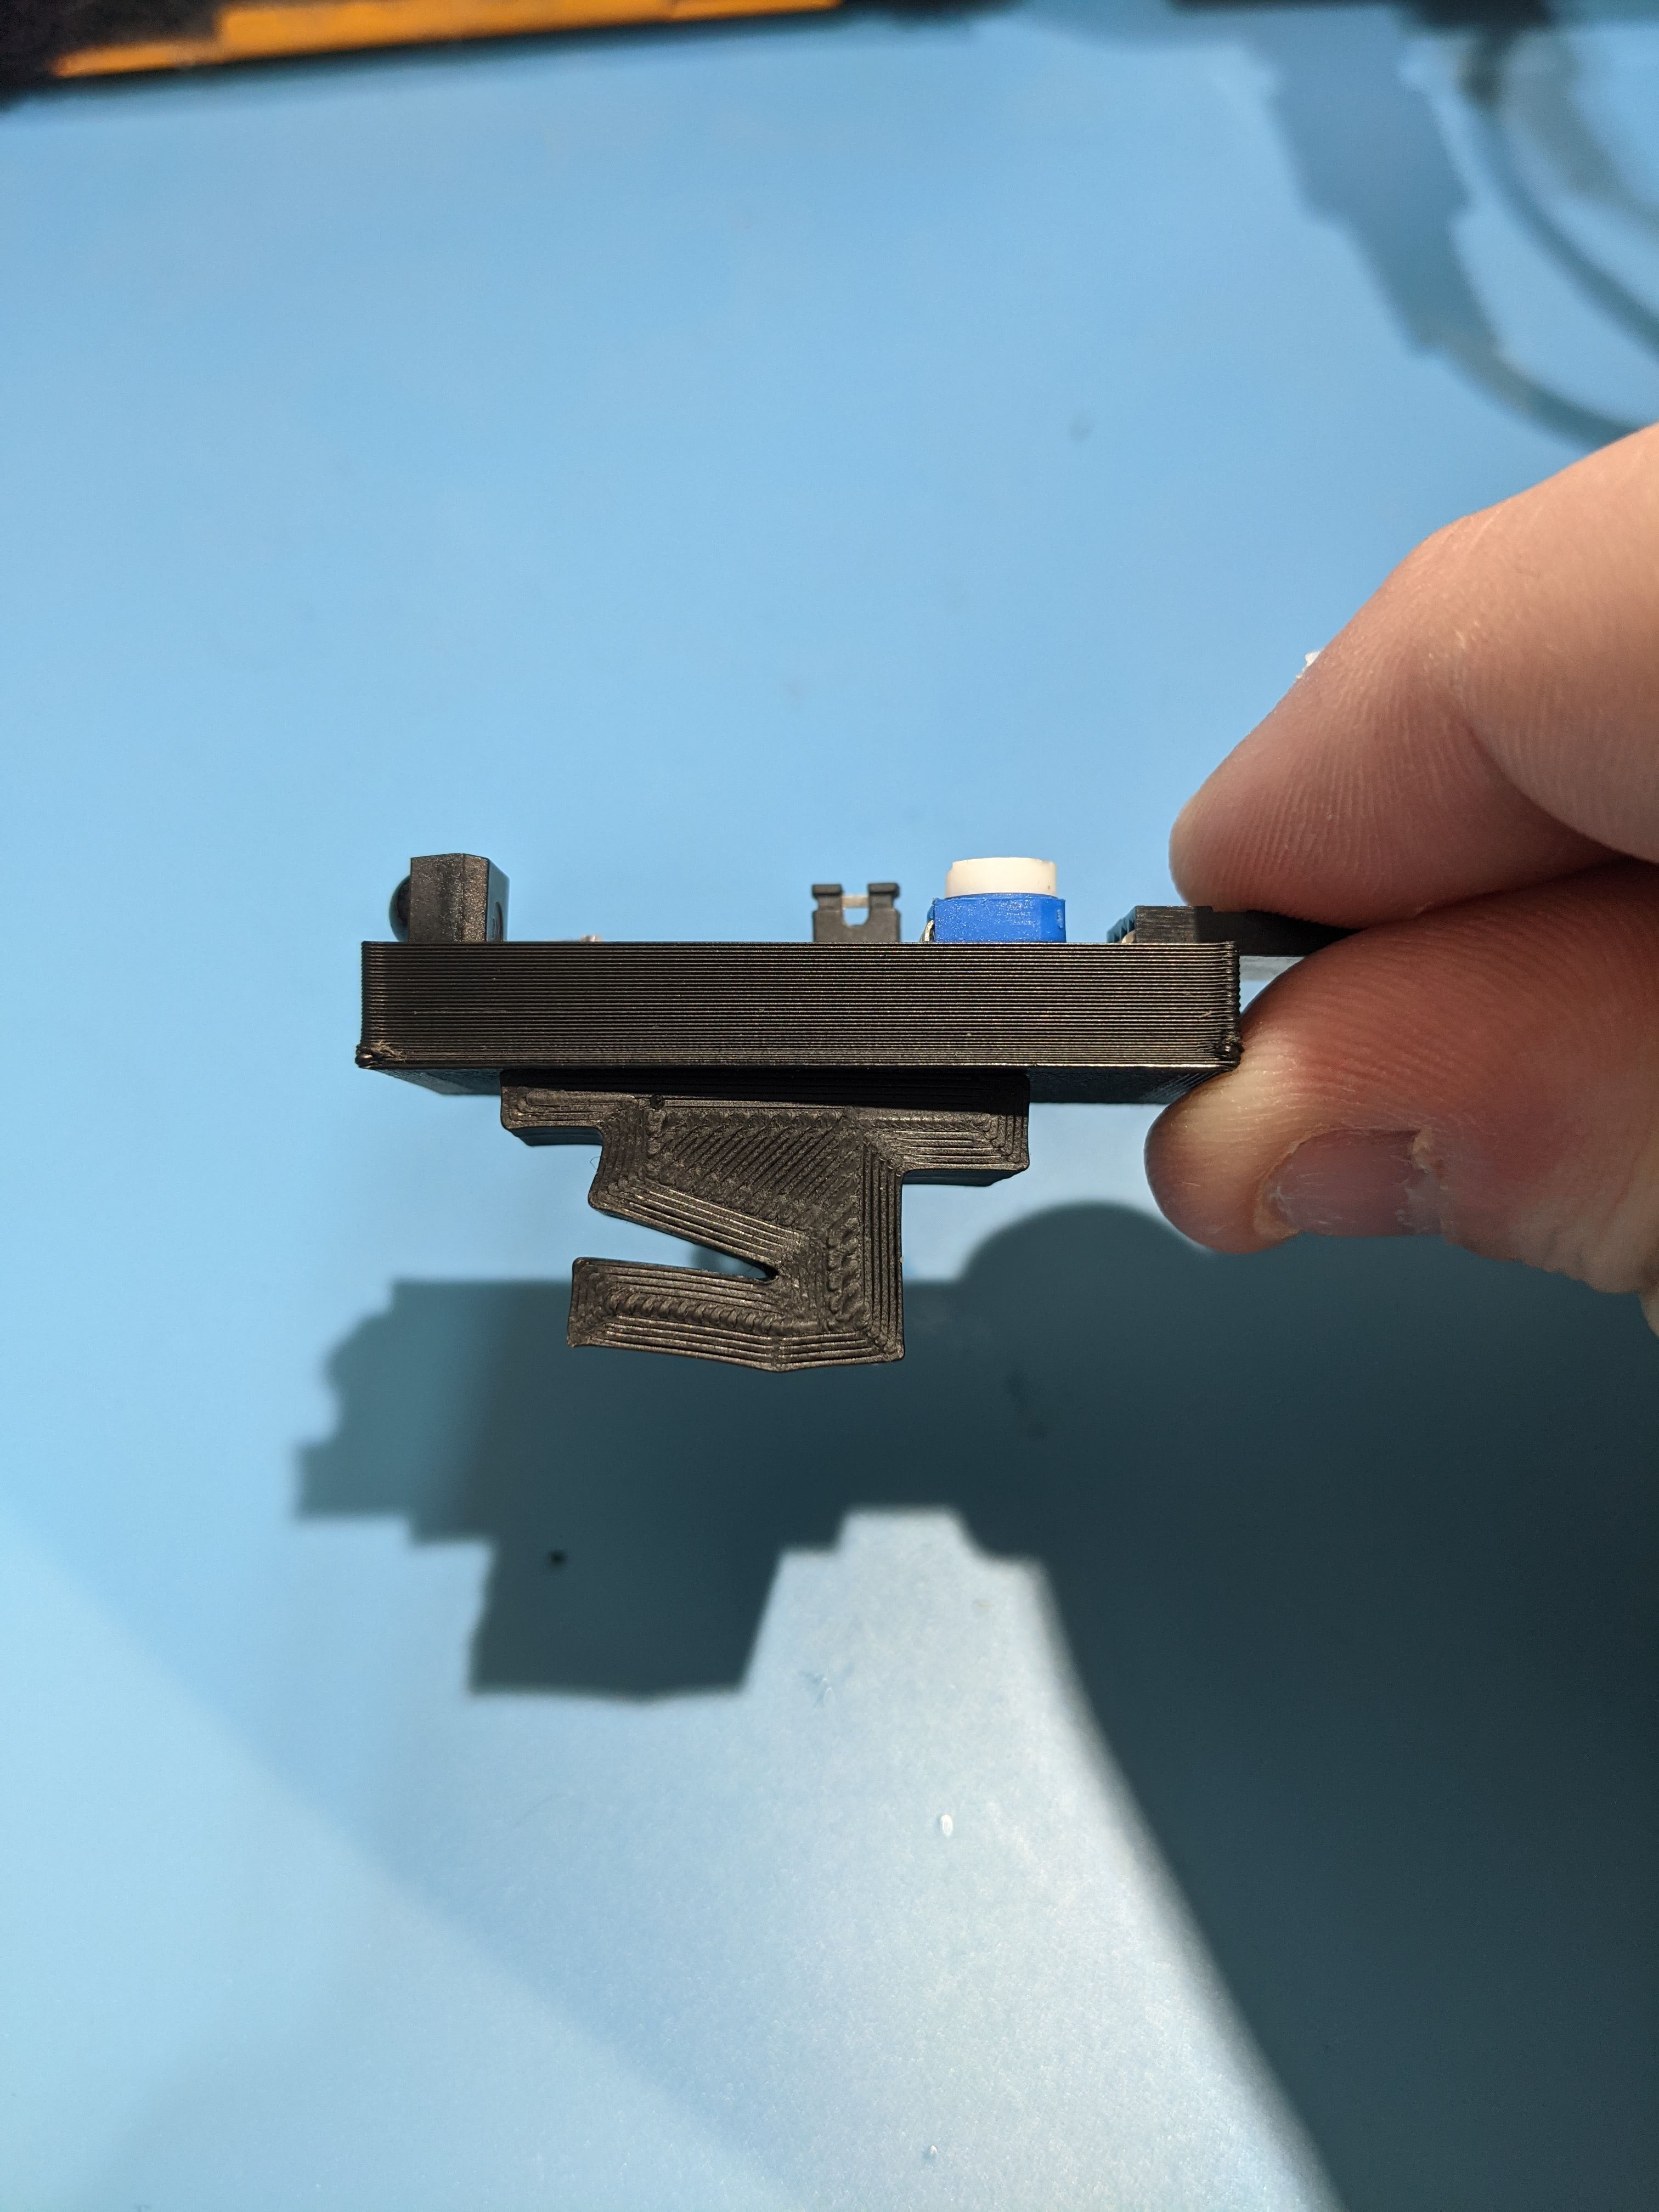
3D printed bracket
First I designed a bracket in fusion 360 to hold our obstacle avoidance sensor. I settled on placing the sensor perpendicular to the iron so as to avoid heat from the iron warping the bracket.
Step 2
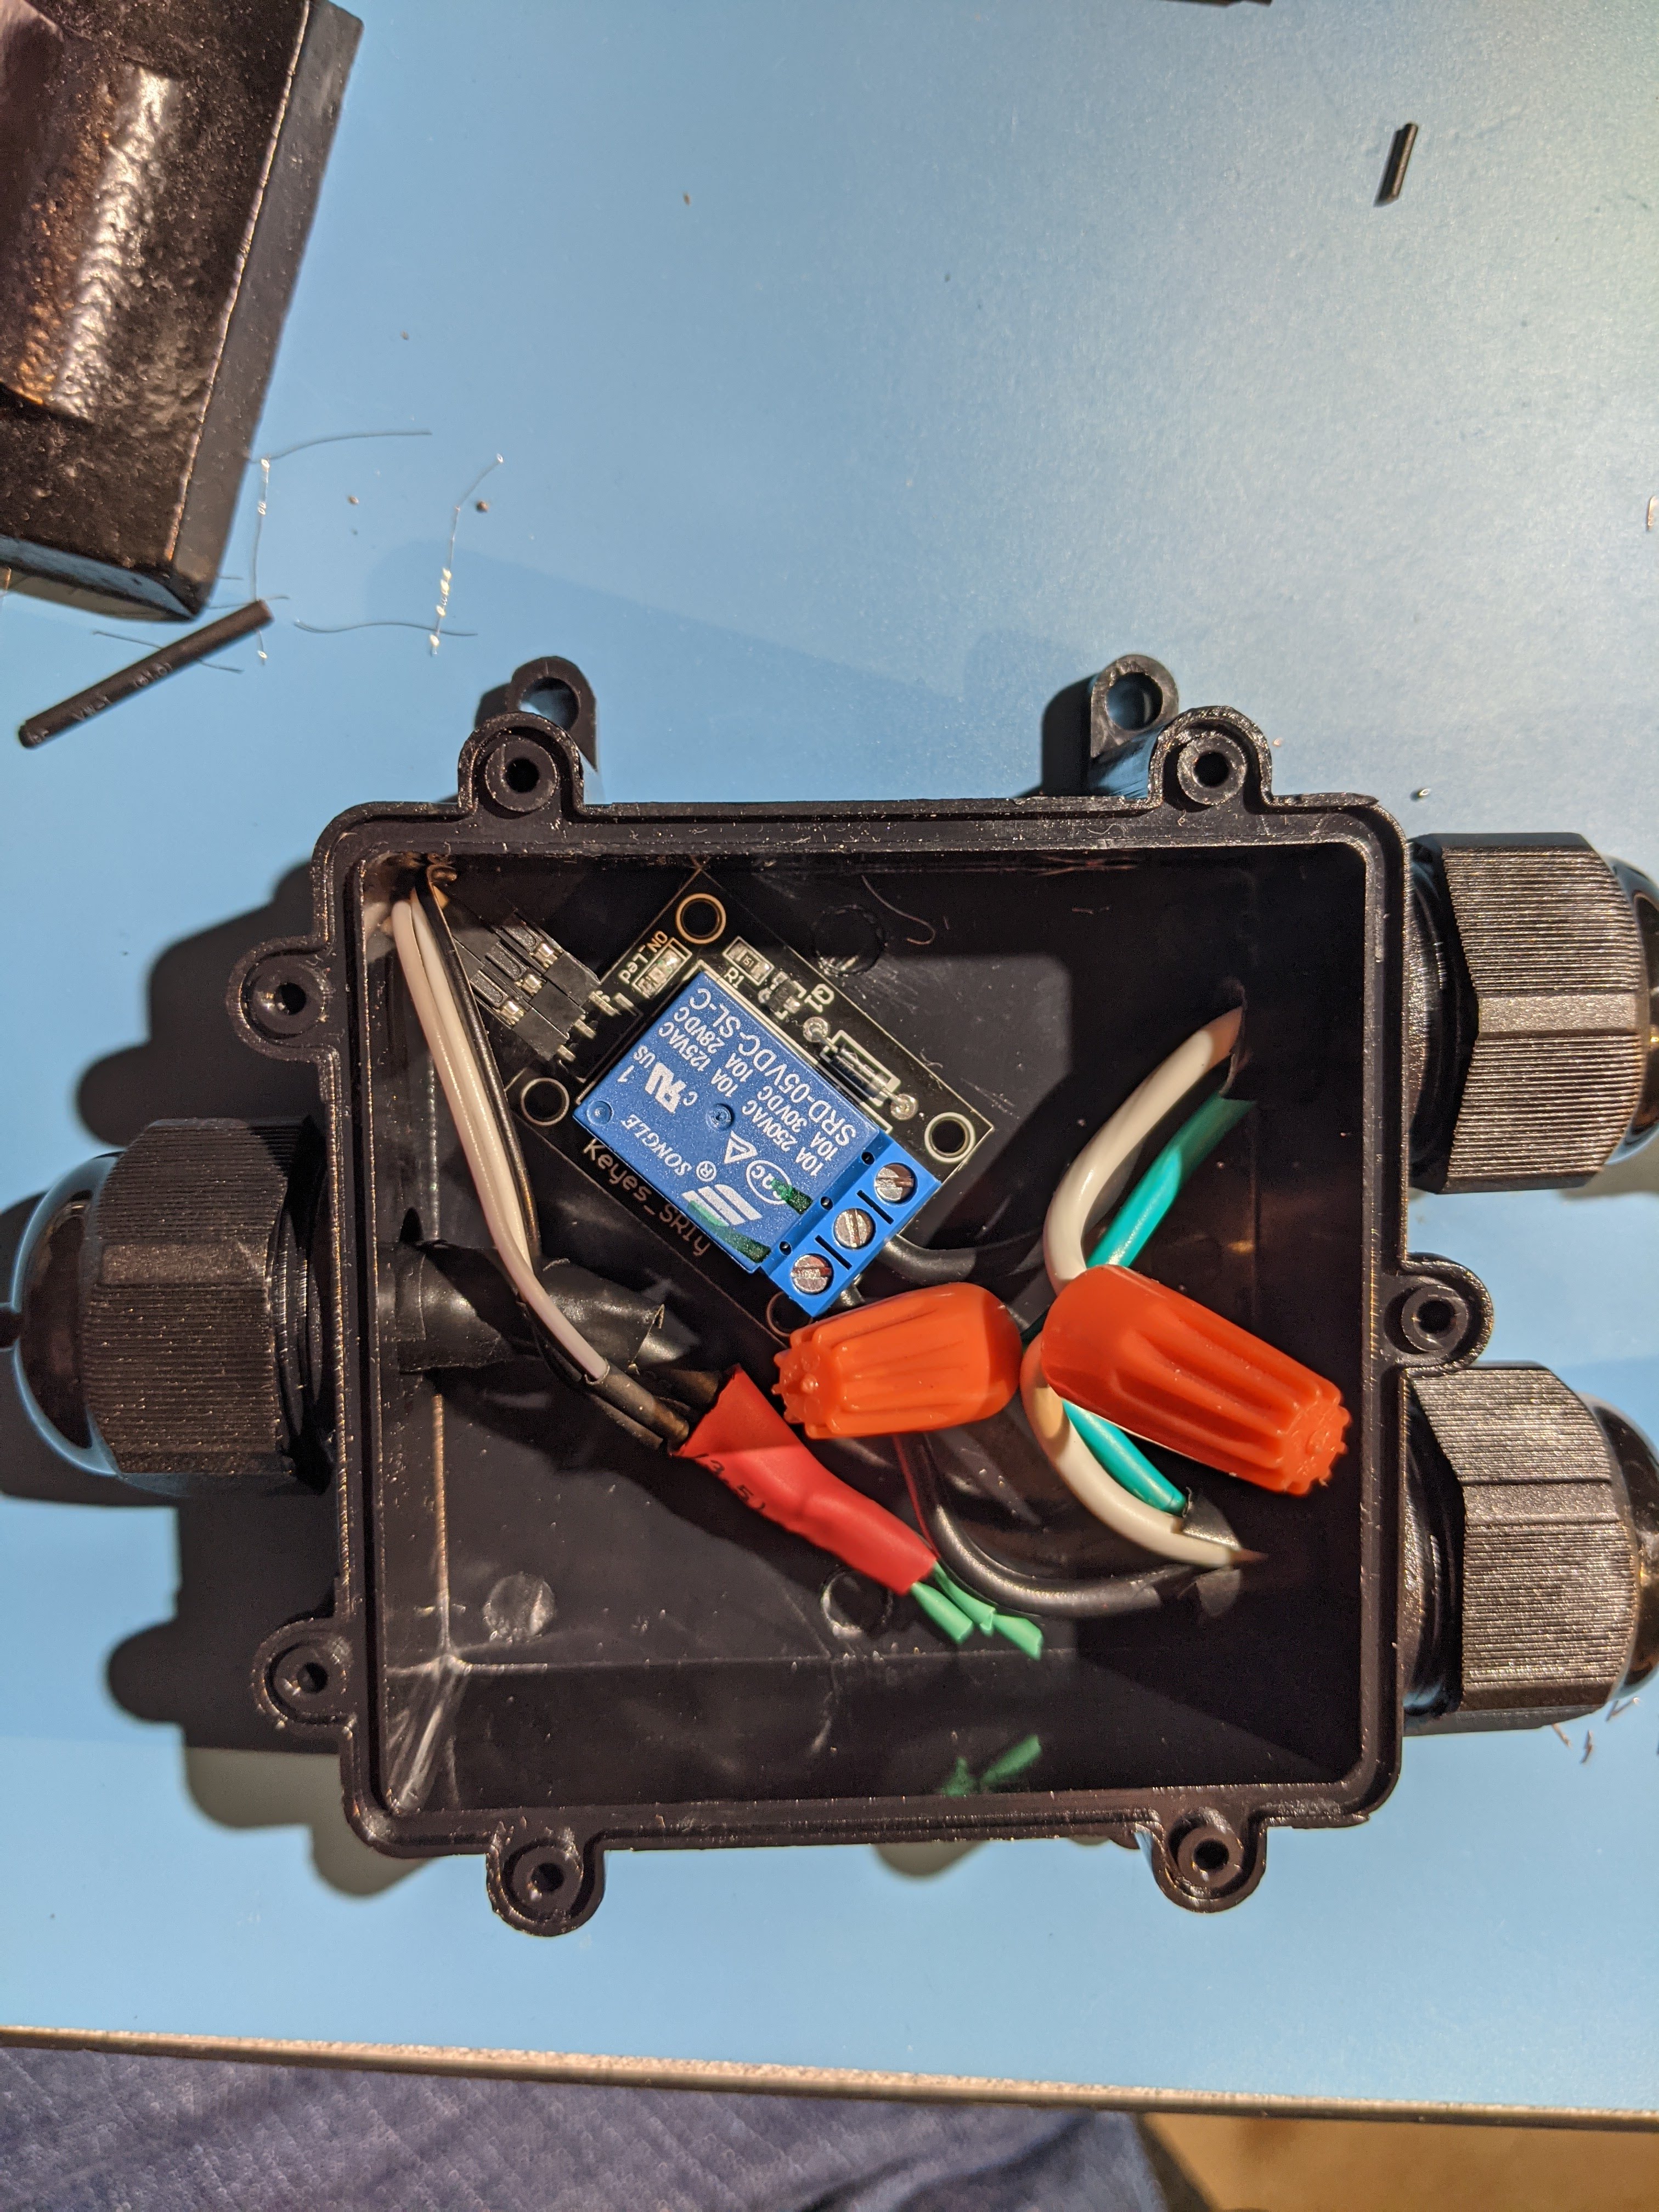
Relay and junction box
Next I wired up the high voltage power cable to the relay. Do not attempt working with 120v if you do not feel comfortable, safety first. When our sensor detects that the iron has left the stand, a signal will energize the relay and we'll get a closed connection, powering our fan.
Step 3
Wiring the Arduino.
See schematic. After wiring, the Arduino was mounted to the junction box and enclosed in its own protective case.
Step 4
Coding the Arduino.
The code for our project is very simple, essentially we have a loop reading the state of our sensor. If the sensor doesn't detect an object, the relay will turn on the solder fan and vise versa. It's that simple.
Results and Conclusions
All and All this project works great and I had fun making this. I hope this inspired someone to make something creative as well! Happy building and happy coding!
🛠️ In-depth Look at the Inner Workings (Deep Dive / Technical Analysis)
The Automatic Water Tap is the exact technology you find in modern airports and mall bathrooms. It prevents the spread of germs on tap handles and drastically reduces water waste by shutting off the moment you step away.
The Core Actuator: Solenoid Valve
Unlike a mechanical tap that you twist, this project uses an electro-mechanical Solenoid Valve.
- Normally Closed (NC): Without power, a spring pushes a plunger down, blocking the water flow.
- The Activation: When the Arduino detects hands via the IR Obstacle Sensor, it triggers a Relay.
- The Flow: The Relay sends 12V to the Solenoid. The coil becomes an electromagnet, pulling the plunger up and allowing water to rush through instantly.
Essential Hardware
- Arduino Uno/Nano: The logic controller.
- IR Proximity Sensor: Mounted near the faucet spout.
- 12V Solenoid Valve (1/2" or 3/4"): Must match your pipe size.
- Tip120 Transistor or 1-Channel Relay: Essential for handling the 12V requirement of the solenoid.
- External 12V Power Supply: The Arduino's 5V pin cannot power a solenoid.
Plumbing and Safety
Working with water and electricity requires caution. Ensure all your wiring is housed in a waterproof project box and use proper silicone sealant where necessary. This is an incredibly rewarding project that yields a high-utility household upgrade!