I missed playing my piano back home and it has been 2 years since I played it, so I thought of making one with Arduino! Even though it may not look or sound like an actual piano, it does seem to make music.
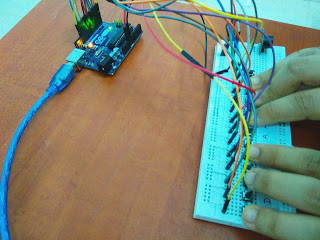
Setup

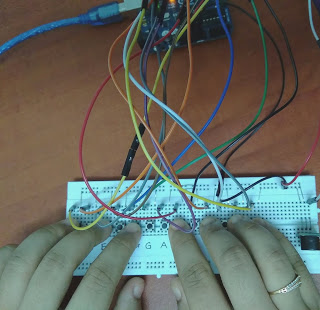
Carefully place the buttons on the breadboard. There must be a spacing of one hole between each push-buttons. Due to lack of Digital I/O ports in my Arduino Uno, I have only used keys from C (fourth octave) to F(fifth octave). I have also included F sharp (or G flat) and A sharp (or B flat) in my piano by using two different coloured push-buttons. I have not used the Analog I/O ports because turning on a pullup will affect the values reported by the analogRead( ).
Connections
All push-buttons should be connected to Ground (GND).
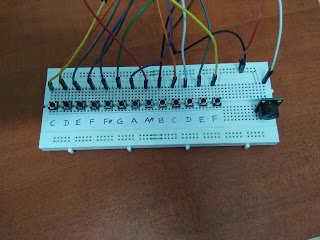
Push-buttons
Fourth Octave
- C - D0
- D - D1
- E - D2
- F - D3
- F# - D4
- G - D5
- A - D6
- A# - D7
- B - D8
Fifth Octave
- C - D10
- D - D11
- E - D12
- F - D13
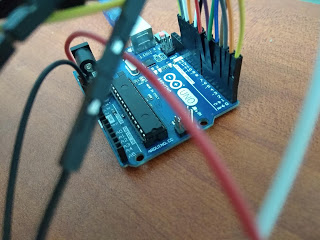
Passive Buzzer Module (KY-006)
- (+) - 5V
- (-) - Ground (GND)
- S - D9
Coding
First of all, create global variables for your push-buttons and your buzzer. Within the void setup( ), call pinMode( ) to configure each of your components' pins as INPUT or OUTPUT. If you have not connected your push-buttons to a 1 kΩ resistor, declare the pins as INPUT_PULLUP. As mentioned in Arduino's tutorial, pressing the push-button will send a LOW signal when its pin is configured as INPUT_PULLUP. Declare the pin of Passive buzzer as OUTPUT because it is a transducer (a component that converts electrical energy into light, heat or sound).
Remember that the push-button is a momentary switch and will only complete the circuit when pressed. If it's released, the circuit will have a gap again. In this case, we will not be debouncing our push-buttons because if you remember quite well, a piano only produces sound when a key is pressed. The keys and momentary switch almost work in the same way, except for the strings that are hammered in the piano when a key is pressed.
The Frequency Arrays (The tone() function)
You cannot output complex `MP3` audio clips on a simple Uno. You must synthesize the waveform mechanically.
- The Arduino's `tone(pin, frequency)` command uses a hardware timer to violently blast a 5V square wave back and forth thousands of times a second.
- The Musical Scale Setup: You define an array of exact physical frequencies. For example, for a middle C scale:
// C4, D4, E4, F4, G4 (Middle C Scale) int notes[] = {261, 293, 329, 349, 392}; - A bank of tactile push-buttons are wired using `INPUT_PULLUP` resistors (preventing them from electrically floating), as shown in the connection diagram above.
The Simultaneous Play Loop
Therefore, within the void loop( ), you will be using if( ) and else if( ) to make your piano work. Please refer to this website to get the frequencies of each piano note. Round the values to the nearest whole number before using tone( ) to produce sounds from your passive buzzer.
The Arduino rapidly scans the buttons continuously. When you press a button, the speaker cone vibrates at the corresponding frequency—producing a musical note! If you release all buttons, the loop should call `noTone(speakerPin);` to instantly mute the square wave generator and prevent an eternal droning beep.
The duration of the sound produced by the buzzer once I press a push-button is 30 milliseconds. You can shorten this duration according to your preferences. For example, if the music is fast, you must shorten the duration as the tone( ) function only works for one pin at a time.
Here is an example of code:
void loop( ){
if ((digitalRead(C4))==LOW){
tone(Buzzer, 262, 30);
}else if ((digitalRead(D4)==LOW){
tone(Buzzer, 294, 30);
}
...
}
If you have any questions with the coding, please feel free to comment below.
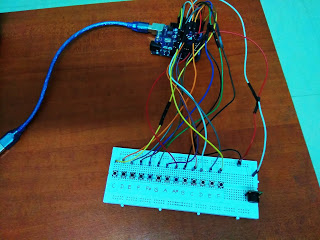
Final Look
The Sound Actuation Hardware
- Arduino Uno/Nano (Excellent timer precision).
- Tactile Push Buttons (Spaced perfectly on a breadboard to mimic piano keys).
- One Passive Buzzer Module (KY-006) (Or a simple Piezo Buzzer).
- (Optional Upgrade: Add a 10K Potentiometer to a free analog pin, using the `map()` function to bend the pitch dynamically, turning the simple piano into an EDM synthesizer!)
If anyone has questions, or suggestions, about this project, please feel free to comment below.