A paint thickness indicator is useful in industries like automotive, aerospace, marine, and construction where precise coating thickness is crucial for quality control and performance. It measures the thickness of paint or coatings on a metal surface. We can use this property, for example, when buying a car, where we can check if the car has a putty hidden under the paint.
In the following, I will present you a very simple way to make such a device using an Arduino microcontroller board. The indicator will show the relative thickness of the measured paint layer in relation to the spot with the original layer. The device also detects whether the substrate is steel or aluminum.
This project is sponsored by PCBWay. They have all the services you need to create your project at the best price, whether it is a school project or a complex professional project. On PCBWay you can share your experiences, or get inspiration for your next project. They also provide completed Surface Mount Technology (SMT) PCB assembly service at a best price, and ISO9001 quality control. Visit pcbway.com for more services.

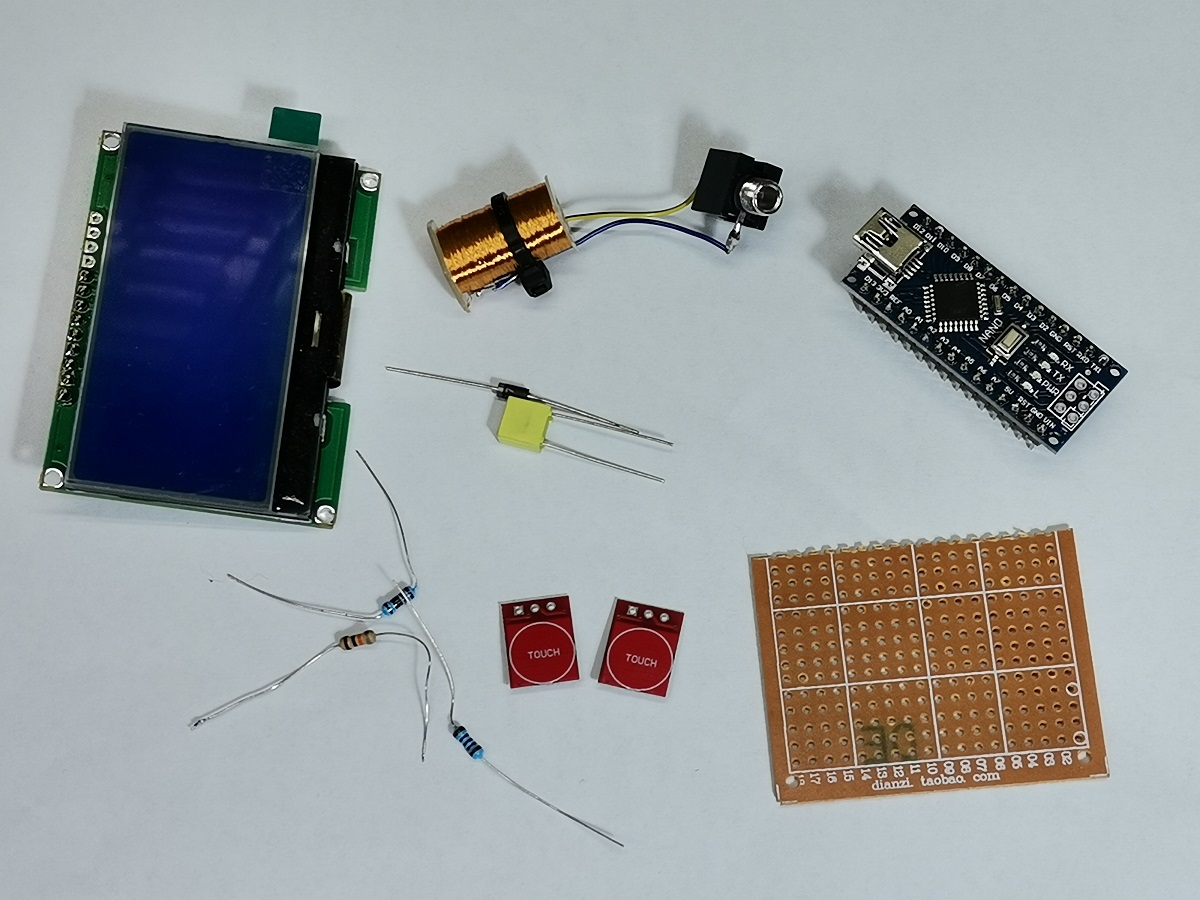
Components Required
As I mentioned before, the device is very simple to make and consists of only a few components:
- **Arduino Nano microcontroller board**: The main microcontroller responsible for generating frequency signals and processing ADC values.
- **LCD Display 128x64 dots with ST7565 driver chip**: For displaying graphics and measured values.
- **Three resistors, a capacitor, and a diode**: Form the filtering and rectification circuit.
- **Two buttons** (specifically I use capacitive touch buttons, but you can use standard mechanical buttons without any change in the code).

- **Sensor Coil**: This is a coil taken from an old electromagnetic relay, in this particular case with an ohmic resistance of about 500 ohms, but any coil with similar characteristics can be used.
In-depth Sensor and Engineering Principles
The core of the measurement isn't in complex chips, but in the "Inductor" that we repurposed from a relay.
Operational Principle of the System:
- Signal Generation: The Arduino sends a rectangular signal through pin D2. This signal has a constant frequency.
- Inductive Voltage Divider: The signal is sent to a voltage divider circuit consisting of a fixed resistor and the "sensor coil," which has an Inductive Reactance ($X_L$).
- Magnetic Field Interference: When the coil is brought near a metal, its inductance ($L$) changes due to the effect of magnetic flux lines (for steel) or the generation of Eddy Currents (for aluminum). This change causes the voltage across the coil to vary accordingly.
- Signal Processing: The fluctuating AC voltage passes through a diode for rectification into DC, and a capacitor helps to smooth the signal before it's sent to the Arduino's Analog Input pin for conversion into a digital numerical value.
Usage and Measurement Procedure
The procedure for measuring the relative thickness of paint is as follows:
1. **Reference Point (Calibration):** First, put the coil to a place on the surface where you are sure that the paint is original and press the **"Calibration"** button. Now this value is taken as a reference against which the thickness of the suspicious areas will be measured.
2. **Measurement:** Now, place the coil on the "suspicious" place and press the **"Measurement"** button.
3. **Display:** The Arduino will calculate the difference between the reference value and the current value, then display it as a relative numerical value on the LCD screen.
And now let's see how the device works: Immediately after switching on, the "Ready" screen appears on the display.
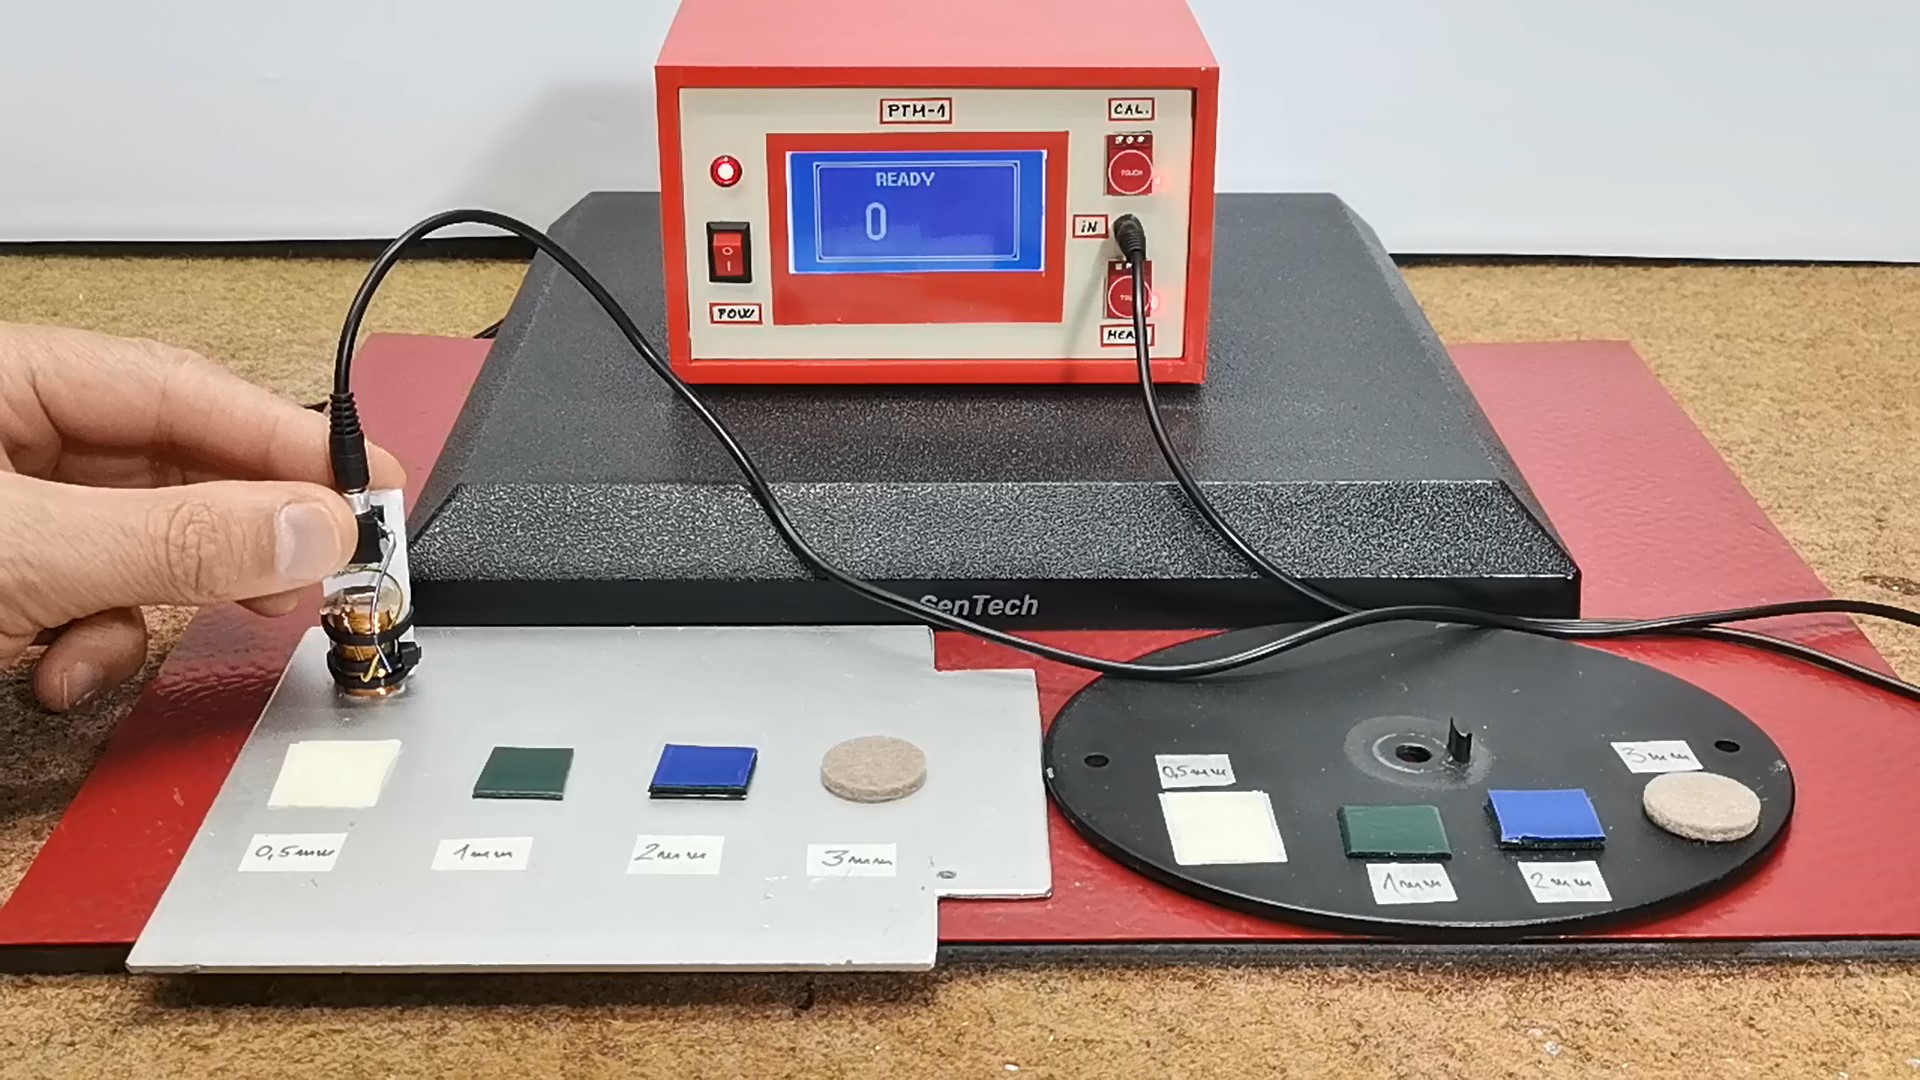
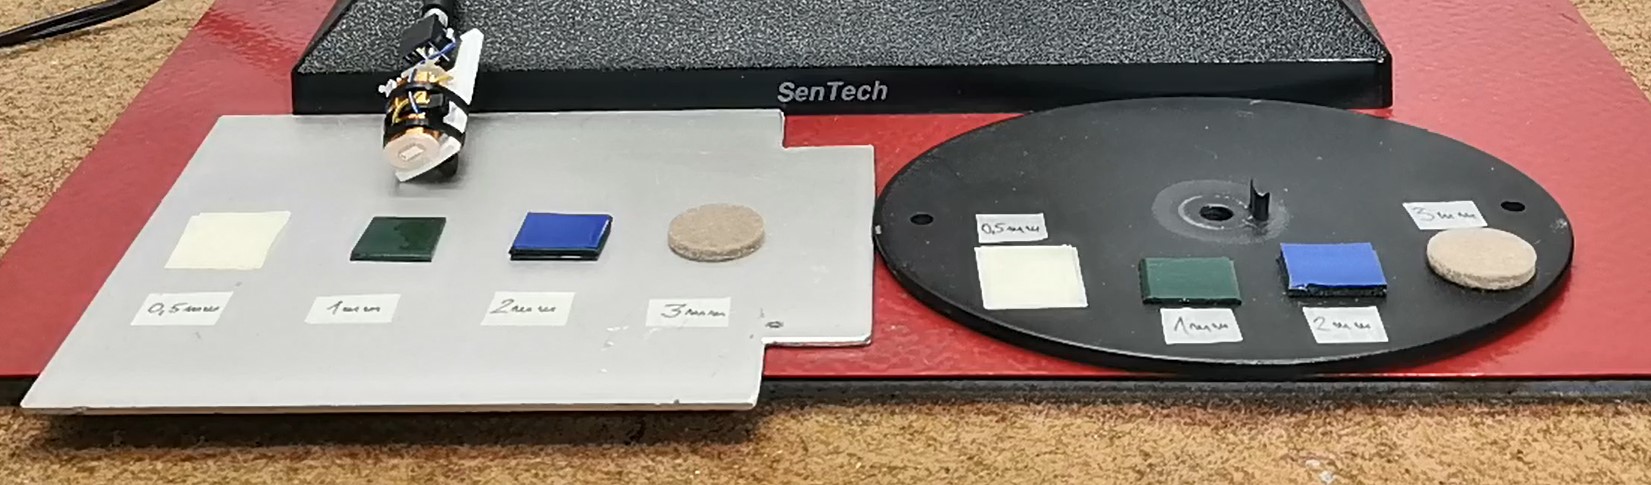
During the measurements I will use pieces of metal on which I will simulate paint and putty of different thicknesses, because at the moment I do not have the conditions to make the measurements on a real car.
Program Logic Analysis
As you can see in the image above, the device perfectly detects the type of surface (iron or aluminum) and for the thickness of the paint it shows a relative number that does not correspond to the real thickness in a given measurement unit, but still gives us an idea of the thickness of the deposit.
The device is programmed to be intelligent enough to distinguish metal types based on their electromagnetic properties:
- If it is Steel (Ferrous): The inductance value will increase significantly.
- If it is Aluminum (Non-ferrous): Eddy Currents will be generated, opposing the change in the magnetic field, causing the read value to differ from that of steel.
Although the displayed value is a "Relative Number" and may not directly indicate thickness in Microns, the sensitivity of this coil sensor is sufficient to tell us that "this spot has unusually thicker paint." With small adjustments in the code we can change the ratio between the actual thickness and the displayed relative number, which would also increase the accuracy. If the user requires quantitative accuracy, the Analog value mapping in the code can be adjusted to convert it into actual thickness units, provided a Lookup Table is created.
Conclusion
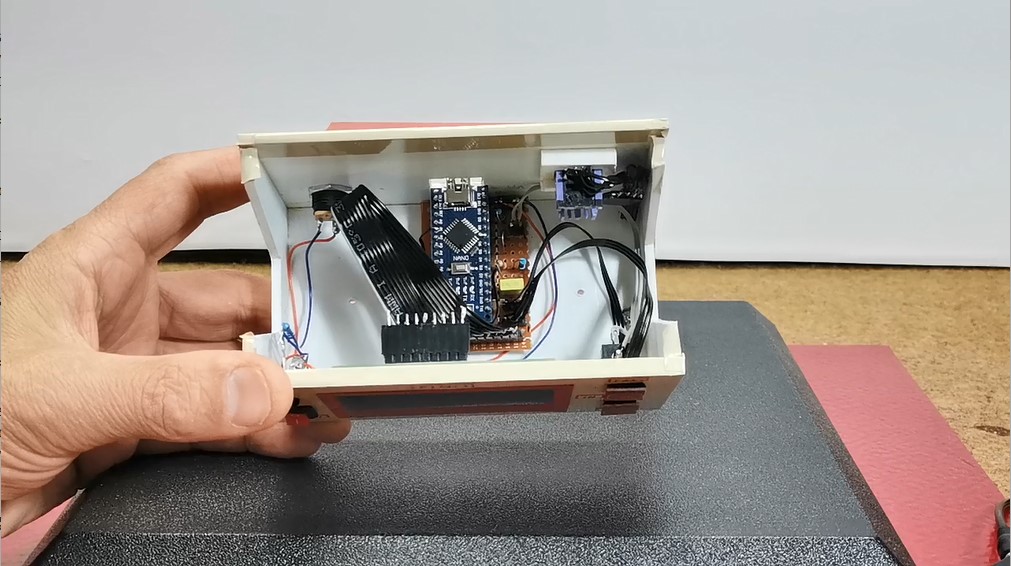
And finally a short conclusion. Although relatively simple to make, this is a very useful device especially when buying a car to check suspicious areas where auto putty has been applied under the paint. The device is embedded in a suitable box made of PVC board and lined with colored self-adhesive wallpaper.