This is a simple arduino setup on a breadboard.
The steps to make it are also very simple
Step 1 : Upload any code to your arduino board.
Step 2: Remove the microcontroller from the board.
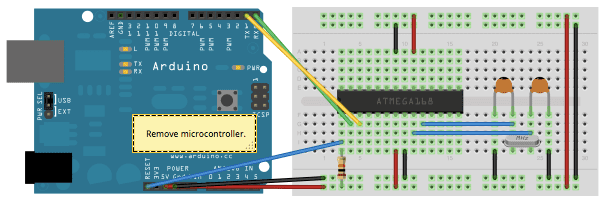
Step 3: The below circuit will let you use a microcontroller on a breadboard :
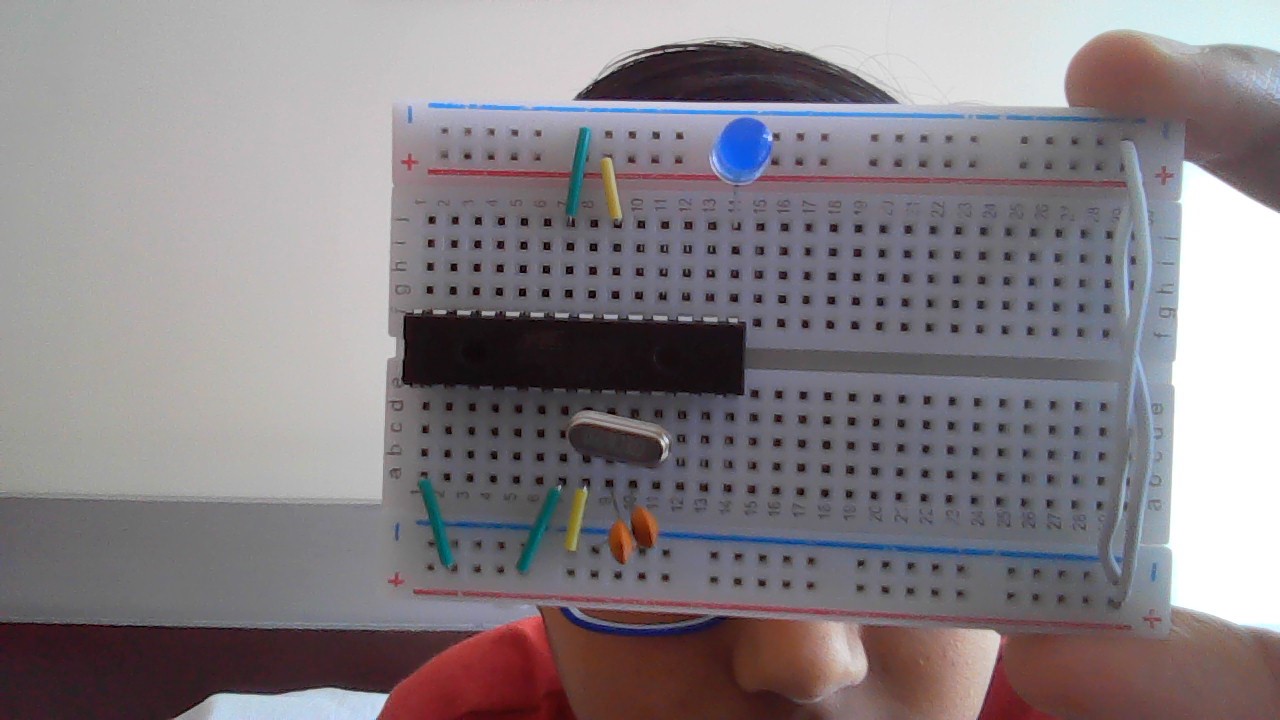
Attach a power source to the buses of 5v and all the required components to the breadboard ( An led in my case ) and you ard done!
I hope you found it helpful. Enjoy!
EXPANDED TECHNICAL DETAILS
Minimalist Embedded Architecture
This project demonstrates how to build a fully functional "Barebones" Arduino on a breadboard, using individual components instead of a pre-built development board.
- Stand-Alone AVR Configuration: Uses the ATmega328P-PU microcontroller. The project details the wiring of the 16MHz crystal oscillator, filtering capacitors, and the necessary 5V voltage regulation for a stable clock.
- ISCP Programming Pipeline: Since there is no USB driver chip, the Arduino is programmed using an external AVRISP mkII or another Arduino acting as an "Arduino as ISP." This bypasses the need for the onboard FTDI or CH340 chips.
Efficiency
- Low-Power Deep Sleep: By removing the power-hungry USB-to-Serial converter and the "Power" LED found on standard boards, this breadboard version can run for months on a single LiPo battery in deep-sleep mode.