Abstract
This project is about object detecting with the help of servo motor and ultrasonic sensor, this uses a java created radar to show the object virtually with it's width and distance from the ultrasonic sensor. This will help human kind for surveillance a large area from a watch station.This will reduce manpower and effectiveness of security, because machines are more accurate and efficient then human.
This system is designed to assist in wide-area surveillance tasks from a central control station. It helps reduce human workload and increases monitoring accuracy, as machine systems offer continuous operation and lower error rates compared to humans.
Pros
- Cost efficient surveillance for a large area.
- More accurate and efficient.
- High Accuracy: High accuracy in determining distance coordinates using ultrasonic waves.
- Automation: Reduces human dependency and operates 24/7.
Steps For Creation
Step 1: Hardware Requirements
Go to your armoury and collect your arms....
Object required :-
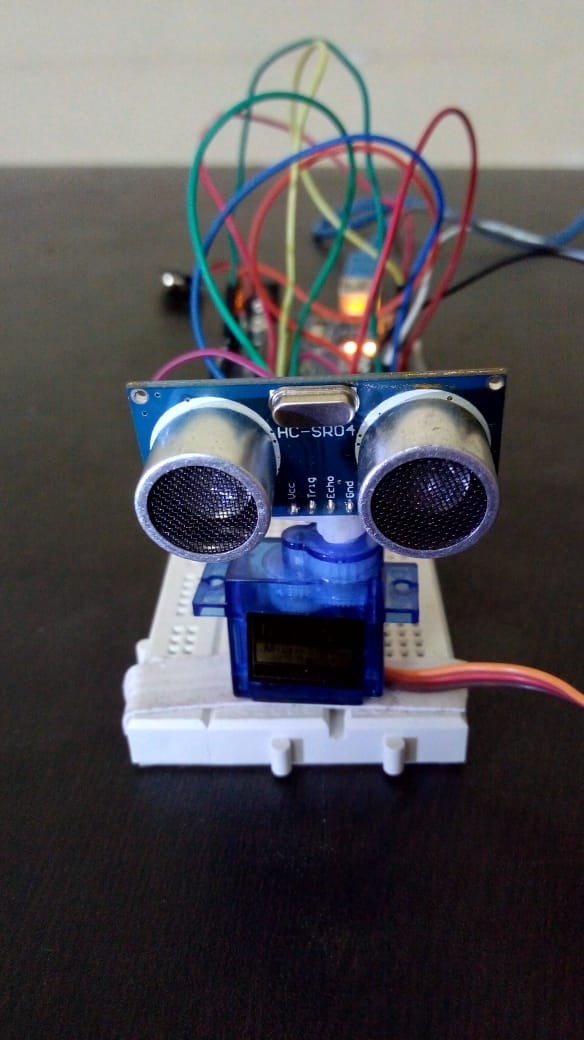
- Arduino UNO
- Ultrasonic Sensor (HC-SR04)
- Servo Motor
- Breadboard
- Couple of jumper wire
Before starting, prepare the following essential engineering components:
- Arduino UNO R3: The main microcontroller board for logic control.
- Ultrasonic Sensor (HC-SR04): Distance sensor using high-frequency waves (40kHz).
- Servo Motor (e.g., SG90 or MG90S): Motor for controlling 180-degree horizontal rotation.
- Breadboard & Jumper Wires: For connecting the test circuit.
- Mounting Materials: Hot glue gun or thick double-sided tape for securing the sensor to the Servo head.
Step 2: Hardware Integration
Follow the diagram and connect all components.
- Triggerpin on 10
- Echopin on 11
- Servo pin 12
Connecting each component to the Arduino requires precision to ensure correct signal transmission (Signal Processing). The connection diagram is as follows:
- Ultrasonic Sensor (HC-SR04):
- VCC Connect to Arduino's 5V.
- GND Connect to Arduino's GND.
- Trigger Pin Connect to Digital Pin 10 (responsible for sending out pulse signals).
- Echo Pin Connect to Digital Pin 11 (responsible for receiving reflected signals).
- Servo Motor:
- Signal Pin (orange/yellow wire) Connect to Digital Pin 12.
- VCC (red wire) Connect to 5V.
- GND (brown/black wire) Connect to GND.
Technical Tip: Once the circuit is connected, securely attach the Ultrasonic Sensor to the Servo Motor's rotating shaft with a hot glue gun to prevent vibrations, which could lead to noise or inaccuracies in the measured distance values.
Don't forget to mount the sensor on top of the servo motor use glue gun or any type of glues for mounting it firmly.
Step 3: Software Implementation
Burn the code written in arduino ide to the arduino through USB cable, and compile the code written in java language in eclipse (java ide).
This project involves the collaboration of two software components:
Arduino Side: Controls the Servo to rotate from 15 to 165 degrees (and rotate back). At each degree of movement, the Arduino will command the HC-SR04 sensor to emit ultrasonic waves and calculate the distance using the formula:
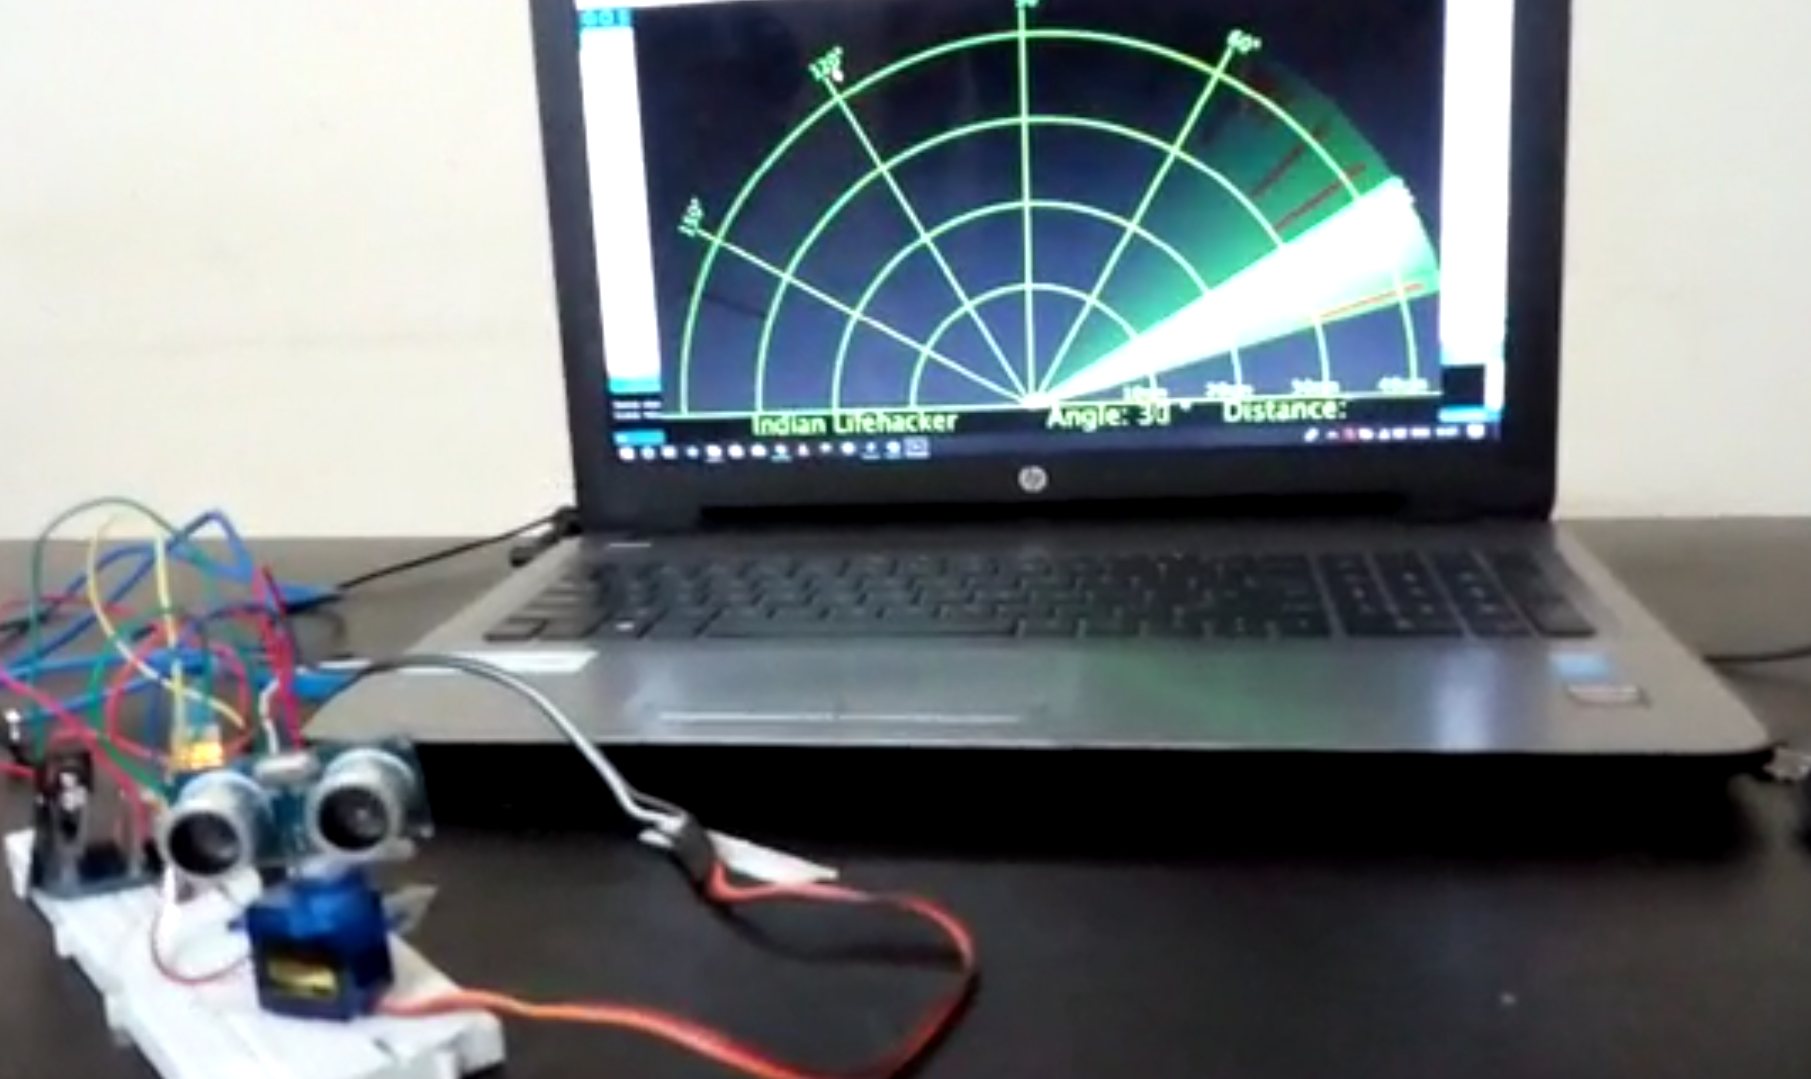
Distance = (Time * 0.034) / 2Subsequently, it will send "angle" and "distance" data via the Serial Port (USB) in string format for further processing by the computer.Java/Processing Side: Upon receiving data from the Serial Port, the program will draw radar lines and red dots on the screen to display the object's position according to the received angle and distance in Real-time.
Installation Methods:
- Upload the Arduino IDE code to the Arduino UNO board.
- Run the Java/Processing code on Eclipse IDE or Processing IDE to open the Virtual Radar window.
This will create a virtual radar on your laptop screen.
System Testing
Now, your arduino radar is ready for work, check it by putting some object in front of ultrasonic sensor and if every thing is fixed right you will see a virtual shadow like image of object.
Test by placing objects in front of the sensor at a distance of 0-40 centimeters. You will see changes on the computer screen, with shadows or symbols appearing at the actual positions of the objects.
if you need help or have any confusion mail me at shubham.jamui2@gnail.com
thanks!!