Want to connect your Arduino sensors to Raspberry Pi? This guide will serve as an easy how-to for beginners. I'm new to Arduino so I wanted to create something for everyone to be able to complete in a short amount of time.
Getting Started
- Create a free account for Ubidots-http://ubidots.com
- Assemble all needed equipment & supplies
Raspberry Pi Setup
- Make sure Pi is connected to internet via WiFi or Ethernet
- In terminal run "
sudo apt-get update" & "sudo apt-get upgrade"
- Install Pyserial "
pip install pyserial"
- Follow these instructions for installingUbibots Python library on your Raspberry Pi: https://github.com/ubidots/ubidots-python
- Install Arduino IDE on your Raspberry Pi
Board Setup
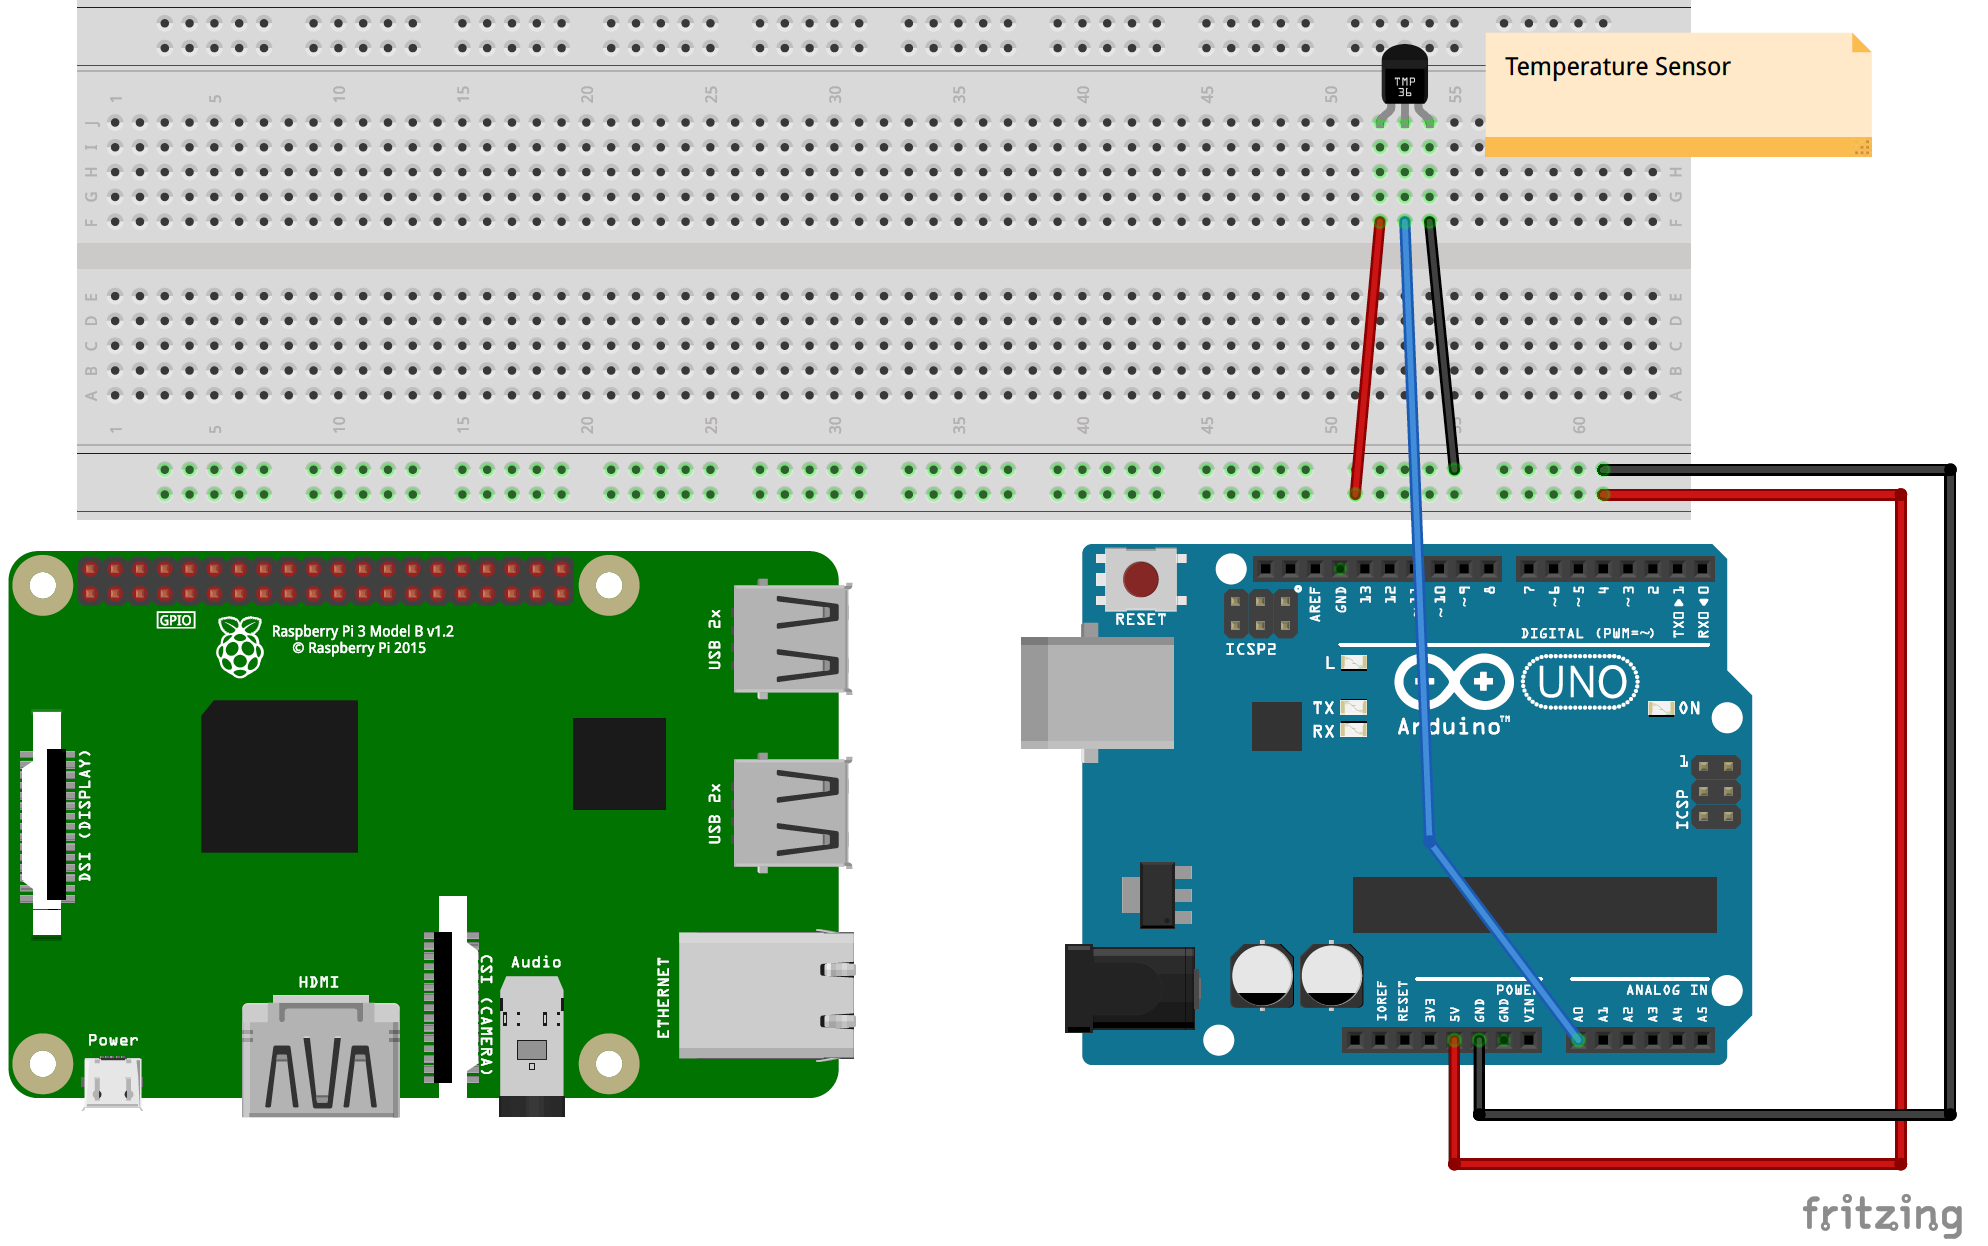
- For this example, I used Arduino Uno R3. Follow the Fritzing diagram provided for breadboard setup.
- Plug the USB cable from Arduino into the Raspberry Pi
- Copy the Arduino sketch to the IDE and upload to the board
- Open Python 2.7 IDLE and copy the file provided, press F5 to run (need to save first)
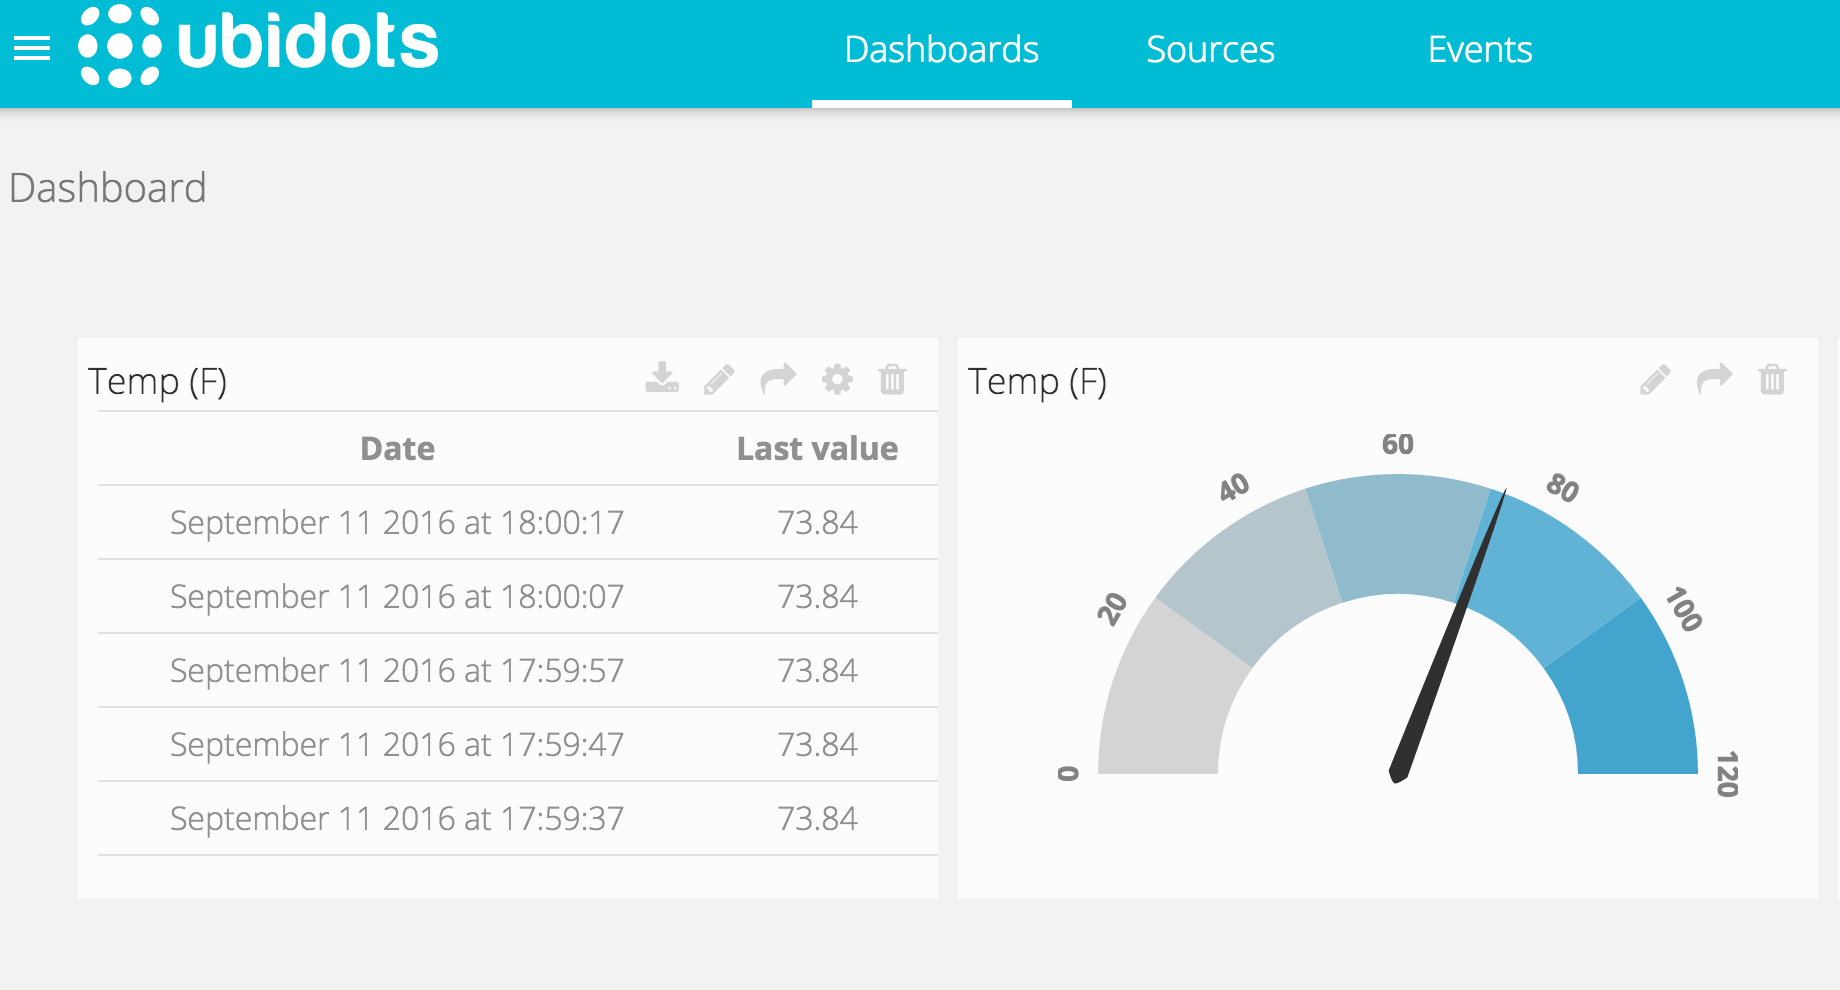
You will see new readings every 10 seconds (default, can be changed in Arduino). Create your dashboard in Ubidots to display the data in whatever format you want.
EXPANDED TECHNICAL DETAILS
Heterogeneous Cloud Gateway
This project creates a professional-grade IoT gateway by combining the localized sensing of Arduino with the high-level processing of Raspberry Pi and the Ubidots Cloud.
- I2C Master-Slave Pipeline: The Arduino acts as a dedicated sensor-node (sampling analog data like light or soil moisture). It sends the processed data to the Raspberry Pi over an I2C link.
- Python Cloud Scripting: The Raspberry Pi runs a Python script that aggregates the data and uses a secure REST API to upload it to the Ubidots Dashboard.
Global Visualization
- Ubidots Dashboarding: Features a real-time web console with gauges, maps, and historical graphs, providing a professional "End-to-End" solution for remote industrial monitoring.