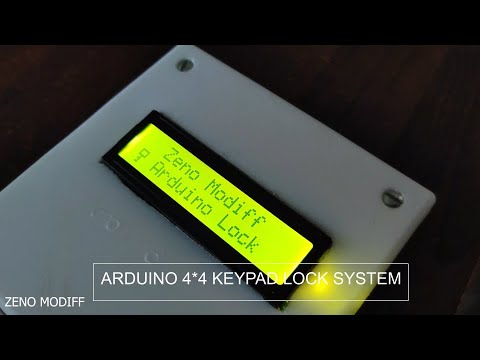
This is an Arduino security lock system which includes a 4x4 keypad, a relay module (or servo motor), and an I2C LCD display to show the text. It's a very simple project to make and does not require a lot of prior skill or deep ideology about Arduino and coding. This project is mainly focused on security purposes. If you like what I make, subscribing to my channel would be appreciative.
Project Perspective
The Arduino Security System is a sophisticated exploration of security technology and interactive interaction. By focusing on the essential building blocks—the password-to-auth mapping and your high-performance keypad-to-servo-dispatch logic—you'll learn how to communicate and synchronize your protection tasks using specialized software logic and a robust hardware setup.
Technical Implementation: Keypad Matrices and Auth State-Machines
The project reveals the hidden layers of simple sensing-to-lock interaction:
- Identification layer: The 4x4 Keypad acts as a high-resolution spatial interface, measuring each point of the user's input via its matrix row/column interrupts.
- Conversion layer: The system uses high-speed digital pins to receive the keypad input and coordinate mission-critical sensing tasks.
- Visual Interface layer: A 16x2 Character LCD provides a high-definition visual data dashboard for your security status (e.g., "Access Denied," "Welcome").
- Communication Gateway layer: A Servo Motor (or Relay Module) provides a manual lock-override or autonomous status check, acting as the physical lock mechanism.
- Processing Logic: The Arduino code follows a "password-dispatch" strategy: it interprets the keypad inputs and matches them to predefined passwords to control the servo (lock) and buzzer states, providing safe and rhythmic entry control.
- Communication Dialogue Loop: Status bits are sent rhythmically to the Serial Monitor for debugging and status coordination during initial calibration.
Hardware-Security Infrastructure
- Arduino Uno: The "brain" of the project, managing the multi-directional keypad sampling and coordinating servo and LCD synchronization.
- Matrix Keypad: Provides a clear and reliable "User Link" for each point of the authentication experience.
- Servo Motor (Lock): Provides a high-capacity and reliable physical interface for each successful "Security Mission."
- LCD Display (16x2): Essential for providing clear and energy-efficient visual feedback for every point of the hardware status in the system.
- Passive Buzzer: Essential for providing clear and energy-efficient acoustic feedback for security alerts.
- Micro-USB Cable: Used to program your Arduino and provides the primary interface for the system controller.
Security Hub Automation and Interaction
The proximity-driven access process is designed to be very efficient:
- Initialize Workspace: Correctly seat your keypad and LCD, and connect them properly to the Arduino pins.
- Setup High-Speed Sync: In the Arduino sketch, initialize the keypad library and define the default password in the
setup()function. - Internal Dialogue Loop: The system constantly performs high-performance periodic data checks and updates the entry status in real-time based on user input.
- Visual and Data Feedback Integration: Watch your LCD dashboard automatically become a rhythmic status signal, displaying messages based on the authentication process.
Future Expansion
- OLED Identity Dashboard Integration: Add a small OLED display to show details like "Last Access Time" or simulated "Battery (%)".
- Multi-sensor Sync Synchronization: Connect a specialized "Bluetooth Module" to perform higher-precision "Device-ID-Logging" wirelessly.
- Cloud Interface Registration Support: Add a specialized web dashboard accessible via smartphone over WiFi/BT to precisely track and log access history.
- Advanced Profile Customization Support: Integrate more advanced logic to allow triggers and passwords to be changed automatically based on user patterns.
The Arduino Security Lock is a perfect project for any science enthusiast looking for a more interactive and engaging security tool!
[!IMPORTANT] The Keypad Entry requires an accurate password handling routine (e.g., for EEPROM storage) in the code to avoid bypass. Always ensure you have an appropriate Fail-Safe flag in the main loop to handle potential system errors or serial bus overloads!