This article shows how to communicate between Arduino and Visual Studio through COM (UART) port.
(1) Arduino will send data to the Visual Studio program:

(2) Visual Studio program will send data to Arduino. Arduino receives it, then feed it back to Visual Studio program.

Overview of steps:
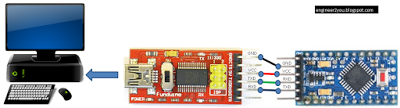
1. Hardware connection
2. Arduino program
3. Visual Studio program
1. Hardware connection
2. Arduino program
Make a program for Arduino. At start up, Arduino will send a string (a sentence) every 0.5 sec. This will stop when User sends data (string) to Arduino, then Arduino will send it back to User. In this case, User is Visual Studio program (in part 3).
The code can be download here - Google share
String mySt;
 char myChar = 0;
 int i=0;
void setup() {
   // start serial port at 9600 bps:
   Serial.begin(9600);
   while (!Serial) {
     ; // wait for serial port to connect. Needed for native USB port only
   }
  establishContact();  // send a byte to establish contact until receiver responds
 }
void loop() {
   if (Serial.available() > 0) {
     myChar = Serial.read();
     mySt +=myChar;  //receive string from Computer
   }
   if ((mySt.length() >0)&(!Serial.available())) {
     Serial.print(mySt); //Print received string to Computer
     mySt="";
   }
 }
 void establishContact() {
   while (Serial.available() <= 0) {
     Serial.print("Arduino send: ");
     Serial.println(i);  //Print increasing value to Computer
     i+=1;
     delay(500);
   }
 }
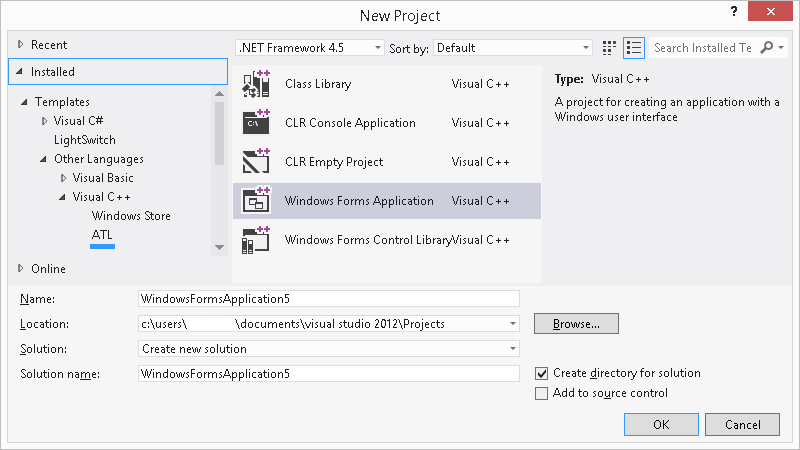
3. Visual Studio program
Make a windows application 🠚 save it.
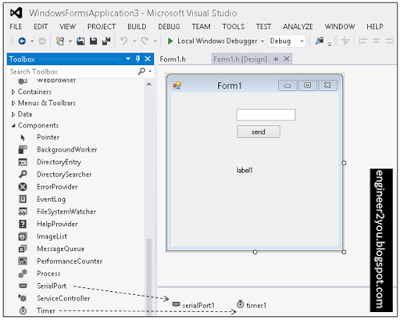
Add a button, textbox and label to the Form (taken from Toolbox in the left):
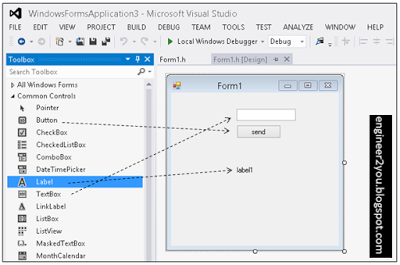
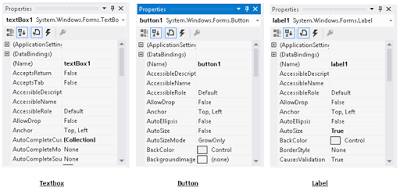
Click on button, textbox and label to see Properties in the Toolbox in the right. Remember the name of each item to program in a latter section.
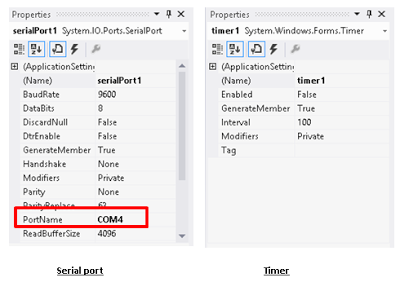
Add components "serial Port" and "timer":
Also, see properties to know the name each item. Remember to rename "serialPort1" 🠚 "Portname" to COM-Port of Arduino (this case is COM4)
Programming works: The whole code of Visual Studio program can be downloaded here - Google share
(1) Double click to Form1 🠚 input the following code.
Meaning: open (Arduino) COM-Port and start timer1
private: System::Void Form1_Load(System::Object^  sender, System::EventArgs^  e) {
 serialPort1->Open();
 timer1->Start();
 }
(2) Double click to Button1 🠚 input the following code.
Meaning: send string from textBox1 to (Arduino) COM-Port
private: System::Void button1_Click(System::Object^  sender, System::EventArgs^  e) {
 serialPort1->WriteLine(textBox1->Text);
 }
(3) Double click to timer1 🠚 input the following code.
Meaning: every time timer1 ticks (it will tick every 0.1s 🠚 setting in "Interval" of Properties of timer1), label1 will update information
private: System::Void timer1_Tick(System::Object^  sender, System::EventArgs^  e) {
 label1->Text=mStr;
 }
(4) Click to serialPort1 🠚 see at Properties toolbox 🠚 click at "Event" icon 🠚 double click at "DataReceived".
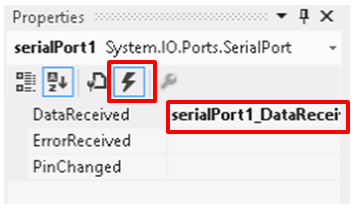
Then input the following code.
Meaning: read COM-Port data at every time receiving 🠚 save it to "mStr"
private: System::Void serialPort1_DataReceived(System::Object^  sender, System::IO::Ports::SerialDataReceivedEventArgs^  e) {
 mStr=serialPort1->ReadLine();
 }
Auxiliary code:
(1) Meaning: when Form1 is closed 🠚 close COM-Port and stop timer1
~Form1()
 {
 if (components)
 {
 delete components;
 }
 serialPort1->Close();
 timer1->Stop();
 }
(2) Meaning: make global variable "mStr"
private:
 /// <summary>
 /// Required designer variable.
 String^ mStr;
 /// </summary>
After all, click icon "Local Window Debugger" to build and run the program.
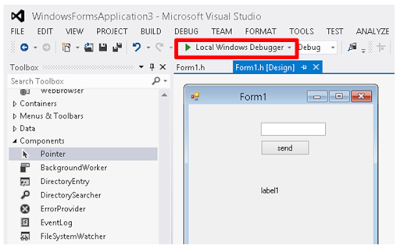
If everything runs smoothly, a window form will appear (note: Arduino should be connected to computer through COM4 with the program as in Step2).
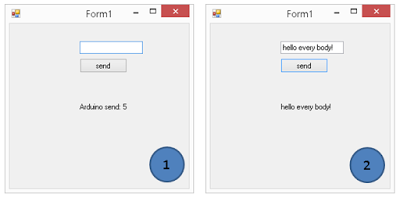
At result (1): Form1 will show results from Arduino.
At result (2): Form1 will send data to Arduino, then receive it after Arduino sends it.
EXPANDED TECHNICAL DETAILS
Full-Stack Embedded Integration
This project bridges the gap between low-level hardware and high-level Windows application development.
- Serial Protocol: The Arduino acts as the data acquisition node, sending sensor readings or status flags over USB via the Universal Asynchronous Receiver-Transmitter (UART) protocol.
- C# / .NET Interface: A custom application built in Visual Studio 2015 using the
System.IO.Portsnamespace listens to the specific COM port. It parses the incoming strings and updates a Graphical User Interface (GUI) in real-time.
Bi-Directional Control
The system isn't just for monitoring; it allows for remote hardware control.
- Command Parsing: The user can click buttons in the Windows app to send bytes back to the Arduino. The Arduino's
Serial.read()loop interprets these bytes to toggle LEDs, drive motors, or adjust system parameters, demonstrating a robust PC-to-embedded control loop.