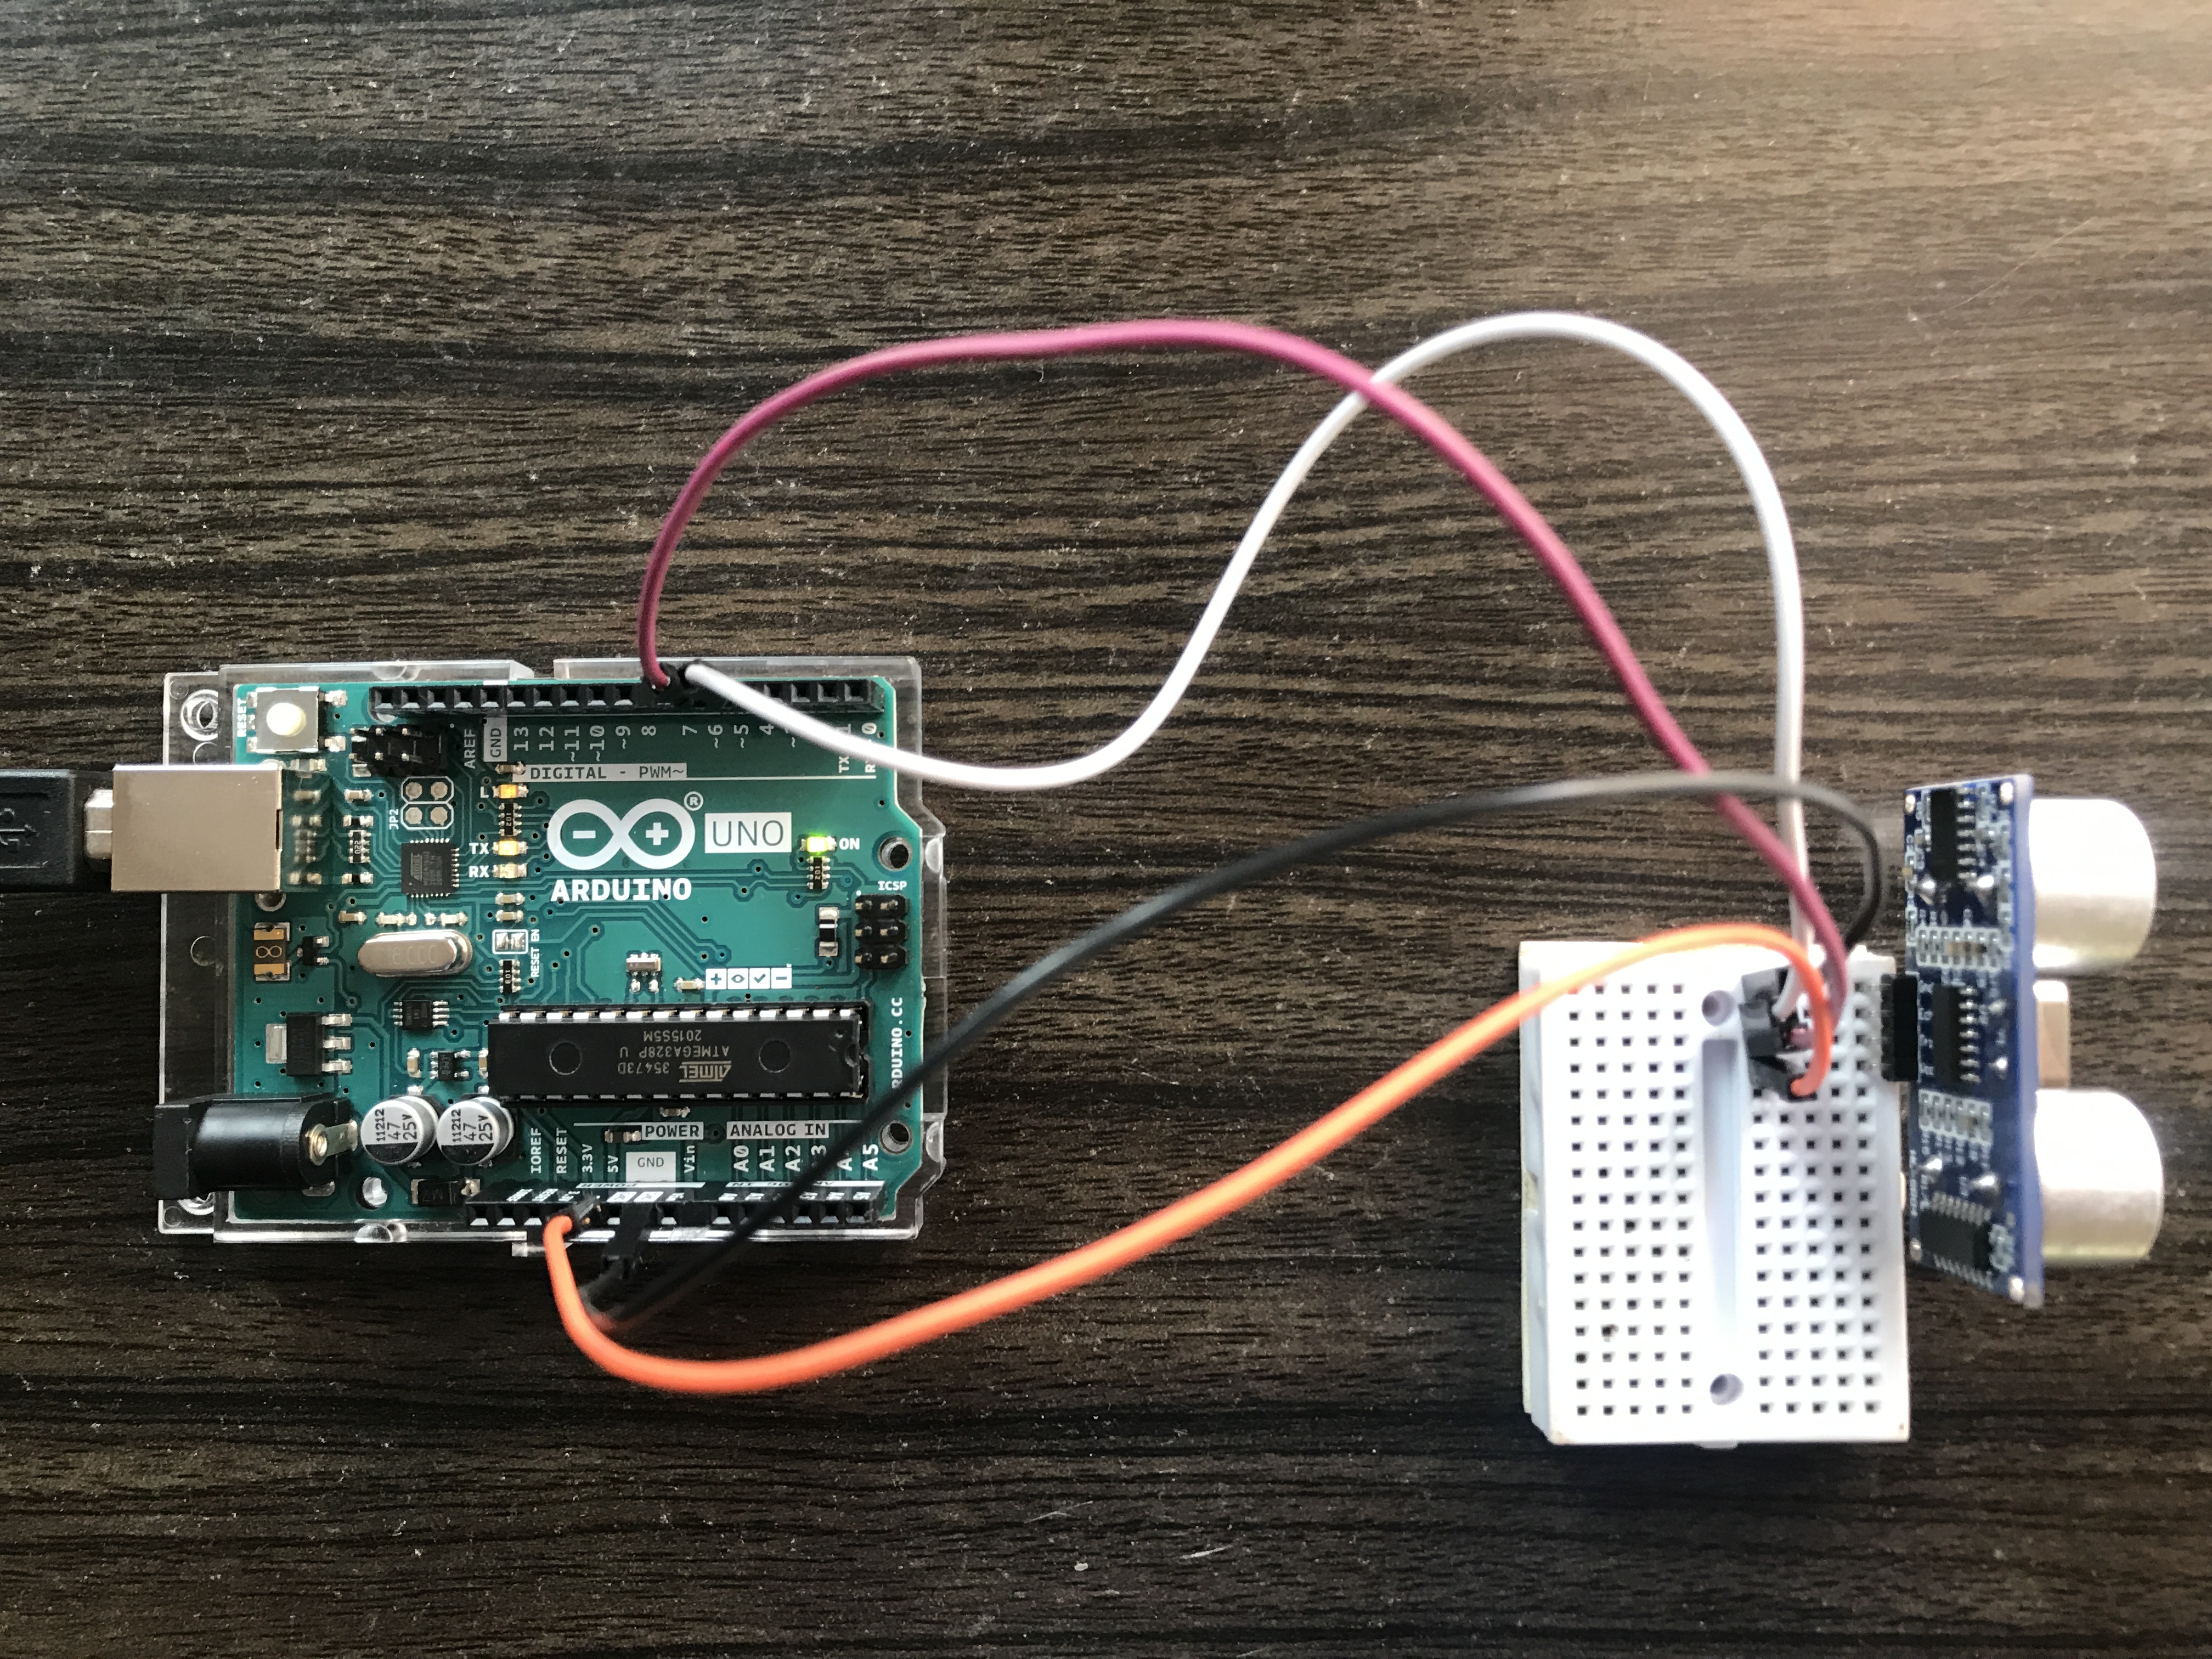
Connections
The Connections can be made direct between Ultrasonic sensor and Arduino (or) You can also use Breadboard to achieve the same.
- Connect the Vcc pin of Ultrasonic sensor to 5V on Arduino
- Connect the GND pin of Ultrasonic sensor to GND on Arduino
- Connect the Trig Pin of Ultrasonic sensor to D6 on Arduino
- Connect the Echo Pin of Ultrasonic sensor to D5 on Arduino
That's it...
Working
Ultrasonic sensor has wide variety of applications such as distance measurement, object detection, obstacle avoidance etc.,
This project is designed keeping in mind the people who are looking for basic setup of Ultrasonic sensor with Arduino. Any type of Arduino can be used for this project.
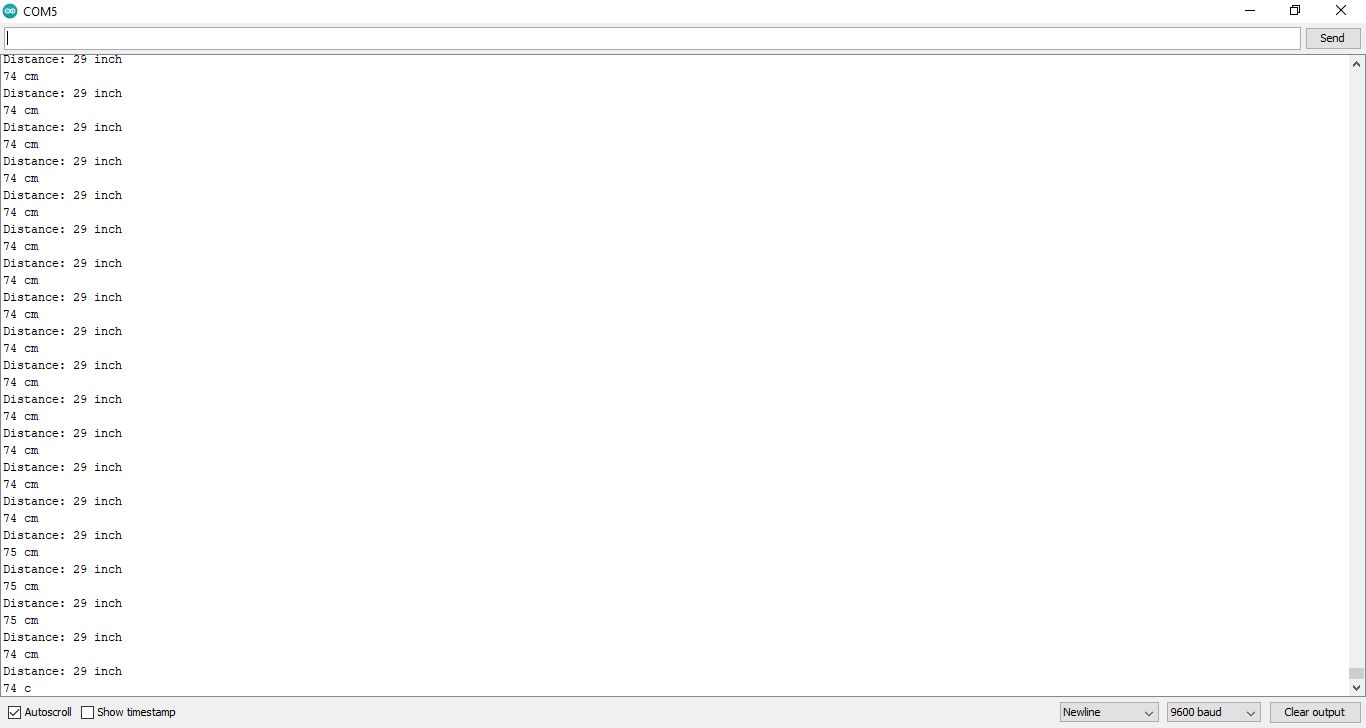
The working is very Simple, when the connections are done as per the circuit diagram and when it is powered ON, the Ultrasonic sensor sends sound waves. When the waves come in contact with an object, they bounce back to the sensor. Hence, the distance is calculated by multiplying speed with time. The speed here refers to the speed of sound, which is 340 meters per second. In cm per microseconds it is 0.034 and inch per microseconds it is 0.0133858. We have to divide the speed by 2, since sound wave travels forward and returns back after hitting the object.
On the other hand, the time is the duration taken by the sound wave to travel forward and bounce back. Therefore the distance of object from the Ultrasonic sensor is easily identified.
You can find the calculation in the code attached below. Peace
Technical Implementation: Sensors and Pulse Timing
The project reveals the hidden layers of simple distance-to-data interaction:
- Identification layer: The Ultrasonic Sensor (HC-SR04) acts as the acoustic eye of your project, measuring distance by emitting high-frequency sound pulses and listening for the echo.
- Conversion layer: The Arduino uses the Speed of Sound (approximately 340 m/s) to convert the raw "Echo Travel Time" (microseconds) into a precise distance value in centimeters (cm) or inches.
- Processing Logic layer: The Arduino code follows a specialized "sequential ping" strategy: it triggers the
Triggerpin for 10µs and then waits for theEchopin to return a pulse. - Execution layer: Using the
pulseIn()function, the Arduino calculates the distance and sends it rhythmically to the Serial Monitor for your observation.
Hardware Infrastructure
- Arduino Uno: The "brain" of the project, managing the ultrasonic pulses and coordinating the conversion and indicator tasks.
- Ultrasonic Sensor (HC-SR04): Providing contactless and reliable distance monitoring for each of your measurements.
- Breadboard: A convenient way to prototype the distance circuit and connect all components without soldering.
- Micro-USB Cable: Used to program the Arduino directly from your computer for power and data.
Measurement and Interaction Step-by-Step
The ultrasonic distance monitoring process is designed to be very efficient:
- Initialize Hardware: Correctly seat the ultrasonic sensor on your breadboard following the provided diagram.
- Setup Output Sync: In the
setup()function, initialize both the trigger and echo pins, as well as the serial communication at 9600 bps. - Execution Loop: The Arduino constantly performs several high-performance sensor reads and updates the Serial Monitor in real-time.
- Visual Feedback: Watch as your distance readings update on the screen.
Future Expansion
- OLED Display Integration: Add a small OLED display to show a "Distance Status" (Far/Medium/Near).
- Multi-sensor Synchronization: Connect several more ultrasonic sensors to independently monitor different directions for a robot or project.
- Cloud Interface Support: Add a specialized mobile app to precisely control and track your distance data from your smartphone over Bluetooth.
- Advanced Range Customization: Add a small slider or potentiometer to manually adjust the detection range for a proximity indicator.
Basic Setup for Ultrasonic Sensor and Arduino is a perfect project for any science enthusiast looking for a more interactive and engaging measurement tool!
End Result