This project uses the capabilities of nRF52 devices like the XIAO BLE Sense 52840, Feather 52840, Clue or other boards to create a Bluetooth controlled audio player.
How it works?
These devices have advanced Bluetooth and audio capabilities built in, so that makes it easy to create an array of applications. In this case the device plays standard format .WAV files from an SD card. Users can use the nRF Connect app to connect to the device and control which track is playing along with the volume.
High-Efficiency SoC: nRF52x Audio Player
Most Arduino Bluetooth projects involve slapping a massive, power-hungry HC-05 module onto a 5V Uno. The nRF52x Audio Player introduces the Maker to System-on-Chip (SoC) architecture. The Nordic nRF52840 processor (found in boards like the Arduino Nano 33 BLE and Adafruit Feather) integrates the Bluetooth radio directly onto the same silicon die as the main ARM processor, achieving insane battery efficiency.
The Bluetooth Low Energy (BLE) Framework
You cannot send simple serial text strings over modern BLE; the protocol is completely different from Classic Bluetooth.
- The Architecture: BLE relies on a complex database structure of "Services" and "Characteristics".
- You define an Audio Control Service (e.g.,
UUID 0x1812). - You define a Play/Pause Characteristic inside it.
- You define an Audio Control Service (e.g.,
- The Interlock: Your smartphone acts as the Central Unit. It scans for the nRF52x (The Peripheral). When connected, the phone writes a hexadecimal byte directly into the "Play" characteristic!
- The Callback: The nRF52's internal ARM processor runs an interrupt.
if (playCharacteristic.written()) { executeAudio(); }
Driving Audio Peripherals (I2S vs. PWM)
Once the Bluetooth play command is received, the tiny board must output the sound.
- Because the nRF52 is a 32-bit powerhouse, it doesn't need to use terrible 8-bit PWM libraries.
- It utilizes the I2S (Inter-IC Sound) Protocol. This is a 3-wire digital bus explicitly designed for CD-quality audio data.
- The nRF52 streams a raw high-resolution wave directly to a MAX98357A I2S Amplifier Board.
- The MAX chip translates that digital data perfectly into stunningly clear, amplified analog audio, blasting it through a 3W speaker!
Components
1x Arduino nrf52x based board
1x MAX98357A or other I2S amplifier
1x SD Card loaded with .WAV files (16-44kHz, 8 or 16-bits, mono/stereo)
1x 8ohm speaker
1x mobile device (iOS or Android) supporting BLE
Crucial Hardware Loadout
- Nordic nRF52832 or nRF52840 Dev Board (e.g., SparkFun nRF52832 Breakout, Adafruit Feather nRF52840 Express).
- MAX98357A I2S Class D Audio Amplifier.
- A 3-Watt 4-Ohm speaker cone.
- A Smartphone running a BLE Scanner app like nRF Connect or LightBlue to push the exact characteristic commands.
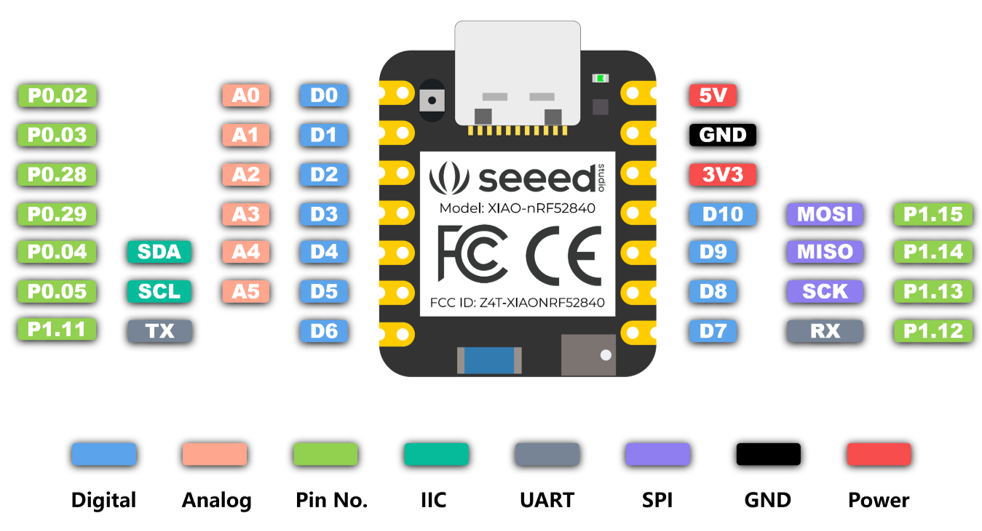
Connecting Everything
MAX98357A I2S breakout:
- BCLK -> Arduino D1 (p0.03)
- LRCK -> Arduino D3 (p0.29)
- DIN -> Arduino D5 (p0.05)
- The above pins can be defined in your sketch by specifying the GPIO number and/or port prior to calling the begin() function:
- For use of D7 (p1.12) for LRCK, users would call aaAudio.I2S_PIN_LRCK = 12; and aaAudio.I2S_PORT_LRCK = 1;
- SD -> Arduino D6
SD Card:
- The CS pin of the SD card is connected to Arduino D2 in the example code provided. The other pins are connected as labelled
Software:
This demo uses the included examples in the Auto Analog Audio library.
- Install the Auto Analog Audio library using the Arduino library manager
- Navigate to examples -> Auto Analog Audio > Platforms -> nRF52 -> nRF52_BLE
- Choose your example based on the Board Support Package you are using, mbed or non-mbed.
- Alternatively, use the code attached to this project
Note: The SPI speed in the Mbed BSP is currently limited so SD Card speed is limited. For higher quality audio use the non-mbed (Bluefruit) version of the code.
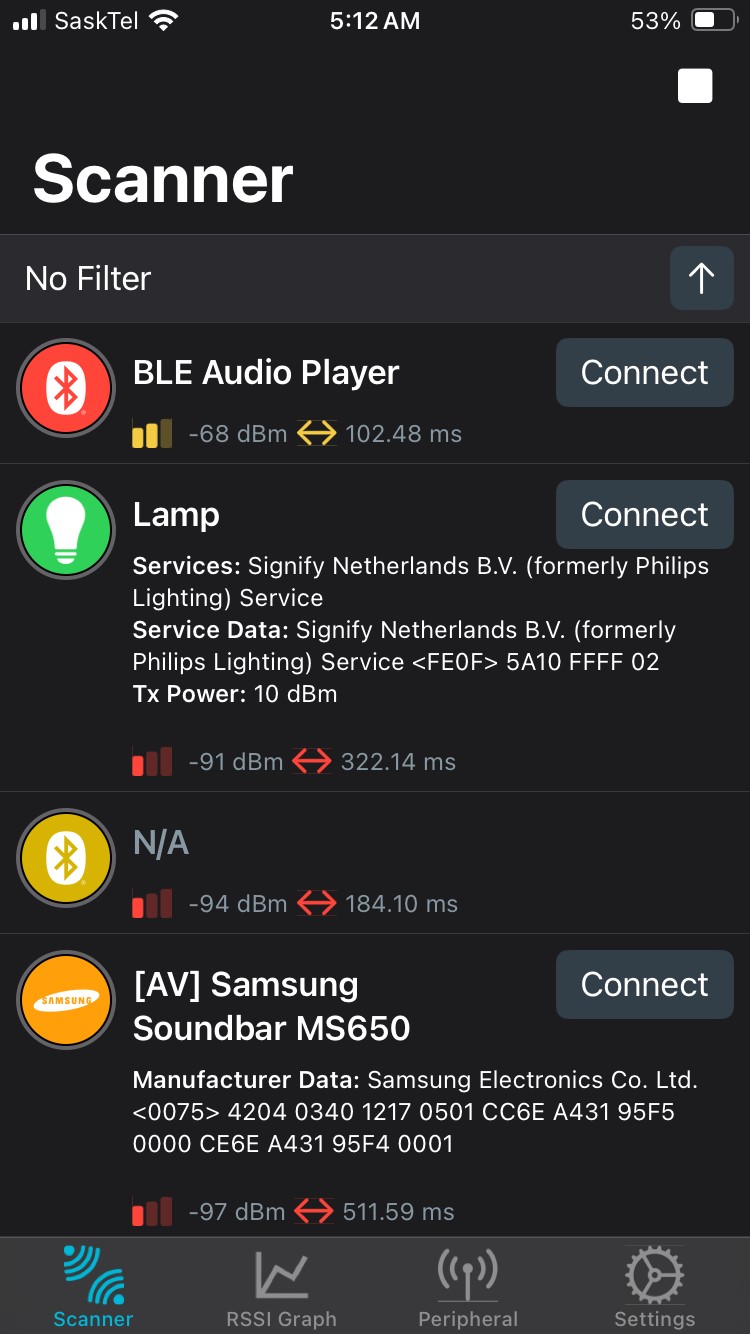
Connecting to Bluetooth:
- Install the nRF Connect app on your mobile device
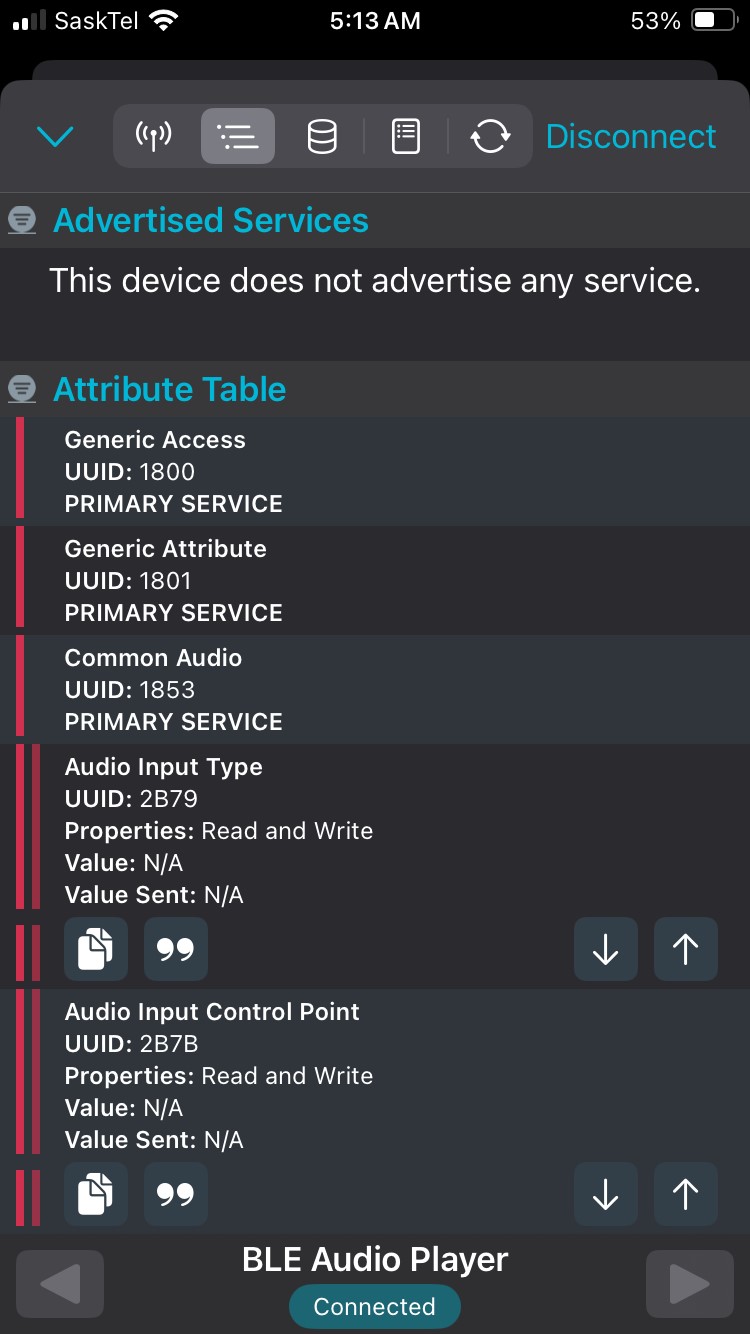
- Scan for devices - look for 'BLE Audio Player' & connect to it
- Once connected you should see 'Common Audio'
- Also 'Audio Input Type' - Here you can enter a UTF8 string ie: mywavfile.wav to start playback
- Also 'Audio Input Control Point' - Here you can enter an unsigned value to control the volume, 1 for lowest, 10 for full volume, 11 if you like to rock.

The code provided is for demo purposes and can easily be extended to support a number of features and functionality.