Wireless Notice Board Innovation: Create a Bluetooth Messenger with Arduino and 16x2 LCD
In today's digital age, fast and efficient communication is crucial. The "Bluetooth Controlled Messenger," or this wireless notice board project, is designed to solve short-range communication problems, such as within offices, hallways, or classrooms, when you want to send alert messages without disturbing others with sound.
This project uses the Arduino Uno as its core, working with an HC-05 Bluetooth module to receive data from a smartphone and display it on a 16x2 LCD screen. This is a fundamental concept for Embedded Systems engineers to learn about Serial Communication and Display control.
The notice board is used to update peoples with new information or if you want to send message with in room or in hall but are not want to talk loudly then this project will help you.
The project based on HC-05 Bluetooth module which Controlling 16x2 LCD display.
You can turn on or off the LCD display via smartphone and also you can send the text message.
The project is very simple you can built it without the knowledge of arduino.
Just upload the program and connect the circuit and you are good to Go.
Add TipAsk QuestionCommentDownload
Step 1: Components & Requirements
The beauty of this project lies in its simplicity, yet each component plays a crucial engineering role:
- Arduino Uno: The main microcontroller board, responsible for receiving Serial data from Bluetooth and converting it into signals to drive the LCD screen.
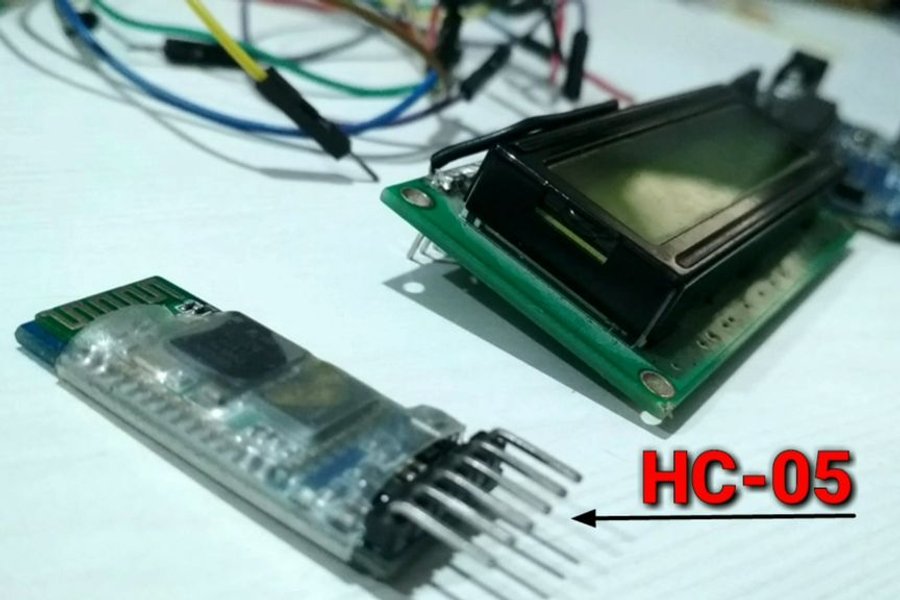
- HC-05 Bluetooth Module: A wireless communication module using the UART (Universal Asynchronous Receiver-Transmitter) protocol, acting as a bridge between a smartphone and the Arduino.
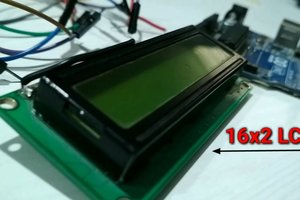
- 16x2 LCD Display: A character display screen with 16 columns and 2 rows, using the standard HD44780 controller chip.
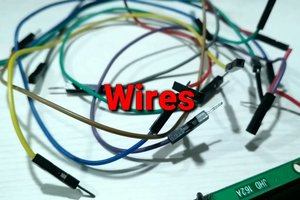
- Connecting Wires: Wires for connecting circuits on a Breadboard or for direct connections.
- HC-05 Bluetooth module
- 16x2 LCD display
- Arduino Uno
- Some wires/connectors
Add TipAsk QuestionCommentDownload
Step 2: Download and Upload the Code
The programming for this project focuses on capturing data from the Serial port (Rx/Tx), with the program logic defined as follows:
- When character "1" is received: Turns the LCD backlight ON.
- When character "2" is received: Turns the LCD backlight OFF.
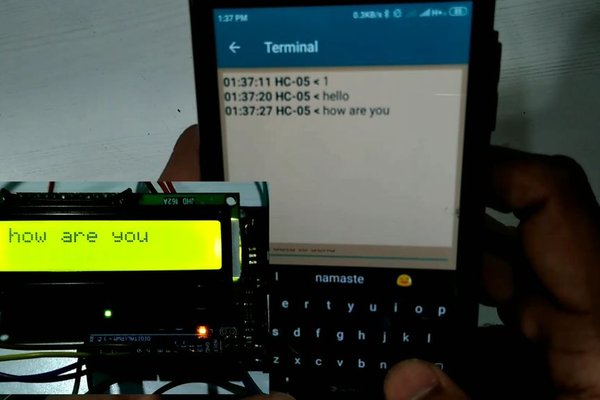
- When other messages are received: Displays the message directly on the LCD screen.

Download and Upload the Code.
Important Precaution: While uploading the Code to the Arduino board, you must disconnect the Rx and Tx wires of the Bluetooth module first. This is because the Arduino Uno board uses the same Serial port for communication with the computer via USB. Failure to disconnect them will result in a Data Collision, causing the upload to fail. Make sure the Bluetooth mode is not connected to Arduino while uploading the Code.
Attachments
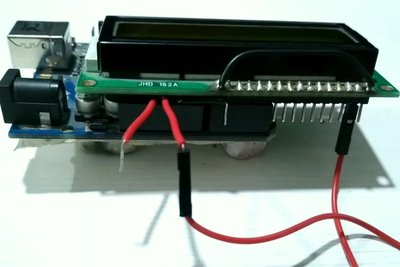
Step 3: Power Supply Wire for LCD and Bluetooth Module
For stable system operation, voltage management is crucial, especially for some HC-05 modules that require a supply voltage of 3.3V to 6V.
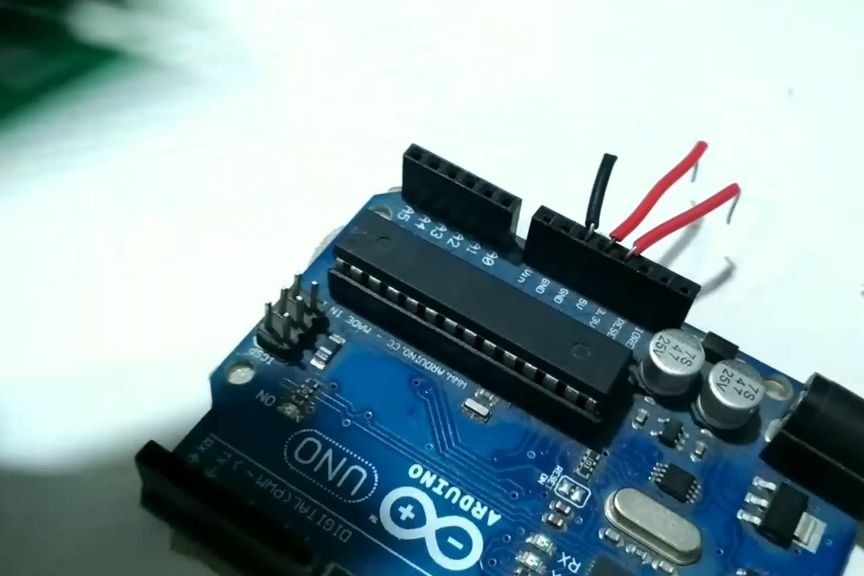
- Connect 2 red wire to the +5v and 3.3v.
- Connect Black Wire to the GND.
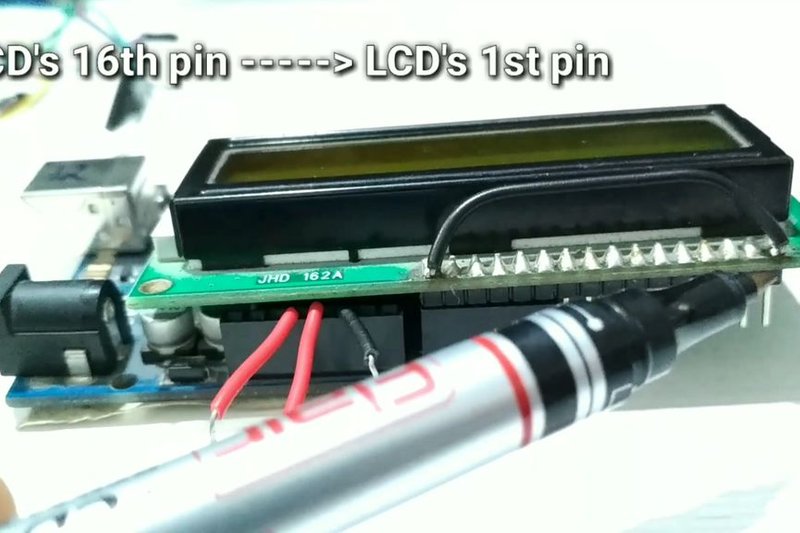
Step 4: Connect LCD
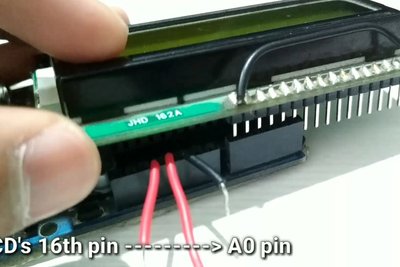
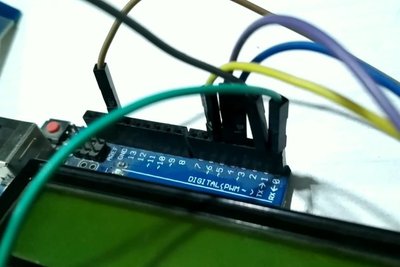
The 16x2 LCD in this project uses a Parallel 4-bit mode connection to save pins on the Arduino board. The pin assignments are as follows (please refer to the images for accuracy):
2 More Images
Connect LCD to Arduino Like given in Photo, So the A0 pin connected to the 16th Pin of LCD.
Connection Table:
- LCD Pin 16 (LED-) ----> Connect to LCD Pin 1 (VSS/GND)
- LCD Pin 2 (VCC) ----> Connect to Arduino +5V
- LCD Pin 3 (V0/Contrast) ----> Connect to GND (or via a Potentiometer for contrast adjustment)
- LCD Pin 4 (RS) ----> Connect to Arduino Pin 5
- LCD Pin 5 (RW) ----> Connect to Arduino Pin 4
- LCD Pin 6 (EN) ----> Connect to Arduino Pin 3
- Note: For data pins D4-D7, connect as specified in the Code (typically pins 12, 11, 5, 4, 3, 2 or as configured by the developer in
LiquidCrystal lcd(...))
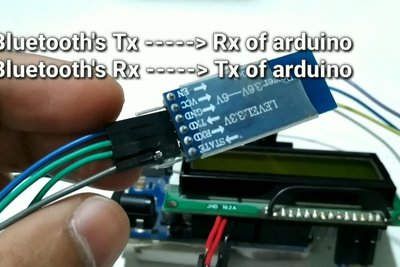
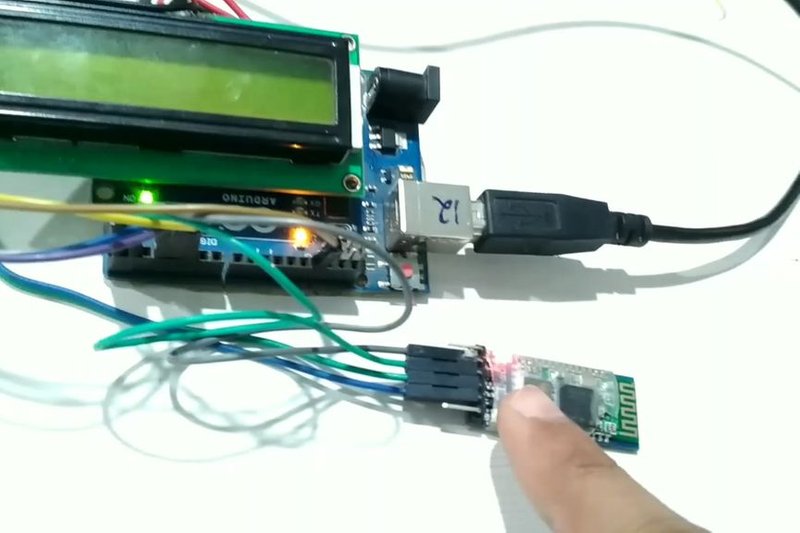
Step 5: Connect Bluetooth
The HC-05 module handles wireless data transmission. Wires must be crossed (Tx to Rx, Rx to Tx) for correct data communication.
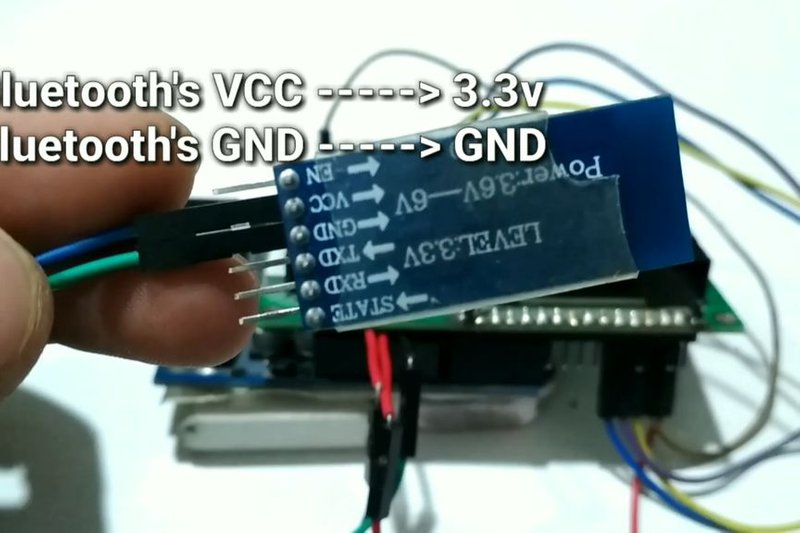
Mine Bluetooth Works on 3.3v to 6v, So I will connect it to 3.3v of Arduino.
Connection Method:
- Bluetooth VCC ----> Arduino 3.3V (or 5V, depending on module specifications)
- Bluetooth GND ----> Arduino GND
- Bluetooth TX ----> Arduino RX (Pin 0) (for incoming data)
- Bluetooth RX ----> Arduino TX (Pin 1) (to receive data from the board - it is recommended to use a Voltage Divider to reduce the voltage to 3.3V for the HC-05's RX pin)
Step 6: Connect the Bluetooth
When power is supplied to the system, the red LED on the HC-05 module will blink rapidly, indicating that it is waiting for a connection (Pairing Mode).
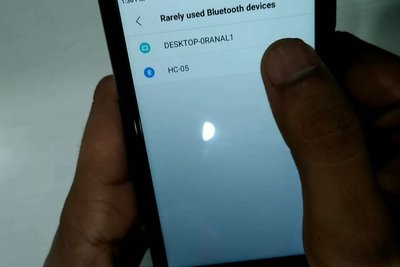
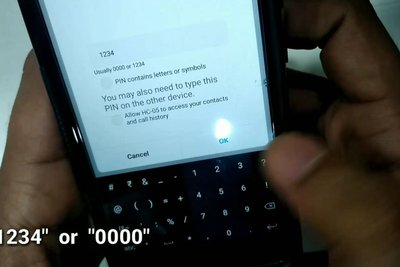
Connect your Arduino to Power supply
the red LED in Bluetooth will starts fast blinking it means it is not connected to any device.
- Turn on the Bluetooth in your device.
- Search for new device.
- Click on Hc05 once it appear.
- Enter the password "1234" or "0000".
Once connected, the LED on the module will change its blinking pattern to a slower rate.
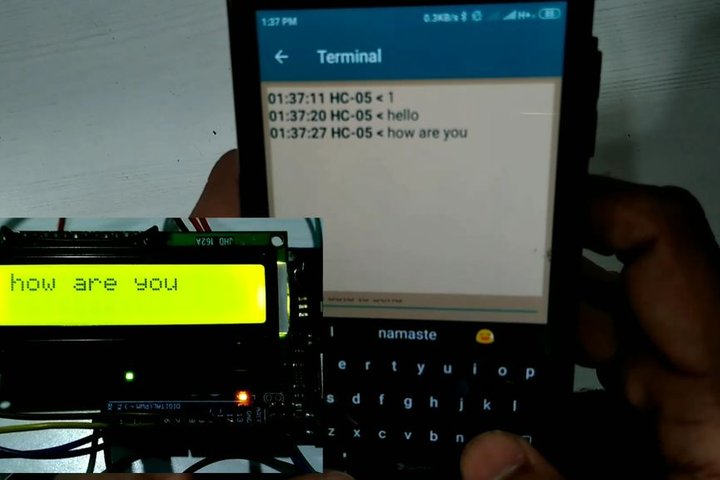
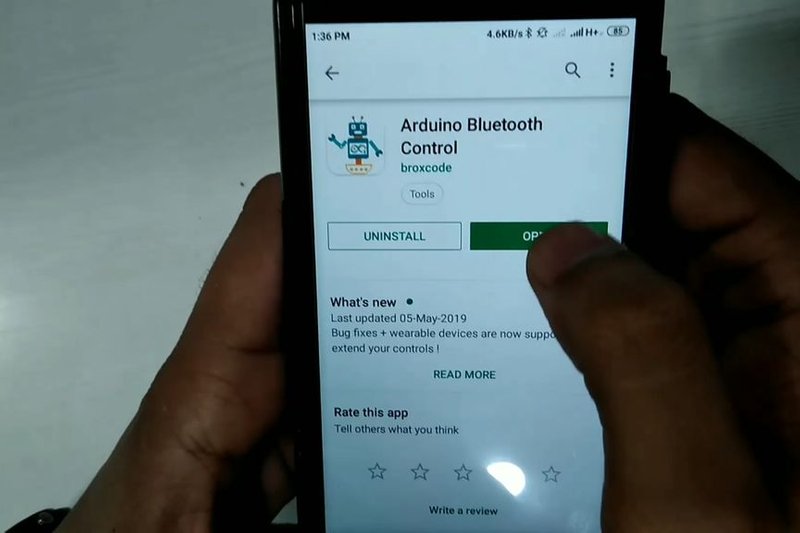
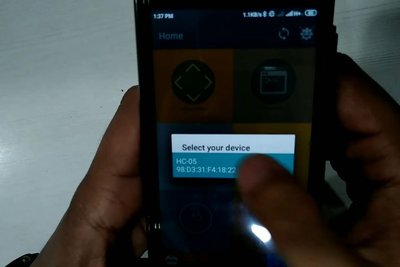
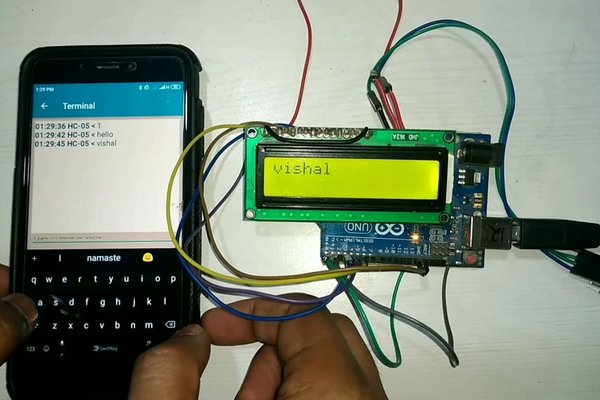
Step 7: Download the App and Connect
To send messages, we will use a Bluetooth Terminal type application to transmit data to the Arduino.
2 More Images
- Download the app from here.
- Open the app
- Click on connect on the top right.
- Click on the Hc05 and connect.
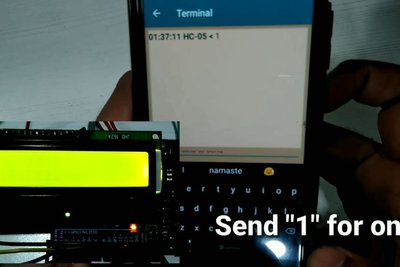
Send "1" to turn on the LCD display.
Send any message to display on LCD.
Send "2" to turn off the LCD display.
Step 8: Now We Are Good to Go
The Project is Ready you can build it for fun or for your school / collage project.
............ :)
..........................
Please SUBSCRIBE To my YouTube channel for more videos........