Background and Inspiration
This project began with the intention of creating a special Christmas gift for my girlfriend and marked my full entry into the world of electronics engineering. It was greatly inspired by @Arduino_Jarod's project Wooden LED Christmas Tree, which sparked my desire to create my own version.
Core Project Concept
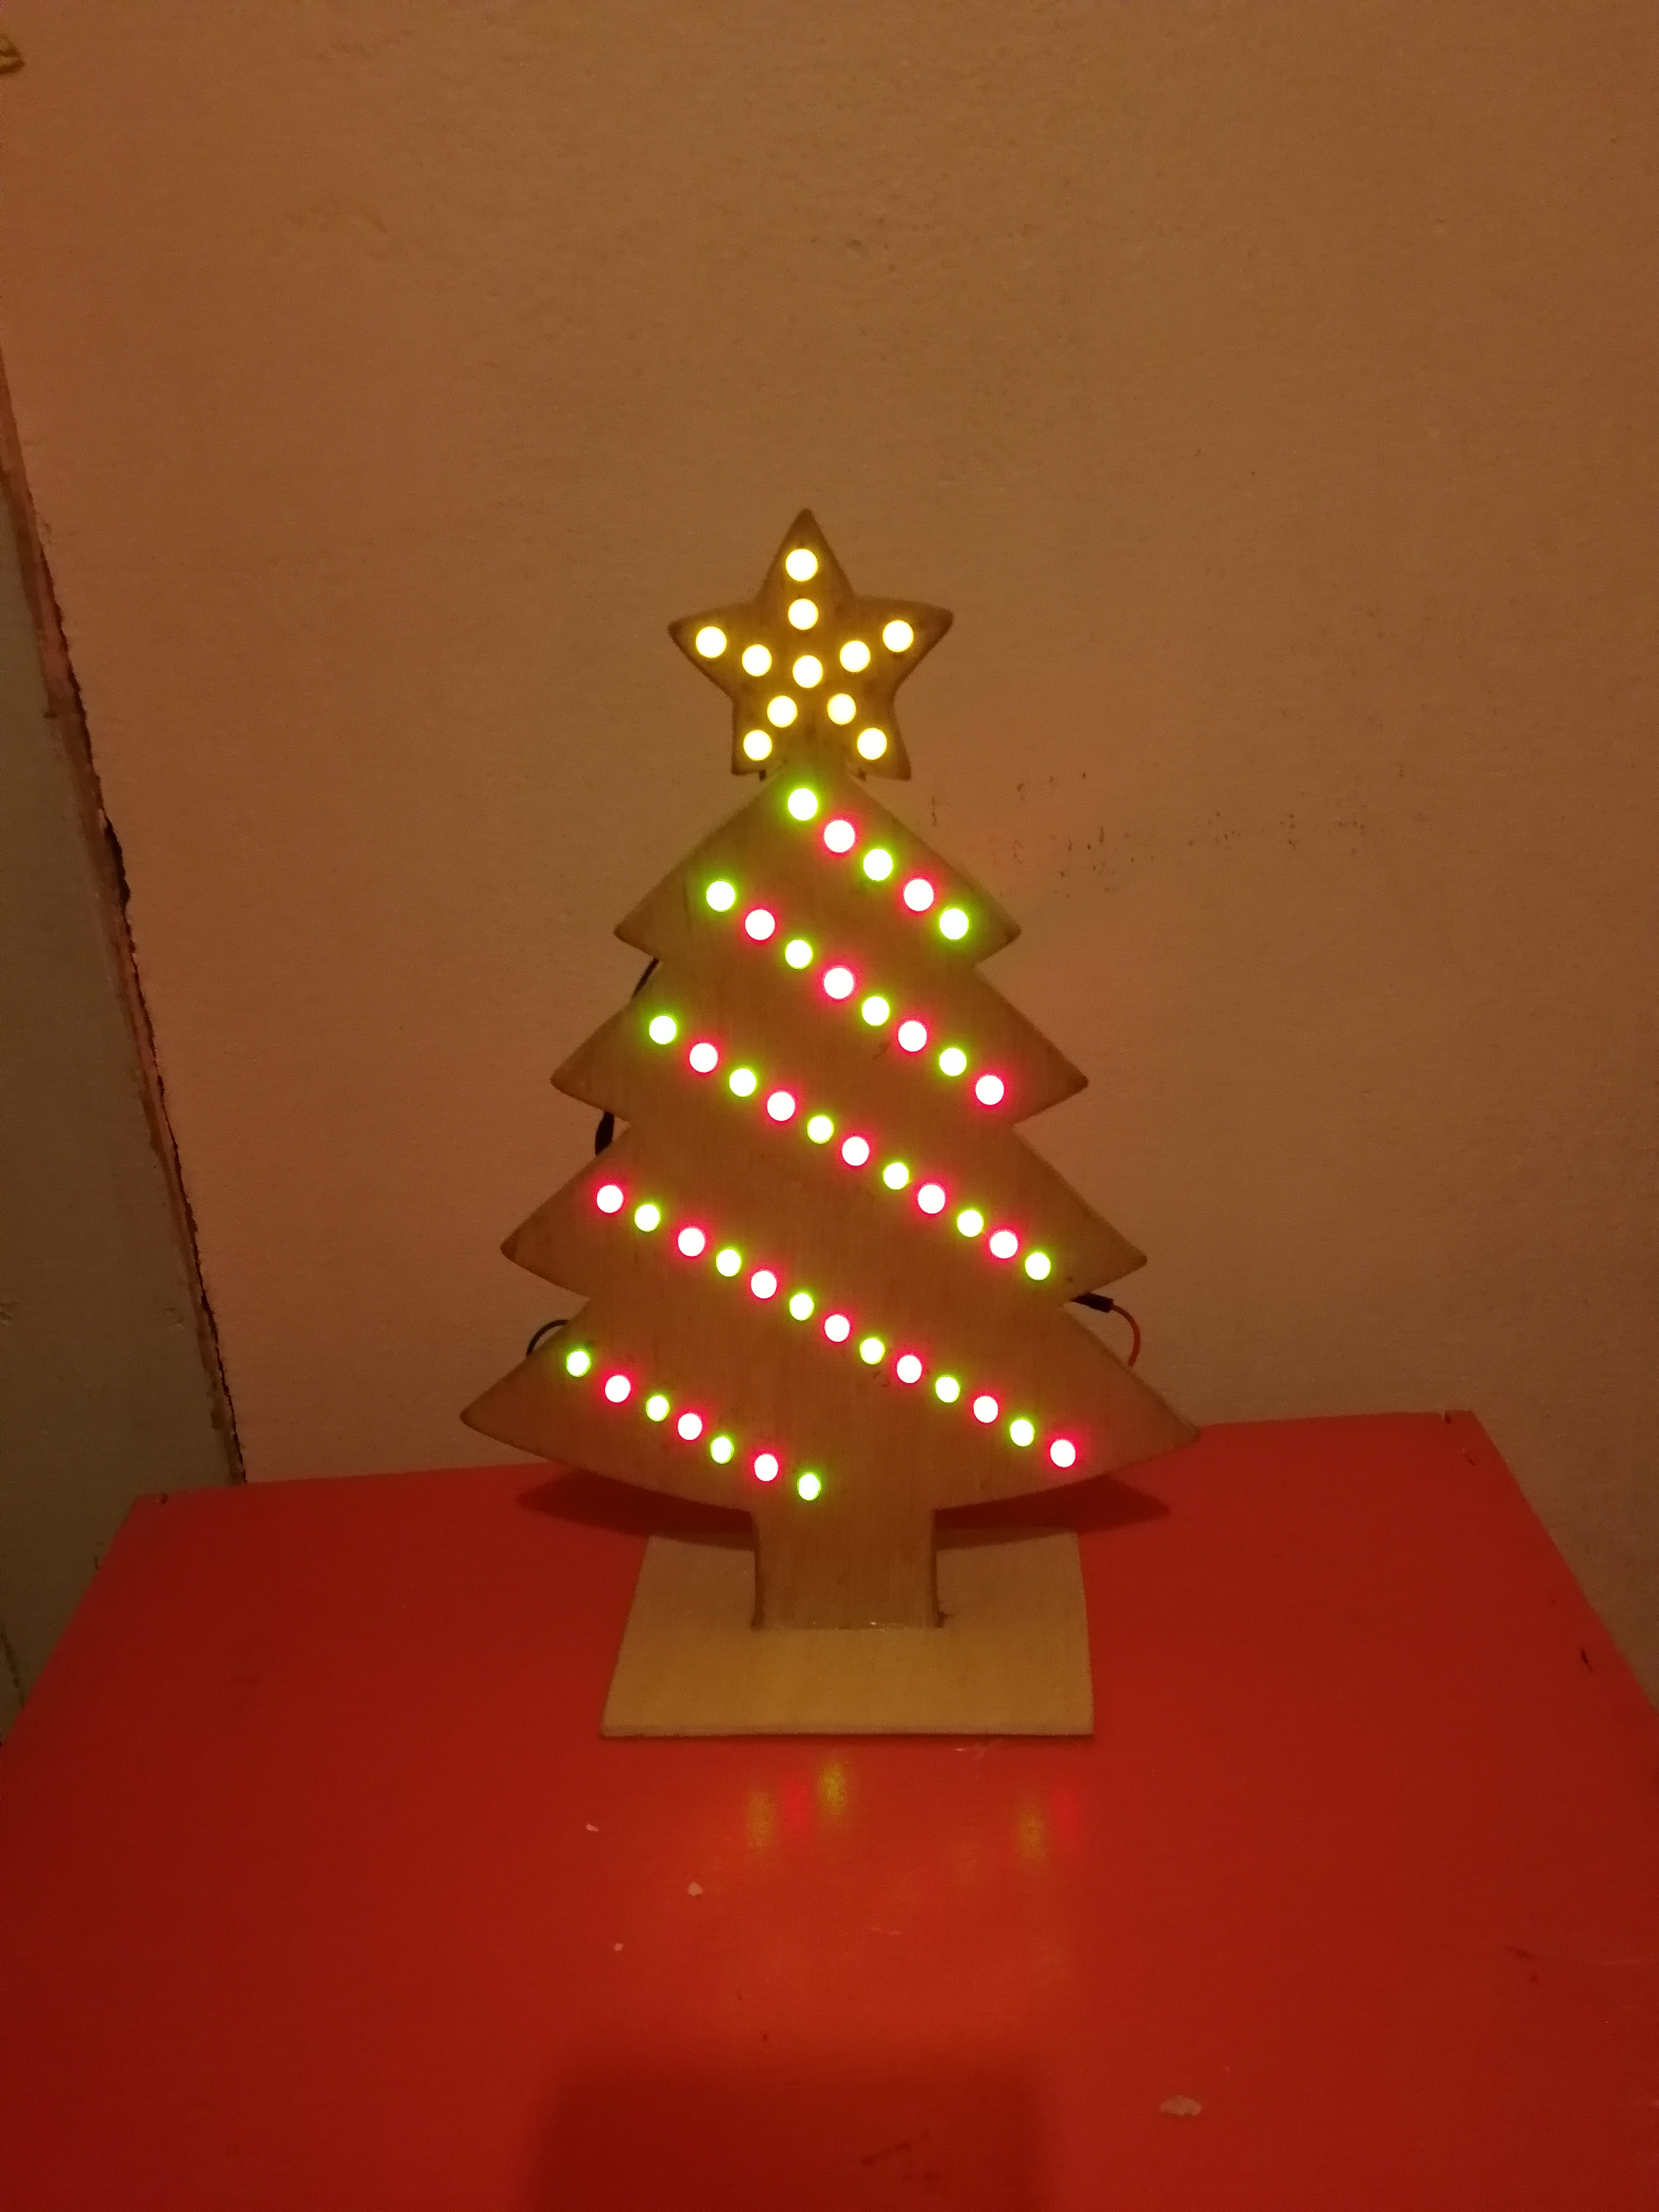
The main idea was to create a wooden Christmas tree decoration with embedded LED strips to simulate decorative lights wrapped around the tree, topped with a glowing star. Each layer of LEDs would be color-separated and independently controlled by an Arduino microcontroller, allowing me to design custom "Light Shows" using my own algorithms. This added depth and vibrancy to an otherwise simple wooden piece.
Electrical System and Circuit Structure Design
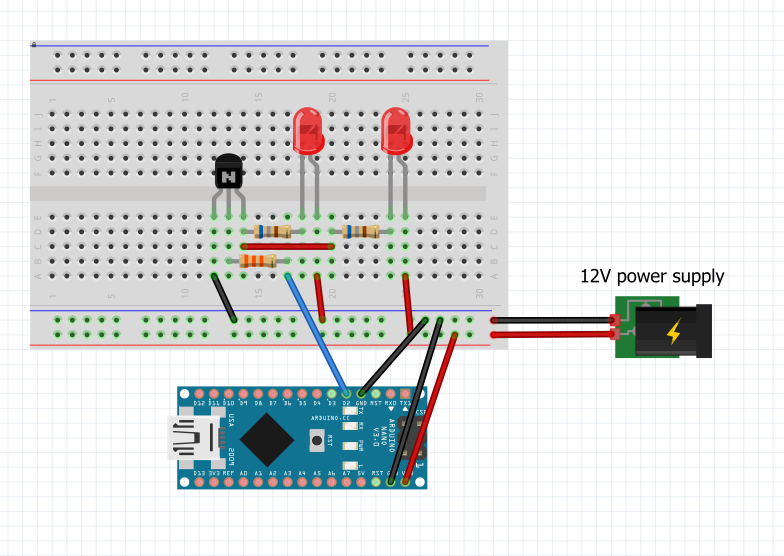
From an engineering perspective, the Arduino Nano has limitations regarding the number of Digital Input/Output (DIO) pins. Therefore, I designed a total of 13 circuit sets to cover the control (5 layers x 2 colors for the tree body) plus 3 sets for the star on top.
A significant challenge was that the Arduino's DIO pins could not supply sufficient voltage or current to drive a large number of LEDs simultaneously (typically, each pin can supply no more than 20-40mA). I therefore had to use an external 12V 1A power supply as the main power source and opted for NPN Transistors to act as electronic switches. These transistors receive low-voltage logic signals from the Arduino at their Base pins to switch the 12V power at the Collector pin to the LED sets.

Although 12V is significantly higher than the 5V from the Arduino, when driving very long strings of LEDs, connecting them all in Series would result in an accumulated Voltage Drop exceeding what the power supply could handle. I solved this by designing a Series-Parallel circuit: dividing the LEDs into smaller groups connected in series, and then connecting these groups in parallel before they connect to the transistor's Collector pin. This method reduces the overall voltage requirement but increases the Current Draw, which our 1A power supply could comfortably handle.
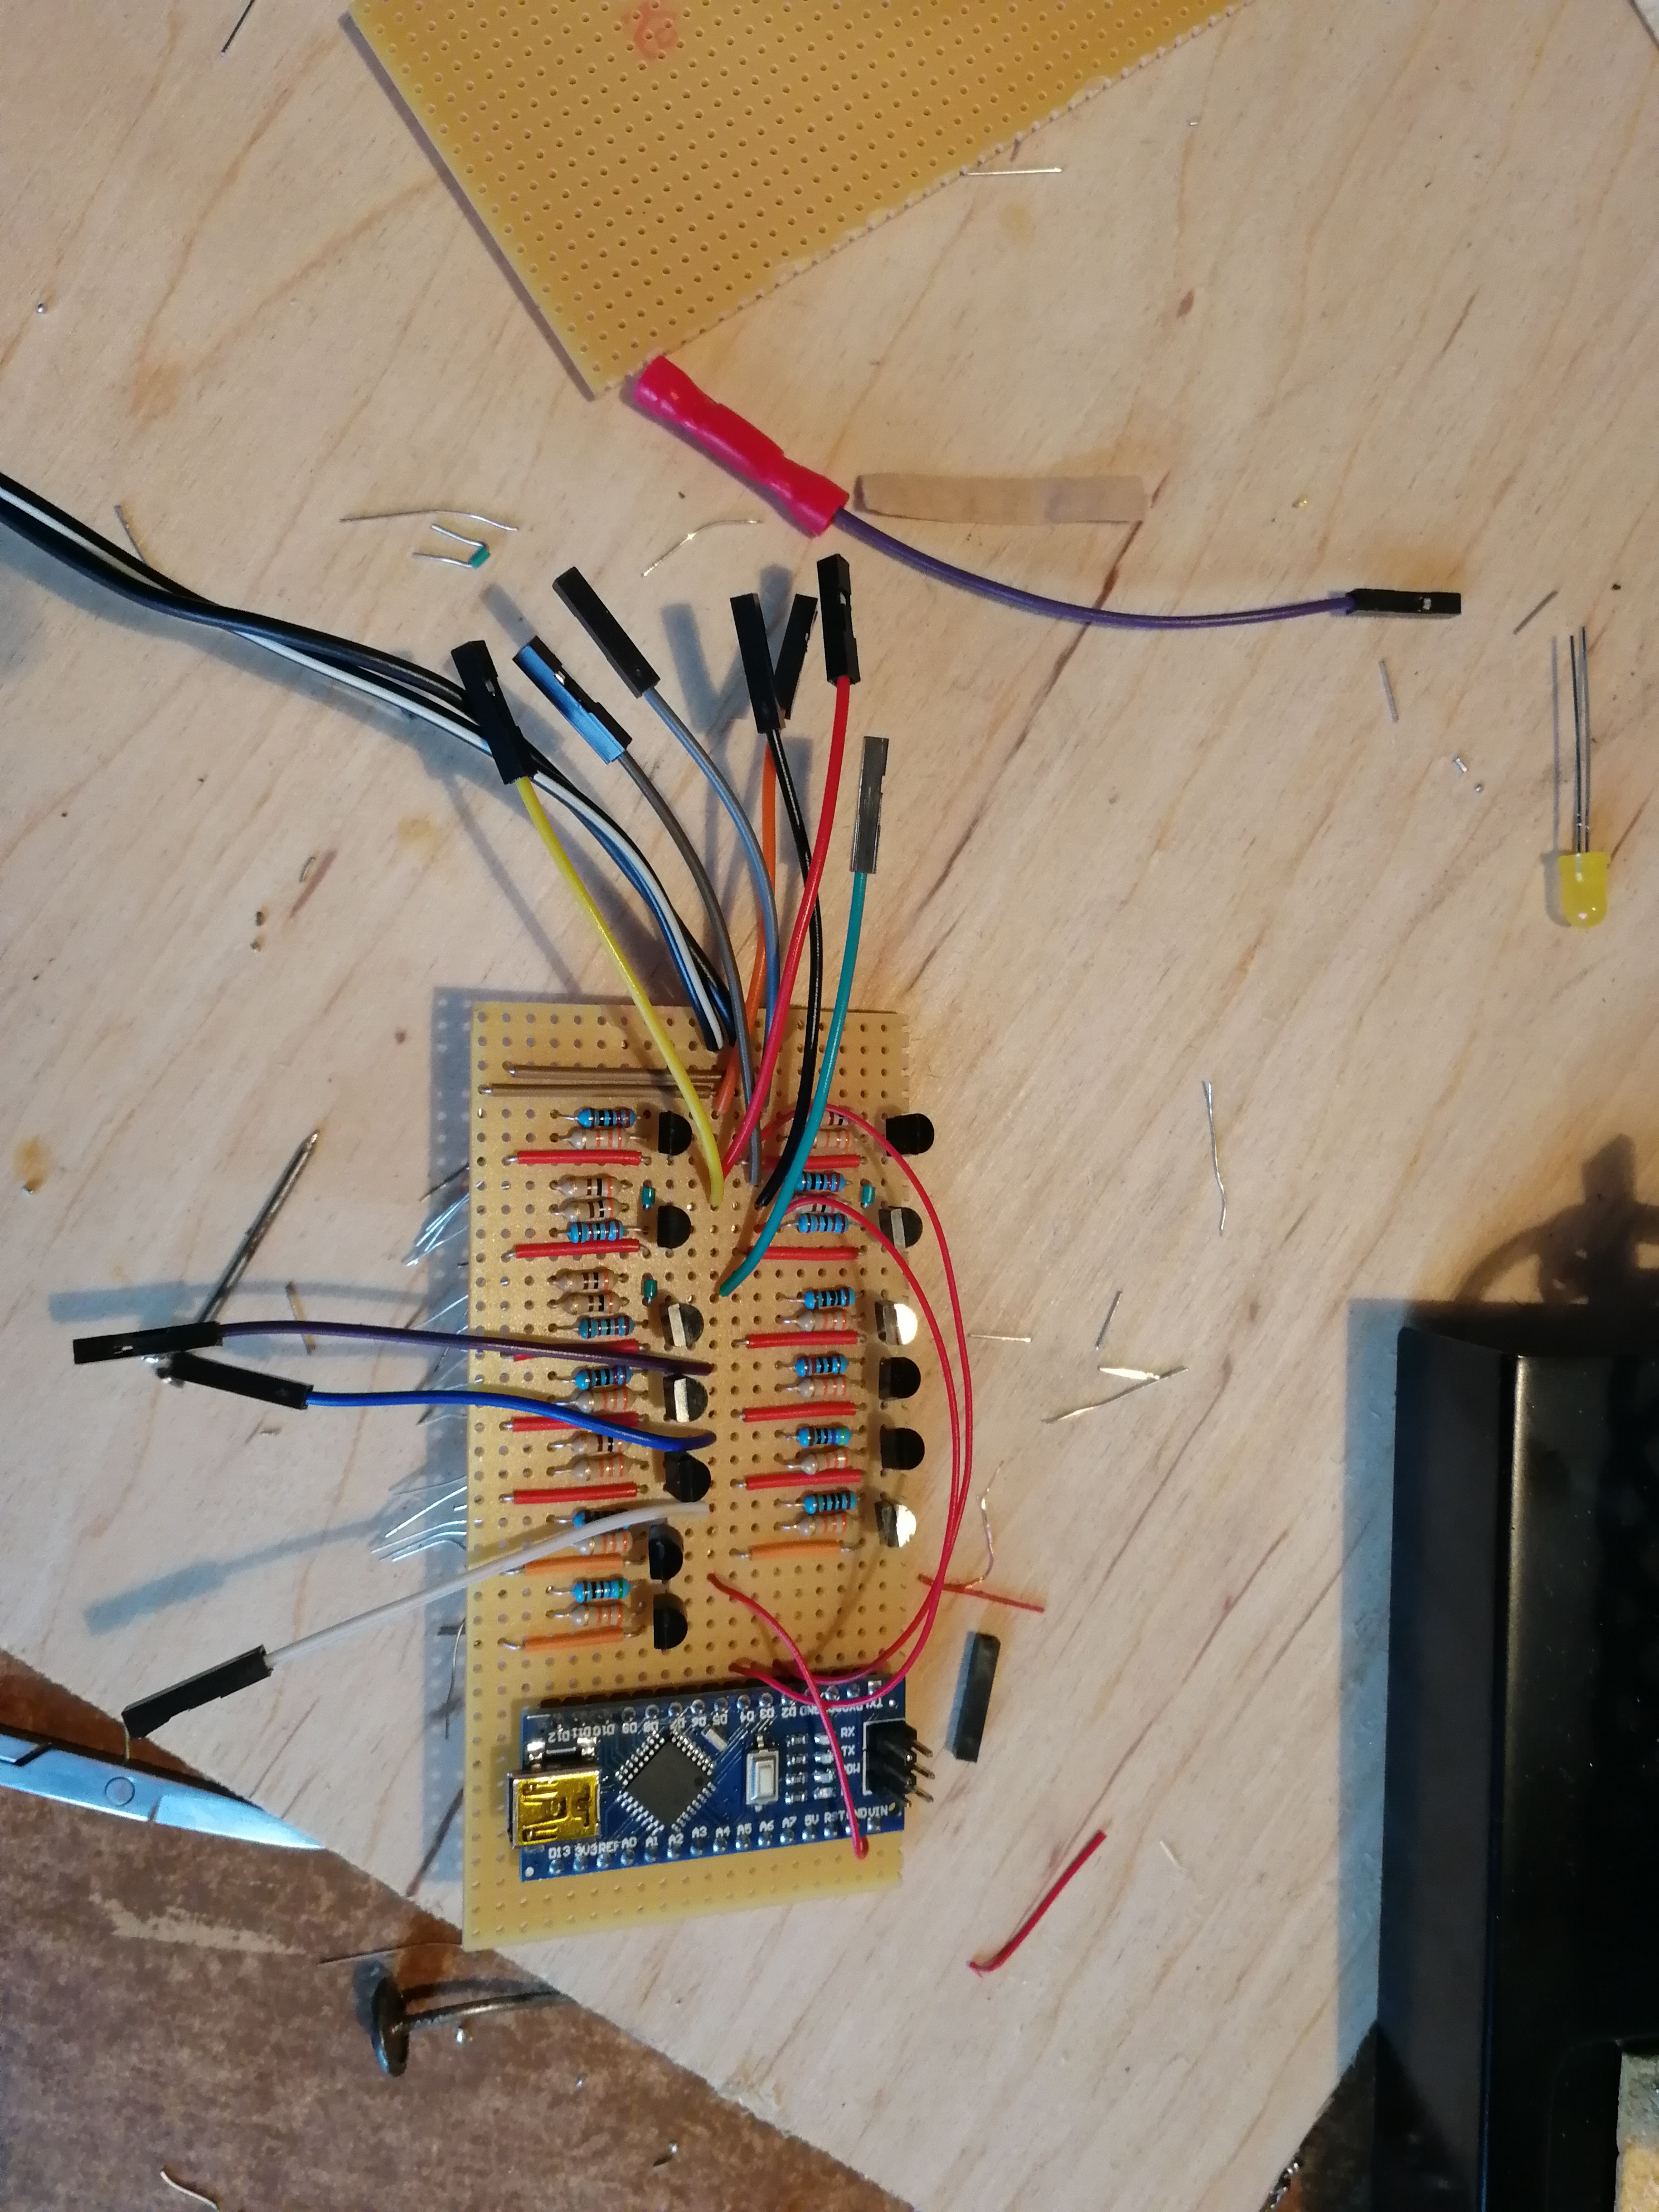
Once the electrical system was planned, I designed the component layout on a Pref-board, separating the 13 circuit sets into two columns: green rows at the top and red rows at the bottom. For neatness, I created horizontal "Power & Ground Stripes" mimicking a Breadboard layout to facilitate easy power connections to all parts of the circuit.

Wood Material Preparation Process
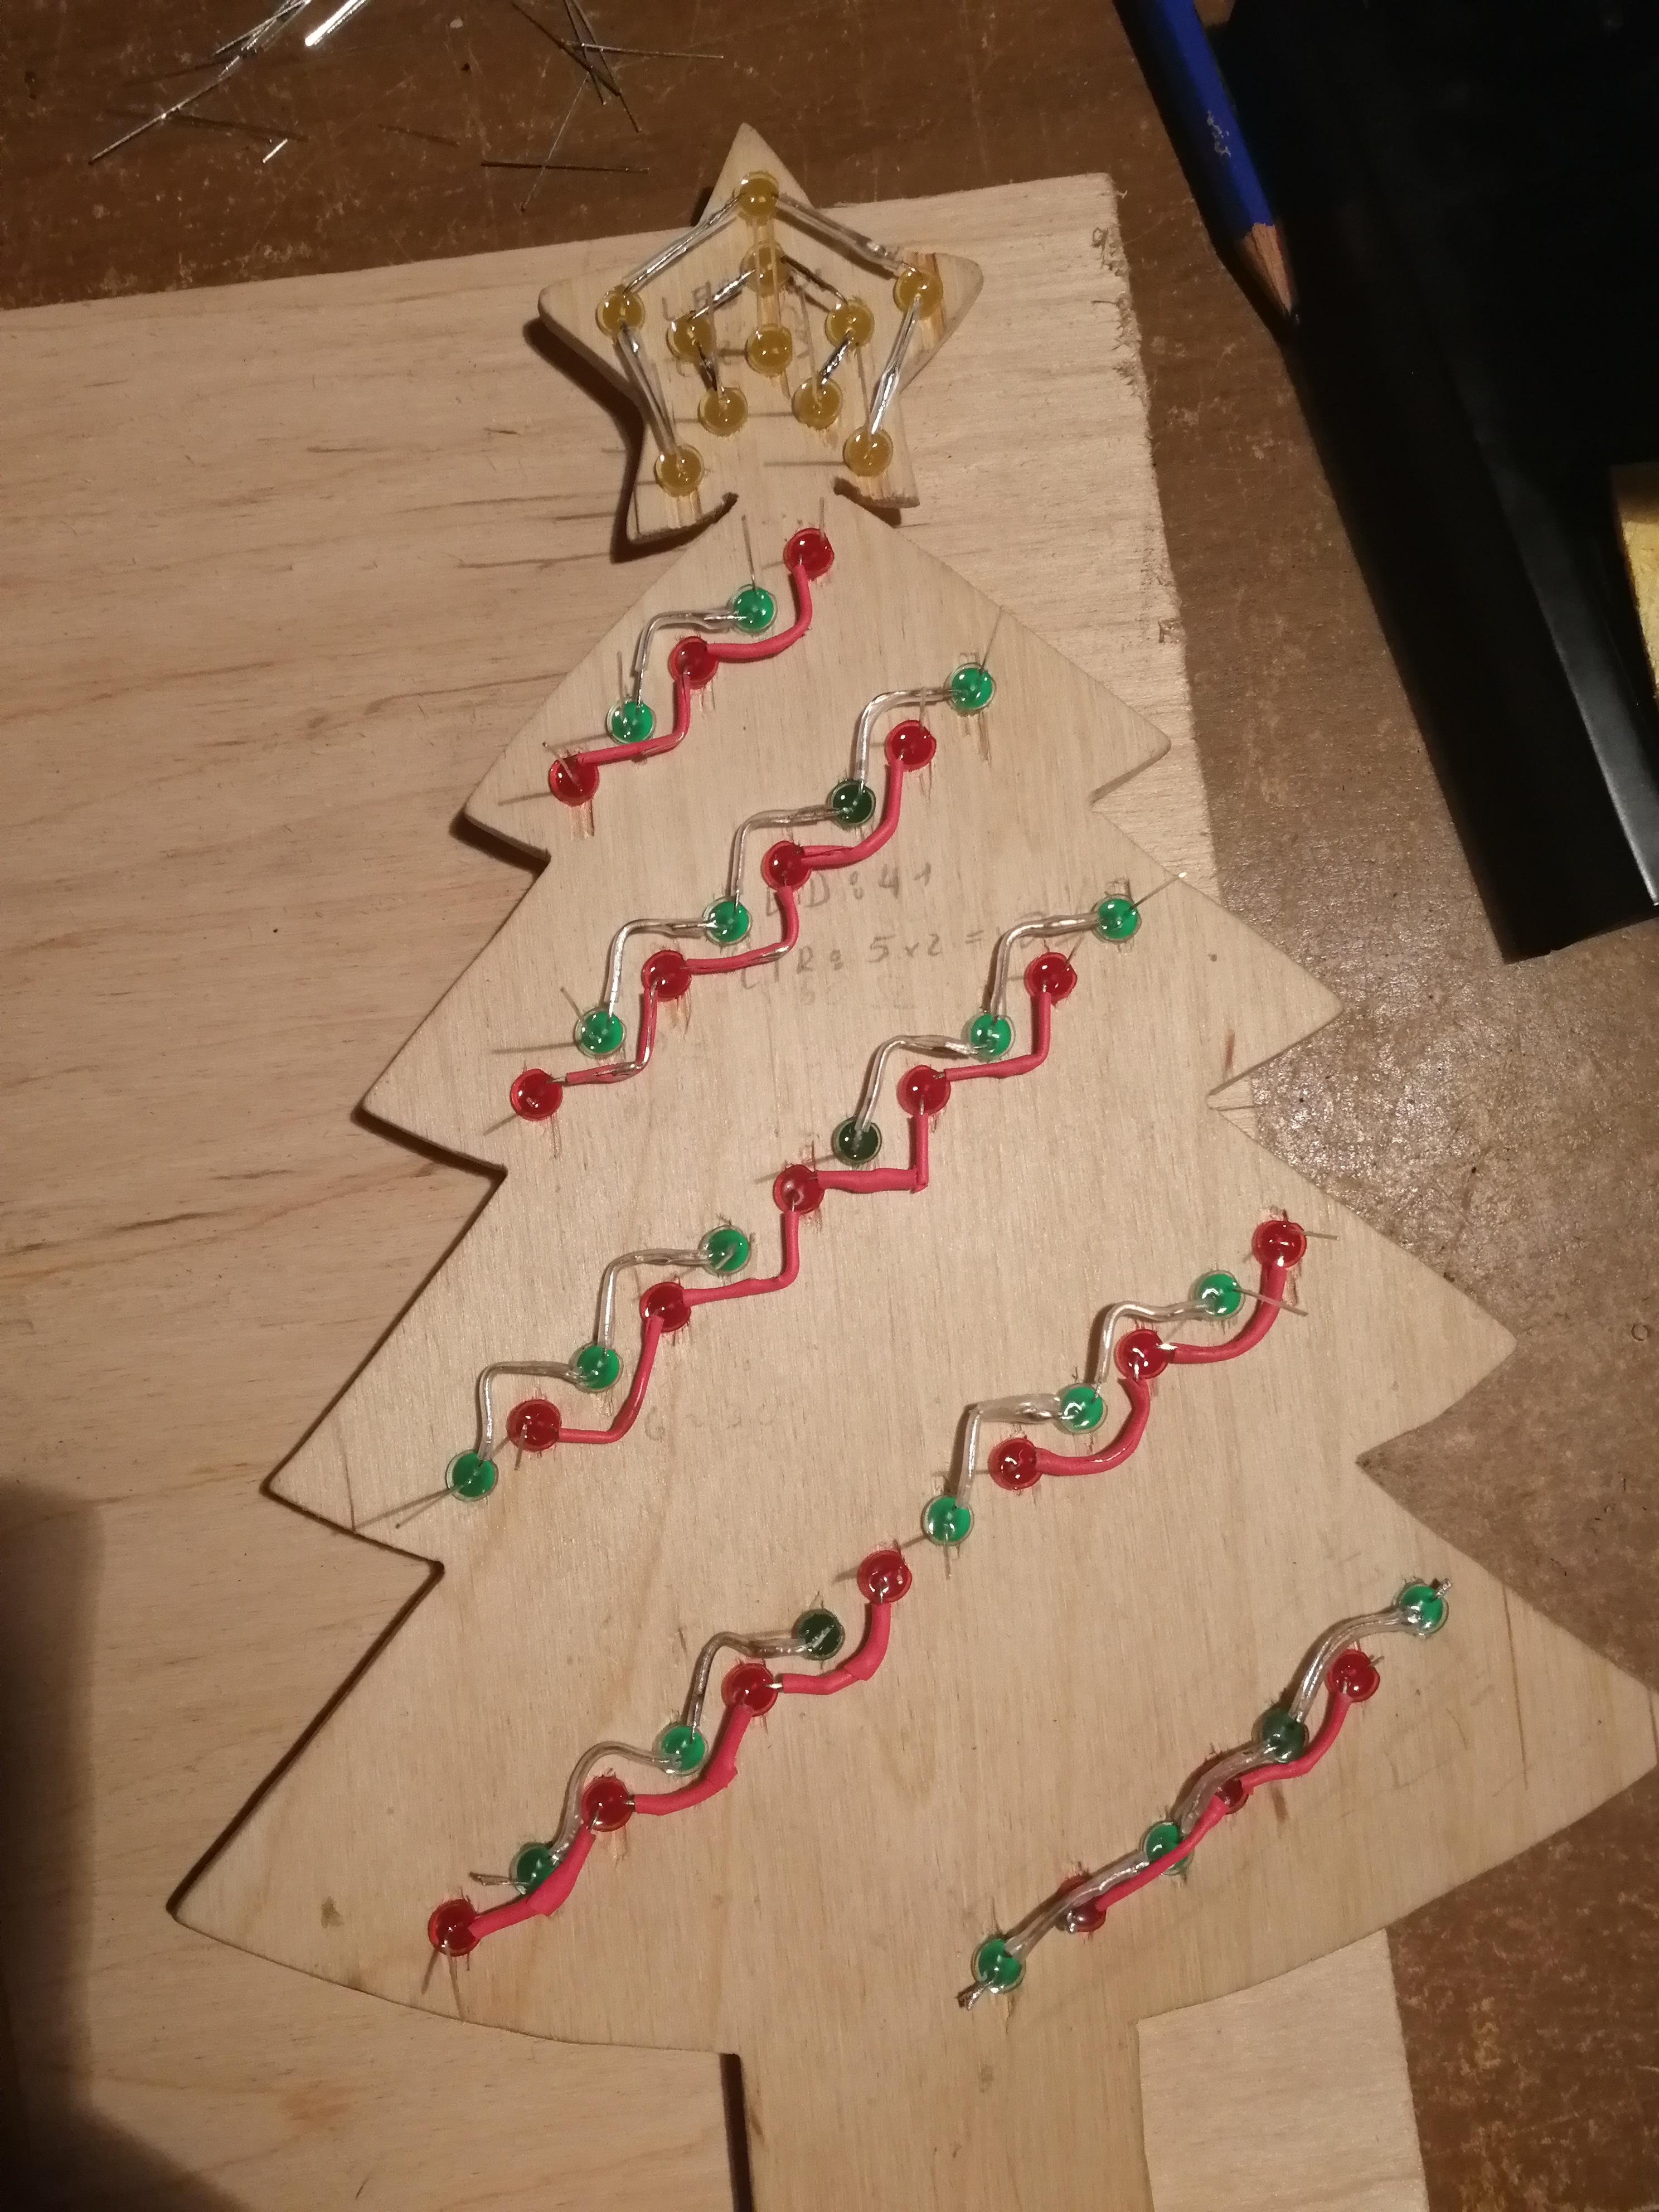
For the woodworking, I started by cutting the wood into a Christmas tree shape and creating a stable base. Then, I used a drill to make holes at the designed positions to embed the LEDs into the wood. This step required precision to ensure the light output was symmetrical and aesthetically pleasing.
Wiring and LED Soldering
I decided to use the LED leads themselves for connections instead of additional wires, as their length was sufficient to bend and solder them directly together. This helped keep the back of the tree cleaner. However, to prevent Short Circuits, I covered all critical solder joints with Heat Shrink Tubing.
Control Board Assembly
The most time-consuming part was soldering onto the Pref-board. I assembled the components according to the planned schematic, connected signal wires from the Arduino to the Base pins of the transistors via current-limiting resistors, and routed wires from the LED circuits to the board. In some areas with high wire density, I used a Hot Glue gun to help secure the connections and provide additional electrical insulation.
Final Assembly and System Testing
After the long process, it was time to assemble all the parts. I mounted the control board to the back of the tree, connected the wires from all LED strips to the prepared ports, and started writing the test code.
Initially, I encountered some hardware issues, such as Cold Solder Joints, which were due to my inexperience at the time. But after thorough Debugging and circuit tracing, the Christmas tree finally lit up as intended. The flickering lights through the wood gave a warm feeling and made all the effort truly worthwhile.