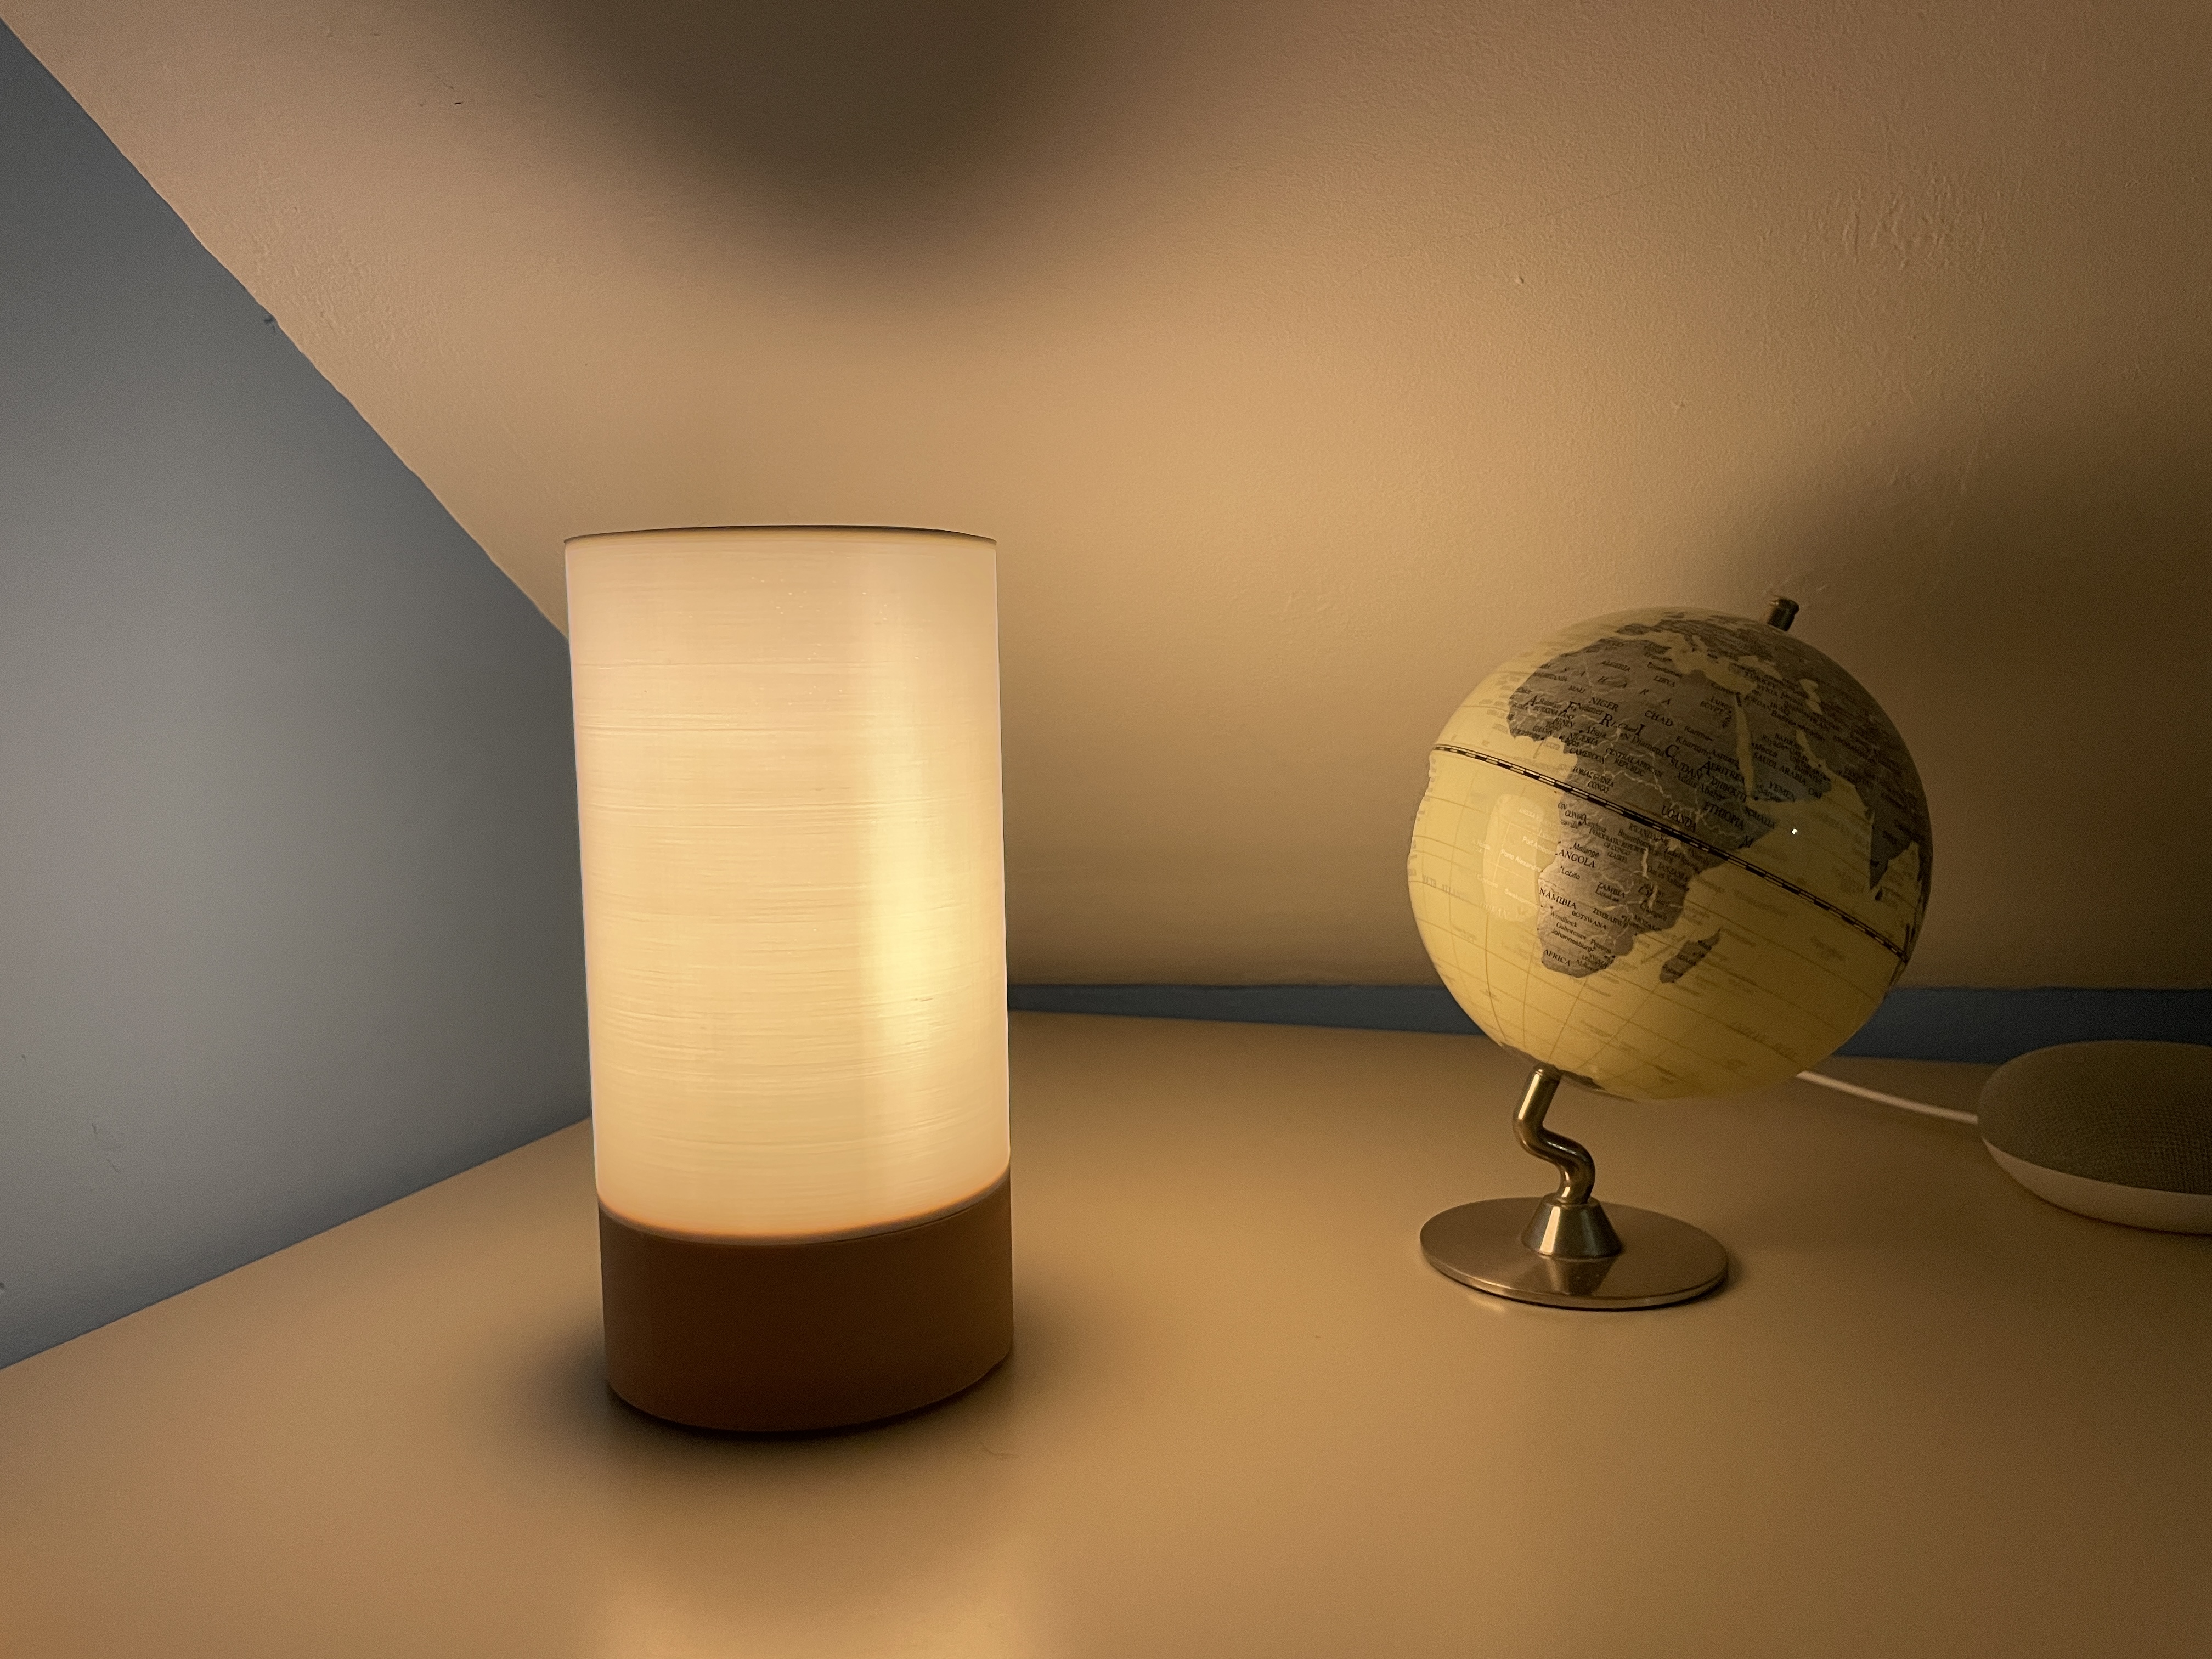
The Lamp.
A minimal and probably overkill lamp, based on the microcontroller ESP8266 and MHZ-19B Co2 sensor that allow us to have controll over the Co2 levels in our room, kitchen...
This lamp is a good way to introduce yourself into the Arduino and 3d printing world, while at the same time you build a quite decorative and cute lamp.
PS. This is my first project with arduino.
Features:
- Controllable brightnes on app
- Co2 readings through app (chart)
- Scheduling option (this allows us to tell the lamp when to turn on)
- Co2 mode integrated with the lamp that tell us the Co2 levels based on its color
Project Perspective
Co2 Lamp is a sophisticated exploration of health technology and IoT aesthetics. By focusing on the essential building blocks—the MH-Z19B sensor and an ESP8266—you'll learn how to communicate and monitor your air quality using a specialized software logic and a robust wireless setup.
Technical Implementation: NDIR Gas Sensors and RGB Feedback
The project reveals the hidden layers of simple air-to-light interaction:
- Identification layer: The MH-Z19B NDIR CO2 Sensor acts as its infrared eye, measuring the concentration of carbon dioxide in your room via its UART Serial interface.
- Conversion layer: The ESP8266 uses its I/O and the MHZ-19 library to decode the gas level (ppm) and performs the math to find a "Safe" or "Stuffy" status.
- Visual Interface layer: A SK6812 RGB LED Strip provides high-definition visual feedback. The lamp's color (e.g., Green = OK, Yellow = Warn, Red = Vent) indicates air quality.
- Wireless Interface layer: The ESP8266 connects to the Arduino IoT Cloud, allowing real-time charting and control of the lamp via the mobile app.
- Capacitive Control layer: A TTP223 Touch Sample Module provides a high-performance way to manually turn "ON" or "OFF" the lamp with a simple touch.
Hardware Infrastructure
- ESP8266 NodeMCU: The core WiFi-enabled micro-controller that manages high-speed data sampling and coordinates the cloud and LED tasks.
- MH-Z19B CO2 Sensor: Provides contactless and reliable CO2 monitoring for your living spaces.
- RGB LED Strip (NeoPixels): Provides high-power and colorful light for the "Air Status" report.
- TTP223 Touch Sensor: Provides a digital input for the lamp's manual override.
- 3D-Printed Body: Acts as the high-performance mechanical housing for the environmental sensing circuit.
- Micro-USB Cable: Used to program the ESP8266 and provide primary power for the controller.
Software:
The lamp uses Arduino Cloud MQTT service in order to controll the lamp trough internet and you will need some libraries (Think of them as mini-programs that you can include in your own Arduino projects to make things work the way you want) in order to be able to compile the program.
- MHZ-19 ( Jonathan Dempsey)
- OneButton ( Mattias Hertel)
- Neopixel (must use v1.8.4) ( Adafruit)
Building:
The base of the lamp was printed out of wood filament (recomendable) and the rest of the lamp was made out PLA (the .stl files are down in this project)
Once you have everything printed, you'll only need to polish the parts with some sandpaper and it'll be ready to go.
Then comes the electrical stuff, components which are on the list below. For the wiring you have two options:
- 1st option. You can choose to use simple cables by soldering them and then slam them into the base of the lamp. (The connections for this are in a .pdf called schematic)
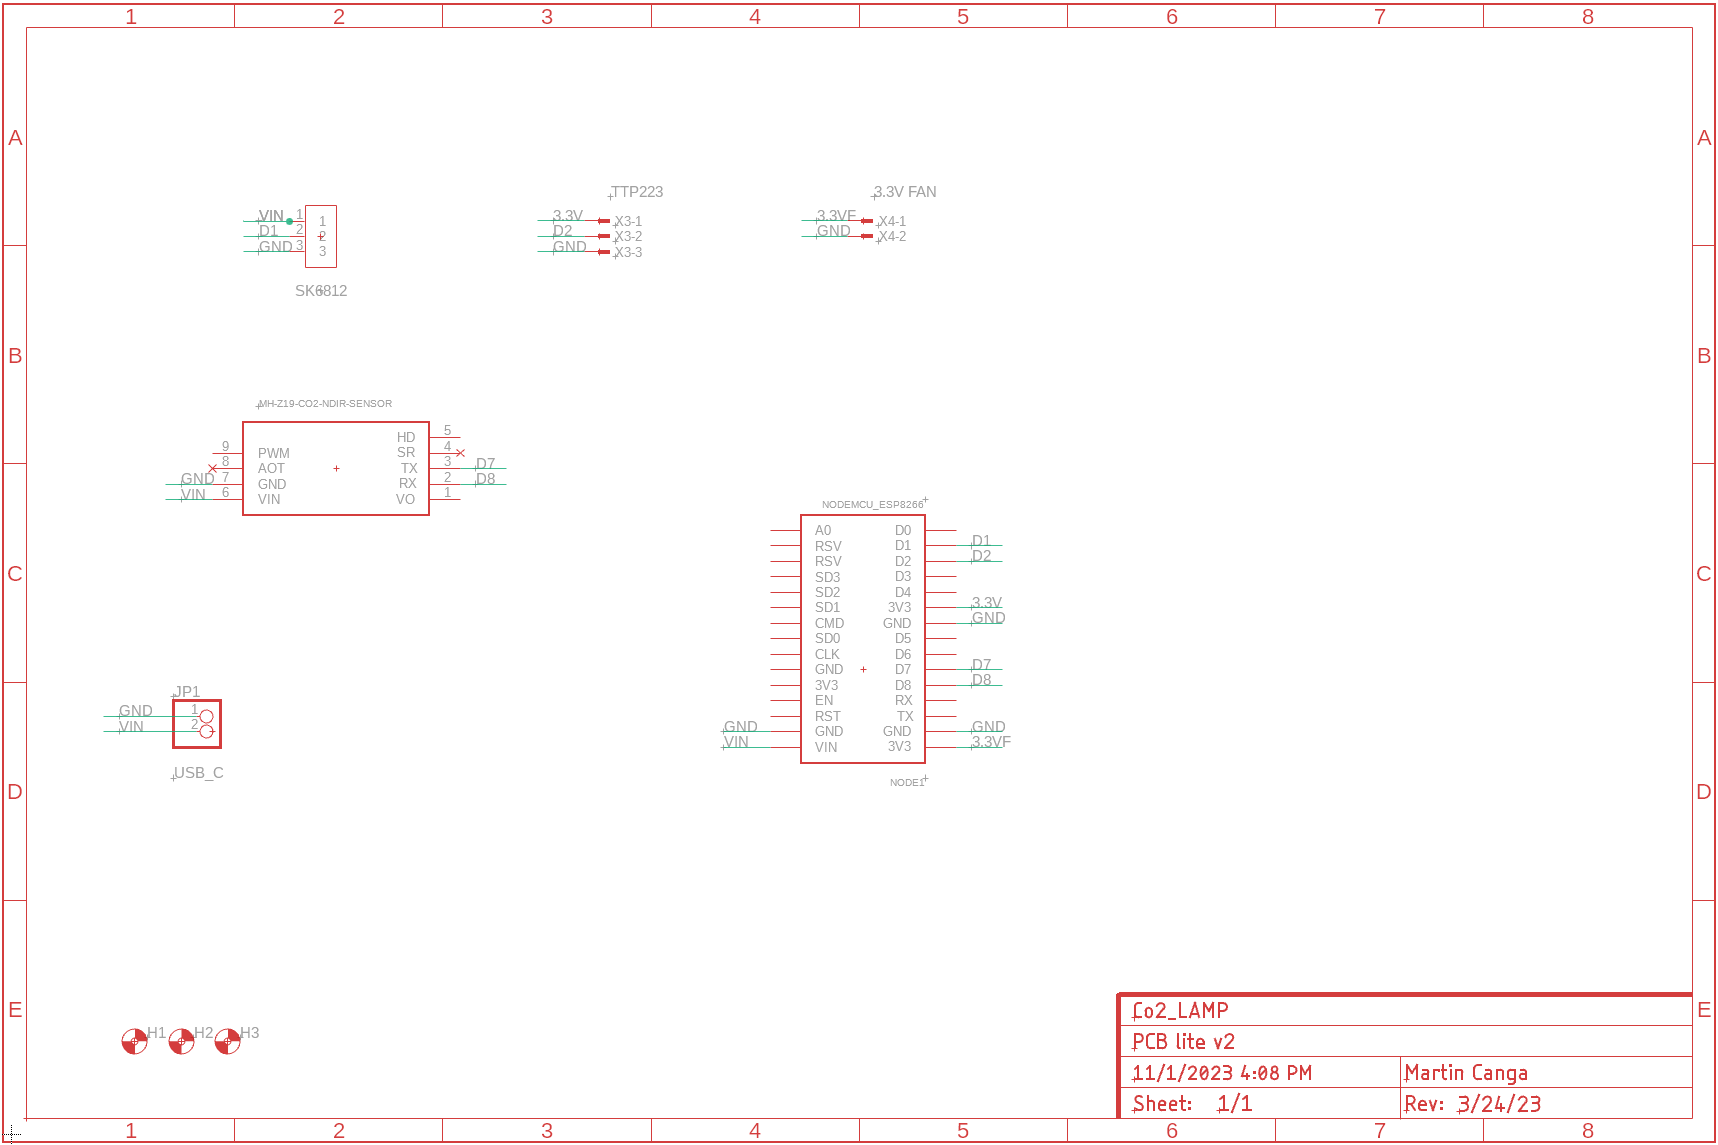
- 2nd option. Order a PCB (expensive and overengineered option don't do it) you can download the gerber files in the folder of the repository called desing files

Air Monitoring and Interaction Step-by-Step
The CO2 lamp monitoring process is designed to be very efficient:
- Initialize Hardware: Correctly seat the ESP8266 and MH-Z19B sensor in the 3D-printed base and prepare the ESP for action.
- Setup Cloud Sync: In the `setup()` function, initialize the WiFi connection, the IoT Cloud variables, and the Neopixel strip.
- Internal Dialogue Loop: The ESP8266 constantly performs high-performance gas sampling and updates the lamp color and cloud chart in real-time.
- Visual Feedback Integration: Watch as your lamp automatically becomes a rhythmic visual signal, pulsing and following the air quality settings.
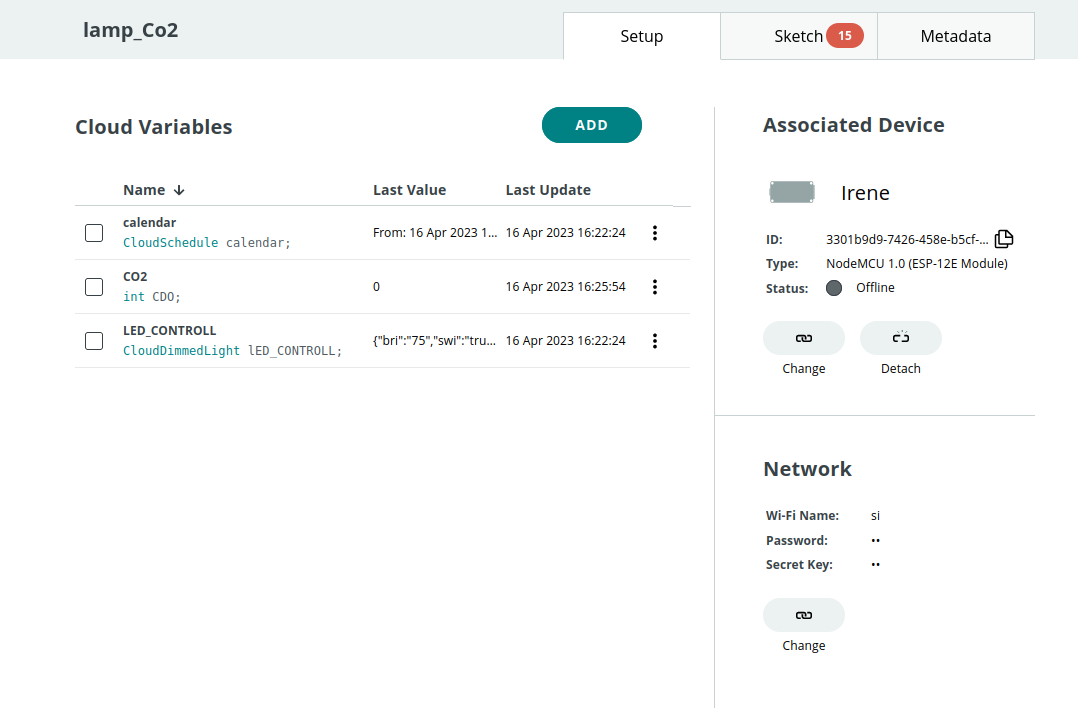
Once you have decided how are you gonna organize this project the next step is the software, and for this you will have to use IoT Clod (from Arduino)
- 1st. You'll have to create a "Thing" an associate it with your board (esp8266)
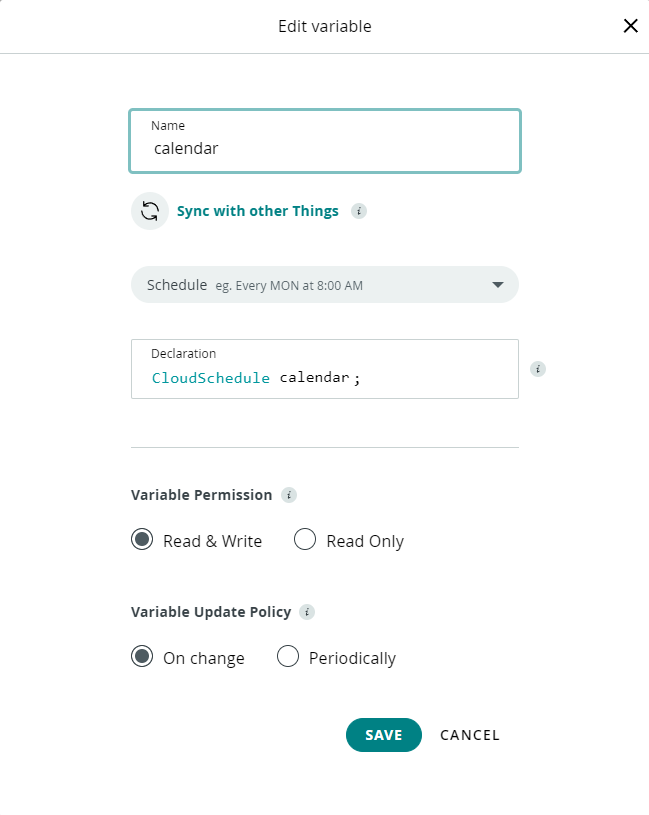
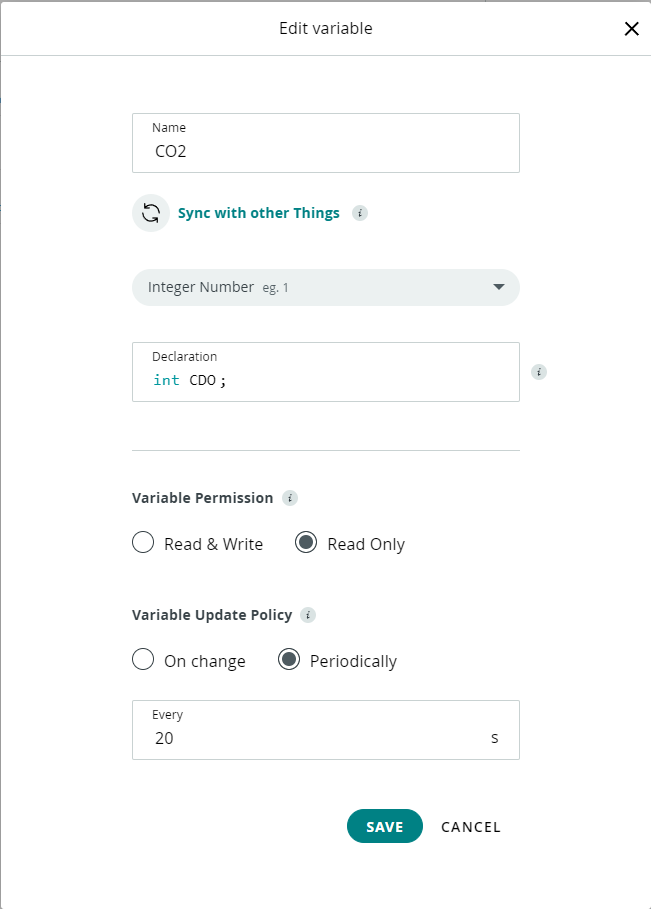
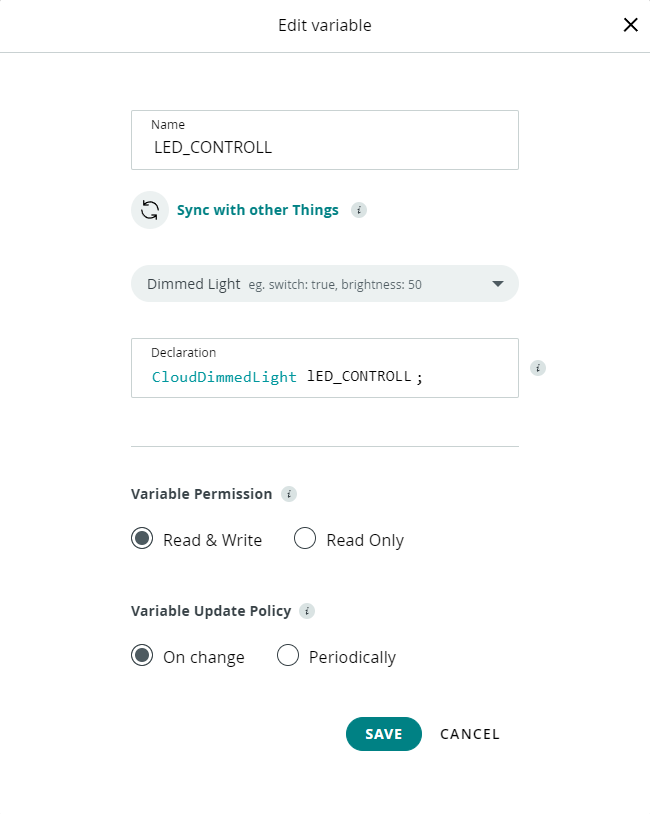
- 2nd. You'll have to add the mandatory variables in the Arduino cloud "Thing" in order to make the code work properly. (See in pictures)
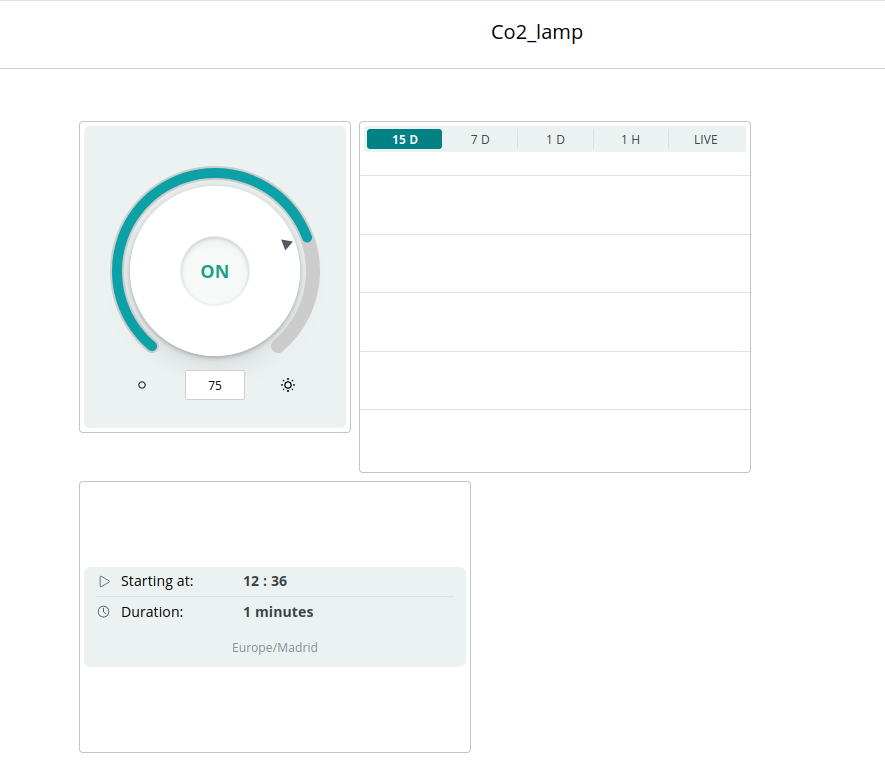
- 3rd. You'll have to create a dashboard and associate it with the variables from the "Thing" that you created right before.
- 4th Modify the given code and add in thingproperties your wifi, password, device ID and secret key.
Future Expansion
- OLED Identity Dashboard Integration: Add a small OLED display on the lamp base to show the "Current CO2 (ppm)," "Temperature," and "Humidity."
- Multi-sensor Climate Sync Synchronization: Connect an MQ-2 or MQ-135 sensor to build a truly autonomous AIR monitor that also detects "Gas Leaks" and Smoke.
- Cloud Interface Registration Support Synchronization: Add a specialized web-dashboard to precisely track and log the air quality history from your smartphone wirelessly over WiFi.
- Advanced Velocity Profile Customization Support: Add a specialized "Ventilation Alert" (Buzzer) to have the lamp follow a safety protocol and notify you when CO2 is too high.
Co2 Lamp is a perfect project for any electronics enthusiast looking for a more interactive and engaging health-tracking tool!