Introduction
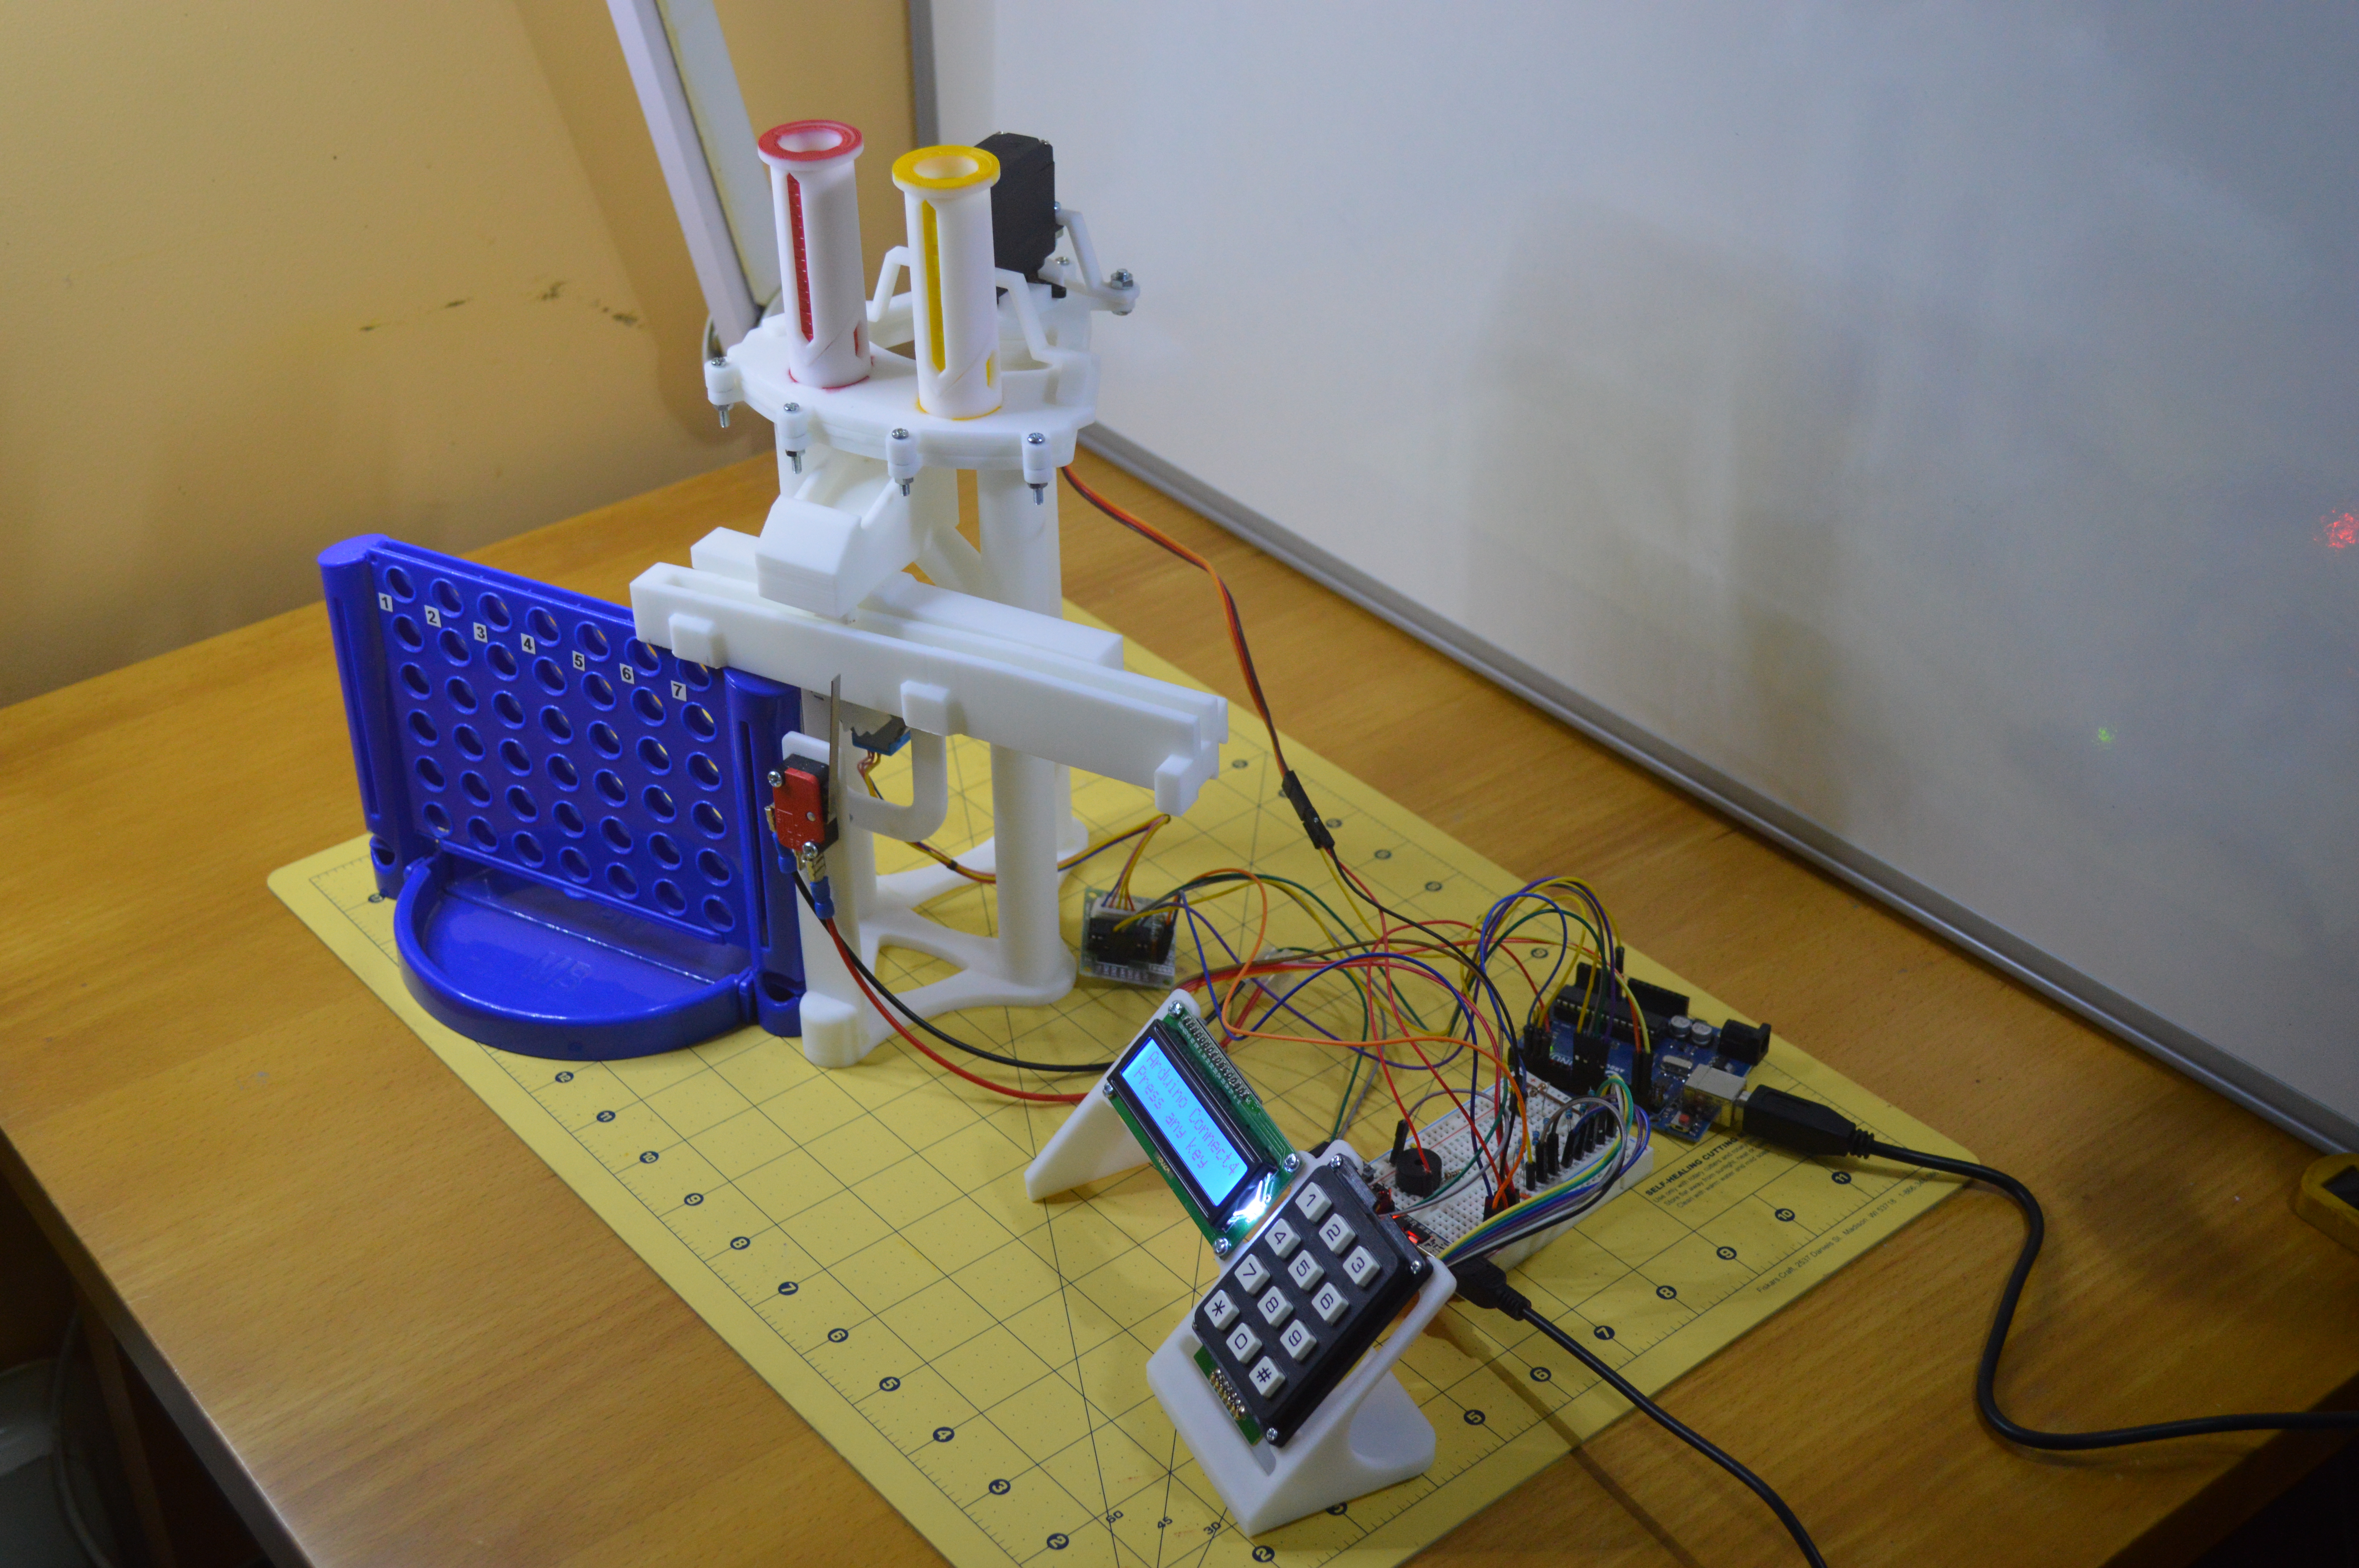
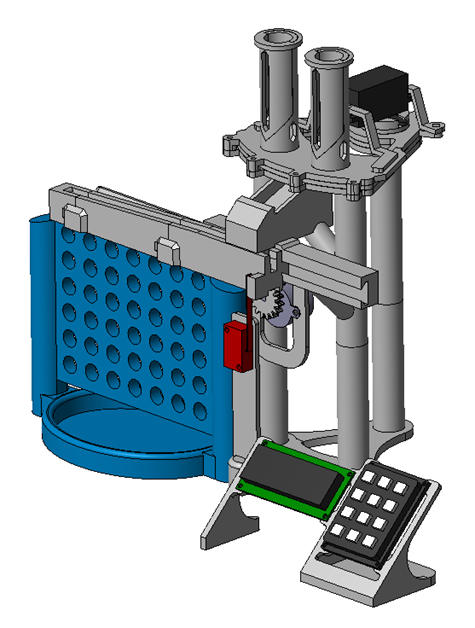
These instructions describe the making, assembly and workings of a Connect 4 game created for use with an Arduino microcontroller. The game consists of a purchased game board, 3D printed parts and electrical components to create a machine that plays the game, it is controlled by the Arduino and played by computer or human players.
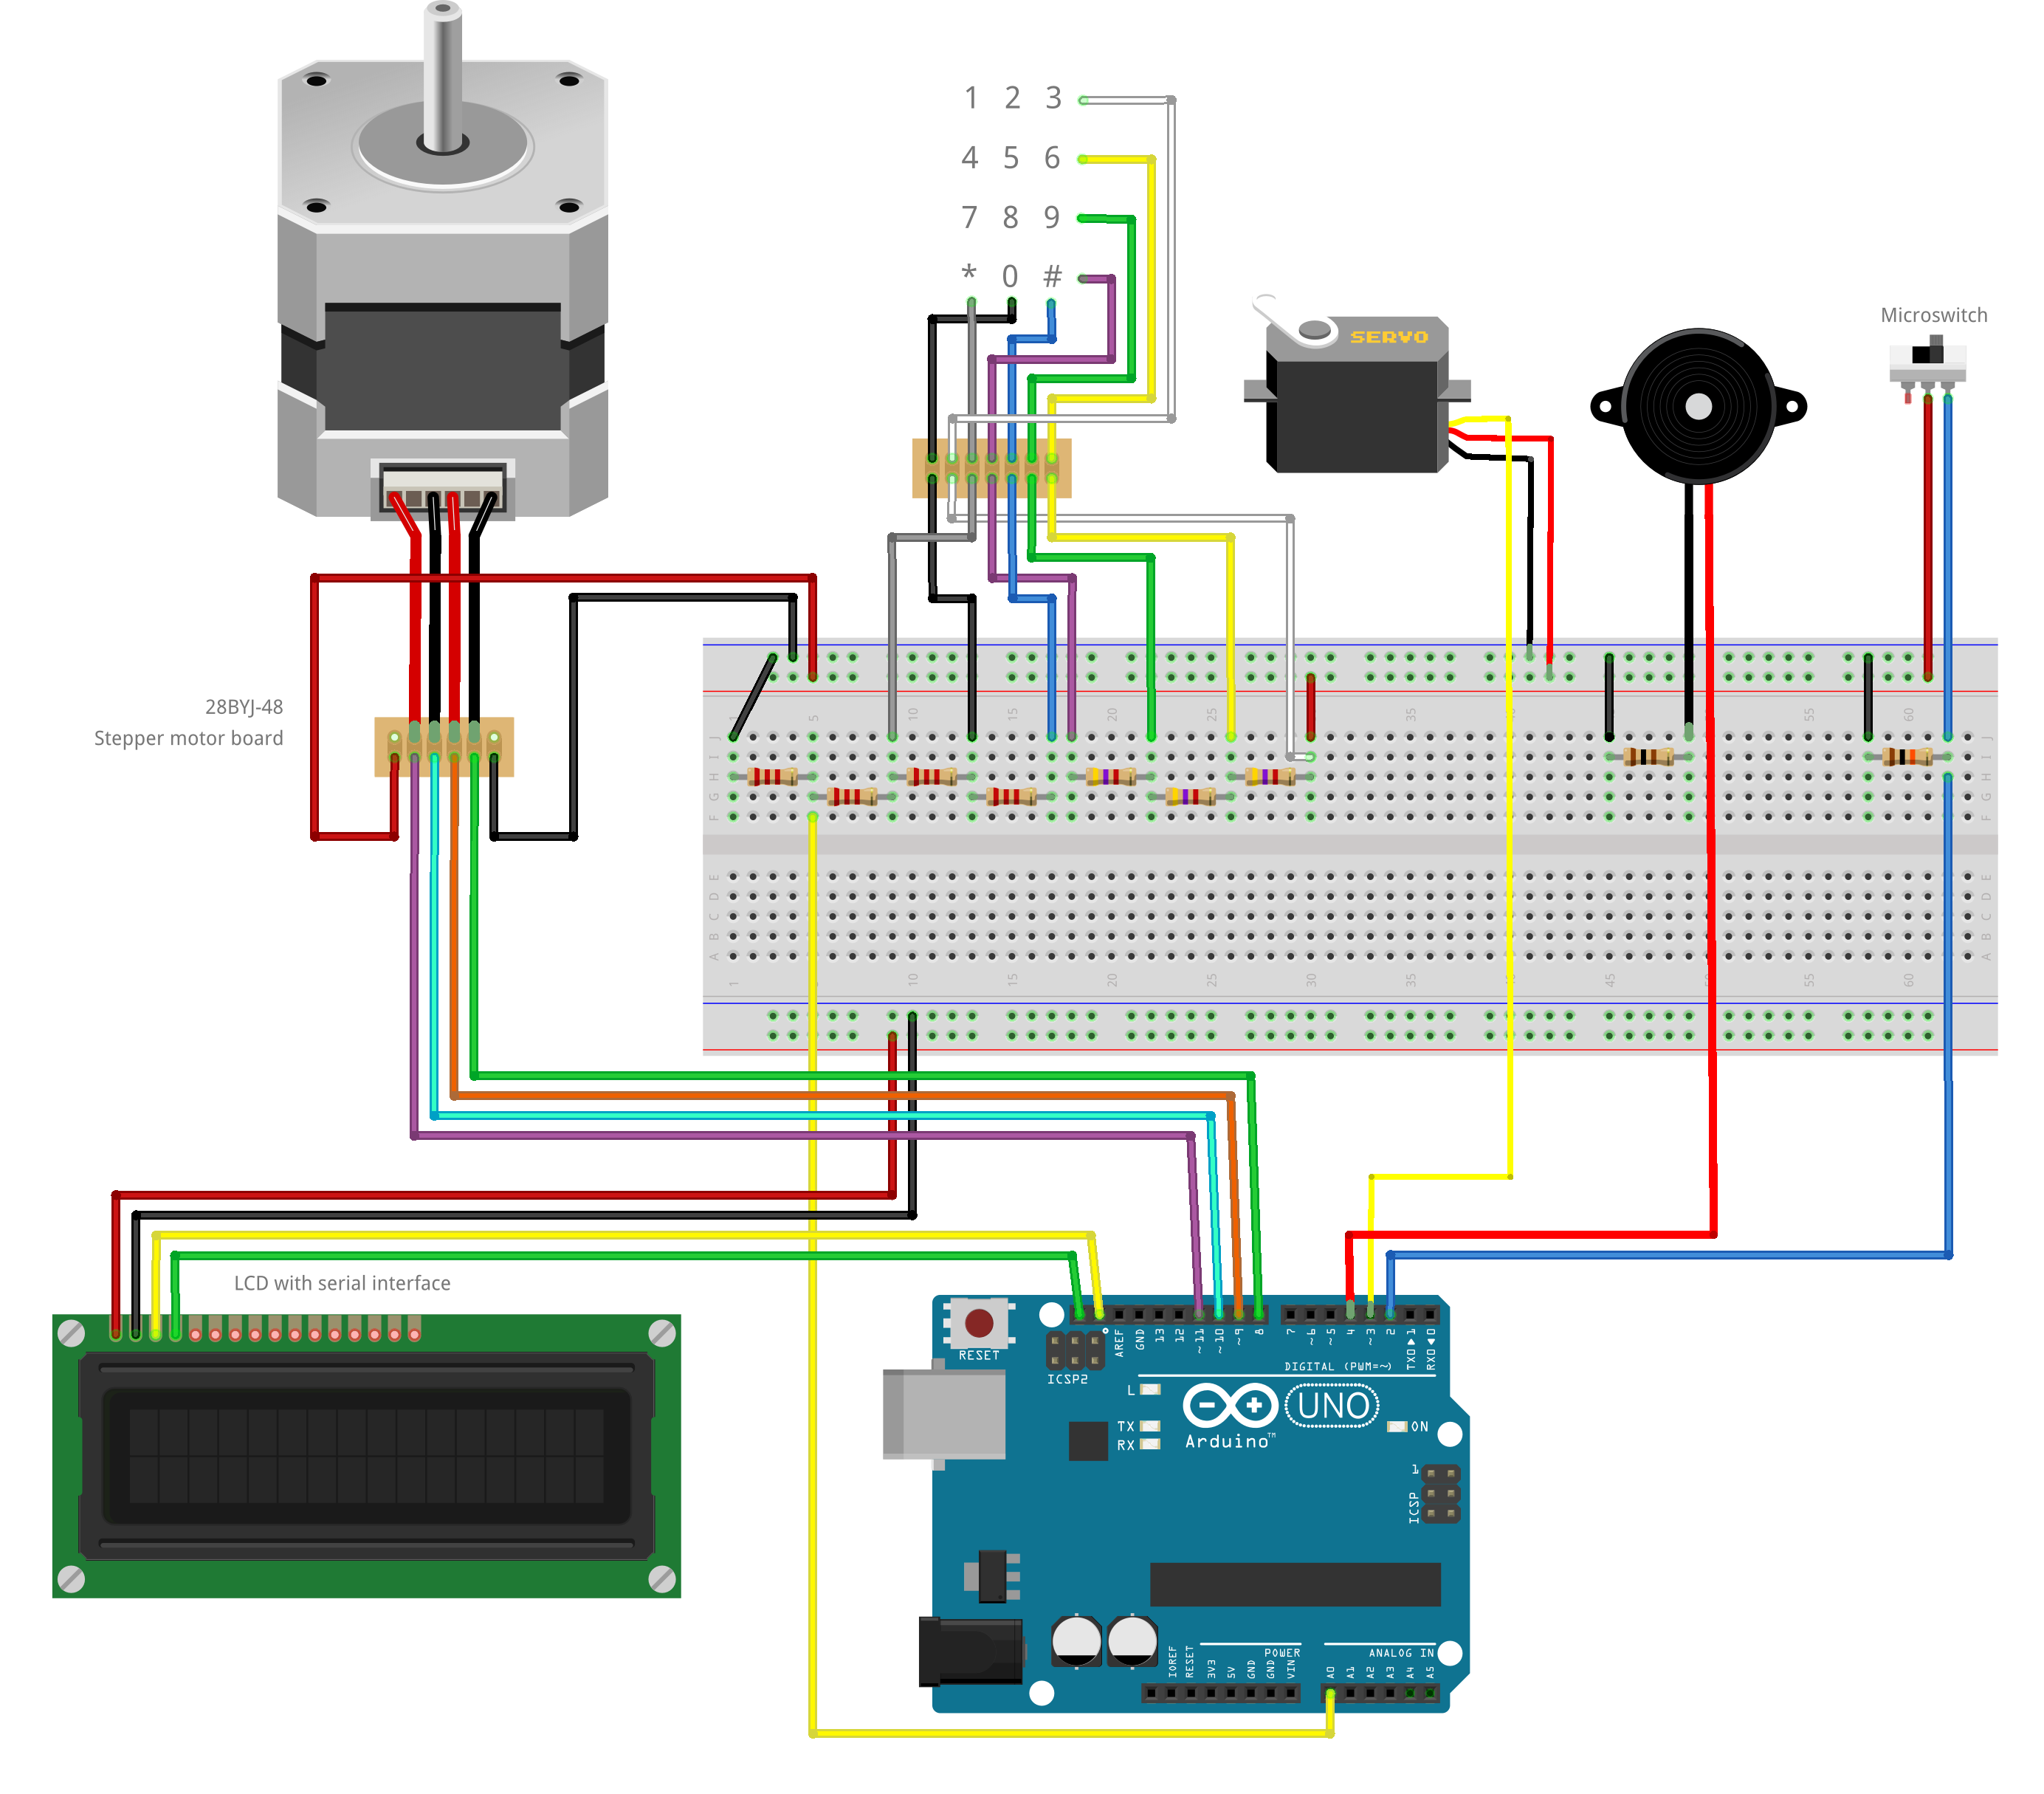
Wiring
There are 6 individual circuits involved in this project,
Each of these is described widely on the internet and so the details will not be repeated here.
A circuit diagram that suits my particular hardware is included. Not all my hardware is available in Fritzing, so some elements are representations of the components used.
Assembly
Full assembly instructions are included in the filedownloads of this project.
Set-up
Once the wiring is complete and the sketch has been loaded, the set-up menu is used to obtain the values for the keyboard, servo and column selector. (Although the keys will not work without values so an initial sketch to find some values may be required. Use analogRead() on pin A0 and send them to the serial interface as described on various web pages.)
Keypad: pressing keys shows the voltage on the A0 pin and these values should then be entered in the sketch in the keyValues array. These values are then used to identify keys pressed.
Servo: using the keys, move the servo to the centre and drop positions for the counters, enter these values in the variables, servoCentre, servoRed and servoYellow in the sketch.
Selector: use the keys to count the steps from the reference position to column 1 and the number of steps between columns, enter these values in the referenceSteps and stepsPerColumn variables in the sketch.
Test
The test menu can then be used to manually move the machine and drop counters. Thoroughly test the operation and iron out any problems before playing the game.
Gameplay
The game is played by two players, each player can be either a human or computer player. The first to go is always playing red counters. The game type is selected from the Play menu. The computer player will play a defensive game, it does not do strategy :) Once a player wins a tune will play and a message will be displayed. If the game is a draw or it is aborted then a message will be displayed.
Conclusion
I really enjoyed designing and making this project, it has alot of different elements and getting some parts right took several attempts to get to the final design. The two improvements I would make are the column selector is a little slow, a bigger gear would sort that out. The other would be a better playing algorithm, it plays a very defensive game without any real strategy so there is definitely some room for improvement there even with the limited memory resources of an Arduino Uno.
EXPANDED TECHNICAL DETAILS
Game Logic & Mechanical Actuation
This project builds a physical robot capable of playing the classic "Connect 4" game against a human.
- AI Algorithm: The Arduino runs a "MiniMax" or a heuristic grid-search algorithm to calculate the best next move. It tracks the 6x7 grid state in its internal RAM.
- Mechanical Drop: A Stepper Motor or Servo moves a coin-dispensing mechanism along the top of the board, dropping a piece into the selected column.
Vision & Feedback
- Opponent Move Detection: Uses an IR sensor array or a simple camera to detect where the human player has placed their coin.
- Interaction: An LCD displays messages like "Thinking..." or "I Win!", demonstrating the integration of game theory, mechanical engineering, and embedded logic.