1. Make the prototype
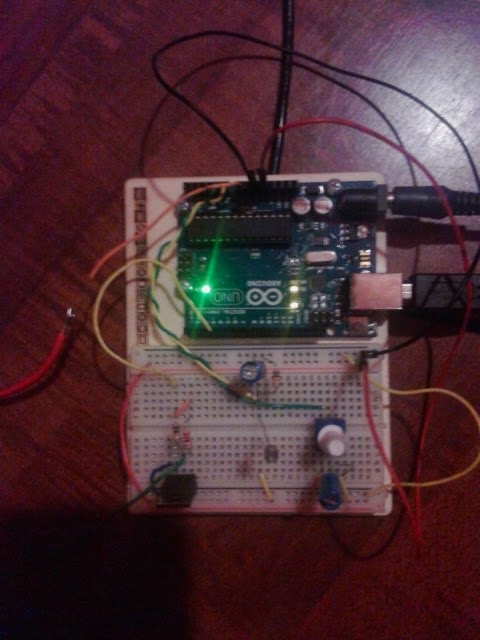
First: take the necessary parts and create the prototype on your breadboard as you see in the schematic below.
2. Write the code on Arduino
Second: write code! (see code below)
3. Make your box
Third: cut the plexiglass by a Laser Cutter.
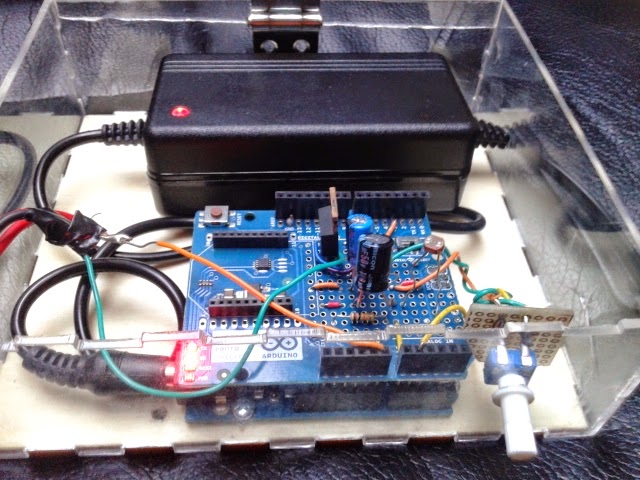
After, decide where to collocate the Arduino with the Shield and the power supply, and then make one hole for the potentiometer and one for the lamp's cables. Paste all! Congratulations! You just made a domotic lamp with the Arduino! Good job guys! Implement code to improve the lamps with your ideas (for example add also a timer to regulate it)!
4. Some photos
Some photos of the final project.
EXPANDED TECHNICAL DETAILS
Home Infrastructure Automation
This project is a fundamental entry into high-voltage automation, allowing an Arduino to safely switch standard AC household lights.
- Relay Driver Isolation: Manages a 10A 250V AC relay module. The Arduino controls the relay's electromagnetic coil via an opto-isolated trigger pin, ensuring that high-voltage spikes never reach the delicate microcontroller logic.
- Multi-Input Control Logic: The firmware allows the light to be toggled via a physical button, an infrared remote IR sensor, or even a serial command from a PC, demonstrating a unified control hub architecture.
Safety Features
- Flyback Diode Integration: Explains the necessity of the parallel diode across the relay coil to protect the switching transistor from inductive voltage kicks during the deactivation phase.