Background
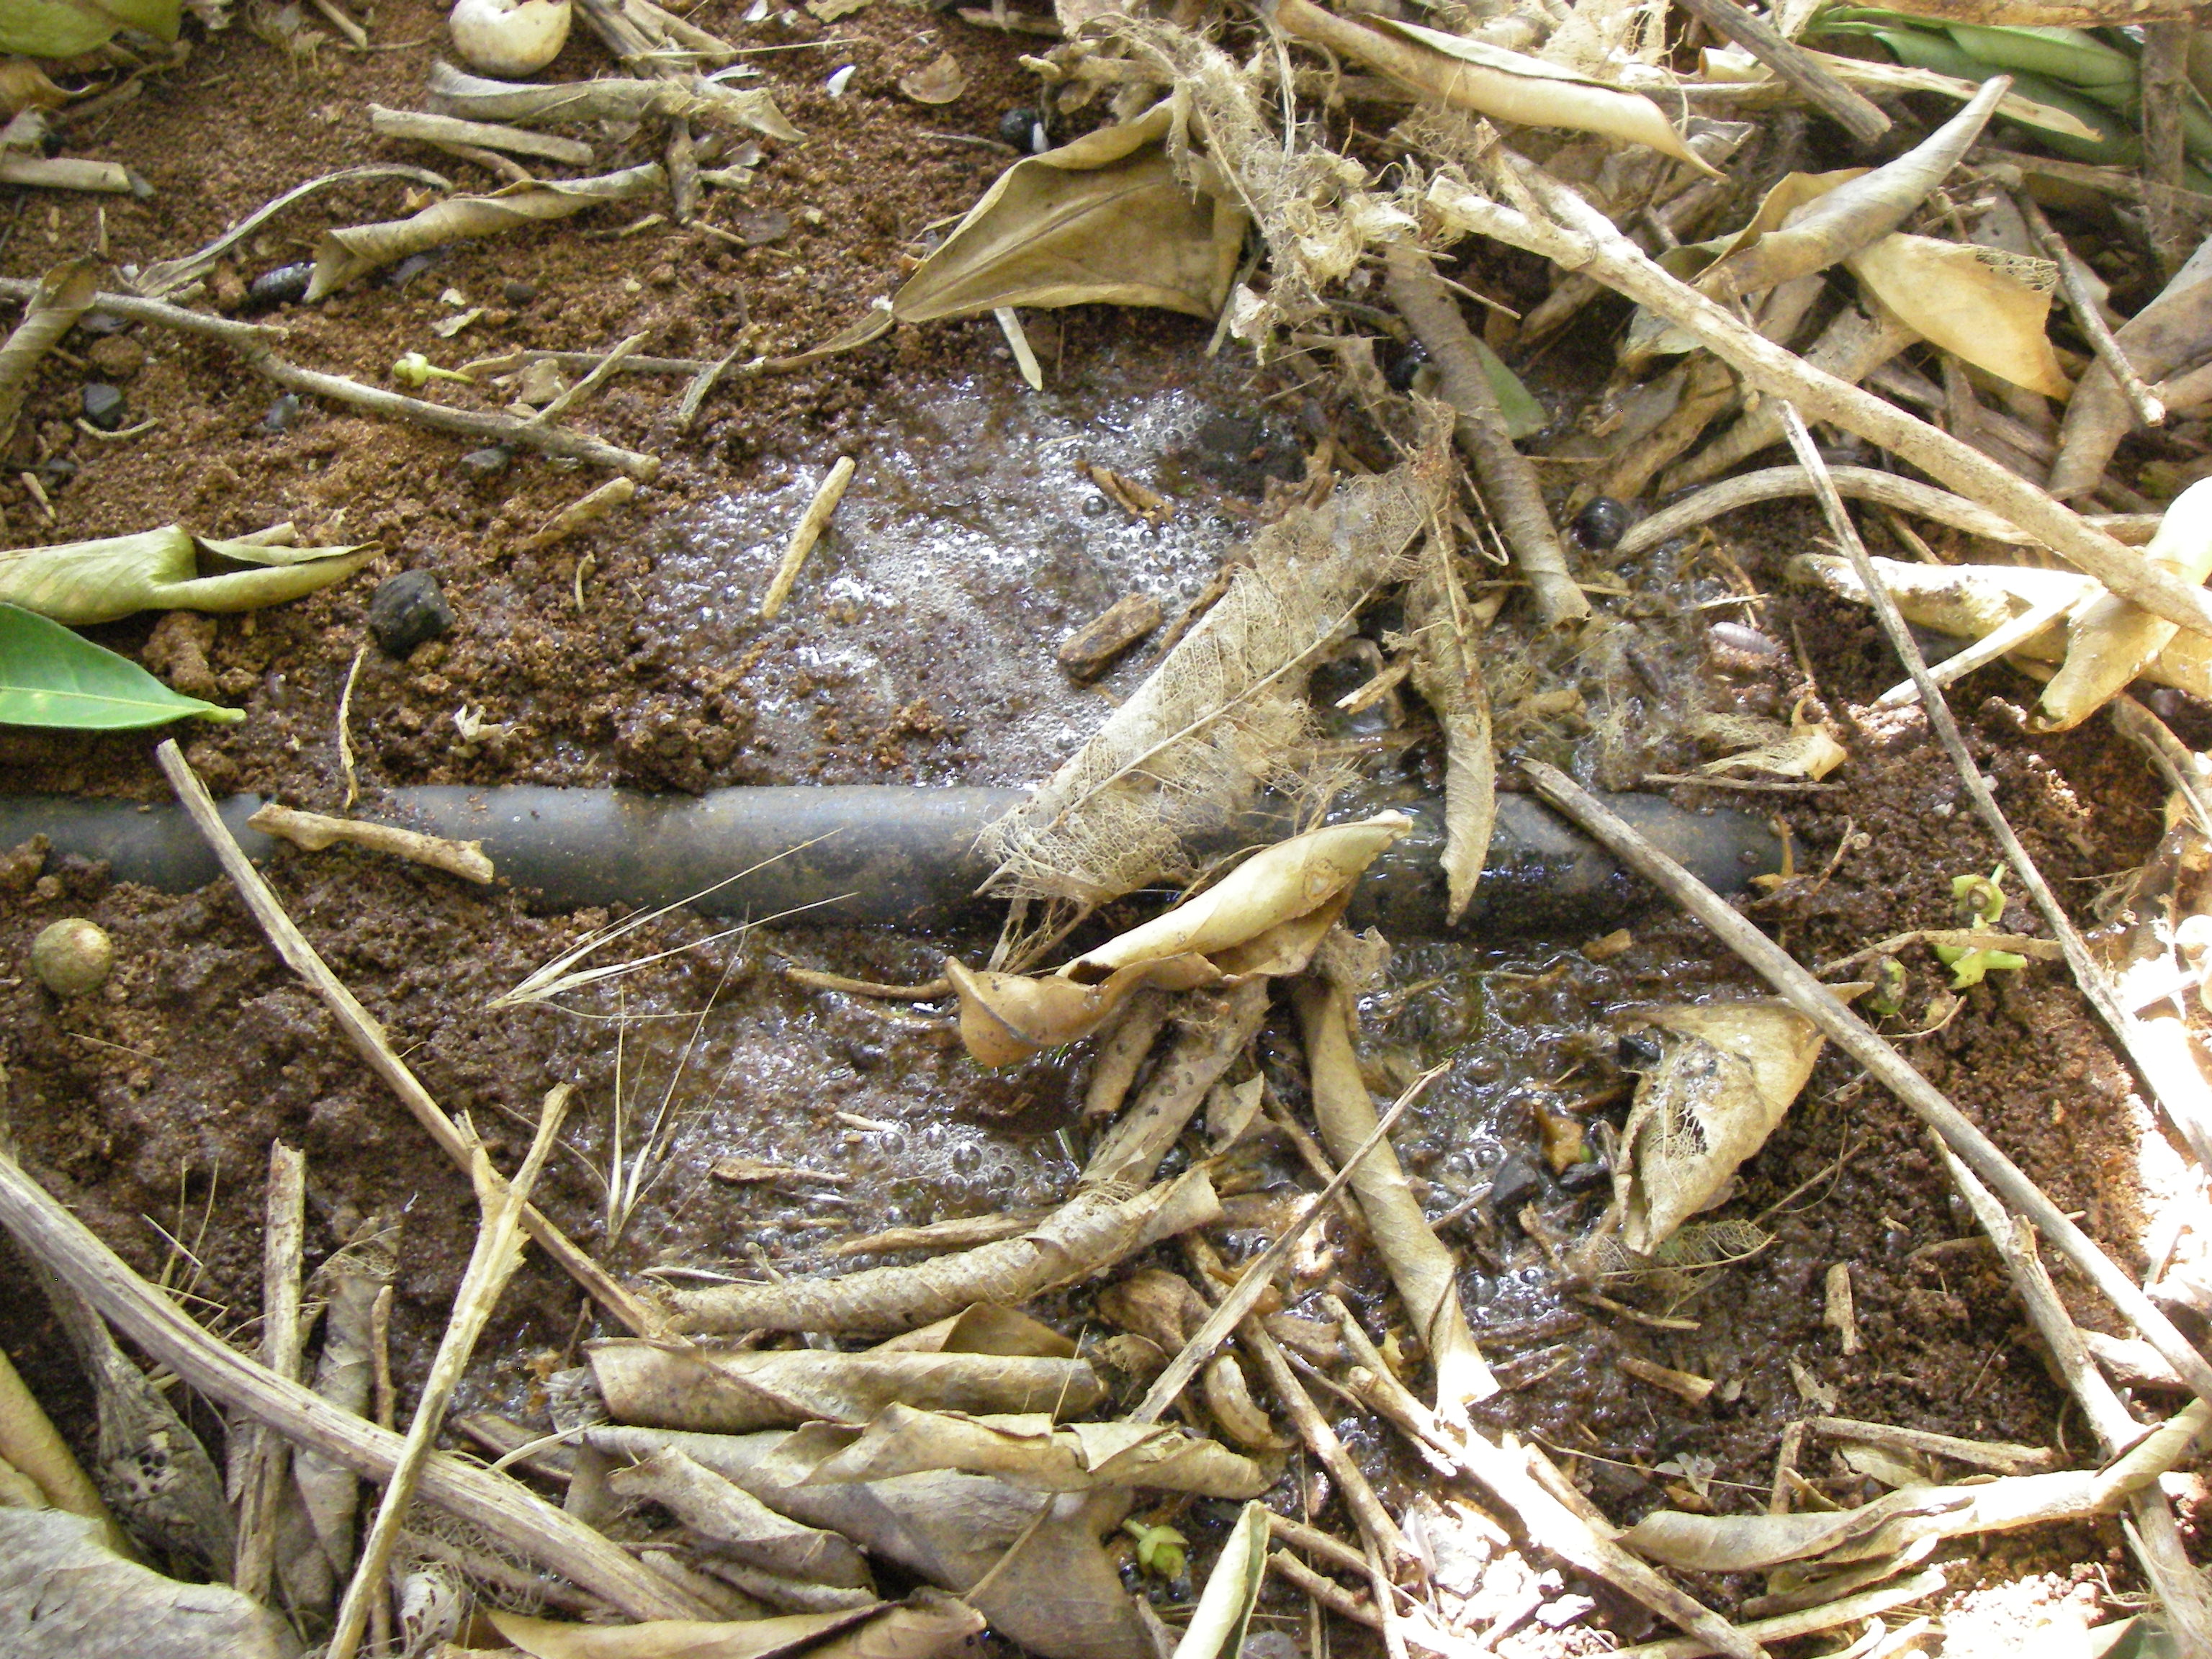
Last season our avocados suffered from a lack of water, the problem was caused by blocked dippers. After a few dipper autopsies it was clear that "organic stuff" was growing in the lines. The only way to treat this is by injecting chemicals to kill and dissolve said gunge from the inside of the pipes. Regardless of the chosen chemical you need to inject it at the correct rate during an irrigation.
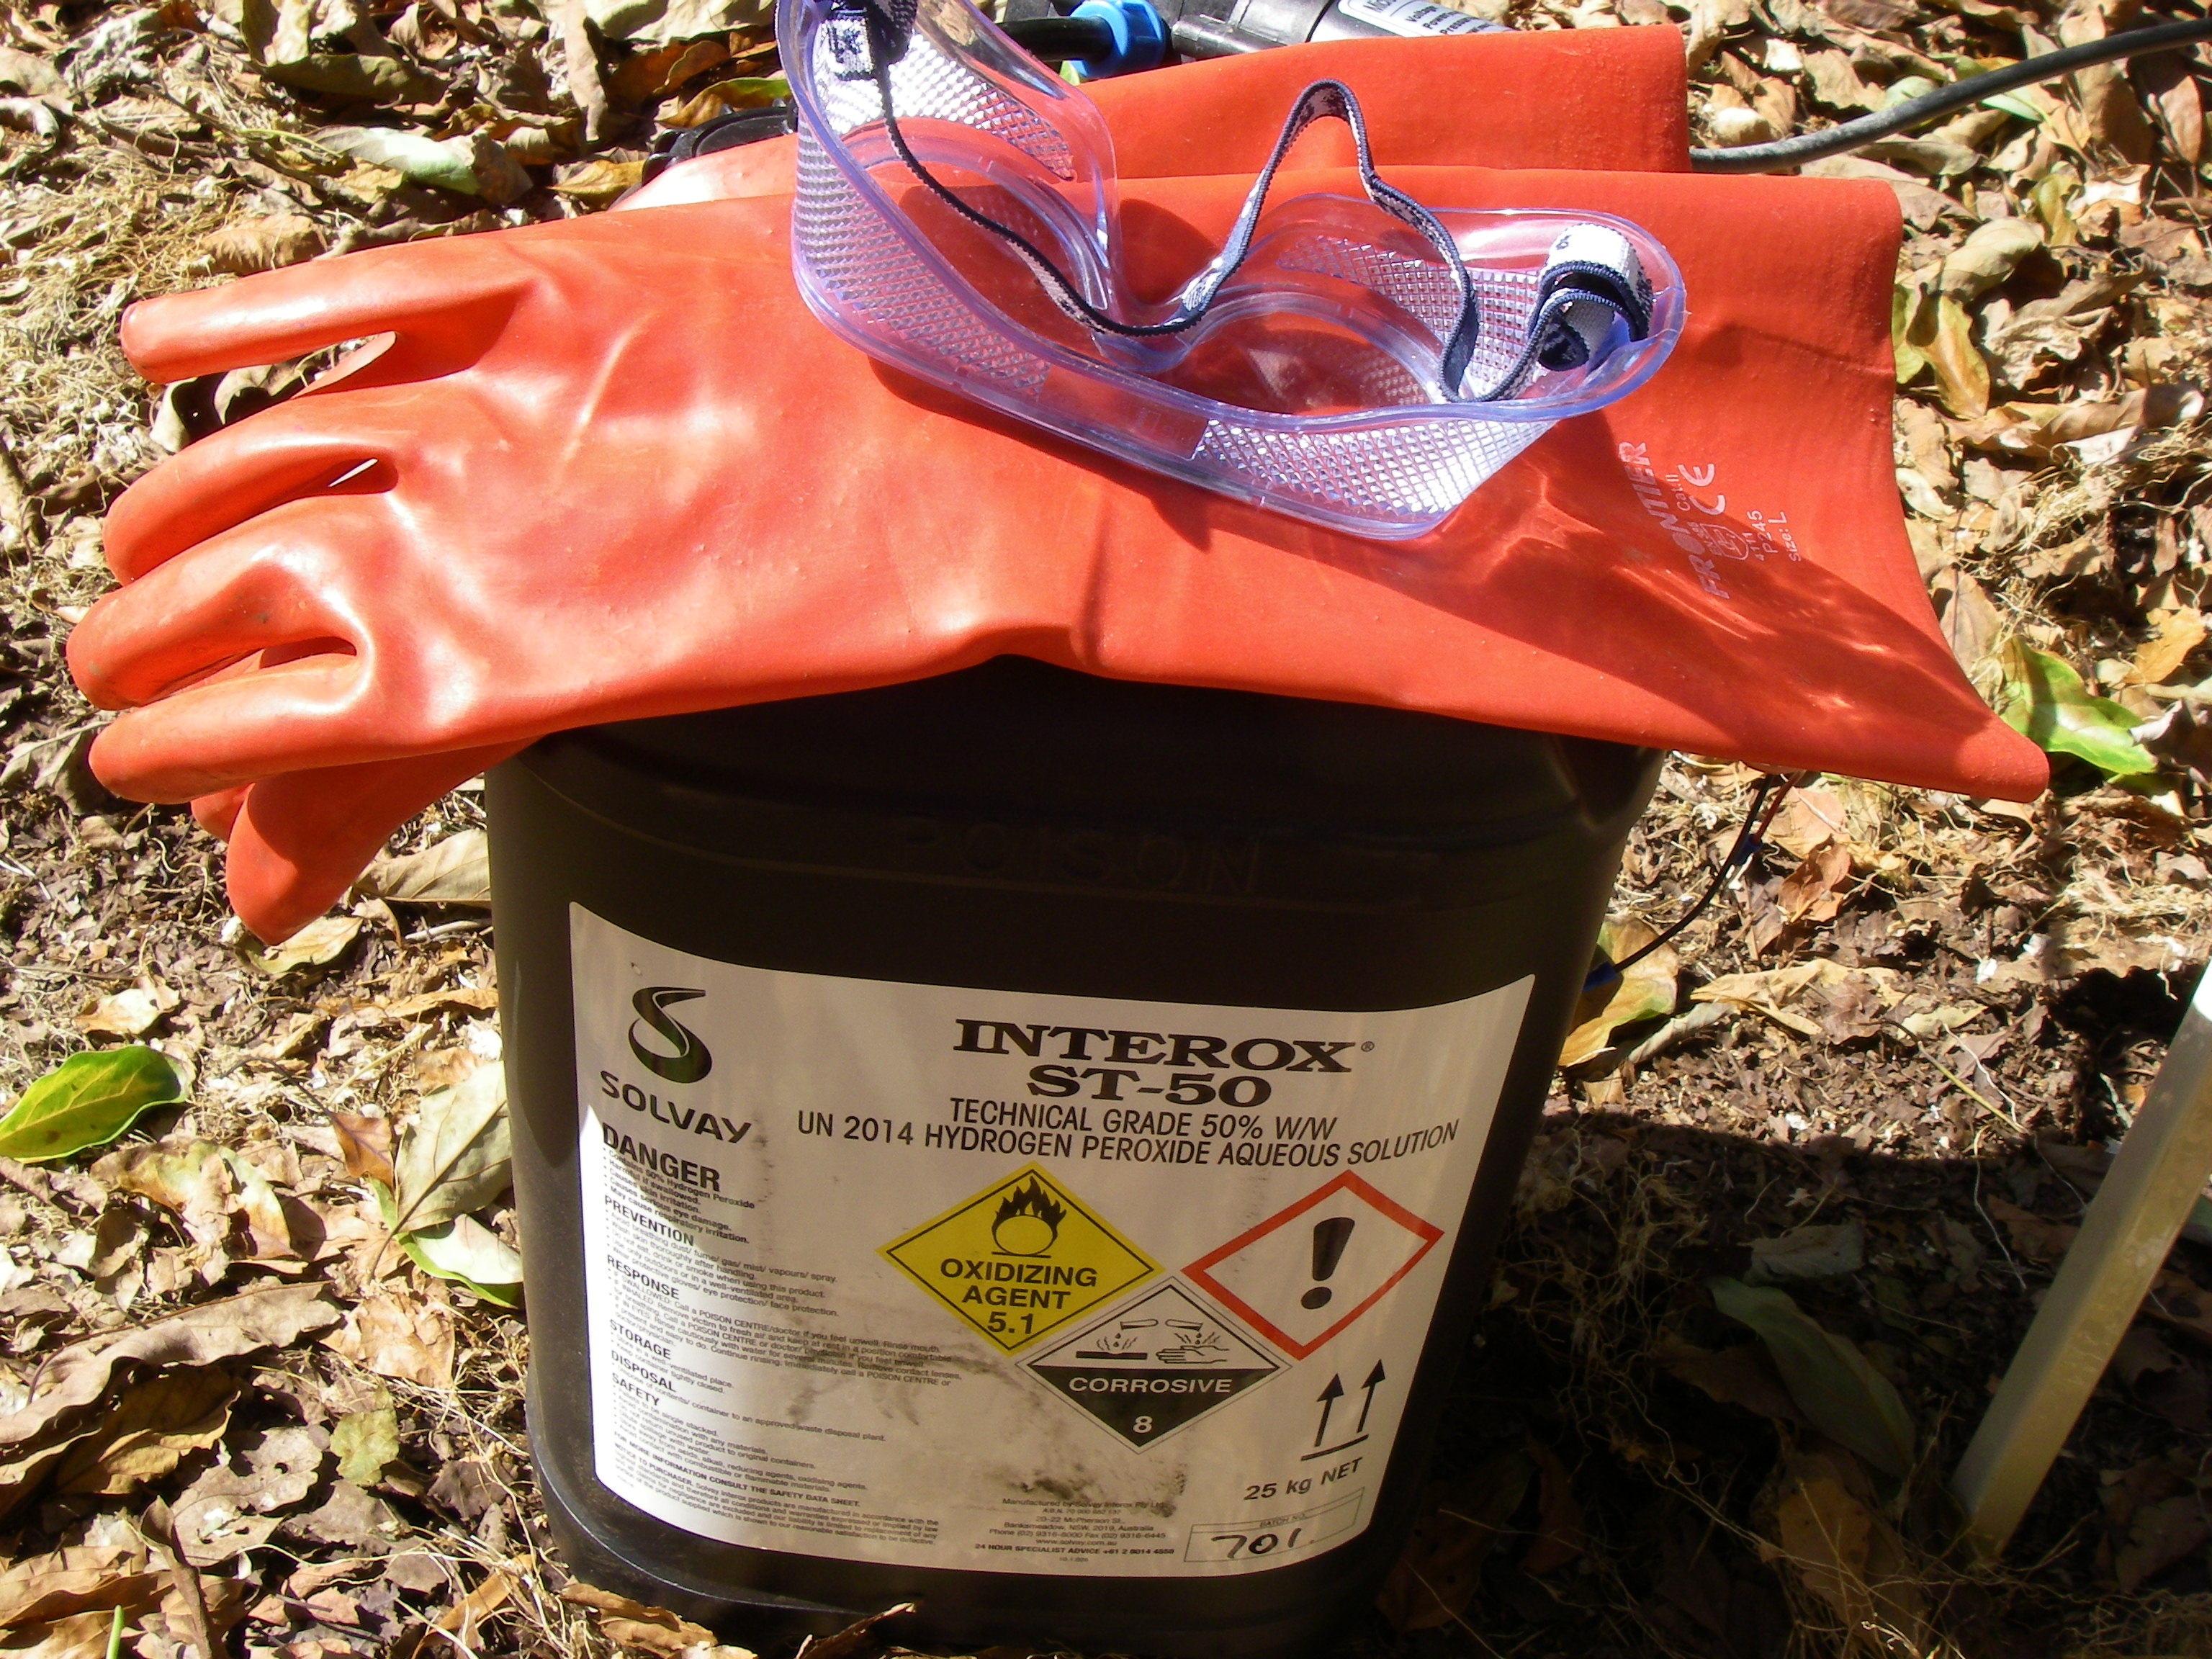
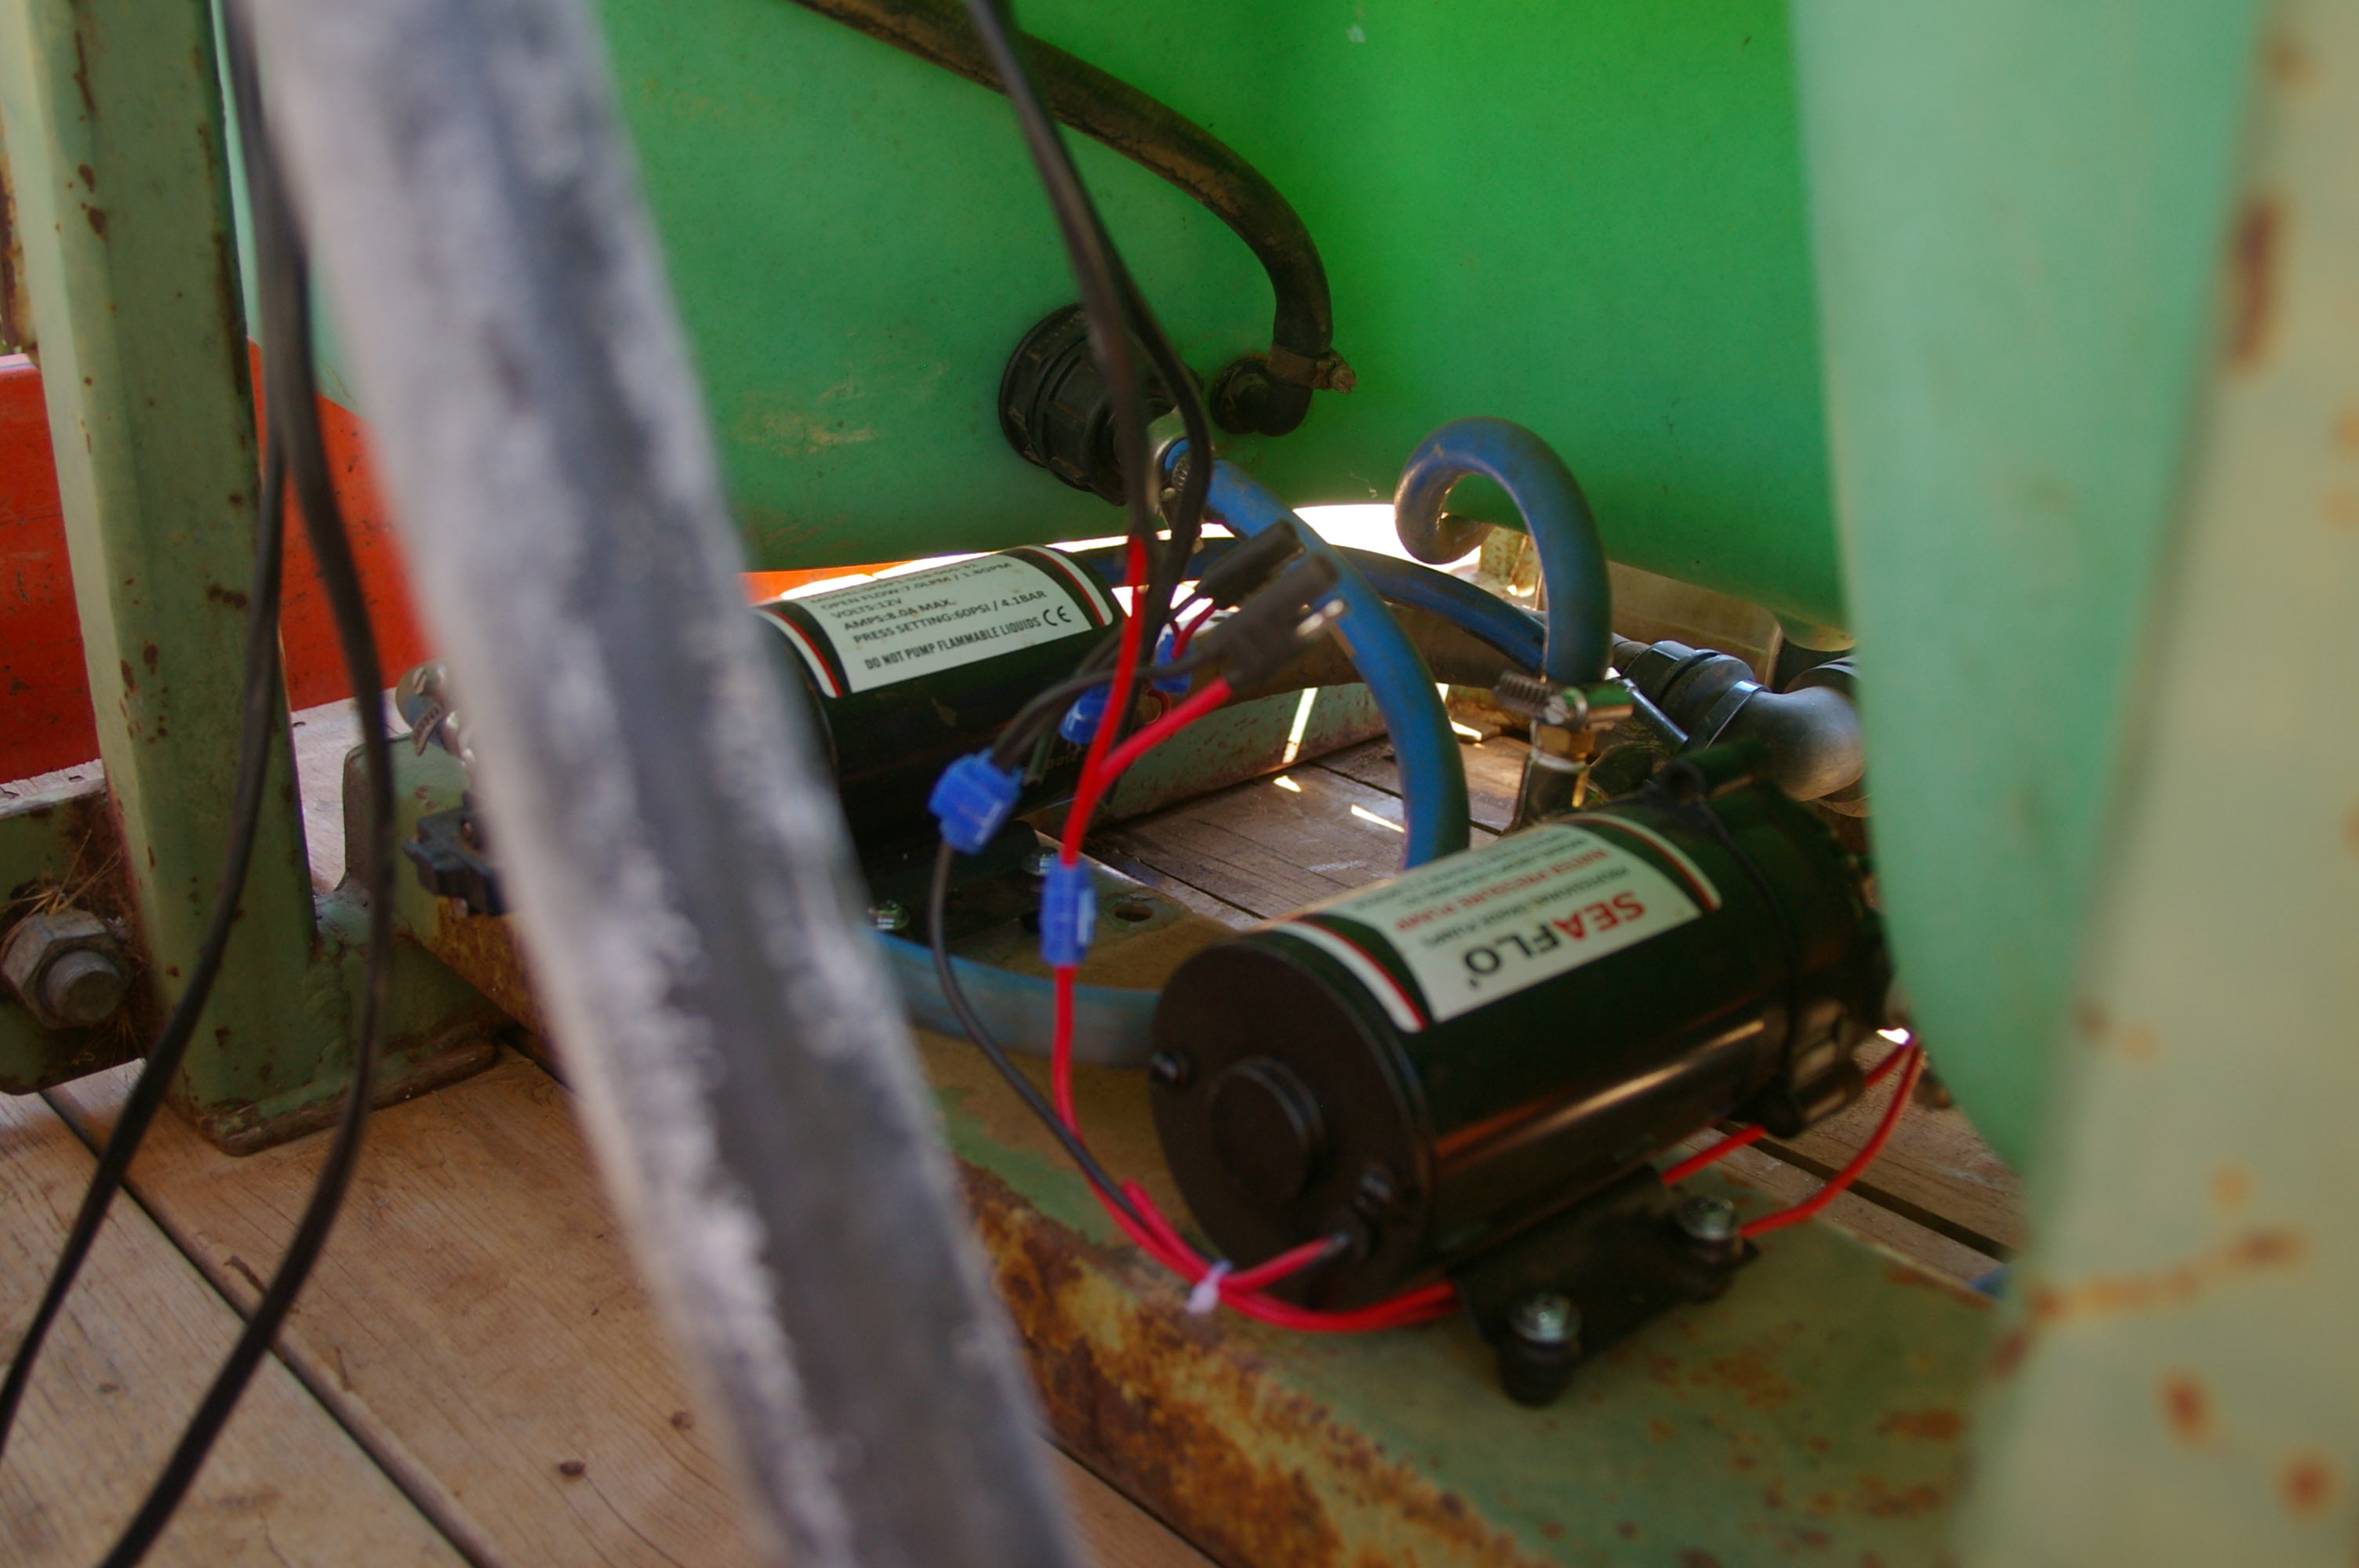
In this case we elected to inject Hydrogen Peroxide, chosen for its lack of residual byproducts after decomposition. The trouble with this chemical is that it is not very user friendly. If we could pump it directly from the container it would eliminate a considerable source of personal risk while handling the concentrated chemical. There is also a degree of mechanical cleaning action from peroxide decomposition which is better expressed at higher concentrations.
Step 1 - Proof of Concept
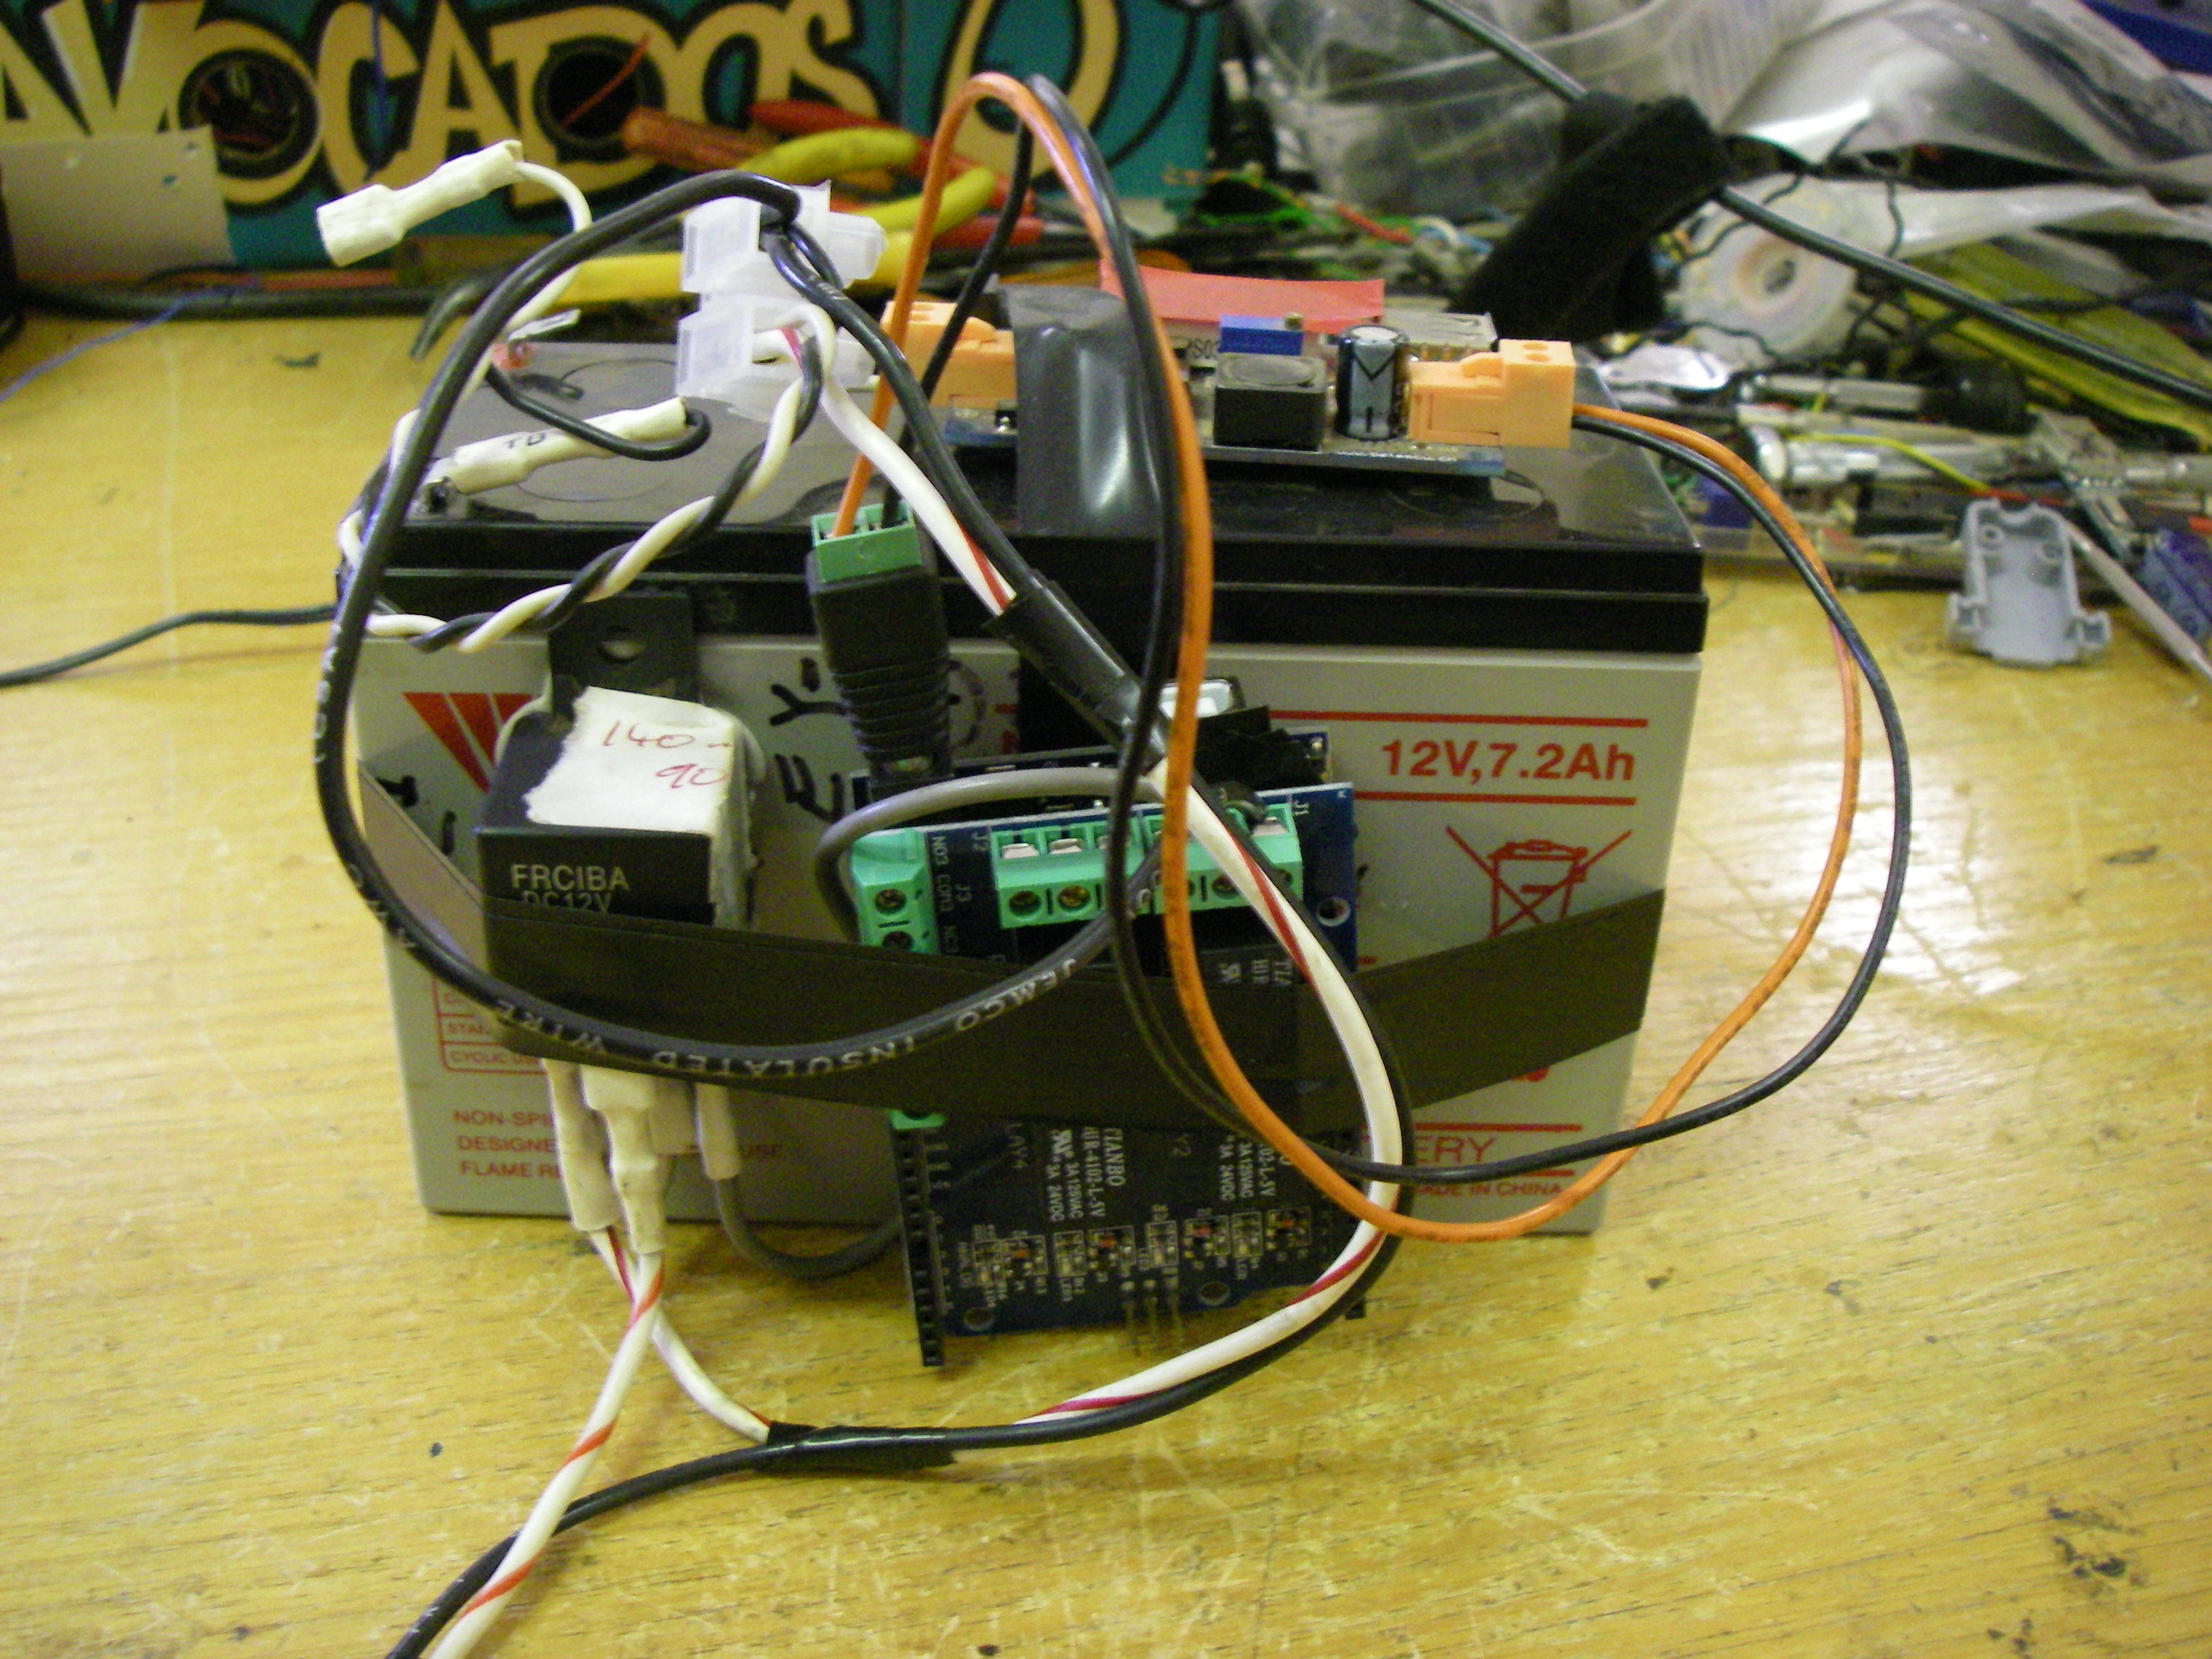
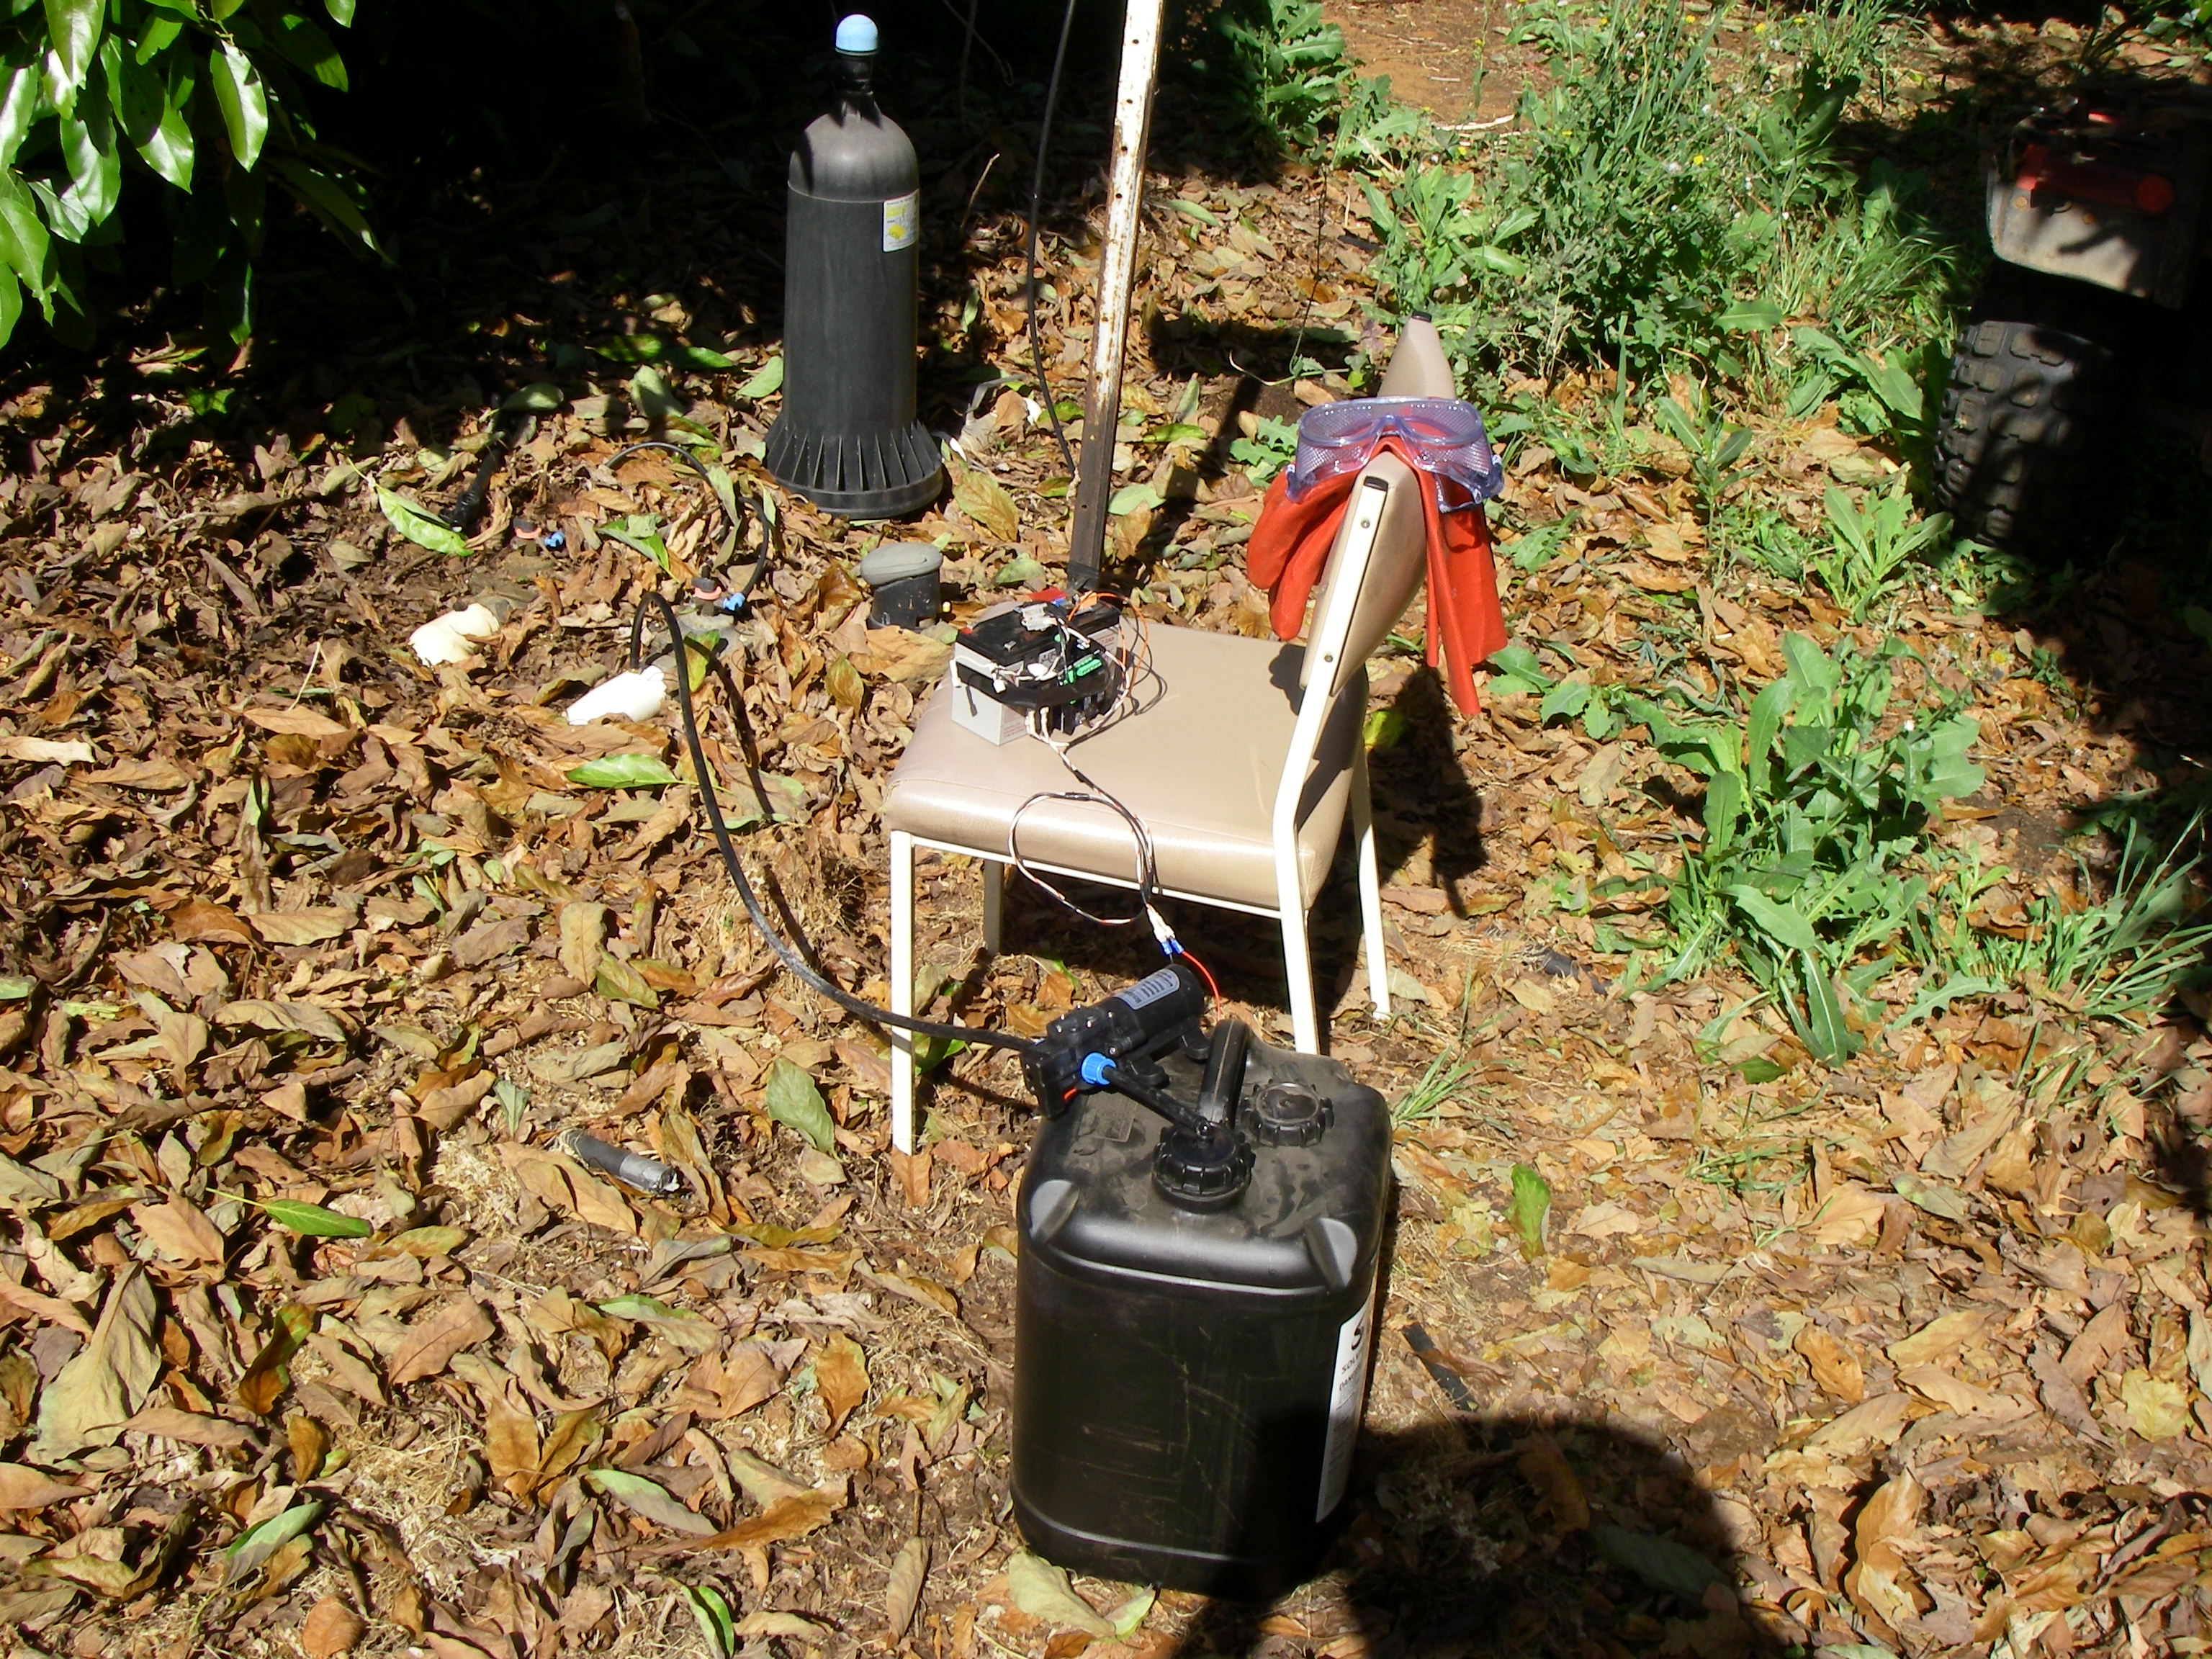
Having built two other dosing pumps for fertigation using "dot net", I wanted to see if my box of Arduino bits could be used to build a portable one. So I constructed a test unit out of a UNO and relay shield. This is as basic as it gets, the only external components are an automotive relay to drive the pump and pre-regulator to keep the Arduino cool while running off the 12V battery. The code was stripped to delays and digital writes, this would later yield interesting observations about the system.
Calibration
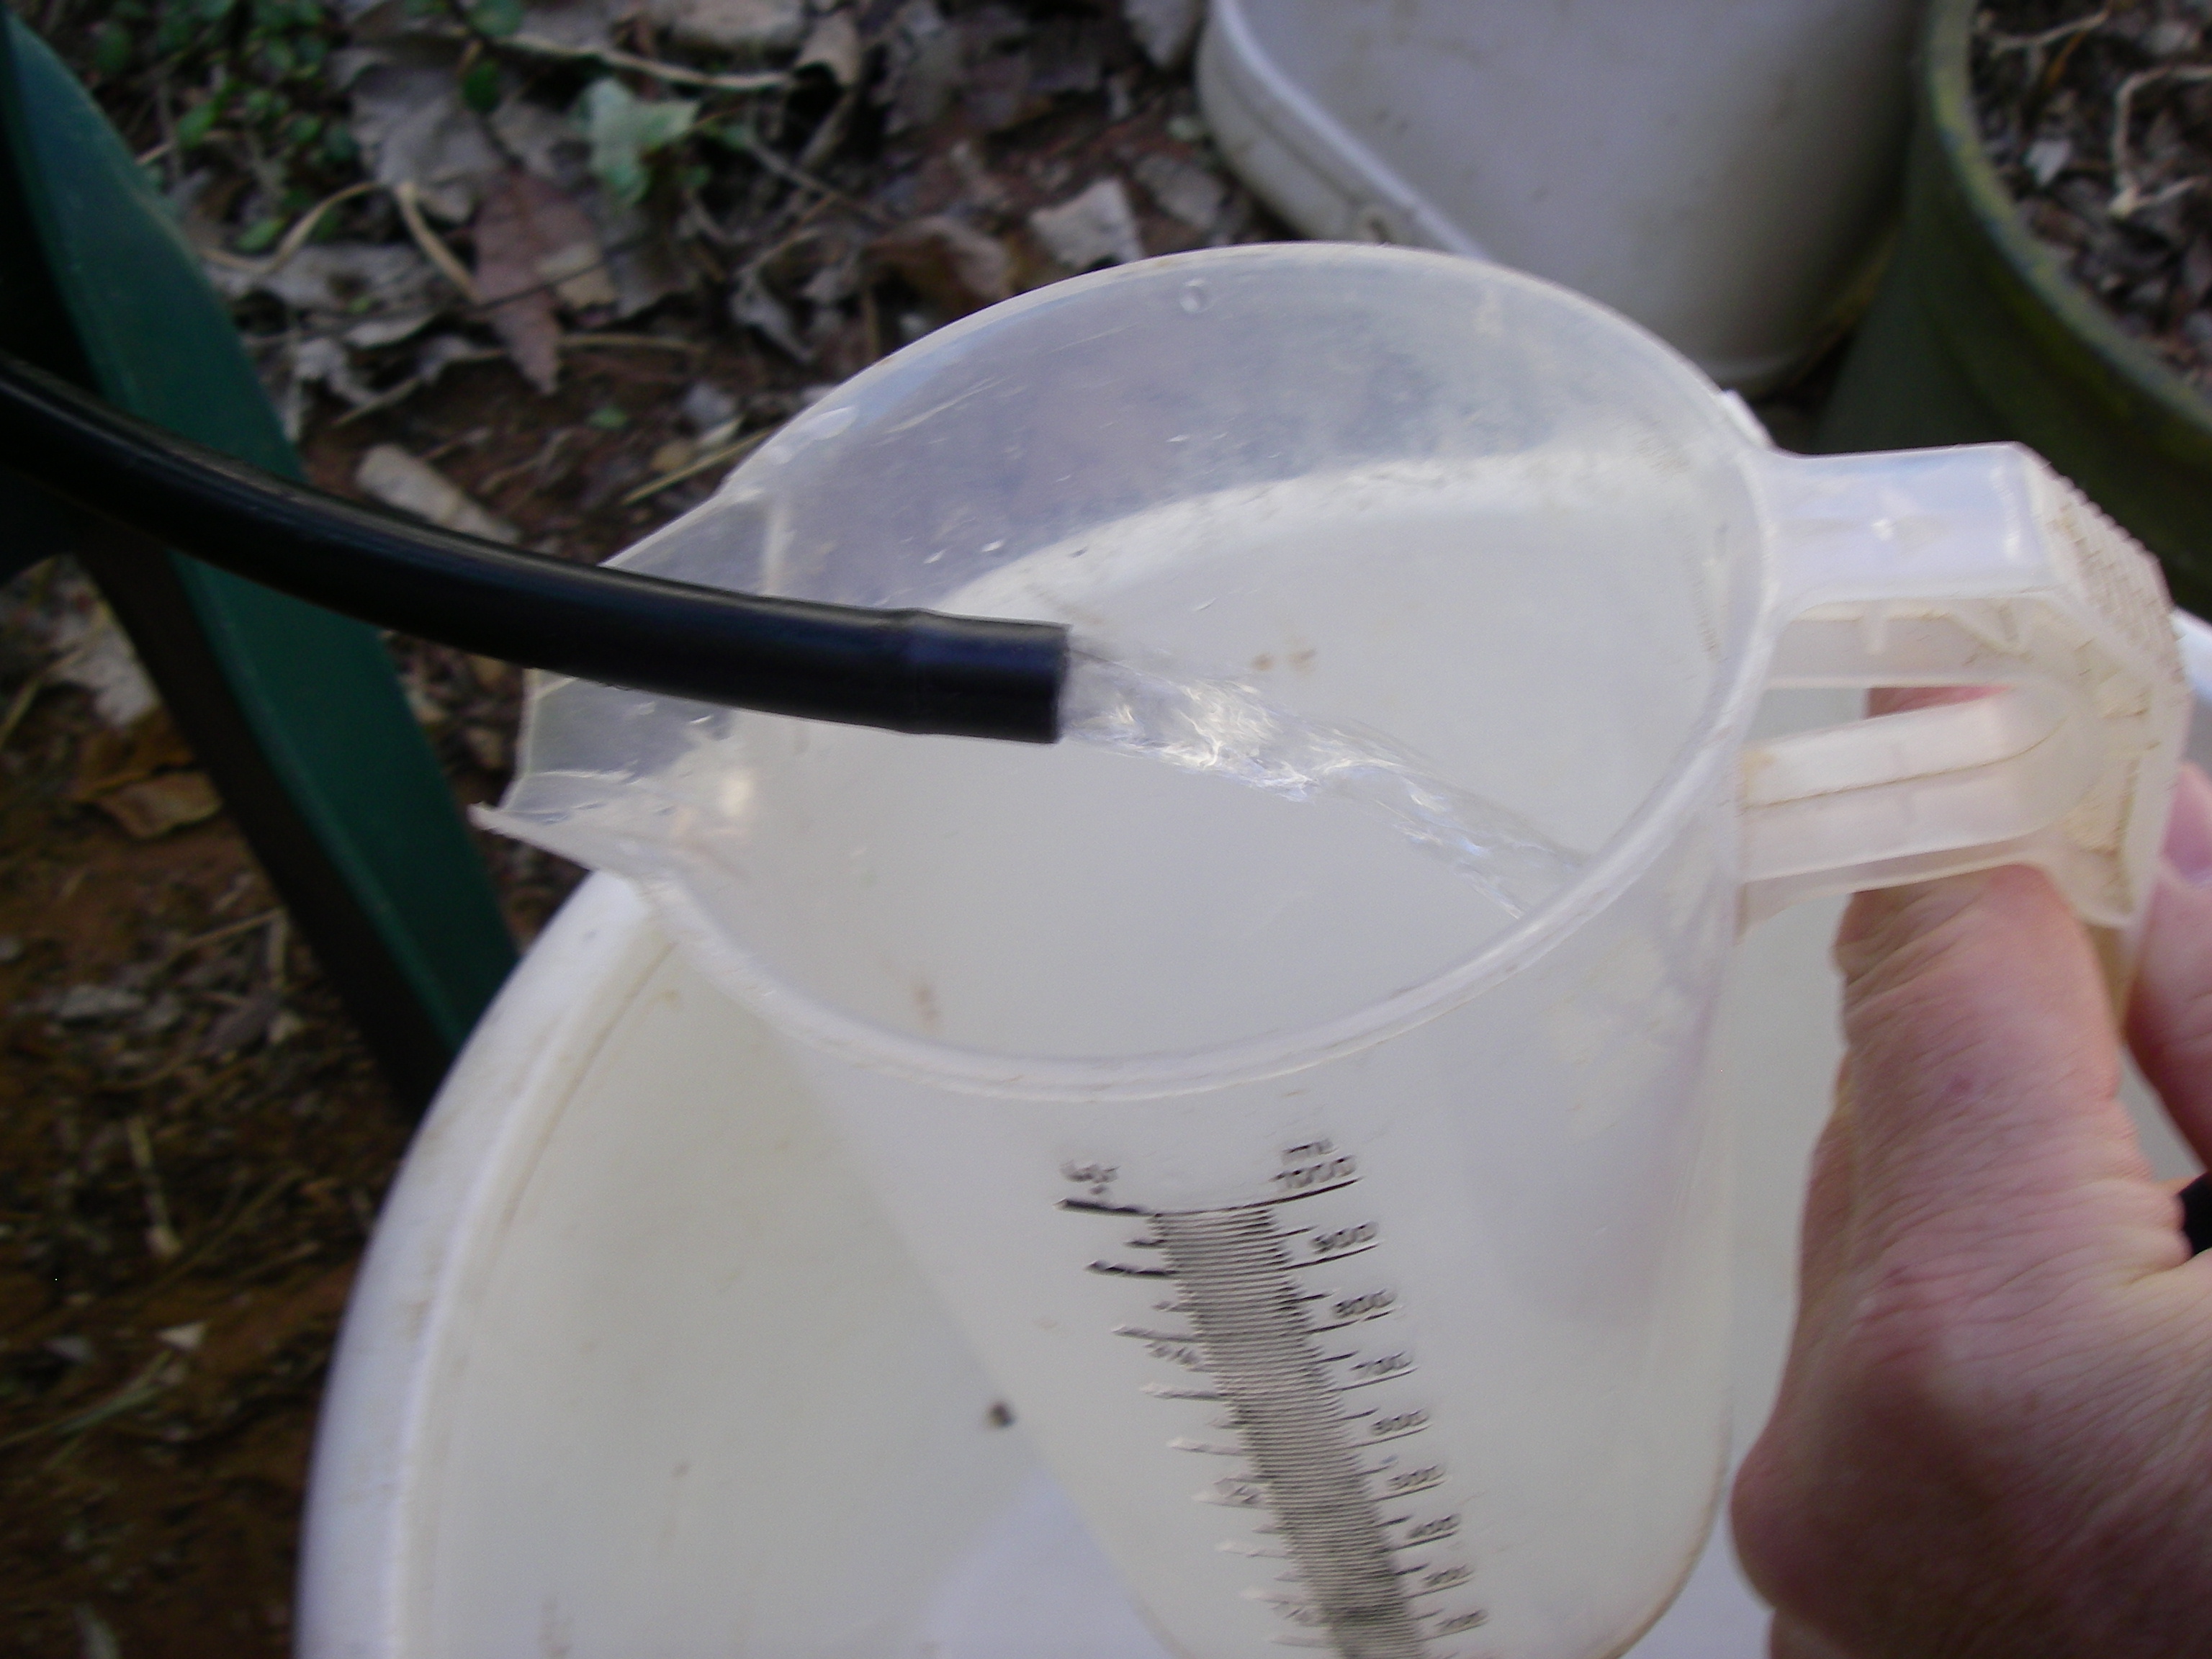
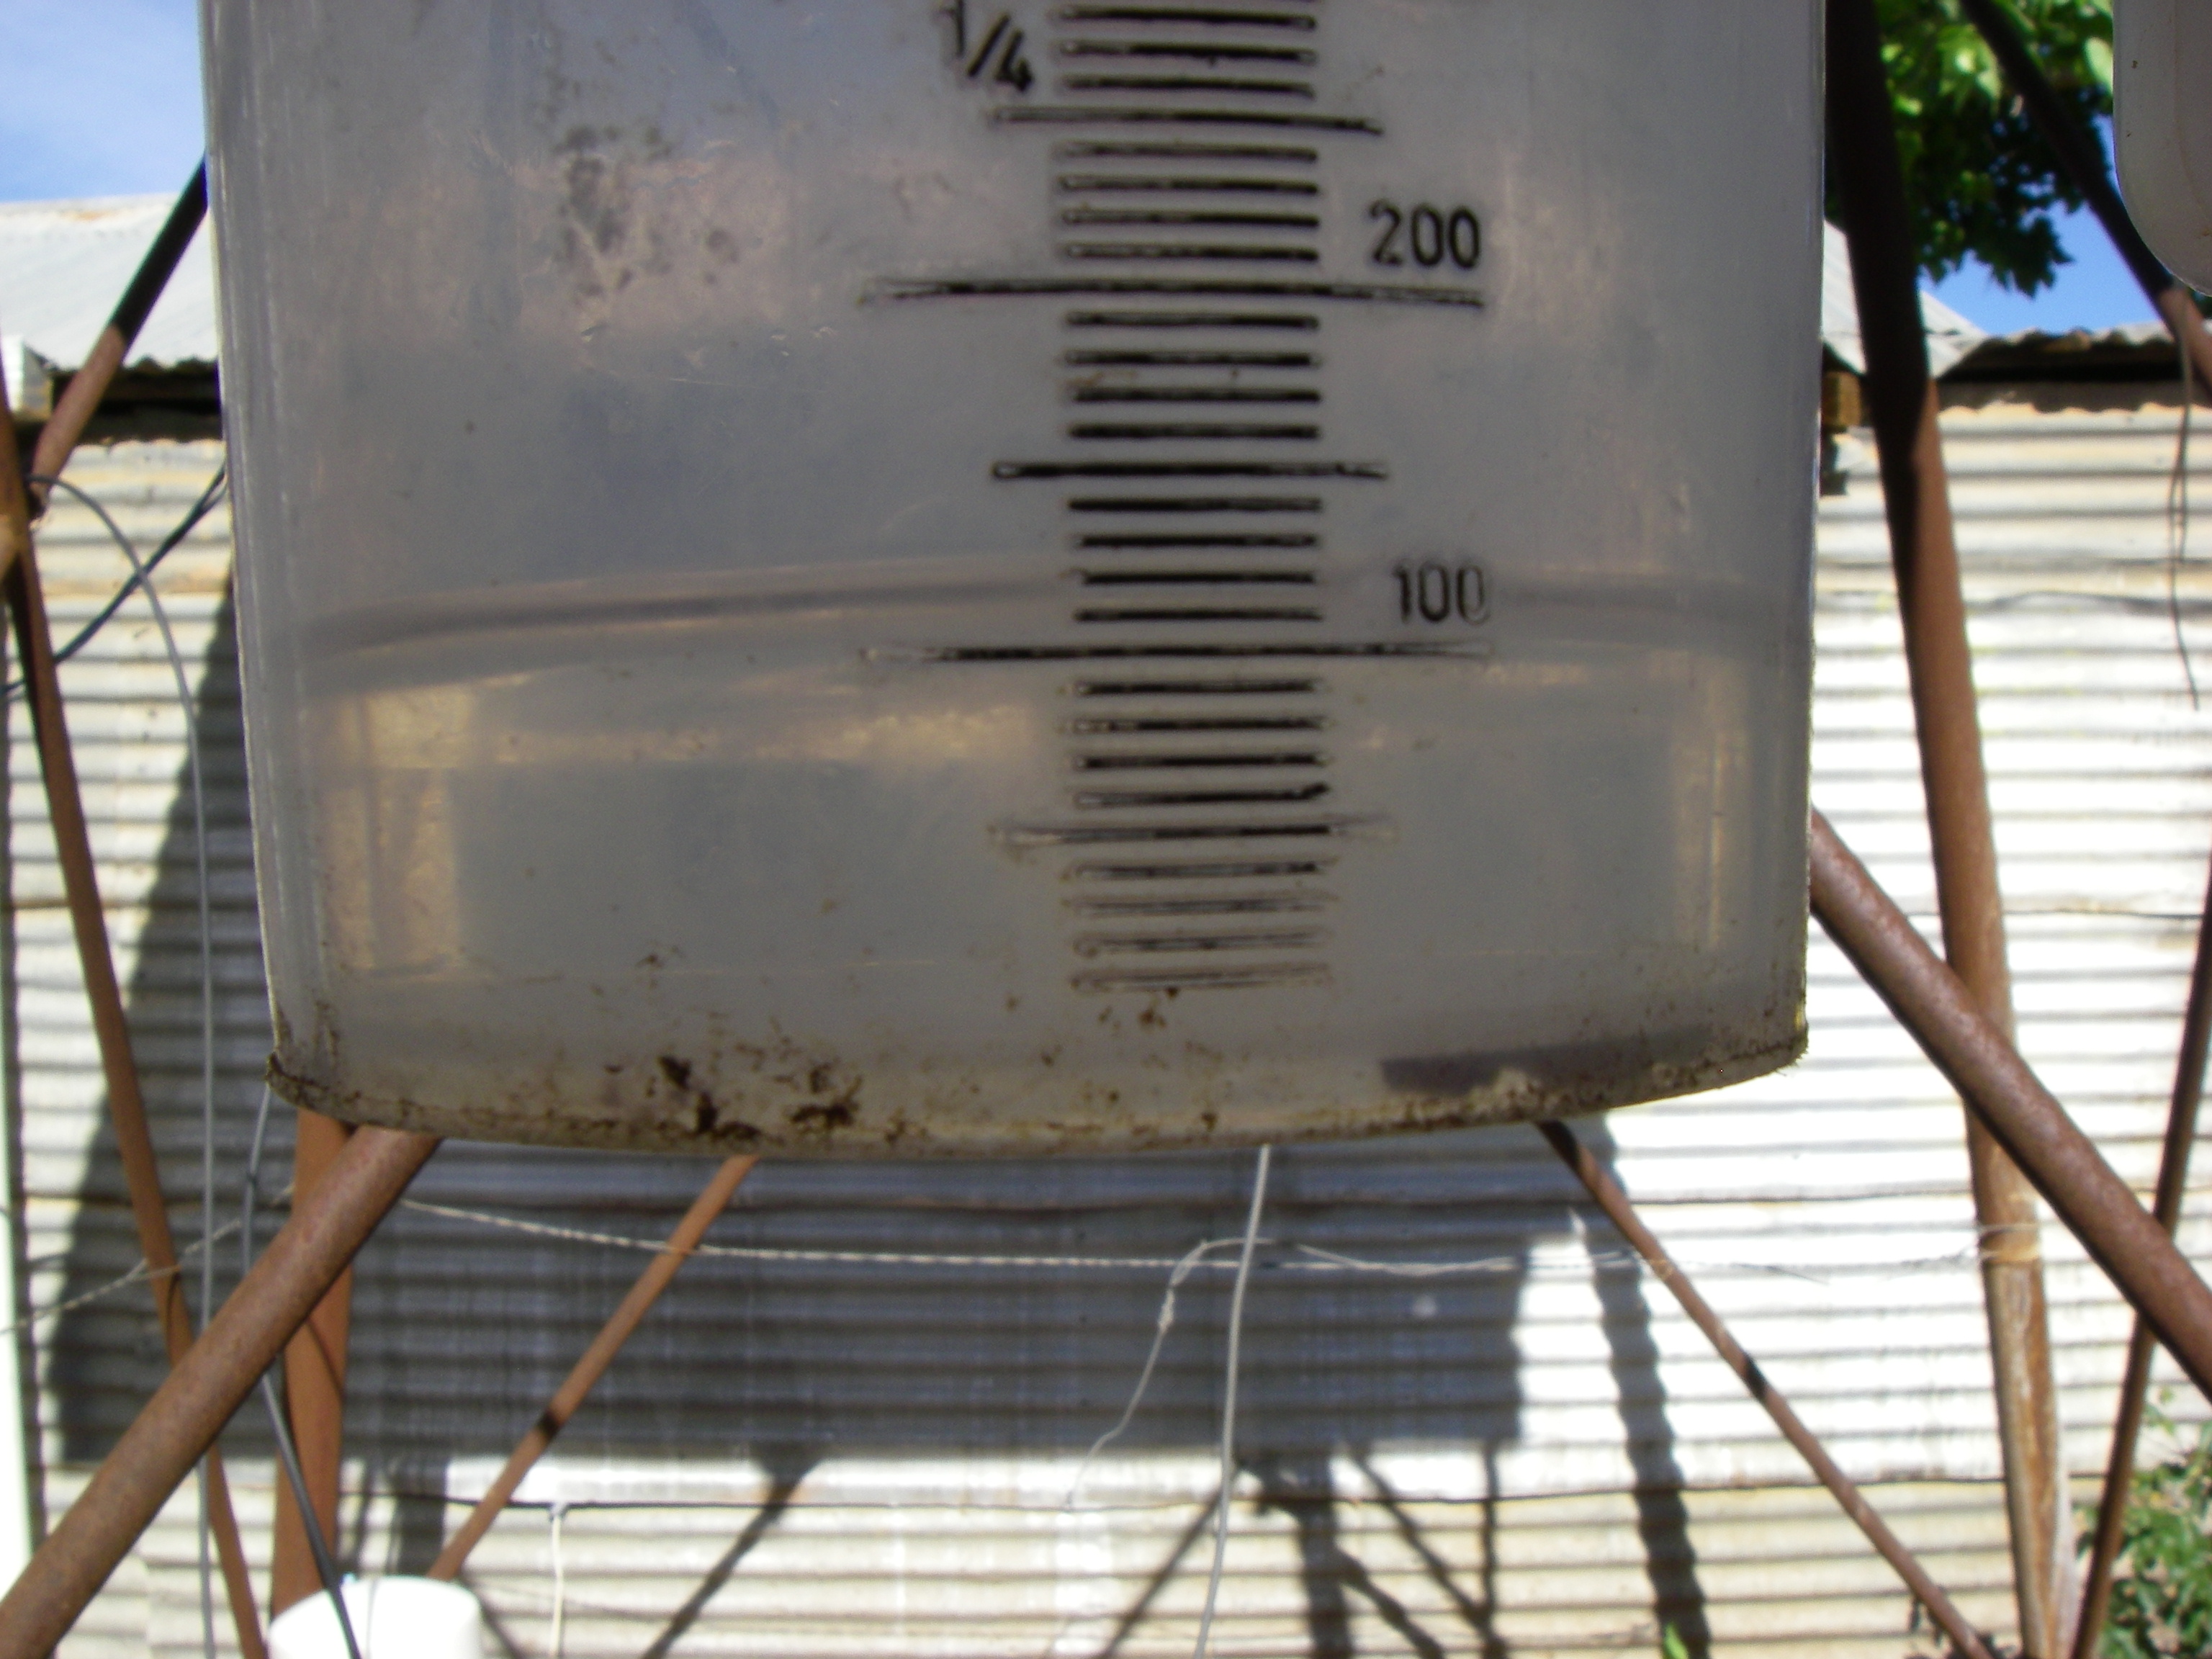
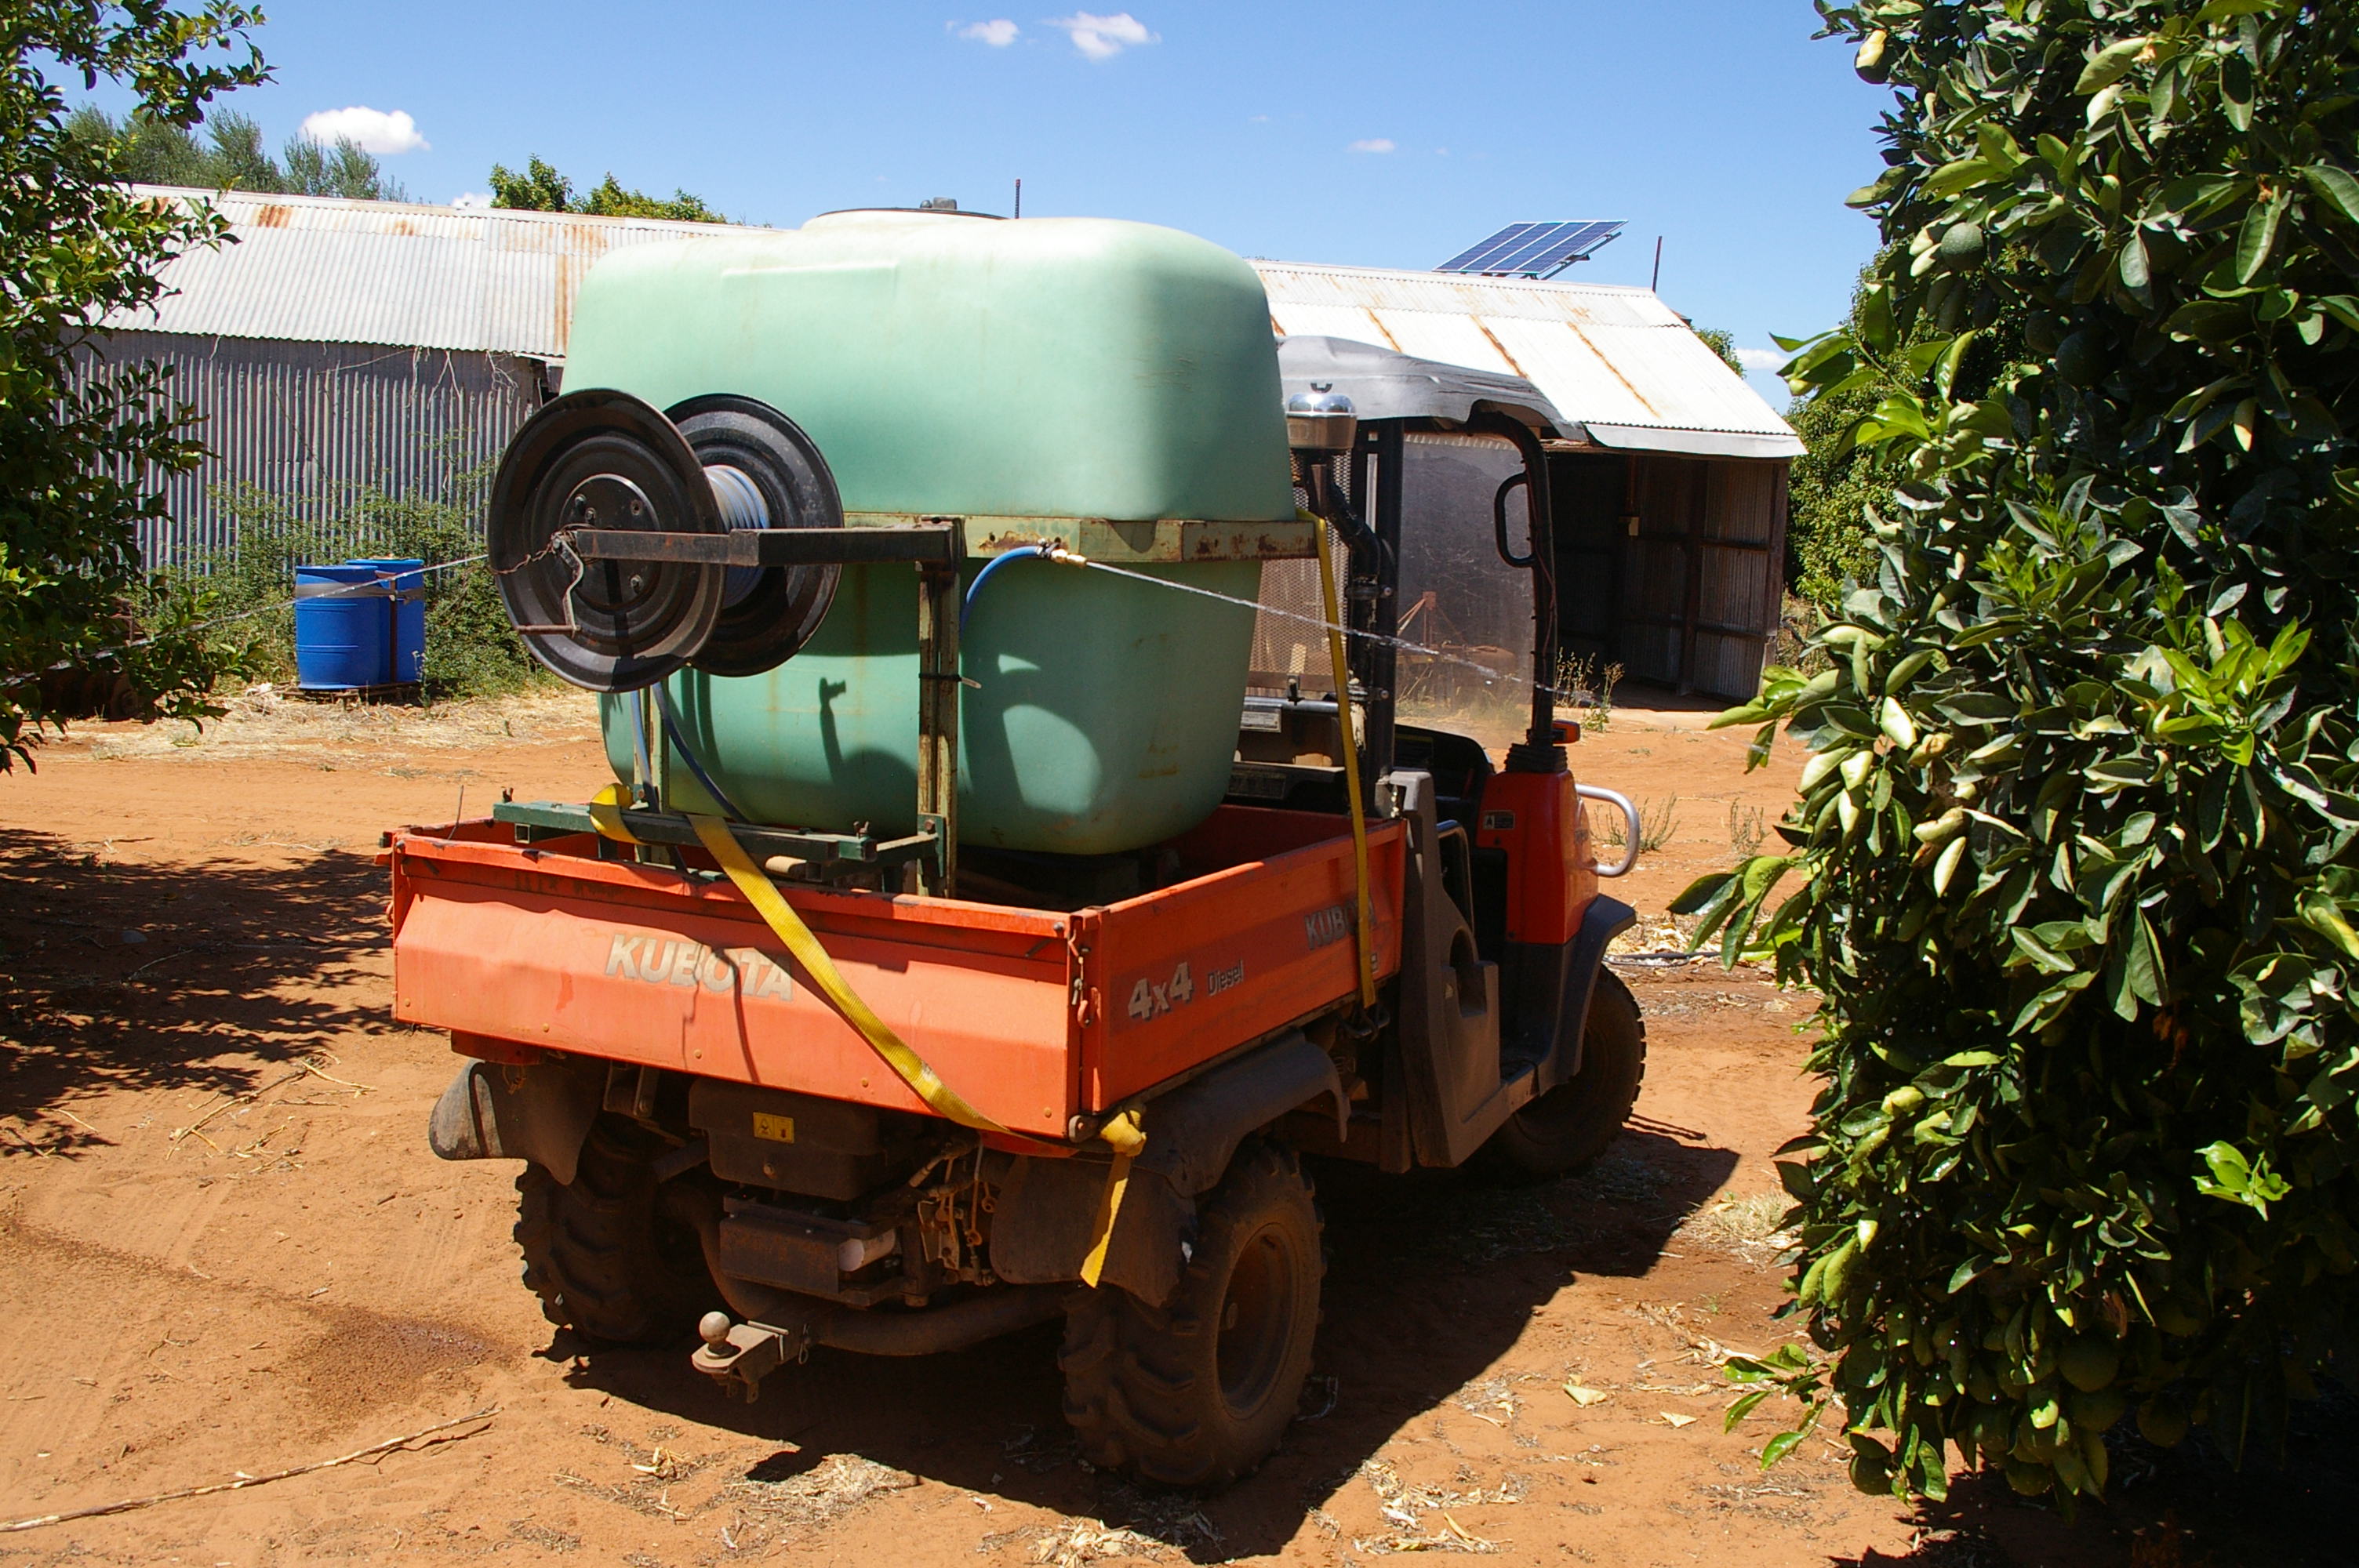
So after connecting up the pump to a drum of water I started to check the calibration of the pump. The pump was supposed to be 5L/min according to the eBay ad but like most items the spec are some what "optimistic". Turned out the pump was about 3L/min which meant that a 2 second burst of the pump yielded about 100ml. At this stage I also checked the plumbing for leaks and the safety switch for operating against a closed head. Now I selected a 30 second cycle as I didn't want Oxygen bubbles forming in the pump or pipes. The flow rate on the target irrigation line was about 1.5 l/sec which should yield a final average concentration of 0.1 1%. Just in case, I programmed the shield relays as 2, 4, 8 and 16 seconds. This meant there was a bit of clicking going on which is a good confidence meter in the field.
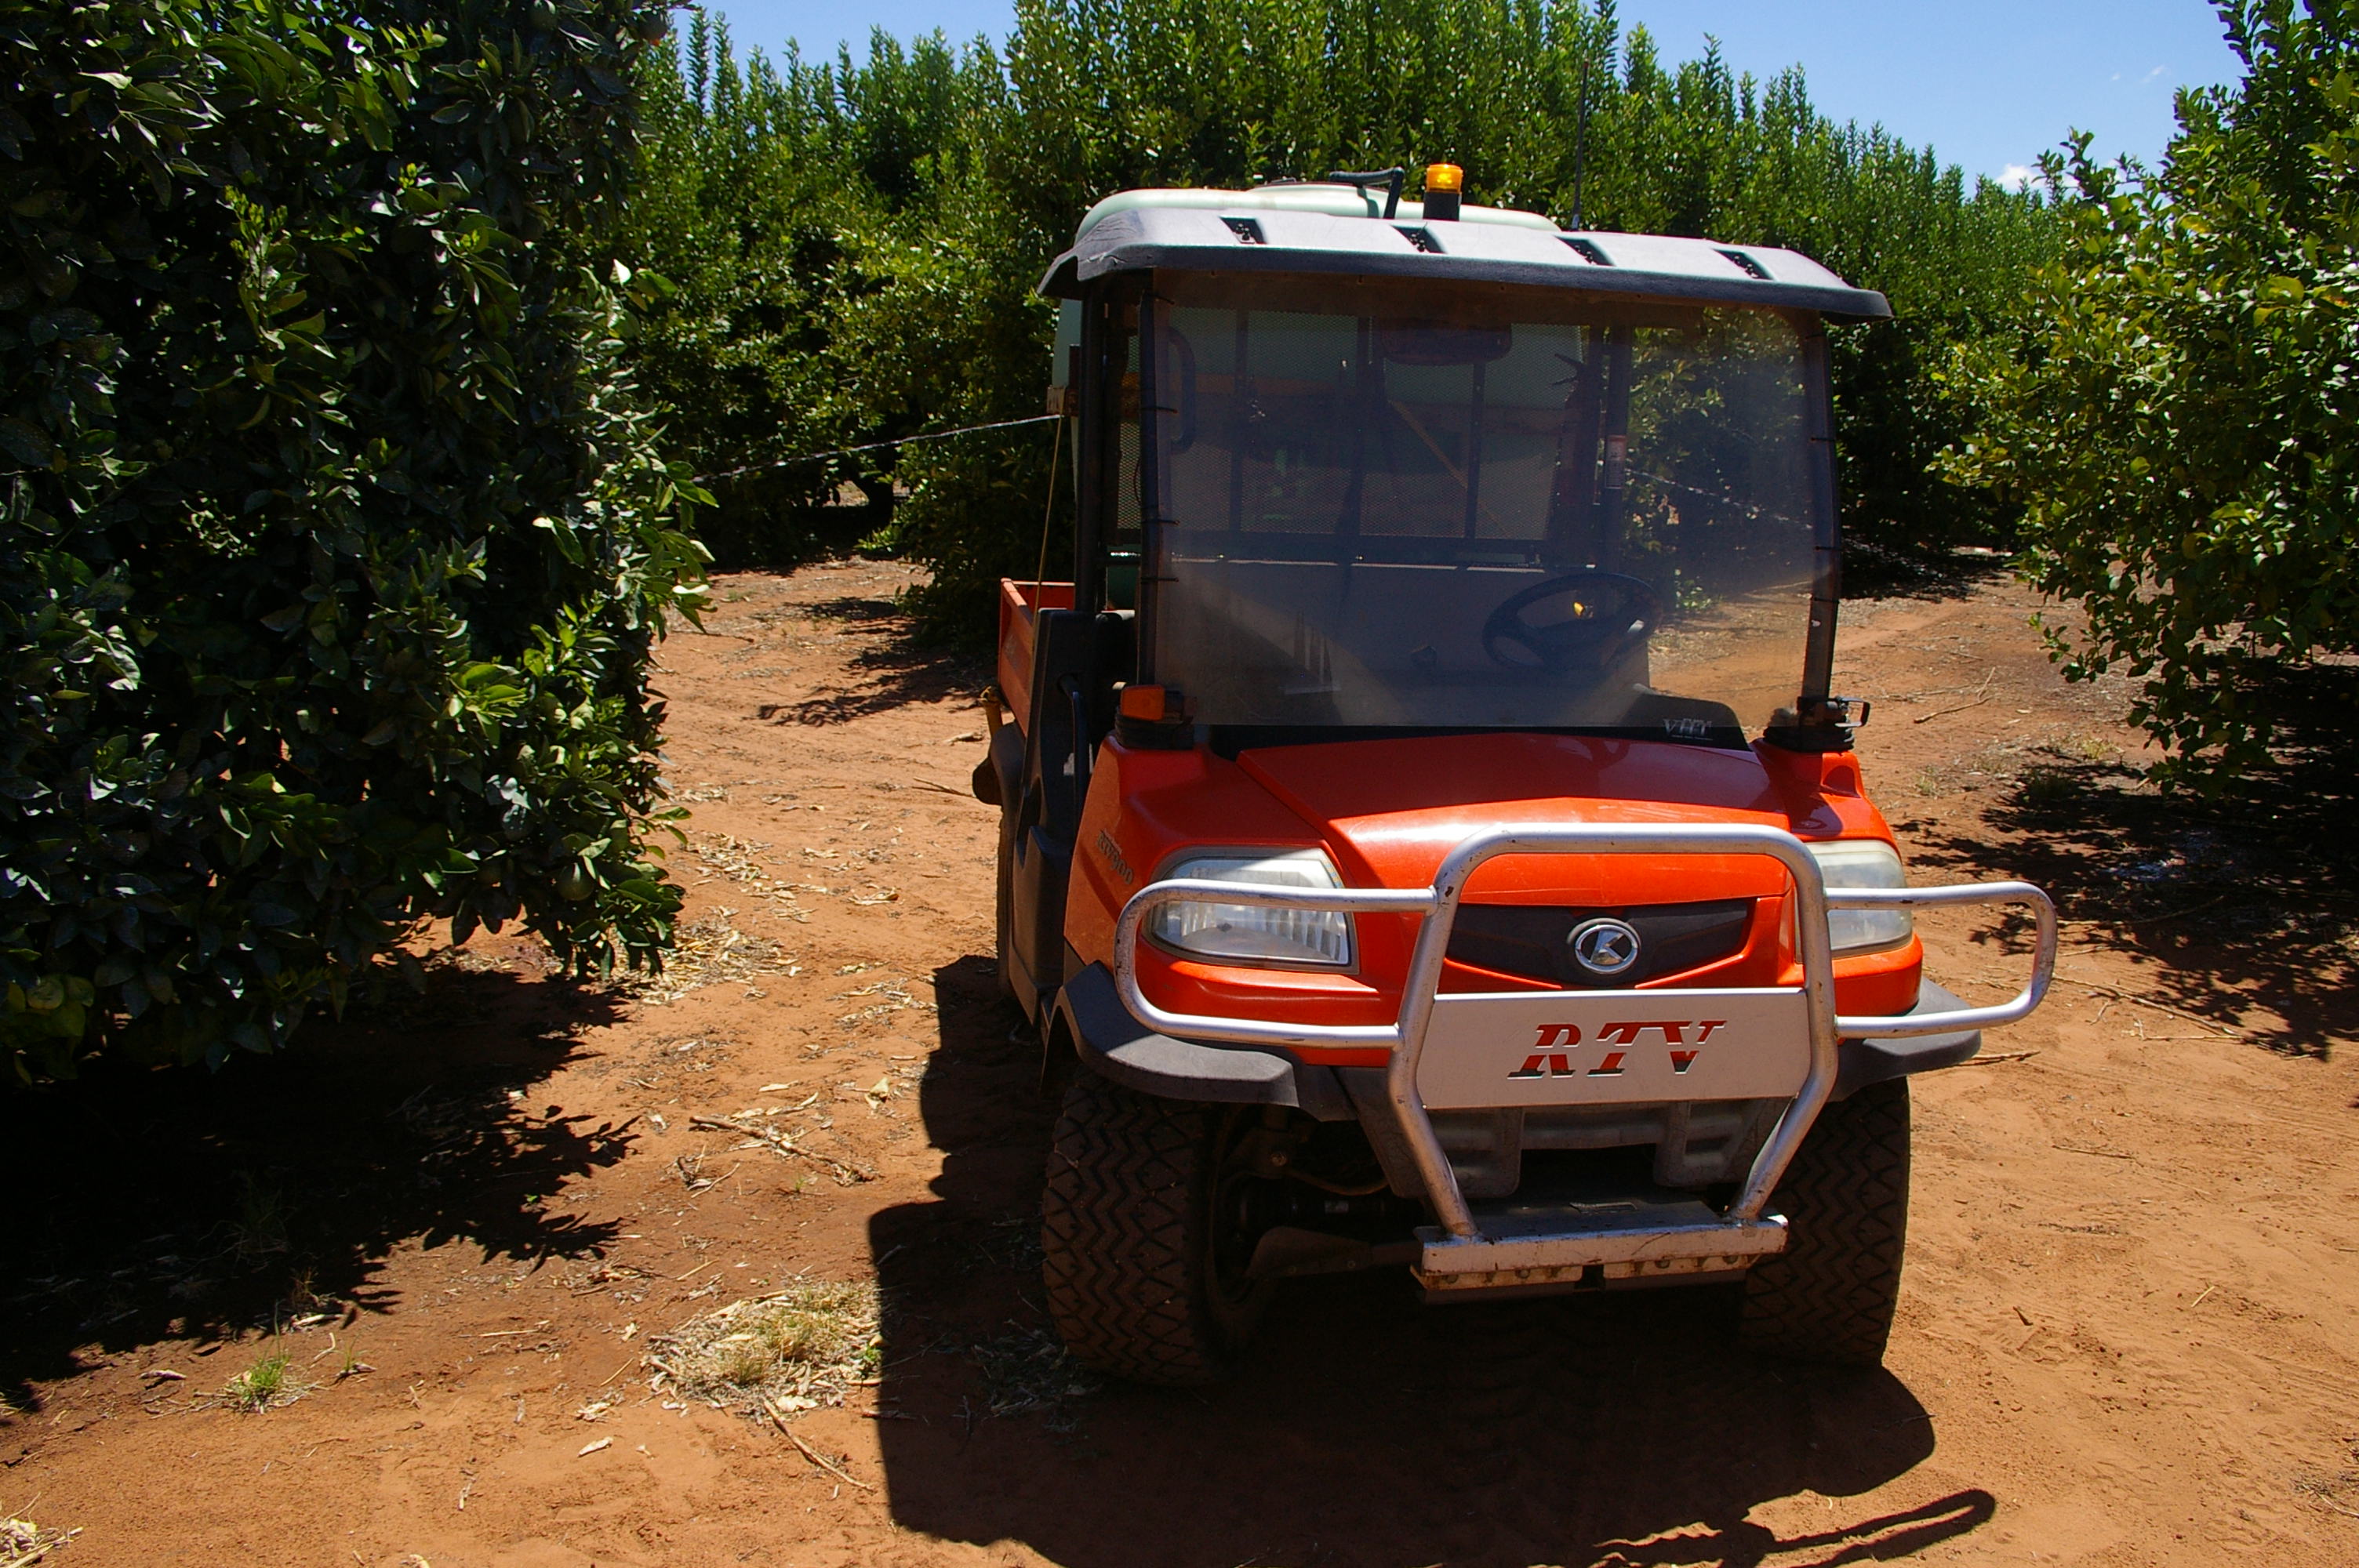
The Real Deal - Injecting Chemicals into Irrigation Water
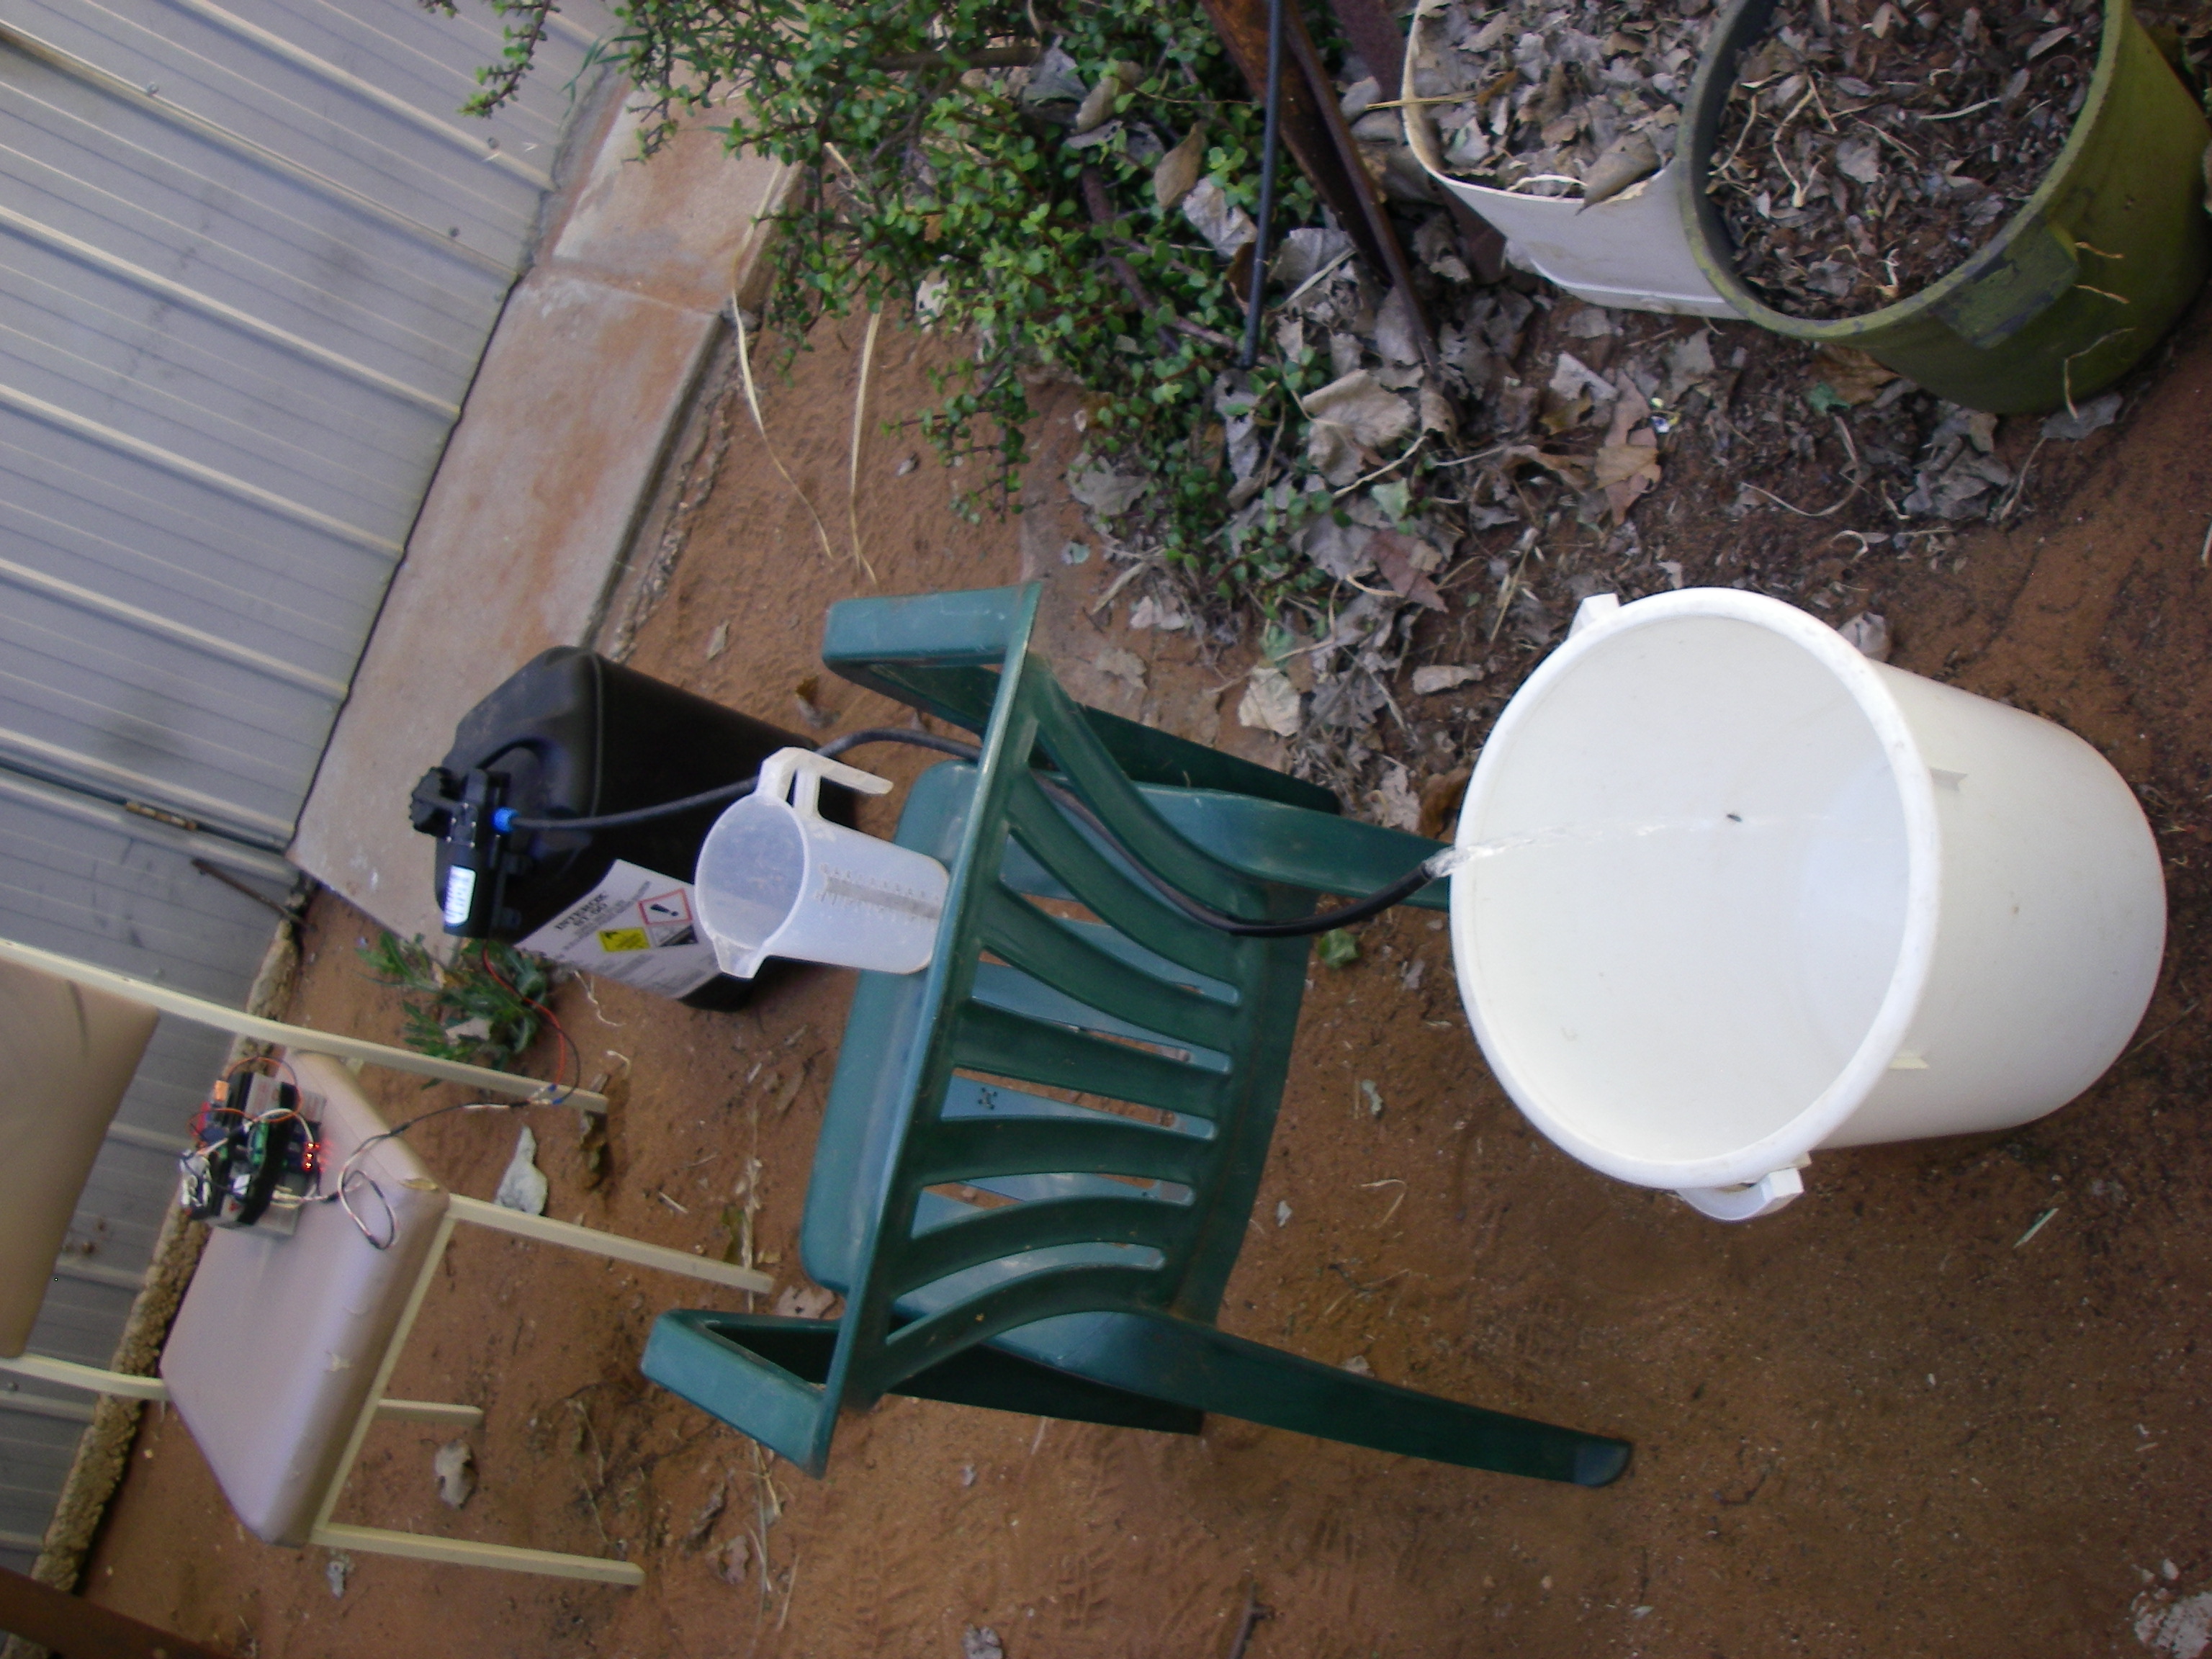
Now it was time to try it out in the field. So after hooking everything up, taking the photos and then putting on gloves and goggles (in case a pipe fails) the pump was stated. The result positive, but had issues with interference from the pump or relay crashing the CPU periodically. My wife commented that the pump jumped around when it started and stopped, which made me think that it's really a job for soft start PWM not a on/off relay. Anyhow the field results looked good from the trial and the pump controller so on to the next step.
Step 2 - A Proper Working Prototype
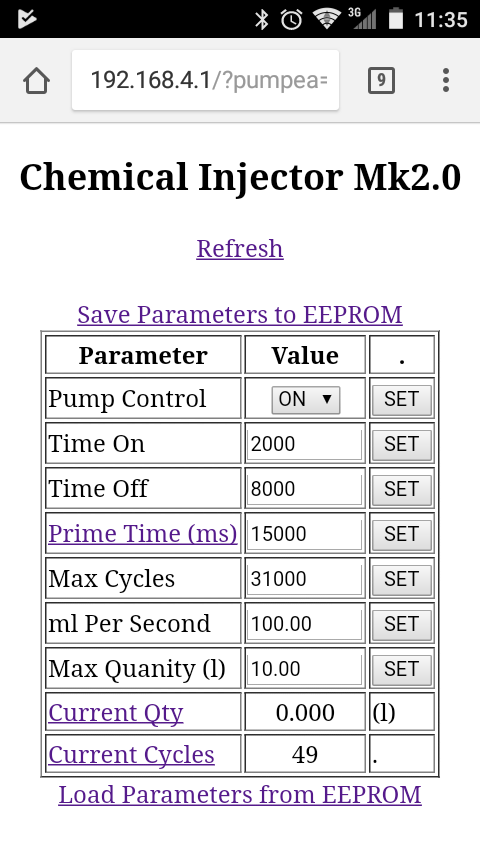
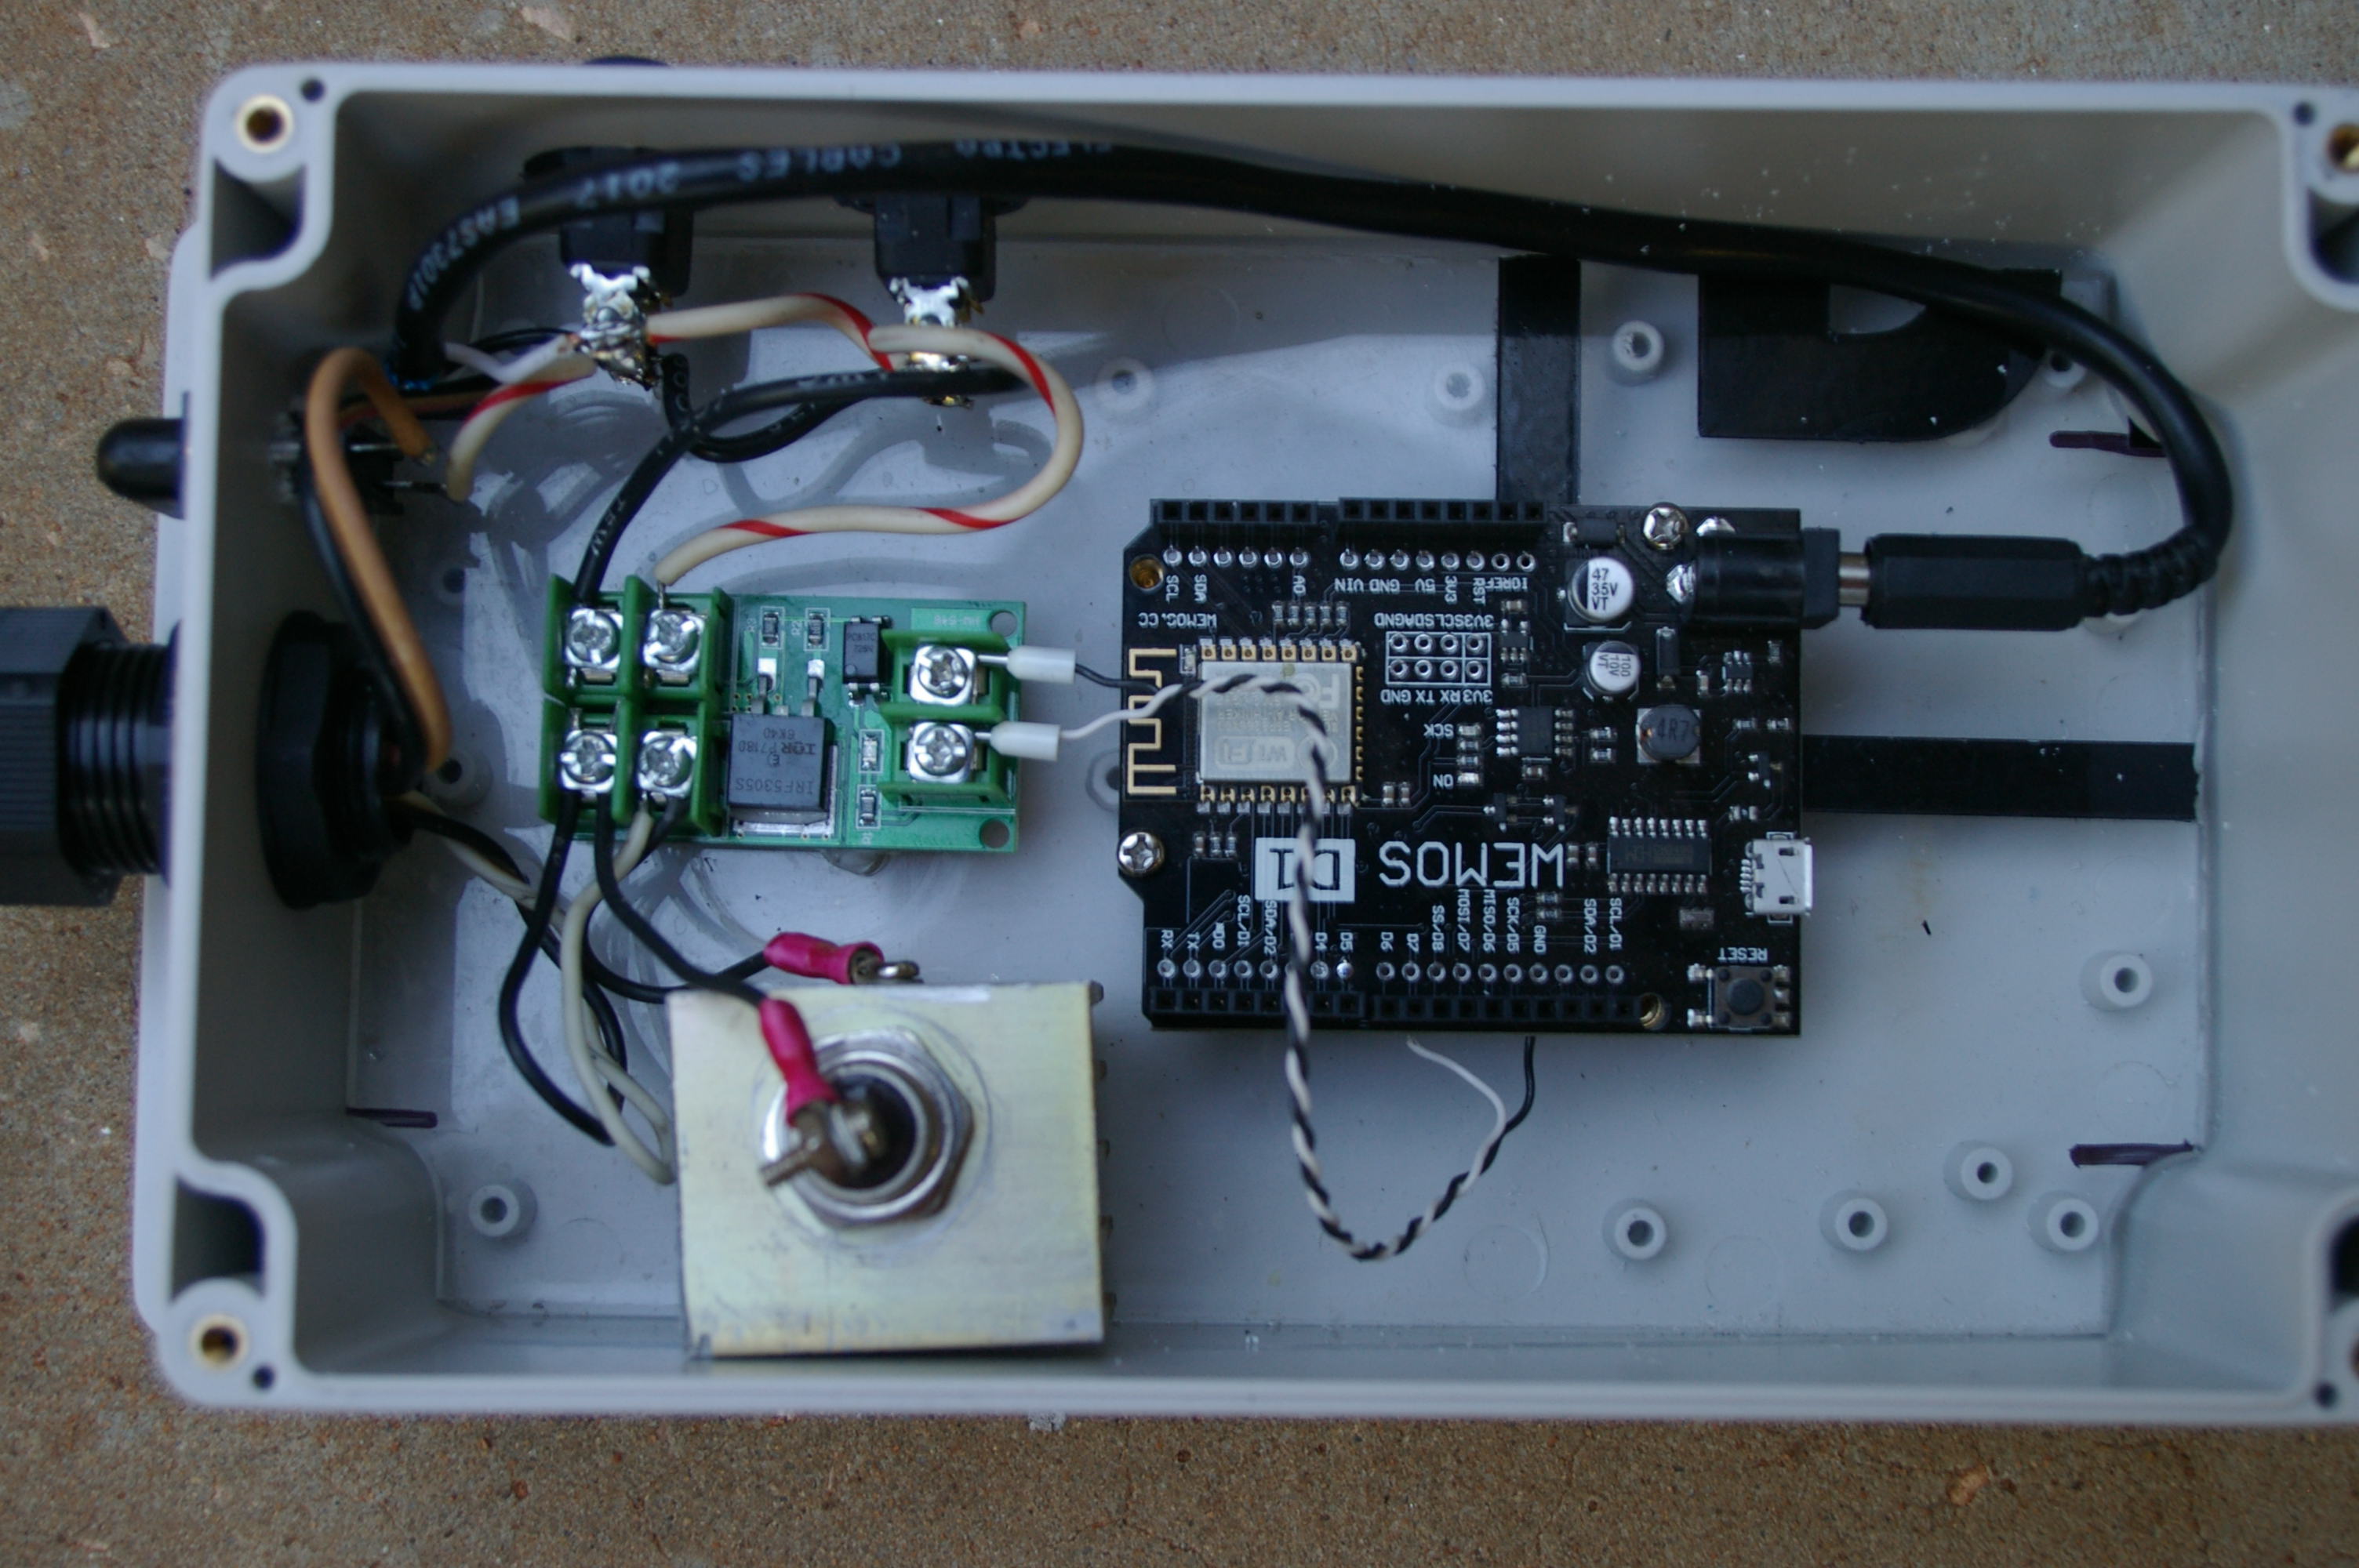
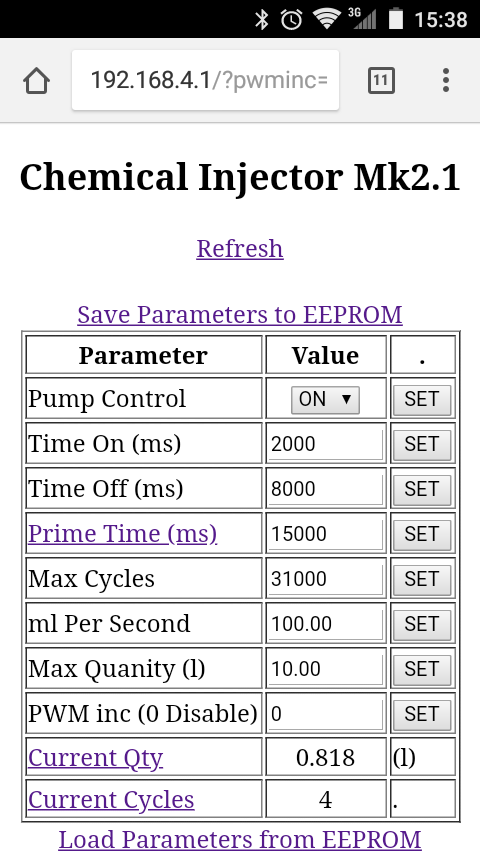
I didn't want a physical UI on this controller as it's near chemicals and wants to be in an IP65 box, etc. So I thought it should be operated at a distance via WiFi. Been itching to try out a WeMos D1 R2, they are same layout as a UNO but 3.3 Volt. So I designed a HTML user interface and implemented it via the WeMos web server and WiFi access point.
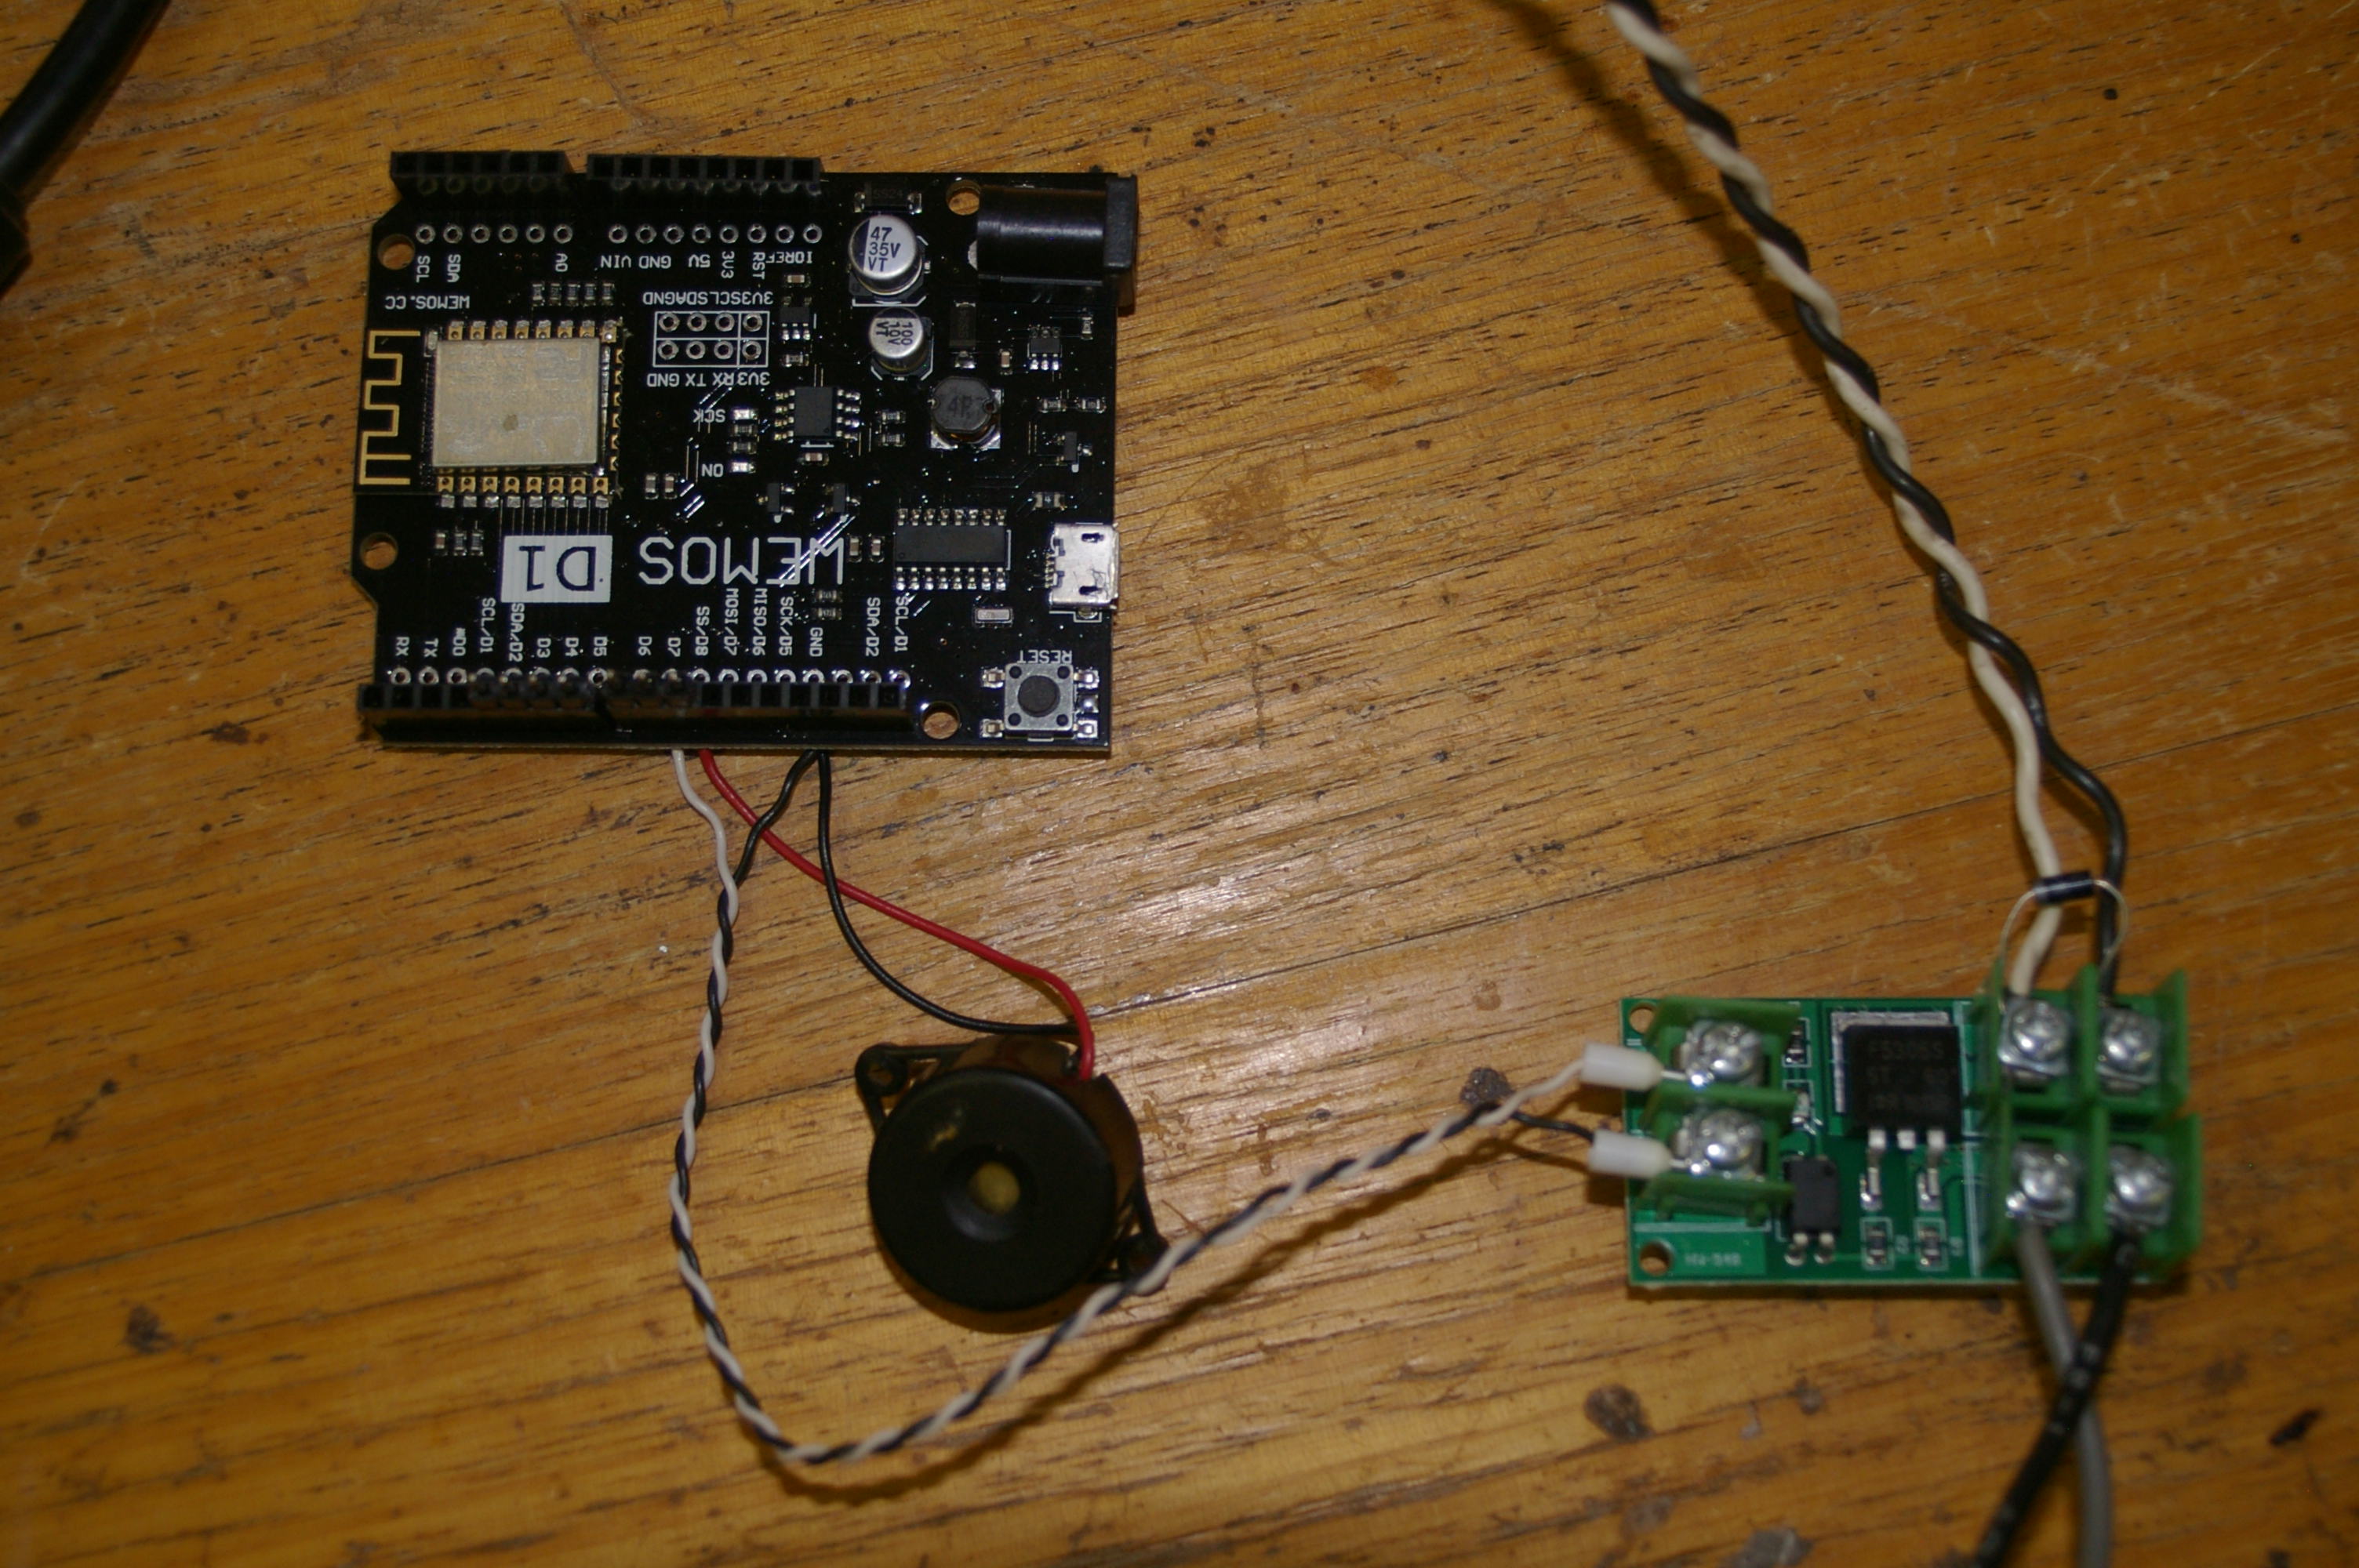
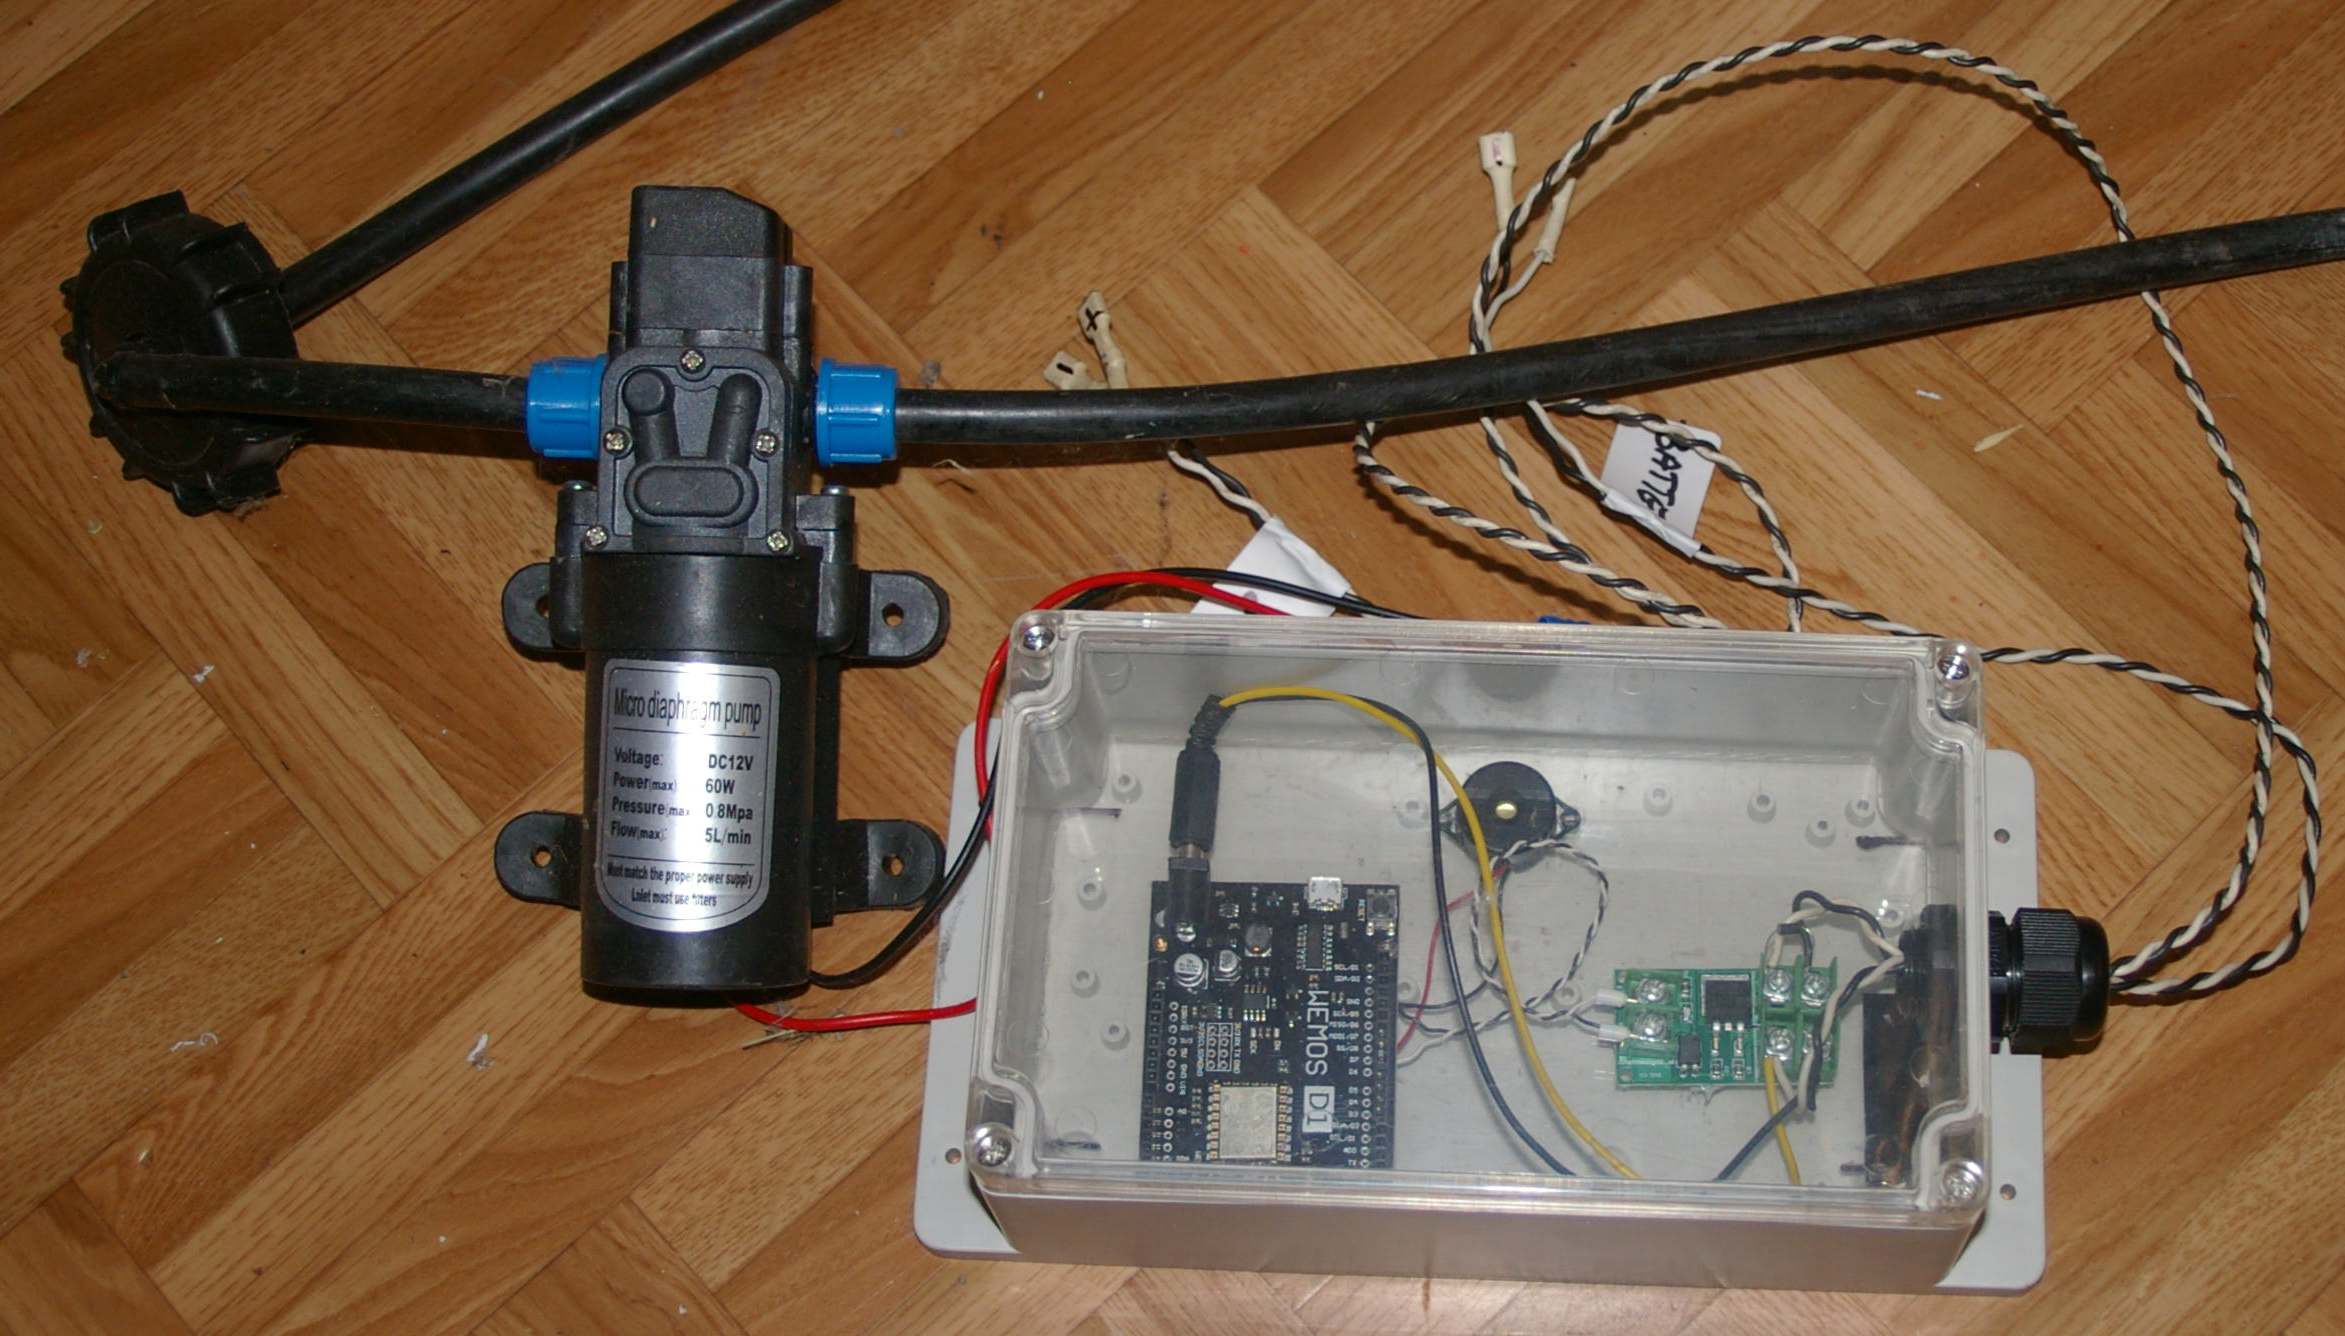
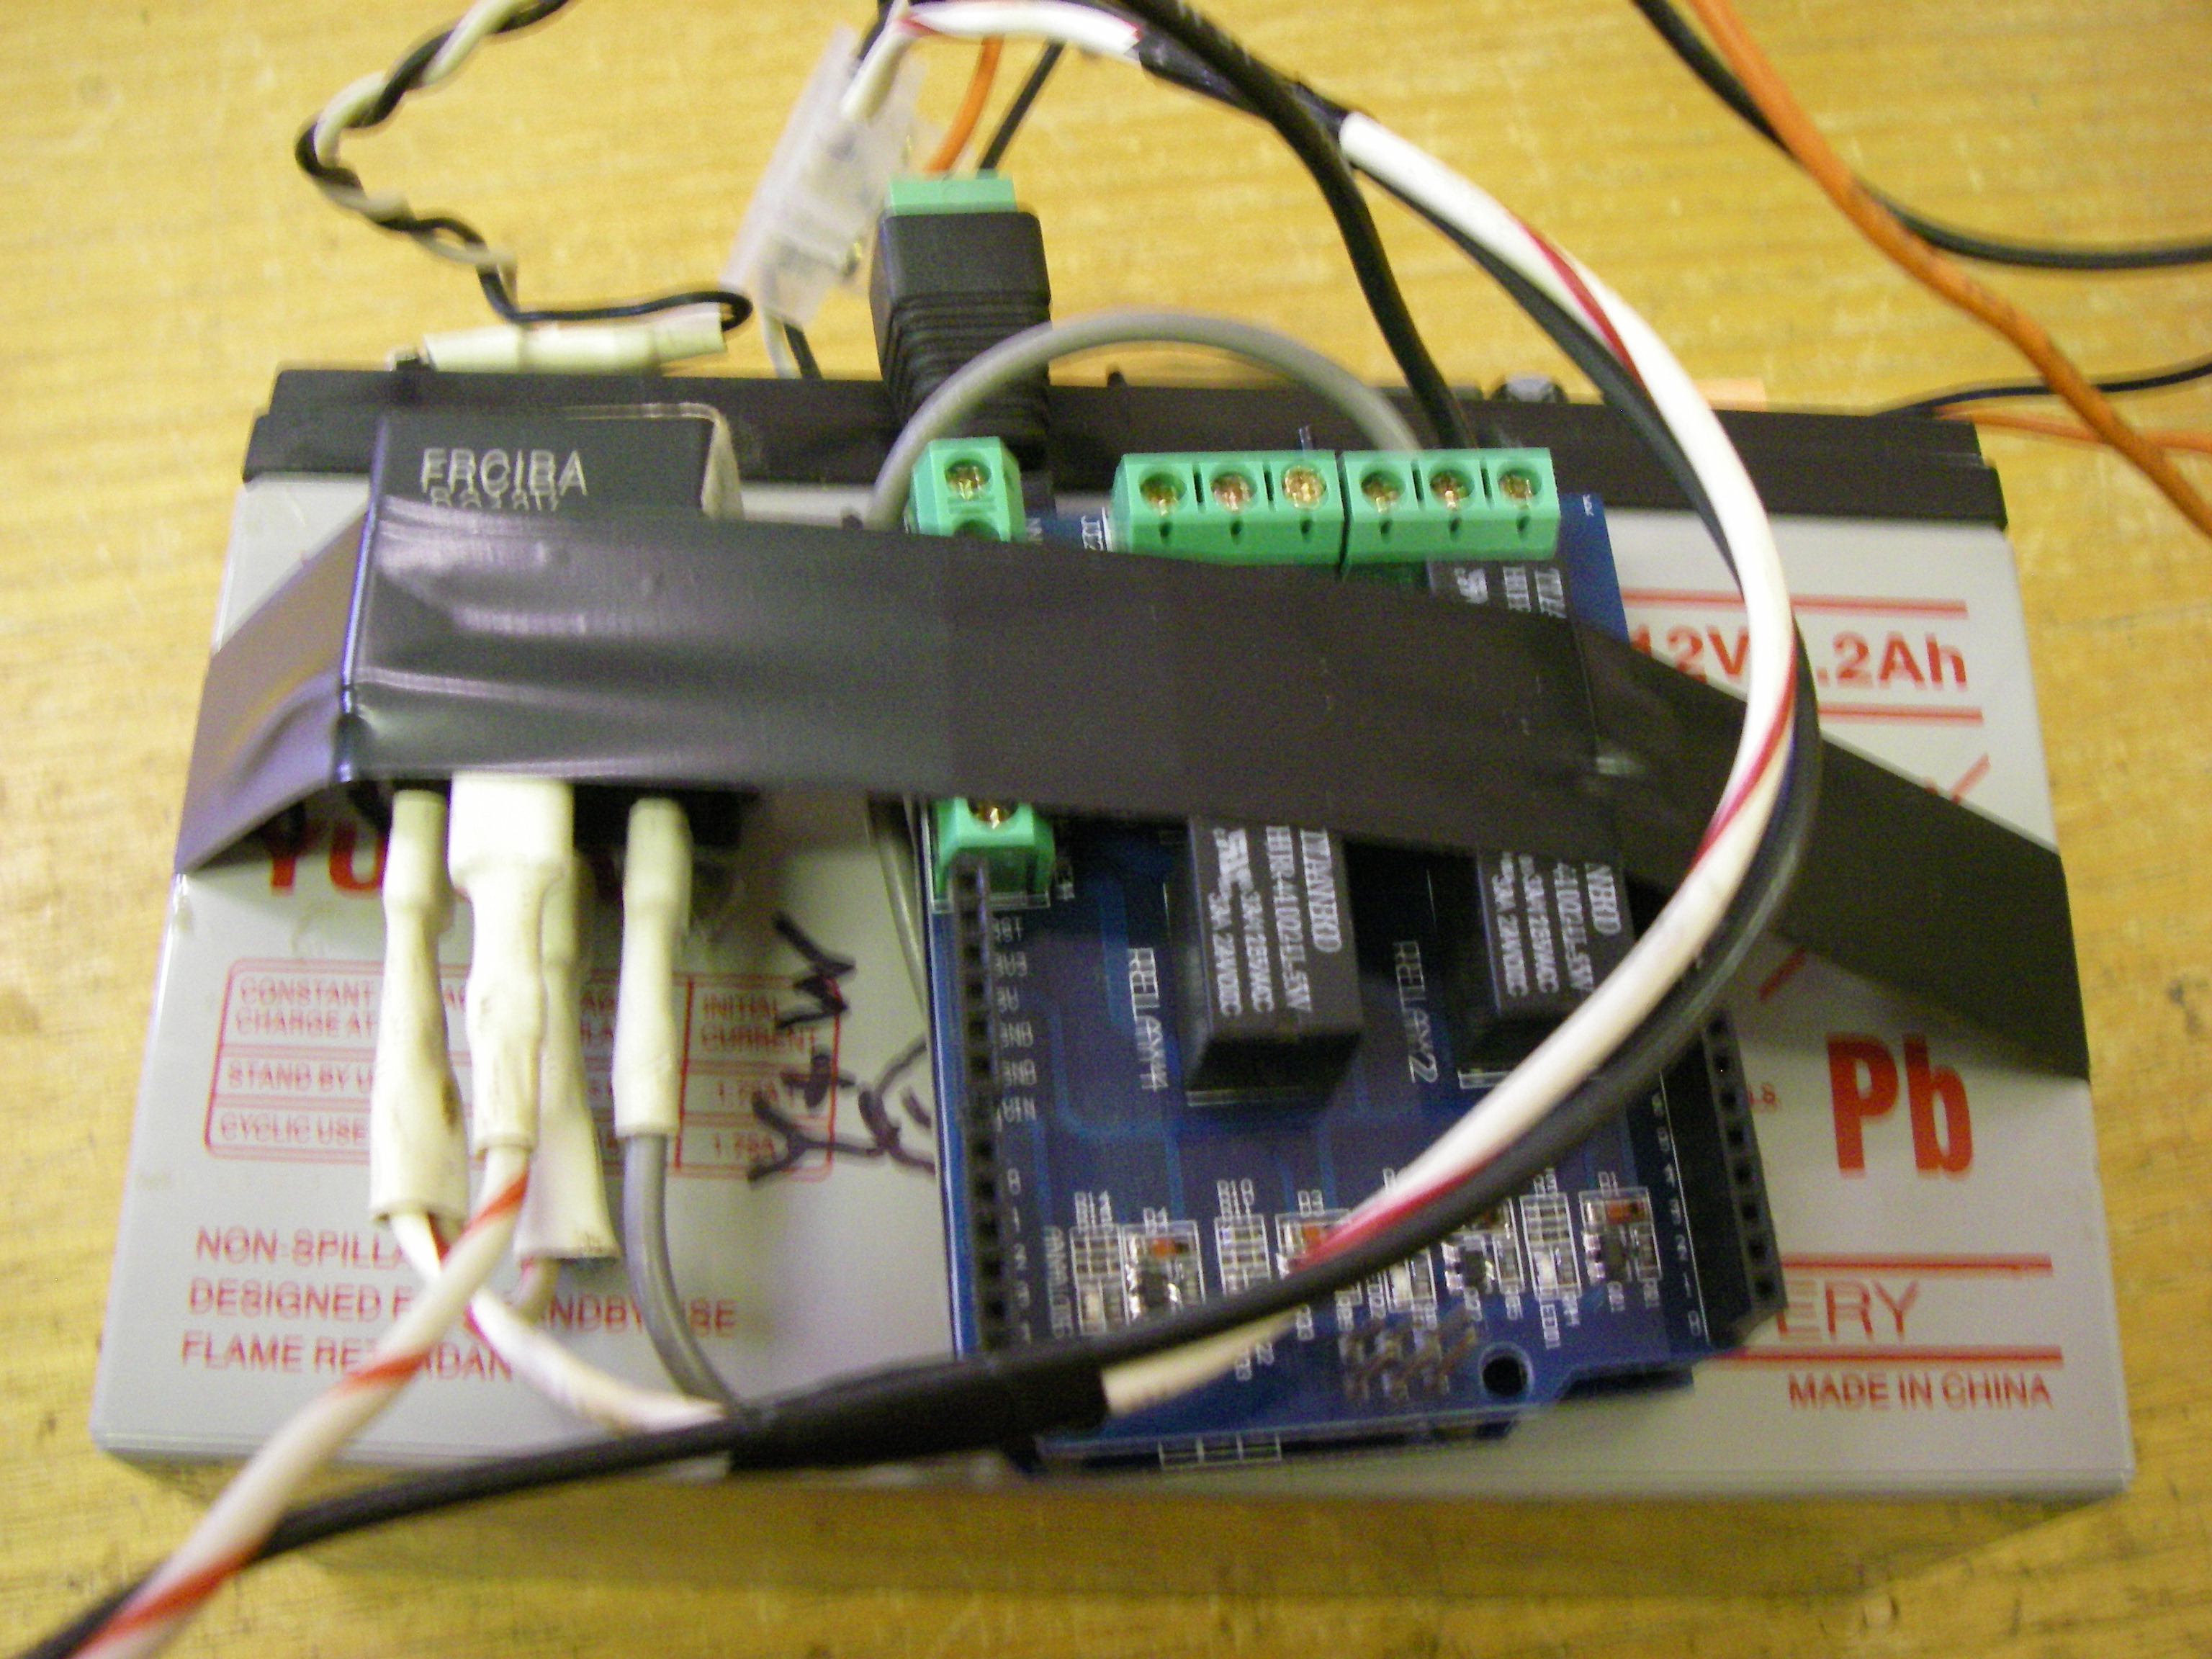
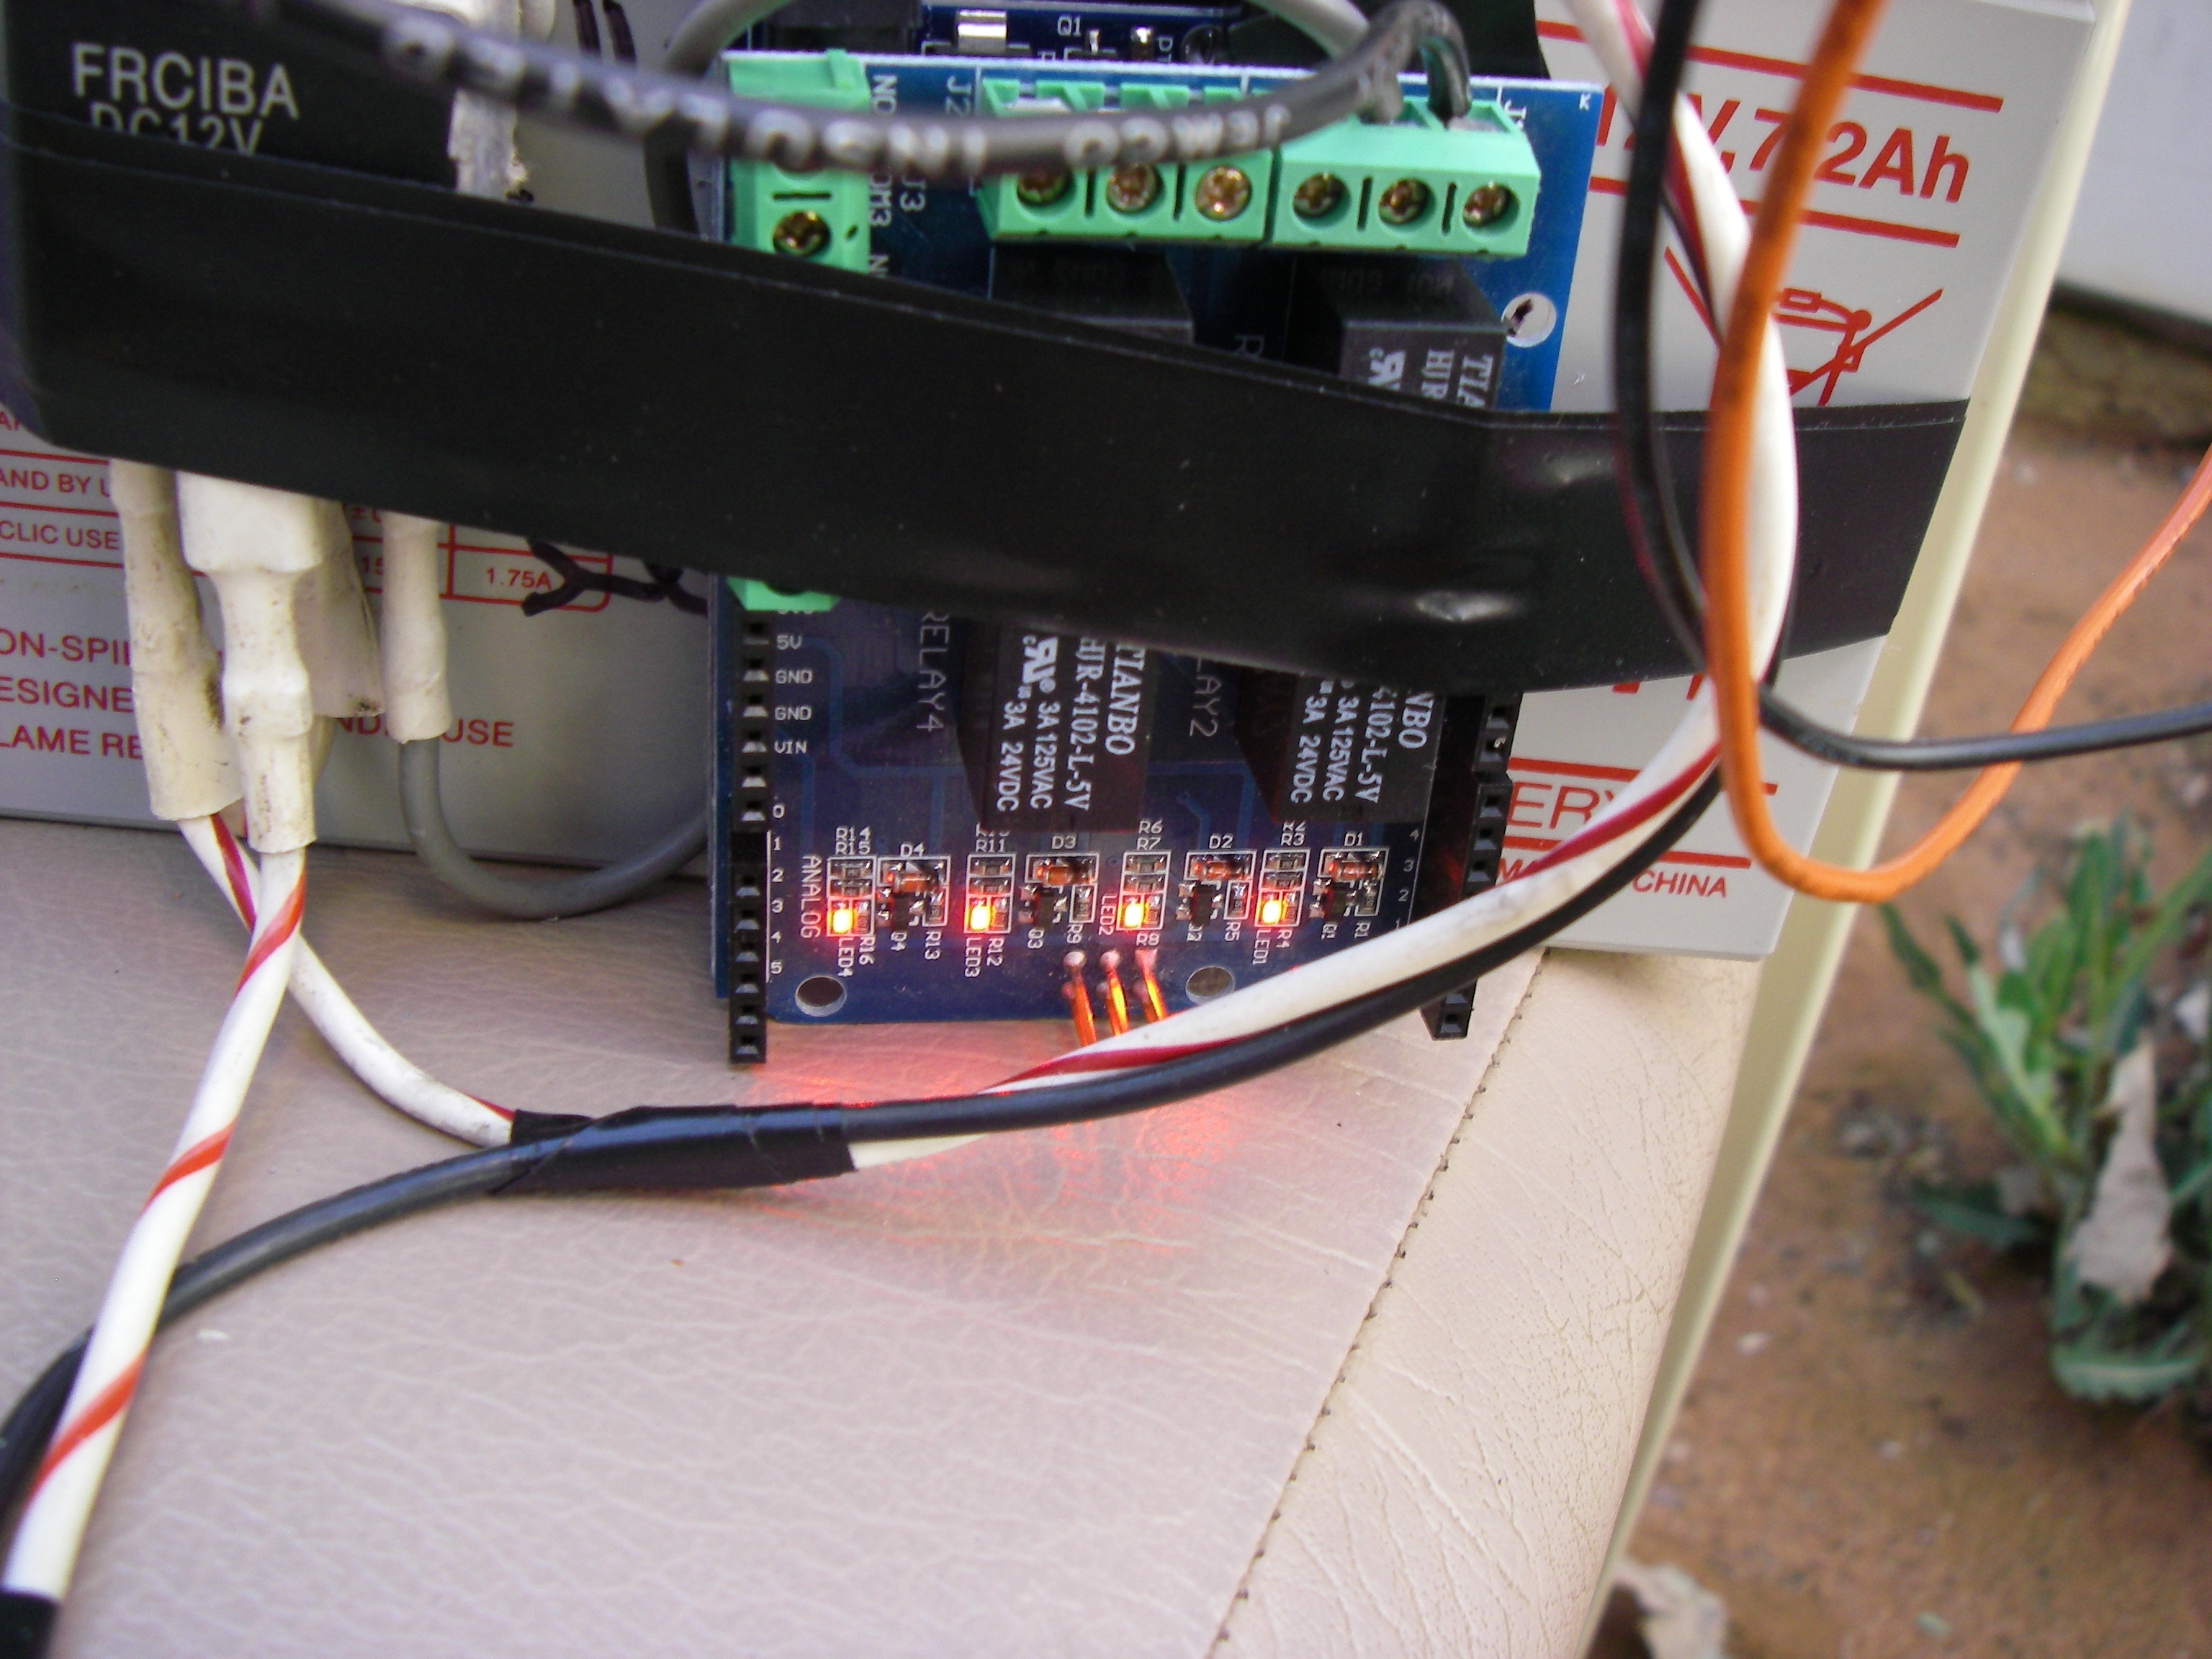
The PWM output form the D1 is connected to the FET board which drives the motor directly. Everything else is done in the software on the WeMos. Actually I think this photo might be "self-fritzing" as you can see where the connections go. Obviously power has to be connected to the D1 but it can accept 9 to 24V DC so a 12V battery is in the butter zone.
HTML Headers Are Important
Yep this one caused me some grief, pages that would work on Android but not iOS browsers - WTF. I have been coding data backed web pages for years but I've never had to make or send a header. Bit of an eye opener, all this stuff you normally take for granted. Must say the google chrome was great, you can click and see the header source after pressing F12. I'd did some simple pages on my office web server and compared the results to my Arduino versions. A bit of study of the included library files (.h and .cpp) to see what they do, how they do it and my issues where sorted.
Yet Another Use
My neighbor and I was chatting about fruit fly control, his new spray rig lacked the pulse control to deliver the right amount of bait to the trees. After seeing what my injector did he asked for one with some modifications. A quick build later and he was a happy camper. So the new features in the software are setting the max quantity and max cycles both to zero. This lets the pump free run at the selected duty cycle. I have also set it to remember the previously saved pump run state instead of the default off at power up. You can also adjust the PWM ramp or disable (0) it so the ESP can drive a relay instead of the FET board.
So stay tuned, I will upgrade this as changes are made during the next 12 months as reality and practicality catch-up with workshop theory.
EXPANDED TECHNICAL DETAILS
Precision Fluid-Rate Analytics
A professional-grade controller designed for managing chemical dosing in laboratories, aquariums, or industrial processes.
- Peristaltic Pump PWM Driver: The Arduino manages a high-accuracy peristaltic pump via a MOSFET or motor driver. The firmware translates "Milliliters per Day" into a precise sequence of timed rotations.
- Browser-Based Calibration UI: (Features) The Arduino (WiFi enabled) hosts a local web dashboard. Users can calibrate the pump's flow rate and set dosing schedules directly from a Chrome browser on their PC or phone.
Reliability
- Volumetric Safety Interlock: The firmware tracks the "Total Dosed Volume" in real-time. If the pump runs for longer than its safety limit (indicating a pipe leak or sensor error), the Arduino instantly shuts down the system.