ABOUT THIS PROJECT
In this project you'll learn how to control the brightness of an led using any remote. You will learn how to finely control the brightness of an LED using Infrared (IR) signals from common household remote controls, such as a TV remote or an AC remote. We will use the principle of Pulse Width Modulation (PWM) to adjust the brightness and IR protocol decoding to command the Arduino.
STEP 1: What you'll need


For this tutorial you'll need:
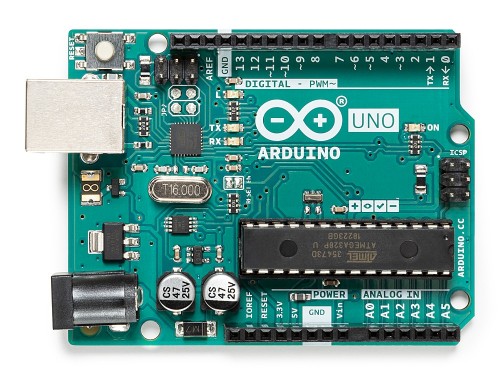
- Arduino uno
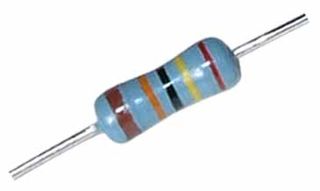
- 221 Ohm resistor (To limit the current and prevent it from flowing excessively through the LED, which could cause damage)
- Jumper wires
- IR Receiver & Remote (The infrared signal receiver, often operating at 38kHz, and the signal-transmitting remote)
- Breadboard
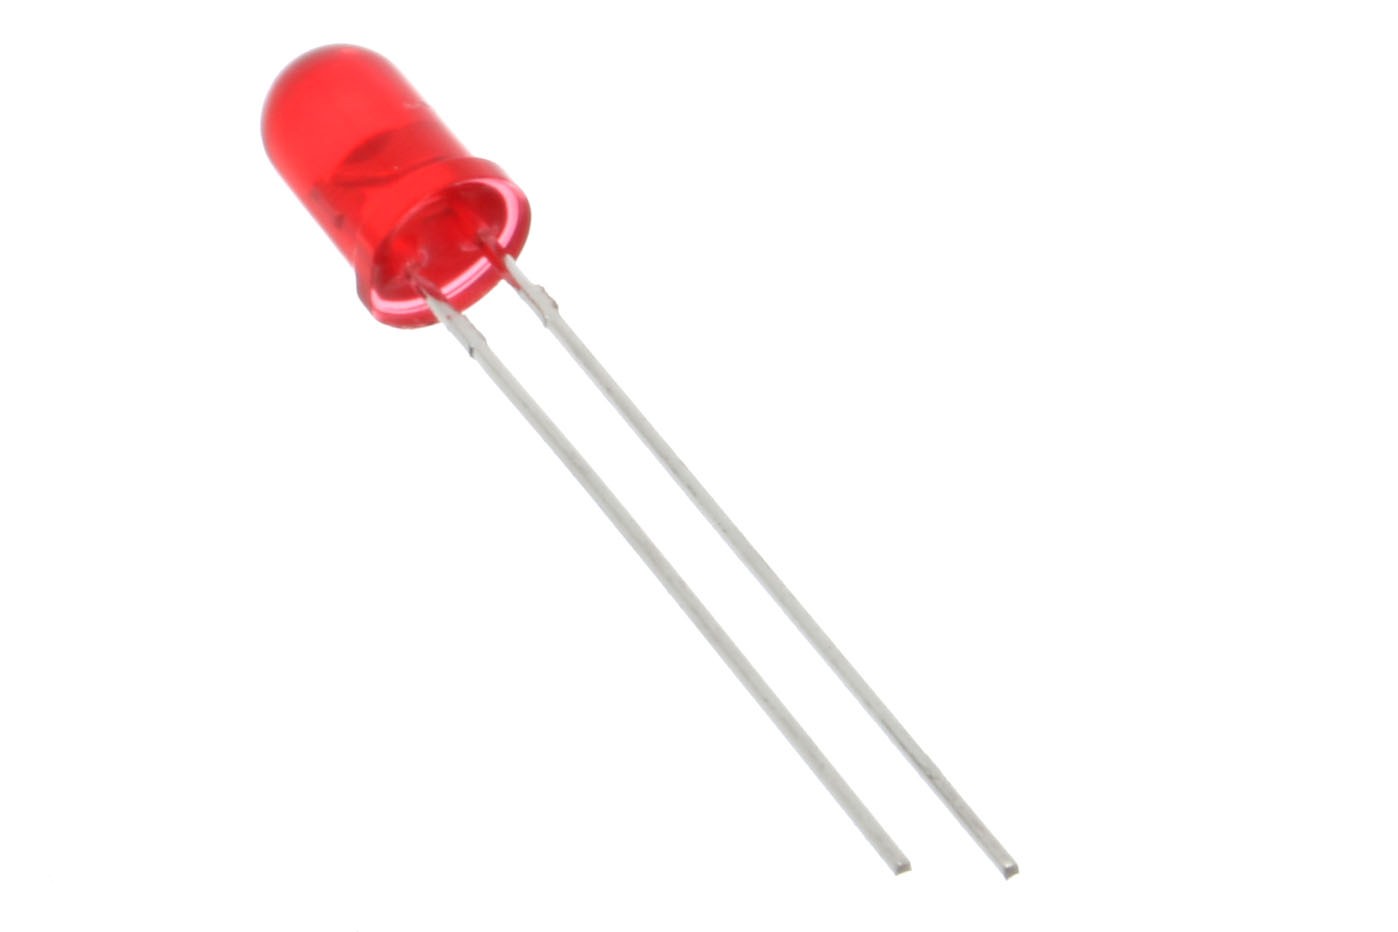
- LEDs
STEP 2: The Circuit
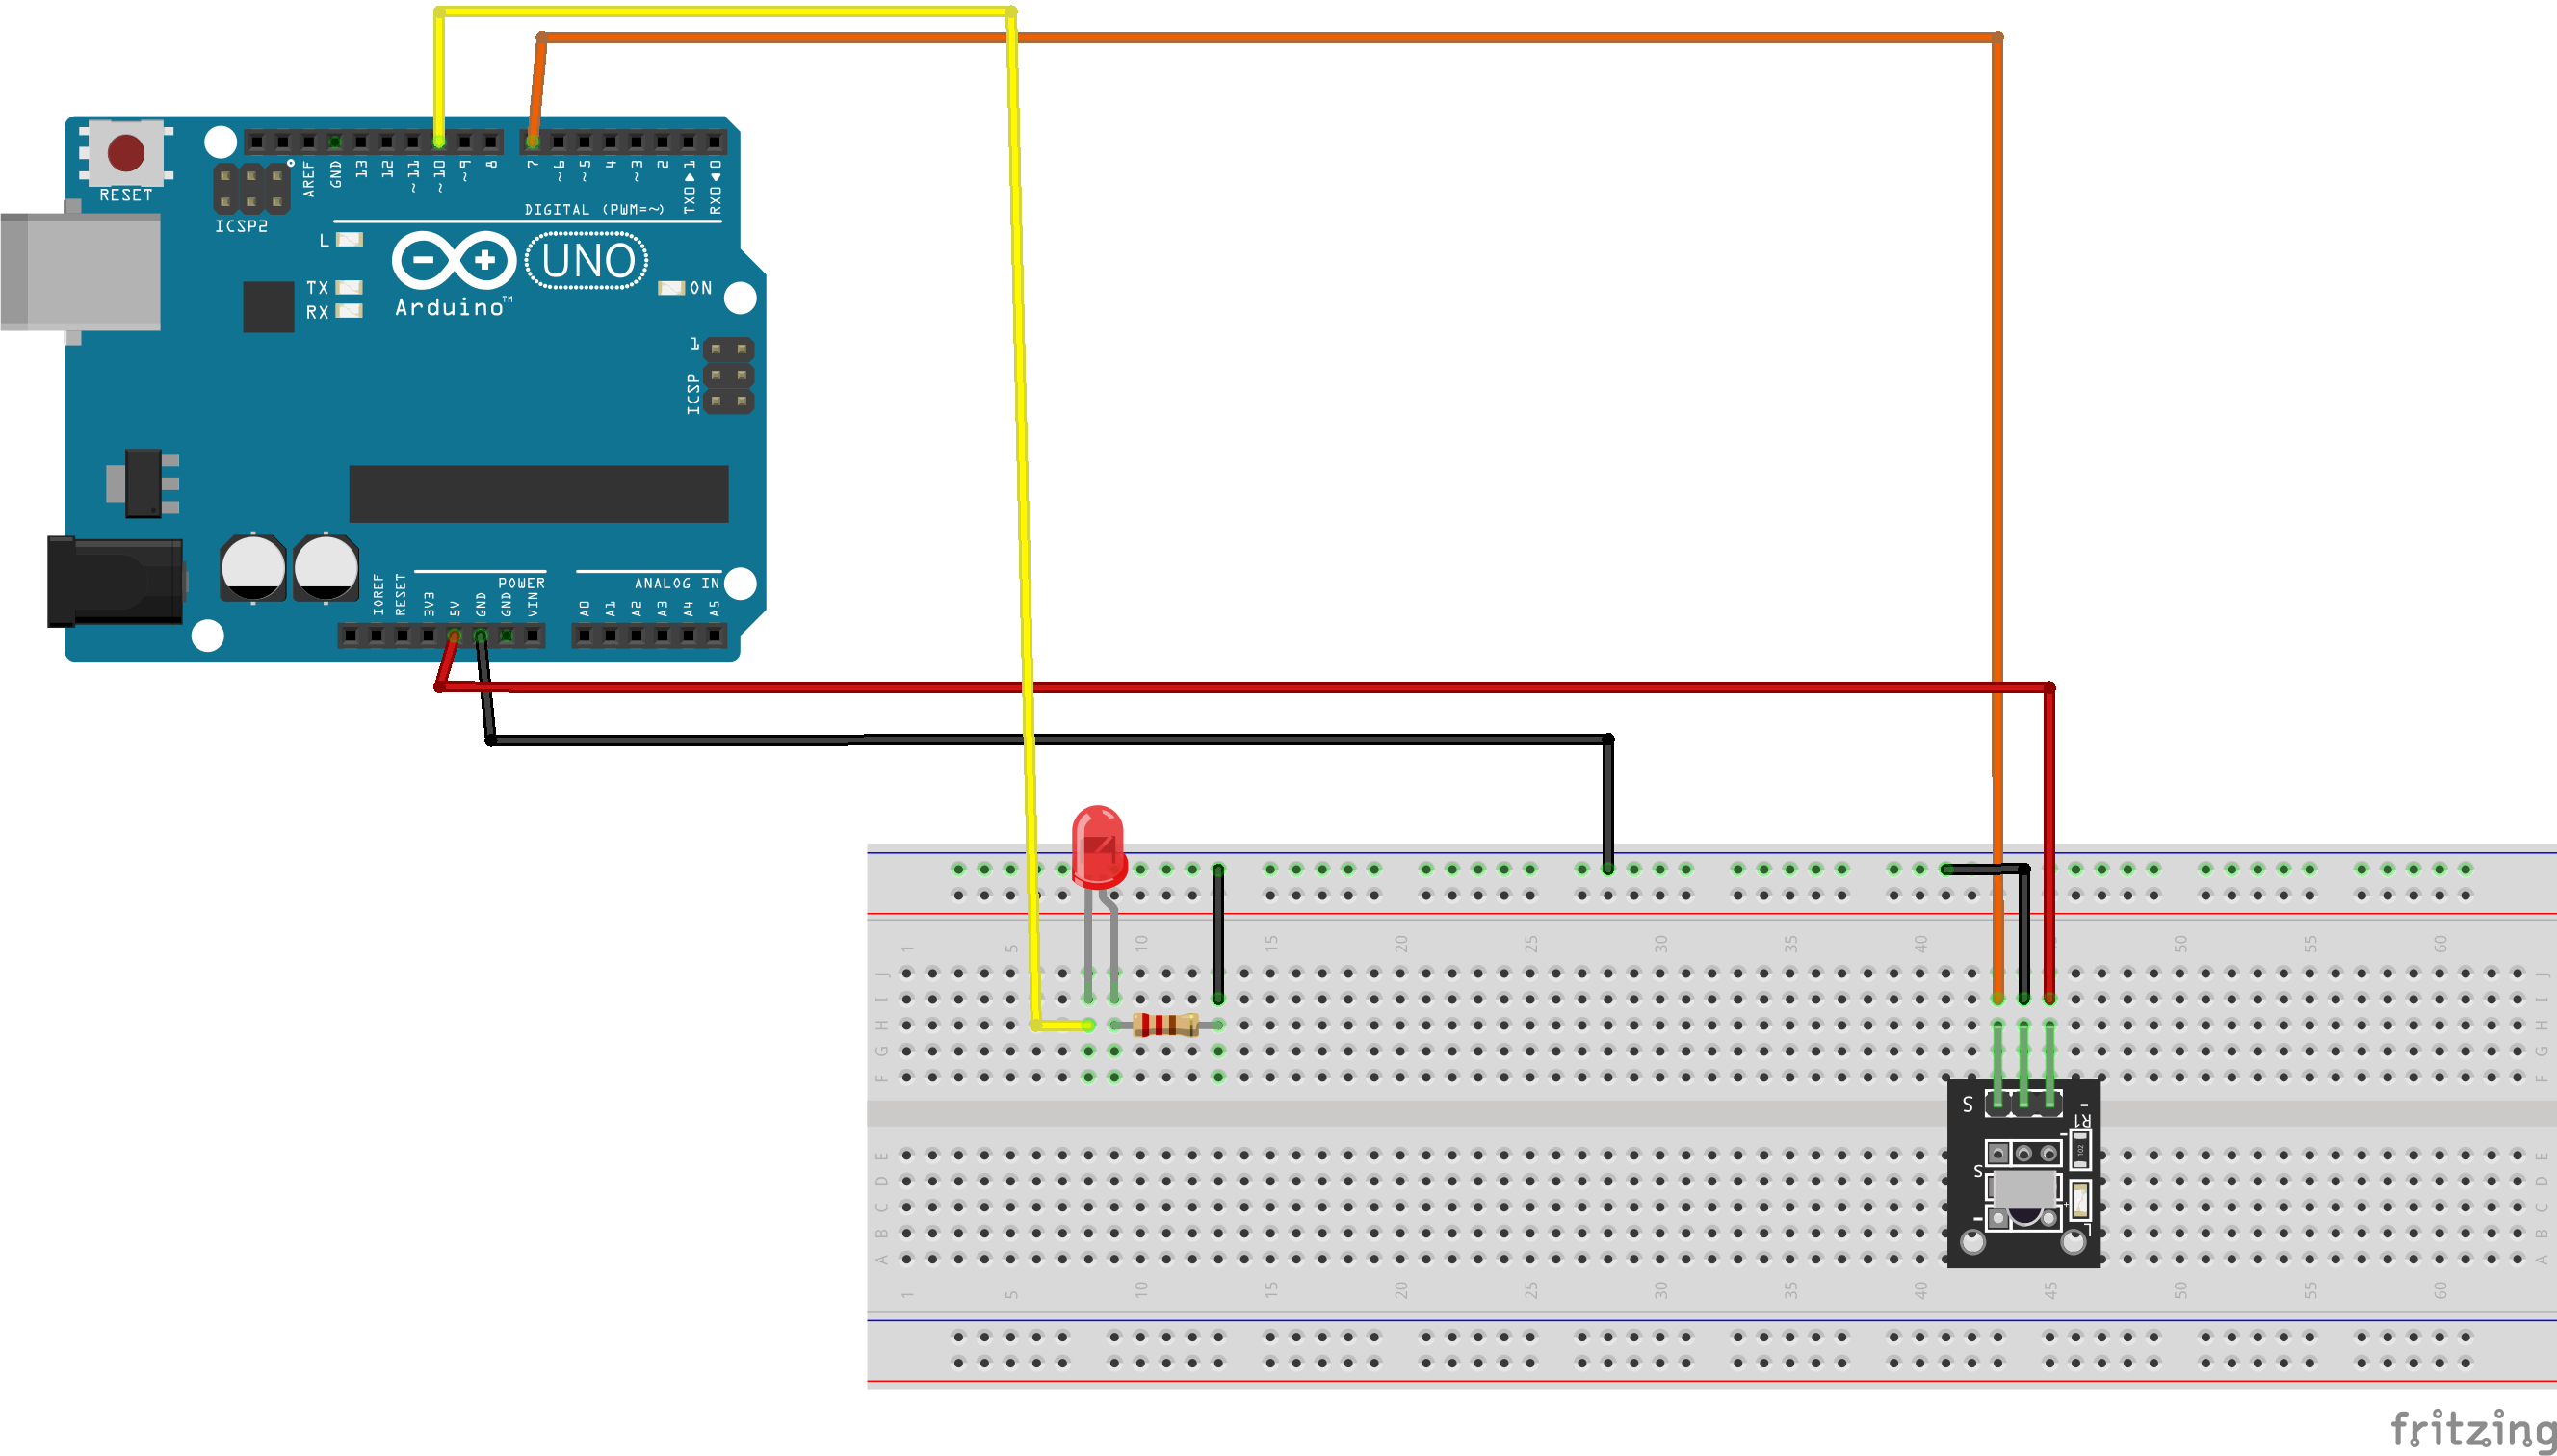
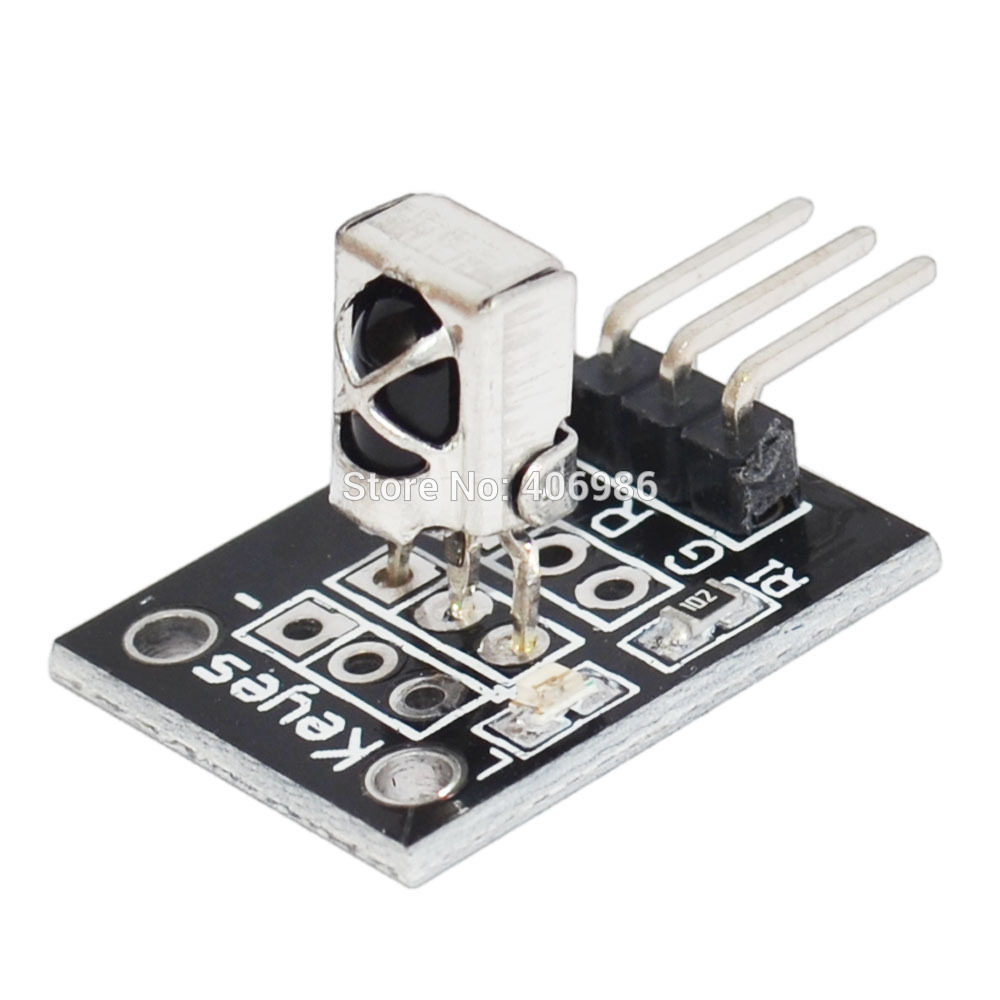
If you don't know how IR Receivers and Transmitters work you can click this link or this to learn more on them. When connecting the IR Receiver circuit, special attention should be paid to the "pinout" of the receiver, as both module types (Breakout Board) and standalone diode packages are available on the market.
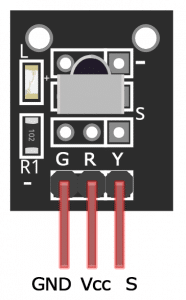
The pin layout on most breakout boards look like this:
The pin layout of most stand-alone diodes is like this:
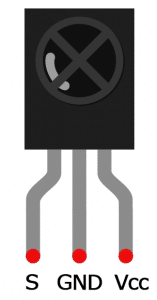
Source of images: https://www.circuitbasics.com/arduino-ir-remote-receiver-tutorial/
STEP 3: The Code
How it works
Before we look at the code we need to first know the button layout of our remote. First you have to download the IRremote library from here. To install the library from the ZIP file, open up the Arduino IDE, then go to Sketch > Include Library > Add.ZIP Library, then select the IRremote ZIP file that you downloaded. When you're done Upload the code below and open the serial monitor (This is also a great opportunity to see if your pin layout is correct).
#include
const int RECV_PIN = 8;
IRrecv irrecv(RECV_PIN);
decode_results results;
void setup(){
    Serial.begin(9600);
    irrecv.enableIRIn();
    irrecv.blink13(true);
}
void loop(){
    if (irrecv.decode(&results)){
        Serial.println(results.value, HEX);
        irrecv.resume();
     }
}
If nothing seems to be happening (LED on Arduino doesn't flash when you press a button) check your pin layout you might have swapped Vcc with S.
You can map out each button of your remote and save it in a txt file for reference later.
NOTE: When you hold down a button continuously the serial monitor would print 0XFFFFFFFF, which signifies a "Repeat Code." Note down the HEX values of the buttons you want to use for "increasing brightness" and "decreasing brightness" for use in the next step.
Now that you know the button layout of your remote lets look at the code bit by bit.
#include
const int RECV_PIN = 7;
IRrecv irrecv(RECV_PIN);
decode_results results;
const int ledPin = 10;
int brightness=0;
unsigned long key_value = 0;
To use the IRremote library, we need to create an object called irrecv and specify the pin number where the IR receiver is connected (line 3). This object takes care of the protocol and processing of the information from the receiver.
The next step we create an object called results from the decode_results class, which will be used by the irrecv object to share the decoded information with our application (line 5).
Next we create variables to set up pin 10 (which must be a PWM-supported pin, e.g., 3, 5, 6, 9, 10, 11) for our LED and to store the value of our brightness. The last variable, key_value, is used to store the last button code to handle continuous presses.
void setup(){
 irrecv.enableIRIn();
 irrecv.blink13(true);
 pinMode(ledPin, OUTPUT);
}
In the void setup() block, first we set up the serial monitor baud rate. Next we start the IR receiver by calling the IRrecv member function enableIRIn() (line 10).
The irrecv.blink13(true) function on line 11 will blink the Arduino’s on board LED every time the receiver gets a signal from the remote control, which is useful for debugging.
The pinMode(ledPin, OUTPUT) function configures ledPin (pin 10) to behave as an output, ready for PWM signal transmission.
void loop() {
 if (irrecv.decode(&results)){
    // If it's a Repeat value, use the last received value
    if (results.value == 0XFFFFFFFF) {
        results.value = key_value;
    }

    // Example HEX codes (must be changed according to your remote)
    if(results.value == 0xF076C13B){ // Decrease brightness button
        brightness -= 5;
        if (brightness < 0) brightness = 0;
    }
    else if(results.value == 0xA3C8EDDB){ // Increase brightness button
        brightness += 5;
        if (brightness > 255) brightness = 255;
    }

    key_value = results.value; // Store the current code for the next iteration
    irrecv.resume();           // Reset the IR receiver
 }
 brightnessControl(brightness); // Update LED brightness
}
In the void loop() block, the function irrecv.decode will return true if a code is received and the program will execute the code in the if statement. The received code is stored in results.value. The most important logic is handling the 0XFFFFFFFF value. If we receive this value, it means the user is "holding down the same button," so we must instruct the program to use the previously stored code in key_value to continue execution.
The if condition checks if the button pressed is a + or - (your HEX code might be different depends on your remote and receiver) and increases or decreases the value of the brightness. The next condition constrains the value of brightness between 0 & 255.
irrecv.resume() is used to reset the receiver and prepare it to receive the next code.
The line brightnessControl(brightness); calls the brightnessControl() function and passes in the current value of our brightness as its argument to update the LED.
 void brightnessControl(int value){
     analogWrite(ledPin,value);
 }
The brightnessControl() method takes an integer as its argument and sets the brightness of our LED using PWM. The analogWrite() function generates a Square Wave signal with a constant frequency, but adjusts the width of the High period (Duty Cycle) to control the amount of power the LED receives, making us perceive a change in brightness.
For more info on PWM click here or here
For more info on IRremote click here
STEP 4: Congratulations!!!
You've successfully finished this project. Well done! You have successfully built a lighting control system with a remote control. This project serves as a fundamental basis for Home Automation.
I hope you liked this, If you have any suggestions on how to make my code, let me know in the comments. If you have any questions or suggestions for improving the code's efficiency (such as using Interrupts or storing brightness values in EEPROM), feel free to comment and share.
THANK YOU