Hey guys!
How are you all doing?
I am back with a new project, which is controlling LEDs via an ESP8266 WiFi module.
You can control anything with the WiFi module.
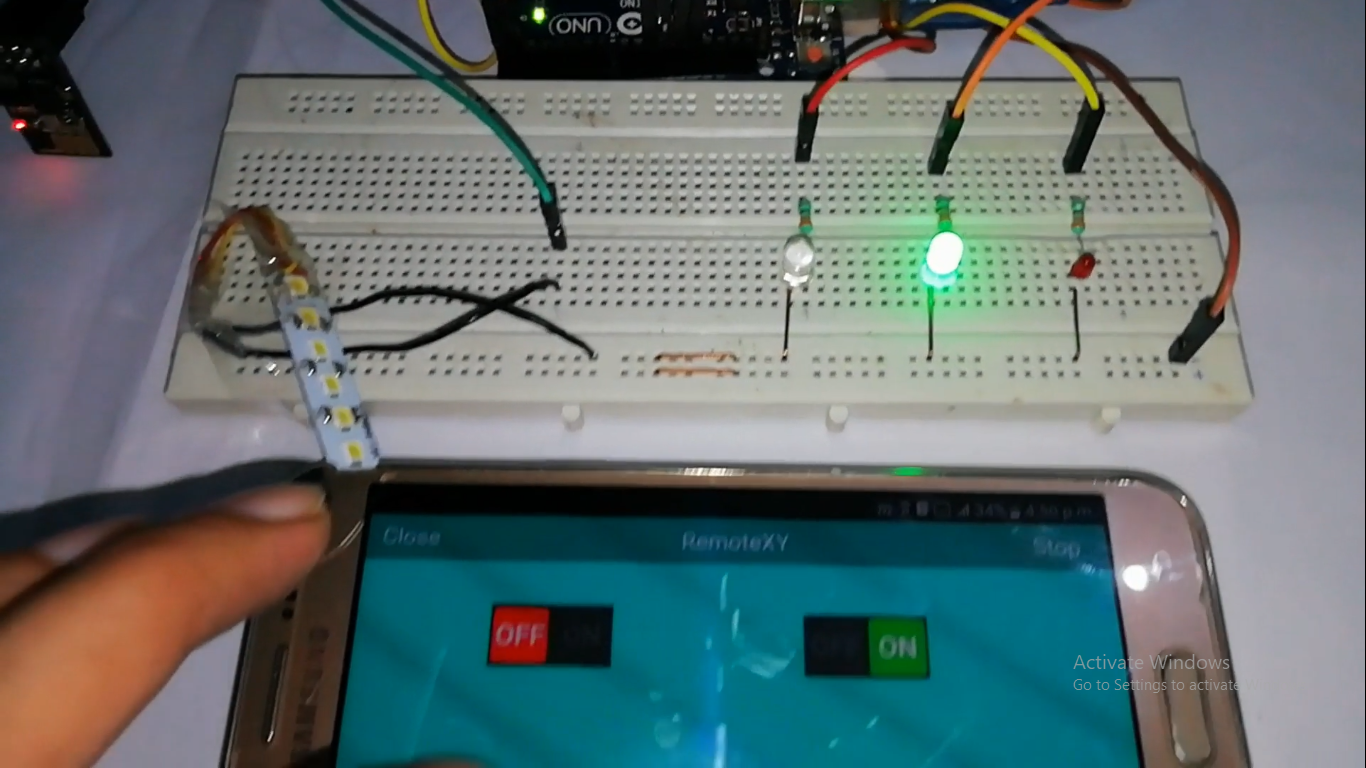
In this project, I am using 3 LEDs and a lamp to control it with an Android mobile phone.
You can make this project.
Step by step video can be found above. Watch the entire video!
Also make sure to subscribe my YouTube channel "Electronics is Fun."
Steps:
Gather all the components.
- Arduino
- Arduino cable
- ESP8266
- Breadboard
- 330 ohm resistors (3)
- 3 LEDs
- Lamp
- Jumper wires
- Android device
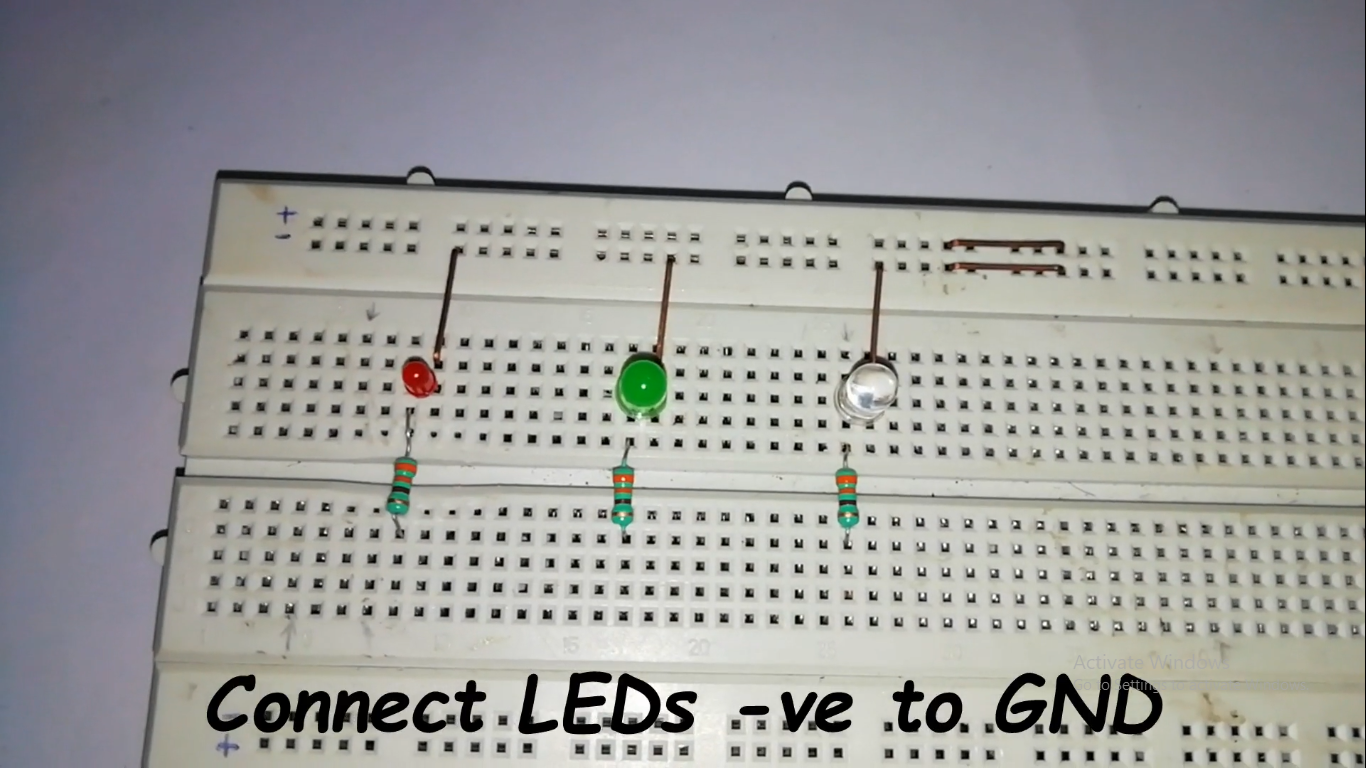
Place all 3 LEDs on BB and connect it with 330 ohm resistors to +ve end of LED and connect -ve end to GND.
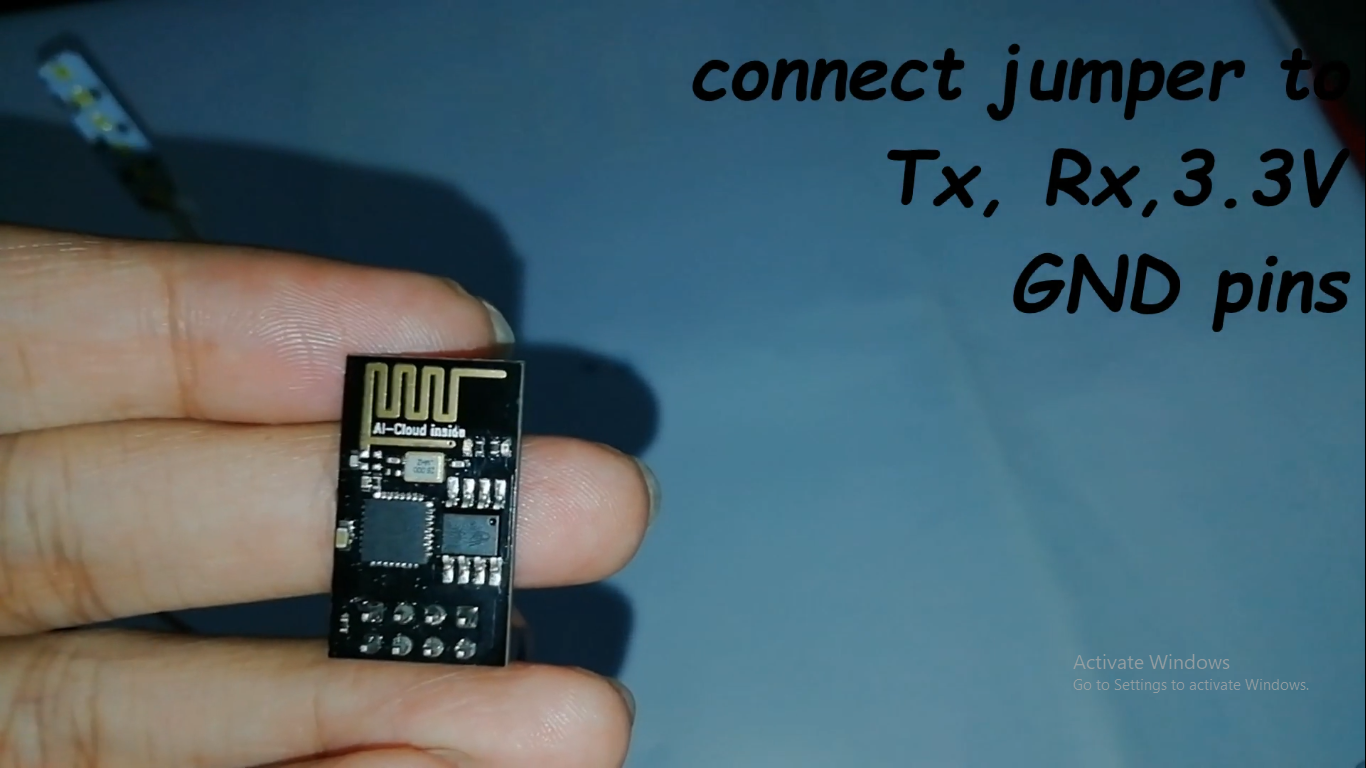
- Take ESP8266 module with jumper wires.
Connections: Tx pin to Arduino Rx Rx pin to Arduino Tx (Connect TX and RX pin of ESP8266 after uploading the code) Vcc and Chip enable pin to Arduino 3.3v Gnd pin to Arduino GND.
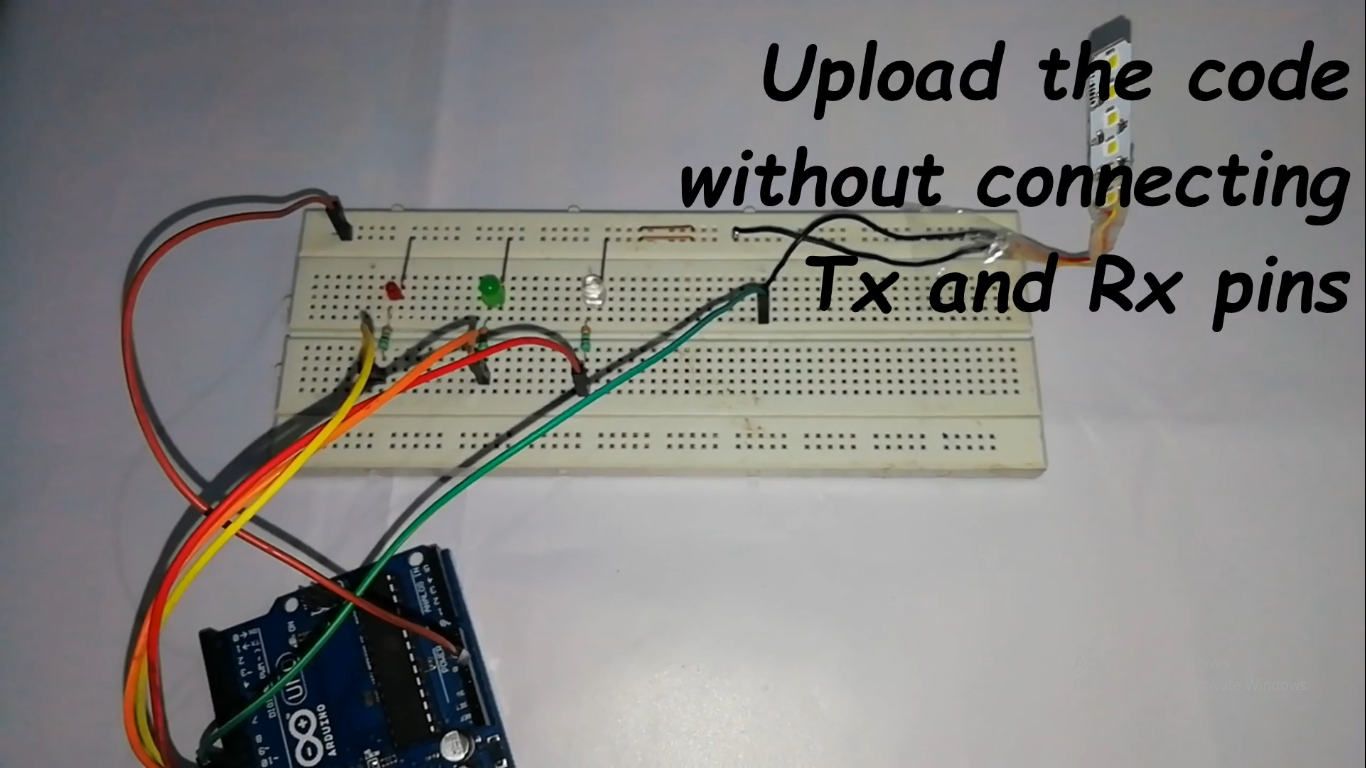
- Connect LEDs and Lamp to BB and do connections as follows: LED RED to Arduino pin 13 LED GREEN to Arduino pin 12 LED BLUE to Arduino pin 11 LAMP to Arduino pin 10
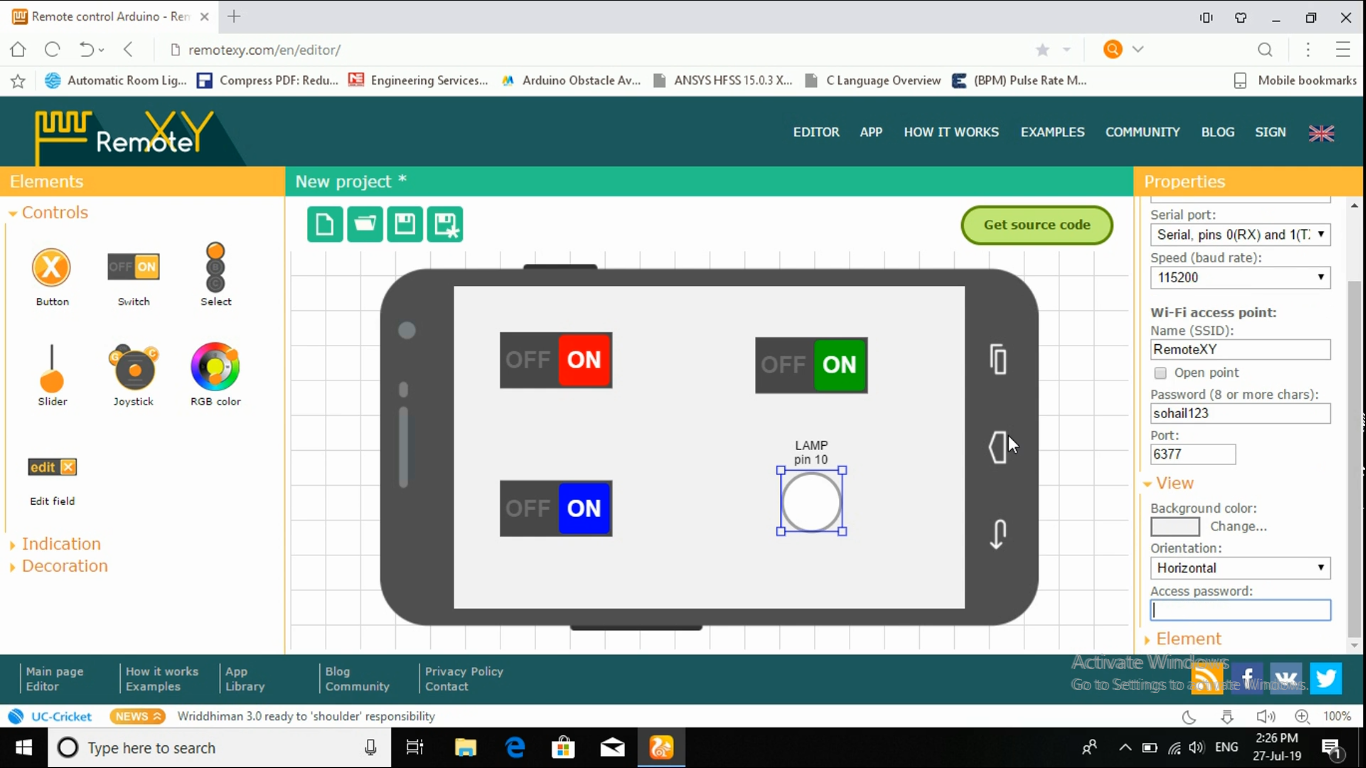
- Open RemoteXY to create app for Android device. The whole process to create app cab be seen in my video.
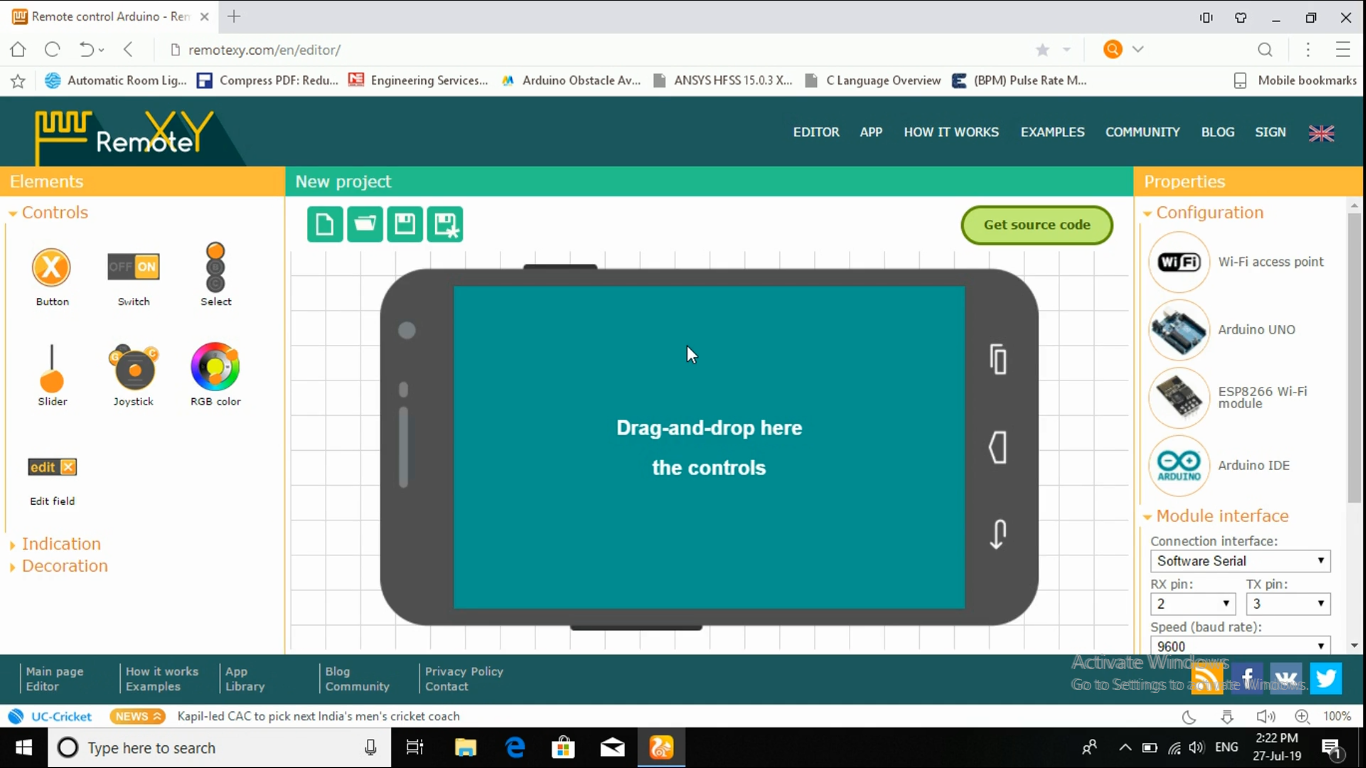
- After the app is successfully created it will look like this.
Do all the connections as in video.
Download the RemoteXY library and add it to Arduino software then upload the code without connecting to Tx and Rx pins.
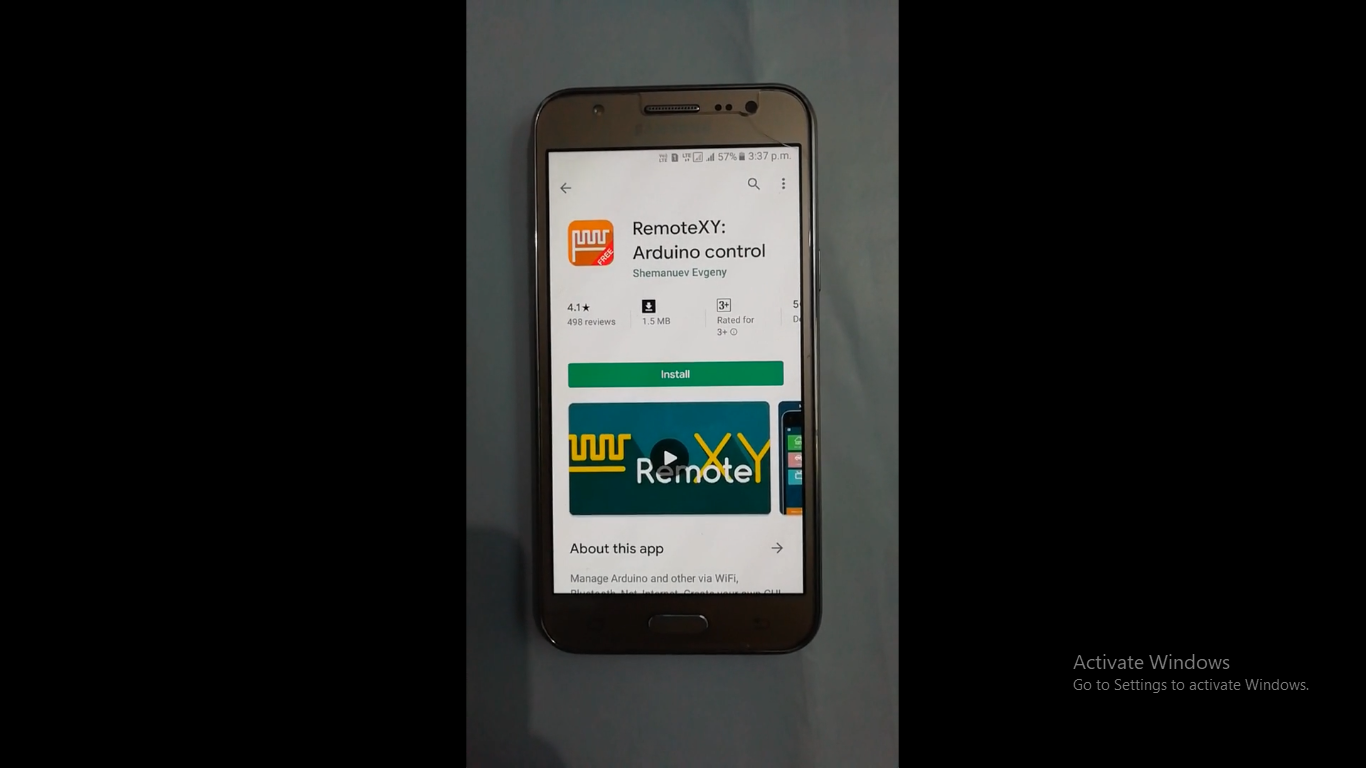
Open playstore in Android device and download RemoteXY app.
Open WiFi and connect to RemoteXY and put password as you have created in the app.
Connect with RemoteXY and open app. Now control the LEDs.
Expanded Technical Details
Web-Based Lighting Control
This project bridges local lighting hardware with a remote, web-accessible interface.
- mDNS & Web Server: The ESP8266 hosts a local web server (using the
ESP8266WebServerlibrary) and registers itself via mDNS, allowing users to access the control panel by typing "led.local" instead of an IP address. - PWM Dimming: Utilizes the ESP8266's hardware PWM pins to provide 1024-step brightness control, significantly smoother than the standard 256 steps of an Arduino Uno.
UI Interaction
- RemoteXY / Blynk Compatibility: The firmware is structured to be compatible with drag-and-drop IoT platforms, allowing users to create custom mobile apps with sliders and color pickers to control individual LED strips or RGB channels.
Also make sure to subscribe my YouTube channel.
Help me reach 1K subscribers.
Thanks!!!