A chess clock is essential for adding a competitive edge to your games, ensuring fair play by limiting each player's thinking time. It enhances the excitement and strategy of chess, making every second count in your quest for victory. But, a purchased chess clock can cost up to 60 dollars, and buying one is no fun at all, is it?
My chess clock (which can be used for any game that requires keeping time: Scrabble, Go, Checkers ect. ect.) features a compliant switch mechanical, 4 customizable inputs, and a large lcd screen to display time. Additionally, the large toggle mechanism is a lot of fun to use, and makes a nice thonk sound.
I designed my clock's body in Fusion 360, and since I wanted to easily swap components, I included a set of parameters that can easily be adjusted to create a clock that suits any need.

The primary use of these parameters is to set the physical dimension of components, which I was able to physically measure with a pair of calipers. The x and z offset parameter is the distance from the top inside corner of the box the limit switch is placed, as according to the following figure:
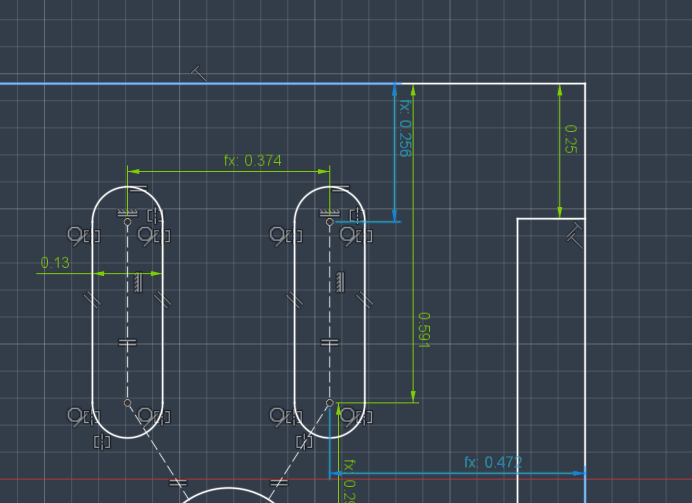
the "encoderBore" sets the hole size for the potentiometer, "buttonBore" is the diameter of the panel mount button's hole, and "limitSwitchC2c" is the distance between the mounting holes for your limit switch. The final parameter "bodyThickness" sets the thickness of the entire clock. I suggest going as thick as possible, since packing all of the components in such a small space is difficult, but this will be limited by the length of m3 bolts you own. (One thing to note, most micro switches come with m2 mounting holes, but they should be in a location where they can be drilled to m3 safely, which longer bolts are more common. To set this dimension, start with the length (in mm) of your desired bolt, and subtract around 9-10mm from that. This accounts for the wall thickness, as well as the length of a simple m3 locknut on the other side.
Once these parameters are adjusted, you are good to print all of the components in any stiff material (pla - petg or similar.)
If you decide to just print the attached stl files, you should be able to complete the project, but you might need to drill out some holes to make everything fit.
The Dual Timer Algorithm (millis)
The Custom Chess Clock is the ultimate application of dual state-machine tracking. It features two players, two timers, and extremely strict logic rules. You cannot pause your clock without activating your opponent's clock instantly.
Unlike the basic countdown timer, there are two distinct variables running concurrently.
- The Global State Variable:
int activePlayer = 1;. - The Millis Engine:
if(activePlayer == 1) { if (millis() - prevMillis > 1000) { player1_time--; prevMillis = millis(); } } else if (activePlayer == 2) { if (millis() - prevMillis > 1000) { player2_time--; prevMillis = millis(); } } - The Interruption: As soon as Player 1 slaps their huge arcade button, the interrupt toggles the
activePlayerto 2. Player 1's millisecond math instantly pauses mid-calculation, preventing any lost seconds over hours of play.
Hardware Construction (The See-Saw Mechanism)
The physical build is just as important as the code. Instead of using two separate buttons, many makers use a 3D-printed or wooden "See-Saw" lever over a SPDT microswitch. When you press your side down, the other side pops up, enforcing physical exclusivity! This is the type of mechanism shown in the design images above.
Parts Needed for Construction
- Arduino Nano: Perfect for building inside a small, flat box.
- 16x2 Text LCD or Dual 4-Digit 7-Segment Displays (one facing each player).
- Massive Arcade Push Buttons OR a mechanical See-Saw lever resting on a limit switch.
- Buzzer: For the dreaded "Flag Fallen / Out of Time" alarm indicating a game loss.
I recommend soldered joints for all components, and all components should be wired in according to the following wiring diagrams, with roughly similar resistors in all places. Note: Due to the cramped nature of this project, wires should be kept to pretty short lengths, and larger boards, like the UNO, may not fit in the project box at all, unless it is made to be very thick.
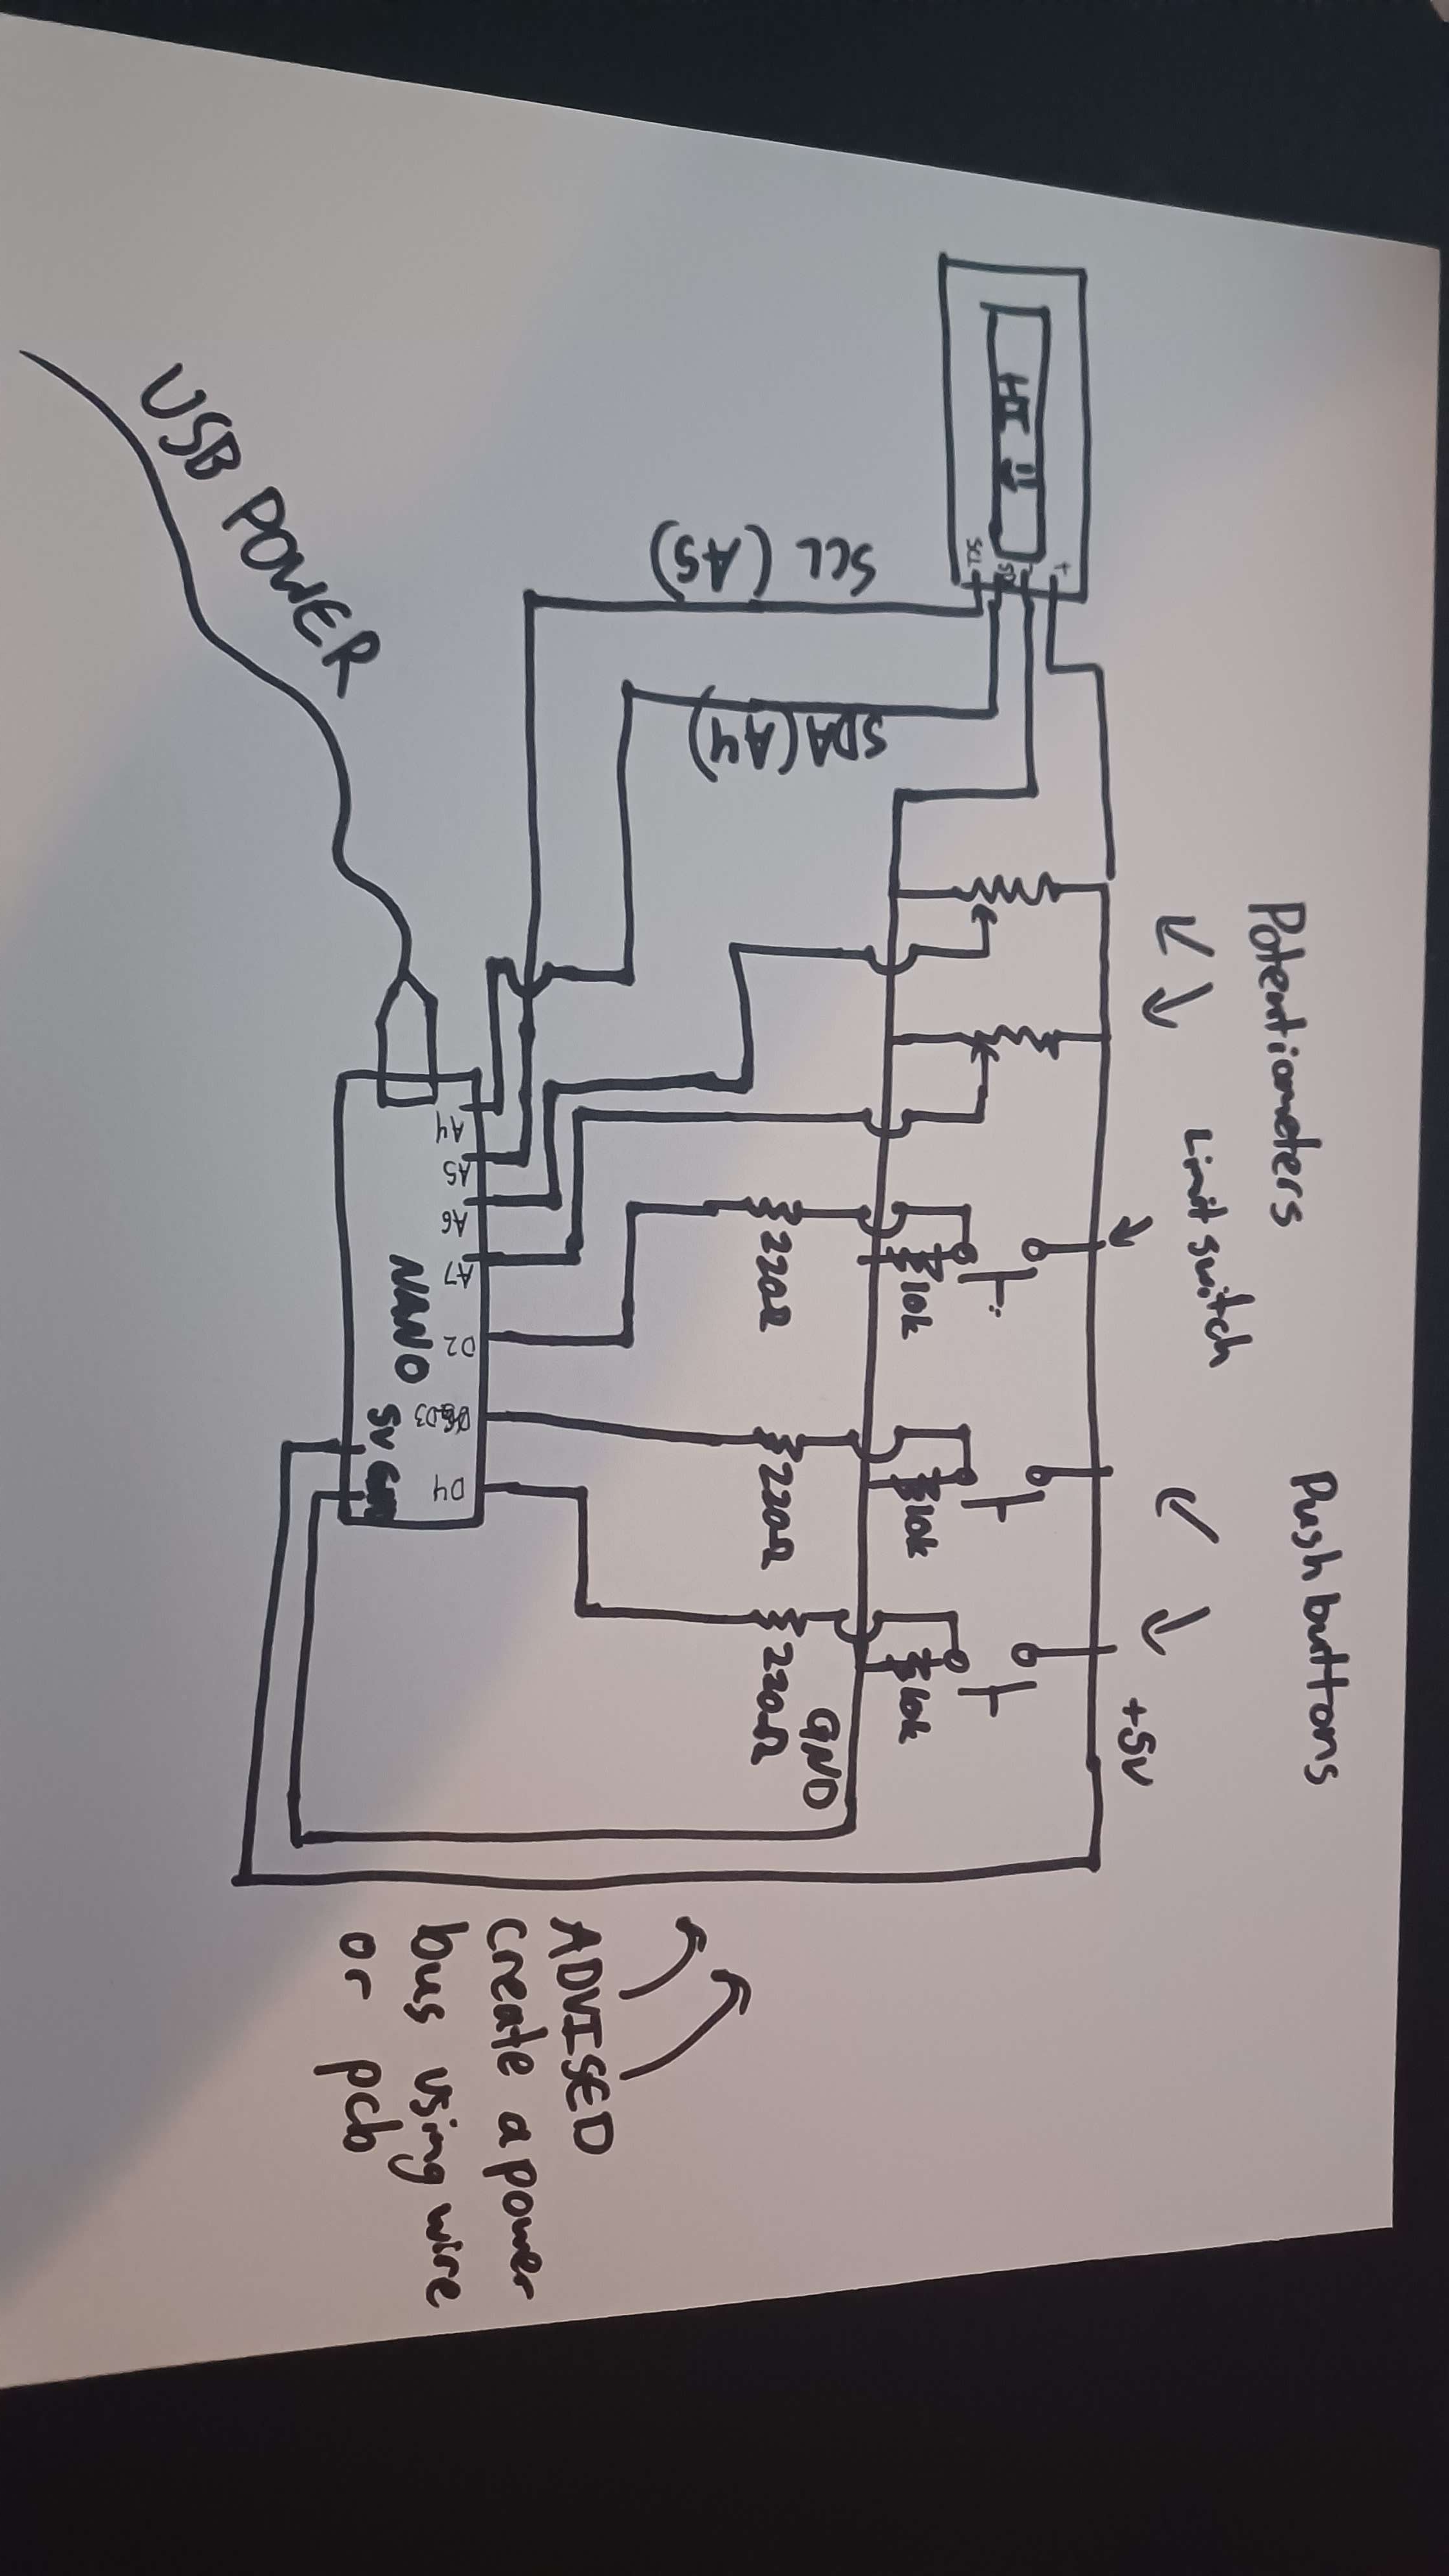
Once everything is wired up, upload the code and play chess!
(If the time is counting for the wrong side, reverse the "true" and "false" for the variables "LEFT" and "RIGHT.")