Introduction
How many times have you asked Santa to bring you an Arduino kit, a 3D printer or a set of tools and only brought you a pair of socks? Well, this is going to end.
Santa Claus has hired us to run a project based on IoT and Arduino MKR1000, which will help you to have more control over where to deliver the gifts.
The first thing you have to do is be good, do the dishes, help at home and the elderly ladies, make the purchase and, of course, send the letter to Santa.
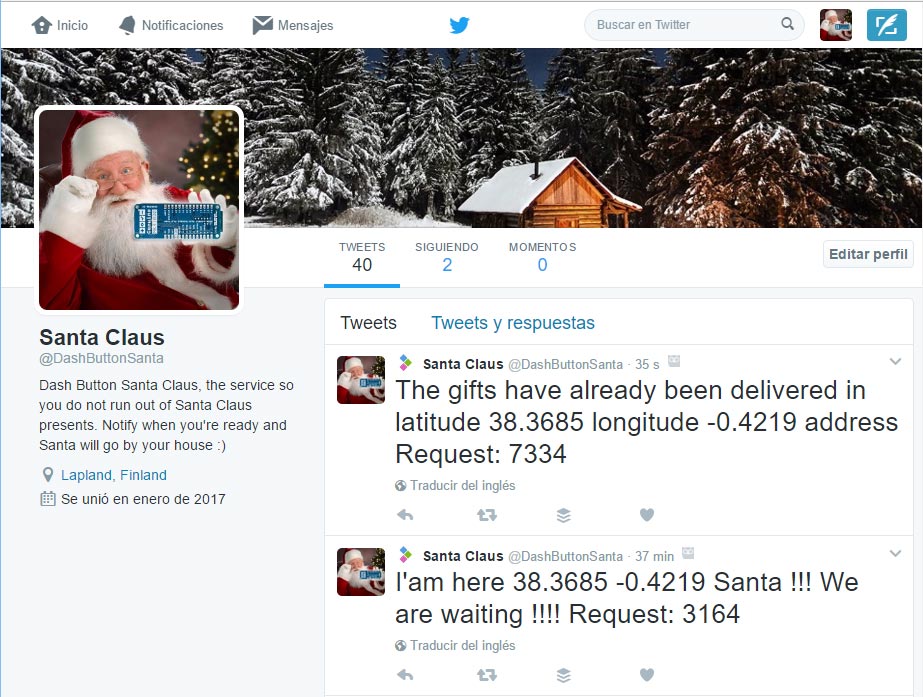
Once you have fulfilled all the requirements, you are ready to press the magic button that will send to Santa's Twitter (@dashbuttonsanta) the coordinates where you have to leave the gifts.
In addition, he will send an email to the department that has been created with this project, Dash Button Department.
Finally, once Santa Claus leaves the gifts in your house, will make the confirmation of the delivery in your Twitter account and you will be able to see the updated map in this web page.
This way Santa will never forget to stop by your house and you will know where to take your Makers gifts.
General operation of the system
The system will work with 4 different states depending on the situation of the Dash Button Santa.
Status 1: Disabled
In this state no notification has been sent to Santa from the location of where we want to leave the gifts.
The first thing you have to do is to be good, from the dishes, help at home and the elderly ladies, make the purchase and, of course, send the letter to Santa.
Then, you can send the location to Santa to leave the gifts in your house. Pressing the button will move to the next state.
Status 2: sent location
When you enter this state, a Tweet is sent to Santa Twitter (@dashbuttonsanta) and an email to the account dashbuttonsanta@gmail.com.
The Dash Button Santa will remain in this state until Christmas Day. Even if you press the button it will not do anything.
When it is December 25th, the lights will start flashing. This means that we are ready to receive Santa. Only he can press the button again to change to the next state.
State 3: Gifts delivered
Santa will press the button and confirm that the gifts have been delivered.
When you wake up in the morning you can check whether or not it has happened because the Dash Button Santa will be green.
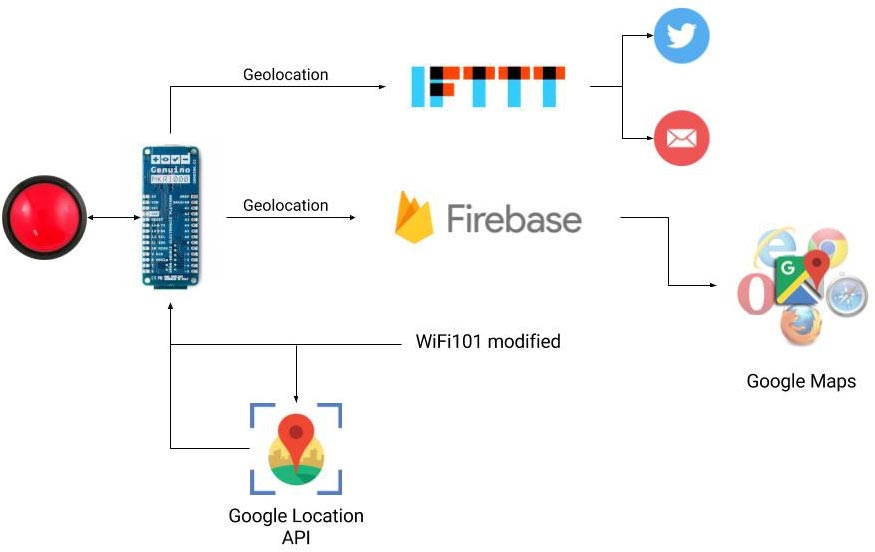
System Architecture
The architecture is very simple. We rely on different services all of them free of charge.
Of course the central axis of the project revolves around Arduino MKR1000. It can be divided into 4 large blocks:
- Location finding
- Save information in the cloud
- Post to Twitter and send an email
- The circuit
Project Perspective
Dash Button Santa with Arduino MKR1000 is a sophisticated exploration of network technology and IoT interaction. By focusing on the essential building blocks—the Secure WiFi telemetry-dispatch and robust high-performance Firebase-to-Maps mapping logic—you'll learn how to communicate and synchronize your holiday tasks using specialized software logic and a robust high-performance setup.
Technical Implementation: Cloud Databases and Map Proxies
The project reveals the hidden layers of simple sensing-to-cloud interaction:
- Identification layer: The MKR1000 WiFi Module acts as a high-resolution chronological eye, measuring each point of the button-triggers and dispatching coordinates to the cloud.
- Conversion layer: The system uses a high-speed digital protocol to receive high-speed HTTPS data packets for mission-critical sensing tasks.
- Visual Interface layer: A Google Maps Dashboard provides high-definition visual and mechanical feedback for each Santa tracking status check (e.g., Current Location).
- Communication Gateway layer: Firebase Real-time DB provides a manual data-dispatch or automated cloud-sync status check during the initial calibration to coordinate status.
- Processing Logic: The Arduino code follows a "JSON-webhook-dispatch" (or dash-dispatch) strategy: it interprets physical button presses and matches database keys to provide safe and rhythmic holiday tracking.
- Communication Dialogue Loop: Telemetry codes are sent rhythmically to the Serial Monitor during the initial calibration to coordinate status.
Location finding
Dash Button Santa goes with you. You don't know in advance where are you going to be on Christmas day. Use Dash Button Santa to tell Santa where are you.
It listens what WiFi networks are around and gets precise location using Google Maps Geolocation API.
WiFi101 library, as it is now, does not allow getting a list of access points MAC addresses (BSSID). We needed to modify library in order to enable the feature to get a detailed list of WiFi networks in the neighborhood.
Store information in the cloud
After testing several services and platforms in the cloud for IoT, the simplest we have found to implement this project has been Firebase.
This service has a simple database based on JSON and accessible through its API. By simply making a PUT request with a JSON, you can generate your own data structure on the fly.
You need to have a Google account to access the free service with limitations that they offer.
The JSON that we have used is the following:
{
 "persons" : {
   "A9:D8:F5:05:F0:F8" : {
     "lat" : 38.3685,
     "lon" : -0.4219,
     "prec" : 100999,
     "status" : "2"
   }
 }
}
Everything hangs from persons. As a unique identifier we have used the MAC of the Arduino MKR100.
Then we send the latitude, longitude, precision and status of the button.
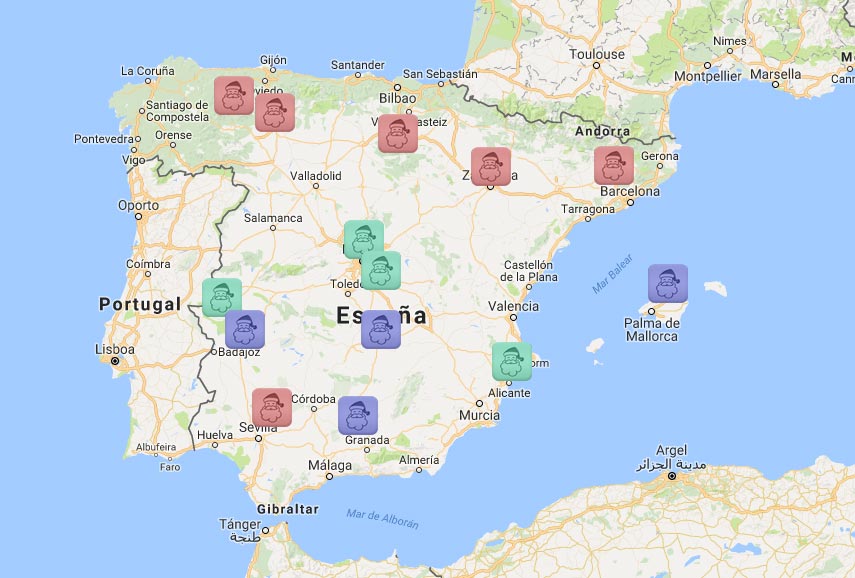
The goal of storing location information is to be able to track Dash Button Santa around the world.
In a web page we will be able to see all connected Dash Buttons. This web is made with jQuery that accesses the Firebase API to obtain the information.
It consists of two files, one .html and one .js. Then you can see the code.
<!DOCTYPE html>
<html>
<head>
	<title>Dash Button Tracking Santa Claus</title>
	<style type="text/css">
     html, body { height: 100%; margin: 0; padding: 0; }
     #map { height: 100%; }
   </style>
   <meta name="robots" content="noindex">
</head>
<body>
	<!--<ul id="costumers" class="list-group">
	</ul>-->
	<div id="map"></div>
	<!-- jQuery (necessary for Bootstrap's JavaScript plugins) -->
	<script src="https://ajax.googleapis.com/ajax/libs/jquery/1.11.2/jquery.min.js"></script>
	<!-- Latest compiled and minified Bootstrap -->
	<script src="https://maxcdn.bootstrapcdn.com/bootstrap/3.3.4/js/bootstrap.min.js"></script>
	<!-- Include Firebase Library -->
	<script src='https://cdn.firebase.com/js/client/2.2.1/firebase.js'></script>
	<!-- Tracking Store JavaScript -->
	<script src="script.js"></script>
	<!-- API Google Maps -->
	<script async defer
     src="https://maps.googleapis.com/maps/api/js?key=AIzaSyABRsKsE4ISjkikM96Hn7RIv9nW-oice8Q&callback=initMap">
   </script>
</body>
</html>
And the JavaScript file.
// Create a firebase reference
var dbRef = new Firebase('https://dash-button-arduino.firebaseio.com/');
var costumersRef = dbRef.child('persons');
var markers = {}
//load persons
costumersRef.on("child_added", function(snap) {
   // Print to map
 addNewPerson(snap.val().lat,snap.val().lon,snap.val().status, snap.key());
});
//change persons
costumersRef.on("child_changed", function (snap) {
 changePerson(snap.val().lat, snap.val().lon, snap.val().status);
});
/******** GOOGLE MAPS *********/
var map;
function initMap() {
 // Center map
 var myLatLng = {lat: 38.392101, lng: -0.525467};
 map = new google.maps.Map(document.getElementById('map'), {
   center: myLatLng,
   zoom: 3
 });
}
function addNewPerson(lat, lon,status, key){
	console.log("status",status);
	var image
	if(status==0)
	{
		image='images/santa-icon-1.png';
	}
	else if(status==1)
	{
		image='images/santa-icon-2.png';
	}
	else if(status==2)
	{
		image='images/santa-icon-3.png';
	}
 var marker = new google.maps.Marker({
   position: new google.maps.LatLng(lat,lon),
   icon: image,
   map: map,
   title: key // Tooltip = MAC address
 });
 markers[key] = marker;
}
function changePerson(lat, lon, status, key) {
   console.log("status", status);
   var image;
   if (status == 0) {
       image = 'images/santa-icon-1.png';
   }
   else if (status == 1) {
       image = 'images/santa-icon-2.png';
   }
   else if (status == 2) {
       image = 'images/santa-icon-3.png';
   }
   marker = markers[key];
   marker = new google.maps.Marker({
       position: new google.maps.LatLng(lat, lon),
       icon: image,
       map: map,
       title: key // Tooltip = MAC address
   });
   markers[key] = marker;
}
To show the information on the map according to the state we have used the following images.


You can access the web that is published in this URL.
Post to Twitter and send email
In this block is where more difficulties we could find, but thanks to the service offered by IFTTT, this task has been very simple :).
They have recently enabled a service called IFTTT Maker that lets you launch events and triggers through an API. With a simple GET call and a well configured recipes it is very simple.
This makes it much easier to publish in any social network and open channels of communication between objects or machines, giving free rein to IoT technologies.
In this project we will use 3 recipes.
- Recipe 1: sends the information to the @dashbuttonsanta account with the length and latitude of the Dash Button.
- Recipe 2: send an email to the account dashbuttonsanta@gmail.com with the longitude and latitude.
- Recipe 3: Once Santa has left the gifts at home, he publishes that the gifts have already been delivered.
The circuit
The basic scheme is to connect a pushbutton to the Arduino MKR1000 and 3 pixels Neopixel.
Then we can decorate it as we want. In our case we used a teddy of Rudolf, the reindeer of Santa Claus.
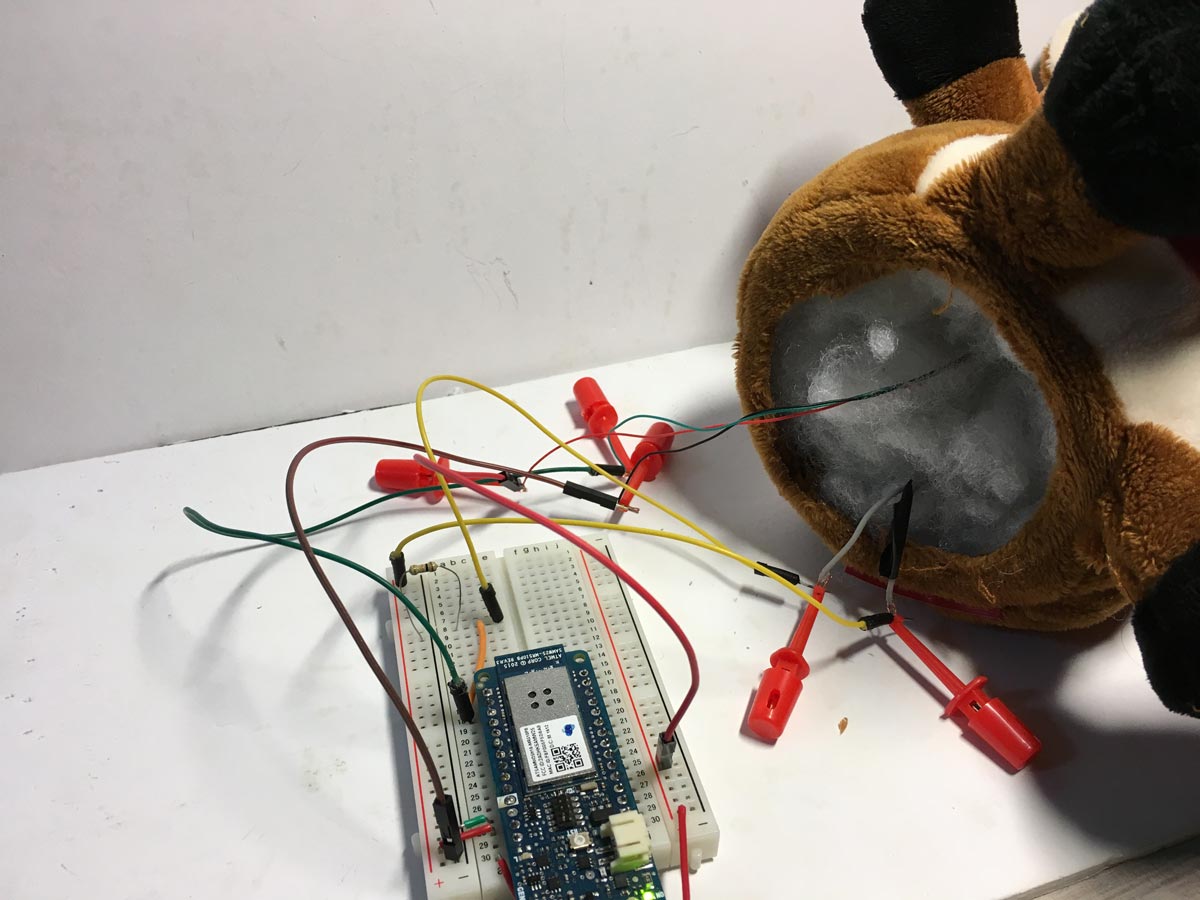
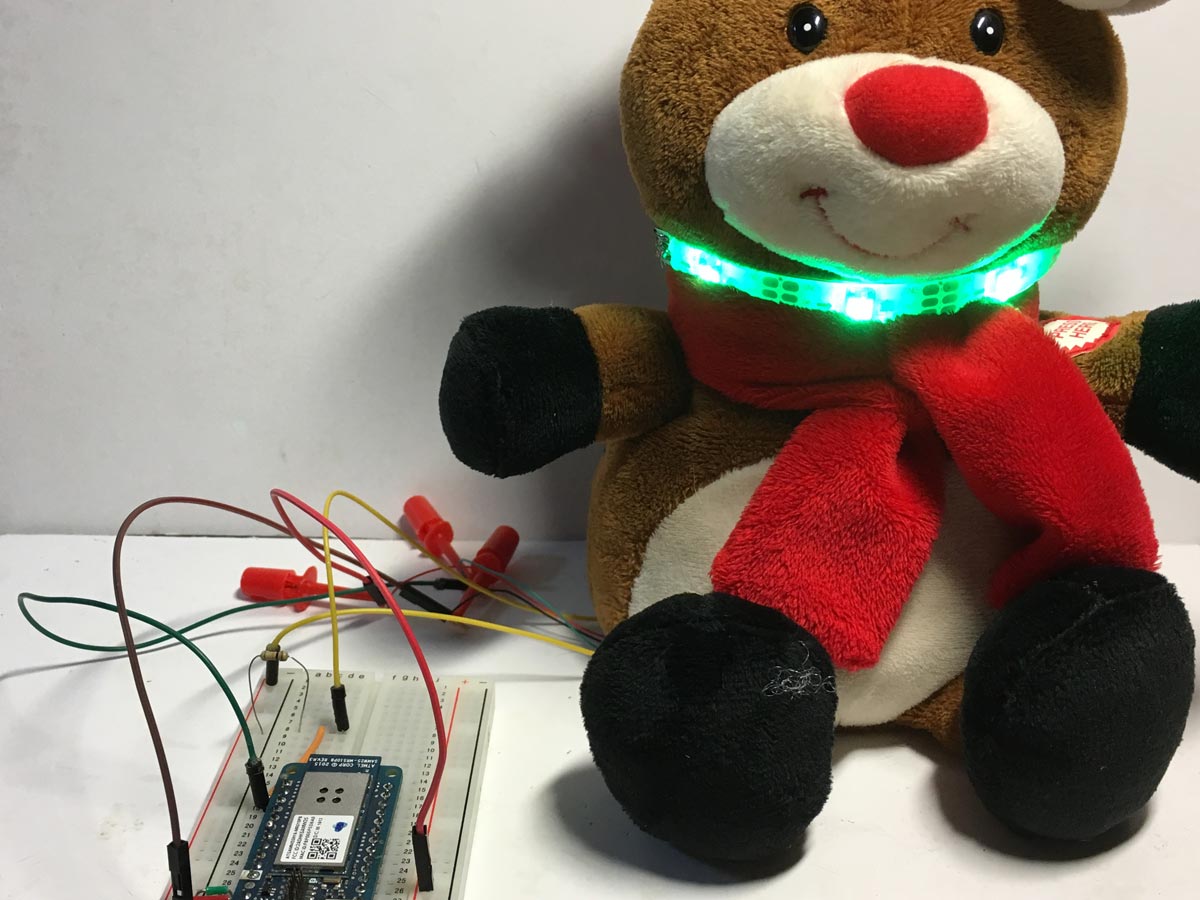
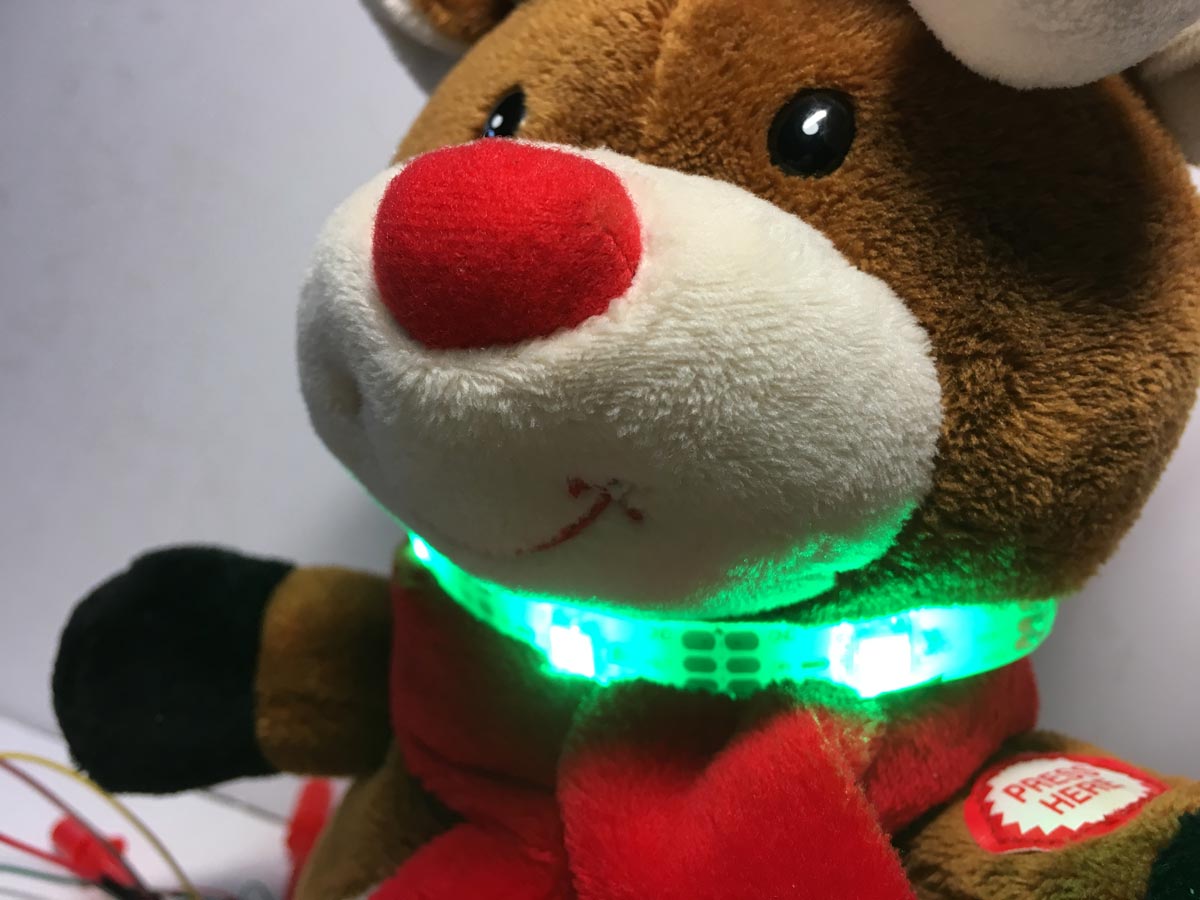

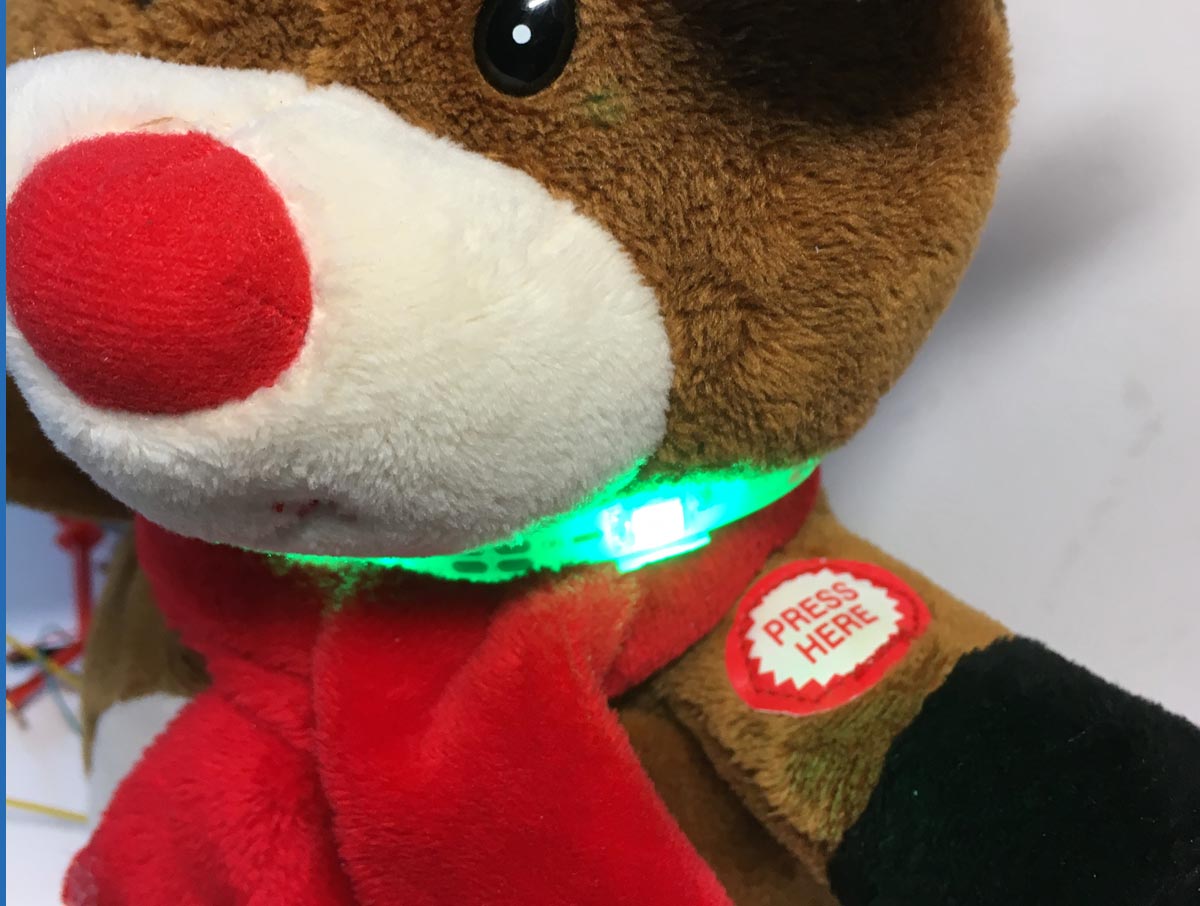
We took advantage of a button inside and the Neopixel strip in the scarf.
The pixels tell us the status of the Dash Button Santa.
- Pixel 1 red, pixel 2 blue and pixel 3 green, attemping to connect to WiFi.
- 3 pixels orange blink, WiFi error.
- 3 pixels red blink, error RTC.
- 3 pixels red, device off. Location not sent to Santa.
- 3 pixels blue, location sent to Santa.
- 3 pixels blue blinking, Christmas Day !!!!!
- 3 pixels green, Santa claus left the presents and pressed the button.
All this you can see in the next section where we talk about the code.
Hardware-IoT Infrastructure
- Arduino MKR1000: The "brain" of the project, managing multi-directional event sampling and coordinating WiFi and Firebase sync.
- Tactile Dash Button: Providing clear and reliable "Trigger Link" for each point of the interactive holiday experience.
- Li-Po Battery (Portable): Providing high-capacity and reliable physical interface for your first successful "Mobile Mission."
- Custom Button Enclosure: Essential for providing clear and energy-efficient protection for every point of the hardware.
- Active Buzzer: Essential for providing clear and energy-efficient sound for acoustic sensing.
- Micro-USB Cable: Use to program your Arduino and provides the primary interface for the system controller.
Arduino Sketch
In the sketch several libraries are used that facilitate the task of managing the connections with the services and controlling the time to know when it is Christmas.
You will need different accounts to use the service. We are working on improving it and not depend on third parties :).
You will need the following to make it work:
- Google API key
- IFTTT key
- SSID WiFi
- Password WiFi
The whole code is very well explained. Any questions you can leave in the comments of this article.
To store the state in local and to be able to know in which state it was if it is disconnected we have used FlashStorage that simulates an EEPROM memory.
To control the day and the month, we have done it through RTCZero.
In addition we leave you two links so that you download the WiFi101 modified library and the WifiLocation.
You can find the links to the libraries in GitHub, in the section of libraries of this article.
/*
 DashButtonSanta
 Send information to Santa Claus about the status of the gift request. It uses the geolocation through the WiFi,
 of the Google API, and it is sent to Firebase, along with the state and with the MAC (key value) of the Arduino MKR1000.
 It also sends the information to Twitter @ dashbuttonsanta and to the email dashbuttonsanta@gmail.com through IFTTT.
 On the web https://programarfacil.com/proyectos/dashbuttonsanta/tracking-santa.html you can follow the status of all requests.
 When at the end Santa leaves the gifts on the site sent to Twitter and the email, press the button and gives the delivery finished.
 States:
 0 => Device OFF (LED color red)
 1 => I have behaved well, I have made the bed, I have cleaned the dishes, I have helped an old lady, I pray every night, etc ...
      and I have sent the letter :) (LED color blue)
 2 => Is Christmas Day (LED blink color blue)
 3 => Santa claus left the presents and pressed the button (LED blink color green)
 Errors:
  Wifi shield not present => LED blink Color(233, 149, 16)
  NTP unreachable => LED blink Color(150, 0, 0)
 The circuit:
  Arduino MKR1000
  Pushbutton to pin 6
  pull-down resistor to pushbutton
  3 addressable LEDs
 Created 2017
 By https://programarfacil.com
 Luis del Valle @ldelvalleh
 Germán Martín @gmag12
*/
#include <Adafruit_NeoPixel.h>
#include <WiFi101.h>
#include <WiFiUdp.h>
#include <RTCZero.h>
#include <FlashStorage.h>
#include "WifiLocation.h"
// Fill these fields with your data
#define GOOGLE_API_KEY "YOURGOOGLEAPIKEY"
#define IFTTTKEY "YOUR