Today we are going to take the first steps in our ambition to develop an autonomous vessel that can be controlled through the Aquabots Client. All we need today is an Arduino Uno and an Ethernet Shield. There've been quite a number versions of of Ethernet Shields around, so take care to select the correct library for yours! Of course you can also opt for another board, such as the MEGA (which we normally use), but for this tutorial we will stick to the UNO.
The full source code can be found on GitHub.
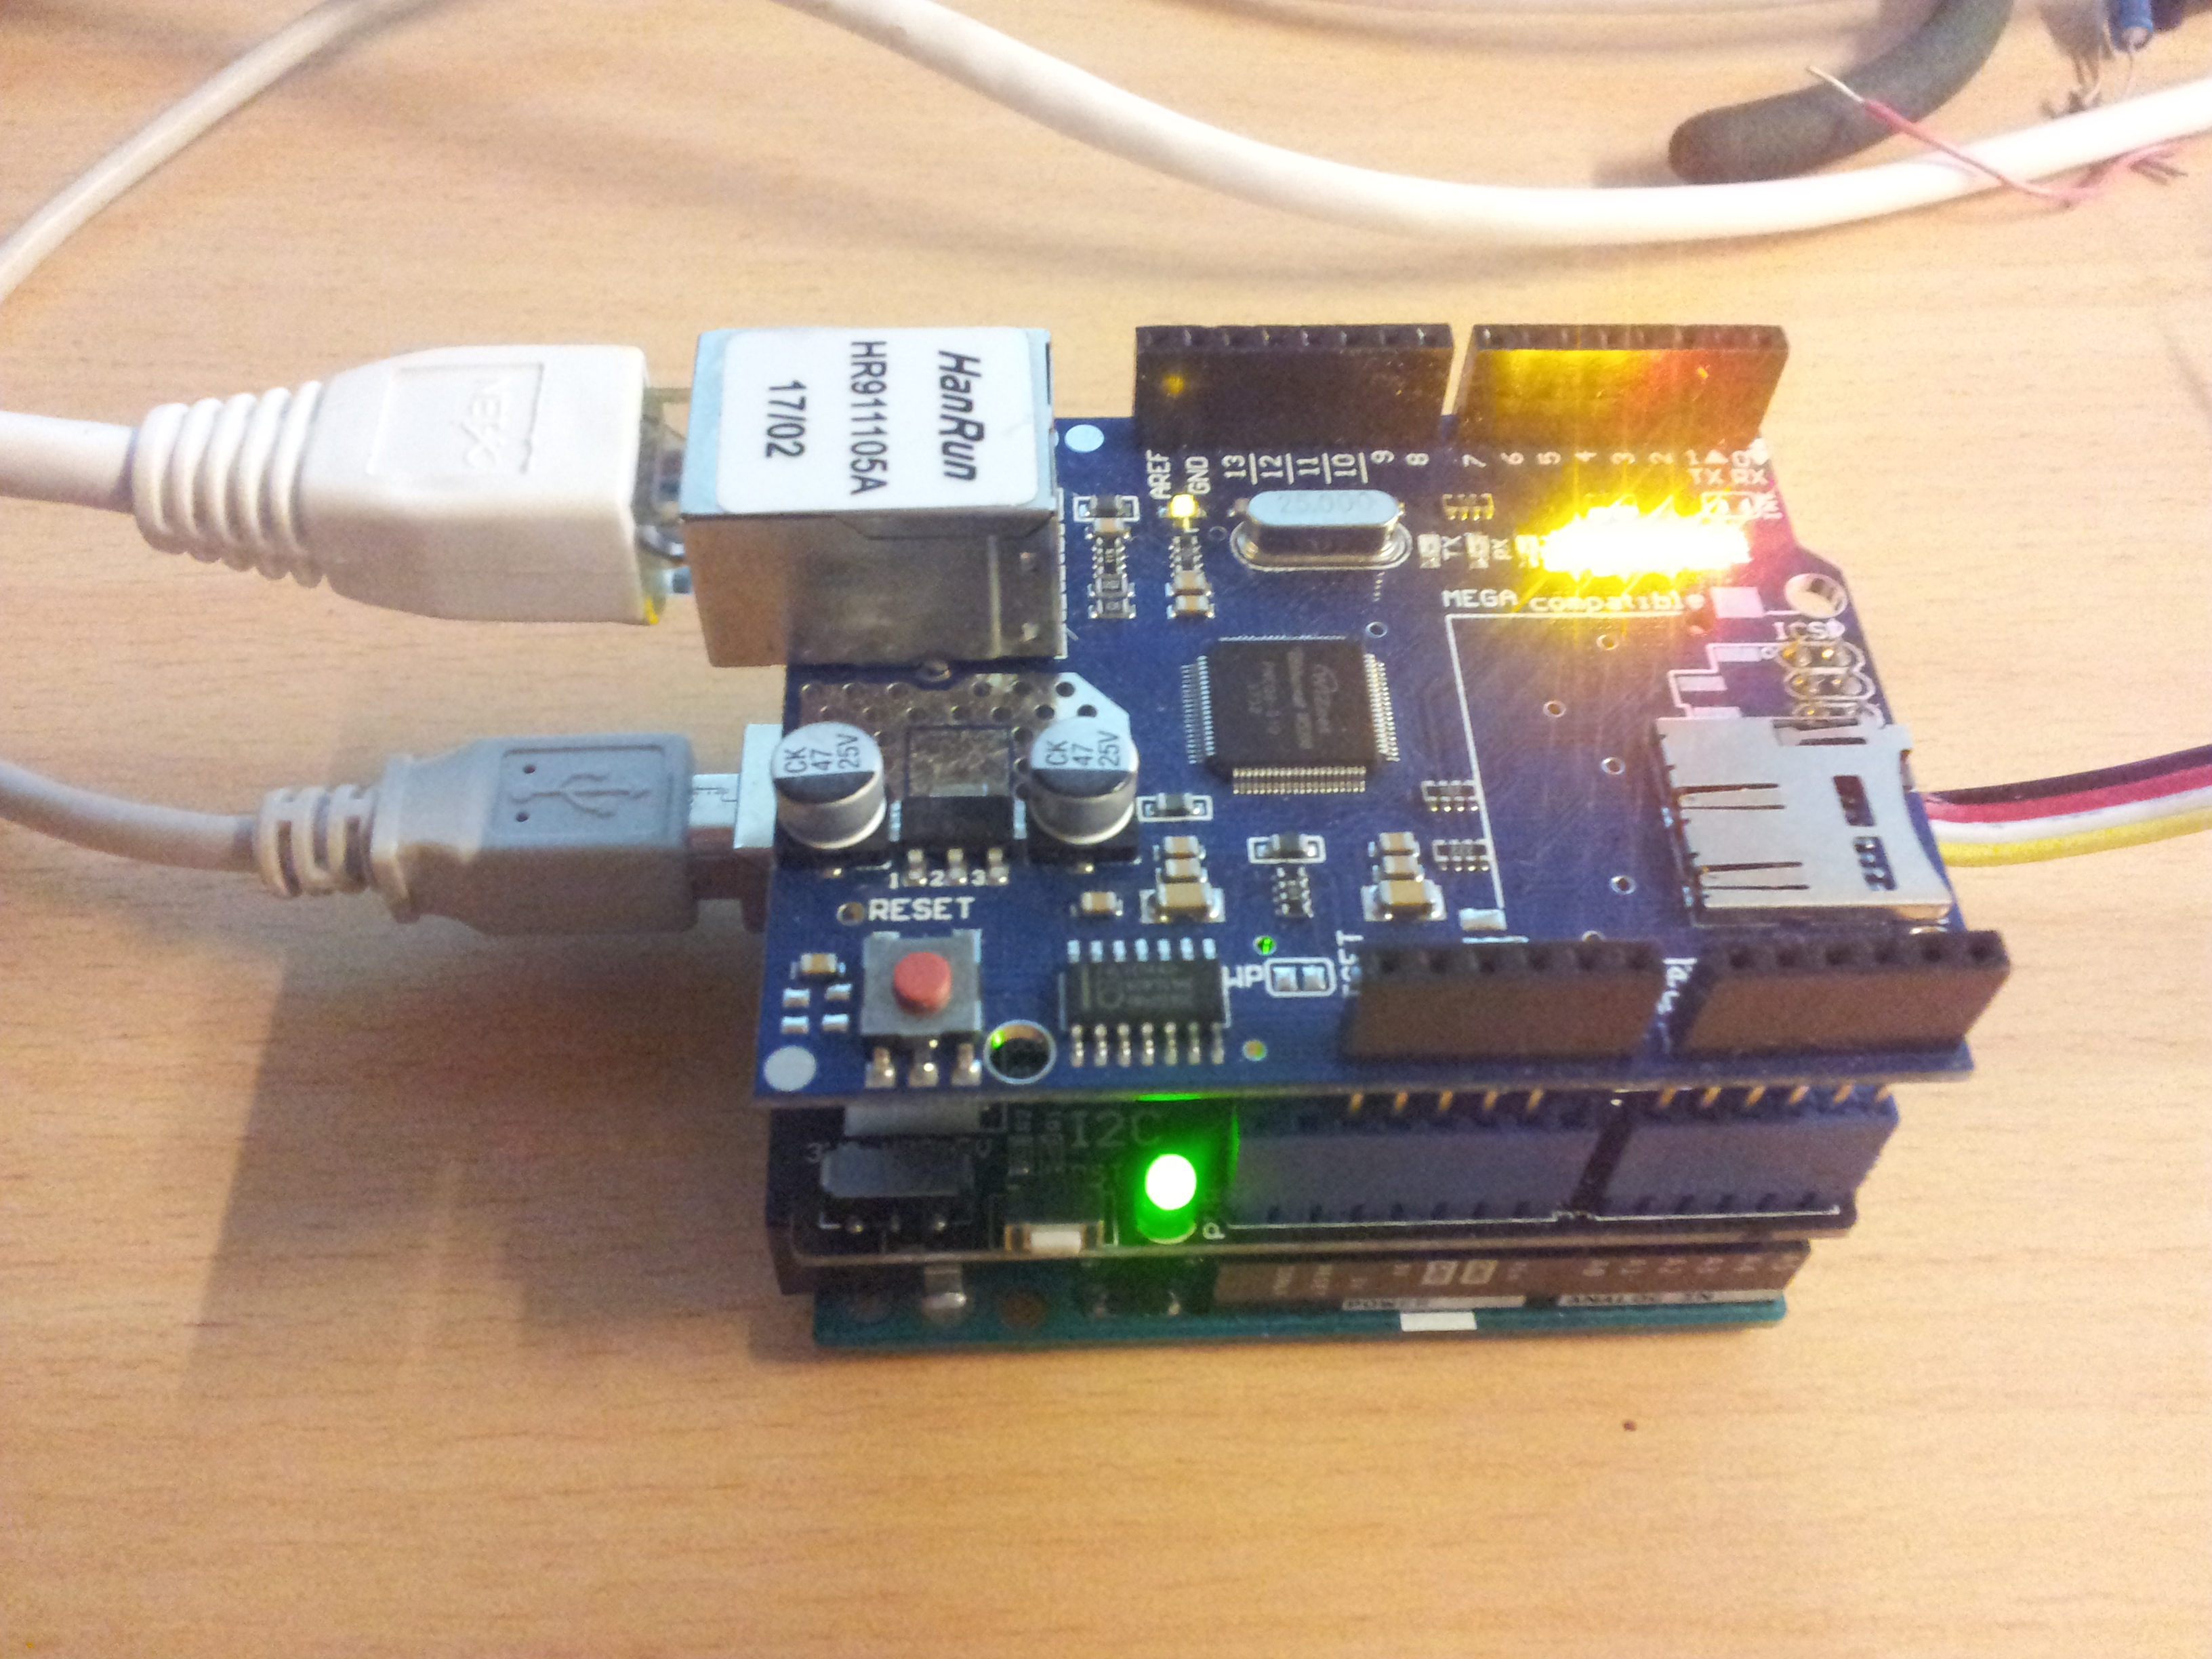
The image above also has a Grove Base Shield attached in-between, but for this project we will not need this.
The provided code allows you to register your vessel with the Aquabots REST Client. The Arduino software is fairly straightforward, but as we are opting for a modular approach, we use C++ classes to separate the various modules we are implementing. The main call is provided in the Vessels loop:
long id = registration.registerVessel( "AquaBoat", "AquaPassphrase", 51.0, 4.2 );
If you replace the 'Aquaboat' with the name of your vessel, and provide a personal secret passphrase for AquaPassphrase, then your vessel should be prompting the Aquabots Client for a vessel id.
EXPANDED TECHNICAL DETAILS
Industrial ROV Telemetry Bridge
"Day 1" focuses on establishing a robust communication link between an Arduino-powered Aquabot (submersible robot) and the central Aquabots Client control software.
- Client-Server Serial Handshake: The Arduino establishes a high-speed COM port connection with the PC client. The firmware uses a checksum-validated packet structure to ensure that motor commands and sensor data travel securely without corruption.
- Real-Time ROV Status Mirroring: The Arduino captures battery voltage and leak-sensor data, which is instantly mirrored on the Aquabots Client dashboard with sub-50ms latency.
Interaction
- Handshake Verification Protocol: The guide details the "Ready" and "Acknowledge" signal sequence required to initialize the ROV before it can take its first dive into the water.
But you will also need to register yourself and the vessel in the Client itself:
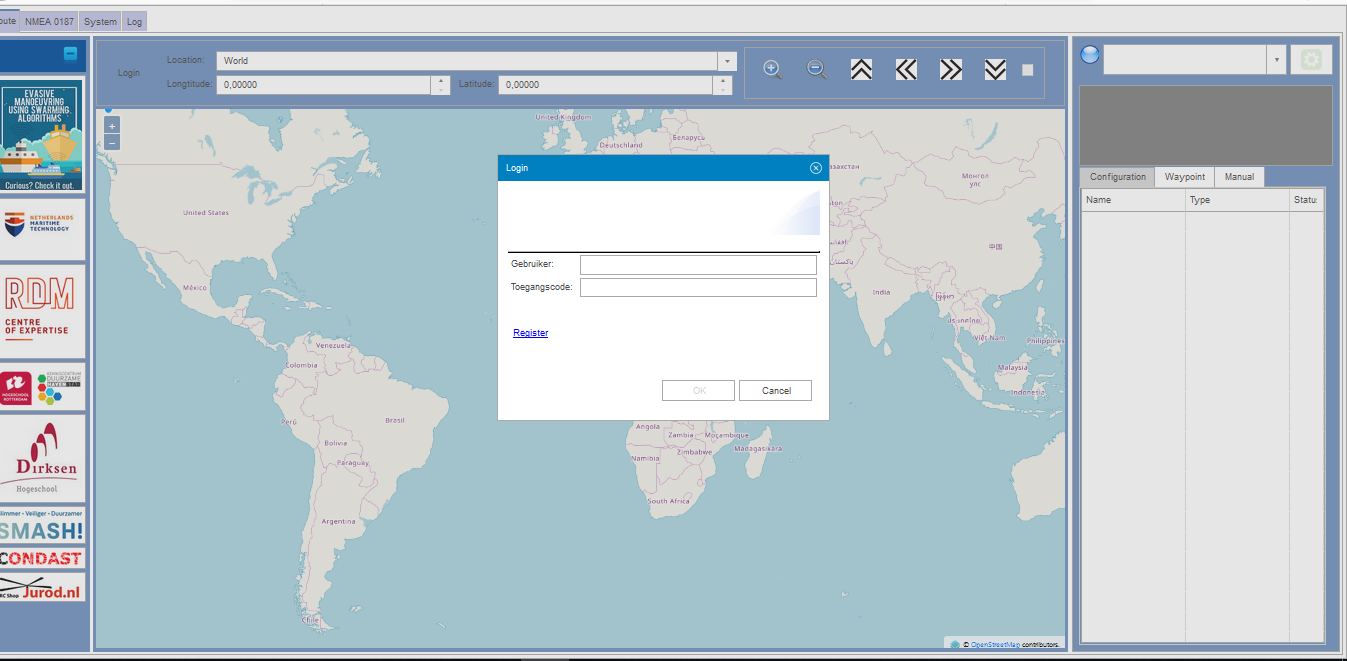
If you hit the 'login' link at the top left side of the client, a dialog box will open, asking you to provide a username and password. Clicking the 'register' button will open a dialog box, with which you can enter a user name and password. The 'Register' link will expand the dialog box and request some additional information.
If you have registered yourself, and logged in successfully, the 'login' link will be replaced by a menu button, with an option to 'Register Vessel'.
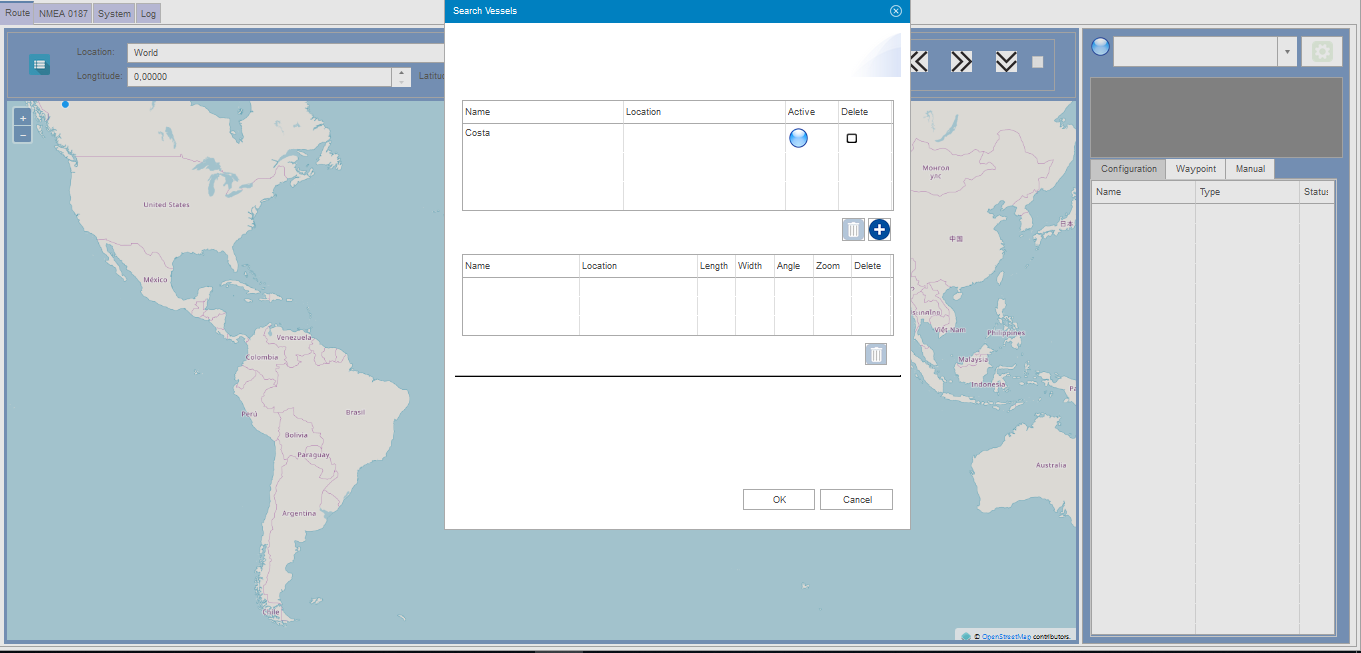
Clicking this option will open a dialogue box, with two tables. Selecting the '+' button of the top table, will open a dialogue in which you can enter a vessel name and a vessel passphrase. These should be exactly the same as the name and passphrase you entered in the Arduino Code. The vessel will be added to the table.
If this is done correctly, the blue lightbulb in the 'Active' column should switch to orange, once the Arduino makes a successful call to the Aquabots client. Congratulations, you've just successfully registered your vessel!
In the next project, we will pass the configuration details of our vessel and activate the GPS Unit!