[ENG] I prepared the project description in both English and Hungarian.
[HUN] A projekt leírását elkészítettem angolul és magyarul is.
UGRÁS A MAGYAR NYELVŰ LEÍRÁSHOZ
━━━━━━━━━
ENGLISH VERSION
━━━━━━━━━
STORY
I've been thinking for a long time that it would be nice to make a multifunctional digital dice, but somehow the project has always fallen through. The upcoming birthday of my board game-loving colleague was a good motivation to start making it happen. After putting the ideas on paper, it became clear that this was going to be a multi-version project: improvements to the hardware and software were to be expected in the future, and the 3D printed box would probably also undergo some tweaks. Currently, this project is version 1.0.
INTRODUCTION
Features (v.1.0):
- Dice roll with 1 dice.
- Dice roll with 2 dice.
- Random number generation from 1 to 100 and from 1 to 9999.
- Play 'Winner' and 'Loser' sound effects on 1 dice rolls when the number rolled is 1 or 6..
- Play 'Winner' and 'Loser' sound effects on 2 dice rolls when the number rolled is 2 or 12.
- Option to turn sound signals on and off.
- After dice rolls and number generation, you can set whether the control automatically returns to the menu items or stays in the menu item (automatic exit).
- If automatic exit is enabled, you can set the time (milliseconds) after which the exit or return should occur.
The project itself is divided into 3 parts:
- 3D printed box
- Hardware
- Software
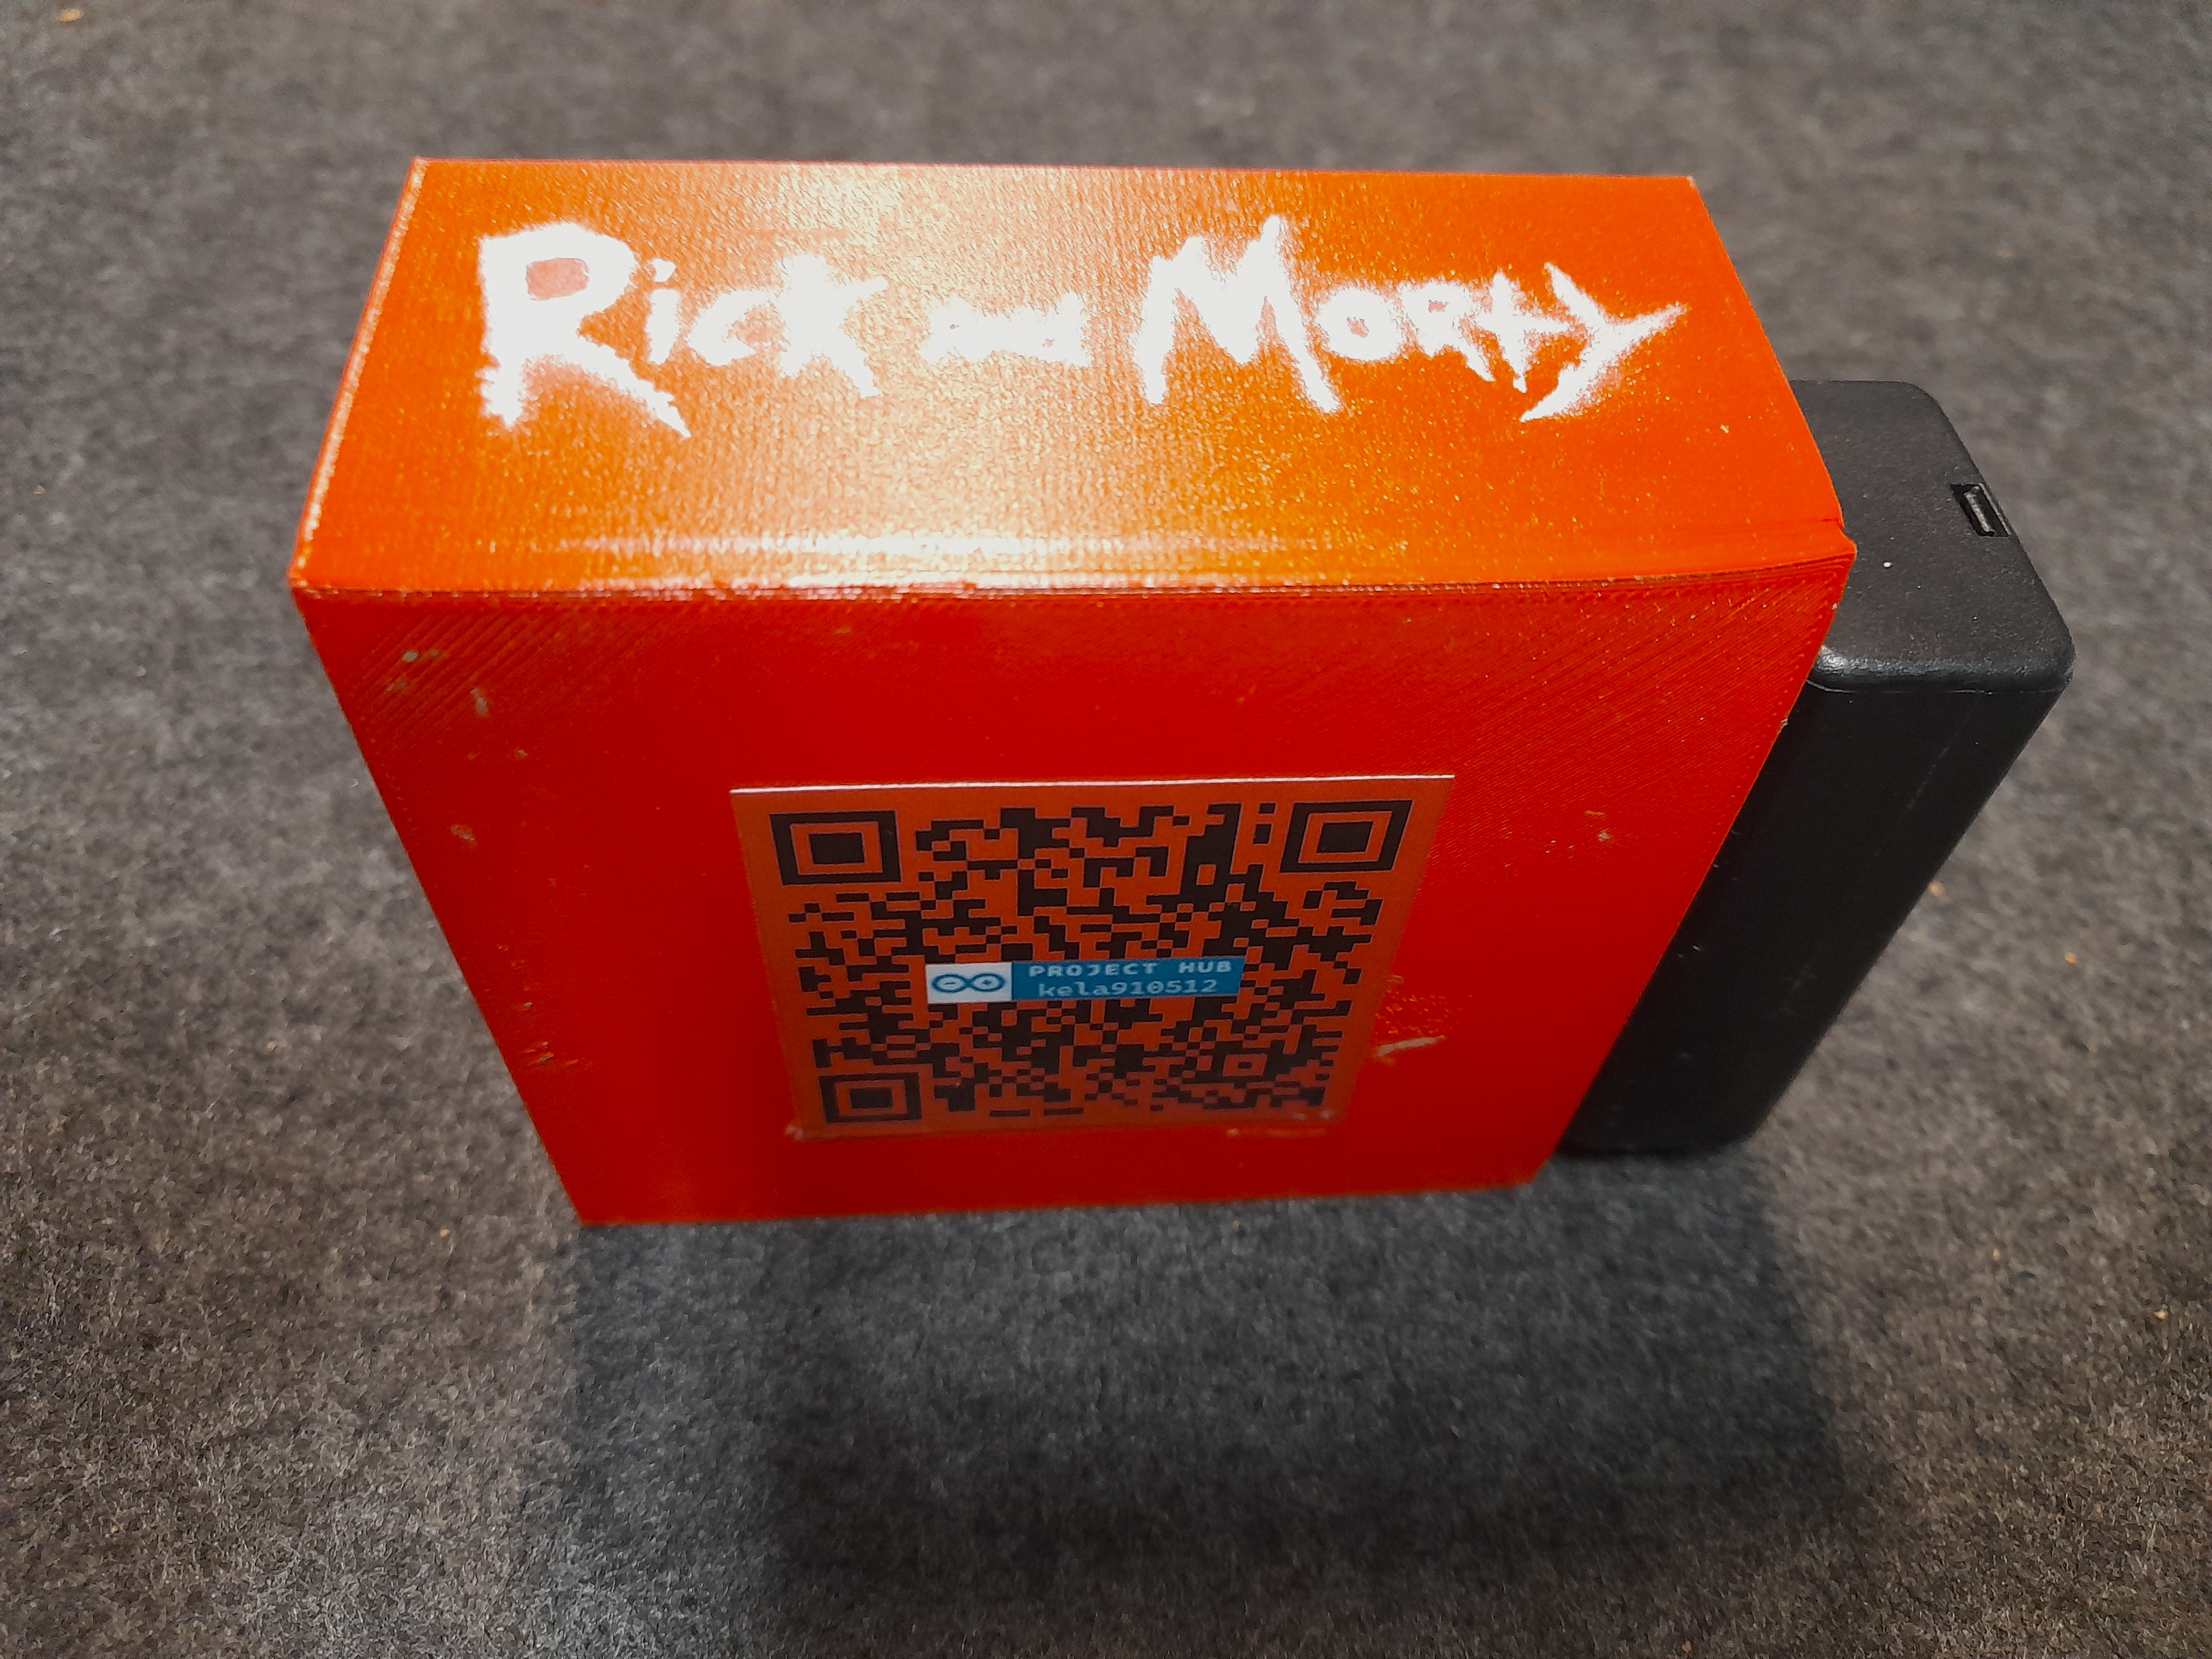
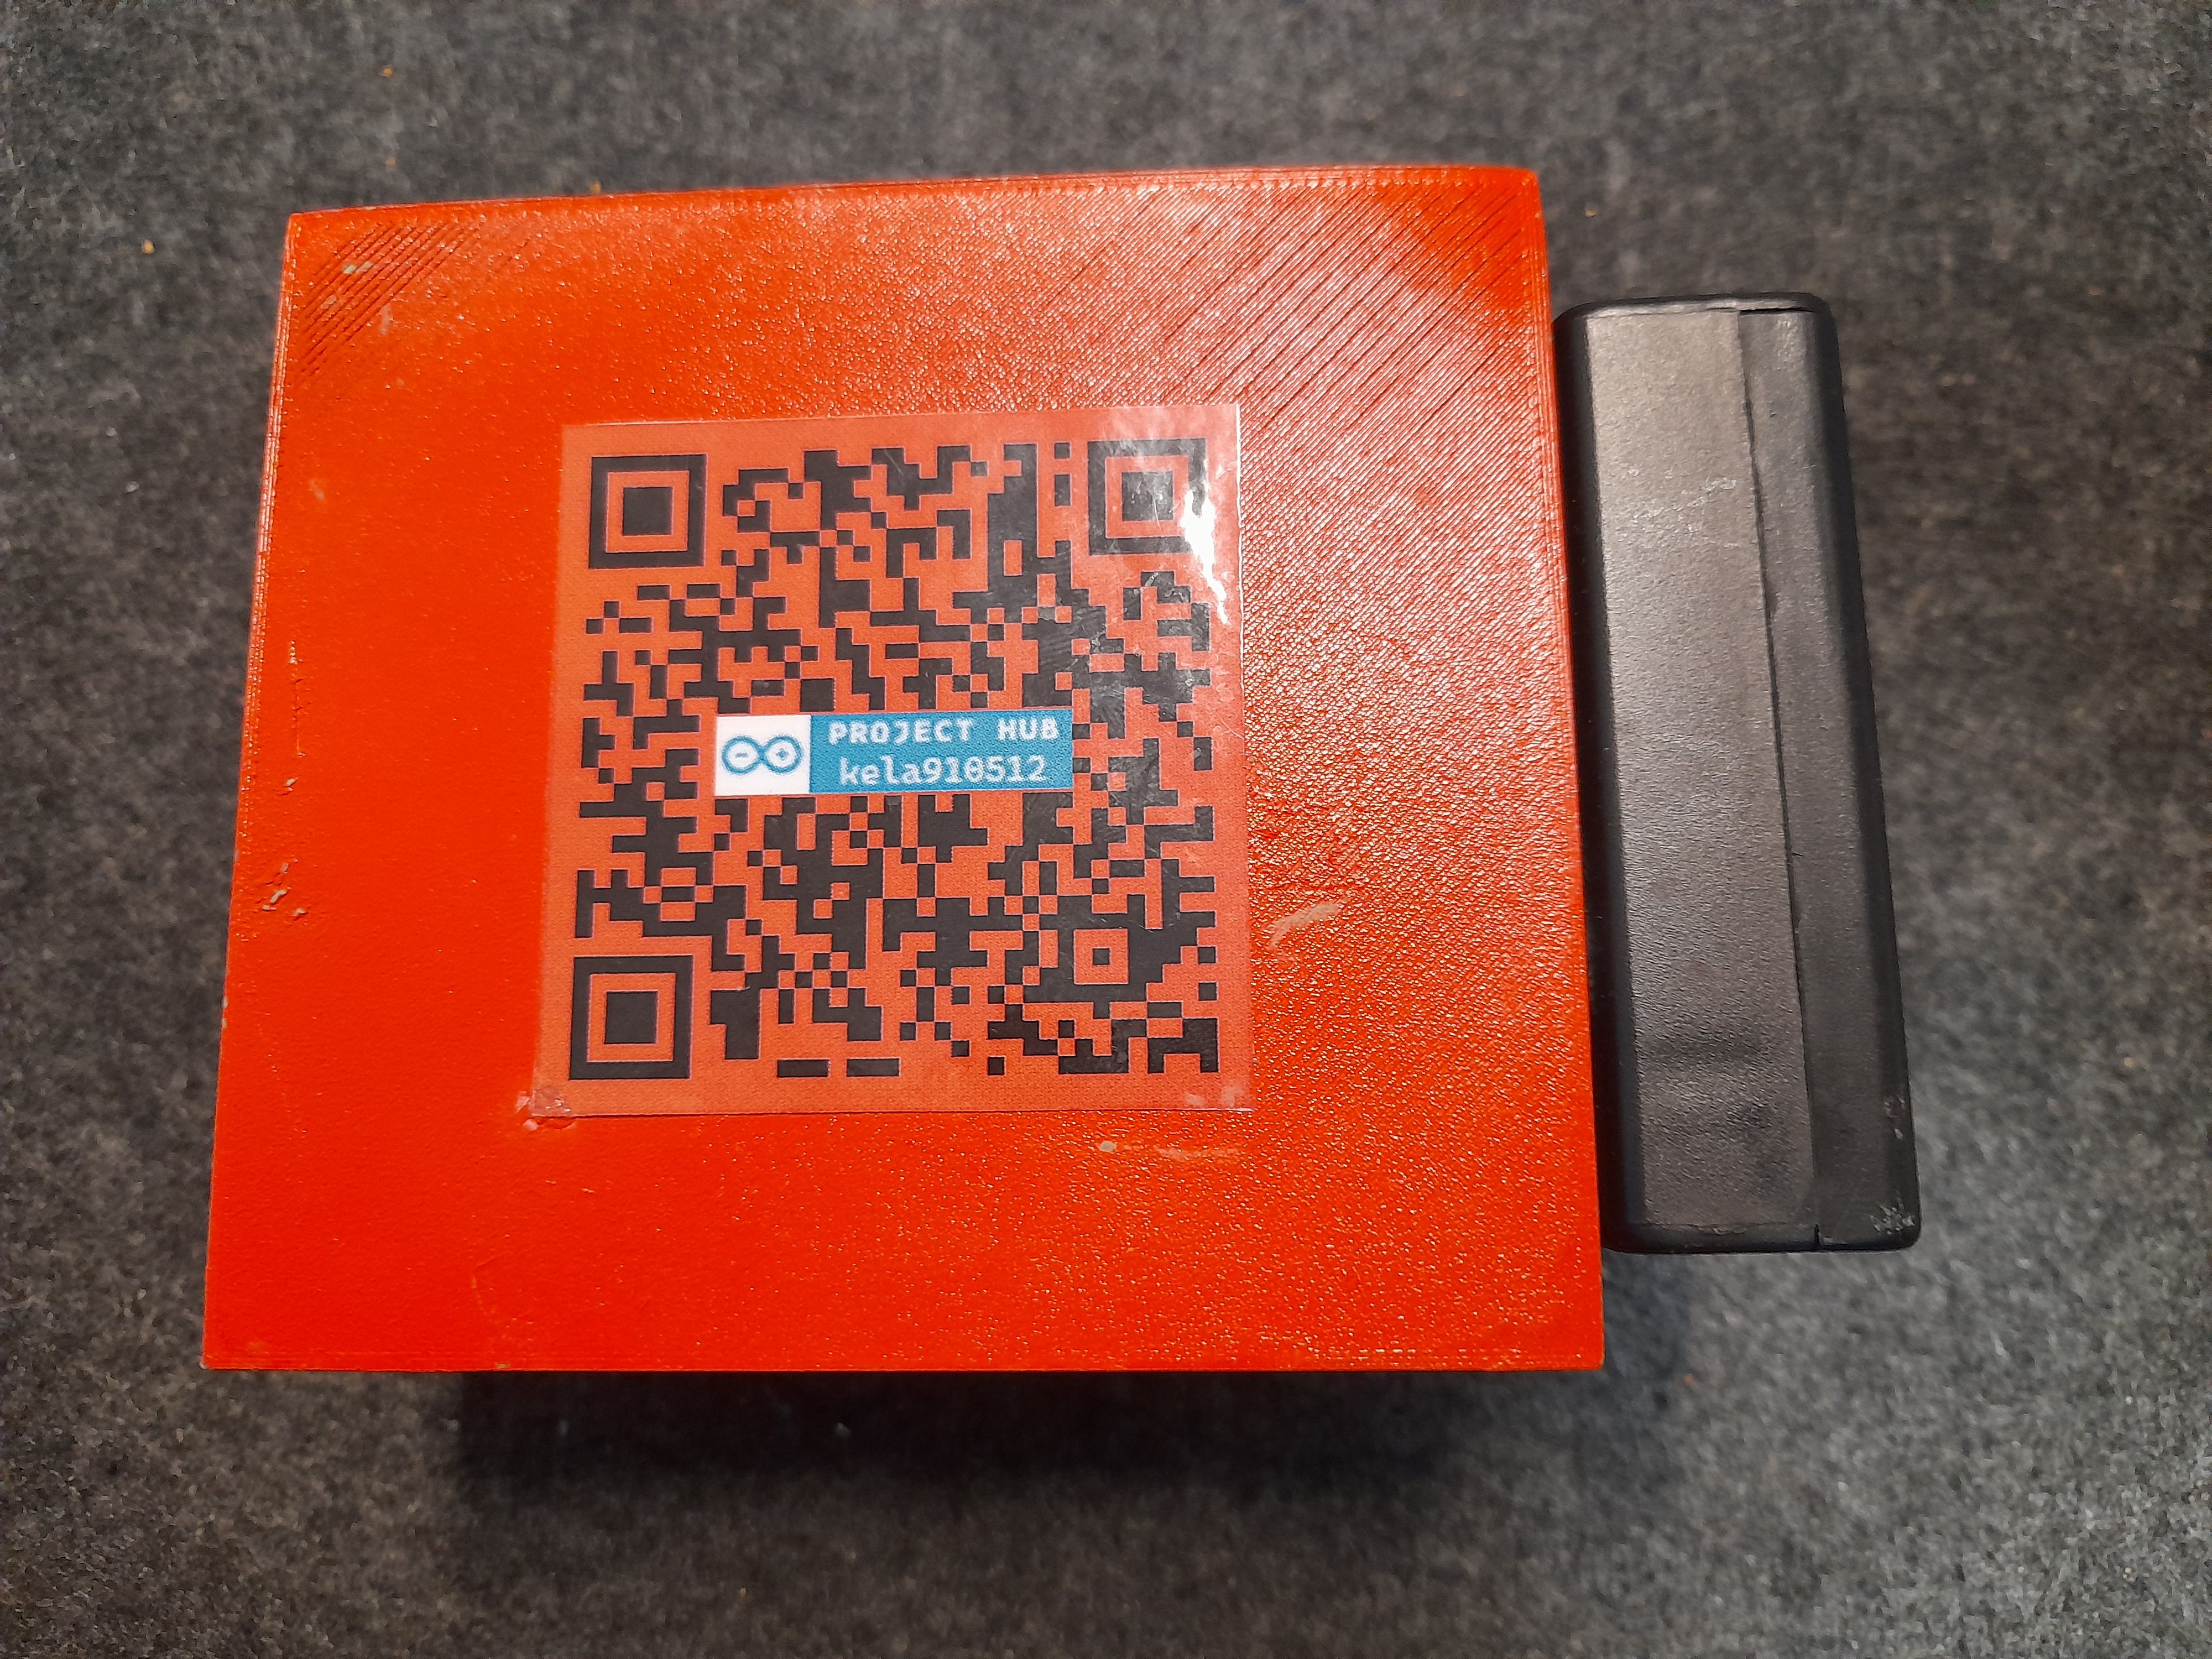
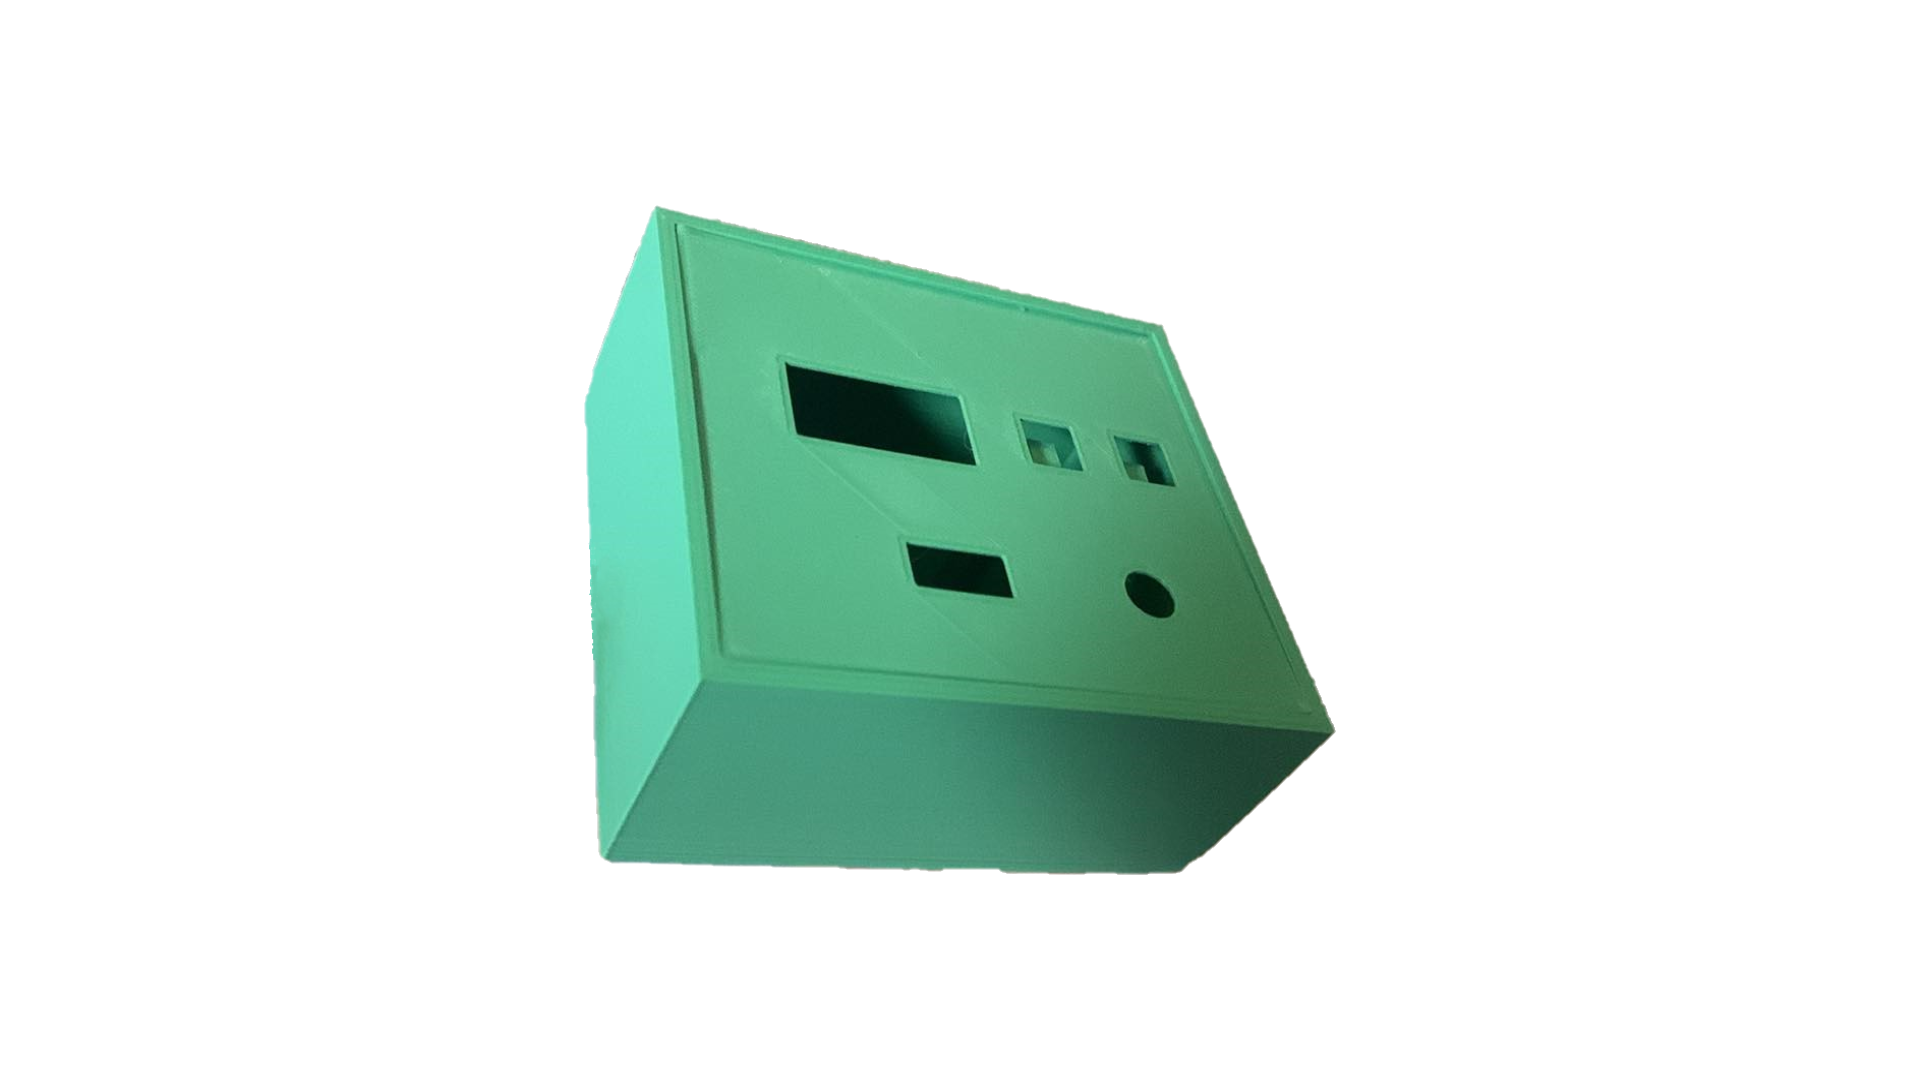
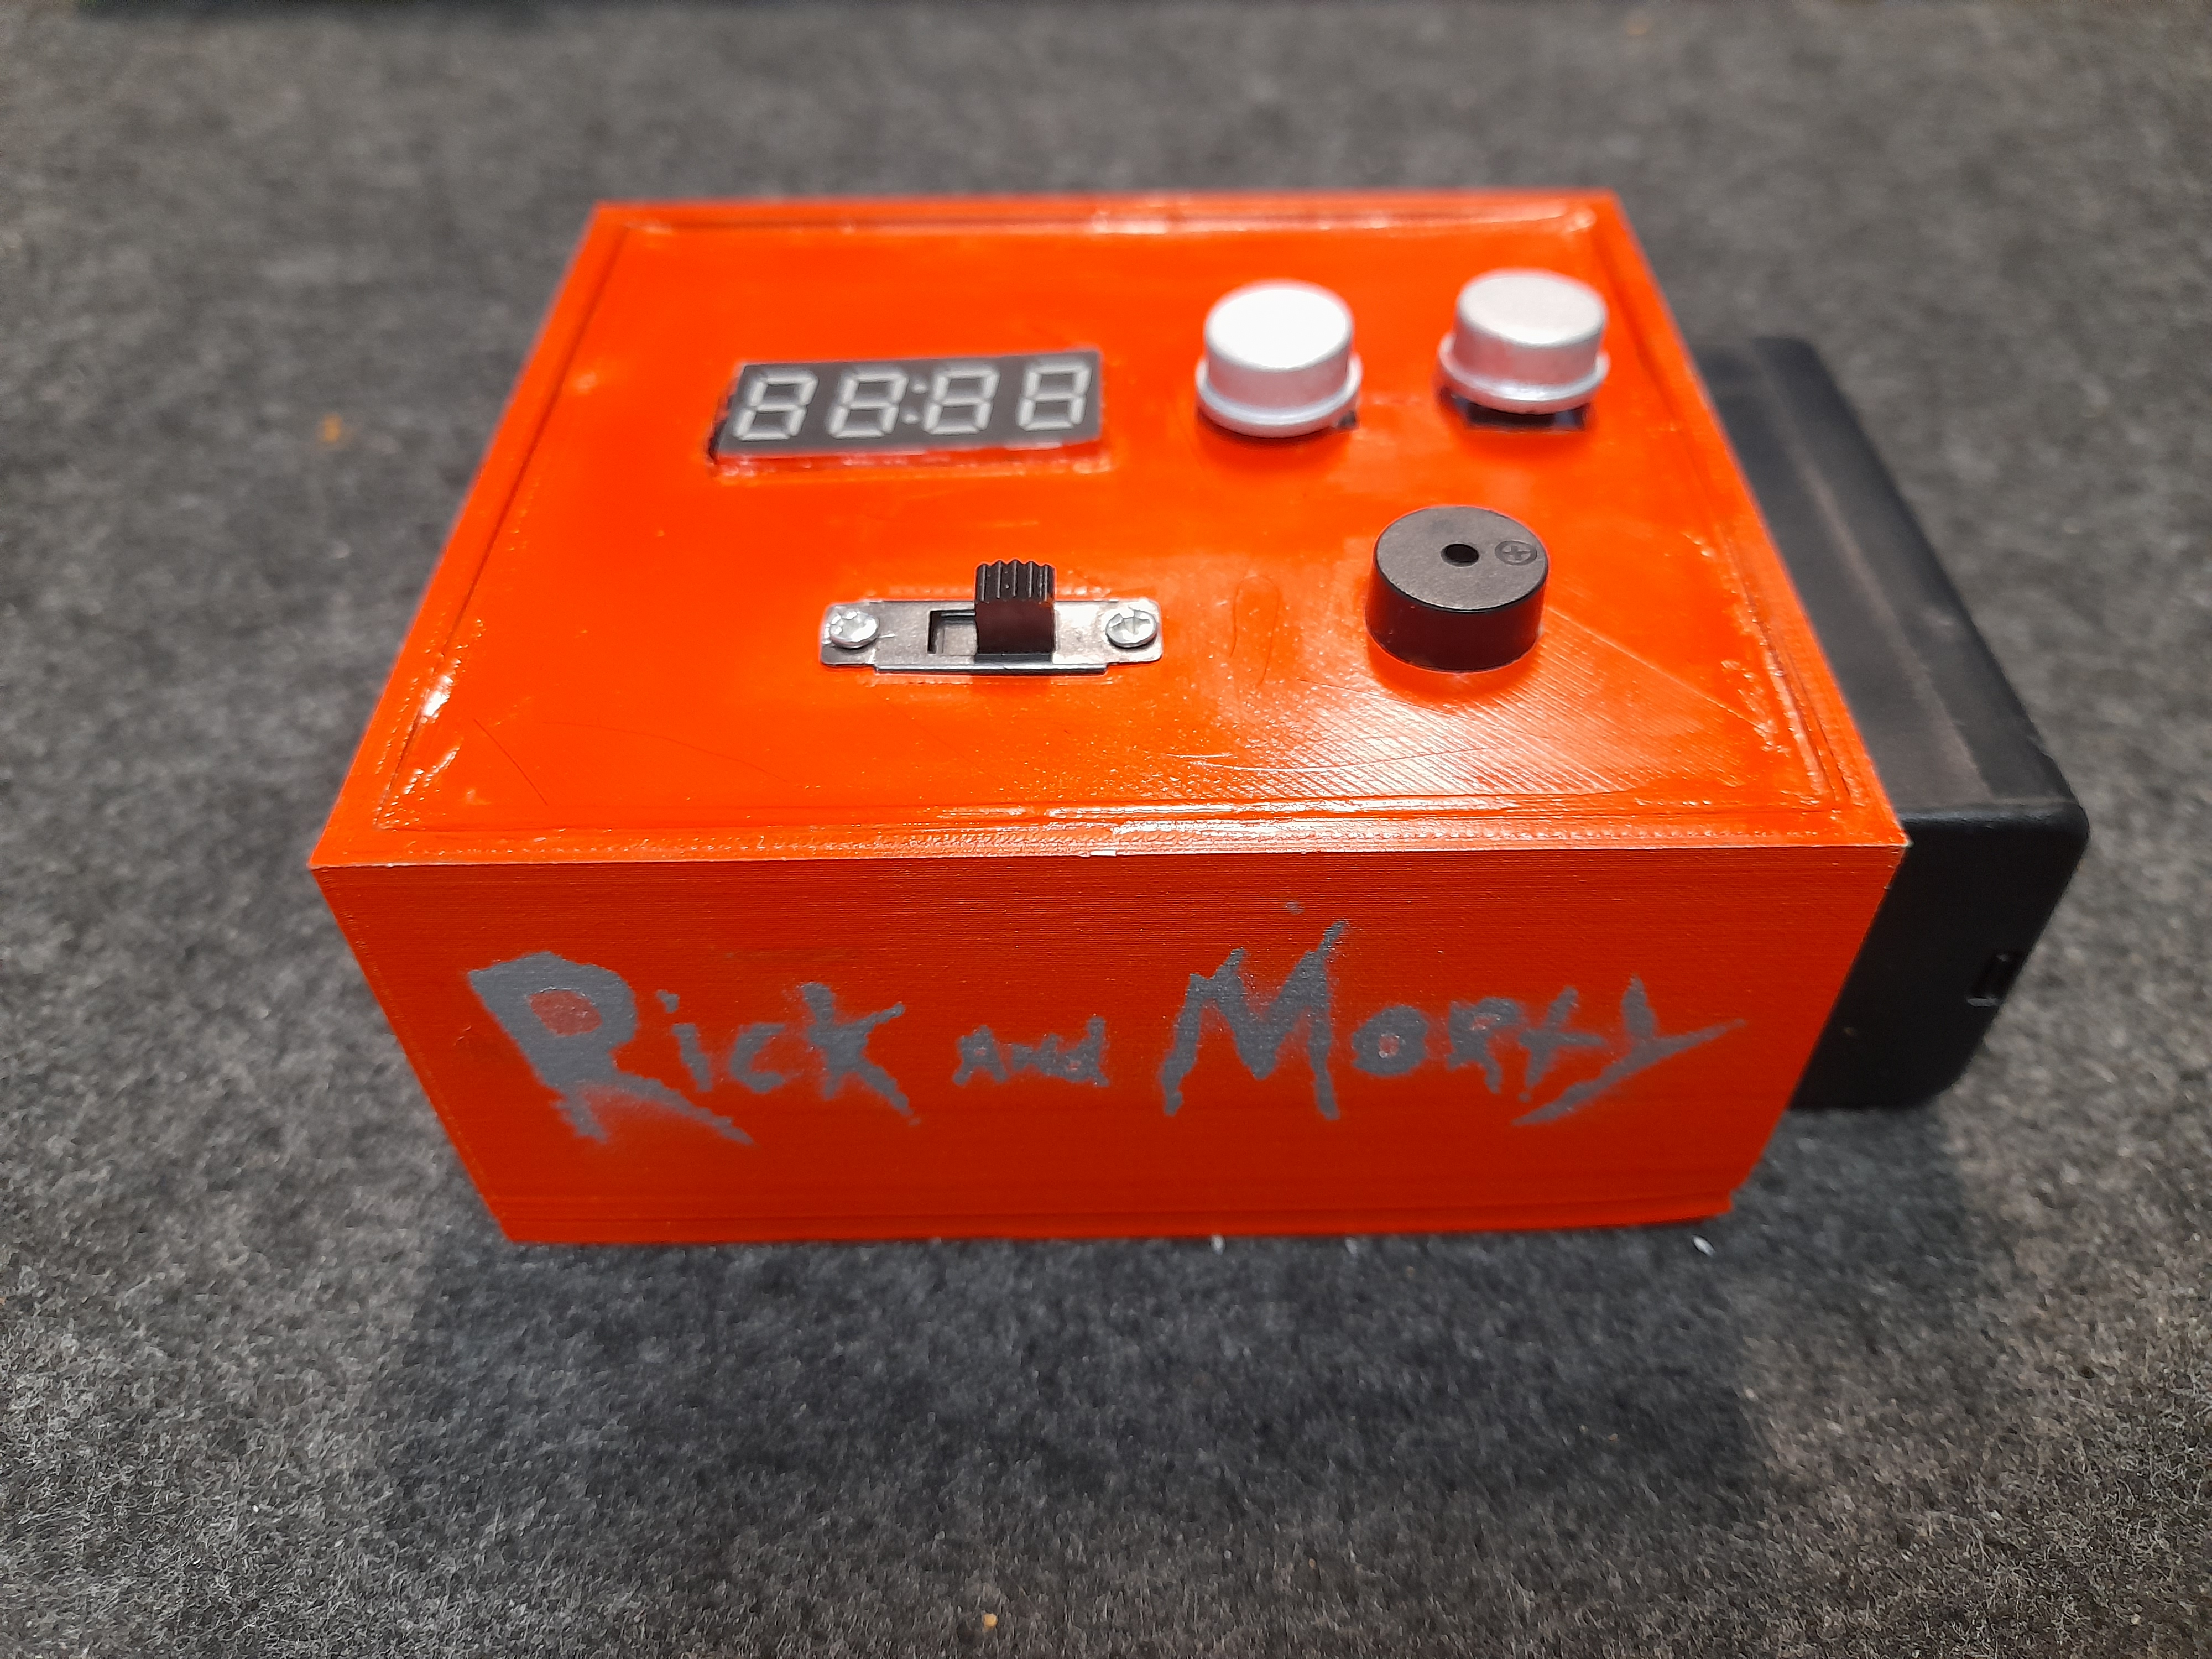
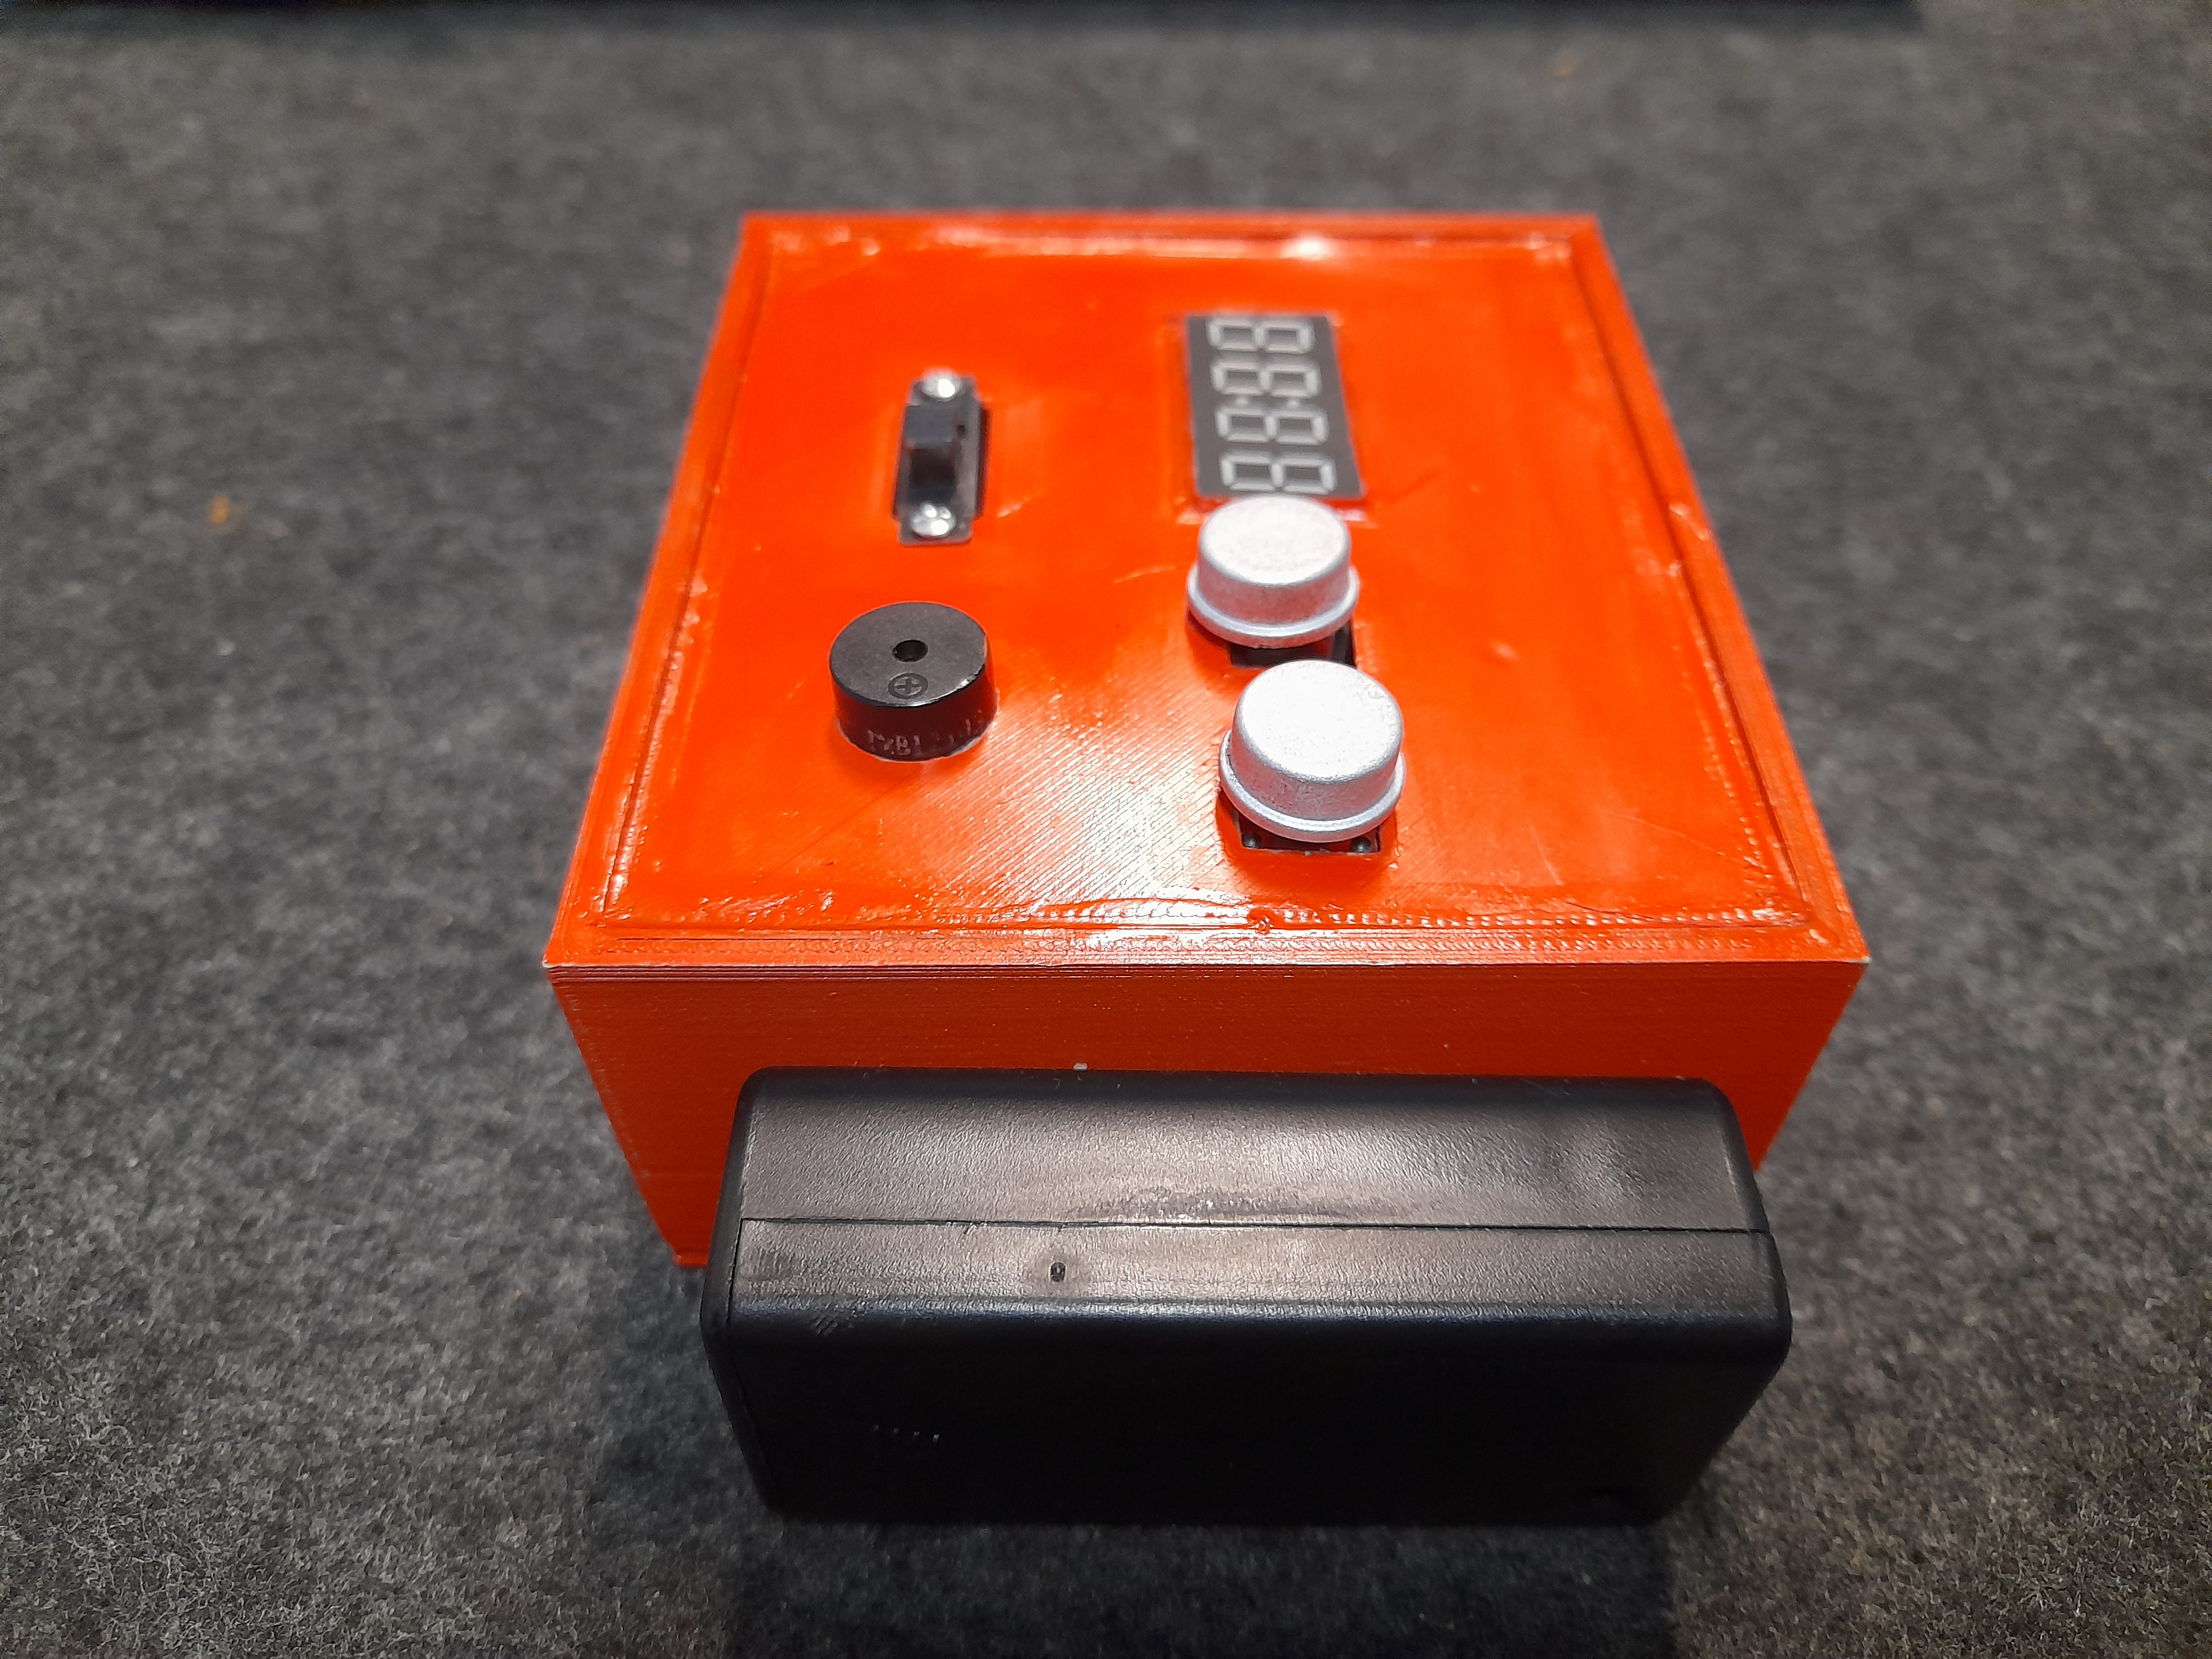
3D PRINTED BOX
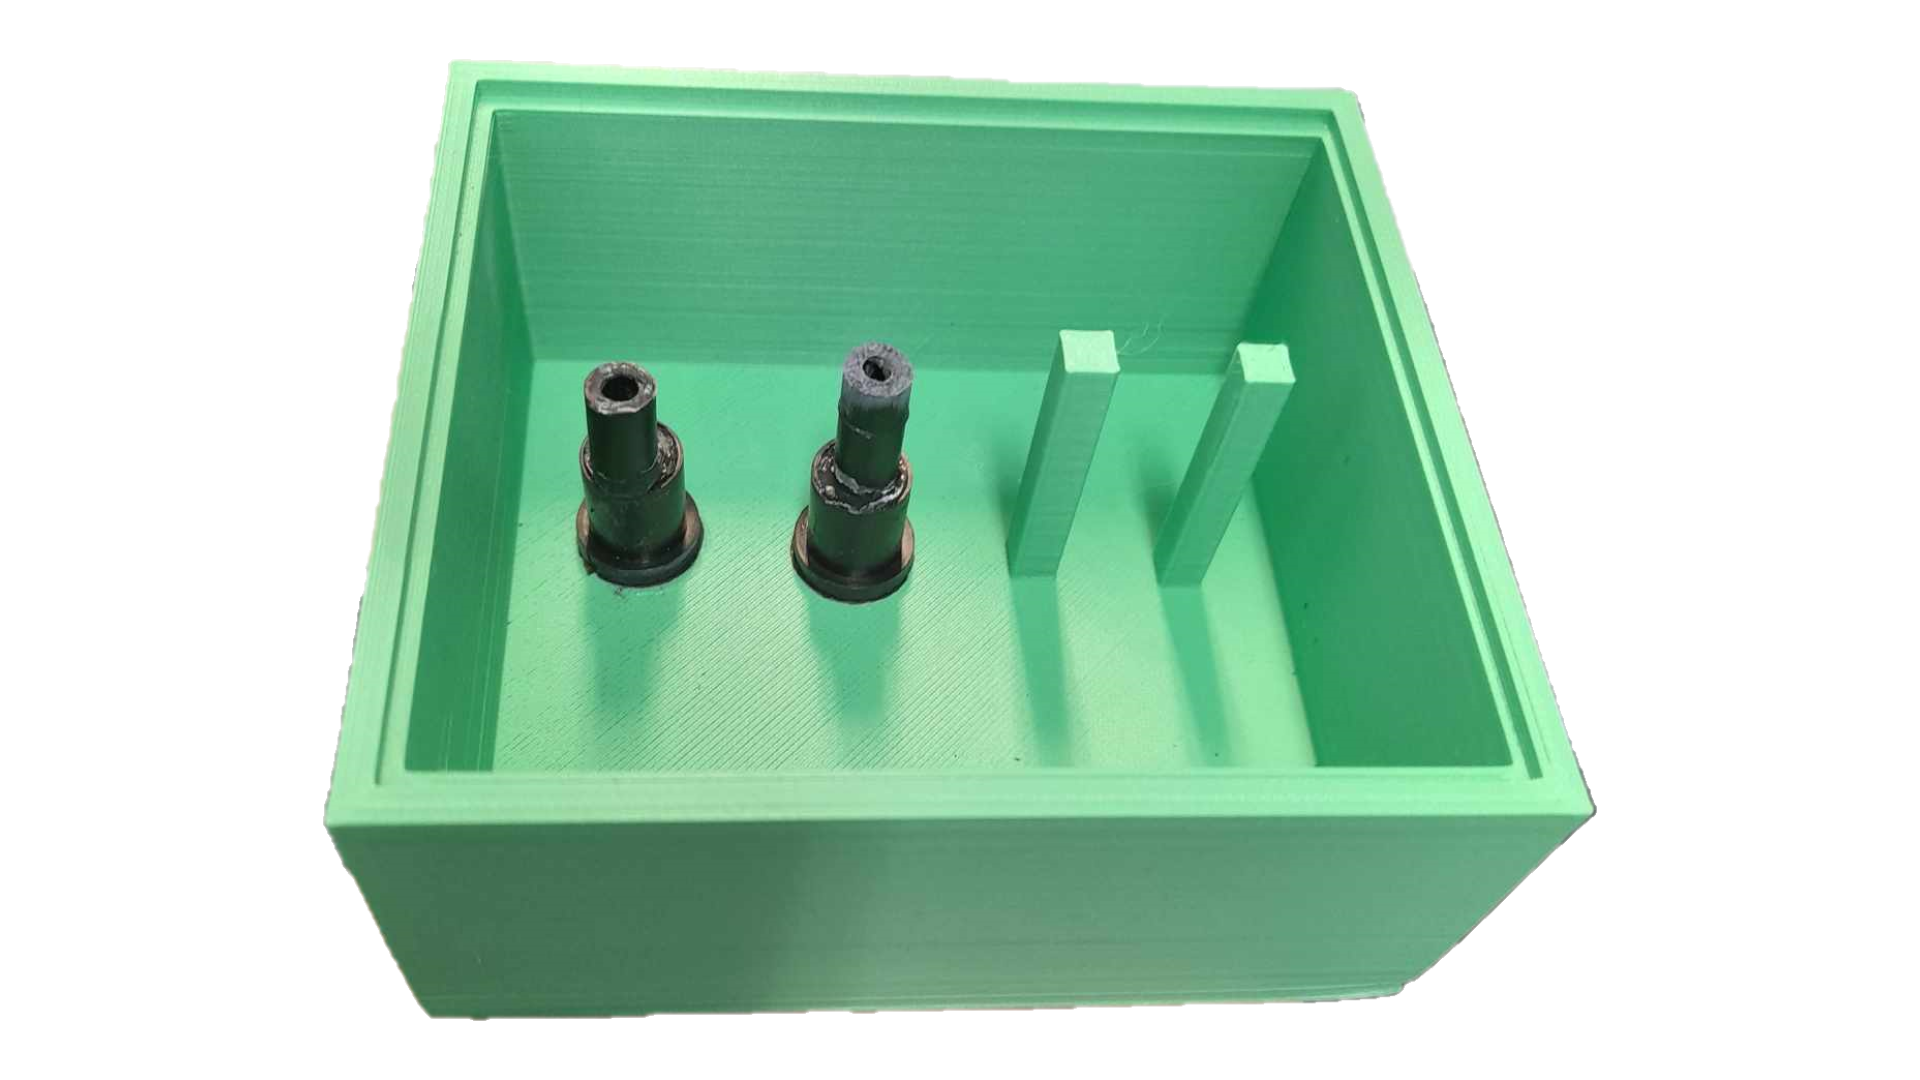
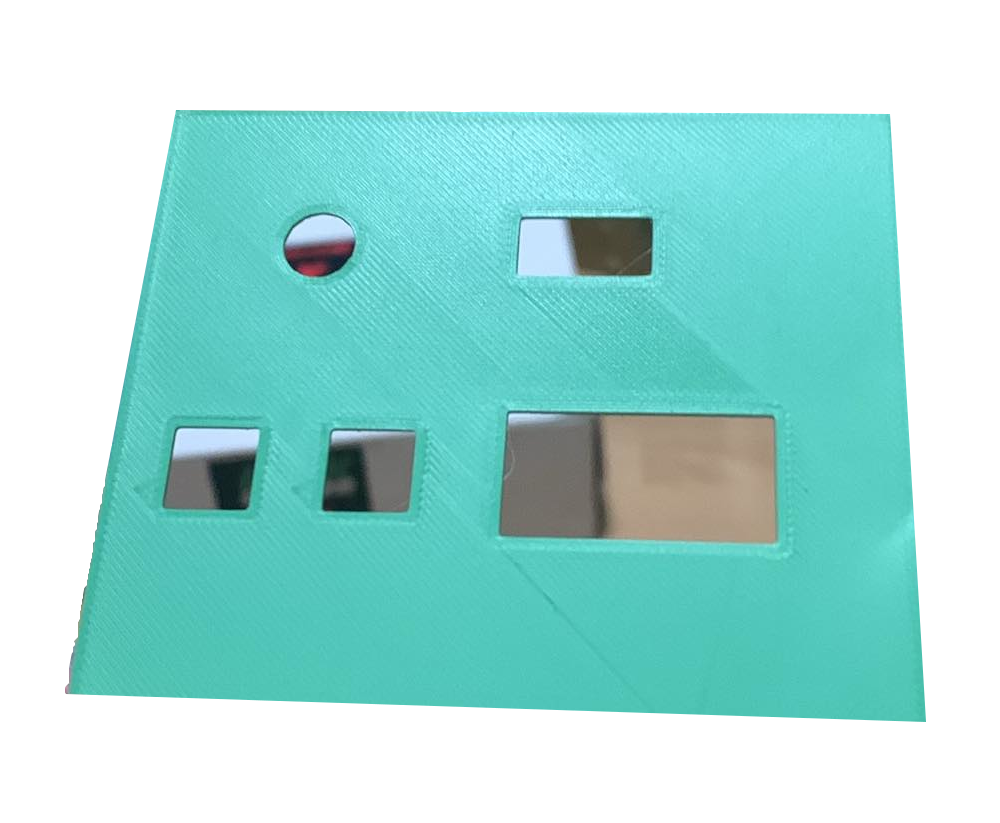
I don't currently have a 3D printer and the design skills to use it, so I asked another colleague ( keresztpapa ) who is skilled in this area to help me design and print my digital dice box. It was designed in Shapr3D and printed on a Creality Ender 3 V2 Neo 3D printer. The top of the box snaps in and out, it has 2 printed spacers and a slot on the lid for all the necessary built-in hardware.
After printing, it was discovered during the test assembly phase that the display would have required two printed spacers. Here I didn't want to do this by printing, so these two spacers were retrofitted by gluing.
The 9V battery holder was glued to the side of the box, with the two wires (9V, GND) also running through a built-in (printed) slot inside the box.


HARDWARE
The hardware infrastructure in this 1.0 version consists of the following devices:
- Arduino Nano
- 9V battery and battery holder
- S6P enclosed 2-position slide switch (6 contacts, DPDT, ON-ON)
- TM1637 4-digit 7-segment digital display module
- 2 push buttons 12x12
- 1 electromagnetic buzzer, without excitation circuit
- 2 10 kΩ resistors
The 7-12V input voltage ( VIN ) of the Arduino Nano allows the use of a 9V battery, which is perfectly suitable for a stable operation of the microcontroller. The digital dice can be turned on and off at any time using the 2-position toggle switch. The push buttons allow you to switch between the built-in menus and use its functions.
Wiring diagram of the hardware used:

Soldering, assembly:
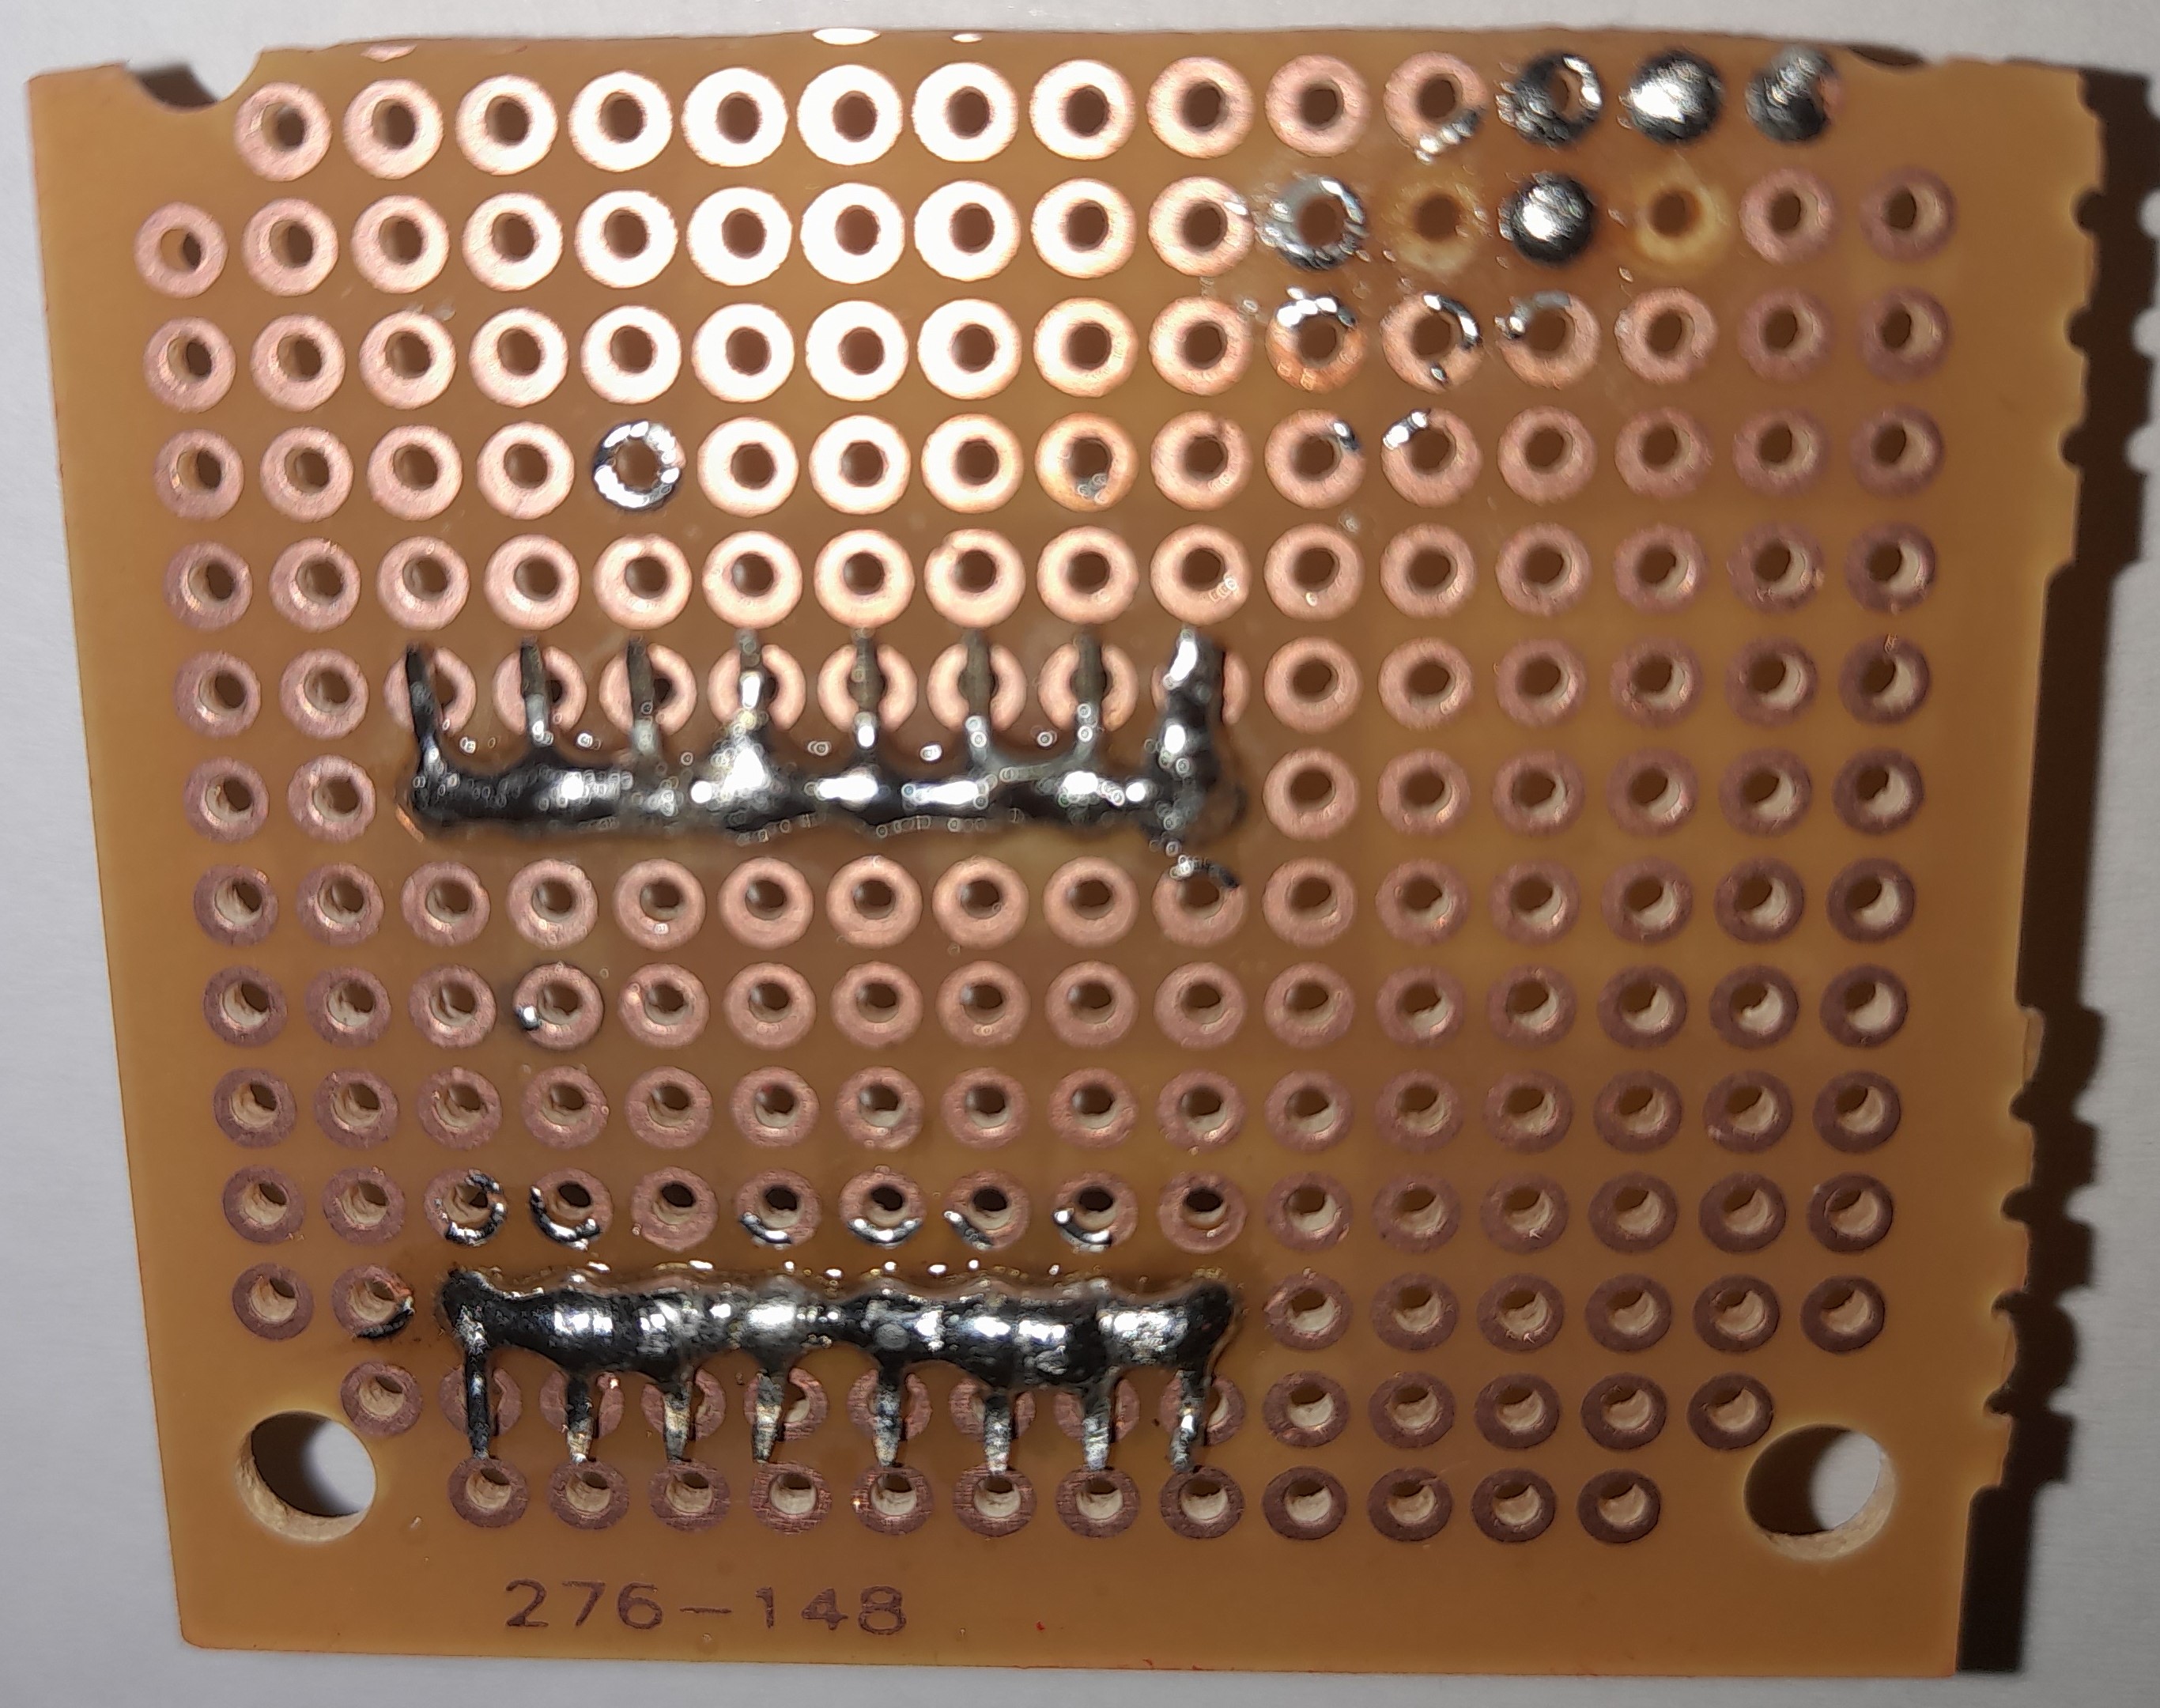
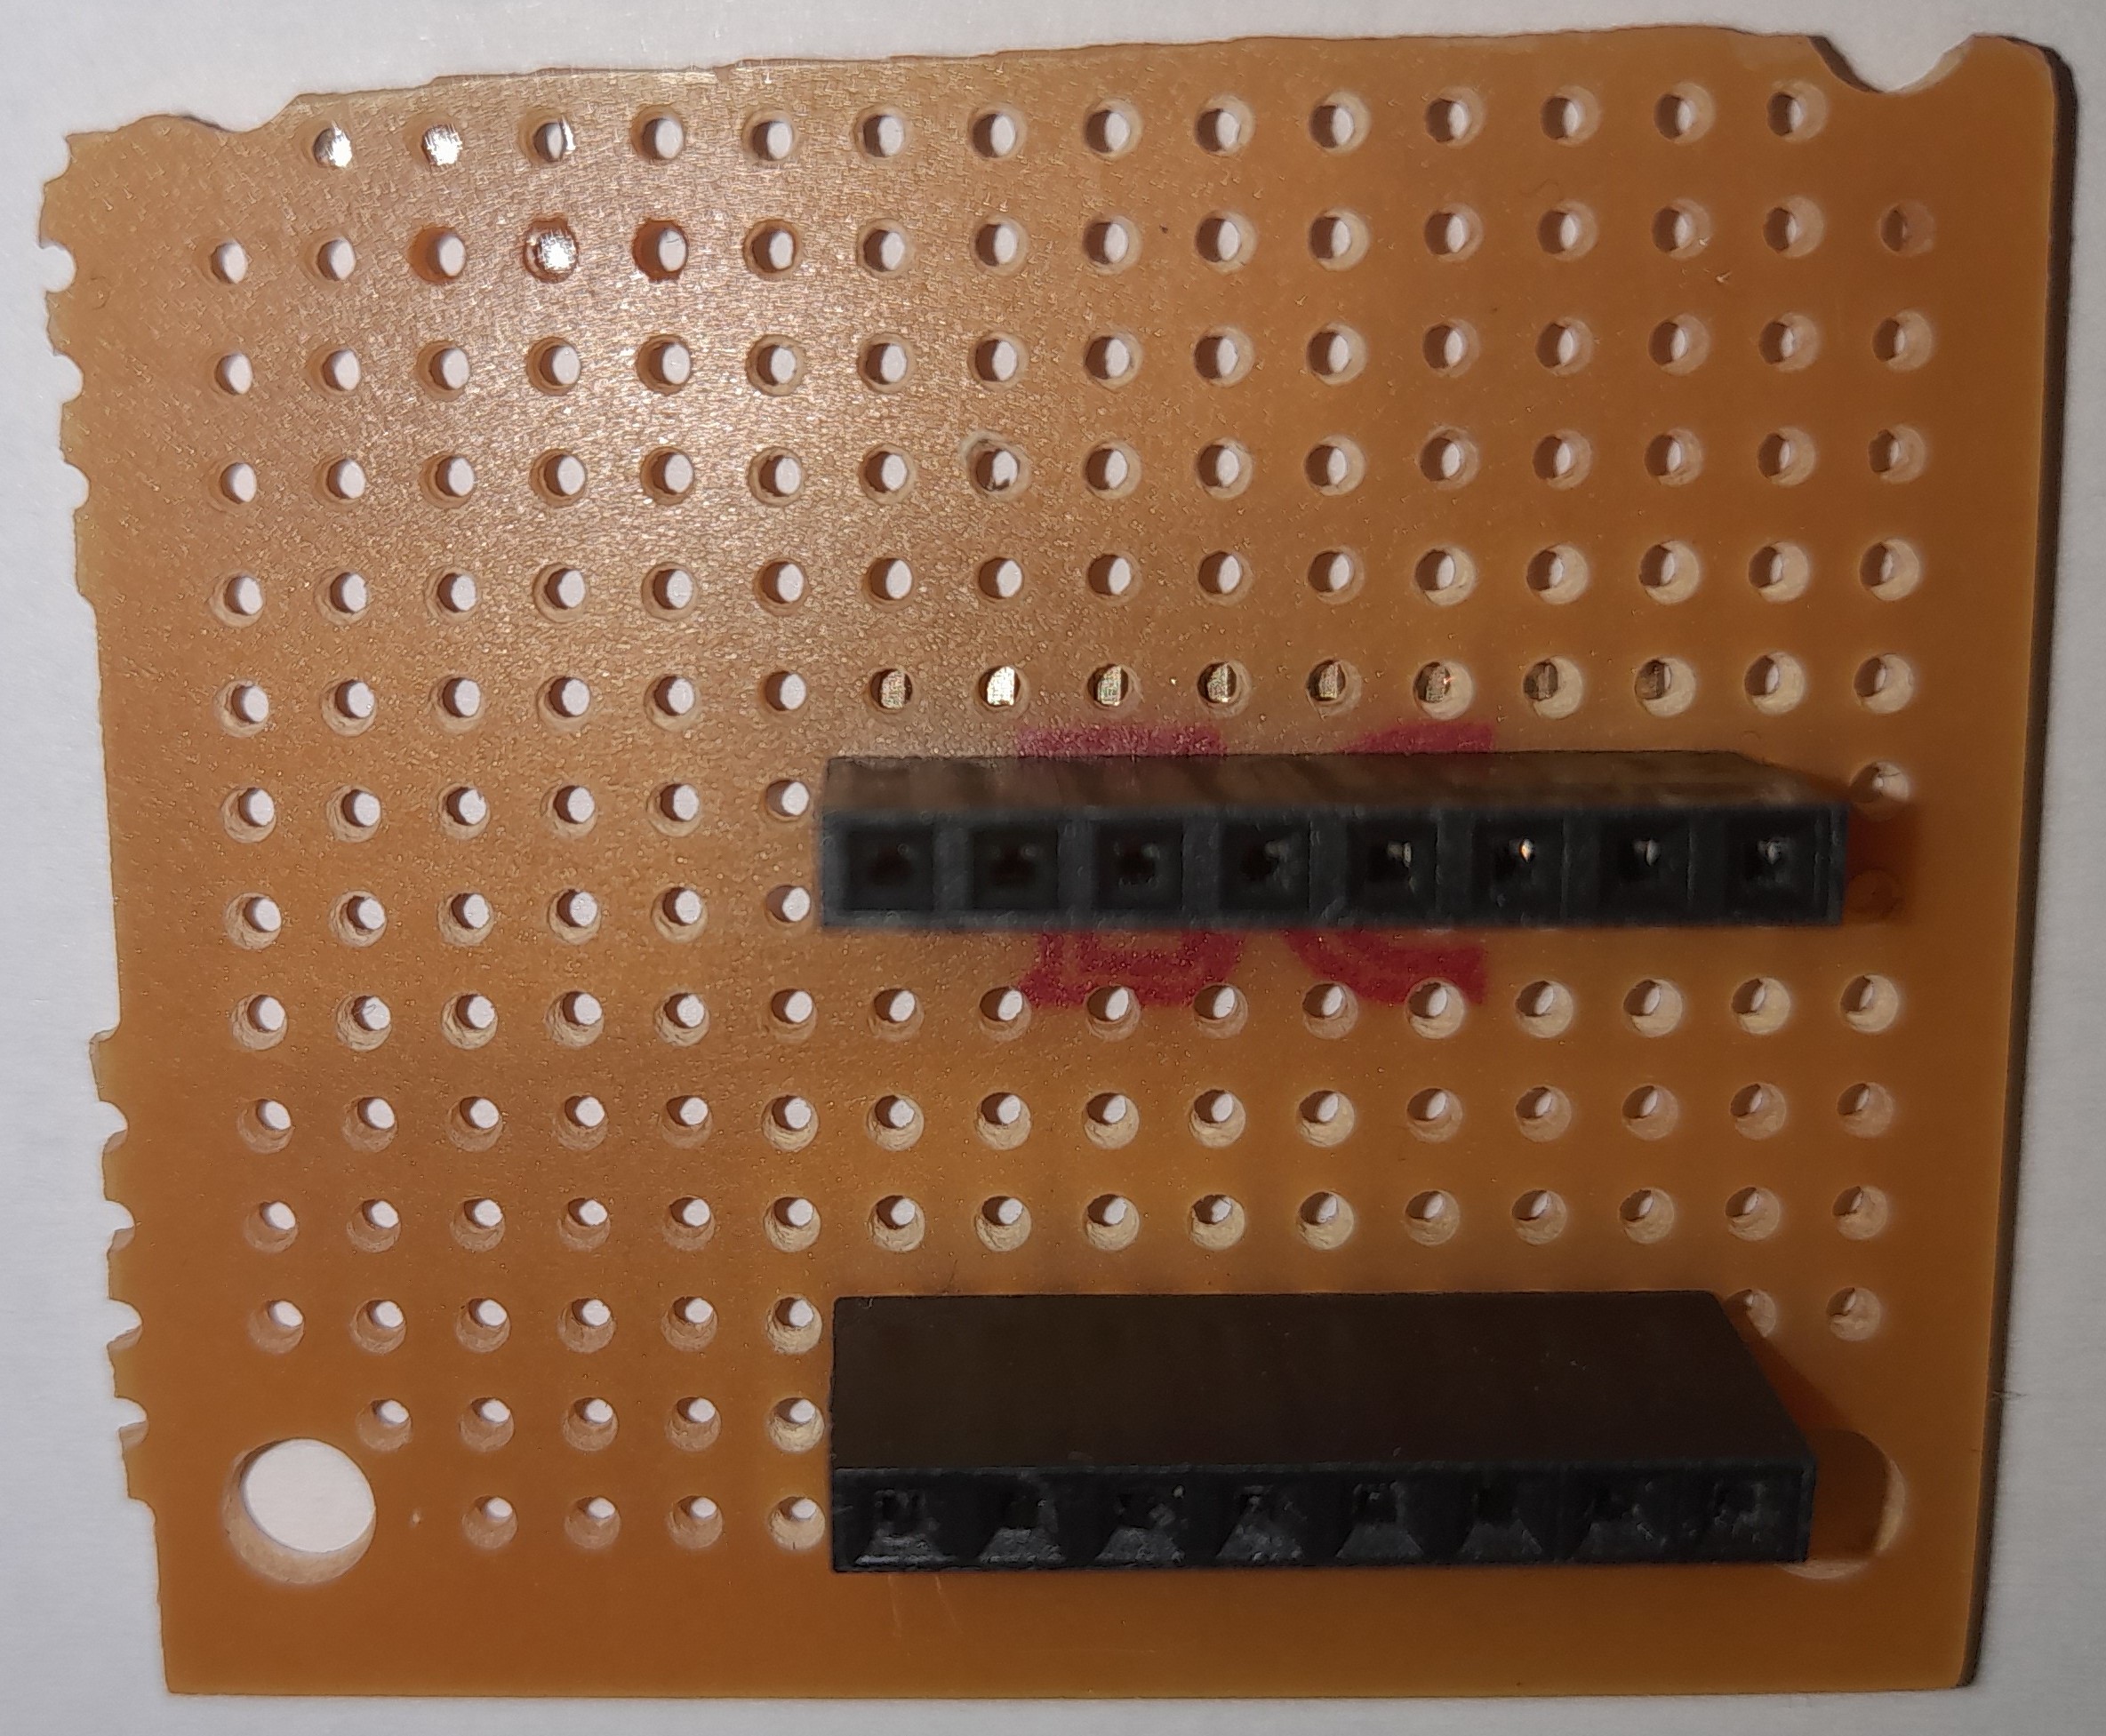
No soldering was done on the Arduino Nano side, only a 'nut' cable was used. GND and 5V are led out to a test socket, where the necessary components are connected with an 'apa' type cable. In addition, the GND and VCC legs of the 9V battery, the push buttons, the slide switch, the buzzer and the display legs were soldered.
I made one mistake during the soldering process, which was that by turning the two-position slide switch the wrong way, I soldered two legs on the opposite side instead of the right side. As a result, the on and off button states are not in the usual positions (left side - off, right side - on), but the other way round.
Unfortunately, I forgot to take a picture at the end of assembly, before sealing (gluing) the box.
SOFTWARE
- DIRECTORIES USED, HEADER FILES
The only library needed is the one for display control (TM1637 -> v1.2 -> TM1637Display.h). Furthermore, a header file ( pitches.h ) is used, in which the frequencies needed to play the two tunes are stored.
- INPUT - OUTPUT
The program can be controlled by two buttons: menuButtonPin (11) and buttonPin (12). The button bound to menuButtonPin is used to navigate between menu items, while the button bound to buttonPin is used to enter the current menu item, and to start dice rolls, number generation, and to change or finalize the options.
When creating the TM1637Display object, 2 values must be entered: the number and ID of the CLK and DIO pins. These are bound to pins 8 ( CLK ) and 9 ( DIO ) in the project. The electromagnetic buzzer ( buzzerPin ) is connected to pin 10.
It is important to note that the 2-position slide switch is not controlled on the software side, it is only in mechanical-functional contact with the rest of the project hardware, so it cannot be considered as an input device: it is only responsible for providing and interrupting the input power source - by mechanical adjustment - via a circuit connection.
- DISPLAY SOFTWARE OPERATION
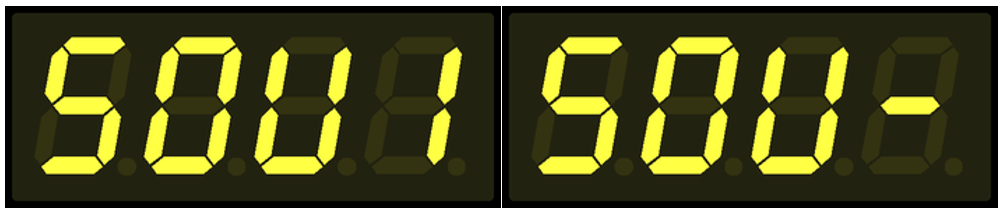
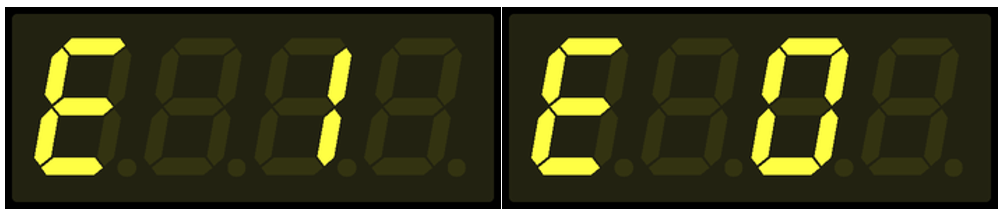
I implemented the display of numbers with a built-in procedure ( showNumberDec() ), while the display of all non-numeric values (dashes for menu items, auto exit on or off, and melody playback) was predefined in arrays at segment level.
const byte OFF[] = {
0, 0, 0, 0
};
const byte MENU[] = {
SEG_G,
SEG_G,
SEG_G,
0
};
const byte AUTO_EXIT_ON[] = {
SEG_A| SEG_F| SEG_G| SEG_E| SEG_D,
0,
SEG_B| SEG_C,
0
};
const byte AUTO_EXIT_OFF[] = {
SEG_A| SEG_F| SEG_G| SEG_E| SEG_D,
0,
SEG_A| SEG_F| SEG_B| SEG_E| SEG_C| SEG_D,
0
};
const byte SOUND_ON[] = {
SEG_A| SEG_F| SEG_G| SEG_C| SEG_D,
SEG_A| SEG_F| SEG_B| SEG_E| SEG_C| SEG_D,
SEG_F| SEG_B| SEG_E| SEG_C| SEG_D,
SEG_B| SEG_C
};
const byte SOUND_OFF[] = {
SEG_A| SEG_F| SEG_G| SEG_C| SEG_D,
SEG_A| SEG_F| SEG_B| SEG_E| SEG_C| SEG_D,
SEG_F| SEG_B| SEG_E| SEG_C| SEG_D,
SEG_G
};
I made the display update dependent on the value of a shouldUpdateDisplay variable, to make it easier to control the display updates and the need for them. Also, before any changes are made to the display, the current content on the display is cleared, which is achieved with the predefined OFF[] array ( setSegments(OFF) ).


The frequencies defined in the pitches.h header file are used in the winnerMelody[] and loserMelody[] arrays. In order to generate the corresponding melodies, it was necessary to define the playback, pitch lengths for each frequency, which were stored in the winnerMelodyDurations[] and loserMelodyDurations[] arrays.
int winnerMelody[] = {
NOTE_C4, NOTE_E4, NOTE_G4, NOTE_C5
};
int winnerMelodyDurations[] = {
4, 4, 4, 4
};
int loserMelody[] = {
NOTE_A3, NOTE_AS3, NOTE_A3
};
int loserMelodyDurations[] = {
8, 8, 4
};
- PROCEDURES
void setup() : Define inputs and outputs, set the display to default values and display menu item 1.
void setup() {
pinMode(menuButtonPin, INPUT);
pinMode(buttonPin, INPUT);
pinMode(buzzerPin, OUTPUT);
display.setSegments(OFF);
display.setBrightness(6);
display.setSegments(MENU);
display.showNumberDec(menuItem, false, 1, 3);
}
void loop() : Reading the values of the two buttons and controlling the button presses, running the logic built into them continuously.
void loop() {
// READ BUTTONS STATE
buttonState = digitalRead(buttonPin);
menuButtonState = digitalRead(menuButtonPin);
// CHANGE MENU
if (menuButtonState == HIGH && lastMenuButtonState == LOW){
lastMenuButtonState = HIGH;
shouldUpdateDisplay = true; // NEED TO UPDATE THE DISPLAY
menuItem <= 6 ? menuItem += 1 : menuItem = 1; // INCREASE THE VALUE OF THE MENU ITEM
shouldUpdateDisplay == true ? setDisplay('M', 0, menuItem) : none();
}
// AFTER WE PUSHED THE MENU BUTTON
if (menuButtonState == LOW && lastMenuButtonState == HIGH){
lastMenuButtonState = LOW; // WE NEED TO CHANGE THE LAST STATE OF THE MENU BUTTON
}
// ENTER CURRENT MENU: ROLLING THE DICE | GENERATE RANDOM NUMBER | CHANGE SETTINGS
if (buttonState == HIGH && lastButtonState == LOW){
lastButtonState = HIGH;
shouldUpdateDisplay = true;
(shouldUpdateDisplay == true) ? menuControl(menuItem) : none();
}
// AFTER WE PUSHED THE FUNCTION BUTTON (ROLLING | GENERATE | SETTINGS)
if (buttonState == LOW && lastButtonState == HIGH){
lastButtonState = LOW;
}
delay(100);
}
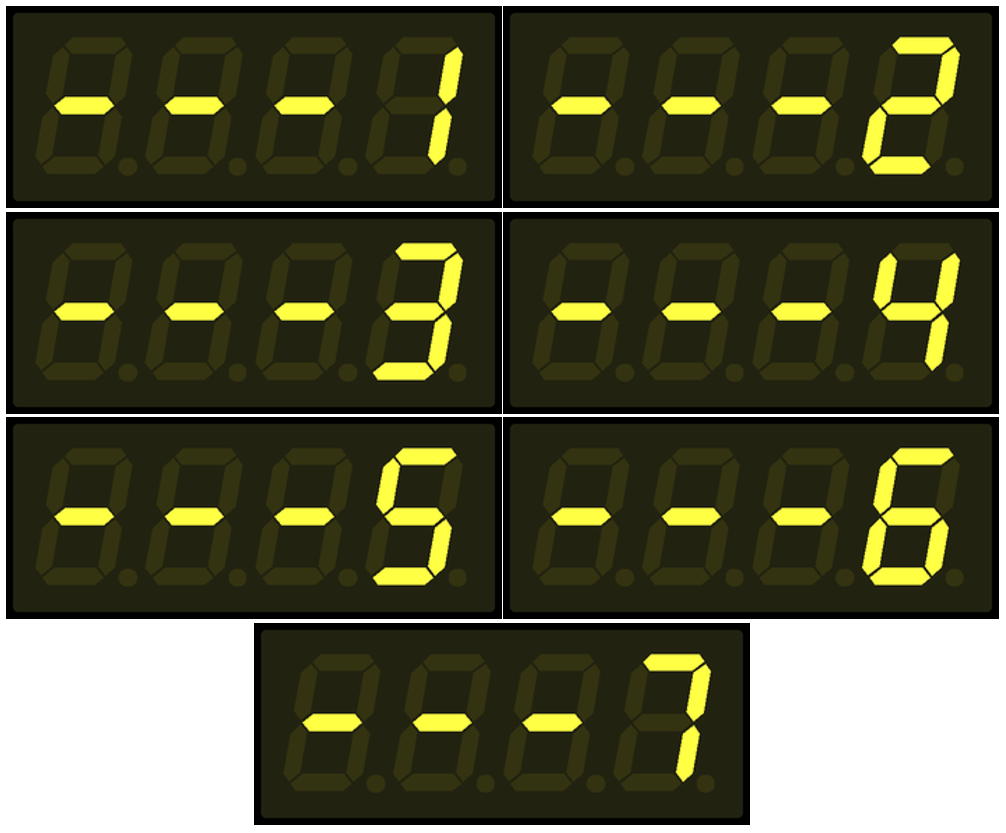
void menuControl(): A one-parameter procedure to trigger the execution of the logic associated with a given menu item. When called, it expects the value of the menu item as a parameter ( menuItem ).
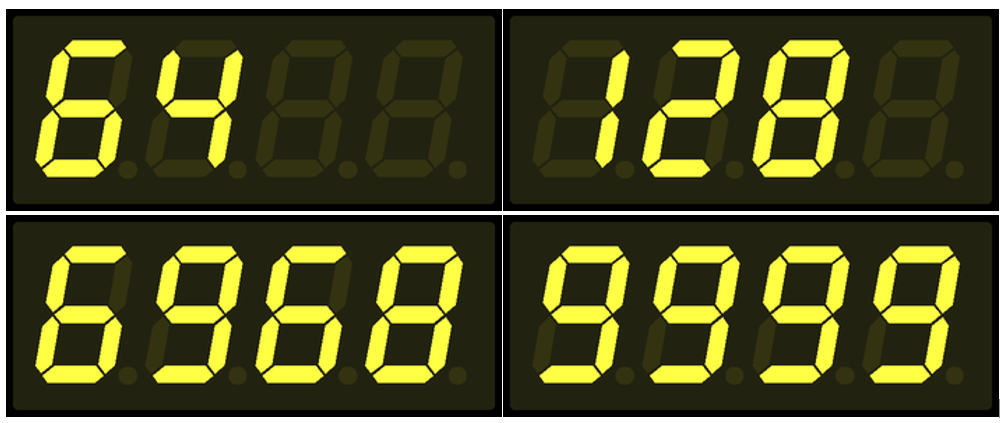
- Menu item 1: Dice roll with one die.
- Menu item 2: Roll two dice.
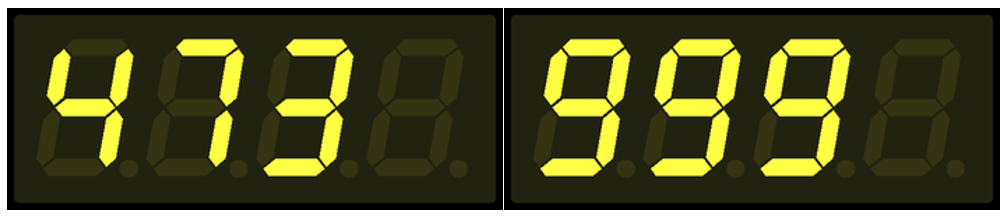
- Menu item 3: Generate a random number between 100 and 1000.
- Menu item 4: Generate a random number between 1 and 10000.
- Menu item 5: Toggle melody playback on and off.
- Menu item 6: Enable or disable automatic exit from menu.
- Menu item 7: Set the time for automatic exit.
In single or double dice rolls, if the roll is one of the highlighted numbers (1, 2 | 6, 12) and the tune is on, the buzzer will play the winning or losing tune, depending on the number rolled.
For rolls of the dice and random number generation, it is checked if the automatic exit is enabled. If it is, after the dice roll / number generation and after the set time has elapsed (menu item 7), the system will exit back to the main menu, displaying the current / last menu item. If the automatic exit is disabled, nothing happens, the display will show the last thrown / generated number until further button presses.
The automatic exit setting does not apply to entering and making settings in menu items 5, 6 and 7. In all cases, it will return to the main menu, even to menu item 1.
void menuControl(int menuItem) {
switch (menuItem) {
// ROLLING A DICE
case 1:
randNumber = random(1,7);
setDisplay('R', randNumber, menuItem);
// PLAYING THE WINNER MELODY IF THE ROLLED NUMBER IS 6 AND THE SOUND OPTION IS ON
(randNumber == 6 && buzzerState == 1) ? playMelody(winnerMelody, winnerMelodyDurations, sizeof(winnerMelody) / sizeof(winnerMelody[0])) : none();
// PLAYING THE LOSING MELODY IF THE ROLLED NUMBER IS 1 AND THE SOUND OPTION IS ON
(randNumber == 1 && buzzerState == 1) ? playMelody(loserMelody, loserMelodyDurations, sizeof(loserMelody) / sizeof(loserMelody[0])) : none();
// IF AUTO EXIT IS ENABLED, DELAY IS ACTIVATED
(autoExit == 0) ? none() : delay(DELAY);
// IF AUTO EXIT IS ENABLED, YOU WILL BE AUTOMATICALLY TAKEN BACK TO THE MENU
(autoExit == 0) ? none() : setDisplay('M', 0, menuItem);
return;
// ROLLING TWO DICE
case 2:
randNumber = random(2,13);
setDisplay('R', randNumber, menuItem);
// PLAYING THE WINNER MELODY IF THE ROLLED NUMBER IS 12 AND THE SOUND OPTION IS ON
(randNumber == 12 && buzzerState == 1) ? playMelody(winnerMelody, winnerMelodyDurations, sizeof(winnerMelody) / sizeof(winnerMelody[0])) : none();
// PLAYING THE LOSING MELODY IF THE ROLLED NUMBER IS 2 AND THE SOUND OPTION IS ON
(randNumber == 2 && buzzerState == 1) ? playMelody(loserMelody, loserMelodyDurations, sizeof(loserMelody) / sizeof(loserMelody[0])) : none();
// IF AUTO EXIT IS ENABLED, DELAY IS ACTIVATED
(autoExit == 0) ? none() : delay(DELAY);
// IF AUTO EXIT IS ENABLED, YOU WILL BE AUTOMATICALLY TAKEN BACK TO THE MENU
(autoExit == 0) ? none() : setDisplay('M', 0, menuItem);
return;
// GENERATE RANDOM NUMBER BETWEEN 100 AND 1000
case 3:
setDisplay('R', random(100,1000), menuItem);
// IF AUTO EXIT IS ENABLED, DELAY IS ACTIVATED
(autoExit == 0) ? none() : delay(DELAY);
// IF AUTO EXIT IS ENABLED, YOU WILL BE AUTOMATICALLY TAKEN BACK TO THE MENU
(autoExit == 0) ? none() : setDisplay('M', 0, menuItem);
return;
// GENERATE RANDOM NUMBER BETWEEN 1 AND 10000
case 4:
setDisplay('R', random(1,10000), menuItem);
// IF AUTO EXIT IS ENABLED, DELAY IS ACTIVATED
(autoExit == 0) ? none() : delay(DELAY);
// IF AUTO EXIT IS ENABLED, YOU WILL BE AUTOMATICALLY TAKEN BACK TO THE MENU
(autoExit == 0) ? none() : setDisplay('M', 0, menuItem);
return;
// SET THE SOUND ON/OFF
case 5:
(buzzerState == 0) ? buzzerState = 1 : buzzerState = 0;
setDisplay('S', 0, 0);
delay(3000);
setDisplay('M', 0, 1);
setDeafultMenuItem();
return;
// SET THE AUTO EXIT ON/OFF
case 6:
(autoExit == 0) ? autoExit = 1 : autoExit = 0;
setDisplay('E', 0, 0);
delay(3000);
setDisplay('M', 0, 1);
setDeafultMenuItem();
return;
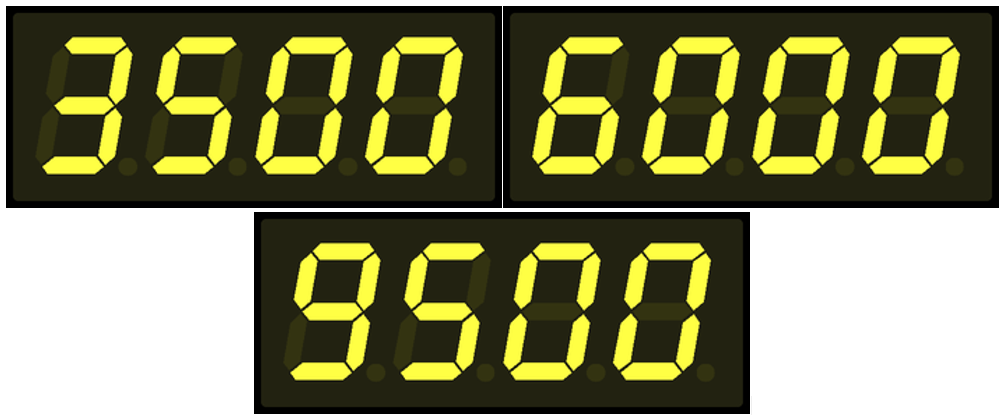
// SET THE AUTO EXIT TIME BETWEEN 3 SEC AND 9,5 SEC
case 7:
unsigned long int lastDelayChange = millis();
// SETTINGS WILL BE SAVED WITHOUT PRESSING THE BUTTON FOR 3 SECONDS
while(3000 > (millis() - lastDelayChange)){
buttonState = digitalRead(buttonPin);
if(buttonState == HIGH ){
lastDelayChange = millis();
(DELAY == 9500) ? DELAY = 3000 : DELAY += 500;
setDisplay('D', DELAY, 0);
delay(200);
}
}
lastDelayChange = 0;
}
setDeafultMenuItem();
setDisplay('M', 0, 1); // IT IS 1 and not 'menuItem', BECAUSE THE DEFAULT MENU VALUE IS NOT YET SET DUE TO THE FAST RUNNING
return;
}
void setDisplay() : A three-parameter procedure that allows you to control the display and the way data is presented on it. It expects the display type as parameter, the generated number in case of generation and a valid menu item. In not all cases the last two parameters are interpretable, so in such cases the passed value of these two parameters is zero (0).
Possible types:
- Show menu item (M)
- Show dropped / generated number (R)
- Toggle melody playback on/off (S)
- Change automatic exit from menu (E)
- Setting the automatic exit time (D)
void setDisplay(char type, int num, int menuItem){
display.setSegments(OFF);
// SHOW THE MENU
if (type == 'M'){
display.setSegments(MENU);
display.showNumberDec(menuItem, false, 1, 3);
}
// SHOW THE ROLLED | GENERATED NUMBER
if (type == 'R'){
display.showNumberDec(num, false, menuItem, 0);
}
// SHOW SOUND SETTING
if (type == 'S'){
(buzzerState == 1) ? display.setSegments(SOUND_ON) : display.setSegments(SOUND_OFF);
}
// SHOW AUTO EXIT SETTING
if (type == 'E'){
(autoExit == 0) ? display.setSegments(AUTO_EXIT_OFF) : display.setSegments(AUTO_EXIT_ON);
}
// SHOW AUTO EXIT TIME
if (type == 'D'){
display.showNumberDec(num);
}
shouldUpdateDisplay = false;
}
void playMelody(): Three-parameter procedure responsible for playing the winning and losing tune on the buzzer.
void playMelody(int melody[], int noteDurations[], int length) {
for (int i = 0; i < length; i++) {
int noteDuration = 1000 / noteDurations[i];
int pauseBetweenNotes = noteDuration * 1.30;
tone(buzzerPin, melody[i], noteDuration);
delay(pauseBetweenNotes);
noTone(buzzerPin);
}
}
void setDeafultMenuItem(): Its only function is to reset the value of the menuItem variable to 1, so that when you exit to the main menu, the menu item 1 is dynamically displayed on the screen.
void setDeafultMenuItem(){
menuItem = 1;
}
void none(): A technical / helper procedure that was created just to allow the ternary if operator to work properly.
void none(){
return;
}
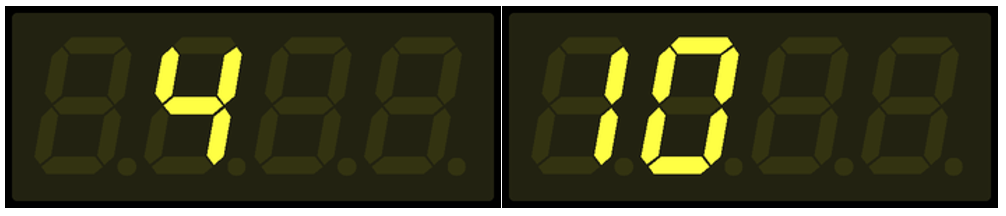
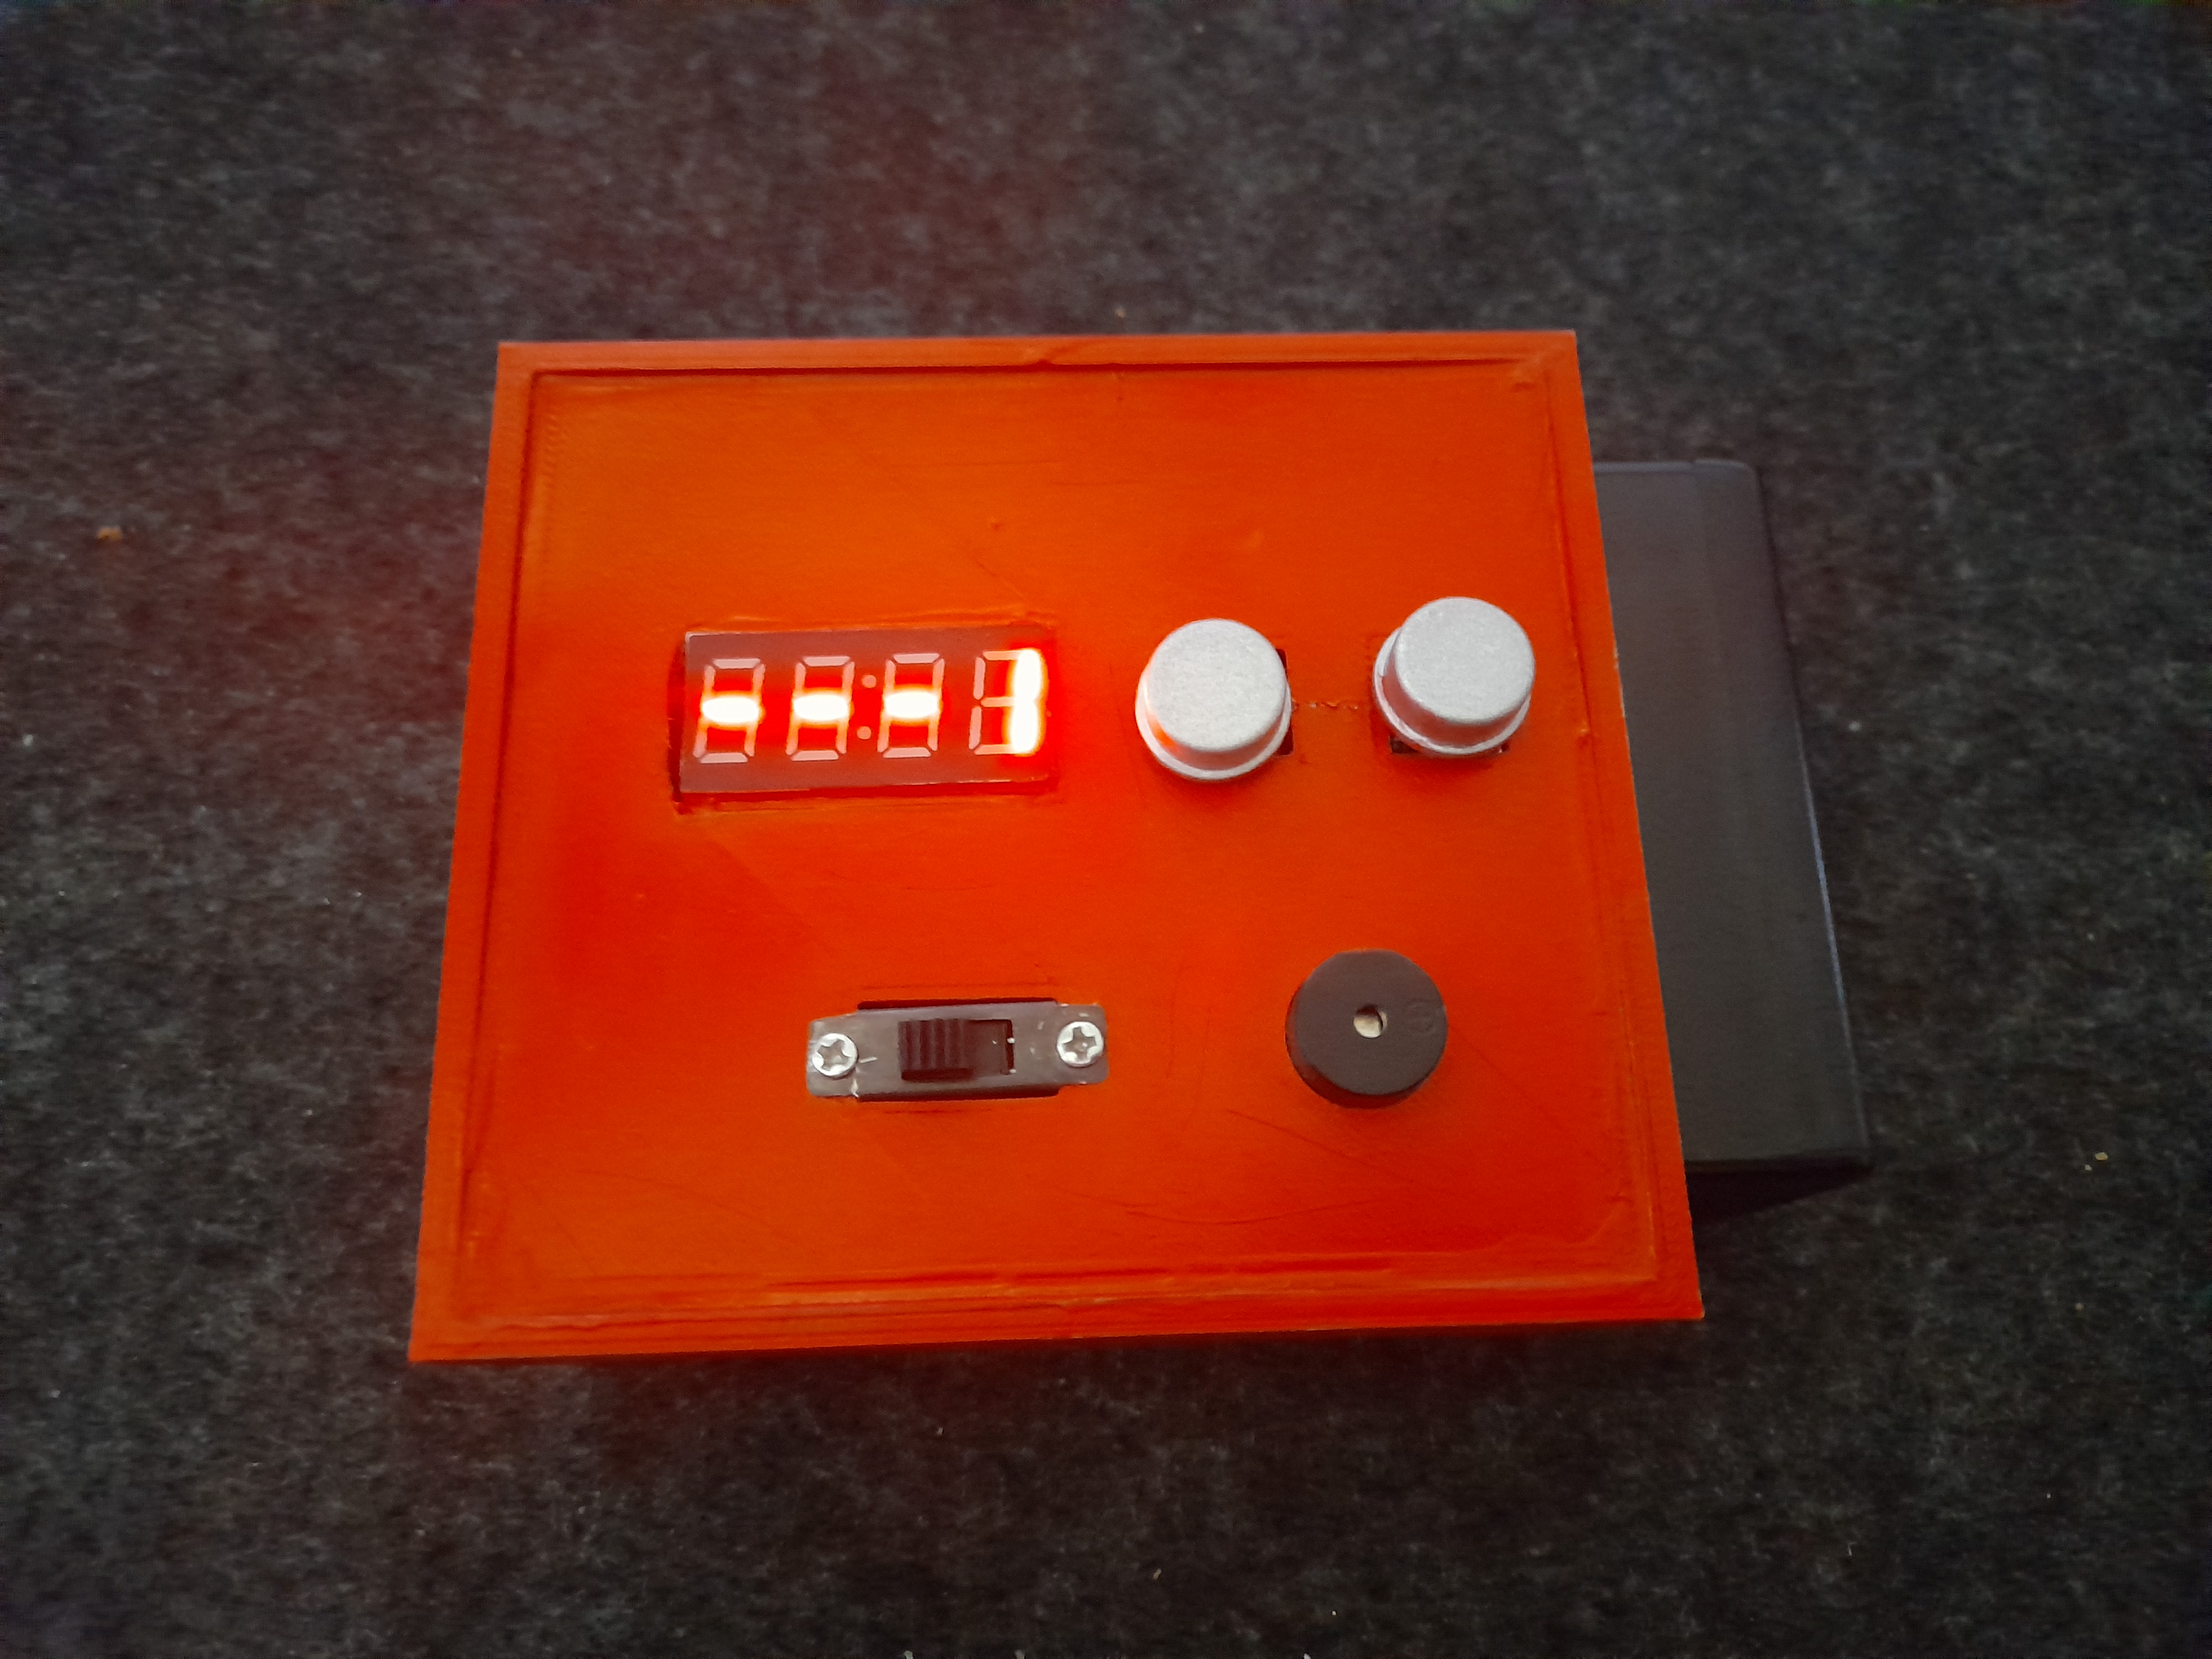
THE READY PROJECT

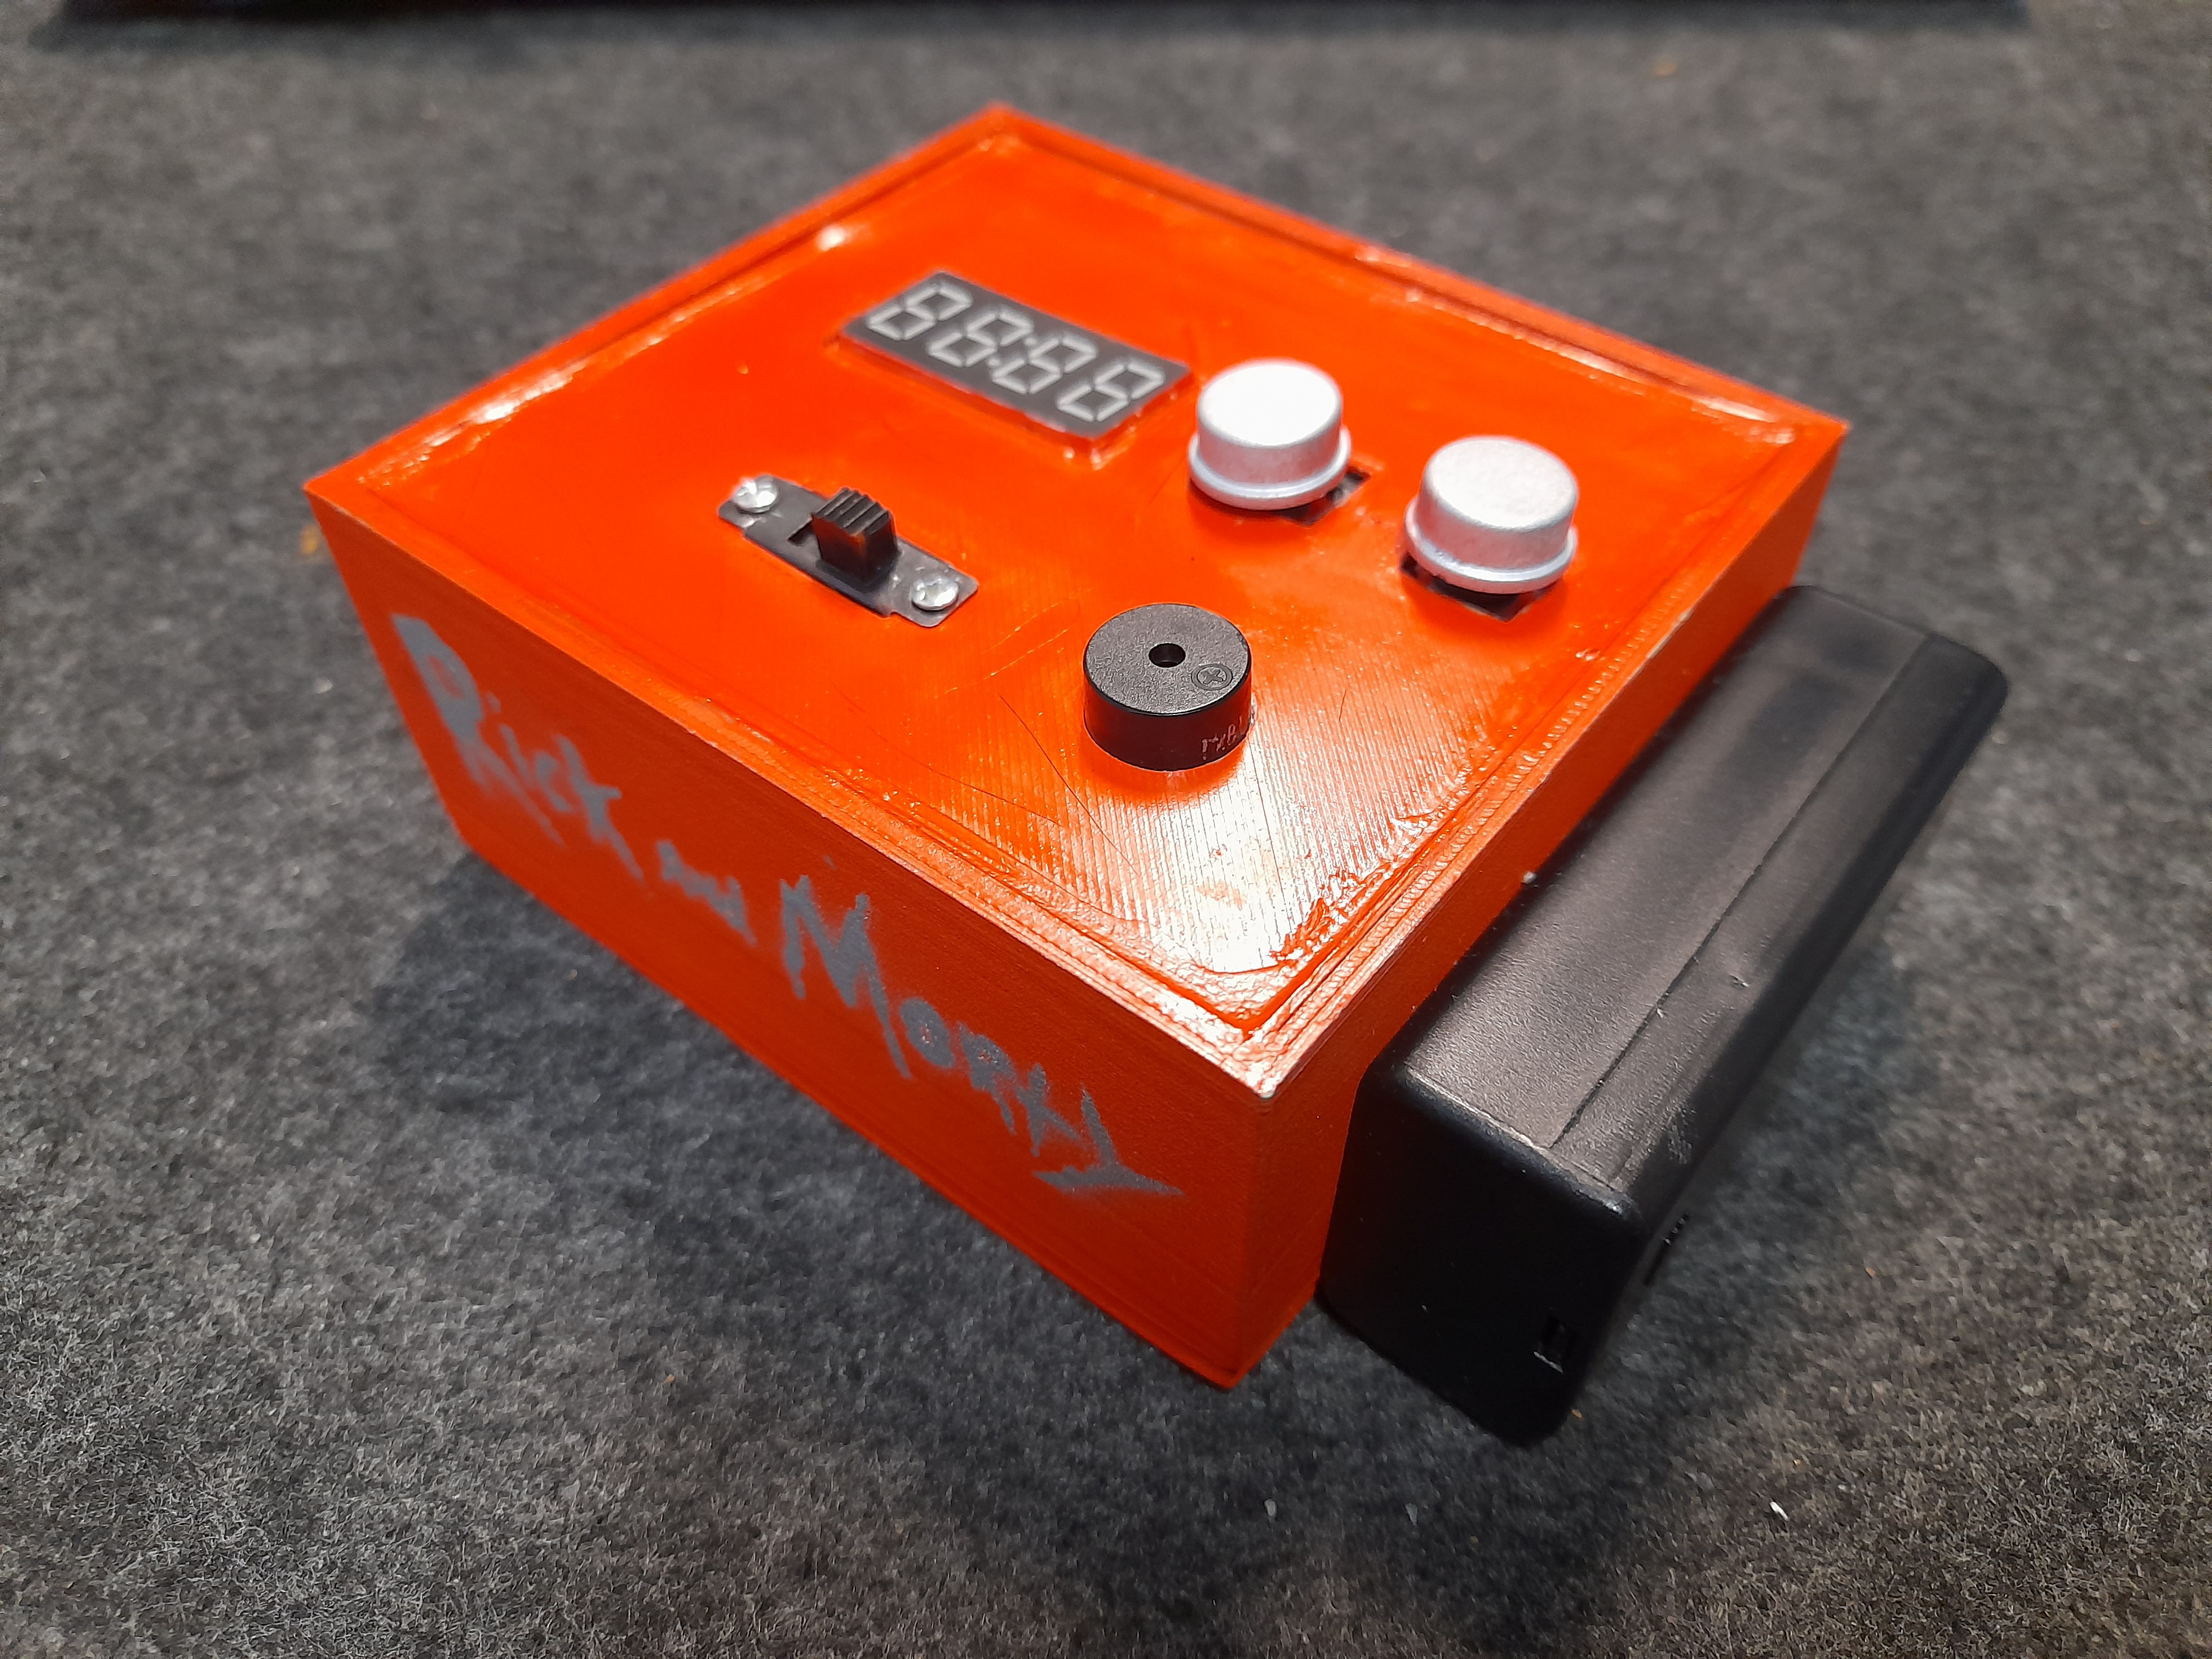

Video available with English subtitles:
SUMMARY
I think the digital dice that I have created is a very simple device with minimal features, but at the same time a great addition to a family or group of friends who like board games.
This prototype will undergo many modifications and changes in the future, as the current development-testing-final product triangle has shown me, in addition to the ideas I had before, what fundamental changes will be needed in the future:
- Redesigning the 3D printed box.
- Widening the spacers in the box.
- Replacing the TM1637 display with an OLED display so that the dice rolls are actually displayed as digital dice.
- Installation of a loudspeaker instead of a buzzer.
- Use of accelerometer/gyroscope: shaking the device automatically starts the dice roll.
- Use of 4x4 button matrix to serve additional functions.
- Always displaying the current / next player in a board game.
- Ability to assign and display scores to players.
- Possibility to roll dice with adjustable number of sides.
━━━━━━━━━
MAGYAR VERZIÓ
━━━━━━━━━
TÖRTÉNET
Régóta gondolkodtam, hogy jó lenne készíteni egy több funkciós digitális dobókockát, de a projekt megvalósítása valahogy mindig elmaradt. Társasjáték kedvelő kollégám közelgő születésnapja egy jó motiváció volt, hogy elkezdjem a megvalósítást. Az ötletek papírra vetése után nyilvánvalóvá vált, hogy ez egy több verziójú projekt lesz: a későbbiekben fejlesztések várhatóak a hardver és szoftver tekintetében, illetve valószínűleg a 3D nyomtatott doboz is ráncfelvarrásokon fog átmenni. Jelenleg ez a projekt az 1.0-ás verziószámot viseli.
BEVEZETÉS
Jellemzők (v.1.0):
- Kockadobás 1 kockával.
- Kockadobás 2 kockával.
- Random szám generálása 1 és 100 között és 1 és 9999 között.
- 'Győztes' és 'vesztes' hangeffektek lejátszása 1 kockával dobás esetén, ha a dobott szám 1 vagy 6.
- 'Győztes' és 'vesztes' hangeffektek lejátszása 2 kockával dobás esetén, ha a dobott szám 2 vagy 12.
- Hangjelzések ki- és bekapcsolásának lehetősége.
- Kockadobások és szám generálások után állítható, hogy automatikusan visszalépjen e a vezérlés a menüpontokba vagy maradjunk az adott menüpontban. (Automatikus kilépés.)
- Amennyiben az automatikus kilépés be van kapcsolva, beállítható, hogy mennyi idő elteltével (miliszekundum) történjen meg a kilépés, visszalépés.
Maga a projekt 3 részre bontható:
- 3D nyomtatott doboz
- Hardver
- Szoftver
3D NYOMTATOTT DOBOZ
Jelenleg nem rendelkezem 3D nyomtatóval és a hozzá szükséges tervezési kompetenciákkal, így az ebben jártas másik kollégámat ( keresztpapa ) kértem meg, hogy segítsen megtervezni és kinyomtatni a digitális dobókocka dobozát. Shapr3D-ben tervezte és egy Creality Ender 3 V2 Neo 3D nyomtatóval lett kinyomtatva. A doboz teteje be- és kipattintható, benne található 2 nyomtatott távtartó, illetve a fedelén minden szükséges beépített hardvernek készült nyílás.
Nyomtatás után a teszt összeszerelési fázisban derült ki, hogy a kijelző számára is szükséges lett volna két nyomtatott távtartó. Itt már nem szerettem volna ezt nyomtatással abszolválni, így ez a két távtartó utólagosan került beszerelésre, ragasztással.
A 9V-os elemtartó ragasztással került fel a doboz oldalára, amelynek két vezetéke (9V, GND) szintén egy beépített (nyomtatott) nyíláson keresztül fut be a doboz belsejébe.

HARDVER
A hardveres infrasturktúrát ezen 1.0-ás verzióban az alábbi eszközök alkotják:
- Arduino Nano
- 9V-os elem és elemtartó
- S6P tokozású, 2 állásos tolókapcsoló (6 érintkező, DPDT, ON-ON)
- TM1637-es 4 számjegyű 7 szegmenses digitális kijelző modul
- 2 darab 12x12-es nyomógomb
- 1 darab elektromágneses hangjelző, gerjesztő áramkör nélkül
- 2 darab 10 kΩ-os ellenállás
Az Arduino Nano 7-12V-os bemeneti feszültsége lehetővé teszi a 9V-os elem használatát, ami teljesen megfelelő a mikrovezérlő stabil működéséhez. A digitális dobókocka a 2 állásos tólókapcsoló segítségével bármikor ki- és bekapcsolható. A nyomógombok segítségével lehet váltani a beépített menüpontok között és használni a funkcióit.
A használt hardverek kapcsolási rajza:

Forrasztások, összeszerelés:
Az Arduino Nano oldalán nem történt forrasztás, csak 'anya' végű kábel lett alkalmazva. A GND és 5V kivezetésre került egy próbanyákra, ahová 'apa' típusú kábellel csatlakoznak a szükséges alkatrészek. Továbbá a 9V-os elem GND és VCC lába, a nyomógombok, a tolókapcsoló, a buzzer és a kijelző lábaira is forrasztva lettek a vezetékek.
A forrasztások során elkövettem egy hibát, mégpedig azt, hogy a kétállásos tolókapcsoló rossz irányba forgatásával nem a megfelelő oldalon forrasztottam két lábat, hanem a szemben lévő oldalon. Ennek következtében a be- és kikapcsolt gombállapot nem a szokványos helyeken található (bal oldal - kikapcsolva, jobb oldal - bekapcsolva), hanem fordítva.
Sajnos az összeszerelés végén, a doboz lezárása (ragasztása) előtt elfelejtettem képet készíteni.


SZOFTVER
- HASZNÁLT KÖNYVTÁRAK, HEADER FÁJLOK
Az egyetlen könyvtár a kijelző vezérléséhez (TM1637 -> v1.2 -> TM1637Display.h) szükséges. Továbbá felhasználásra került egy header fájl is (pitches.h), amelyben a két dallam lejátszásához szükséges frekvenciák vannak letárolva.
- INPUT - OUTPUT
A program vezérlését két gombbal lehet irányítani: menuButtonPin (11) és buttonPin (12). A menuButtonPin -re kötött gomb segítségével a menüpontok között tudunk navigálni, míg a buttonPin -re kötött gombbal az aktuális menüpontba tudunk belépni, illetve ezzel a gombbal történik a kockadobások, számgenerálások elindítása és a beállítási lehetőségek módosítása, véglegesítése.
A TM1637Display objektum létrehozásakor 2 értéket kell megadnunk: a CLK és DIO pinek számát, azonosítóját. Ezeket a projektben a 8-as ( CLK ) és 9-es ( DIO ) pinekre kötöttem be. Az elektromágneses hangjelző ( buzzerPin ) a 10-es pinre került bekötésre.
Fontos megjegyezni, hogy a 2 állasú tolókapcsoló szoftveres oldalon nincs vezérelve, csak mechanikai-működési kapcsolatban áll a projekt többi hardverével, tehát nem tekinthető bemeneti eszköznek: csak a bemeneti áramforrás biztosításáért és megszakításáért felel - mechanikus úton törénő beállítással -, áramköri csatlakozással.
- KIJELZŐ SZOFTVERES MŰKÖDÉSE
A számok kijelzését beépített eljárással ( showNumberDec() ) valósítottam meg, ugyanakkor minden nem numerikus érték kijelzését (menüpontoknál a kötőjel, be- vagy kikapcsolt automatikus kilépés és dallam lejátszás) előre definiáltam tömbökben szegmens szinten.
const byte OFF[] = {
0, 0, 0, 0
};
const byte MENU[] = {
SEG_G,
SEG_G,
SEG_G,
0
};
const byte AUTO_EXIT_ON[] = {
SEG_A| SEG_F| SEG_G| SEG_E| SEG_D,
0,
SEG_B| SEG_C,
0
};
const byte AUTO_EXIT_OFF[] = {
SEG_A| SEG_F| SEG_G| SEG_E| SEG_D,
0,
SEG_A| SEG_F| SEG_B| SEG_E| SEG_C| SEG_D,
0
};
const byte SOUND_ON[] = {
SEG_A| SEG_F| SEG_G| SEG_C| SEG_D,
SEG_A| SEG_F| SEG_B| SEG_E| SEG_C| SEG_D,
SEG_F| SEG_B| SEG_E| SEG_C| SEG_D,
SEG_B| SEG_C
};
const byte SOUND_OFF[] = {
SEG_A| SEG_F| SEG_G| SEG_C| SEG_D,
SEG_A| SEG_F| SEG_B| SEG_E| SEG_C| SEG_D,
SEG_F| SEG_B| SEG_E| SEG_C| SEG_D,
SEG_G
};
A kijelző frissítését egy shouldUpdateDisplay változó értékétől tettem függővé, hogy könyebben lehessen irányítani az egyes kijelző frissítéseket és annak szükségességét. Továbbá minden a kijelzőn történő változtatás előtt törlésre kerül az aktuális tartalom a kijelzőn, amelyet az előre definiált OFF[] tömbbel érek el ( setSegments(OFF) ).


A pitches.h header fájlban definiált frekvenciák kerülnek felhasználásra a winnerMelody[] és loserMelody[] tömbökben. A megfelelő dallamok generálásához szükséges volt definiálni az egyes frekvenciákhoz tartozó lejátszási, megszólaltatási hosszúságokat, amelyeket a winnerMelodyDurations[] és loserMelodyDurations[] tömbökben tároltam el.
int winnerMelody[] = {
NOTE_C4, NOTE_E4, NOTE_G4, NOTE_C5
};
int winnerMelodyDurations[] = {
4, 4, 4, 4
};
int loserMelody[] = {
NOTE_A3, NOTE_AS3, NOTE_A3
};
int loserMelodyDurations[] = {
8, 8, 4
};
- ELJÁRÁSOK
void setup() : Inputok és outputok definiálása, a kijelző beállítása alapértelmezett értékekre és az 1-es menüpont megjelenítése.
void setup() {
pinMode(menuButtonPin, INPUT);
pinMode(buttonPin, INPUT);
pinMode(buzzerPin, OUTPUT);
display.setSegments(OFF);
display.setBrightness(6);
display.setSegments(MENU);
display.showNumberDec(menuItem, false, 1, 3);
}
void loop() : A két gomb értékének beolvasása és a gombnyomások vezérlése, az azokra épített logika folyamatos futása.
void loop() {
// READ BUTTONS STATE
buttonState = digitalRead(buttonPin);
menuButtonState = digitalRead(menuButtonPin);
// CHANGE MENU
if (menuButtonState == HIGH && lastMenuButtonState == LOW){
lastMenuButtonState = HIGH;
shouldUpdateDisplay = true; // NEED TO UPDATE THE DISPLAY
menuItem <= 6 ? menuItem += 1 : menuItem = 1; // INCREASE THE VALUE OF THE MENU ITEM
shouldUpdateDisplay == true ? setDisplay('M', 0, menuItem) : none();
}
// AFTER WE PUSHED THE MENU BUTTON
if (menuButtonState == LOW && lastMenuButtonState == HIGH){
lastMenuButtonState = LOW; // WE NEED TO CHANGE THE LAST STATE OF THE MENU BUTTON
}
// ENTER CURRENT MENU: ROLLING THE DICE | GENERATE RANDOM NUMBER | CHANGE SETTINGS
if (buttonState == HIGH && lastButtonState == LOW){
lastButtonState = HIGH;
shouldUpdateDisplay = true;
(shouldUpdateDisplay == true) ? menuControl(menuItem) : none();
}
// AFTER WE PUSHED THE FUNCTION BUTTON (ROLLING | GENERATE | SETTINGS)
if (buttonState == LOW && lastButtonState == HIGH){
lastButtonState = LOW;
}
delay(100);
}
void menuControl(): Egyparaméteres eljárás, amelynek segítségével elindíthatjuk az adott menüponthoz tartozó logika futtatását. A hívás során a menüpont értékét várja paraméterül ( menuItem ).
- 1-es menüpont: Kockadobás egy kockával.
- 2-es menüpont: Kockadobás két kockával.
- 3-as menüpont: Random szám generálása 100 és 1000 között.
- 4-es menüpont: Random szám generálása 1 és 10000 között.
- 5-ös menüpont: Dallam lejátszásának be- és kikapcsolása.
- 6-os menüpont: Menüből való automatikus kiléptetés be- és kikapcsolása.
- 7-es menüpont: Automatikus kiléptetés idejének beállítása.
Az egy illetve két kockás dobás során, ha a dobás értéke a kitüntetett számok egyike (1, 2 | 6, 12) és a dallam lejátszása be van kapcsolva, akkor a buzzer lejátsza a győztes vagy vesztes dallamot, a dobott számtól függően.
A kockadobások és random szám generálások esetében ellenőrzésre kerül, hogy az automatikus kiléptetés be van e kapcsolva. Ha igen, akkor a kockadobás / szám generálás után és a beállított idő leteltét követően (7-es menüpont) a rendszer visszaléptet a főmenübe, az aktuális / utolsó menüpontot megjelenítve. Ha az automatikus kiléptetés ki van kapcsolva, akkor nem történik semmi, további gombnyomásig a kijelző mutatni fogja az utoljára dobott / generált számot.
Az automatikus kiléptetés beállítása nem vonatkozik az 5-ös, 6-os és 7-es menüpontokba történő belépésre és az ott történő beállításokra. Minden esetben visszaléptet a főmenübe, még pedig az 1-es menüpontra.
void menuControl(int menuItem) {
switch (menuItem) {
// ROLLING A DICE
case 1:
randNumber = random(1,7);
setDisplay('R', randNumber, menuItem);
// PLAYING THE WINNER MELODY IF THE ROLLED NUMBER IS 6 AND THE SOUND OPTION IS ON
(randNumber == 6 && buzzerState == 1) ? playMelody(winnerMelody, winnerMelodyDurations, sizeof(winnerMelody) / sizeof(winnerMelody[0])) : none();
// PLAYING THE LOSING MELODY IF THE ROLLED NUMBER IS 1 AND THE SOUND OPTION IS ON
(randNumber == 1 && buzzerState == 1) ? playMelody(loserMelody, loserMelodyDurations, sizeof(loserMelody) / sizeof(loserMelody[0])) : none();
// IF AUTO EXIT IS ENABLED, DELAY IS ACTIVATED
(autoExit == 0) ? none() : delay(DELAY);
// IF AUTO EXIT IS ENABLED, YOU WILL BE AUTOMATICALLY TAKEN BACK TO THE MENU
(autoExit == 0) ? none() : setDisplay('M', 0, menuItem);
return;
// ROLLING TWO DICE
case 2:
randNumber = random(2,13);
setDisplay('R', randNumber, menuItem);
// PLAYING THE WINNER MELODY IF THE ROLLED NUMBER IS 12 AND THE SOUND OPTION IS ON
(randNumber == 12 && buzzerState == 1) ? playMelody(winnerMelody, winnerMelodyDurations, sizeof(winnerMelody) / sizeof(winnerMelody[0])) : none();
// PLAYING THE LOSING MELODY IF THE ROLLED NUMBER IS 2 AND THE SOUND OPTION IS ON
(randNumber == 2 && buzzerState == 1) ? playMelody(loserMelody, loserMelodyDurations, sizeof(loserMelody) / sizeof(loserMelody[0])) : none();
// IF AUTO EXIT IS ENABLED, DELAY IS ACTIVATED
(autoExit == 0) ? none() : delay(DELAY);
// IF AUTO EXIT IS ENABLED, YOU WILL BE AUTOMATICALLY TAKEN BACK TO THE MENU
(autoExit == 0) ? none() : setDisplay('M', 0, menuItem);
return;
// GENERATE RANDOM NUMBER BETWEEN 100 AND 1000
case 3:
setDisplay('R', random(100,1000), menuItem);
// IF AUTO EXIT IS ENABLED, DELAY IS ACTIVATED
(autoExit == 0) ? none() : delay(DELAY);
// IF AUTO EXIT IS ENABLED, YOU WILL BE AUTOMATICALLY TAKEN BACK TO THE MENU
(autoExit == 0) ? none() : setDisplay('M', 0, menuItem);
return;
// GENERATE RANDOM NUMBER BETWEEN 1 AND 10000
case 4:
setDisplay('R', random(1,10000), menuItem);
// IF AUTO EXIT IS ENABLED, DELAY IS ACTIVATED
(autoExit == 0) ? none() : delay(DELAY);
// IF AUTO EXIT IS ENABLED, YOU WILL BE AUTOMATICALLY TAKEN BACK TO THE MENU
(autoExit == 0) ? none() : setDisplay('M', 0, menuItem);
return;
// SET THE SOUND ON/OFF
case 5:
(buzzerState == 0) ? buzzerState = 1 : buzzerState = 0;
setDisplay('S', 0, 0);
delay(3000);
setDisplay('M', 0, 1);
setDeafultMenuItem();
return;
// SET THE AUTO EXIT ON/OFF
case 6:
(autoExit == 0) ? autoExit = 1 : autoExit = 0;
setDisplay('E', 0, 0);
delay(3000);
setDisplay('M', 0, 1);
setDeafultMenuItem();
return;
// SET THE AUTO EXIT TIME BETWEEN 3 SEC AND 9,5 SEC
case 7:
unsigned long int lastDelayChange = millis();
// SETTINGS WILL BE SAVED WITHOUT PRESSING THE BUTTON FOR 3 SECONDS
while(3000 > (millis() - lastDelayChange)){
buttonState = digitalRead(buttonPin);
if(buttonState == HIGH ){
lastDelayChange = millis();
(DELAY == 9500) ? DELAY = 3000 : DELAY += 500;
setDisplay('D', DELAY, 0);
delay(200);
}
}
lastDelayChange = 0;
}
setDeafultMenuItem();
setDisplay('M', 0, 1); // IT IS 1 and not 'menuItem', BECAUSE THE DEFAULT MENU VALUE IS NOT YET SET DUE TO THE FAST RUNNING
return;
}
void setDisplay() : Háromparaméteres eljárás, amelynek segítségével tudjuk vezérelni a kijelzőt és az azon való adatmegjelenítést. Paraméterként a megjelenítés típusát, generálás esetén a generált számot és egy valid menüpontot vár. Nem minden esetben értelmezhető az utolsó két paraméter, ezért az ilyen esetekben ezen két paraméter átadott értéke nulla (0).
Lehetséges típusok:
- Menüpont megjelenítése (M)
- Dobott / generált szám megjelenítése (R)
- Dallam lejátszásának ki- és bekapcsolása (S)
- Menüből való automatikus kiléptetés módosítása (E)
- Automatikus kiléptetés idejének beállítása (D)
void setDisplay(char type, int num, int menuItem){
display.setSegments(OFF);
// SHOW THE MENU
if (type == 'M'){
display.setSegments(MENU);
display.showNumberDec(menuItem, false, 1, 3);
}
// SHOW THE ROLLED | GENERATED NUMBER
if (type == 'R'){
display.showNumberDec(num, false, menuItem, 0);
}
// SHOW SOUND SETTING
if (type == 'S'){
(buzzerState == 1) ? display.setSegments(SOUND_ON) : display.setSegments(SOUND_OFF);
}
// SHOW AUTO EXIT SETTING
if (type == 'E'){
(autoExit == 0) ? display.setSegments(AUTO_EXIT_OFF) : display.setSegments(AUTO_EXIT_ON);
}
// SHOW AUTO EXIT TIME
if (type == 'D'){
display.showNumberDec(num);
}
shouldUpdateDisplay = false;
}
void playMelody(): Háromparaméteres eljárás, amely a győztes és vesztes dallam lejátszásáért felel a buzzer-en.
void playMelody(int melody[], int noteDurations[], int length) {
for (int i = 0; i < length; i++) {
int noteDuration = 1000 / noteDurations[i];
int pauseBetweenNotes = noteDuration * 1.30;
tone(buzzerPin, melody[i], noteDuration);
delay(pauseBetweenNotes);
noTone(buzzerPin);
}
}
void setDeafultMenuItem(): Feladata csupán annyi, hogy a menuItem változó értékét visszaállítja 1-re, így a főmenübe való kilépéskor dinamikusan kerülhet megjelenítésre az 1-es menüpont felirata a kijelzőn.
void setDeafultMenuItem(){
menuItem = 1;
}
void none(): Egy technikai / helper eljárás, amely csak azért lett létrehozva, hogy a háromoperandusú operátor (ternary if) megfelelően működhessen.
void none(){
return;
}
A KÉSZ PROJEKT


A videó elérhető magyar és angol felirattal is:
ÖSSZEGZÉS
Az elkészült digitális dobókocka úgy gondolom, hogy egy nagyon egyszerű, minimális funkciókkal rendelkező eszköz, ugyanakkor egy társasjáték kedvelő családban vagy baráti társaságban egy nagyszerű kiegészítő lehet.
Ez a prototipus sok módosításon és változtatáson fog átesni a jövőben, hiszen a korábbi ötletek mellett, a jelenlegi fejlesztés-tesztelés-végső termék háromszög megmutatta, hogy milyen alapvető módosításokra lesz a későbbiekben szükség:
- A 3D nyomtatott doboz áttervezése.
- A dobozban található távtartók kiszélesítése.
- TM1637 kijelző lecserélése OLED kijelzőre, hogy a kockadobások valóban digitális kockaként kerüljenek megjelenítésre.
- Buzzer helyett hangszóró beépítése.
- Gyorsulásmérő / giroszkóp alkalmazása: megrázva az eszközt automatikusan indítható a kockadobás.
- 4x4-es gombmátrix használata, további funkciók kiszolgálása érdekébe.
- Társasjátékban mindig az aktuális / soron következő játékos kijelzése.
- Játékosokhoz társítható pontszámok megadhatósága, kijelezhetősége.
- Állítható oldalszámú kockával való dobás lehetősége.
EXPANDED TECHNICAL DETAILS
Randomization Engine
Instead of a simple random number, this digital die implements True Randomness helpers.
- Noise Injection: The
randomSeed()is initialized by reading an "open" analog pin (A0), which picks up environmental electromagnetic noise to ensure the dice sequence is different every time the board is powered. - Display Matrix: Uses a 7-segment display or a 5x7 LED matrix to show the result.
"Extras" Functionality
The "Extras" often include:
- Animations: A "rolling" animation where numbers cycle rapidly before settling on the final result.
- Tilt Sensor: Using a Vibration or Tilt Switch to trigger the roll, mimicking the physical act of shaking a cup.
- Multi-Dice Mode: A button to toggle between D6, D10, or D20 modes, making it versatile for various tabletop games.