Introduction
Today we are going to read some values from an Arduino and display them on an analog meter using Processing.

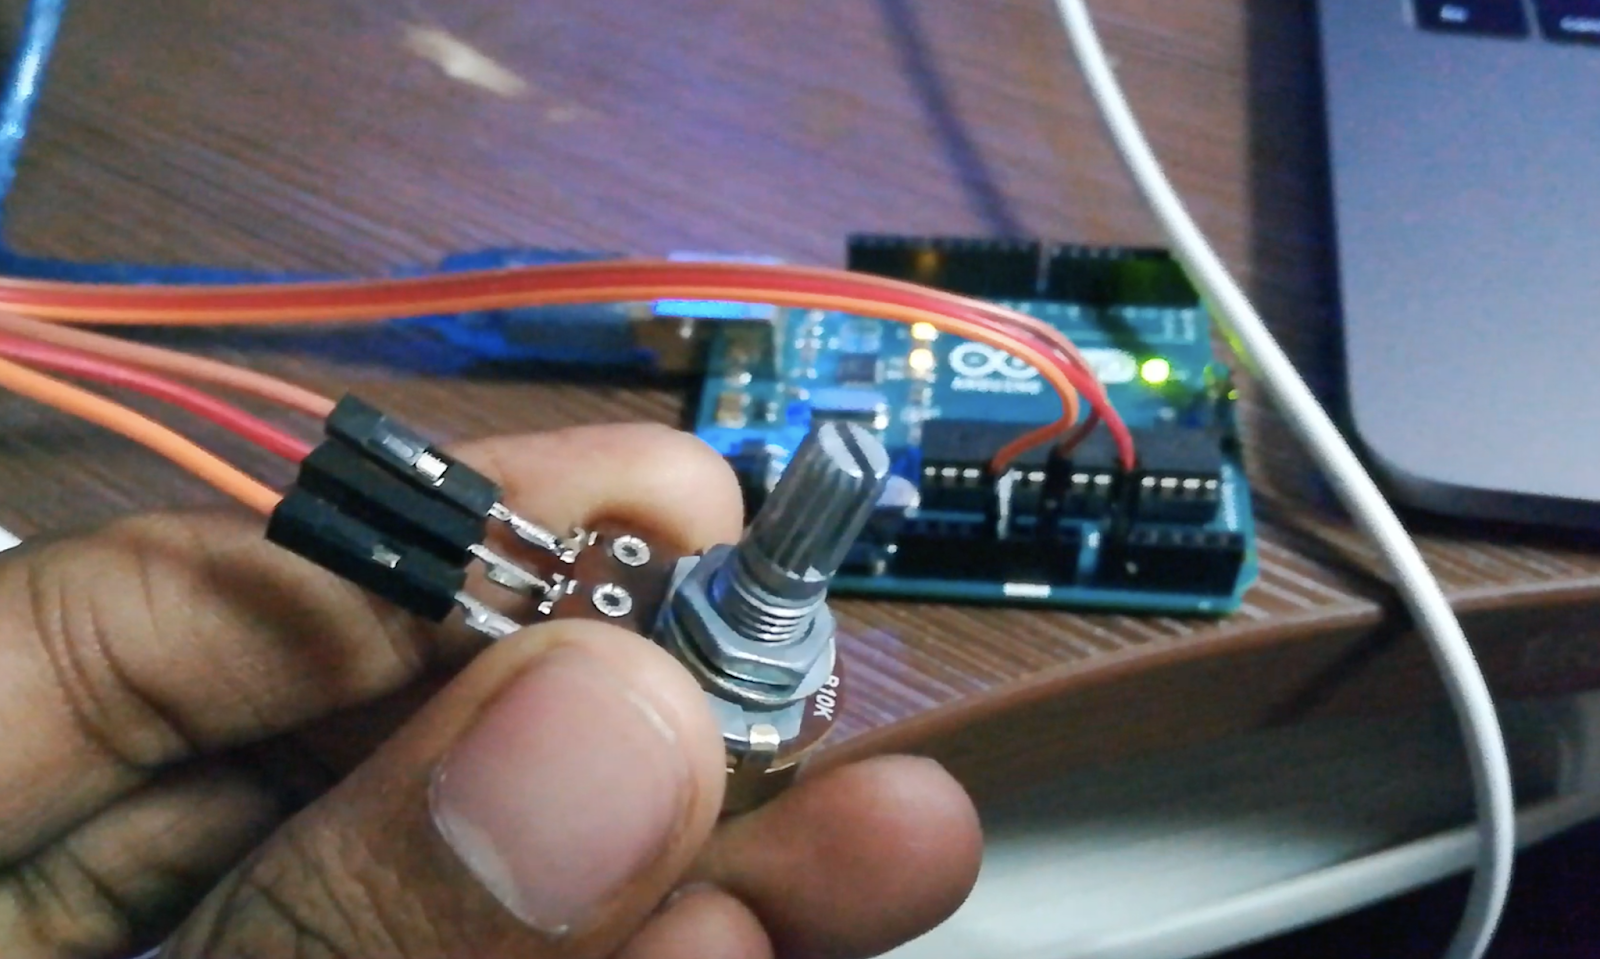
As you can see here I have connected a potentiometer to Arduino, and when I rotate the knob the change in resistance will be measured by Arduino and the values will be read by our processing program and display it in the analog meter.
Only for simplicity I connected potentiometer, we can connect any sensors like piezo, finger print, load cell, pressure sensor, heart beat sensor, etc.. and display its result using Processing.
Project Perspective
Displaying Values From Arduino Using Processing is the fundamental and innovative "Data Lab" bridge for modern electronics developers. By focusing on the essential building blocks—the rotary potentiometer and your Processing graphical engine—you'll learn how to orient yourself and automate your visualization tasks using a specialized software logic and a robust serial setup.
Technical Implementation: Serial Communication and GUI Metering
The project reveals the hidden layers of simple voltage-to-pixel interaction:
- Identification layer: The Arduino Uno acts as your high-resolution data eye, measuring each point of the voltage variation from the potentiometer knob.
- Conversion layer: The system uses high-speed Serial.write() to receive high-speed analog bits for mission-critical data entry.
- Visual Interface layer: A Processing Analog Meter provides high-resolution visual feedback for your sensor reading (0 - 1023).
- Control Interface layer: A Potentiometer provides tactile and reliable signal check for your first successful "Visual Mission."
- Processing Logic layer: The Processing code follows a "serialEvent" (or coordinate-mapping) strategy: it interprets the incoming byte-buffer and matches the meter needle angles to provide a safe and rhythmic data display.
- Communication Dialogue Loop: Data is sent rhythmically to the Processing console during initial calibration to coordinate status.
Hardware-Visualization Infrastructure
- Arduino Uno: The "brain" of the project, managing the multi-directional analog sampling and coordinating serial output.
- Potentiometer (10k): Providing tactile and reliable "Signal Base" for your visualization mission.
- Processing IDE: Provides a clear and professional software interface for your graphical projects.
- Micro-USB Cable: Used to program your Arduino and provides the primary interface for serial communication.
- Breadboard: A convenient way to prototype your first data-electronics circuit and connect all components without soldering.
Data Visualization and Interaction Step-by-Step
The Processing visualization process is designed to be very user-friendly:
- Initialize Hardware: Correctly seat your potentiometer on the breadboard and connect the 5V, GND, and A0 pins properly to the Arduino.
- Setup Output Sync: In the Arduino sketch, initialize
Serial.begin(9600)and define the analog pin asINPUT. - Internal Dialogue Loop: The station constantly performs high-performance serial checks and updates the meter needle in real-time based on your knob rotation.
- Visual and Data Feedback Integration: Watch your computer's dashboard automatically become a rhythmic status signal, pulsing and following your voltage settings.
Future Expansion
- OLED Identity Dashboard Integration: Add a small OLED display to the Arduino to show "Local Reading" or "Battery (%)".
- Multi-sensor Climate Sync Synchronization: Connect specialized sensors to perform higher-precision "3D Rotation" visualization wirelessly via the cloud.
- Cloud Interface Registration Support Synchronization: Add a specialized web-dashboard on a smartphone over WiFi/BT to precisely track and log the total data history.
- Advanced Velocity Profile Customization Support: Add a specialized "Logging Feature" to the code to allow data to be saved automatically as a CSV for analysis.
Displaying Values From Arduino Using Processing is a perfect project for any science enthusiast looking for a more interactive and engaging visualization tool!
Video
Part 1
Part 2
[!TIP] Ensure the Serial Port (e.g. COM3 or /dev/ttyUSB0) is identical between the Arduino IDE and the Processing code to avoid "Port Busy" or "Null Pointer" errors!