This piano is able to play any frequency in-between two keys. It is a touch-based keyboard that is able to detect multiple touches and measure the pressure of touching. In this tutorial, it only makes use of one-touch and one intensity. Making of it would require basic knowledge of Arduino for debugging.
Have a view of video for complete making in fast forward.
Features:
- A piano that takes input from the touch,
- Able to play any frequency in between two keys,
- Adjustable frequency range,
- The response of the piano should fast enough.
How It Works:
First, we break our problem into multiple smaller problems and then try to solve them one by one. In our case to make piano major tasks are:
- Measuring/estimating positions of touch: Here we do not need to have just one value of touch but we need to measure the position of multiple touches which also should be the analog value. so that we can take care of frequency which is in between to keys. This involves taking data from keys and also the processing of that data.
- Key and frequency calculation: After taking data from all keys, we need to map that value for a specific frequency. As we know increment of the frequency of piano is Geometric progression, which means you need to keep multiplying some factors to get the frequency of the upcoming key.
- Tone generation and rejection of noise(in data): After calculating frequency we need to generate the approximate waveform of that frequency. there is also some noise that may present during no-touch condition which needs to eliminate.
Working 1: Measuring Touch Position
We are going to use capacitive touch for our purpose. here we will use an array of plates. we will use each of plate as the touch sensor.
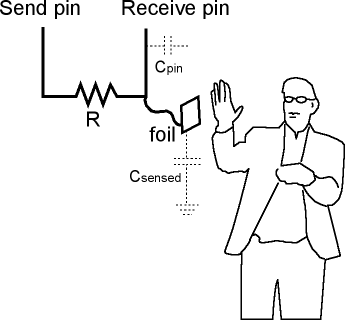
The touch sensor is nothing but a capacitor sensor, we are somehow measuring the change in capacitance (which is a result of touching) using Arduino. There are two pins are used both are connected with a high value of the resistor. We turn ON pin to high and start the timer and see how much time it takes for another pin to go at a high state. This time which we call "rise time" depends upon the capacitance and also resistance. Here resistance is constant but capacitance varies as per touch.
EXPANDED TECHNICAL DETAILS: The CapacitiveSensor.h Topology
You cannot plug a piece of tin foil directly into a Digital Input. It will float violently and read random static. The project requires two Arduino pins for every single "Key": a Sender Pin and a Receiver Pin. You connect a large-value resistor (like 1 Megaohm) between them. You then connect the Receiver Pin directly to a piece of copper tape or aluminium foil.
The Physics: The Arduino fires a rapid 5V pulse from the Sender Pin. It waits to see how fast the Receiver Pin detects it. When your finger touches the foil, your body acts as a massive physical capacitor to ground. It literally steals electrical charge, slowing down the pulse transfer across the resistor! The library measures this slowdown.
long fleshReading = cs_4_2.capacitiveSensor(30); // Fire 30 high-speed pulses!
if (fleshReading > 500) {
  // Human flesh detected! The pulse was slowed down by biological mass.
  tone(8, 261); // Play note 'C4'
}
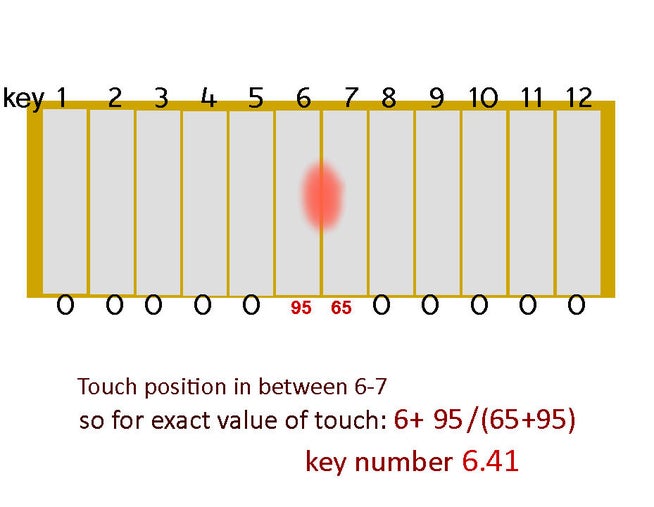
In the image, we have taken around 12 keys for example. and touching somewhere between plate 6 and 7. As we need continuous data and not interested to know whether it is at the 6th or 7th key. We actually want to know the exact position of the touch in between 6-7. First, the key of max touch detected, and then the position is measured for the touch by using basic mathematics.
Image 1: http://playground.arduino.cc/Main/CapacitiveSensor?from=Main.CapSense
Working 2: Determining Frequency & Tone Generation
After calculating the key number we need to calculate frequency associated with that key. The frequency of the key is in geometric progression. The function of it is shown in the image.
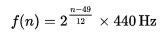
In the above function "n" is a number of keys. so adding a number of keys we can calculate the frequency.
Here we map key 1-18 (a board with 18 touch plates) to any keys we want. And as our device is analog no need to take the range of only 18 key but any range. For example, if you want to play on the 40th to 70th key on the keyboard that is mapped on 1-18. so left most part would play frequency of 40th key and the right part would play frequency of 70th key.
Here we would use direct tone function for frequency generation. It generates the square wave of a given frequency. for a better experience, we also can set a duty cycle for volume control as the pressure of touch.
for more reading related to piano key frequency: https://en.wikipedia.org/wiki/Piano_key_frequencies
EXPANDED TECHNICAL DETAILS: Constructing the Linear Synthesizer
Because the sensing plates can be cut into any shape, you aren't restricted to standard buttons. You can build completely continuous sliding keys. The code logic expands to map each sensor's reading to a specific musical note. For example, CapSensor1 triggers 261Hz (C), CapSensor2 triggers 293Hz (D), and so on. The result is a futuristic synthesizer that plays music the instant you slide your hand across a smooth surface with hidden metal traces underneath.
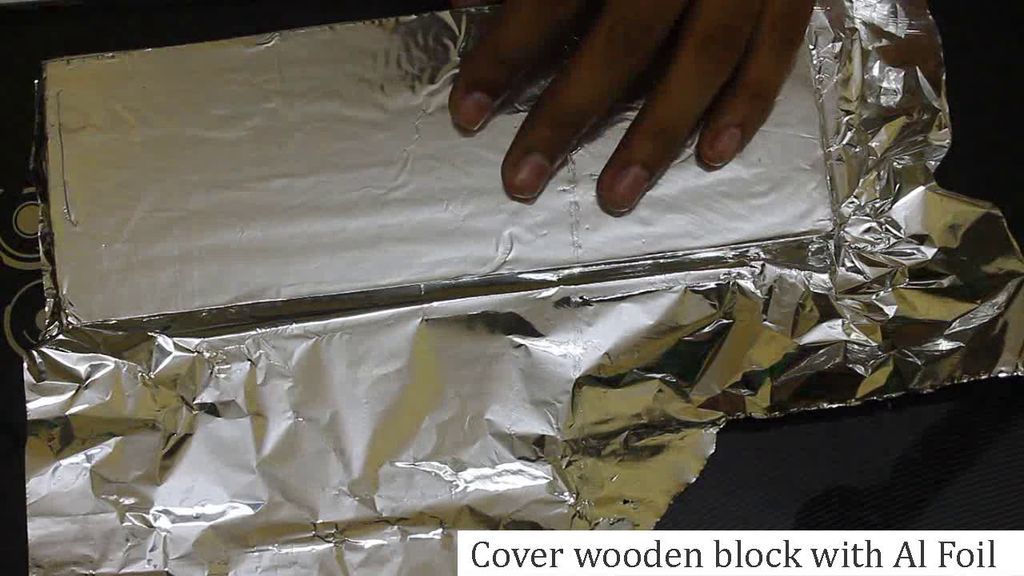
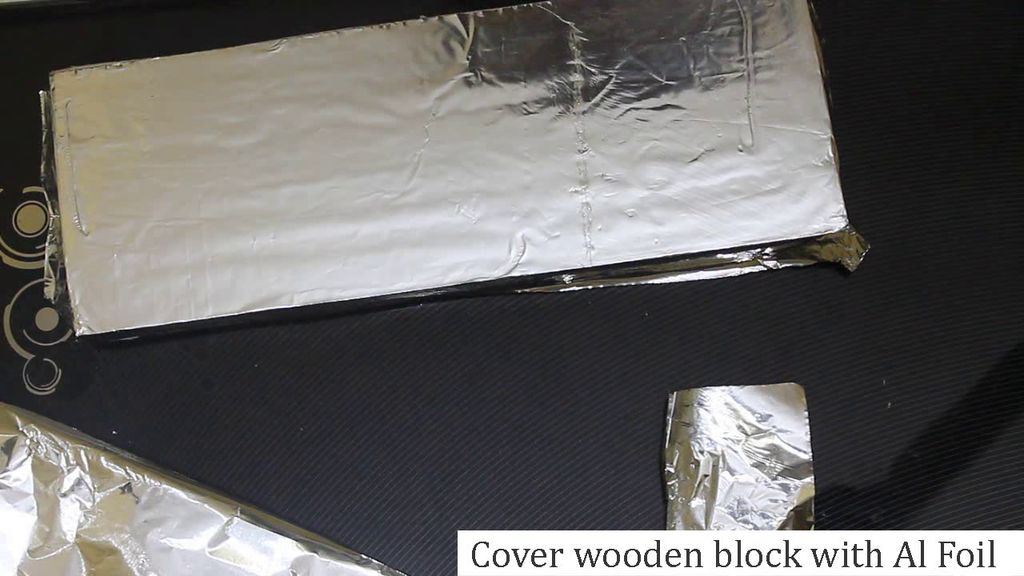
Making 1: Preparing Board
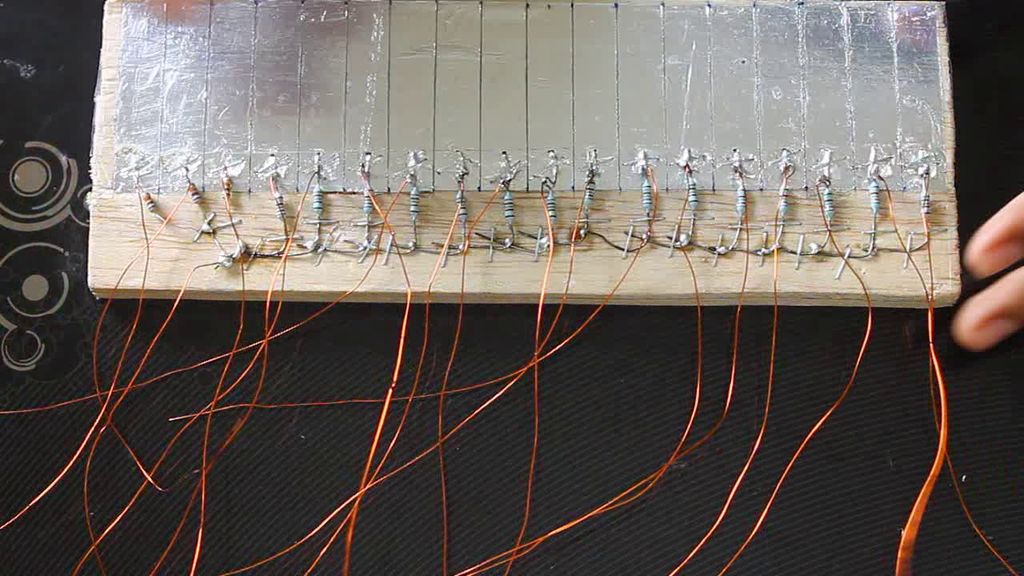
First, take a wooden block and stick aluminum foil on it. There aren't any restrictions on size. Remove extra foil from it and cut it to 30% of width as shown in the 4th image. this blank area will be used to stick resistors on it.
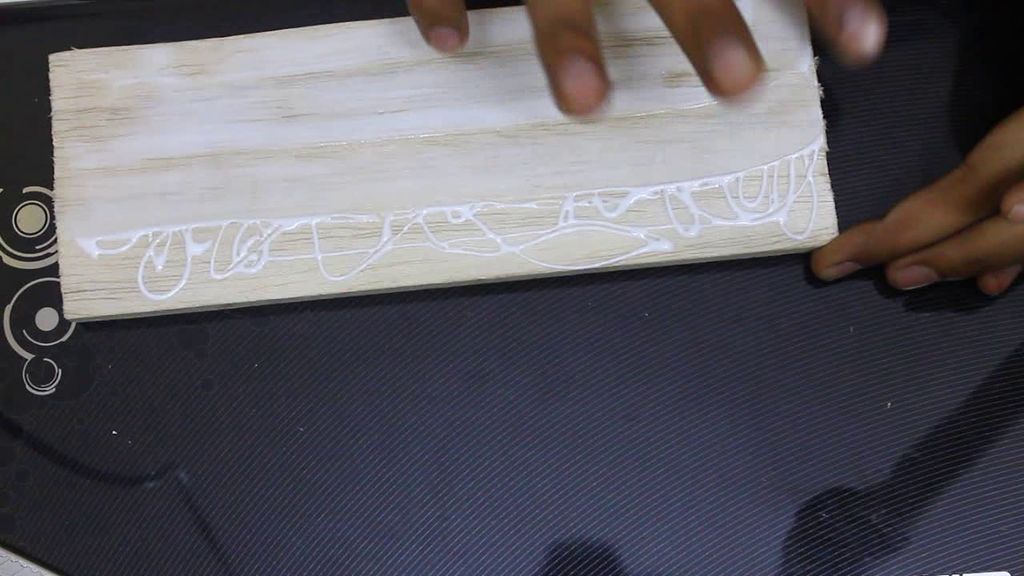
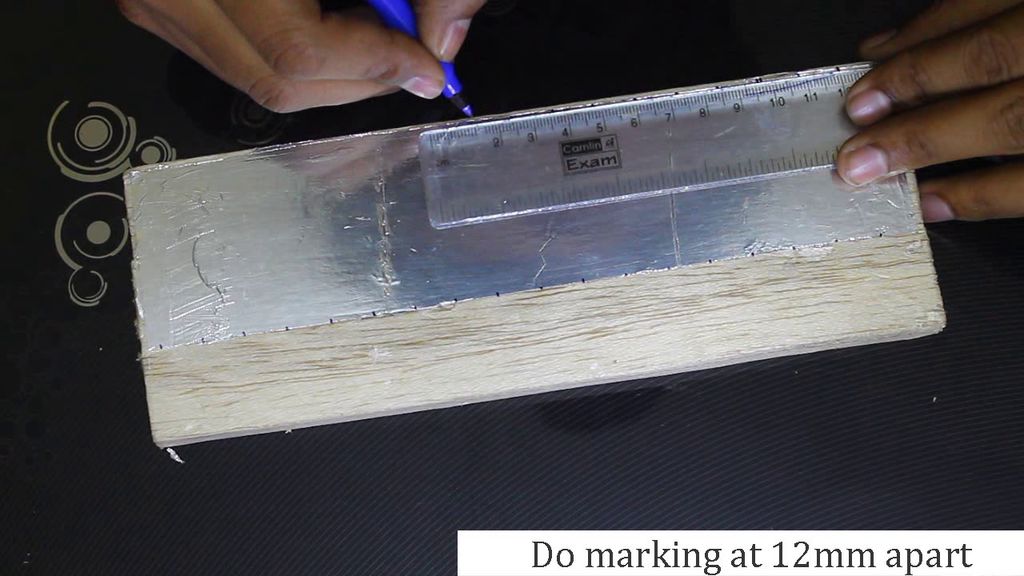
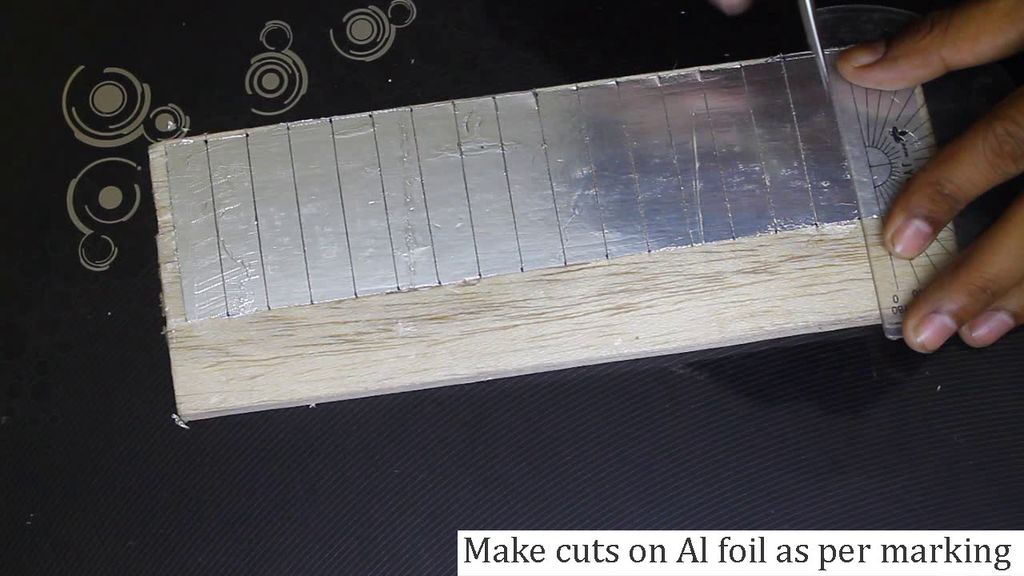
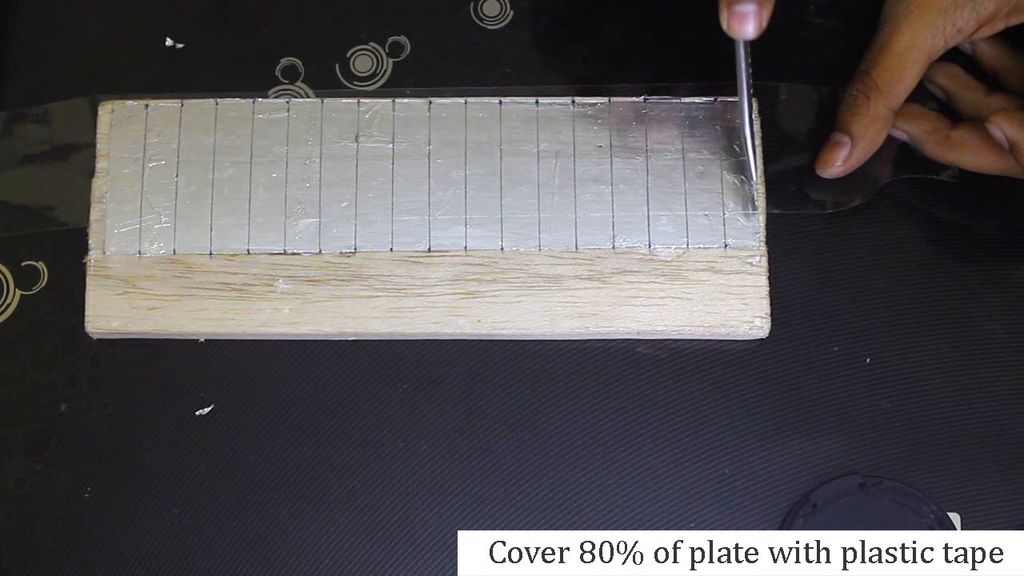
Now do marking on it at 12mm apart along the length. you can even try the lower size of a key for the better result. Cut these foil as per marking so that we would have separate plates which we will use as touch key/plates. Cover Al foil with plastic tape. So that you don't need to touch plates directly.
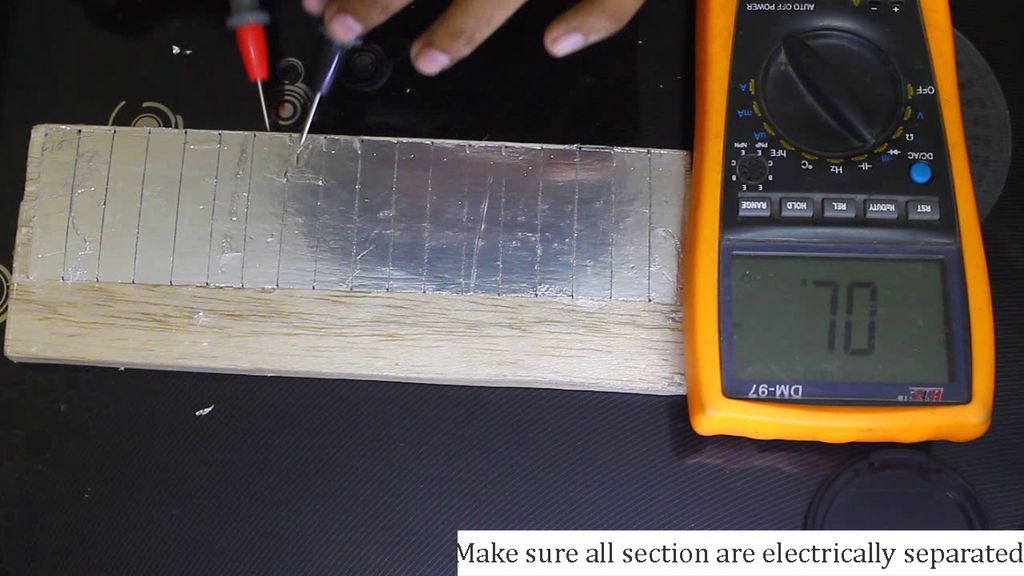
Important: all these plates (key) must be electrically separated from each other.
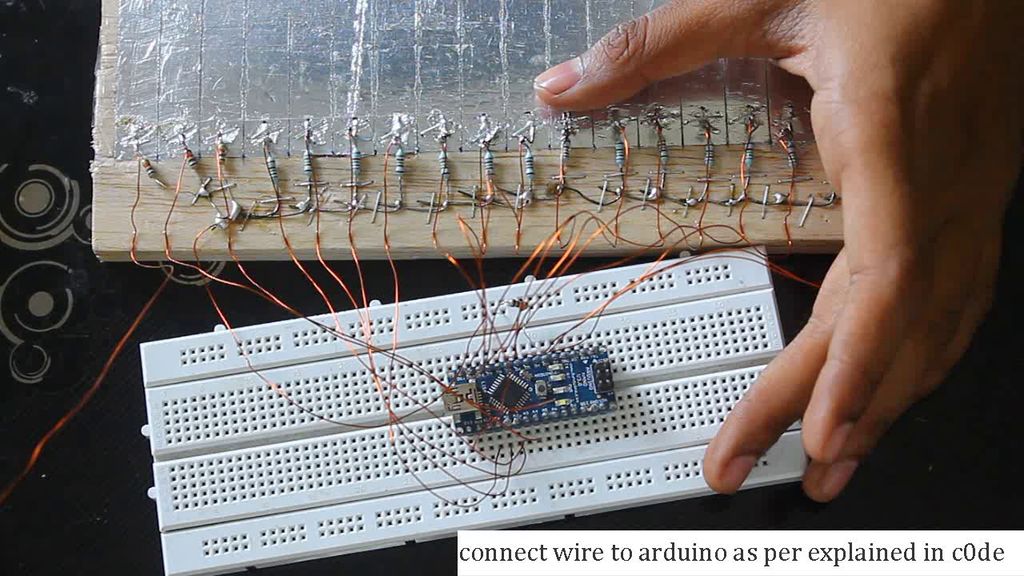
Making 2: Electric Connection
- Check that all plates are separated from each other, they must be electrically insulated. all plate must check after every step,
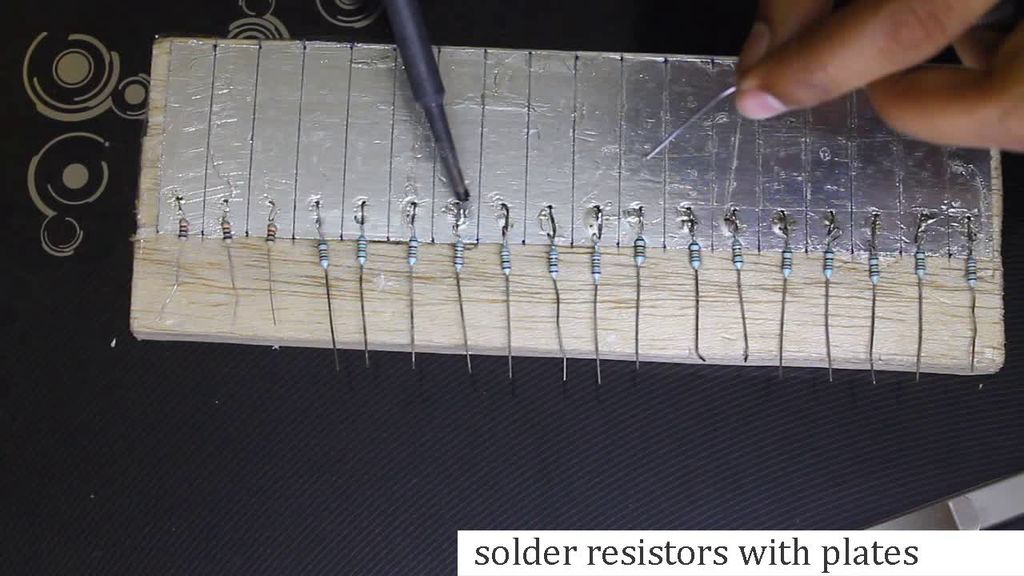
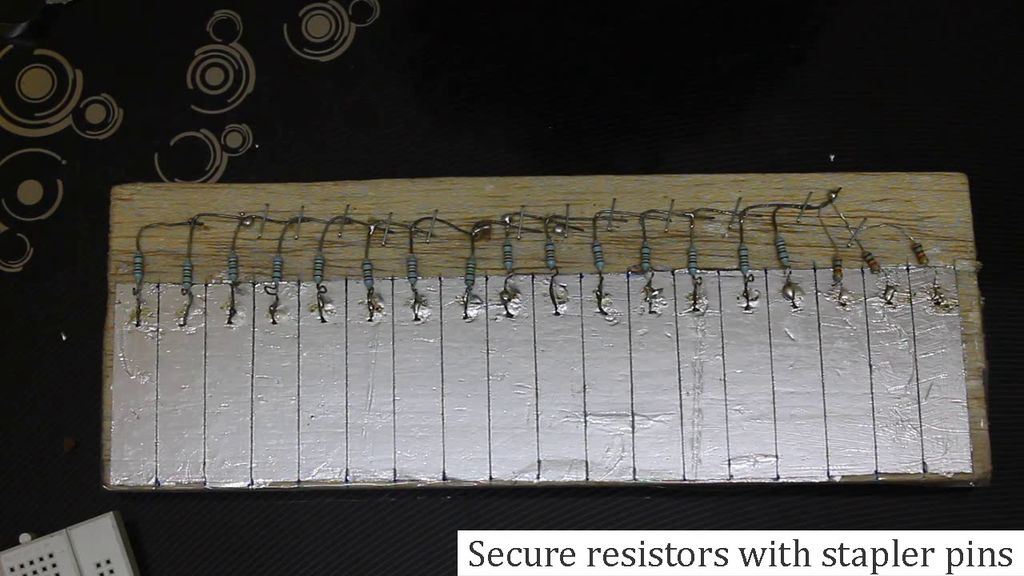
- Now connect the 87K resistor to all plates and solder it properly,
- connect another end of the resistor to common and connect to pin 4. and take a wire from every plate (another end of the resistor),
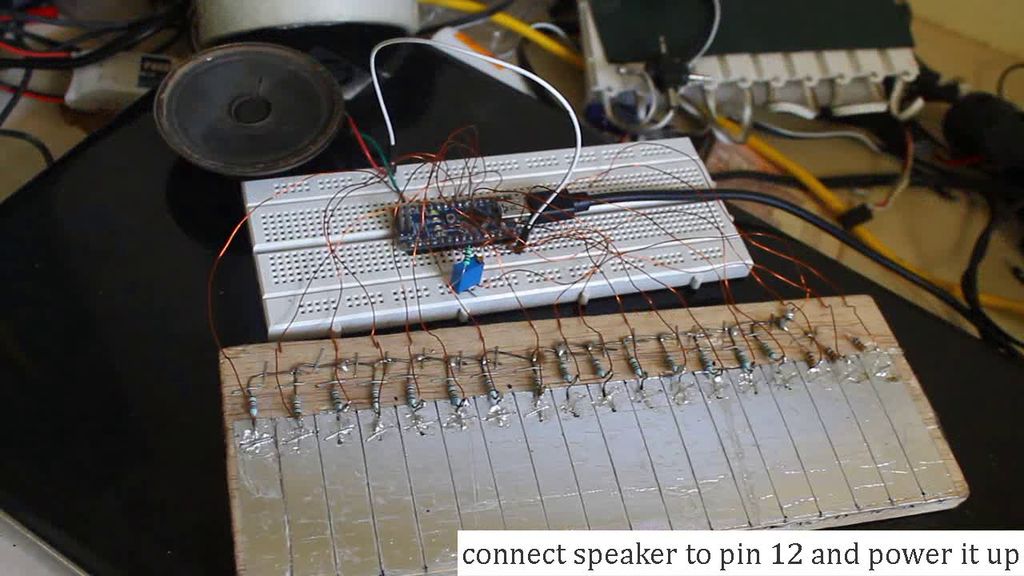
- Connect pin 12 to the speaker.
Connection:
- KEY 1 TO A6
- KEY 2 TO 13
- KEY 3 TO A5
- KEY 4 TO A4
- KEY 5 TO A3
- KEY 6 TO A2
- KEY 7 TO A1
- KEY 8 TO A7
- KEY 9 TO 2
- KEY 10 TO 3
- KEY 11 TO 5
- KEY 12 TO 6
- KEY 13 TO 7
- KEY 14 TO 8
- KEY 15 TO 9
- KEY 16 TO 10
- KEY 17 TO 11
you can take your own combination but then arrange it such a way that value of 'i'th key in array x[i].
EXPANDED TECHNICAL DETAILS: Touch Architecture Matrix
- Arduino Uno/Nano: Standard processor speeds execute the pulse timing math perfectly.
- Large-Value Resistors (87K to 10M Ohm): Mandatory for the RC-time constant to be slow enough for the 16MHz clock to detect the subtle change caused by human capacitance.
- Copper Tape or Heavy Aluminum Foil: Acts as the physical sensing pad.
- Physical Piezo Buzzer or Amplified Speaker: Connected to a digital pin for tone generation.
Making 3: Understanding Code:
First, you need to install the CapacitanceSensor library.
1. Setting the Key Range:
float N_min=48; float N_max=70;
Here you select the range of keys. For example in this code the 48th to 70th key is mapped onto our physical board.
2. Smoothing:
int smooth=2;
This shows the value of smoothing. A higher value results in more lag but smoother readings.
3. Specifying Capacitance Sensors:
CapacitiveSensor   i20 = CapacitiveSensor(4,A6);
CapacitiveSensor   i13 = CapacitiveSensor(4,13);
.
.
.
CapacitiveSensor   i11 = CapacitiveSensor(4,11);
This section specifies various pins as inputs where pin 4 is the common transmitter pin.
4. Mapping Values:
N_map();
This function maps the range of frequency as per N_min and N_max values onto each plate.
5. Read Value:
Read_val() is a function that runs code which takes a value from each plate.
x[1] =  i20.capacitiveSensor(30);
x[2] =  i13.capacitiveSensor(30);
 ..
x[18] =  i11.capacitiveSensor(30);
6. key_calc(): This function performs the calculation of the touched key based on the minimum and maximum sensor values.
for(int z=1;z<19;z++)
{ if(x[z]>t1){t1=x[z];t4=z;}
This detects the plate with the maximum touch value.
kt=((x[t4-1]*N[t4-1])+(x[t4]*N[t4])+(x[t4+1]*N[t4+1]))/(x[t4-1]+x[t4]+x[t4+1]);
This equation takes the key with the max touch and its immediate neighbors. It uses a weighted average of their positions and intensities to calculate the precise, continuous position of the touch.
7. freq_calc(): Now we need to calculate the frequency of that key.
float n;n=(key-49)/12;
freq=m*220*pow(2,n);
Here, 'key' is the calculated key number. The variable m is a value which only becomes 1 when the touch input is high enough, acting as a noise gate. So without any significant touch, the frequency value would be equal to 0.
Making 4: Uploading Code and Debugging
After uploading the code, it may or may not work properly. So here are some of the problems that I observed during this project.
- One of the most common problems is the loose connection between Arduino and the plate. You won't get continuous sound without proper connection.
- If two nearby plates are touching each other, it will have the same value of capacitance.
- The speaker you are using is not suitable for Arduino. so you need to use another speaker or an amplifier circuit.
Maybe, this piano won't work with battery due to lack of proper ground and works best if powered by the use of a PC as it has a good ground.
How to detect the problem:
- you can turn on
print_raw()and then touch all plates together to see which plate is not responding properly. - you can also check all plates one by one by uploading different codes to it.
Making 9: Finally...
Limitations:
- The sound of this piano is not as good to hear as a real piano as it is a square wave wherein an actual piano it is a combination of multiple harmonics.
- You can not play multiple keys at the time,
- The volume of the piano is not controlled by touch but remains fixed.
Set the key range and smoothness number as per your style, and locate various notes on it so that you can play any song you like.