This circuit will...
Display best lap time
Display current lap time
Display total laps traveled
This setup can realistically be used in any slot car lap timing and counting scenario. Feel free to try it on your 1:32 or 1:24 scale track as well. Simply replace the magnet switch test setup with any number of other sensors. As you will see I opted to go with an Opto IR Sensor instead of magnetic reed switch for more reliable results. As the guide blade passes through the slot sensor it will register the completion of your lap and display lap time.
After you get this running design your own custom box or mounting system and enjoy your racing.
Supplies
Most of what you will need for this project will be found in the ELEGOO Mega R3 Project The Most Complete Ultimate Starter Kit w/ TUTORIAL Compatible with Arduino IDE from Amazon. You just can't beat the price at only $65.99 compared to buying components separately.
$65.99 at the time of this post, in my opinion, is a great purchase and product as I have been using these kits for personal use and with my 7th and 8th grade students for years.
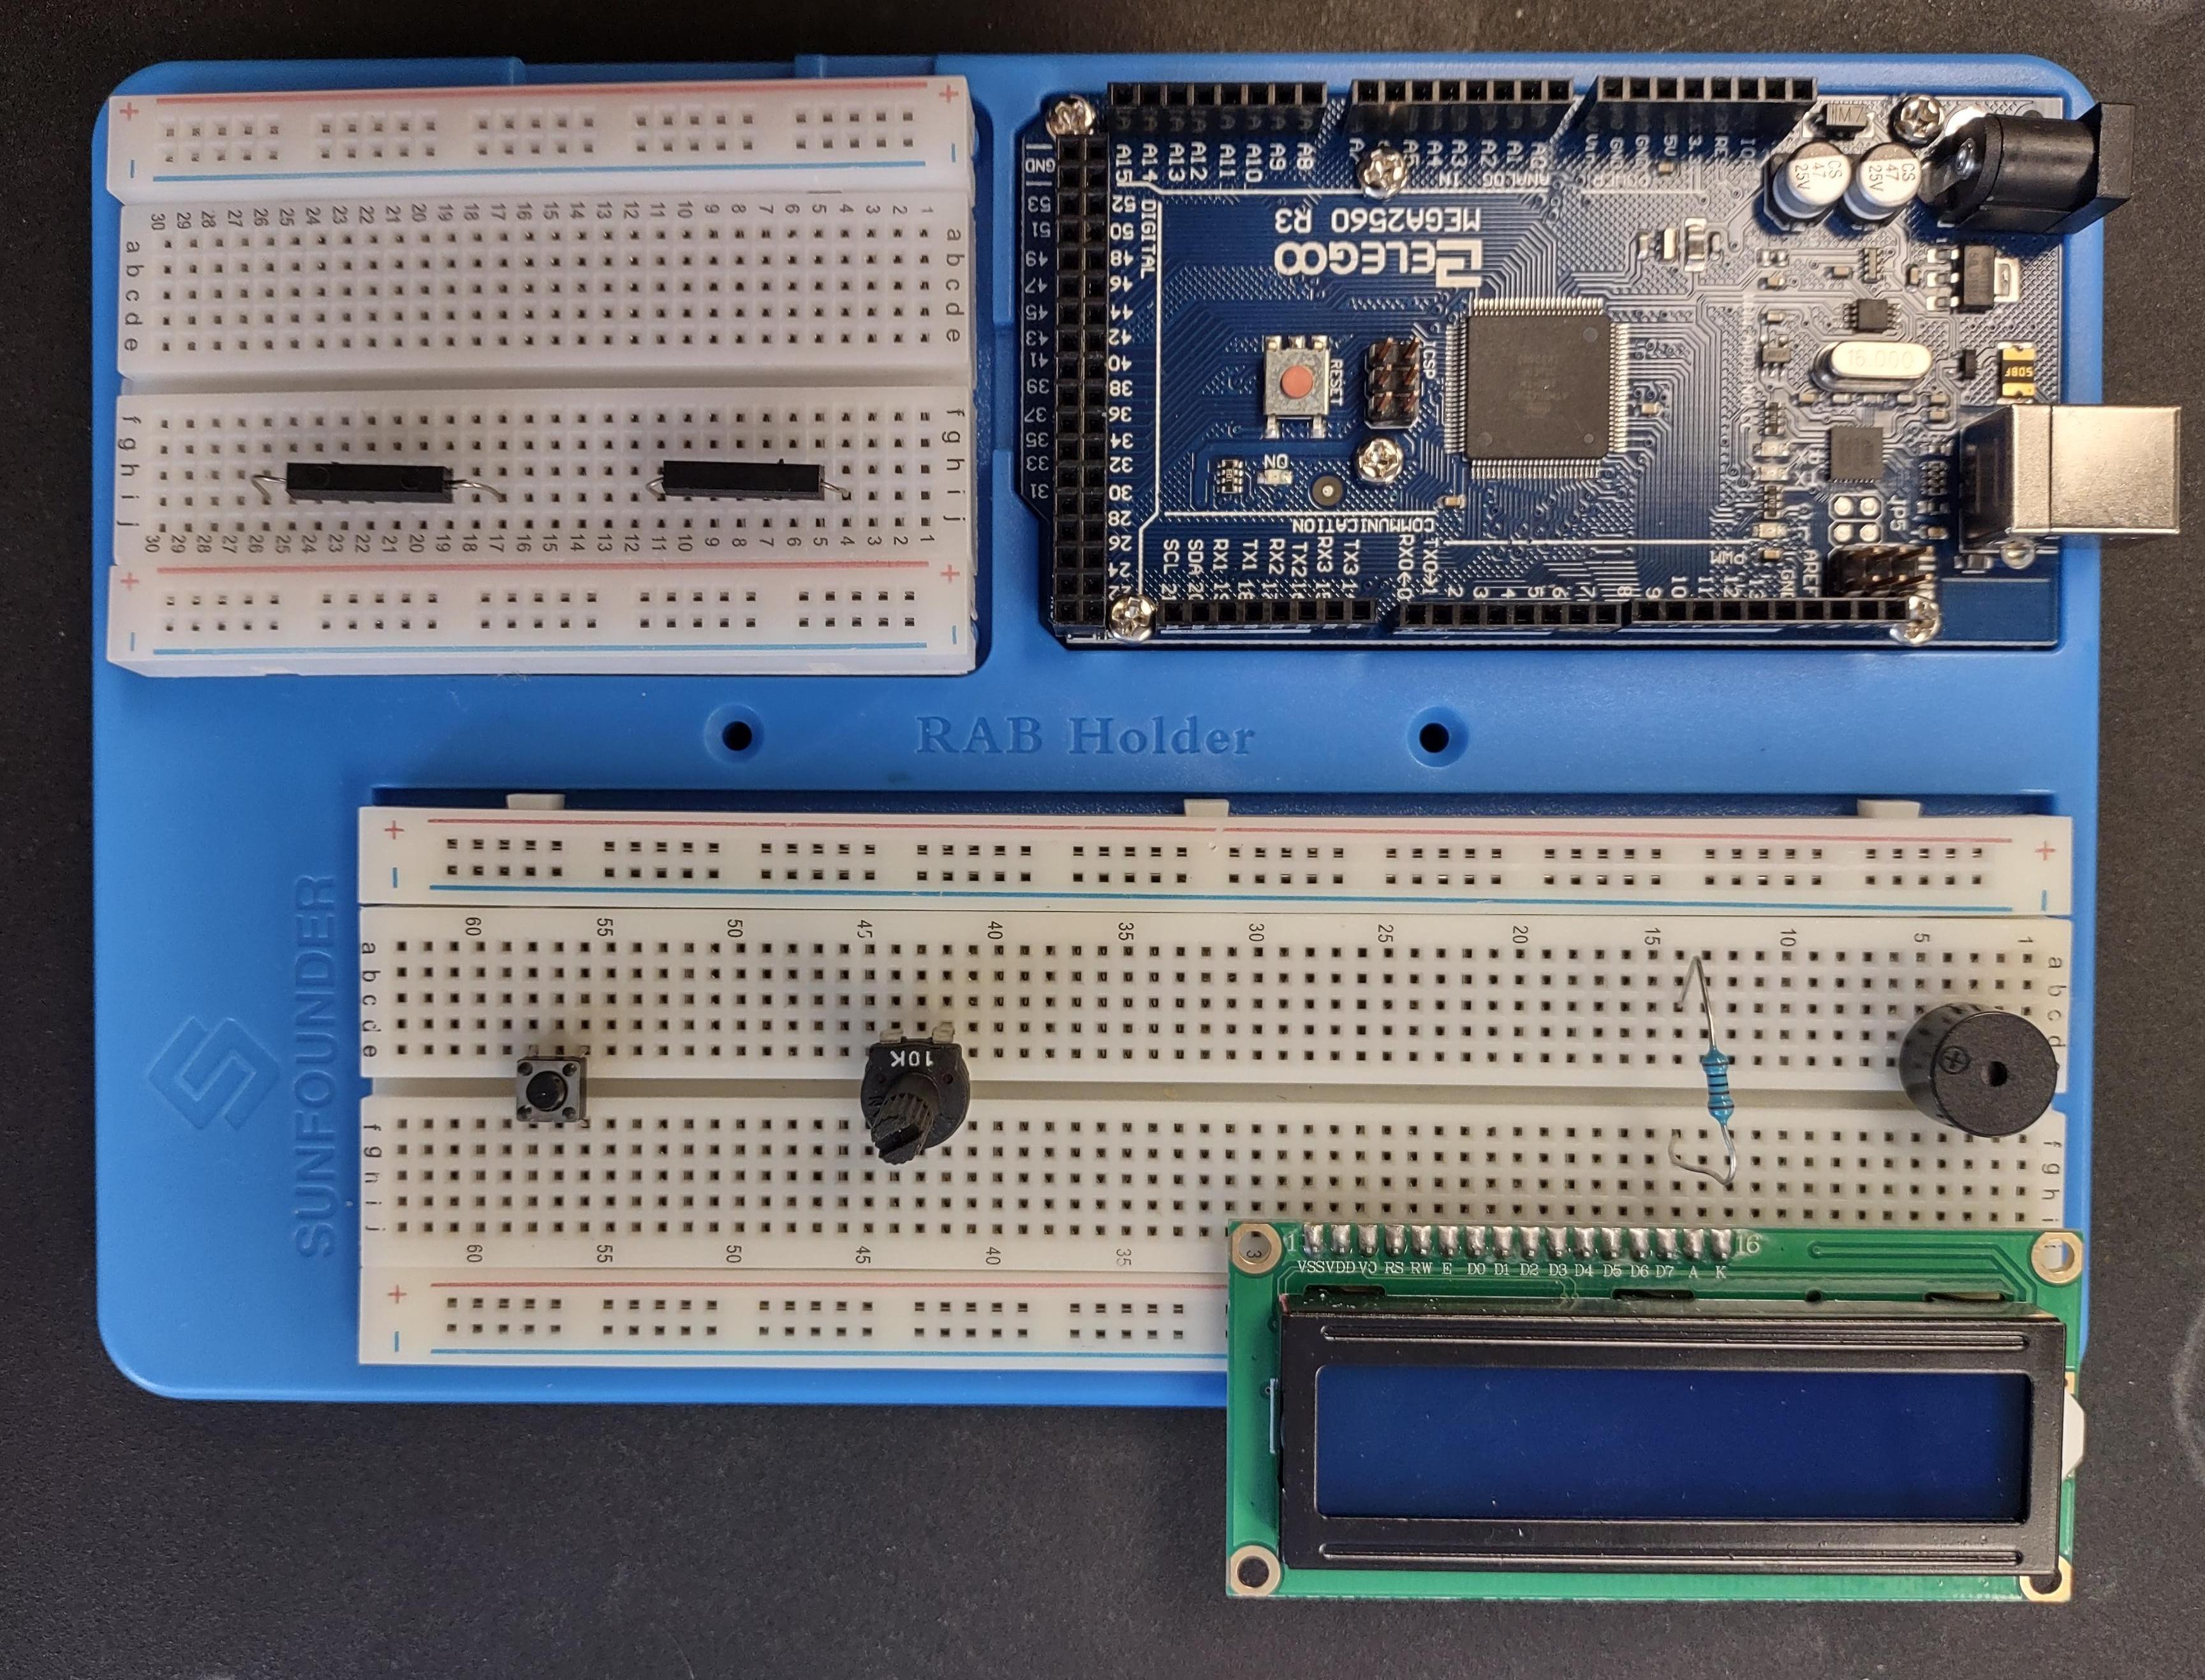
(1) Arduino Mega2560 or Elegoo Mega2560 (Clone) *
(1) 16x2 LCD *
jumper wires *
While the kit provides plenty of wires, I prefer this wire kit as wires are precut to different sizes and are a stiffer gauge wire for neater wire management.
(1) 800 point breadboard
(1) 400 point breadboard
(1) 220 Ohm resistor*
(1) potentiometer*
(1) push button*
(1) piezo buzzer*
(1) 5mm LED*
(2) magnet reed switches
(1) elegoo mega r3 power supply or Battery Pack or connect your lap counter to your computer via USB cable for power.*
Mounting Board While not required, this is highly recommended for building your project unless you encase everything into a box. This really helps with mobility and not accidently disconnecting wires connecting different boards.
The above items with * are all included in the ELEGOO Mega R3 Project The Most Complete Ultimate Starter Kit w/ TUTORIAL Compatible with Arduino IDE from Amazon . Exactly why I suggest buying the kit if this is your first attempt using a the Arduino microcontroller boards.
If you choose to use the magnet reed switch, I do not recommend those encased in glass as they are very fragile and susceptible to breakage.
In my video demonstration I have embedded IR Infrared Slotted Optical Optocoupler Module Speed Measuring Sensor 3.3V to 5V Photo Interrupter Sensors into the track instead of the reed switches.

Since the magnet reed switch is dependent on a strong magnetic pull, I found that 1:43 cars do not have a strong enough magnet to give reliable results. Therefore, I swapped them out for the slotted sensors that are installed into the groove of the track as you will see in upcoming images.
I did have better success with the magnet reed switches running 1:32 cars which have stronger magnetic pull.
Of course don't forget your favorite slot car track, controllers, and cars!
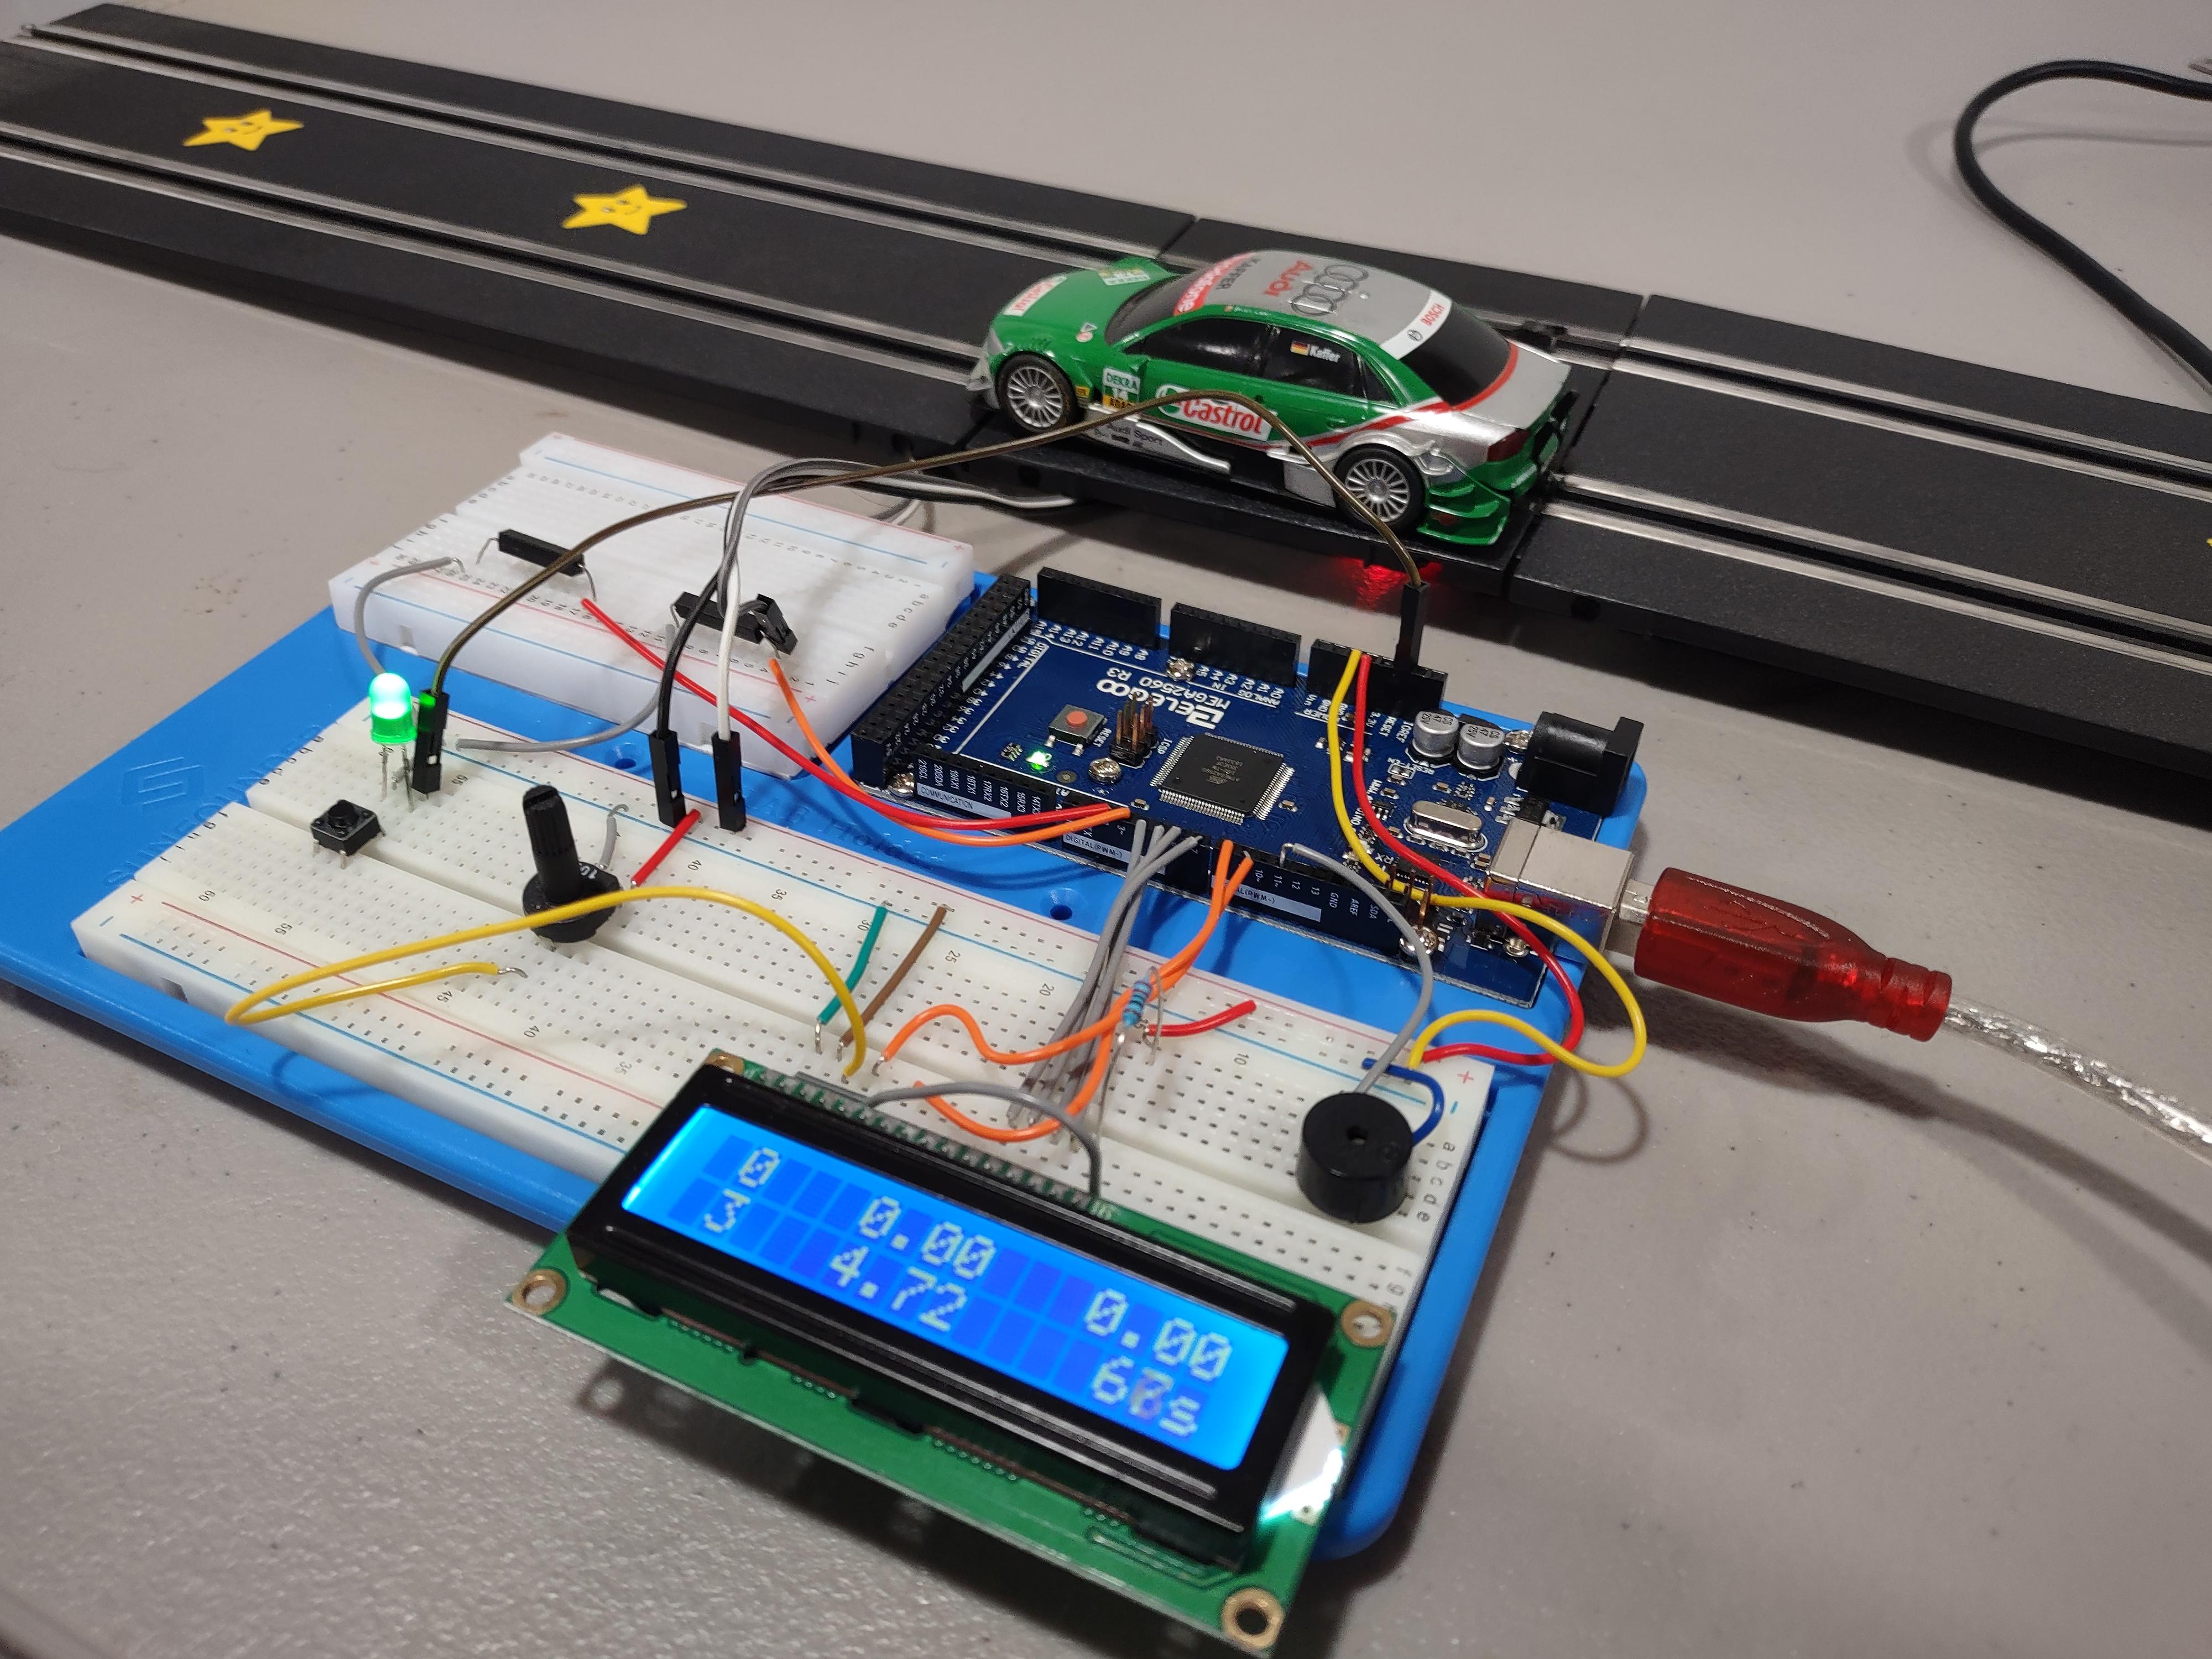
Step 1: Build Component Layout
- If you purchased the mounting board, mount your controller board with the screws and screw driver provided with the mounting board.
- Mount your breadboards with the adhesive backing provided on the breadboards.
- Place your piezo buzzer, potentiometer, push button, and reed switches in these approximate locations. You can choose to make it as compact as you wish. This is just how I liked doing it. Following the wiring diagram is more crucial
- Place your magnet reed switches
- NOTE: LED is not pictured, but you can place it beneath the push button for now.
Step 2: Wiring It All Up
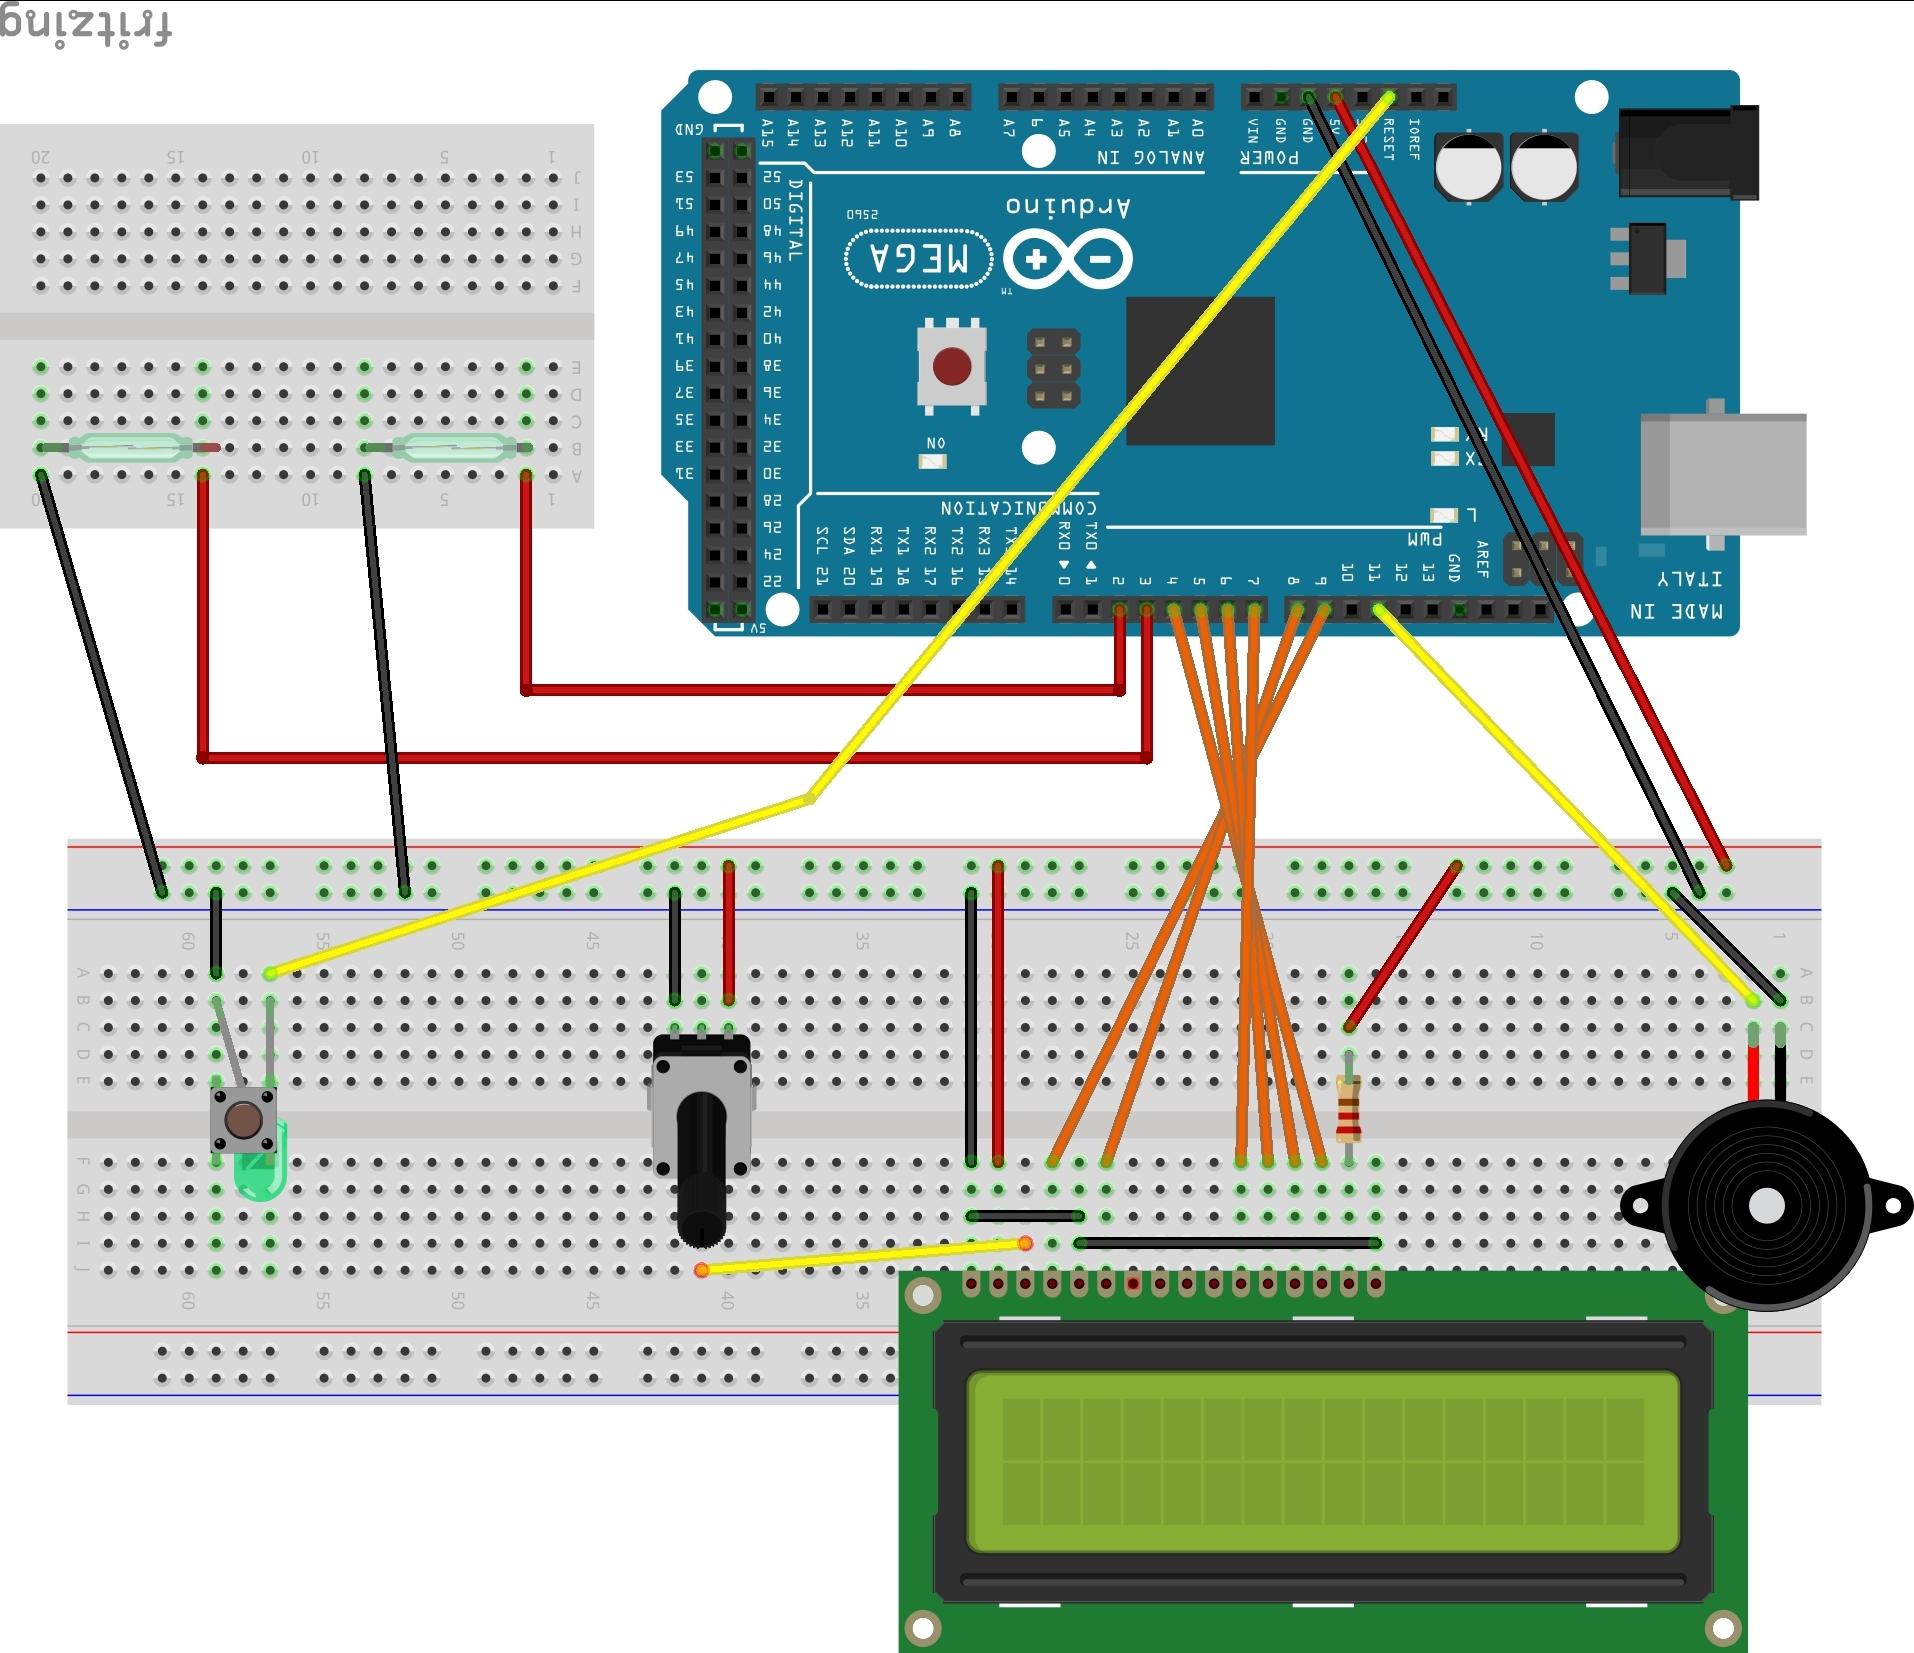
As already mentioned this wiring diagram is designed with use of the Mega 2560 R3 board. If you want to use the Uno board go to GitHub to see sketch author's Uno diagram. When I used the Uno diagram with the Mega board the push button would not reset, and the potentiometer reset but would not let display work properly.
Therefore, a custom wiring diagram for the Mega 2560 R3 board.
Follow the diagram exactly and you will have a functional lap timer and counter. The Devil is in the Detail of any Arduino with proper connections in your circuit. If it doesn't work, double check and triple check everything. Especially that all wires and components are seated correctly.
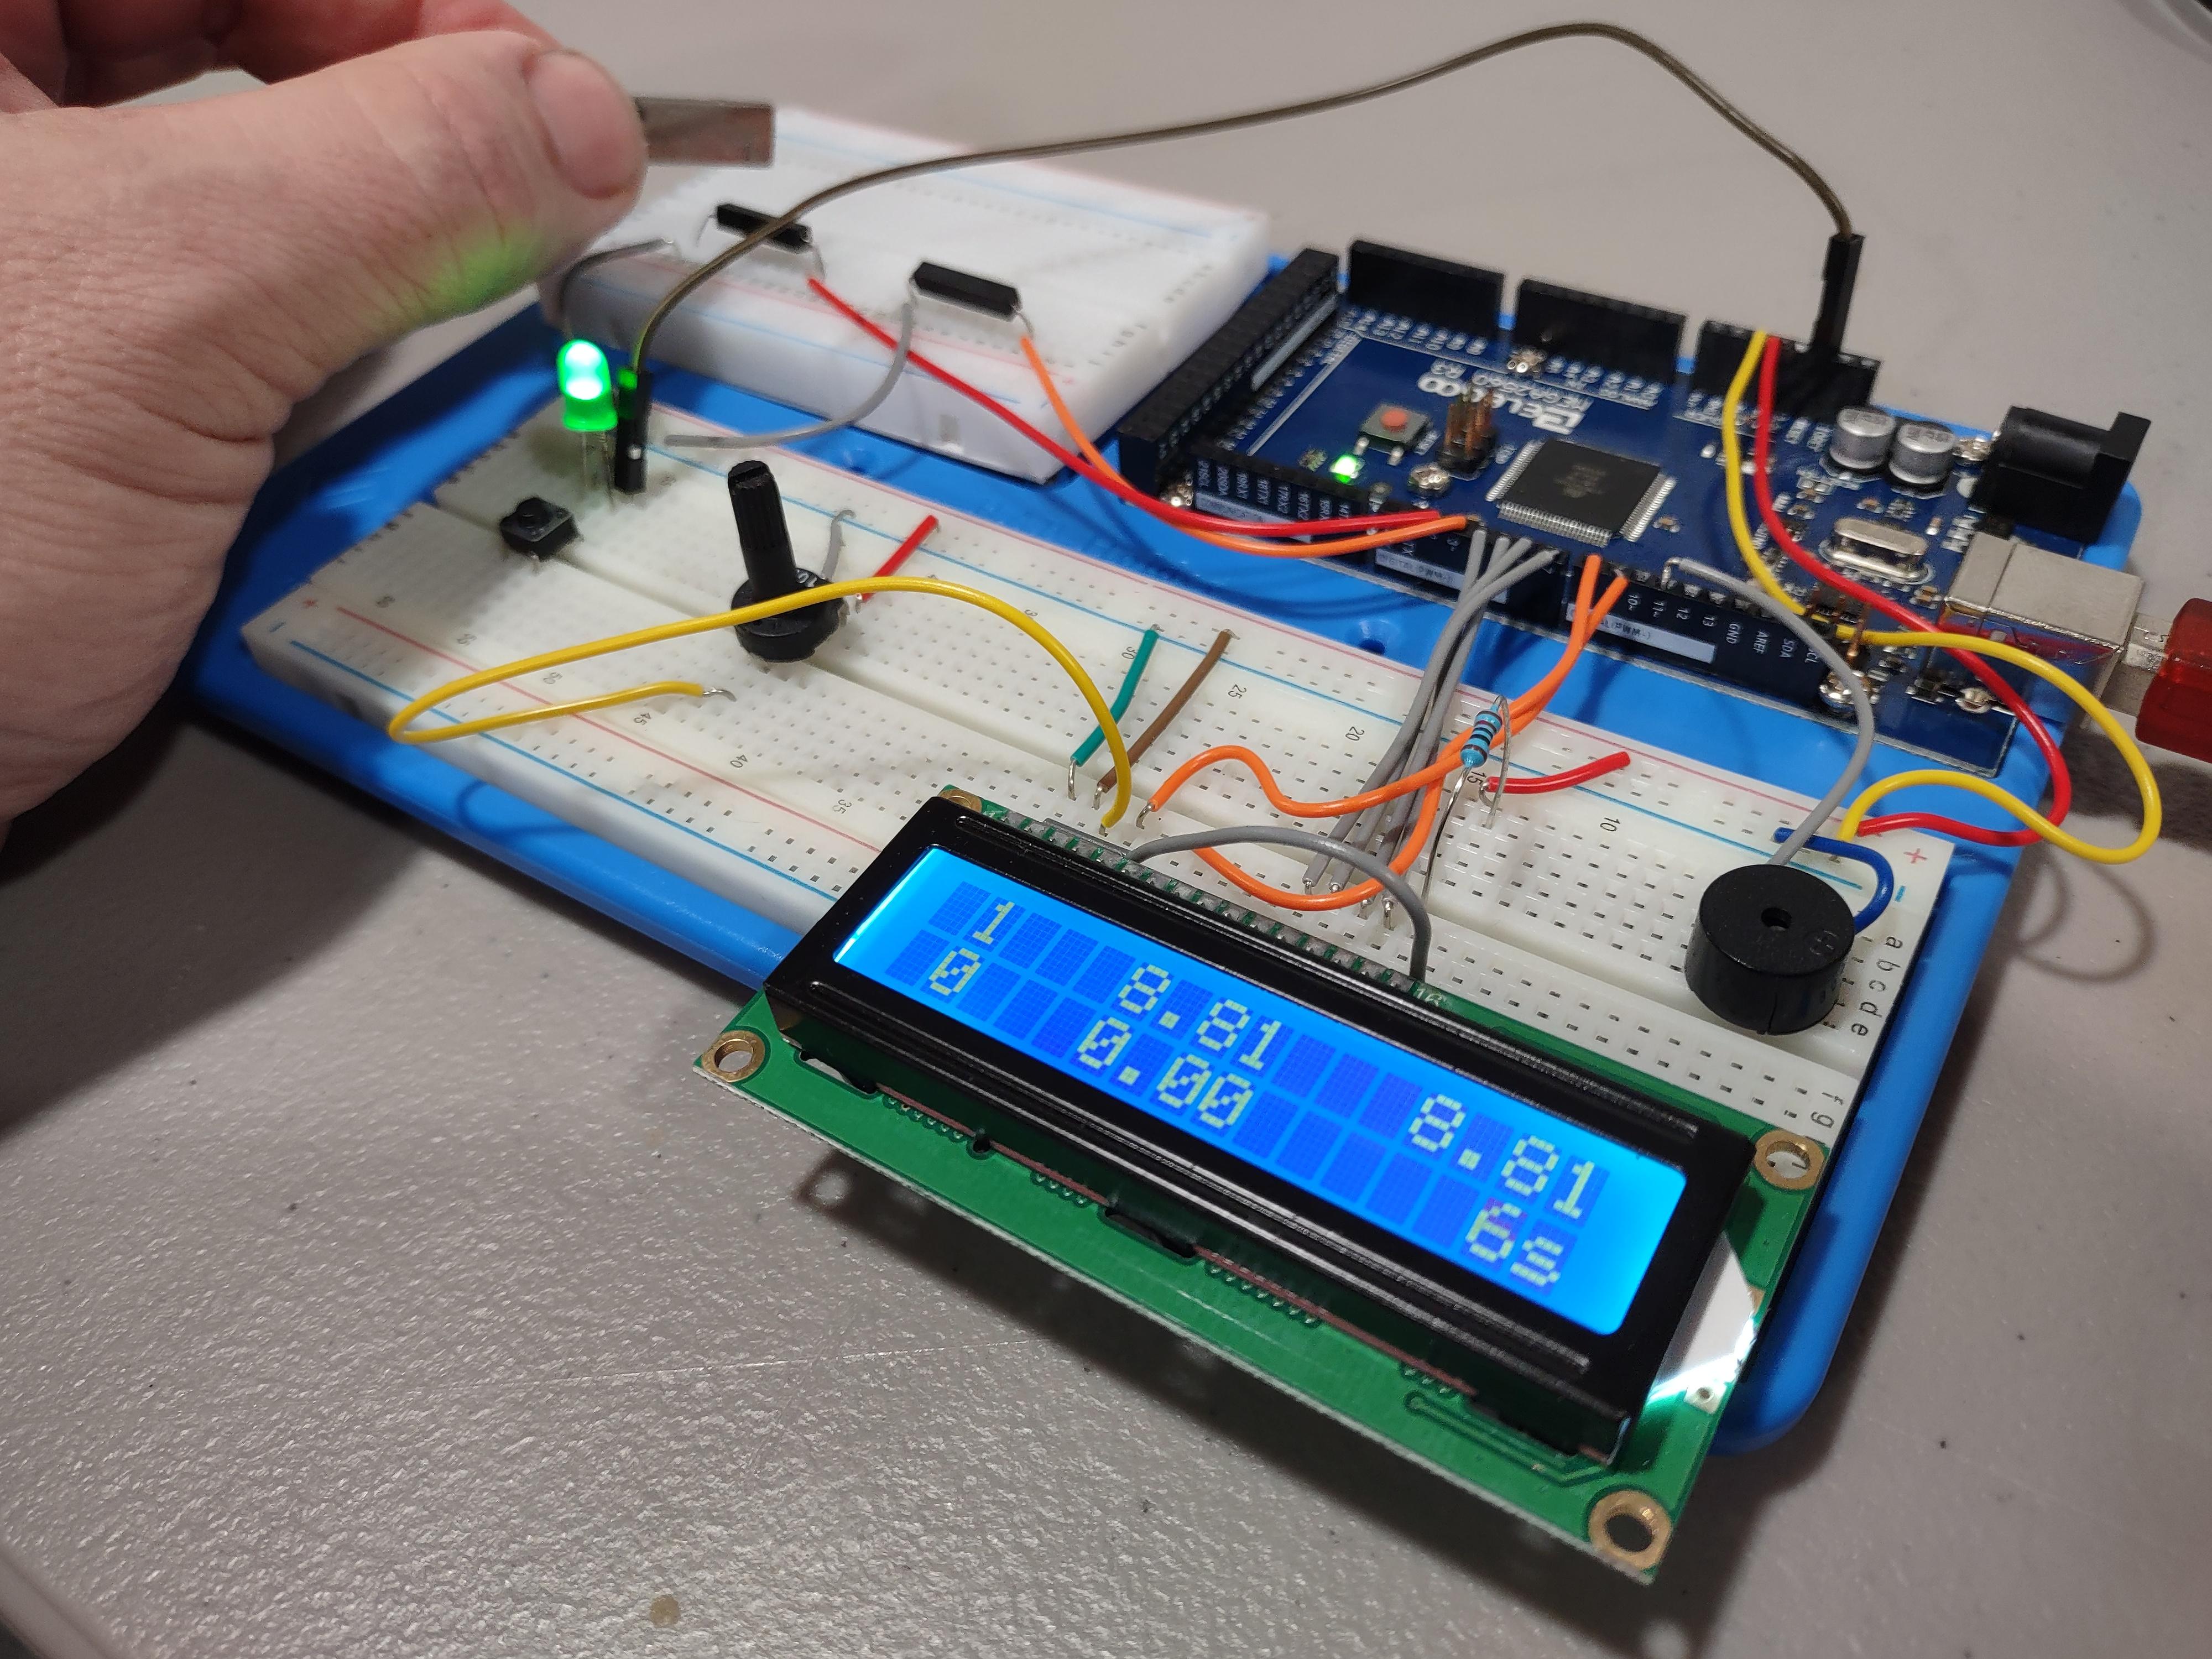
Step 3: Testing With Magnet
Connect Mega 2560 to a power source
To the computer using your USB power cord
Wall wart power supply
Battery pack.
Push reset button on breadboard and hold for 2 seconds
Wait for the LCD to display the welcome message.
Wait for zeros to show
Pass a magnet over the reed switches to activate and begin counting laps.
Push reset button to reset back to zeros.
Step 4: Car With Slot Sensor


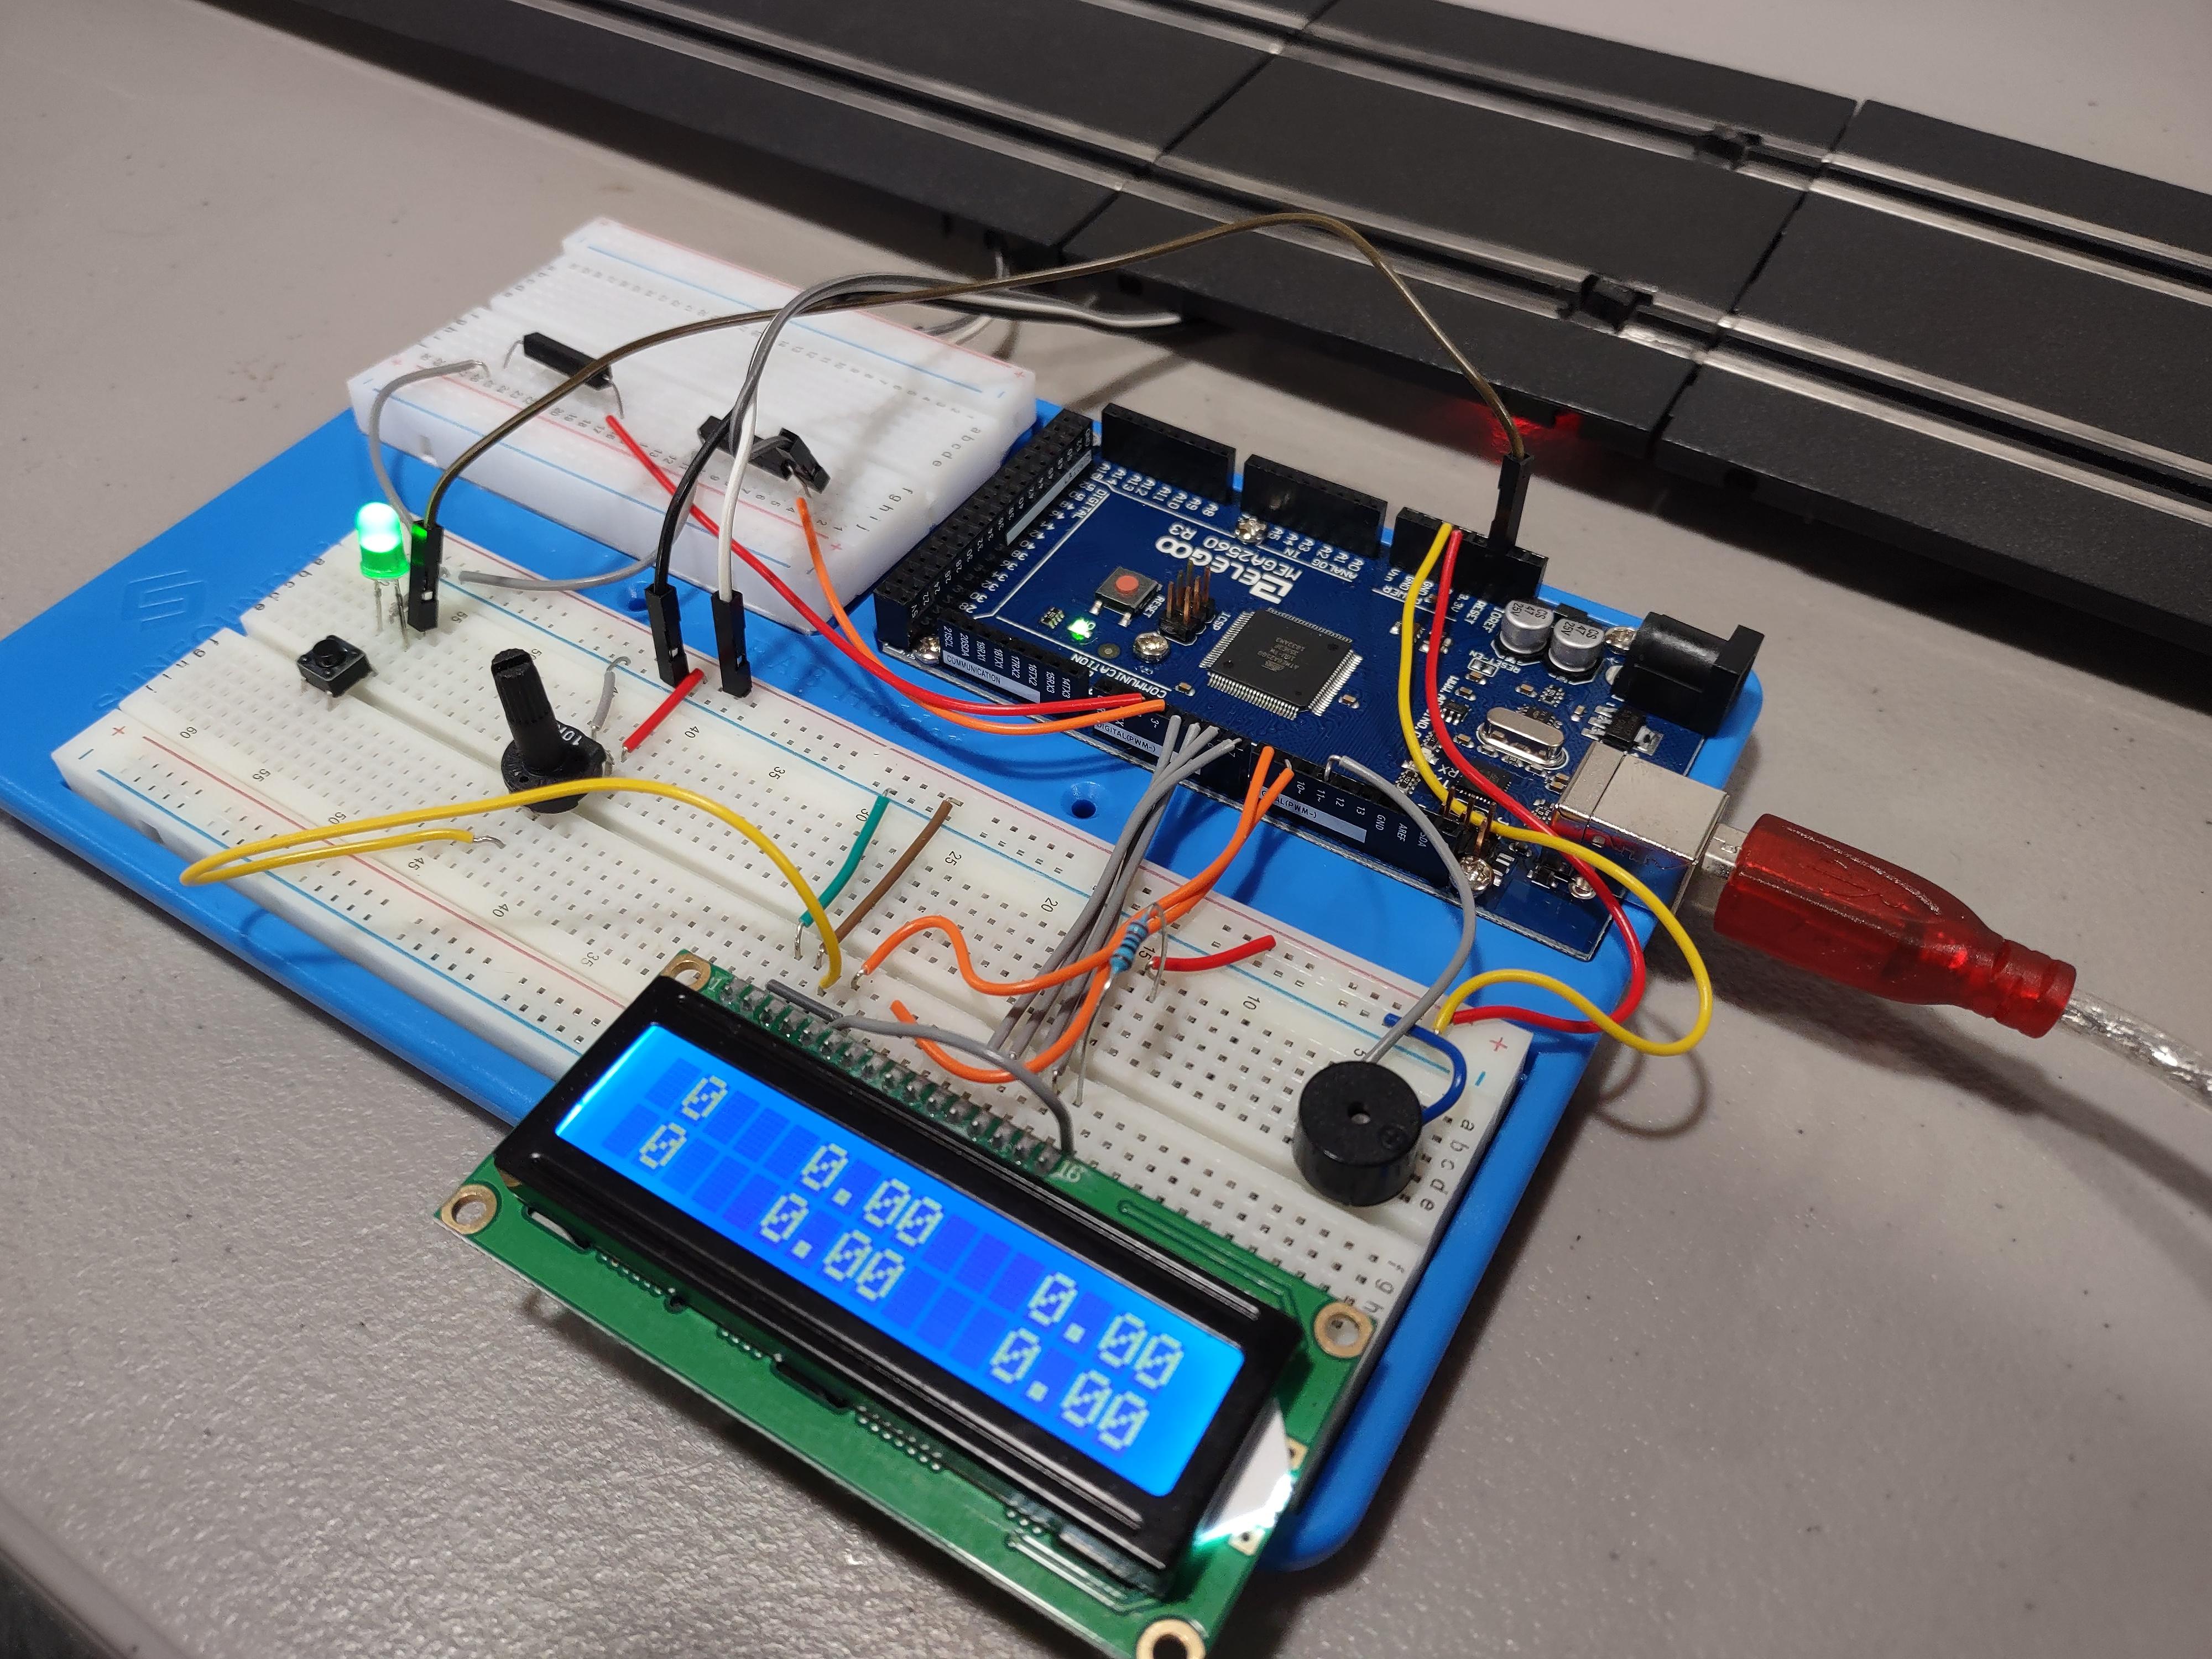
As I mentioned previously, I was not happy with the reliability of the reed switches installed in the track. The triggering of the laps and time was very sporadic at best with 1:43 cars. The 1:32 scale cars probably had about a 90% success on triggering lap count and time.
Therefore I changed to the Opto Slot Sensors listed in the supplies section of this Instructable. Success has jumped to about 98% with 1:43 scale cars and 99% with 1:32 scale slot cars.
Installing the Opto Slot Sensors
- Choose track piece to install sensors
- Remove metal rails
- Cut out plastic slot groove to insert sensor from bottom
- Cut metal rail to fit sensor in place
- Insert and superglue sensor in place
- Replace metal rails
- Connecting Sensors to Circuit
- Connect VCC on sensor to positive rail on breadboard
- Connect GND on sensor to negative row on breadboard
- Connect Signal on sensor to pins 2 or 3 respectively on Mega 2560 R3
- Connect to your track setup
- Press reset button at the beginning of each race and have fun
EXPANDED TECHNICAL DETAILS
High-Speed Event Sensing
This project brings digital timing to analog slot car racing.
- Detection Method: Uses IR Emitter/Receiver pairs or Light Dependent Resistors (LDRs) embedded in the track. When a car passes over the sensor, it breaks the light beam, triggering a millisecond-precision interrupt on the Arduino.
- Interval Timing: The firmware records the
micros()value at each break to calculate lap times with extreme precision (down to the microsecond).
UX & Display
- Real-Time Leaderboard: Results are displayed on an I2C 16x2 LCD or a series of 7-Segment displays.
- Session Management: Tracks the "Best Lap" and "Current Lap" for two separate lanes, allowing for competitive, professional-grade racing diagnostics on a DIY budget.