In this project documentation, you will be reading about making a DIY IR Remote and controlling LEDs with it. This project serves as an excellent foundation for learning short-range wireless communication systems, using two Arduino boards (Arduino Uno and Arduino Nano) as separate receiver and transmitter units. Before starting this project, make sure that you install the IRremote Library by Ken Shirriff from your Arduino IDE software.
Please visit this website, to learn about IR communication in detail. Refer to the 'Coding' section in this page to understand how to start this project.
Hardware Analysis
The core of this project lies in the collaboration between the IR Transmitter and IR Receiver:
- IR Transmitter Module: Converts electrical signals from the Arduino into infrared light waves. It typically uses a carrier frequency of 38kHz to prevent interference from natural light.
- IR Receiver Module: Features an infrared light sensor with a filtering circuit to separate transmitted data from ambient light interference, then sends a Digital signal back to the Arduino board.
- Push Buttons: Used to receive user input. In this project, we utilize Arduino's
INPUT_PULLUPmode, which employs internal pull-up resistors, resulting in a cleaner circuit and reducing the need for external 10kΩ resistors.
Connections
IR transmitter module
- (+) - 3.3V
- (-) - Ground (GND)
- S - D3
Push button
- Ground (GND)
- 01 - D4
- 02 - D5
- 03 - D6
- 04 - D7
- 05 - D8
I have not connected the push buttons to the 10kΩ resistor. You can learn more about this, here.
IR receiver module
- (+) - This pin has no connectivity with the IR LED
- (-) - Ground (GND)
- S - D11
LEDs
- Cathode - Ground (GND)
- Red - D7
- Green - D6
- Yellow - D5
- Blue - D4
Coding & Logic
The program development process is divided into two main phases: Decoding and Sending commands.
First of all, assemble your components.
Step 1: Decoding IR Signals
Go to Examples, open IRRemote Library, and select IRrecvDemo to get decode the IR signals sent by an IR remote and to discover its type of IR transmission protocol. Upload this code to the Arduino Nano connected to the IR Receiver, then open the Serial Monitor. Take out an IR remote, place the IR LED right in front of your IR receiver module to avoid IR noises, and press each button on your remote to see the data send by the IR signals (Hex Code) and protocol (e.g., NEC, Sony, RC5).
Decoding the IR signals and discovering the IR transmission protocol can help us to prepare the sketch for our DIY IR remote.
Step 2: Testing IR Transmitter
To check whether the connections are correct with your IR transmitter module, go to examples, open IRremote library, and select IRsendDemo. Place your phone camera above the IR LED and upload the code to your Arduino Uno. You should see the IR LED blinking if your connections are correct. Engineer's Tip: Infrared light is invisible to the naked eye, but you can use a smartphone camera to look at the IR LED while the program is running. If it's working correctly, you will see a flickering purple or white light on your phone's screen.
Step 3: Building the DIY Remote Project
From the analysis in this example, we found that the prototype remote (e.g., a Midea fan remote) uses the NEC protocol. Therefore, in our code, we chose to use the function irsend.sendNEC(0xXXXXXX, 32);.
Transmitter Program Logic:
- Set pins D4-D8 as
INPUT_PULLUP. - Check button status with
digitalRead(). If the status isLOW(button is pressed). - Call the
irsend.sendNEC()function to send the specific code value for that button via pin D3.
Receiver Program Logic:
- Wait to receive a signal from pin D11.
- Once a signal is received, compare the received value with conditions (Switch Case or If-Else).
- If the code matches the predefined one, send a
digitalWrite()command to the LED pins (D4-D7) to turn the light on or off.
My Midea Fan remote uses NEC IR transmission protocol, and I have used the irsend.sendNEC function in my sketch. Refer to this website to learn more about coding for IR transmitter and receiver modules.
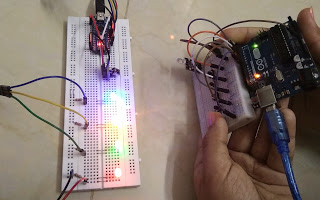
Final Look
Once everything is assembled, you will have a custom remote control system where you can define which button controls which device in your home.
If you have any questions, or suggestions, about this project please feel free to comment below.