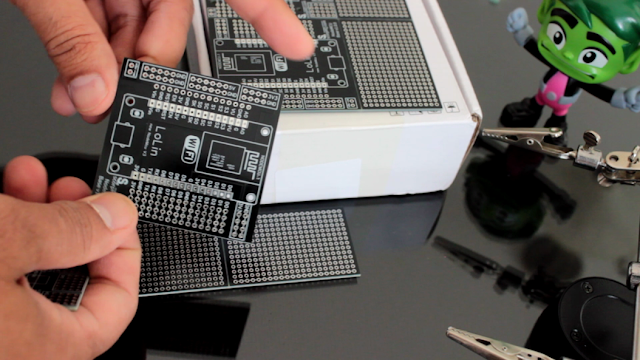
If you have ever programmed a NodeMCU, then I bet you know the pain you have to go through while connecting sensors to NodeMCU on a breadboard.I looked for various solution on the web and found "NodeMCU Development Boards" for around $6 to $7. Well, I wasn't ready to spend that much for a simple projects. So, I went ahead and designed a replica of those boards, which, 10 of them I got fabricated from PCBWay for just $5.
Project Perspective
This DIY - NodeMCU Development Board is a fundamental and practical breakout board for anyone starting their journey with the NodeMCU. By creating a custom PCB that extends all the digital and analog pins, you can build a more organized and easy-to-use development environment for all your NodeMCU-based projects.
Technical Implementation: PCB and Pin Extension
The project focuses on creating a robust and expandable hardware platform:
- PCB Design layer: The custom PCB design features extensions for all the NodeMCU pins, including dedicated power rails for 3.3V, 5V, and GND.
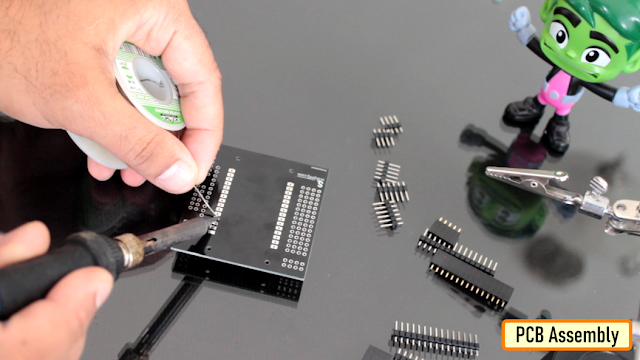
- Header Integration layer: Using both Male and Female Pin Headers side-by-side, the board can accommodate any sensor or module with ease, providing a more versatile experience.
- Power Management layer: The board includes a dedicated VIN Connector and leverages the NodeMCU's built-in LDO regulator for stable 3.3V power.
Hardware Infrastructure
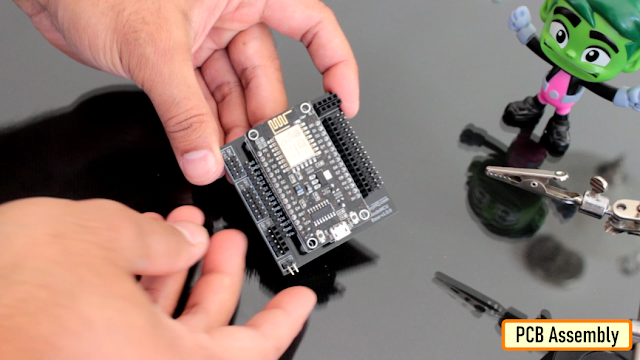
- NodeMCU ESP8266: The core WiFi-enabled microcontroller that will be the heart of all your development.
- Custom PCB (Replica Design): A professionally designed and fabricated PCB that acts as the backbone for the entire development board.
- Male and Female Pin Headers: Providing multiple connection points for all of the NodeMCU's digital and analog pins.
- Reset Button: A convenient way to reset the NodeMCU without having to unplug it.
- Screw Terminal (VIN): A sturdy way to connect an external power source to the board.
PCB Design

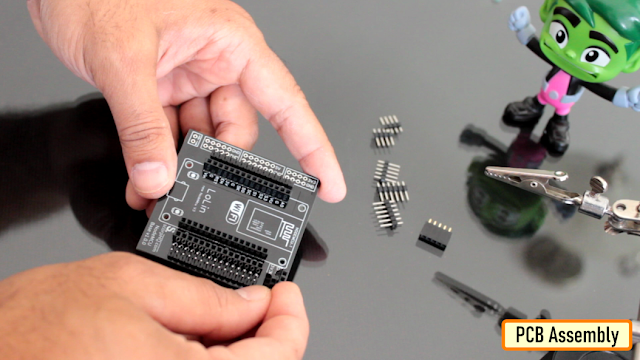
PCB Assembly
Future Expansion
- OLED Display Integration: Add a dedicated header for an OLED display to show real-time status and telemetry from your NodeMCU.
- Sensor Port Integration: Add specific headers for common sensors like DHT11 or HC-SR04 for even easier prototyping.
- Vibration/Motion Detection: Integrate motion or vibration sensors to trigger specific actions or alerts from your development board.
- MQTT/Cloud Sync: Use the NodeMCU's built-in WiFi to sync sensor data from your board with various cloud IoT platforms.
DIY - NodeMCU Development Board is a perfect project for any electronics enthusiast looking for a more interactive and engaging development tool!
Thanks
YouTube: https://youtu.be/y2m2nh7wHaY
Odysee : https://odysee.com/@Arduino:7/DIY---NodeMCU-Development-Board:1
cos.tv : https://cos.tv/videos/play/32048547001832448
Schema : https://drive.google.com/file/d/1XRR2sNZ5t4NhLFla9X3DyjaPAujrjeGY/view?usp=sharing
Support My Work:
BTC: 1M1PdxVxSTPLoMK91XnvEPksVuAa4J4dDp
LTC: MQFkVkWimYngMwp5SMuSbMP4ADStjysstm
DOGE: DDe7Fws24zf7acZevoT8uERnmisiHwR5st
ETH: 0x939aa4e13ecb4b46663c8017986abc0d204cde60
BAT: 0x939aa4e13ecb4b46663c8017986abc0d204cde60
LBC: bZ8ANEJFsd2MNFfpoxBhtFNPboh7PmD7M2 Thanks, ca again in my next tutorial.