Connect me on Youtube
https://www.youtube.com/channel/UC0e1GXy-etqAIfIv1iHESRA?sub_confirmation=1
In this project I will show you how to make DIY Arduino Based Security Alarm
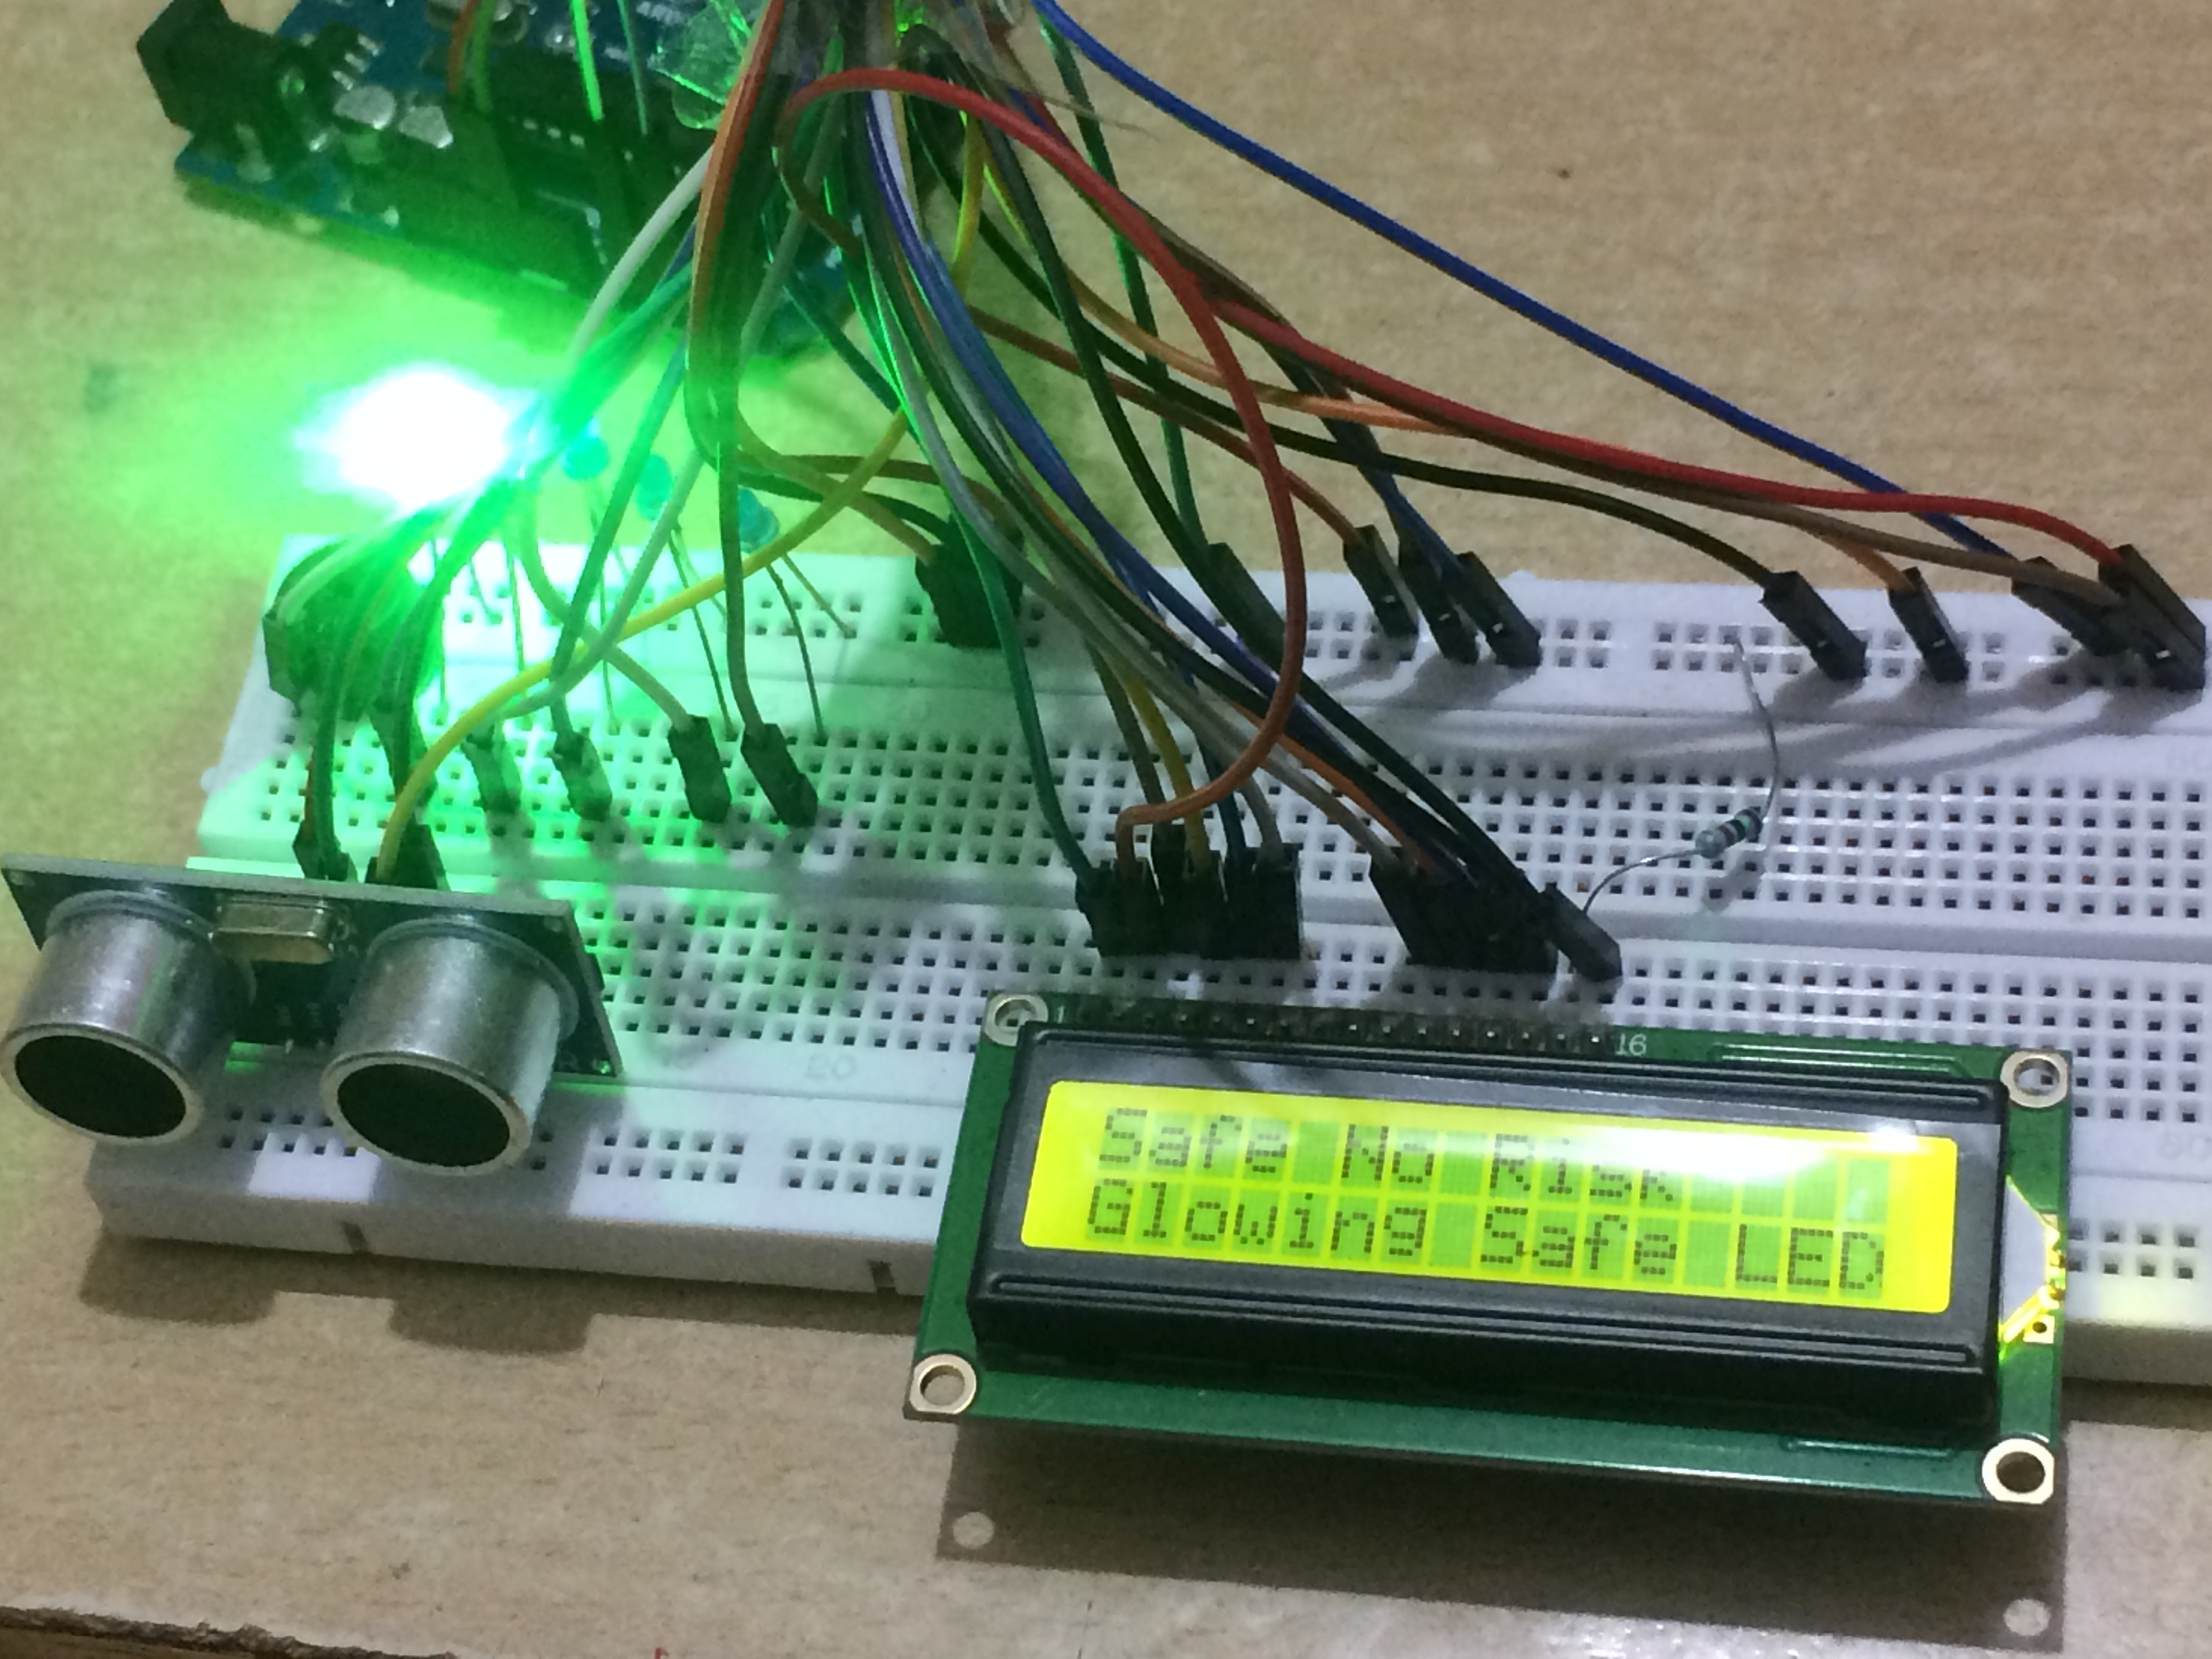
This project will help the People to identify the Distance of an object from the Sensor and shows the level of Risk through LED, LCD and Buzzer.
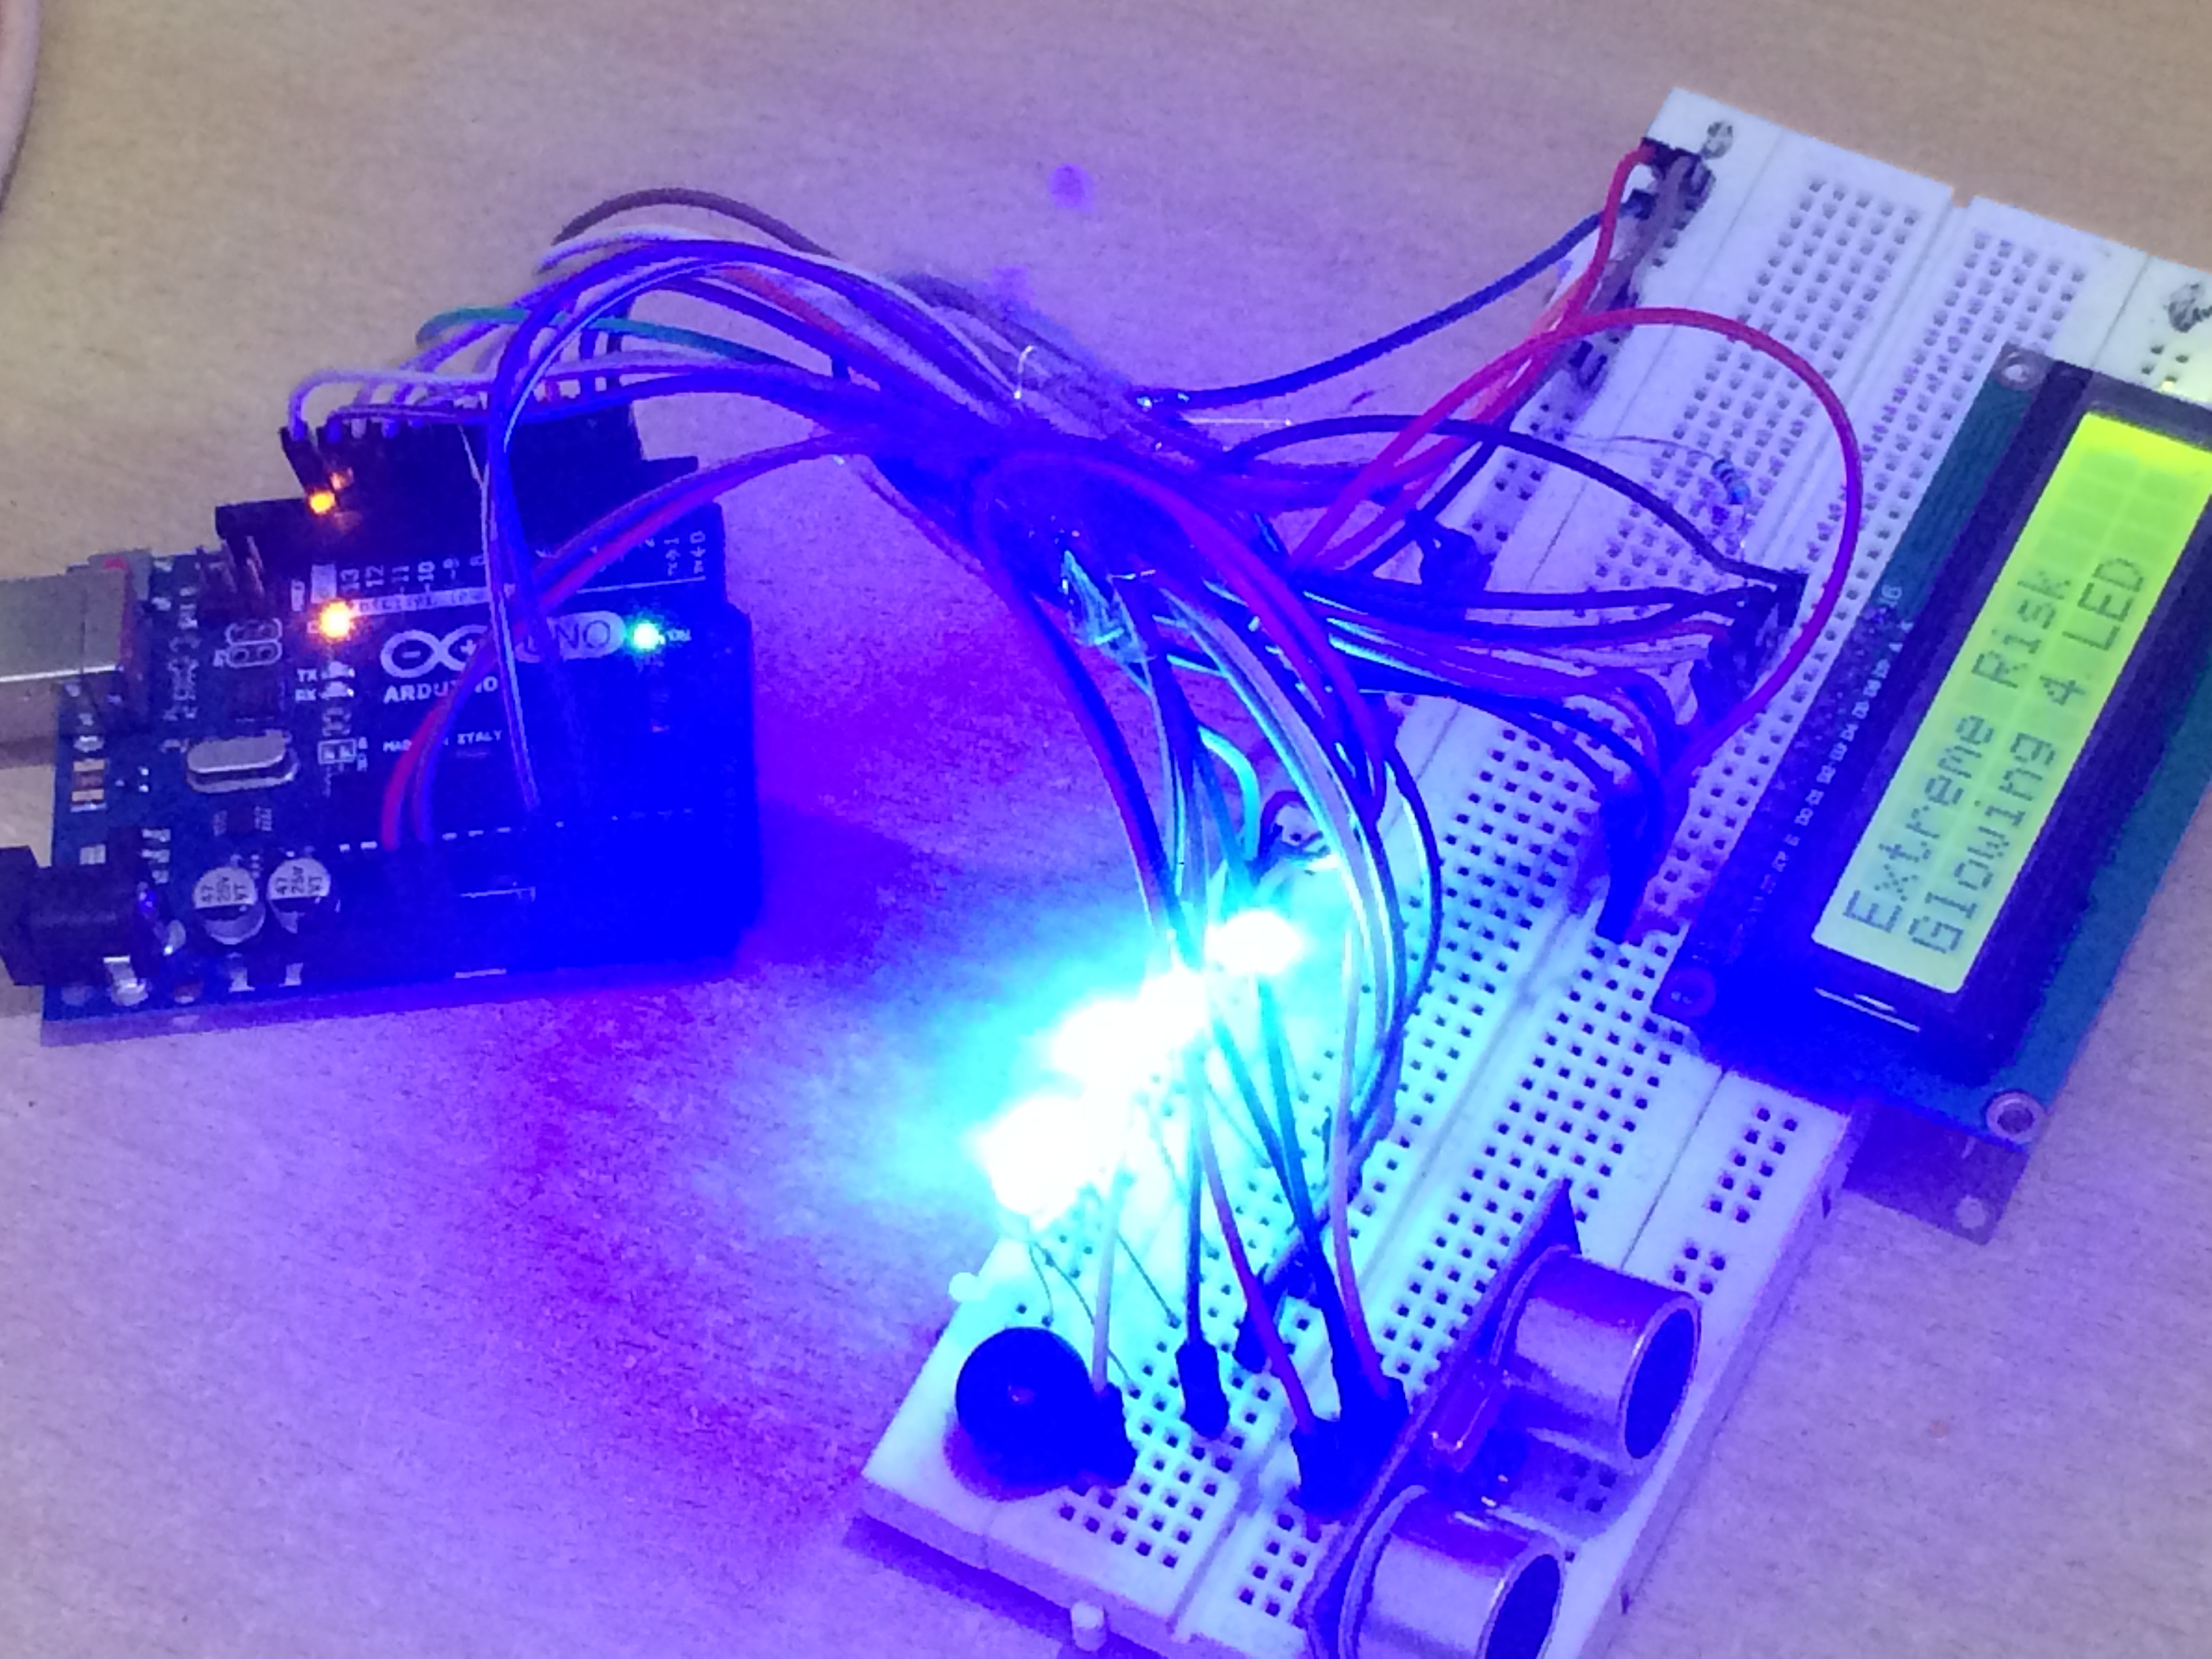
It's Glows different type of LED based on Distance and Make Different type of Alarm
When there is no Object it Glows green LED and Display Safe no Risk on LCD
When there is Object between 150 cm to 250 cm it Glows 1 Blue LED and Buzzer starts Beeping with Different Tune in Gap of 2 Second and LCD Display's Low Risk
When there is Object between 100 cm to 150 cm it Glows 2 Blue LED and Buzzer starts Beeping with Different Tune in Gap of 1.2 Second and LCD Display's Medium Risk
When there is Object between 25 cm to 100 cm it Glows 3 Blue LED and Buzzer starts Beeping with Different Tune in Gap of 0.7 Second and LCD Display's High Risk

When there is Object between 1 cm to 25 cm it Glows all 4 Blue LED and Buzzer starts Beeping with Different Tune in Gap of 0.1 Second and LCD Display's Extreme Risk
Watch Video
Proximity Defense: Ultrasonic Security Alarm
The Ultrasonic Security Alarm is an excellent fusion project. It takes the basic "Ping" distance sensor and elevates it into a complete, standalone electronic product featuring a user interface, visual logging, and audio deterrence.
The Logic of the Safe Zone
The code establishes a variable safeZone = 100 (centimeters).
- Monitoring: The HC-SR04 sensor bounces sound waves down a hallway.
- The LCD: It constantly prints
"Status: ALL CLEAR"and the current distance (e.g.,"Dist: 150cm") on a 16x2 Text LCD. - The Intruder: When someone walks into the hallway, the distance reading drops to 80cm.
- The Breach: Since
80 < safeZone, the Arduino triggers the alarm sequence. The LCD screen wipes and flashes"INTRUDER ALERT!"while a piezo siren blares.
Recommended Hardware
- Arduino Uno/Nano: The command logic.
- HC-SR04 Ultrasonic Sensor: The detector.
- 16x2 I2C LCD Screen.
- Active 5V Buzzer or Relay to a 12V Siren.
- Hidden Reset Button: Used by the owner to disable the alarm after it trips.
Why use an LCD?
Adding an LCD transforms the project from a toy into a tool. It allows you to debug the sensor in real-time (to see exactly where the "ghost" reflections are bouncing off side walls) and allows the user to confirm the system is armed and active before leaving the room.