We used the components of the Elegoo Most Complete Starter Kit
We used a prototyping board because it had more 5V and GNDs
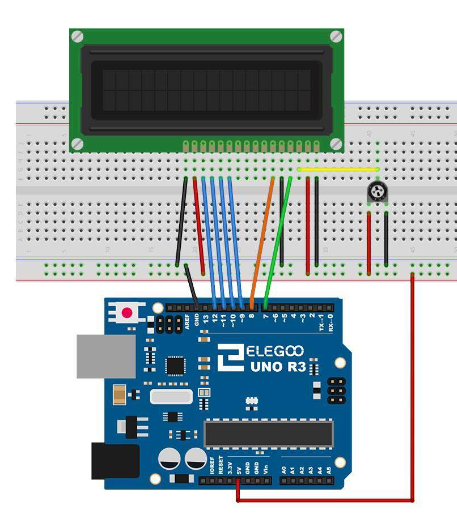
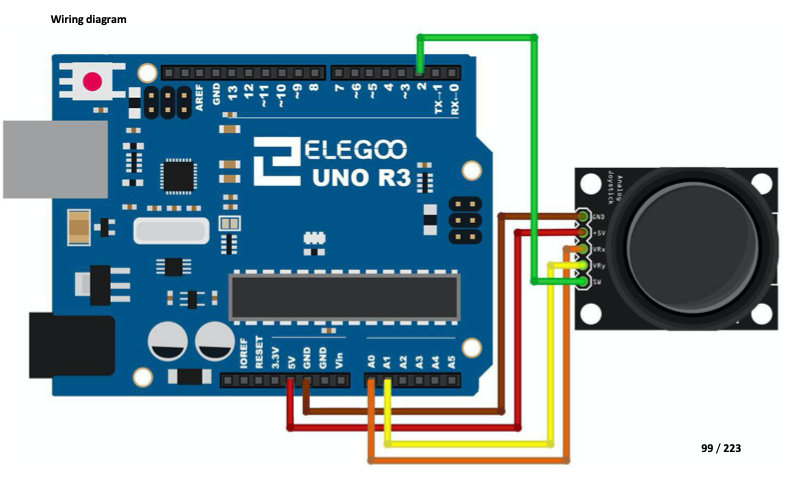
Wire the Analog Joystick and the LCD as described in the Elegoo manual. For the MAX7219 Dot Matrix the pins described on the manual are already in use, so change the pins to 4, 5 and 6 (4=DIN, 5=CLK, 6=CS)
This is the LCD display pinout:
This is the Analog Joystick pinout:
And the video is this:
EXPANDED TECHNICAL DETAILS
Grid-Based Graphical Interaction
This project transforms an 8x8 LED Matrix into a digital canvas, allowing users to draw and save custom icons and animations.
- MAX7219 Segment Scanning: The Arduino manages the matrix via the MAX7219 driver chip. The firmware uses an "8x8 Byte Array" to represent the screen; toggling a bit in the array instantly lights up the corresponding physical LED.
- Interactive Coordinate Selector: Users select pixels using a joystick or two potentiometers. The current cursor position is indicated by a "Blinking LED" on the matrix, with a physical button to "Ink" the pixel.
Performance
- EEPROM Glyph Storage: (Features) Once a drawing is finished, the Arduino can store the 8-byte icon into its non-volatile memory, allowing the user's custom designs to persist across power cycles.