Exploring the Invisible: The Science of EMI Detection
We live in a world filled with invisible energy. Everywhere there is electricity, there are electromagnetic waves. This project, designed for young scientists (ages 9-12), introduces the concept of Electromagnetic Interference (EMI) through a hands-on "Ghost Hunter" style device that translates electrical fields into audible sound.
The Physics of the "Vampire Power" Probe
The EMI detector works on a principle similar to how a radio antenna functions:
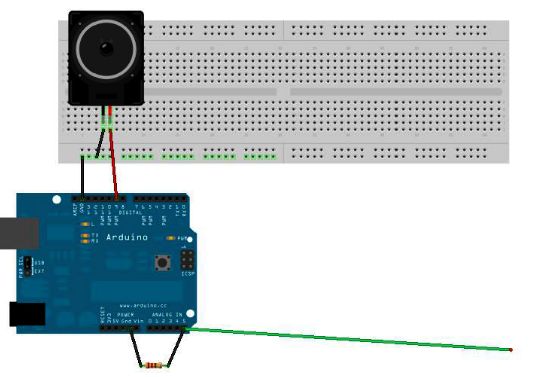
- Antenna Effect: A simple length of wire is connected to the Analog Input (A0) of an Arduino Nano. Because the port is highly sensitive and has very high impedance (especially with the 1M ohm resistor), it acts as an antenna, picking up the stray electromagnetic waves emitted by power lines, appliances, and digital devices.
- Analog Induction: When the probe gets close to a device (like a TV in standby mode), the fluctuating electromagnetic field induces a tiny voltage in the wire.
- Digital-to-Audio Translation: The Arduino reads these micro-fluctuations and outputs a corresponding frequency to a Piezo Speaker. The more "noise" in the air, the louder and more frantic the speaker becomes.
Identifying "Phantom Loads"
This gadget is an exceptional tool for teaching Energy Efficiency:
- Standby Power: Most electronics (clocks, remote receivers) never truly turn off; they draw small amounts of "Standby Power."
- Vampire Detection: Children can use the probe to "see" which devices are still active when "off," identifying the energy vampires in their homes.
- Energy Consciousness: By finding these loads, kids learn the importance of unplugging devices or using power strips to save electricity and help the planet.
Engineering for Portability
To make the activity effective, the device is powered by a 9V battery, making it completely mobile. This is critical because a USB-tethered Arduino would pick up too much interference from the computer, masking the signals from local appliances. Packaged in a custom case, it becomes a durable tool for classroom exploration and home energy audits.
In this tutorial you will learn how a DIY EMI detector works.
You will also understand what electromagnetic interference is, and why it’s important to be aware of it.
Introduction
EMI is a form of electromagnetic radiation: a combination of electric and magnetic waves traveling outward from anywhere that an electrical power signal is changing or being turned on and off rapidly
Where this gadget excels is spotting “phantom” or “vampire” energy loads.
More correctly called standby power, this is the amount of electricity that constantly flows through some electronic devices, even when they’re supposedly switched off or in standby mode. Devices use standby power on features such as digital clocks, remote control reception, and thermometers.
Relatively weak energy efficiency regulations in the United States result in many devices drawing far more wattage than they need in standby mode.
The EMI detector works by capturing the electrical energy coming into the arduino's analog port, and turning it into a sound via the speaker.
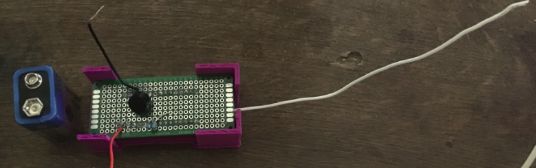
Step 1: Assemble the EMI detector
For the step-by-step, click HERE.
Step 2: Program the EMI detector
Whether you are using an arduino uno or a nano, the code that you will need to upload in order for the probe to function correctly is basically the same.
Just make sure to program the correct digital pin for the piezo speaker. In the instructions above, we connected the speaker on D9 on an arduino uno, and D3 on an arduino nano.
The full arduino code is also available here (or below).
Because Arduino is connected by a USB cable to your computer, it is receiving a flood of electromagnetic interference from the computer. Even worse, that EMI is being pumped into Arduino via the USB cable. To make this detector really work, we’ve got to go mobile.
A fresh 9-volt battery should be enough to get this gadget running.
Your Arduino should start up normally: the LEDs mounted on the Arduino board should flash, and within a few seconds the EMI code should be up and running.
Step 3: Activity Idea for Kids
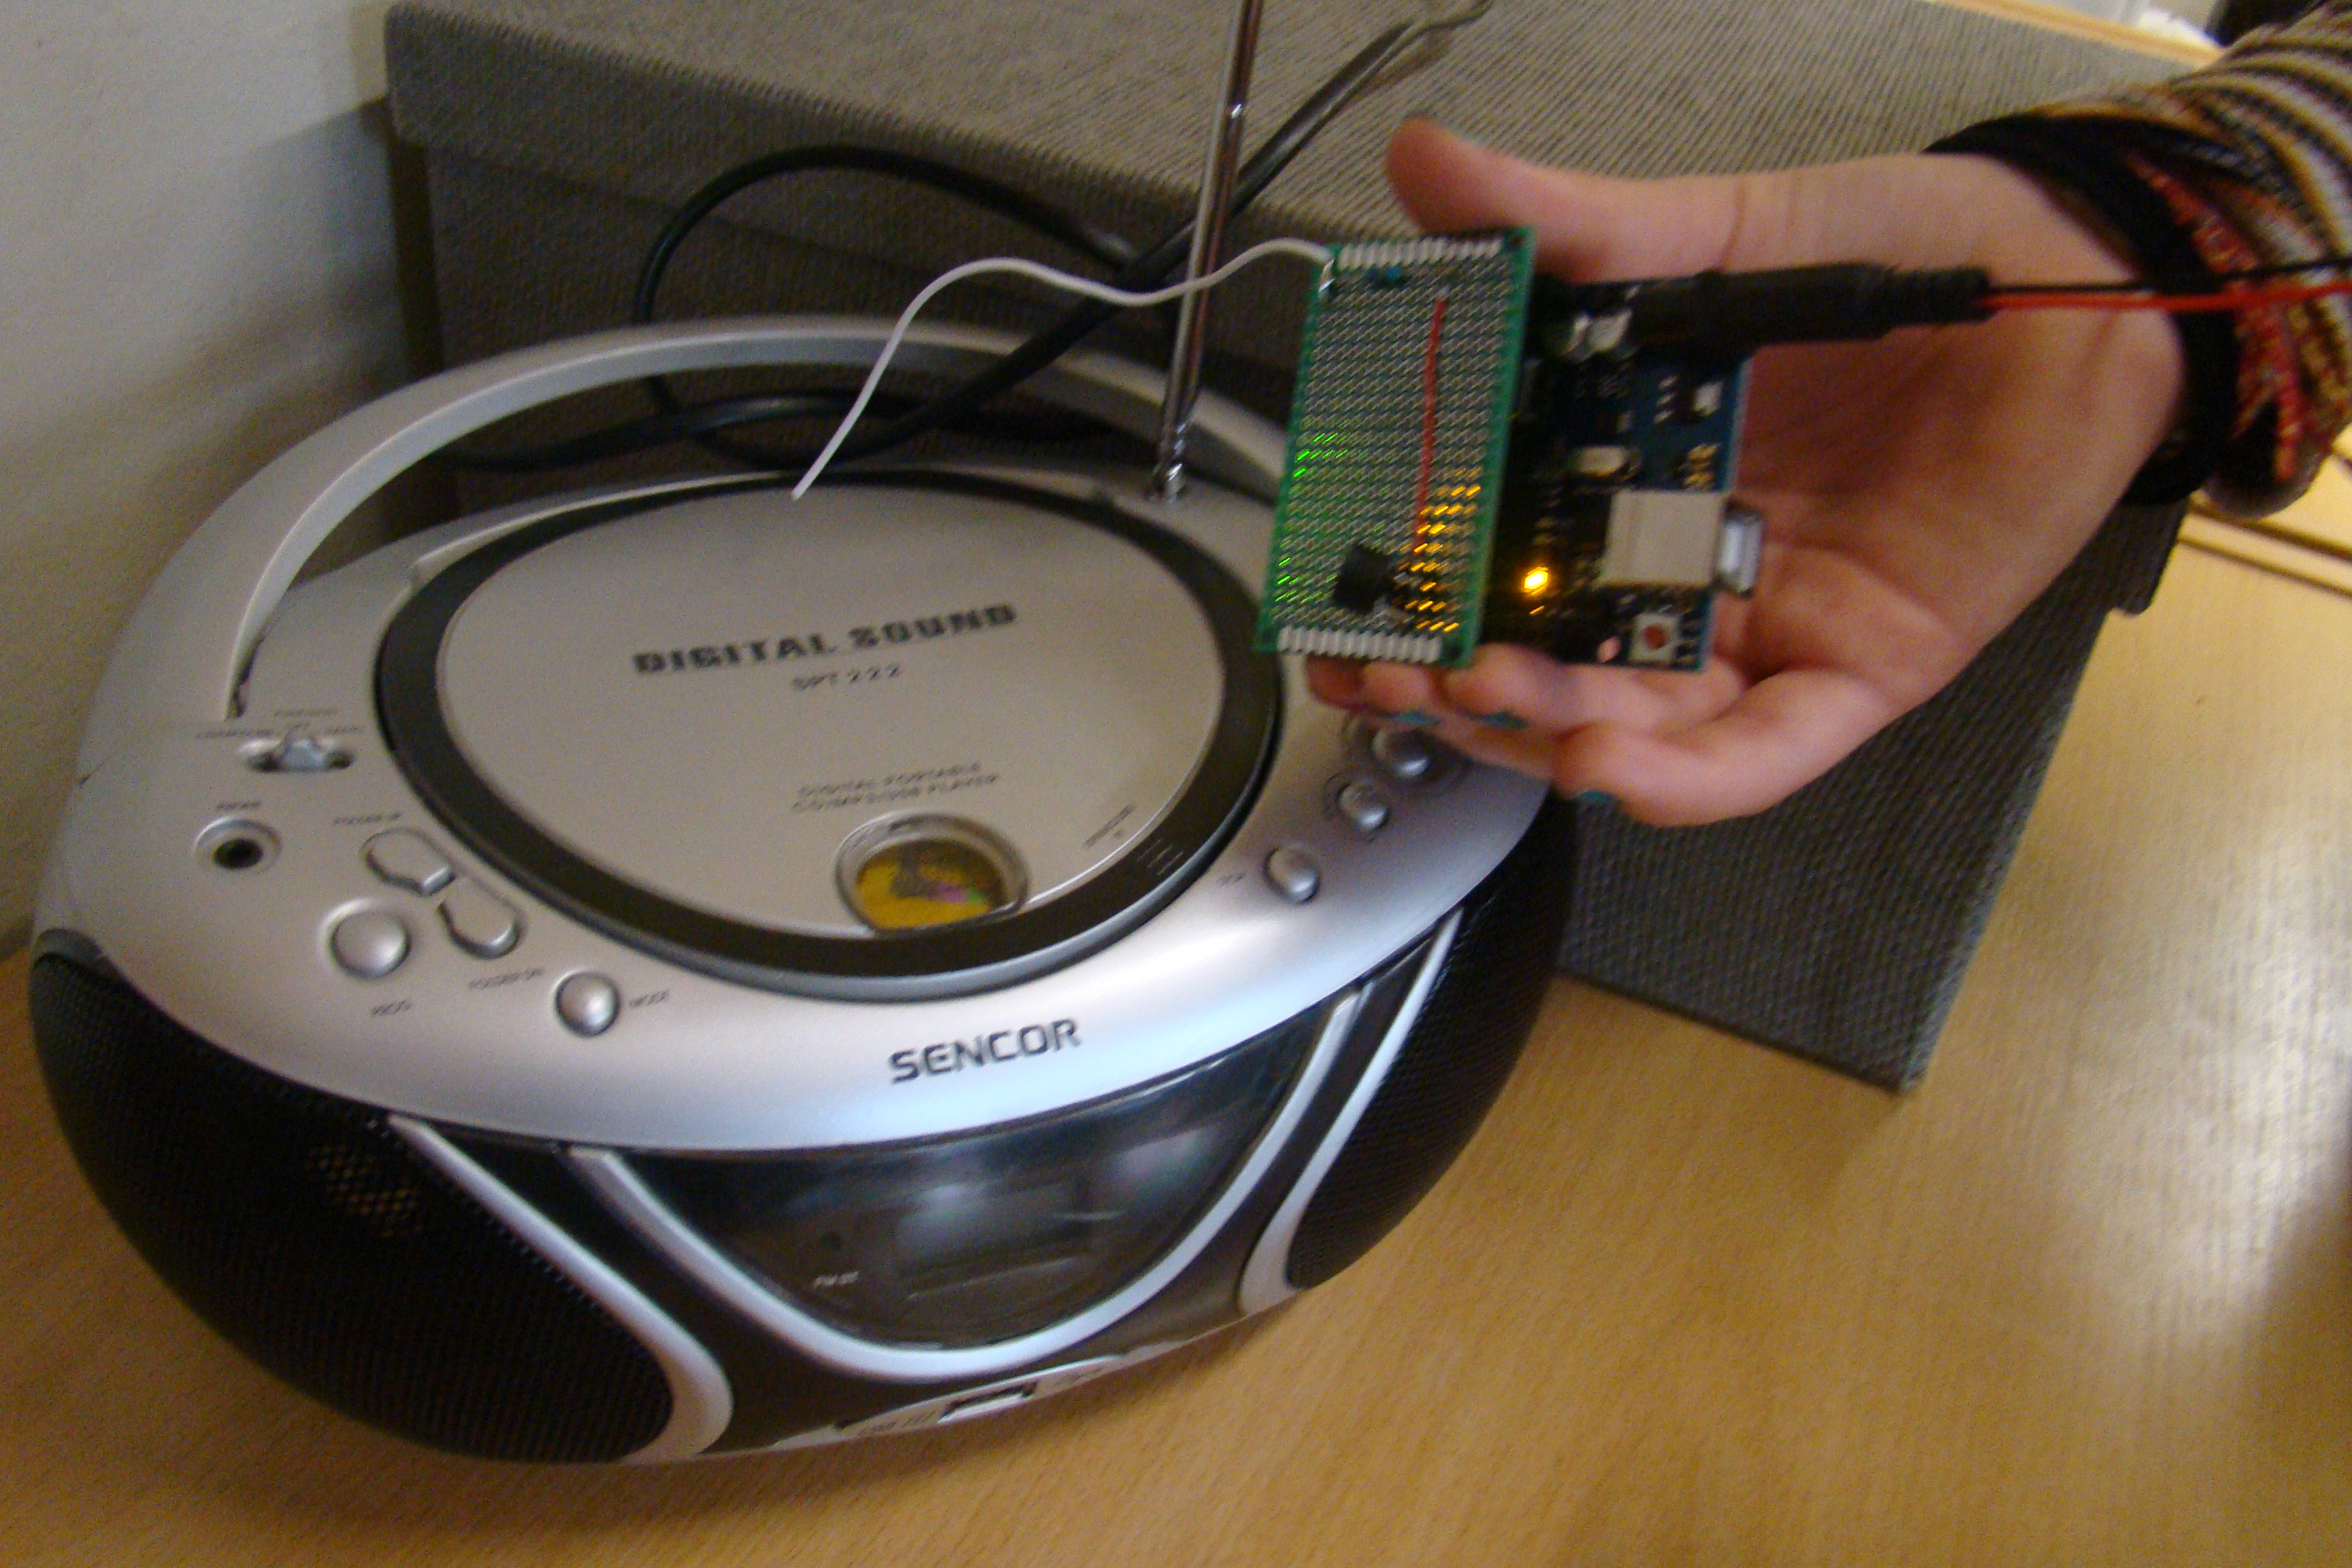
You can use the EMI probe to compare and contrast EMI radiations deriving from different electronic appliances.
Hold the probe next to a stereo system or a TV whilst these devices are in standby mode, and you ll probably get a similar reading to a laptop when this is turned on.
Let kids discuss or write on a board which electronic appliances readiated EMI and discuss why this is relevant to the environmental topic of energy saving.
Once you ve found out which electronic appliances radiate the biggest amount of EMI when in standby mode, you can learn ways to eliminate vampire power. There are several options how to do that:
- Unplug electronic appliances and chargers when you don't use them.
- Set devices to energy save mode.
- Use a power strip to turn all electronics off at the same time.

This tutorial has been produced as part of the DEEDU project, co-financed by the Erasmus + Programme of the European commission. Project n°: 2018-1-FR02-KA205-014144.
The content of this publication does not reflect the official opinion of the European Union. Responsibility for the information and views expressed therein lies entirely with the authors. For more information, email us at info@digijeunes.com.