Eco-Conscious Robotics: The EscoriaBot Journey
EscoriaBot is more than just a remote-controlled tank; it is a manifesto for sustainable engineering. Born from a childhood dream inspired by R2-D2 and realized through the philosophy of recycled electronics, this project demonstrates how "waste" materials can be transformed into a high-performance, caterpillar-drive robotic platform.
Sustainable Engineering: Discard to Dashboard
The core of EscoriaBot is built on the principle of "Circular Robotics." Instead of purchasing expensive pre-made chassis and motor kits, this project leverages components salvaged from discarded office and household tech:
- Recycled Motive Power: Printer motors and gearboxes rescued from "vampire" devices provide the high-torque output needed for a 60cm tank.
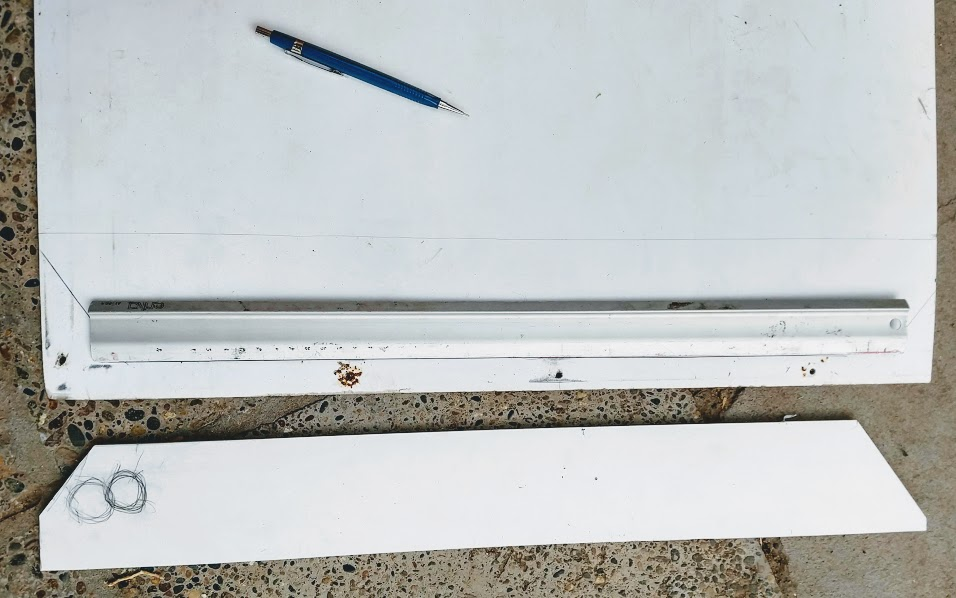
- Upcycled Structural Materials: The chassis is fabricated from dense poster plastic foam—a durable, easy-to-cut material often found in discarded advertising signage.
- Salvaged Electronics: Passive components like LEDs, capacitors, and resistors are desoldered from broken devices, reducing the project's environmental footprint.
Advanced Mechanical Design: The Sherman-Style Bogie System
To overcome rough terrain that stops most standard hobby kits, EscoriaBot utilizes a sophisticated Bogie Suspension system inspired by the legendary Sherman tank.
- Terrain Adaptation: The wheels are mounted in pairs that oscillate, allowing the track to maintain maximum contact with uneven ground.
- Recycled Axles: Broken tent fiberglass rods are repurposed as lightweight, high-tensile axles for the wheel system.
- Fabric-Core Tracks: The caterpillar tracks are constructed from plastic plates glued to a strip of heavy-duty fabric, ensuring flexibility while maintaining the necessary pitch for the drive sprocket.
Command and Control: Arduino Mega Power
At the hardware level, EscoriaBot requires the extensive I/O and memory of the Arduino Mega 2560 to manage its complex navigation tasks.
- Motor Drive: An L298N Dual H-Bridge handles the heavy current requirements of the recycled motors, allowing for precise forward, reverse, and skid-steering maneuvers.
- Bluetooth Link: An HC-05 module provides long-range wireless control, enabling the user to pilot the 60cm behemoth via a smartphone or custom Bluetooth transmitter.
- Memory for Expansion: The Mega’s large flash memory allows for future upgrades, such as autonomous obstacle avoidance using ultrasonic sensors or GPS-guided wayfinding.
Since I saw R2-D2 more than 40 years ago in my childhood I wanted to have a robot.
But there was a great barrier between me and my dreams, the Electronics and this problem remained for many more years.
As a user, an advocate of free software, I had heard of arduino but it seemed too difficult for me until my friend Gustavo helped me choose my first kit.
I put it together and kept going.
I did not like the chassis because it was stuck with any obstacle I decided to make my own chassis And it worked but I wanted something more powerful
So I started looking for alternatives and researching I found several YouTube channels such as The Post Apocalyptic Inventor or Espacio de César where I realized that I could take advantage of many discard devices and incidentally make the planet cleaner.
I started looking for all kinds of gadgets from which I could get parts.
I started recycling printer motors, and as I was learning I rescued more and more parts.
Today I disassemble all kinds of devices and take advantage of many more parts, such as gears, gearboxes, LEDs, capacitors, resistors, etc.
I ended up making two versions: a 60 cm long x 37 cm wide caterpillar robot called EscoriaBot and another more modest 36 cm x 25 cm called BotSura
It is made from recycled poster plastic, I don't know what type of plastic it is but it seems like a very dense foam, anyway it could be made of any type of plain material or recycled plastic.
Plans of the robot The plans are made in inkscape to the scale of the final robot but can easily be scaled.
https://drive.google.com/file/d/1gIeu_Nfqf8OKlPs3iF4hUQFp0k1Tc_Qh/view?usp=sharing
The repository
https://github.com/EstebanJPagano/EscoriaBot
Story in Spanish
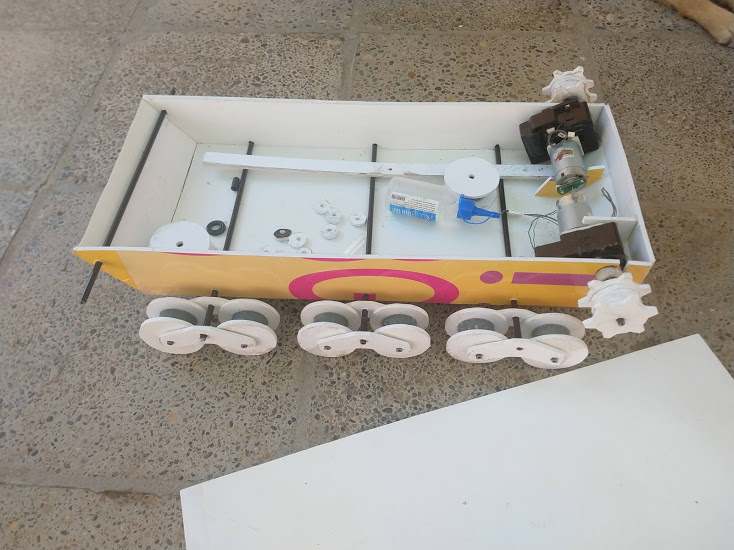
Step 1: The chassis
The chassis is large to be able to mount various things on top.
It is a box with the tips at an angle which helps to overcome obstacles.
It is a good idea to make the holes before cutting, if the design is well decided.
Step 2: The wheels
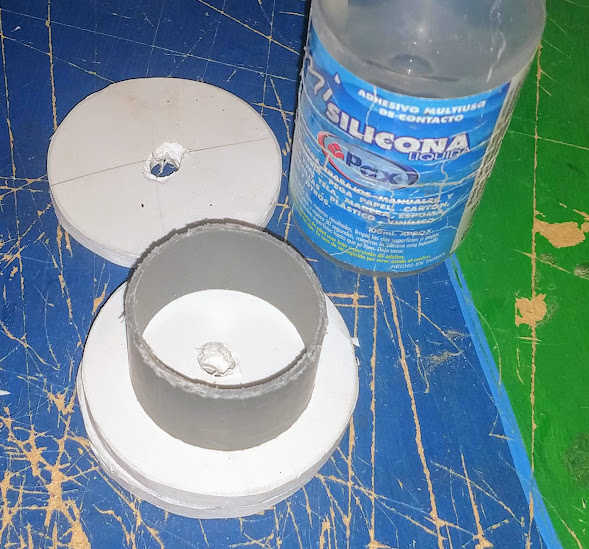
The wheels are made of two circles joined by a piece of smaller diameter tube in the middle and glued together with silicone.
In my case everything is cut with a cutter and perforated so they are not super precise, I also realized that they did not need to be perfect for them to work well.
To make sure they were straight, I put them on a recycled fiberglass rod of broken tents and rotated them, since the silicone allows corrections, I used to make sure they rotated as perfectly as possible.
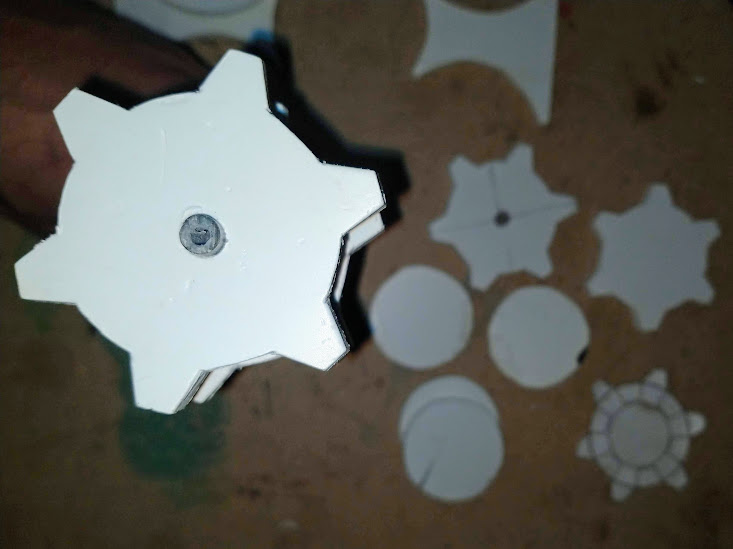
Step 3: The bogies
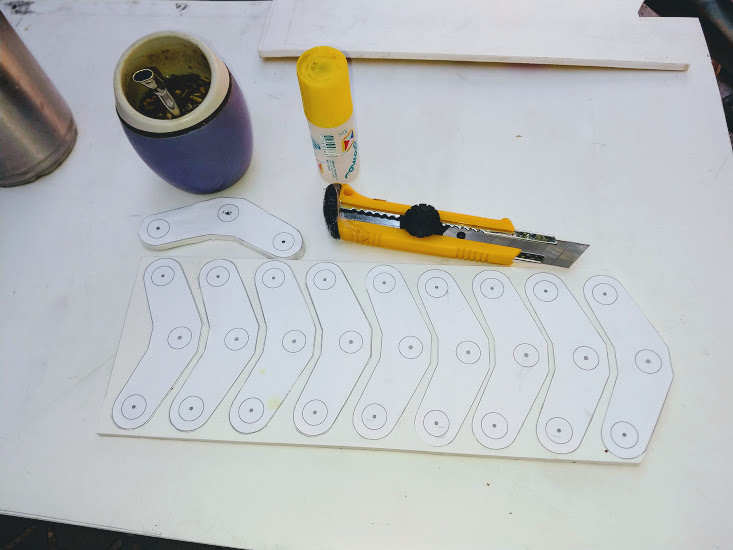
Then design the bogies based on the Sherman tank design, this allows the wheels to adapt to the terrain and to better overcome obstacles.
For this I printed the patterns that appear in the plans and then cut and pasted them on the plastic to cut them.
Of course all this with a cnc would be much easier but I don't have one (for now) and I still like to do things by hand.
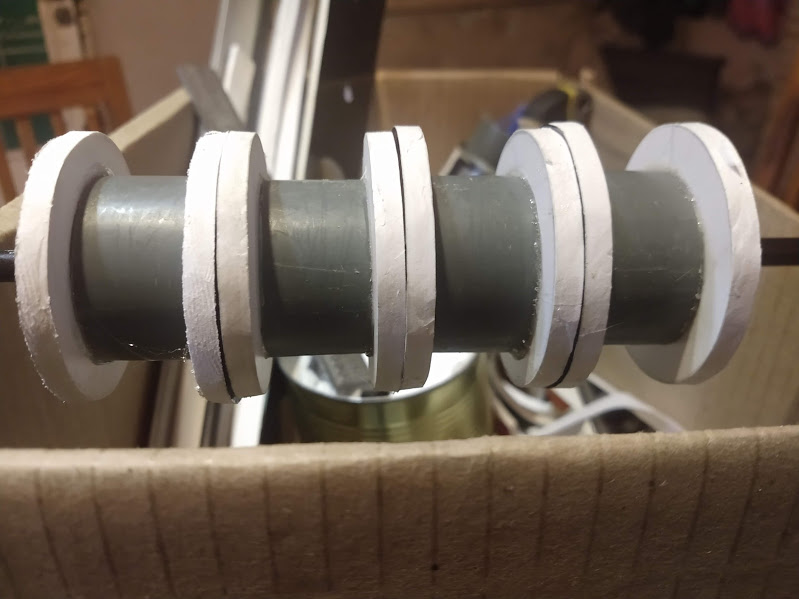
Then I assembled the bogies using fiberglass rods as axles
To align the wheels, I decided to go through the entire chassis with fiberglass rods to make sure everything was aligned and incidentally give the chassis more rigidity.
Step 4: The drive wheel
Now comes the complicated.
In the past I had made tracks whose drive wheel worked by rubbing on the track but this is not the way that those of track vehicles work and it is not the best way either since it loses power in friction and also often turns false.
So design a track that is simpler than a tank and also simple to make by hand. made of plastic plates that mesh with gears.
Step 5: The caterpillar
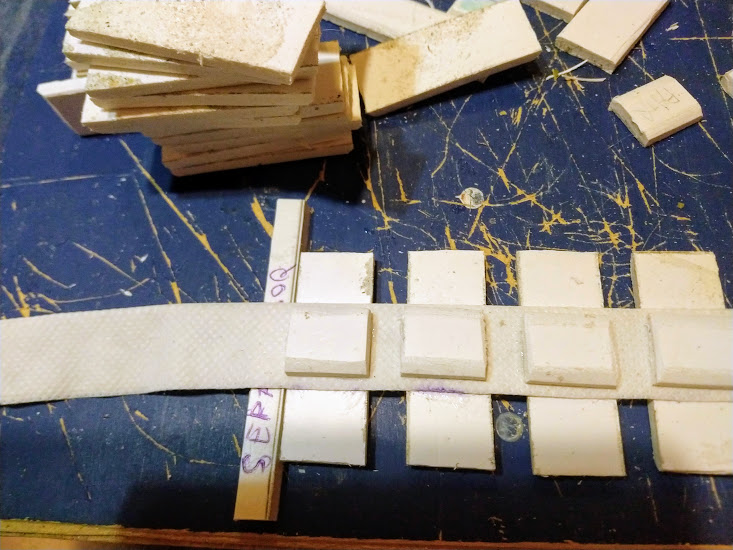
Once the gears were designed and cut, I measured the distance between them and cut some plates that would be the links, when I was happy I put it together by gluing the piece on a strip of fabric that connects the links.
When I glued the first pieces I already had the measurement that separates the links and with this I made a separator to make sure that the distance was always the same.
I also measured and glued some center pieces that keep the track aligned fitting inside the grooves of the wheels, this is important to make sure they do not come off, they have all their sides beveled so that they fit well.
Another problem is that the tracks lost tension, vibrated a lot and came out especially when turning backwards,
That's why I put two wheels on top of the chassis so that the track wouldn't hang on the volve.
I also made some grooves to the chassis where the front axle is, which allows the axle to be tensioned using two elastic bands. With this I managed to minimize the problem of vibration.
I also added two strips of fabric to the outer and inner sides of the tracks which makes them stiffer and better mesh on the sprocket and won't come off.
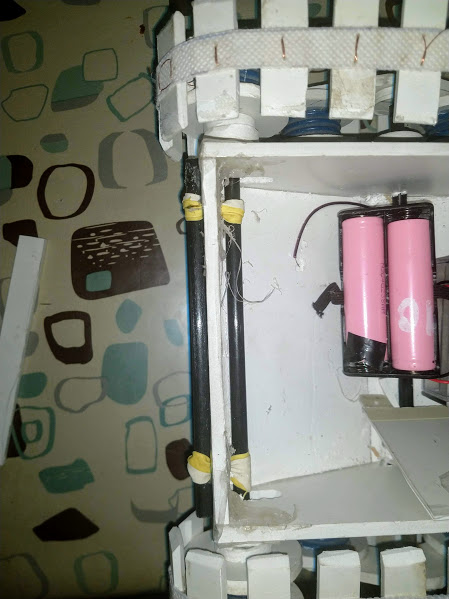
Finally I installed the electronics which is an Arduino Mega with an HC-05 Bluetooth module and an L298N.
I am Spanish-speaking and I translated this article with Google translate.