Executive Summary
We have two cats. Lily is overweight and needs to be on a restricted diet. George is very small and does not eat a lot, but when hungry will get food from wherever he can find it. Without this project we have to put out Lily's bowl in the morning with a premeasured daily amount to let her eat, and then put it up someplace where George can't get to it. When Lily yells for more (several times a day) we have to get the bowl down and feed her. If we forget to put it back up, George will eat the premeasured, special food that only Lily gets, and now Lily has been shorted!
This project uses a load cell and Arduino Uno to control a servo that covers Lily's bowl when she is not around so George cannot get to it. I've calibrated the system to know which cat is on the feeding platform. If it senses a big cat (Lily) the servo actuates to allow her to eat. As soon as she steps off the platform, the servo covers the bowl. When the system senses a little cat (George) nothing happens! I have also added a momentary switch to move the cover out of the way to allow the bowl to be filled.
Technical Implementation: Sensing and Control Logic
The project reveals the hidden layers of a simple weight-sensing-to-mechanical-action interaction:
- Identification layer: The Arduino Uno acts as the central processor, continuously reading high-resolution weight data from the load cell via the HX711 amplifier module.
- Conversion layer: The HX711 uses a high-speed serial protocol to send precise 24-bit weight measurements to the Arduino, enabling accurate differentiation between the two cats.
- Mechanical Interface layer: A standard servo motor provides the physical actuation to cover and uncover the food bowl based on the Arduino's commands.
- Processing Logic: The Arduino code follows a "state machine" strategy: it interprets the weight on the platform, compares it to calibrated thresholds (for "big cat" vs. "little cat" vs. "no cat"), and triggers the servo to open only for the authorized cat.
- Calibration & Feedback Loop: Initial calibration is critical. The system must be taught the weight of the platform itself (tare) and then a known weight to establish a scale factor. Status and raw readings are sent to the Serial Monitor for debugging during this setup.
The Details
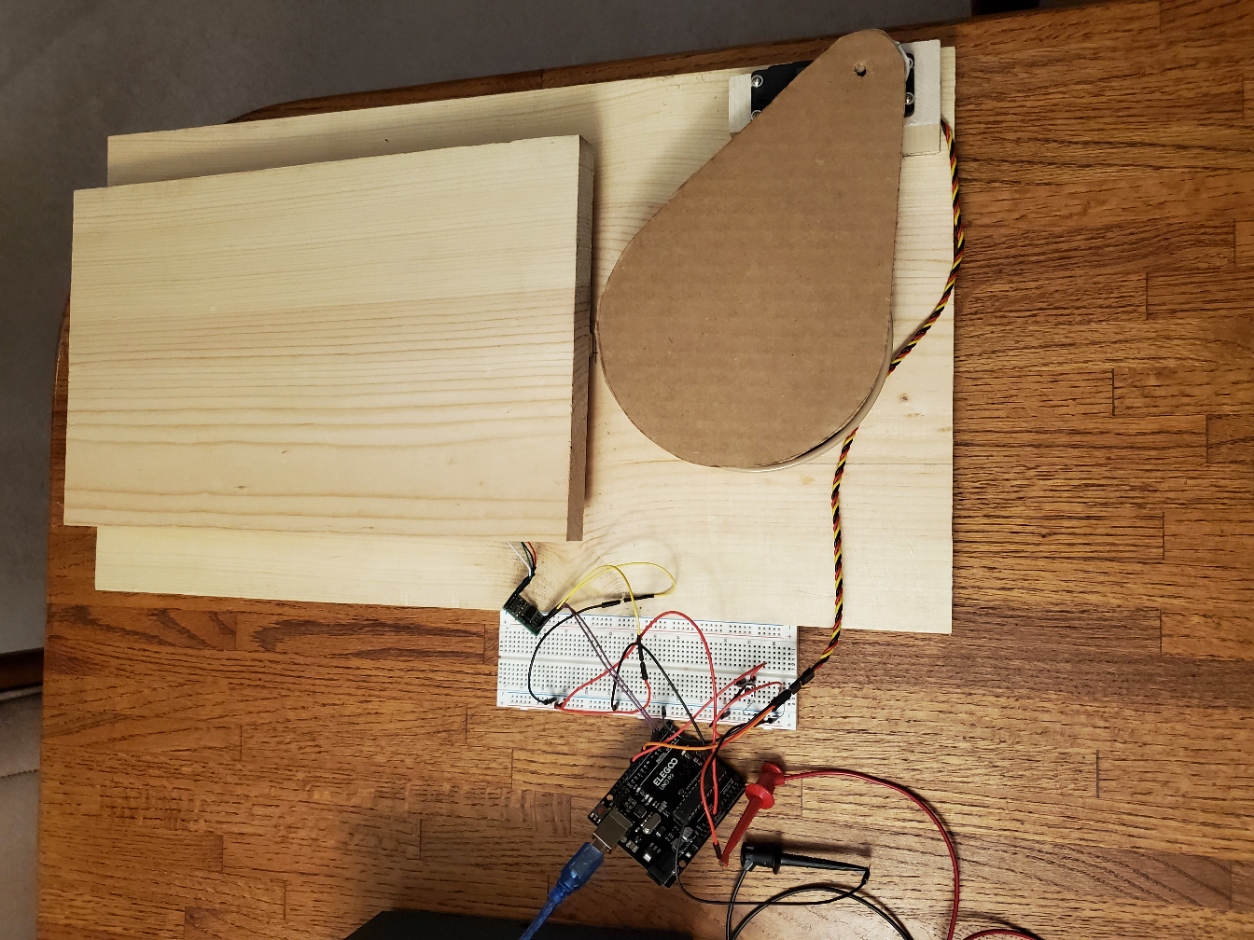
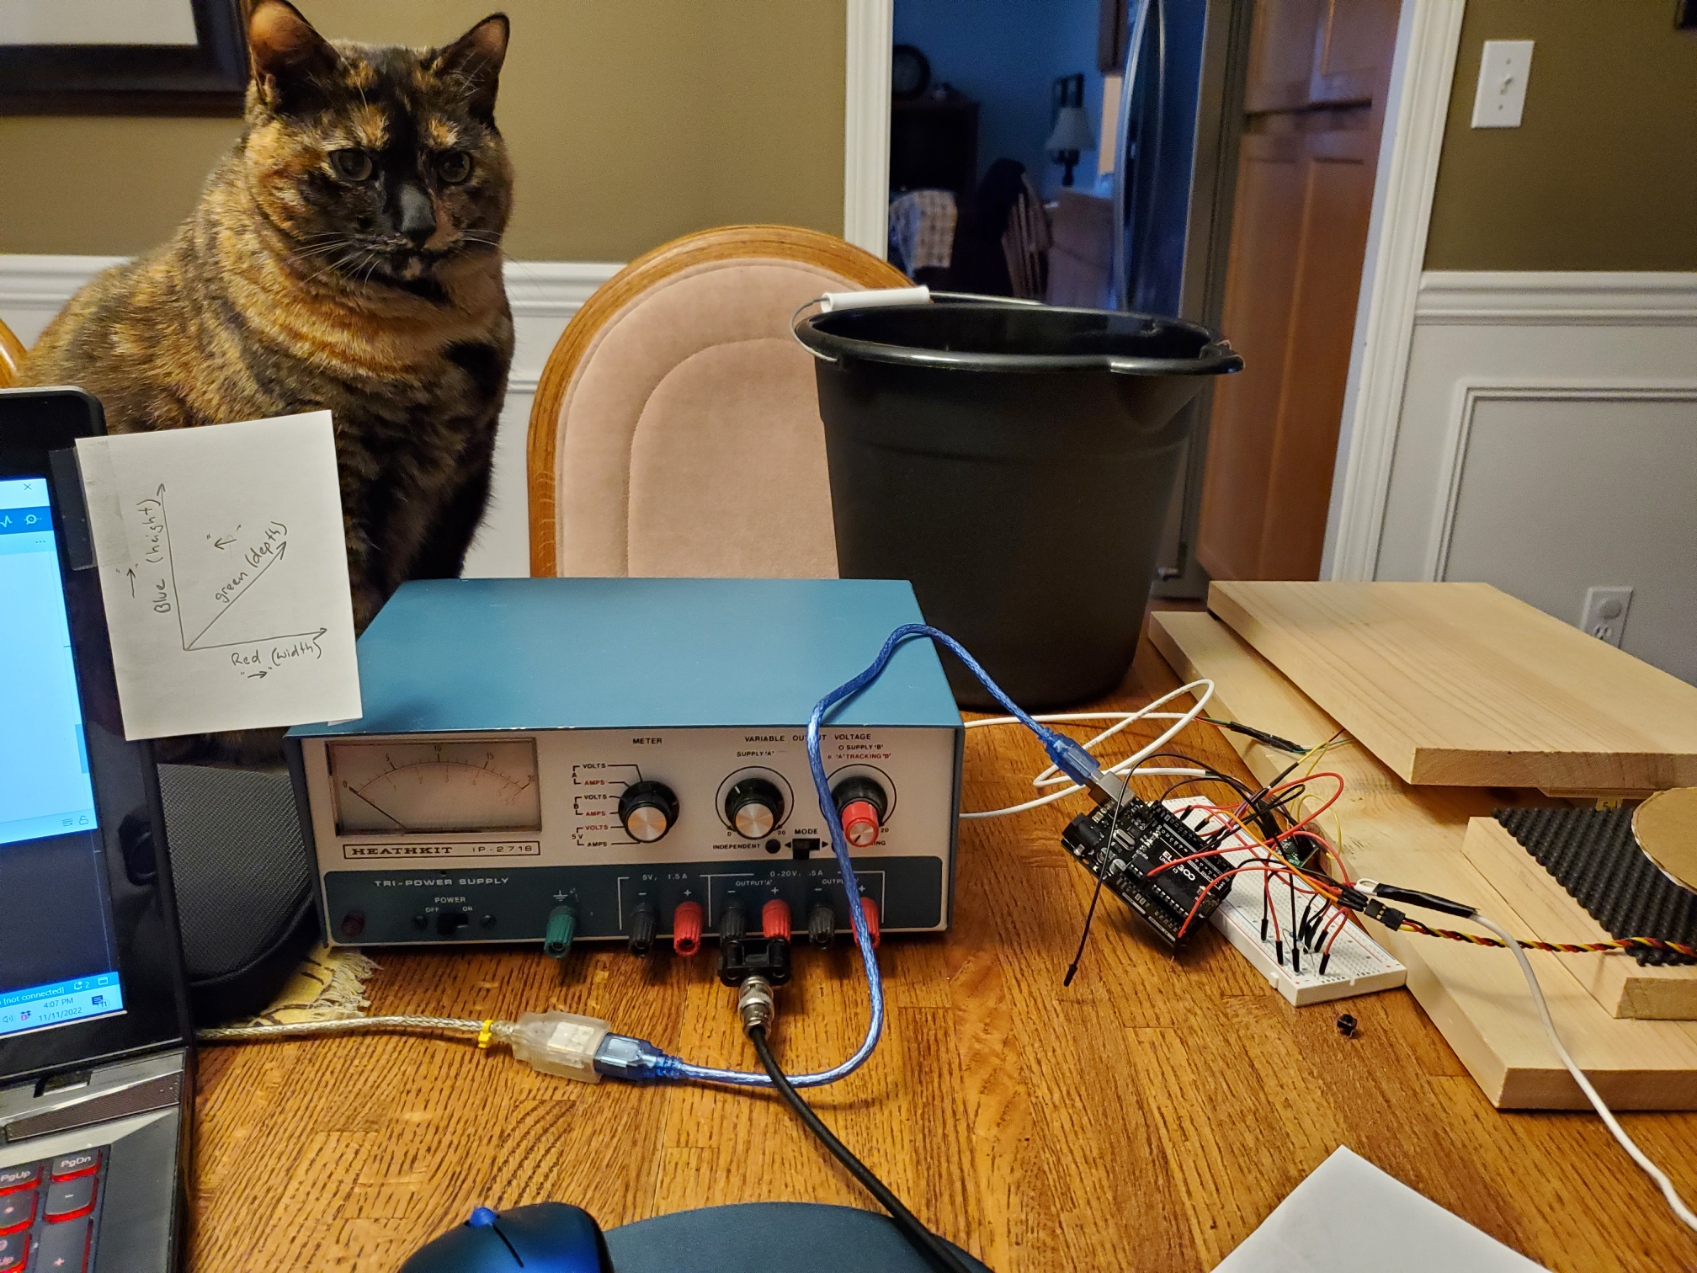
It took a few days to get the whole system set-up in what I call "test bench mode". It included the actual load sensor (mounted temporarily between two small pieces of hobby plywood), HX711 module, Arduino Uno, bread board, and a cheap tiny servo. This allowed me to start understanding how the load cell works, and developing the software right away. This was my first Arduino project so it took some time to just get the basics working! Many thanks to those in the work attribution section - this project would not have happened without you!
I was not familiar with the load cell and HX711 module and I highly recommend the test bench/breadboard mode to learn all the ins and outs of the hardware and software if it is new to you as well. The Electropeak article was VERY helpful (although I could not get their code to work). The info on hooking up the sensor and how it all works was really well done! This simple test bed set up was also helpful in learning how to calibrate the load cell, which took some time to figure out, but is critical to understand before you construct the full size system and expect it to work! I've added comments in the two sketch examples that should explain how to calibrate your particular load cell.
Hardware-Software Infrastructure
- Arduino Uno: The "brain" of the project, managing the continuous weight sampling and coordinating servo control logic.
- Load Cell & HX711 Amplifier: Providing the precise "measuring link" for detecting which cat is present.
- Servo Motor (HiTec): Providing the reliable physical interface to block or allow access to the food bowl.
- Momentary Push Button: Allows manual override to open/close the cover for bowl refilling.
- Breadboard & Jumper Wires: A convenient way to prototype the initial circuit and connect all components without soldering.
- Dedicated 5V Power Supply: Essential for powering the larger servo independently to prevent damaging the Arduino's voltage regulator.
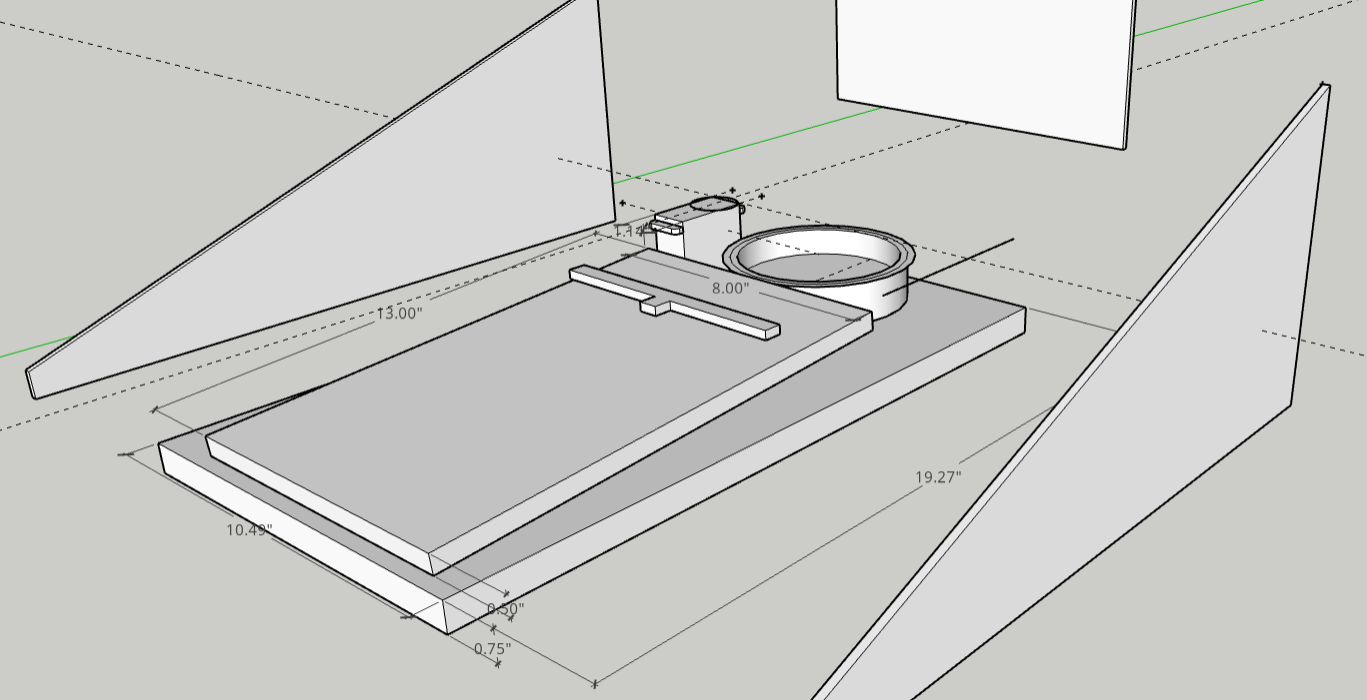
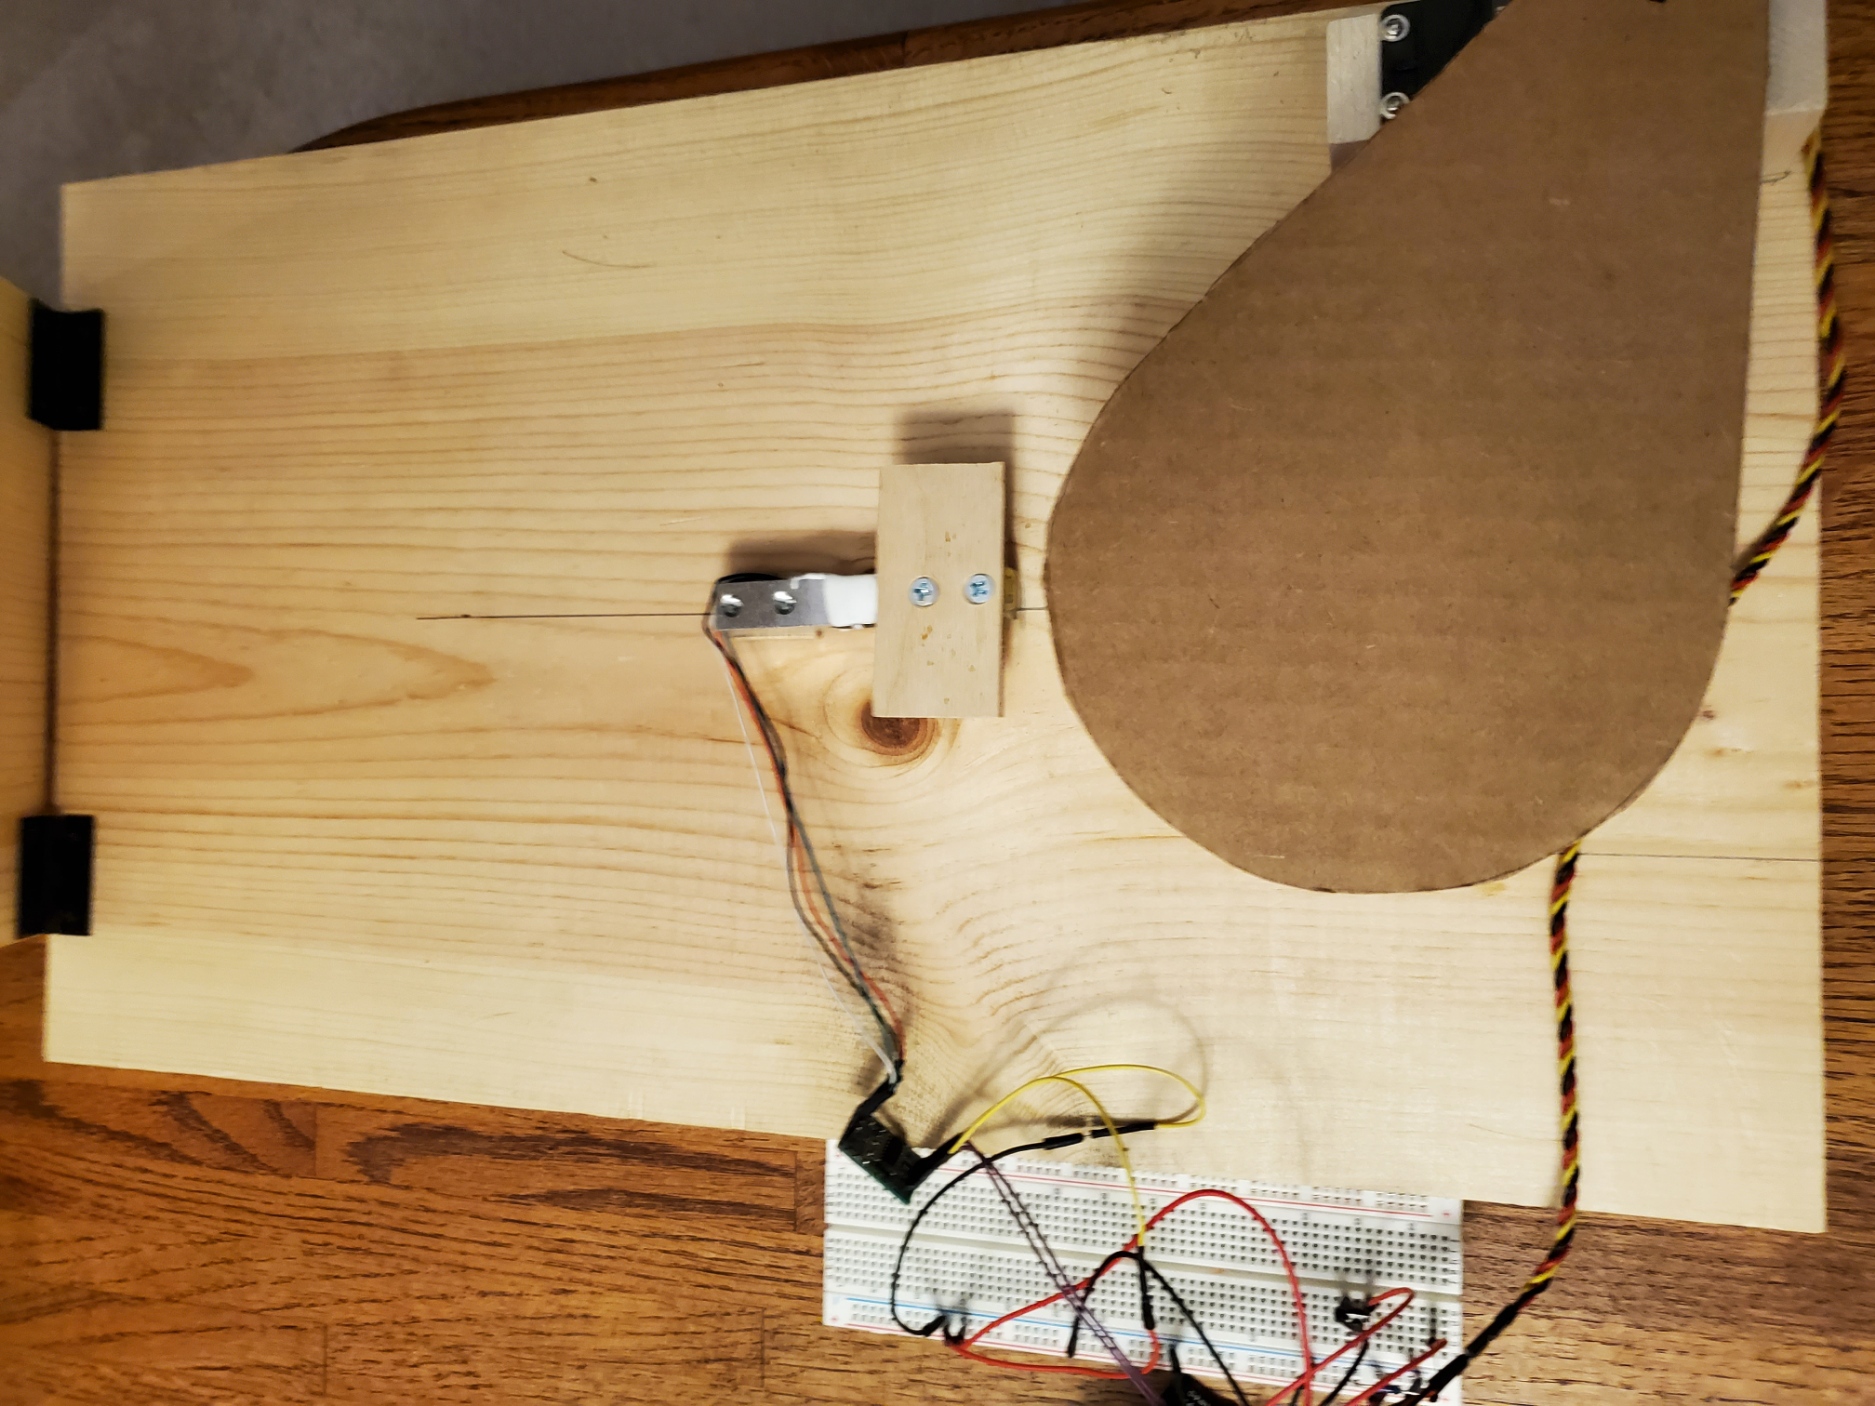
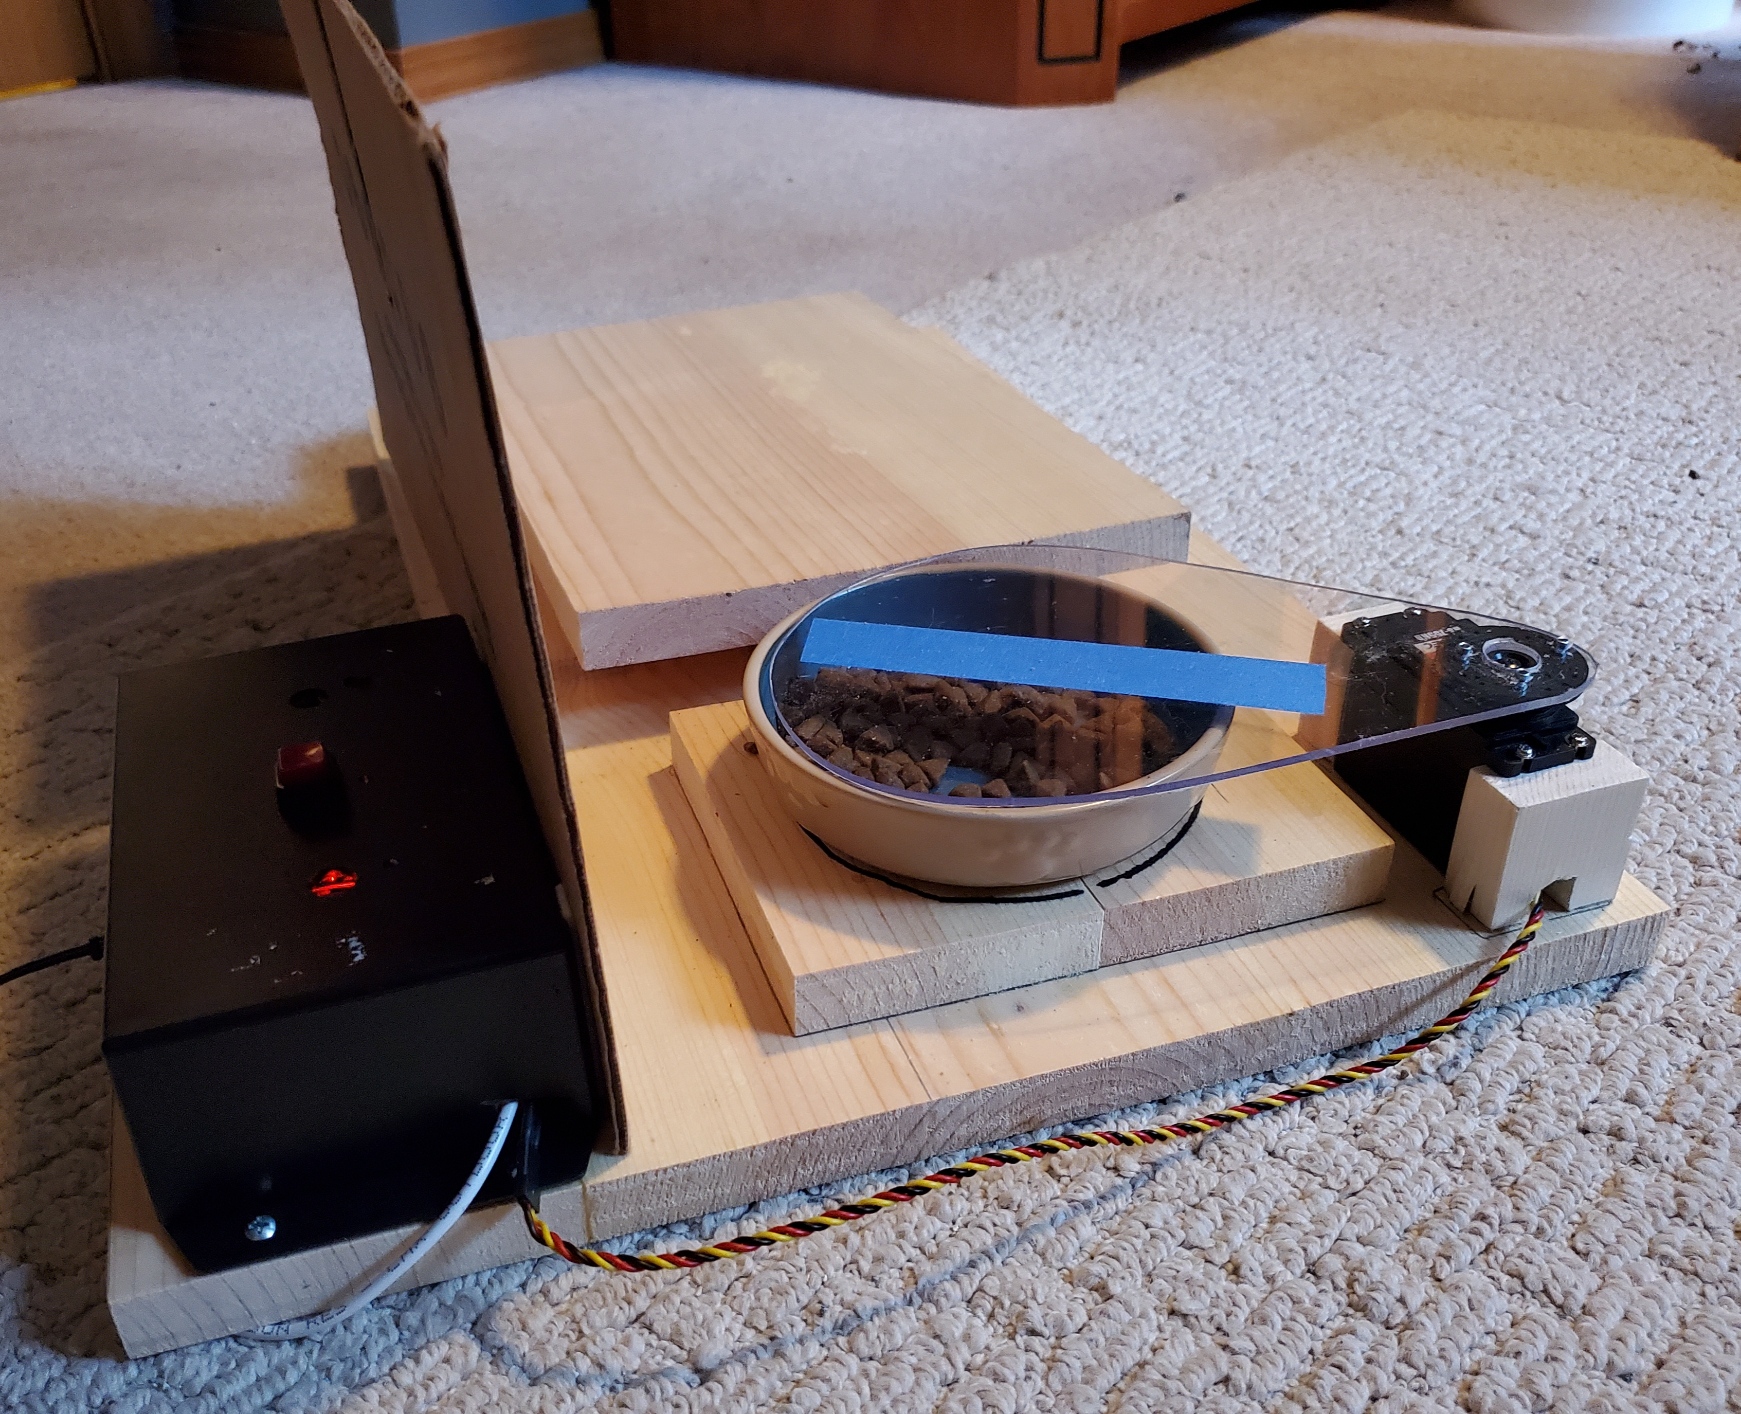
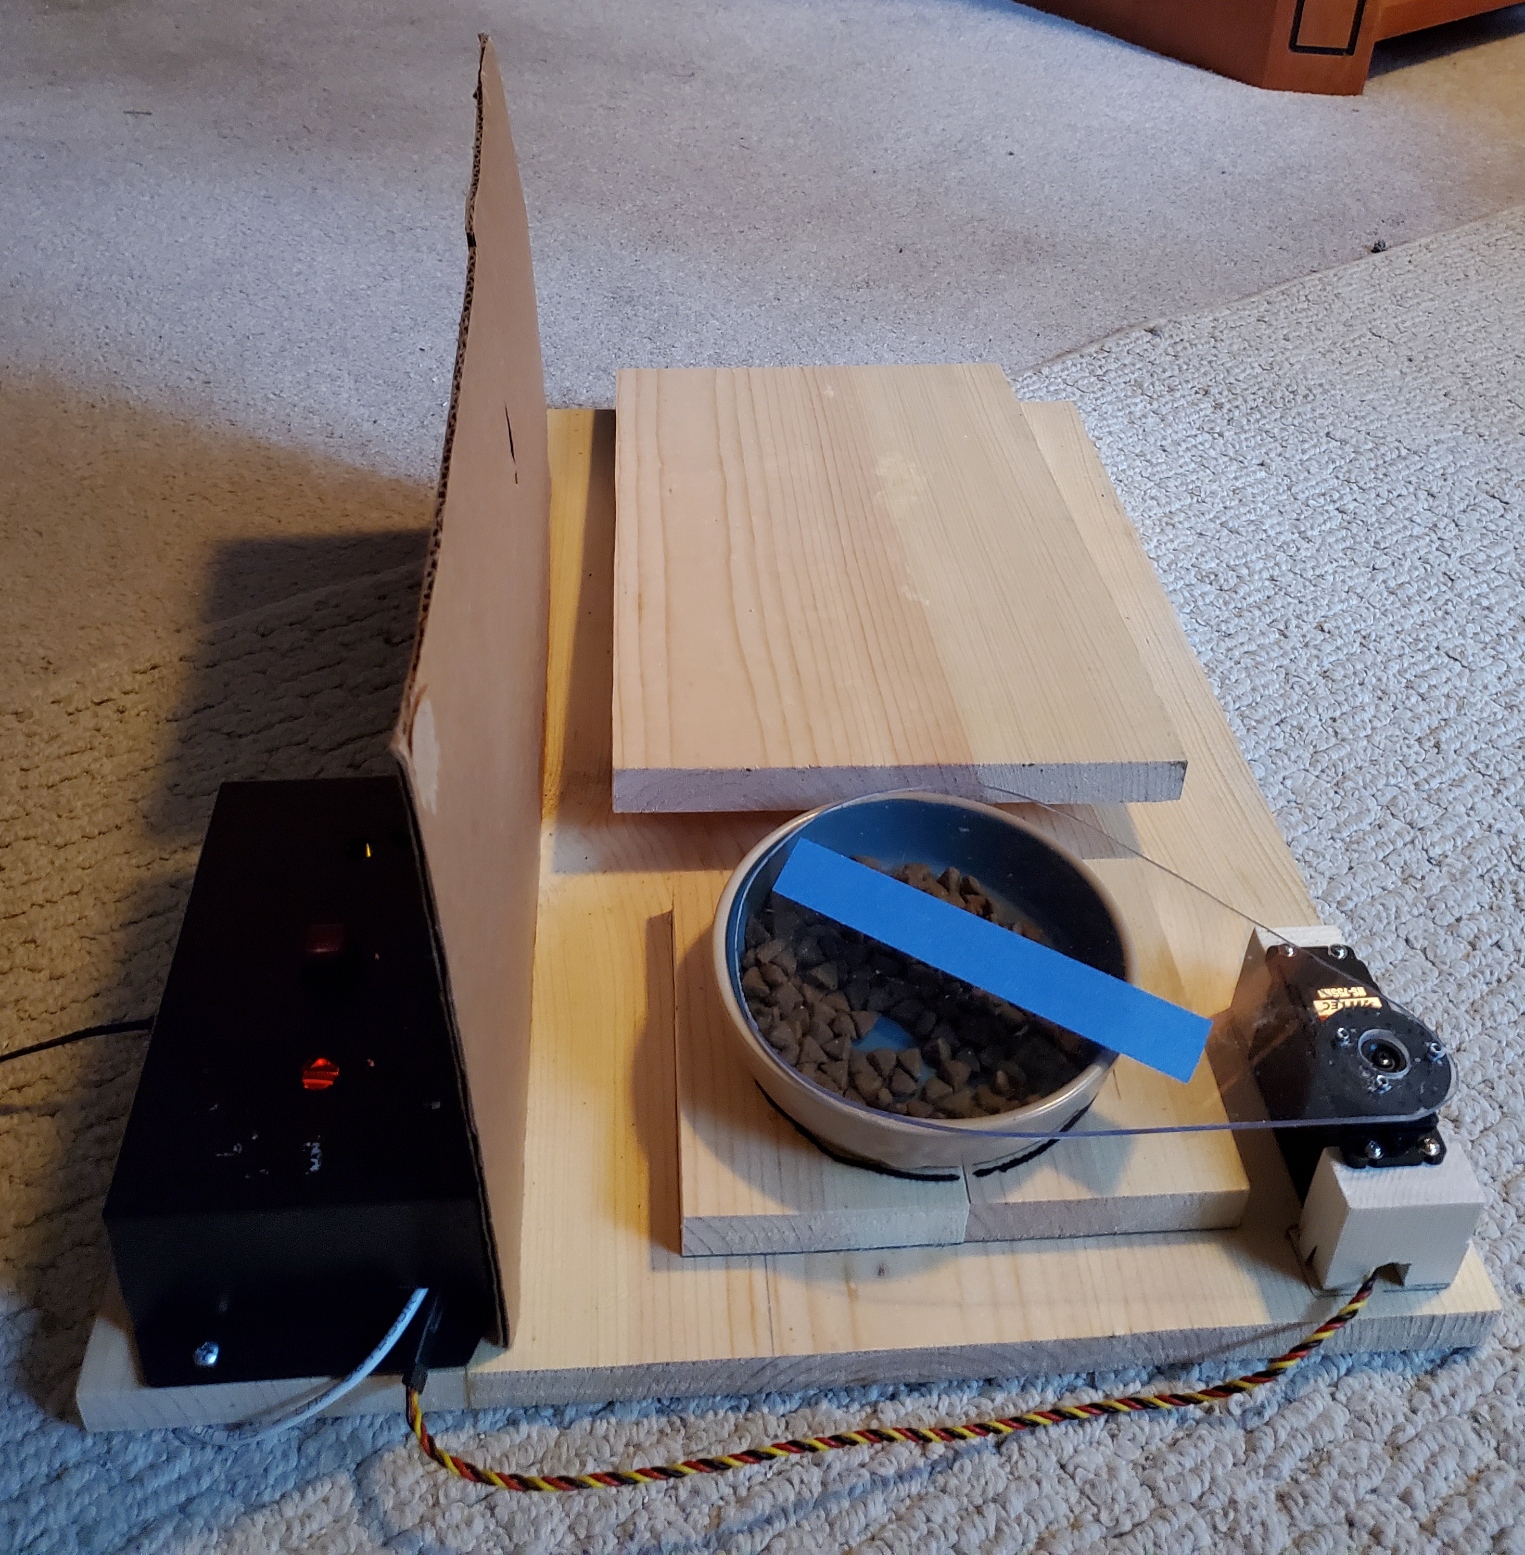
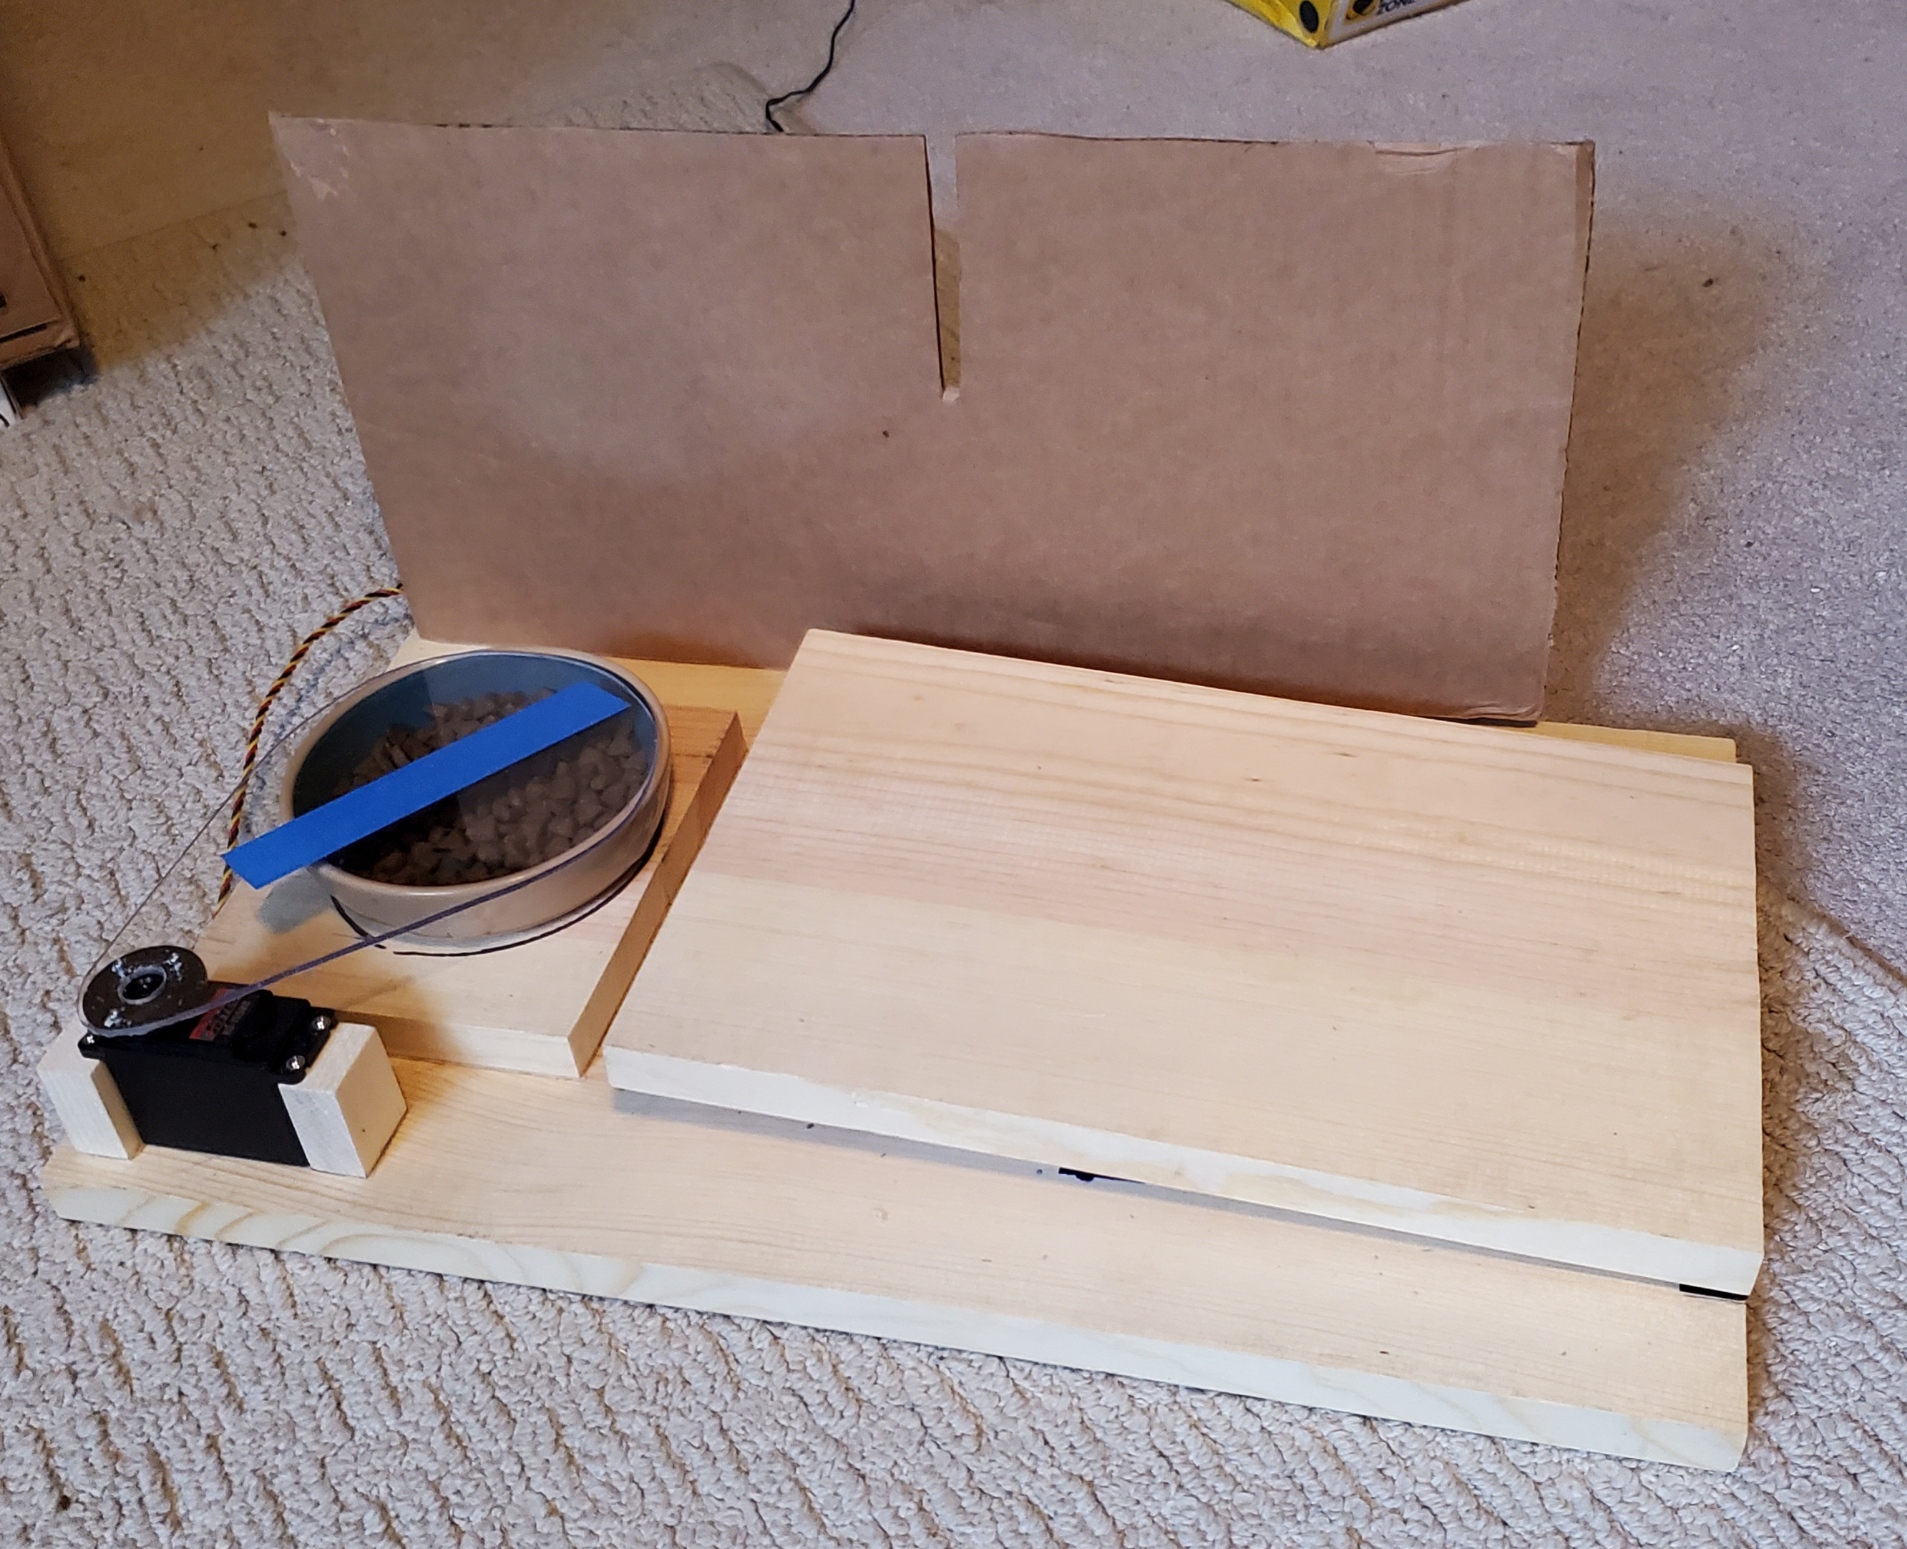
I did some prelim layouts in free SketchUp just to see how things would fit together in space. Eventually I created a base platform and hinged ramp out of scrap wood and mounted the load cell using M5 and M6 bolts. I also mounted the large HiTec servo to the base platform. While still using the bread board set up I was able to refine the software further to include a momentary switch and a mocked-up bowl cover plate made of cardboard. I needed the cover plate mockup to determine how much servo "swing" is needed to fully cover and un-cover the bowl. To open the food bowl, you push the switch. When finished filling the bowl, push the switch a second time to close it. IMPORTANT NOTES: You will need to re-calibrate the load cell after you have mounted it in the full size project! Also, once I started using the full sized servo, I had to employ my bench top adjustable power supply to power the servo (+5 VDC) since the large servo's current draw could harm the Arduino Uno if I ran it off the +5 VDC coming out of the Arduino!
I should also note that to make it less complicated, I created a ramp by hinging one end of the platform and resting the upper end on the load sensor. This very slight angle will cause your weight measurement to be off slightly (the weight times the cosine of the small hinge angle if my engineering memory serves me). If you want to be more accurate, mount the hinges on another thin piece of material to ensure the ramp is level when it rests on the load cell, and attempt to mount the load cell right under the center of gravity of your cat!
I ended up putting this whole prototype/breadboard set up into live testing to see how it would work and I learned several things.
1. The servo movement was way too fast. It freaked out the cat. After it moved once she would never go near it again. After some searching around the arduino message boards, I was able to find the servo library that provides speed control as well position. (VarSpeedServo.h vs. Servo.h)
2. The "closing function" needs to have a delay in it before it closes. Again, the cat freaked out when it started to close immediately following her weight decreasing on the load cell (like if she took a half step back for some reason to reposition herself, the cover would quickly close, and she would jump). So I added a 7 sec delay before it closes which seems to be a good mid point that allows her to move around a bit and still allows it to close before the other cat can get a bite. Its also less scary now that its slower!
3. The ramp used to weigh the cat should be slightly longer than I made it so that she has to get all four feet onto the ramp to get near the bowl. She eventually learned to trust the servo swing and associated noise, but early on she could stretch out long enough to just sniff the bowl without triggering the load cell and since it would not open, she could not eat. (Longer ramp is for a later version!)
Challenges and Lessons Learned
The trickiest problem to solve was a servo chatter problem that started to show up once I started using the larger servo with it's own dedicated power supply. The servo would make small random movements every 10-15 seconds. This was another source of "cat freak out" that kept the cat from trusting this contraption no matter how starved she was! The internet forums all seemed to point to power supplies being the issue, so I messed with that for a while. Then I noticed that when the code was in a delay or in the manual open mode waiting for a second push of the button to make it close, the servo was rock steady. This lead me to start commenting out various bits of the code until I was able to determine that the "scale.get_units" call was the source of the problem. I'm guessing that interrupts and the like are causing some random small pulse width changes during that operation. To fix it I detached the servo just before the "get units" and then re-attached it immediately after. It worked like a charm!
Early on I had some switch bounce issues after I added the momentary push button to manually open the feeder. I ended up just using a short delay immediately after reading the switch and that seemed to fix it. Not sure that is the "correct" way to address switch bounce, but since timing is not a critical thing for this project, I went with it!
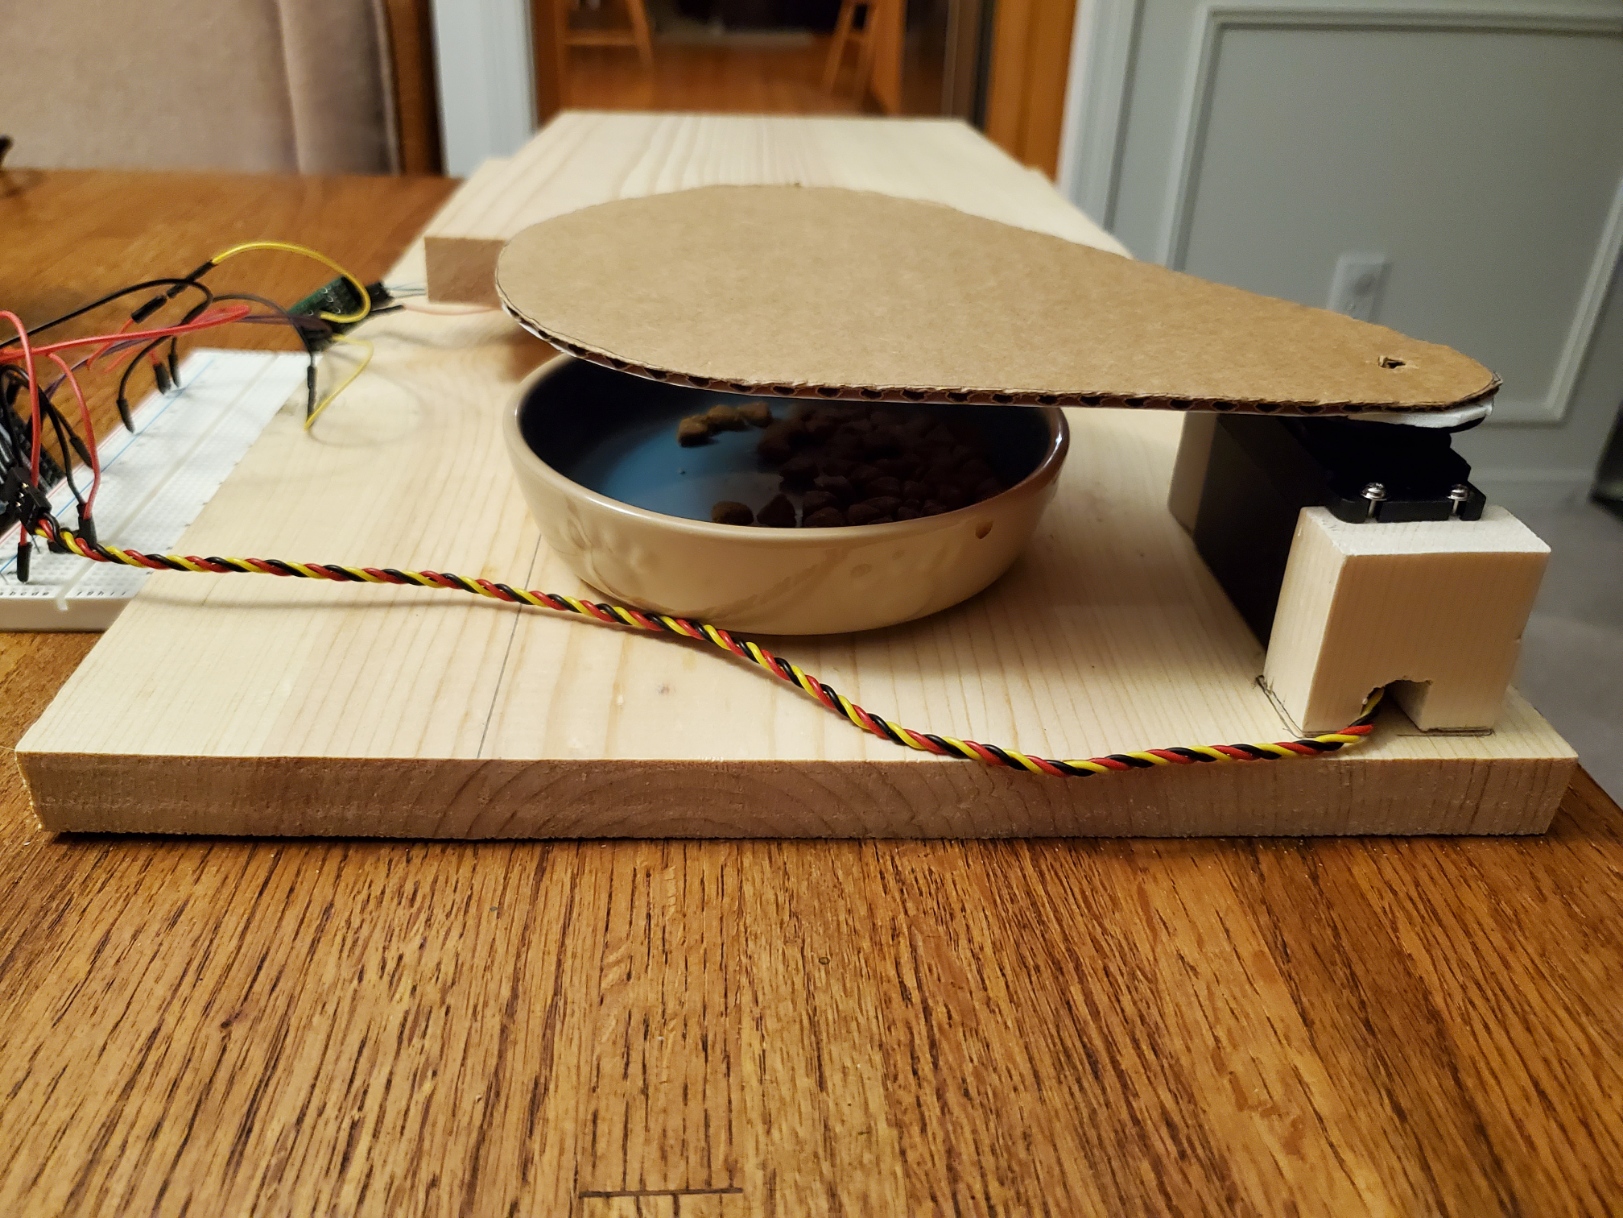
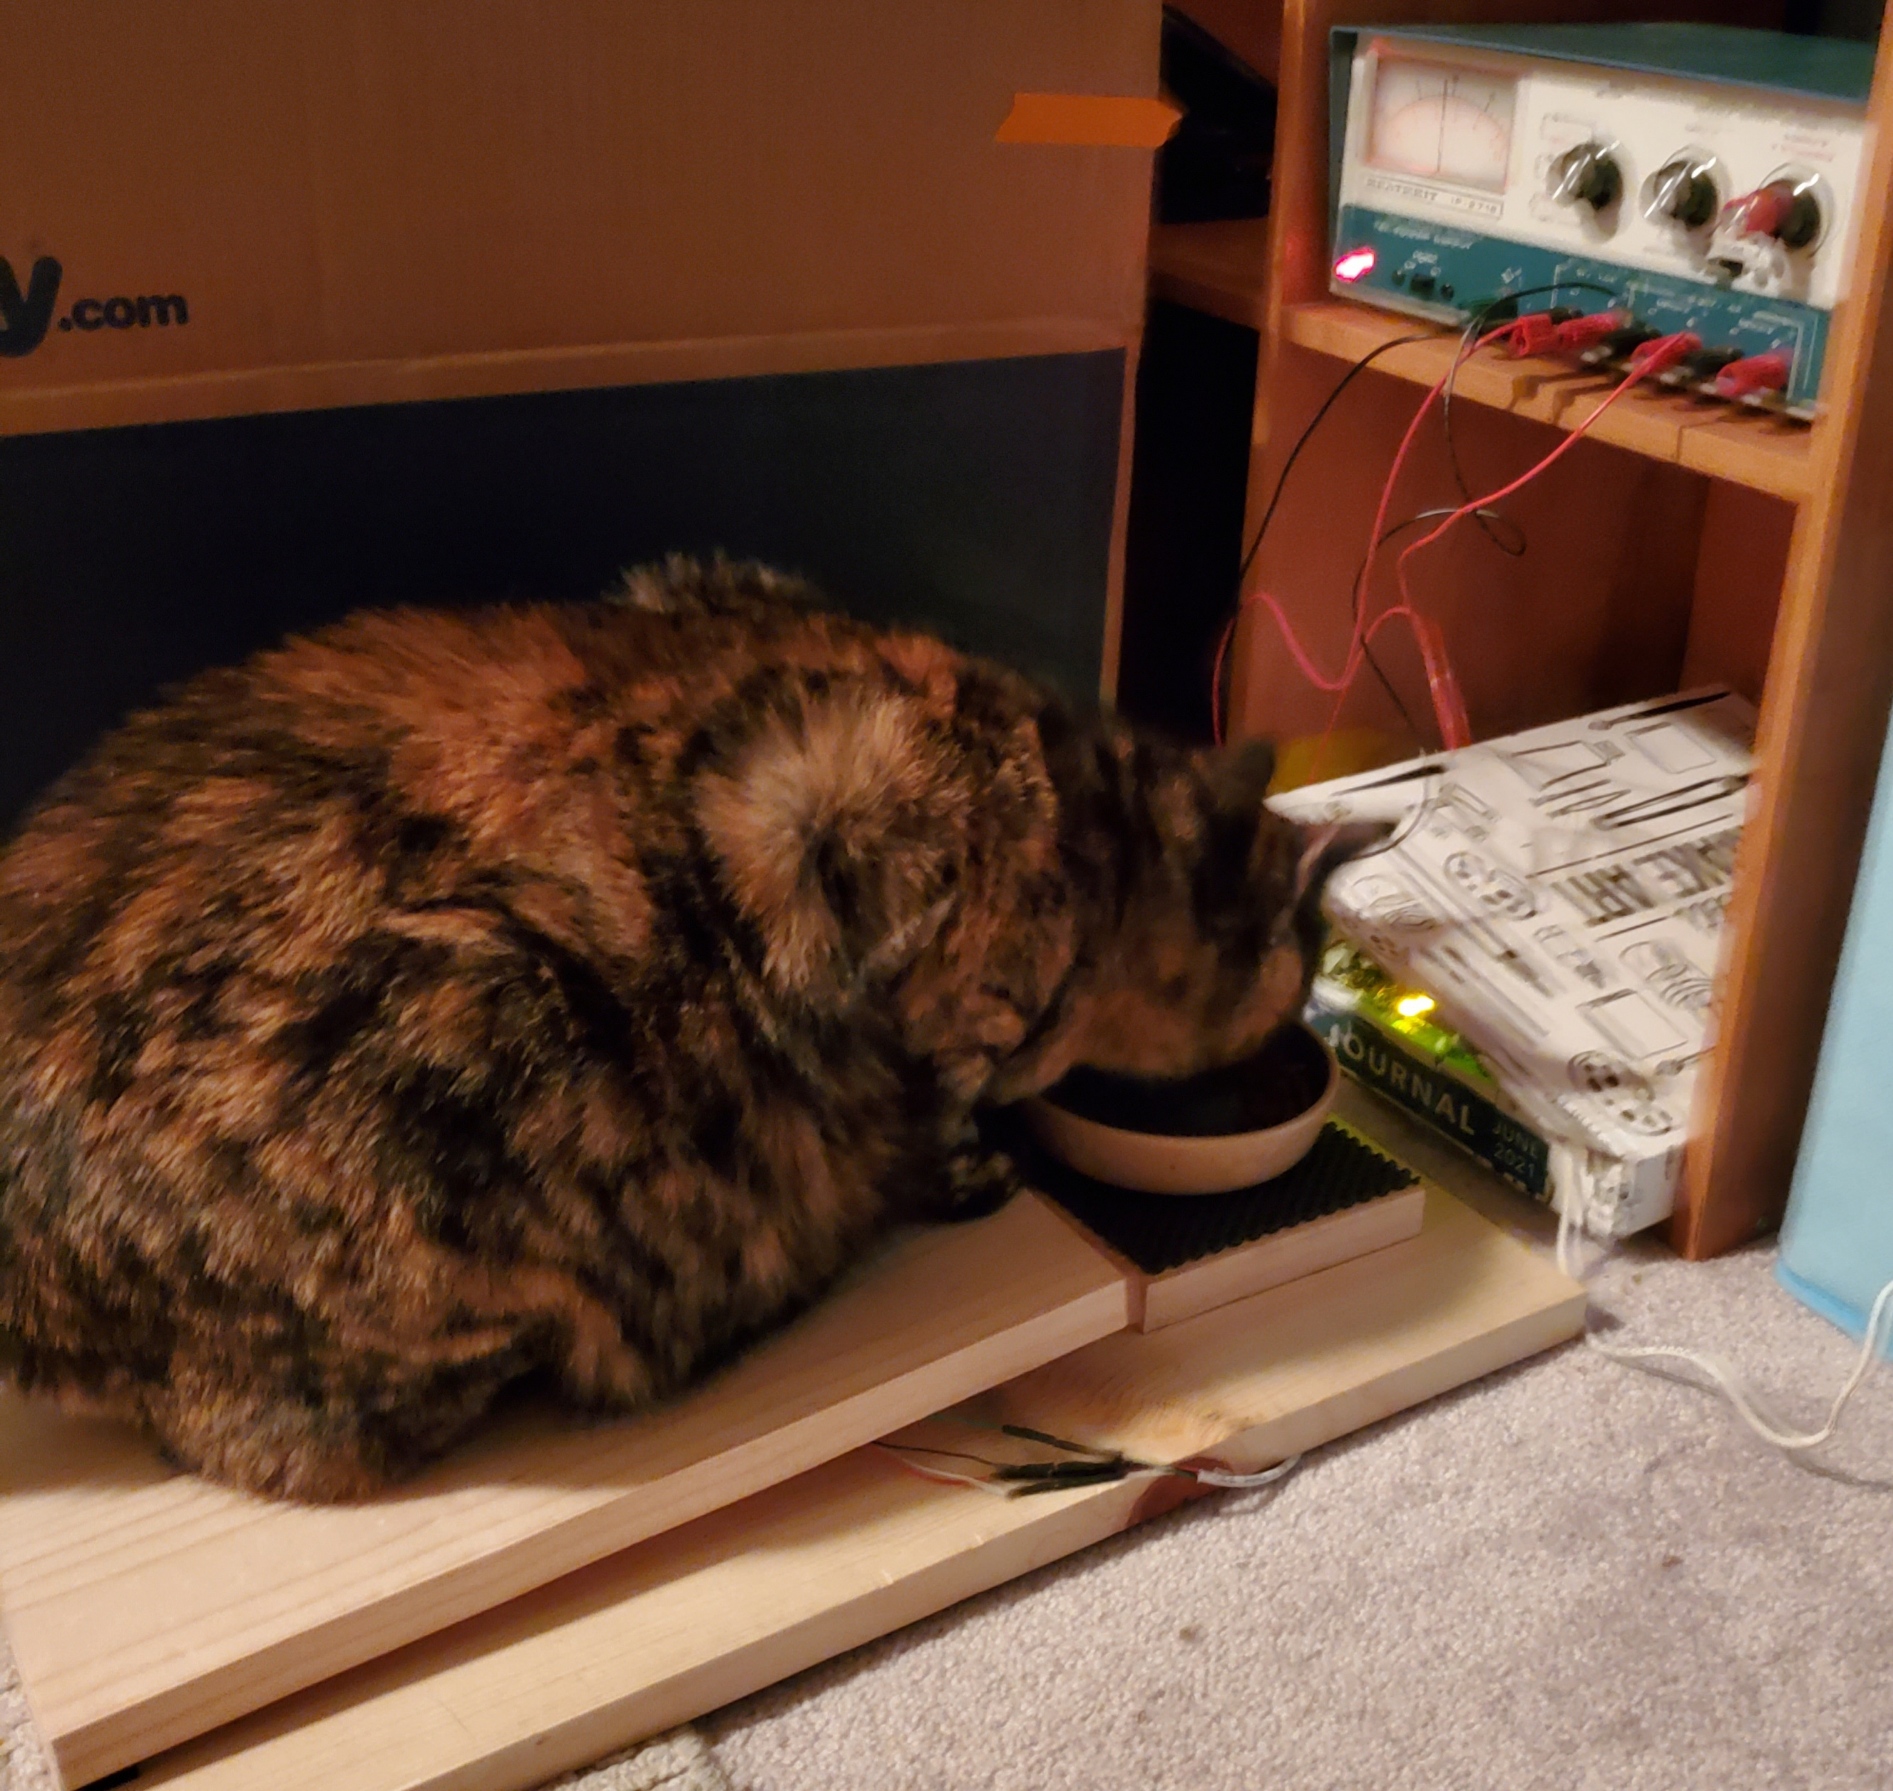
Final Product
Although I still consider this a prototype at this point, it is fully functioning and "on the job". Here are a few photos of where the project stands today.
Possible Future Additions
Possible upgrades I have been thinking about:
1. Create another platform for the other cat and add code to the sketch that will only allow the smaller cat to open his food bowl. [For those of you worried about how George eats, don't worry. George's food is put in a large box that has a hole in it that Lily cannot fit through. He can eat all he wants, when ever he wants!]
2. Add wifi capability and get the system to track the cat's weight into a file on my network so that we know when Lily's target weight is reached.
3. Or get it to do item 2 but on an app on my phone!
4. Add a hopper and measurement system to dole out the food automatically!
Future Expansion Ideas
- Wireless Data Dashboard Integration: Add a WiFi module (like ESP8266) to log cat weights and feeding events to a cloud service or a local network dashboard for remote monitoring.
- Multi-Sensor Synchronization: Integrate a PIR motion sensor to detect a cat's approach, potentially waking the system from a low-power state or providing additional behavioral data.
- Advanced Profile Customization: Implement more sophisticated logic to track feeding duration, amount consumed (by integrating a second load cell under the bowl), and adjust schedules automatically.
[!IMPORTANT] Power & Calibration Notes: The larger servo motor requires a dedicated 5V power supply to prevent brownouts or damage to the Arduino. Always perform a full calibration of the load cell (tare and scale factor) after the final mechanical assembly, as mounting stresses can affect the sensor's zero point.