Overview
It is great to grow a flower, watch it bloom and let its beauty inspire you. But not if you forget to water it, and the next think you know, it died out. Taking care of a flower can be challenging, everyone has many things on their heads and the last thing you have time for is asking yourself if you watered your plant.
FlowerPot Monitor monitors your plant's environment and notifies you on the plant's condition wirelessly, so you can know in an instance if your plant needs attention. This way, your plant will always be safe.
FlowerPot consists of two parts; the transmitter and receiver. The transmitter collects the readings and then transmits them to the receiver.
Functionality
FlowerPot will continuously monitor the environment that the plant is placed in, indoor or outdoor. The device will monitor;
- Soil Moisture
- Atmosphere Humidity
- Atmosphere Temperature
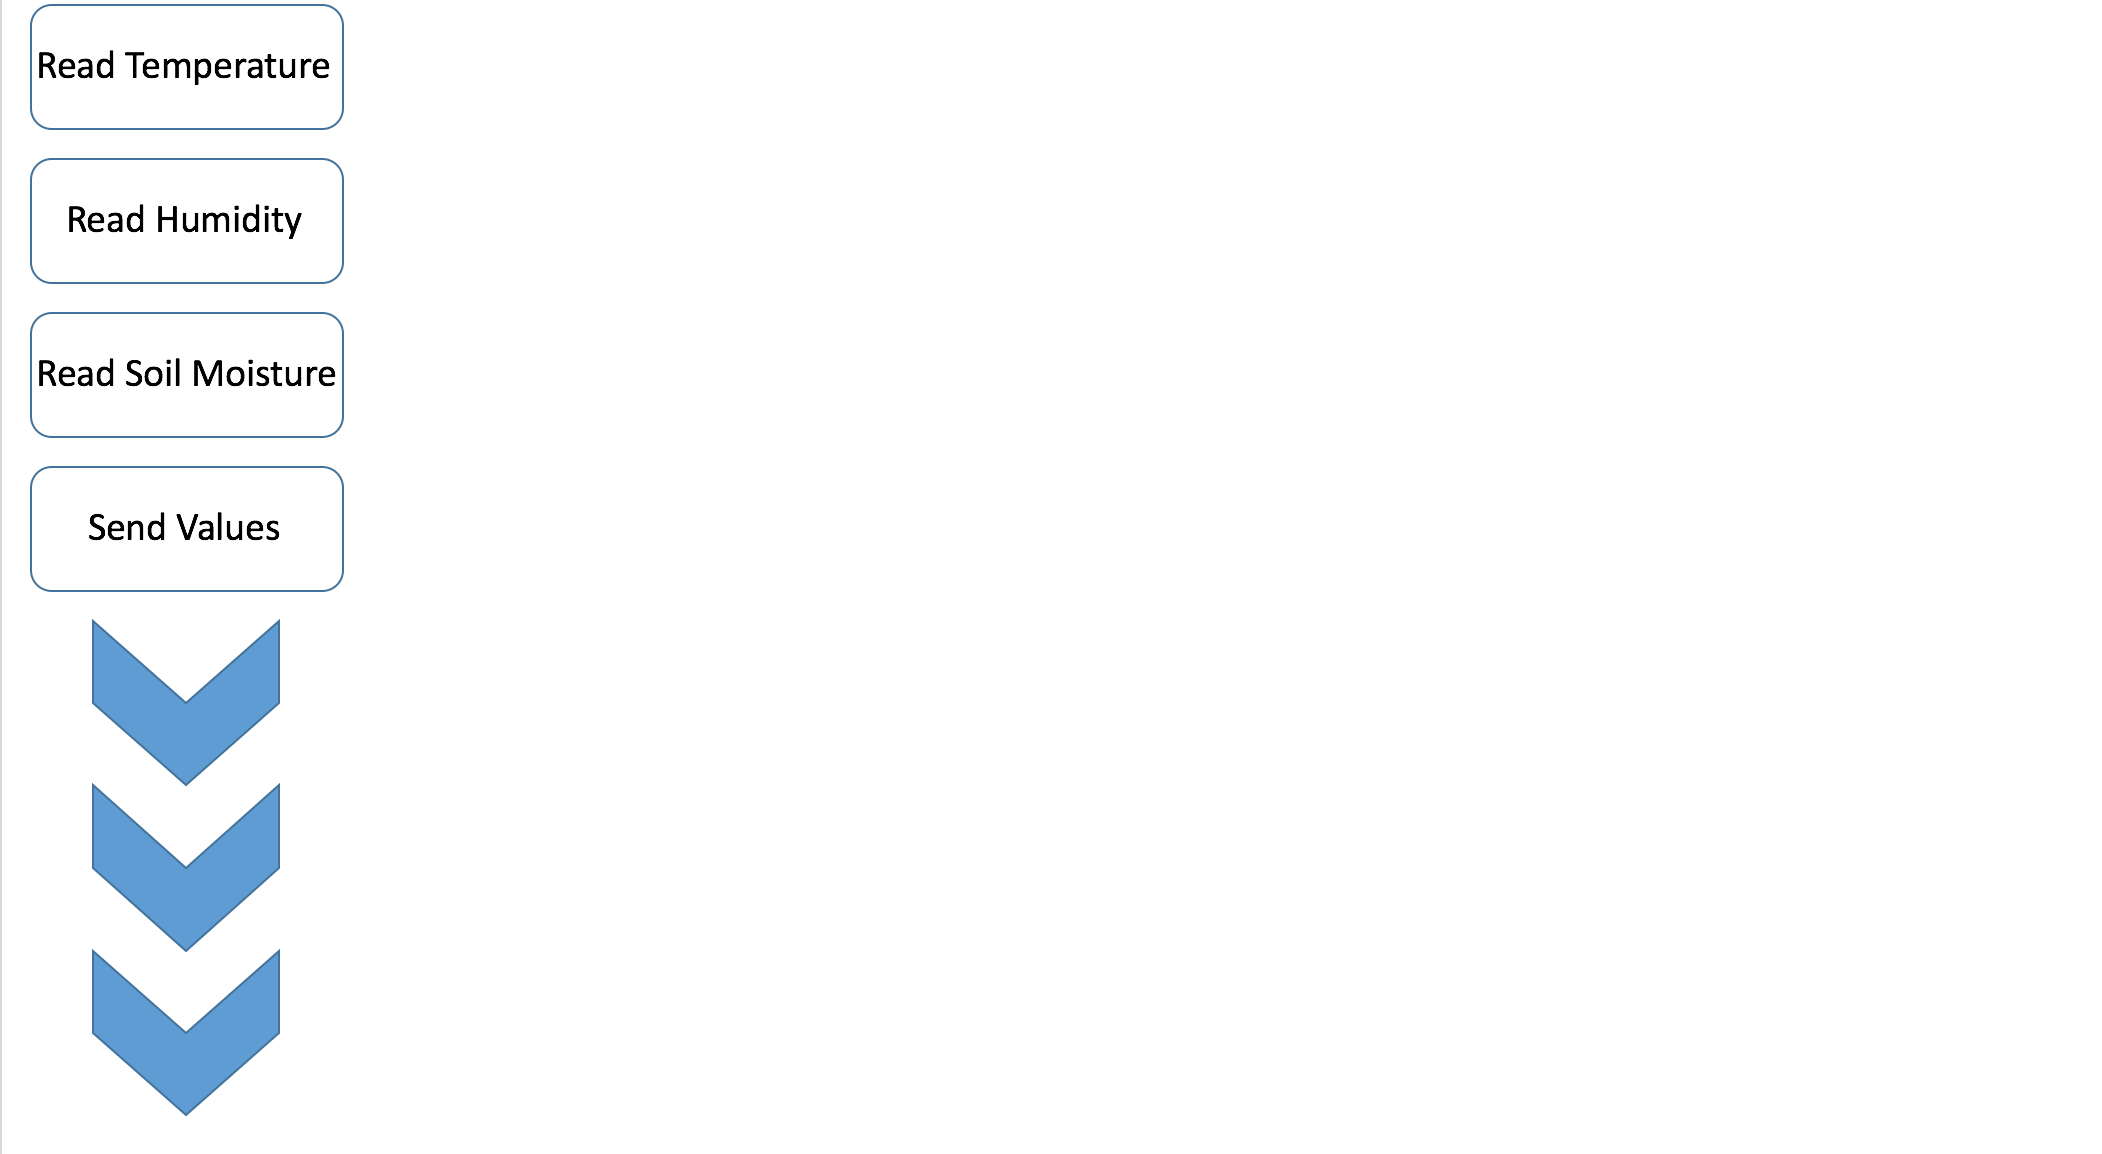
After the transmitter (Arduino Uno reading and transmitting values) stores all the sensor readings, it sends them to the receiver (Arduino Uno receiving values and displaying them) via RF (Radio Frequency) where the data is displayed on an LCD. This is the code overview:

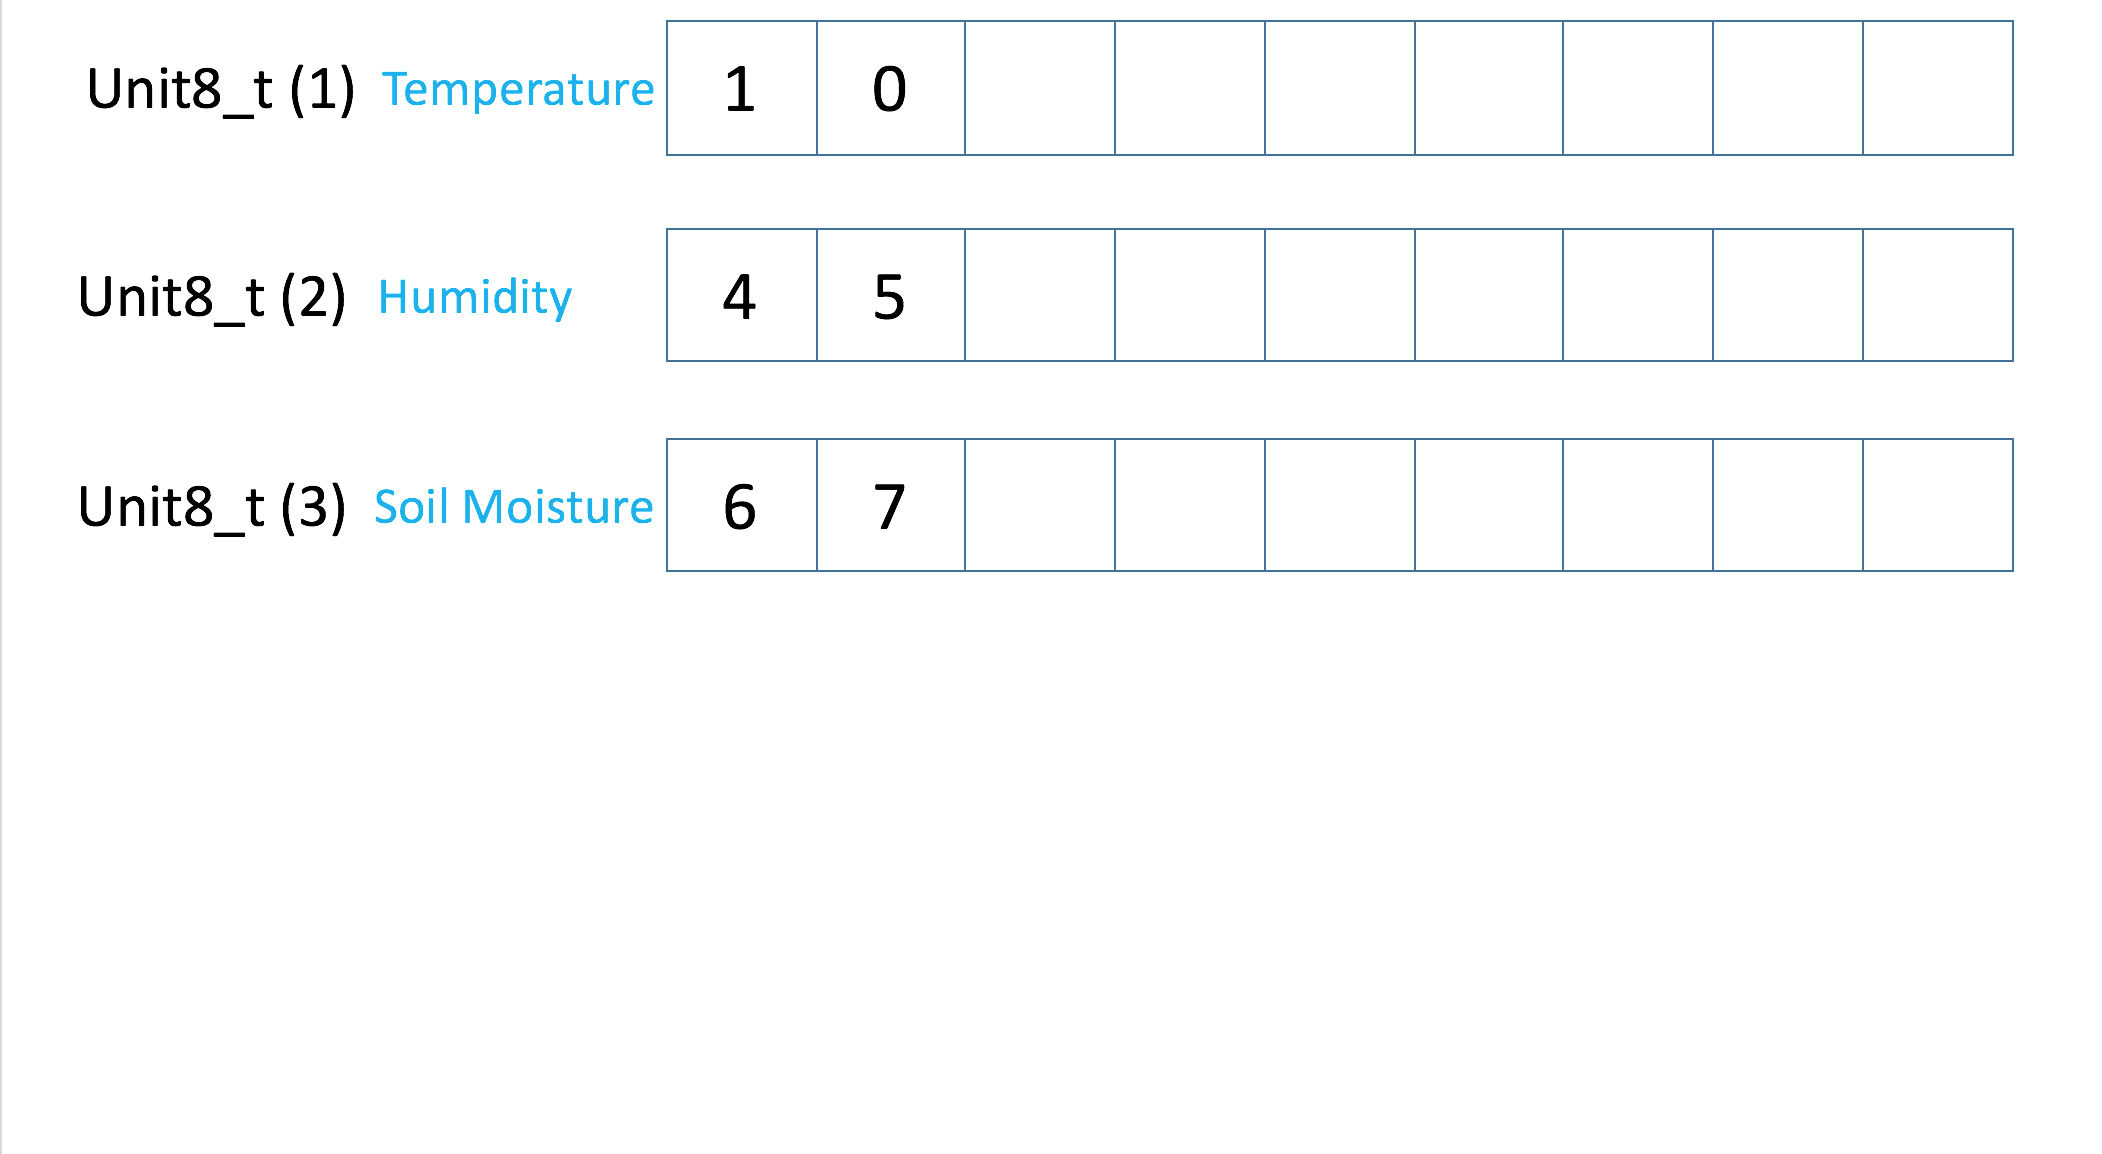
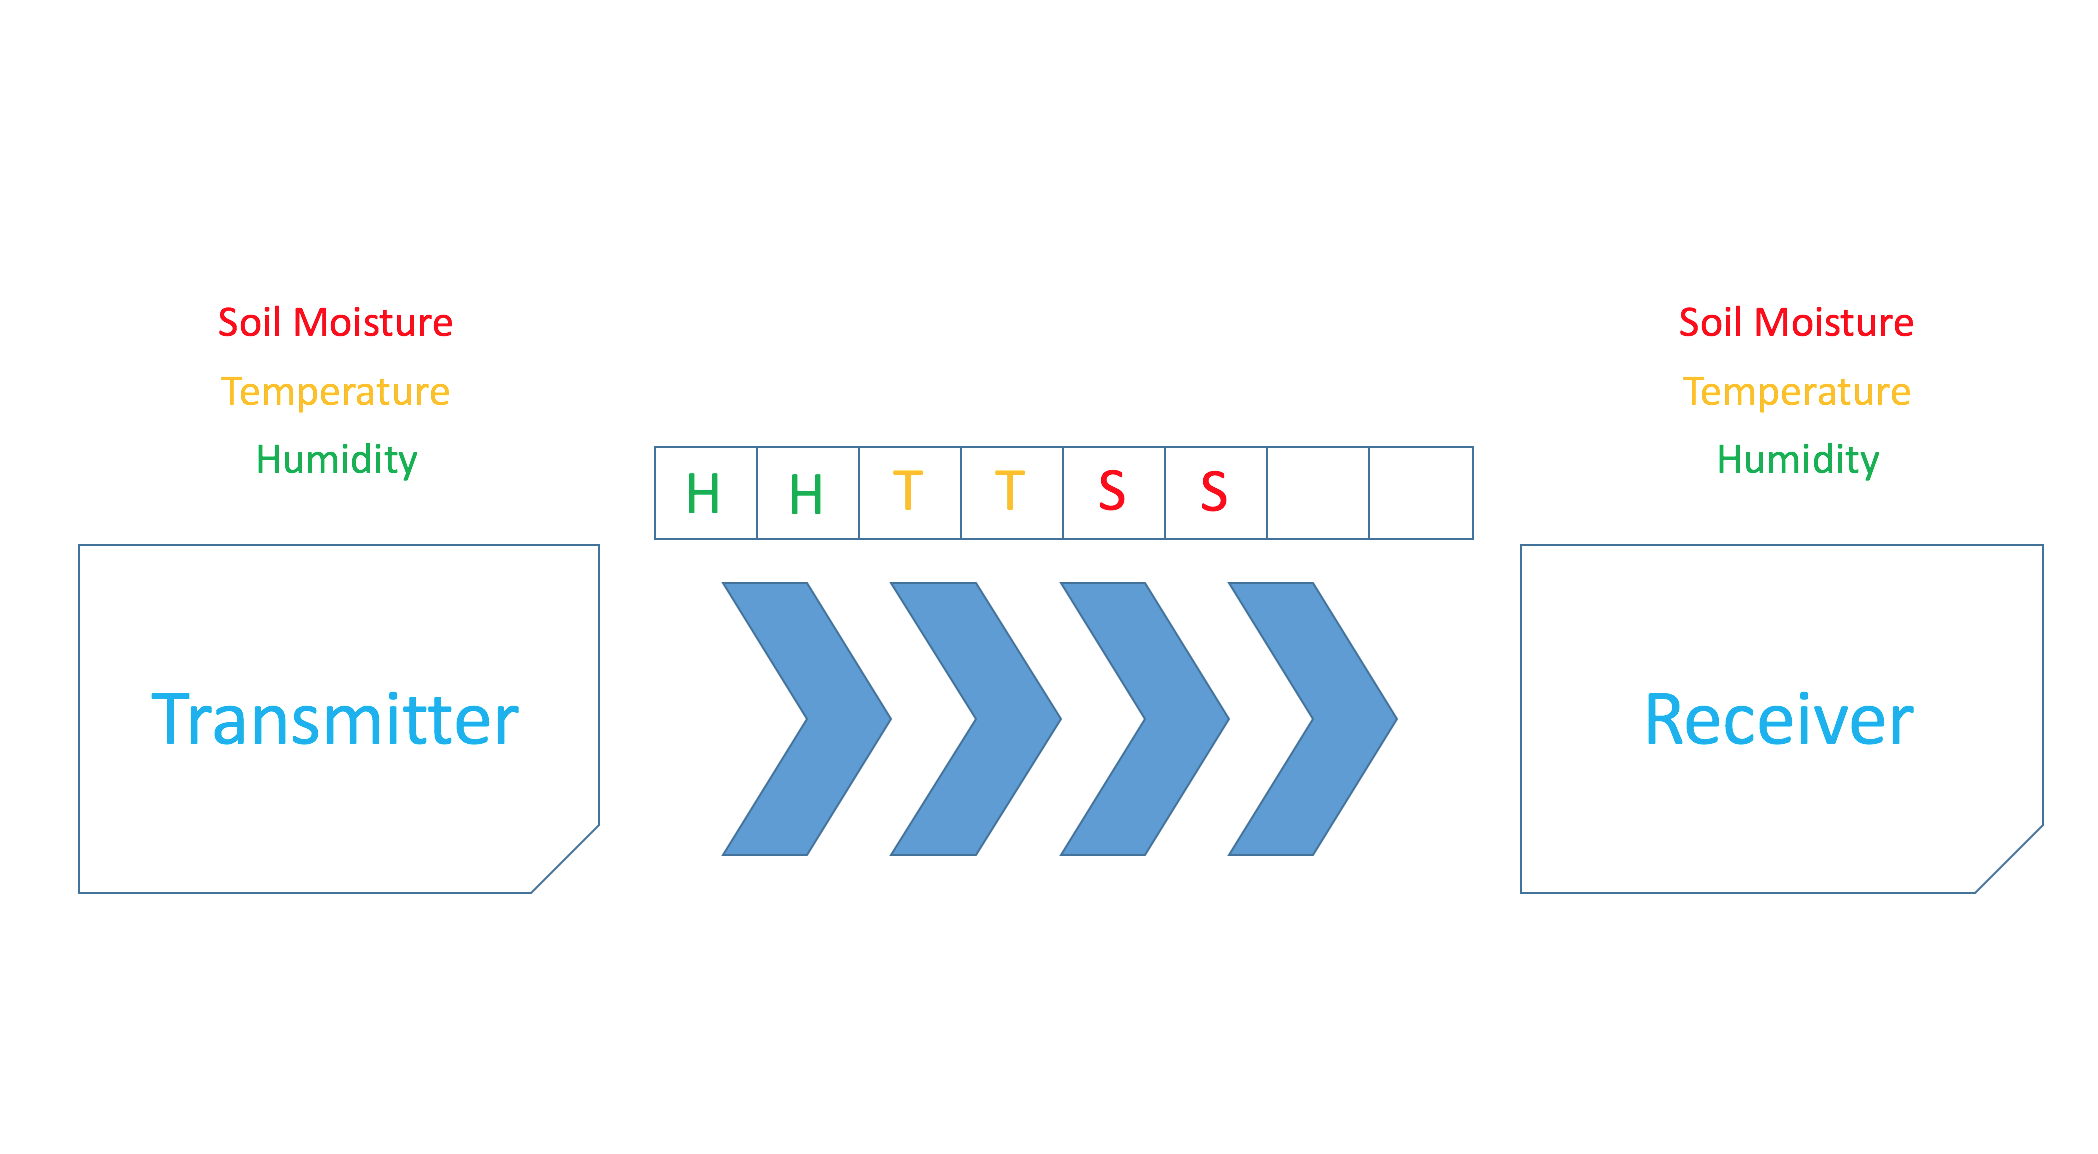
The transmitter must pack all the three int (integer) variables into a unit8_t variable and then send the data over RF communication to another Arduino Uno equipped with a receiver. Here is a diagram displaying this process.
When the data is received, the receiver must process the data and convert it back into the three variables that were sent.
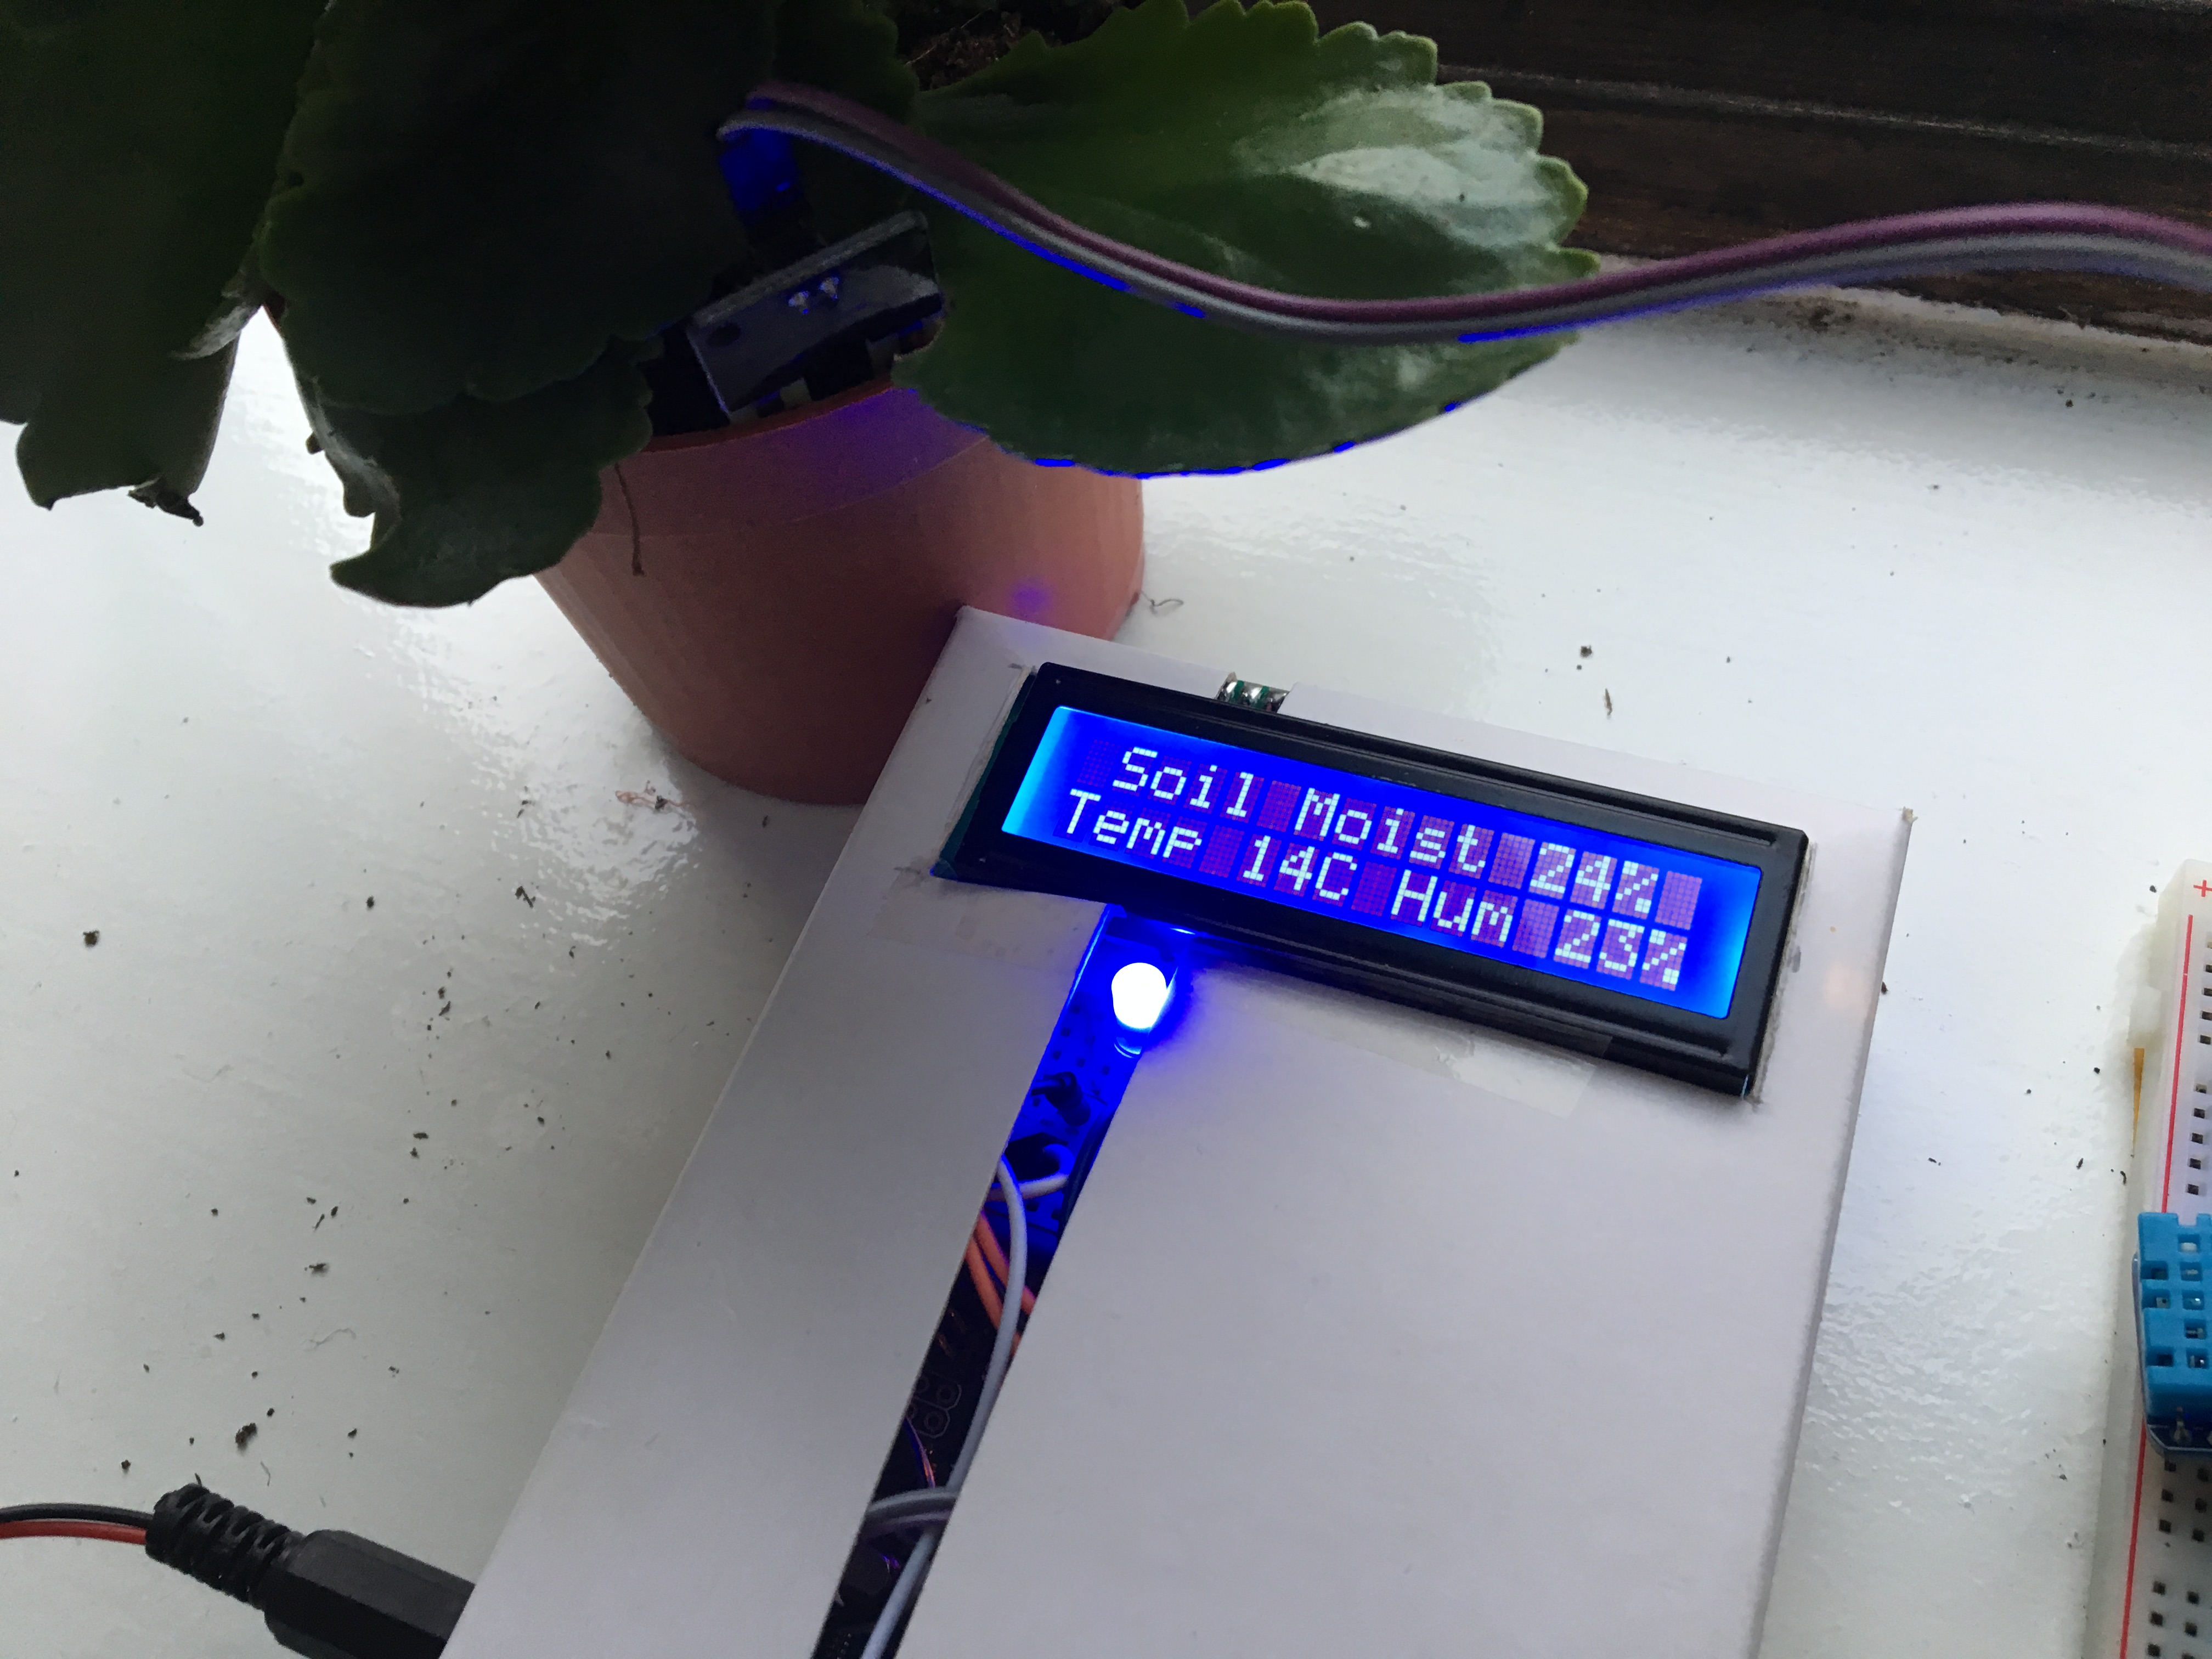
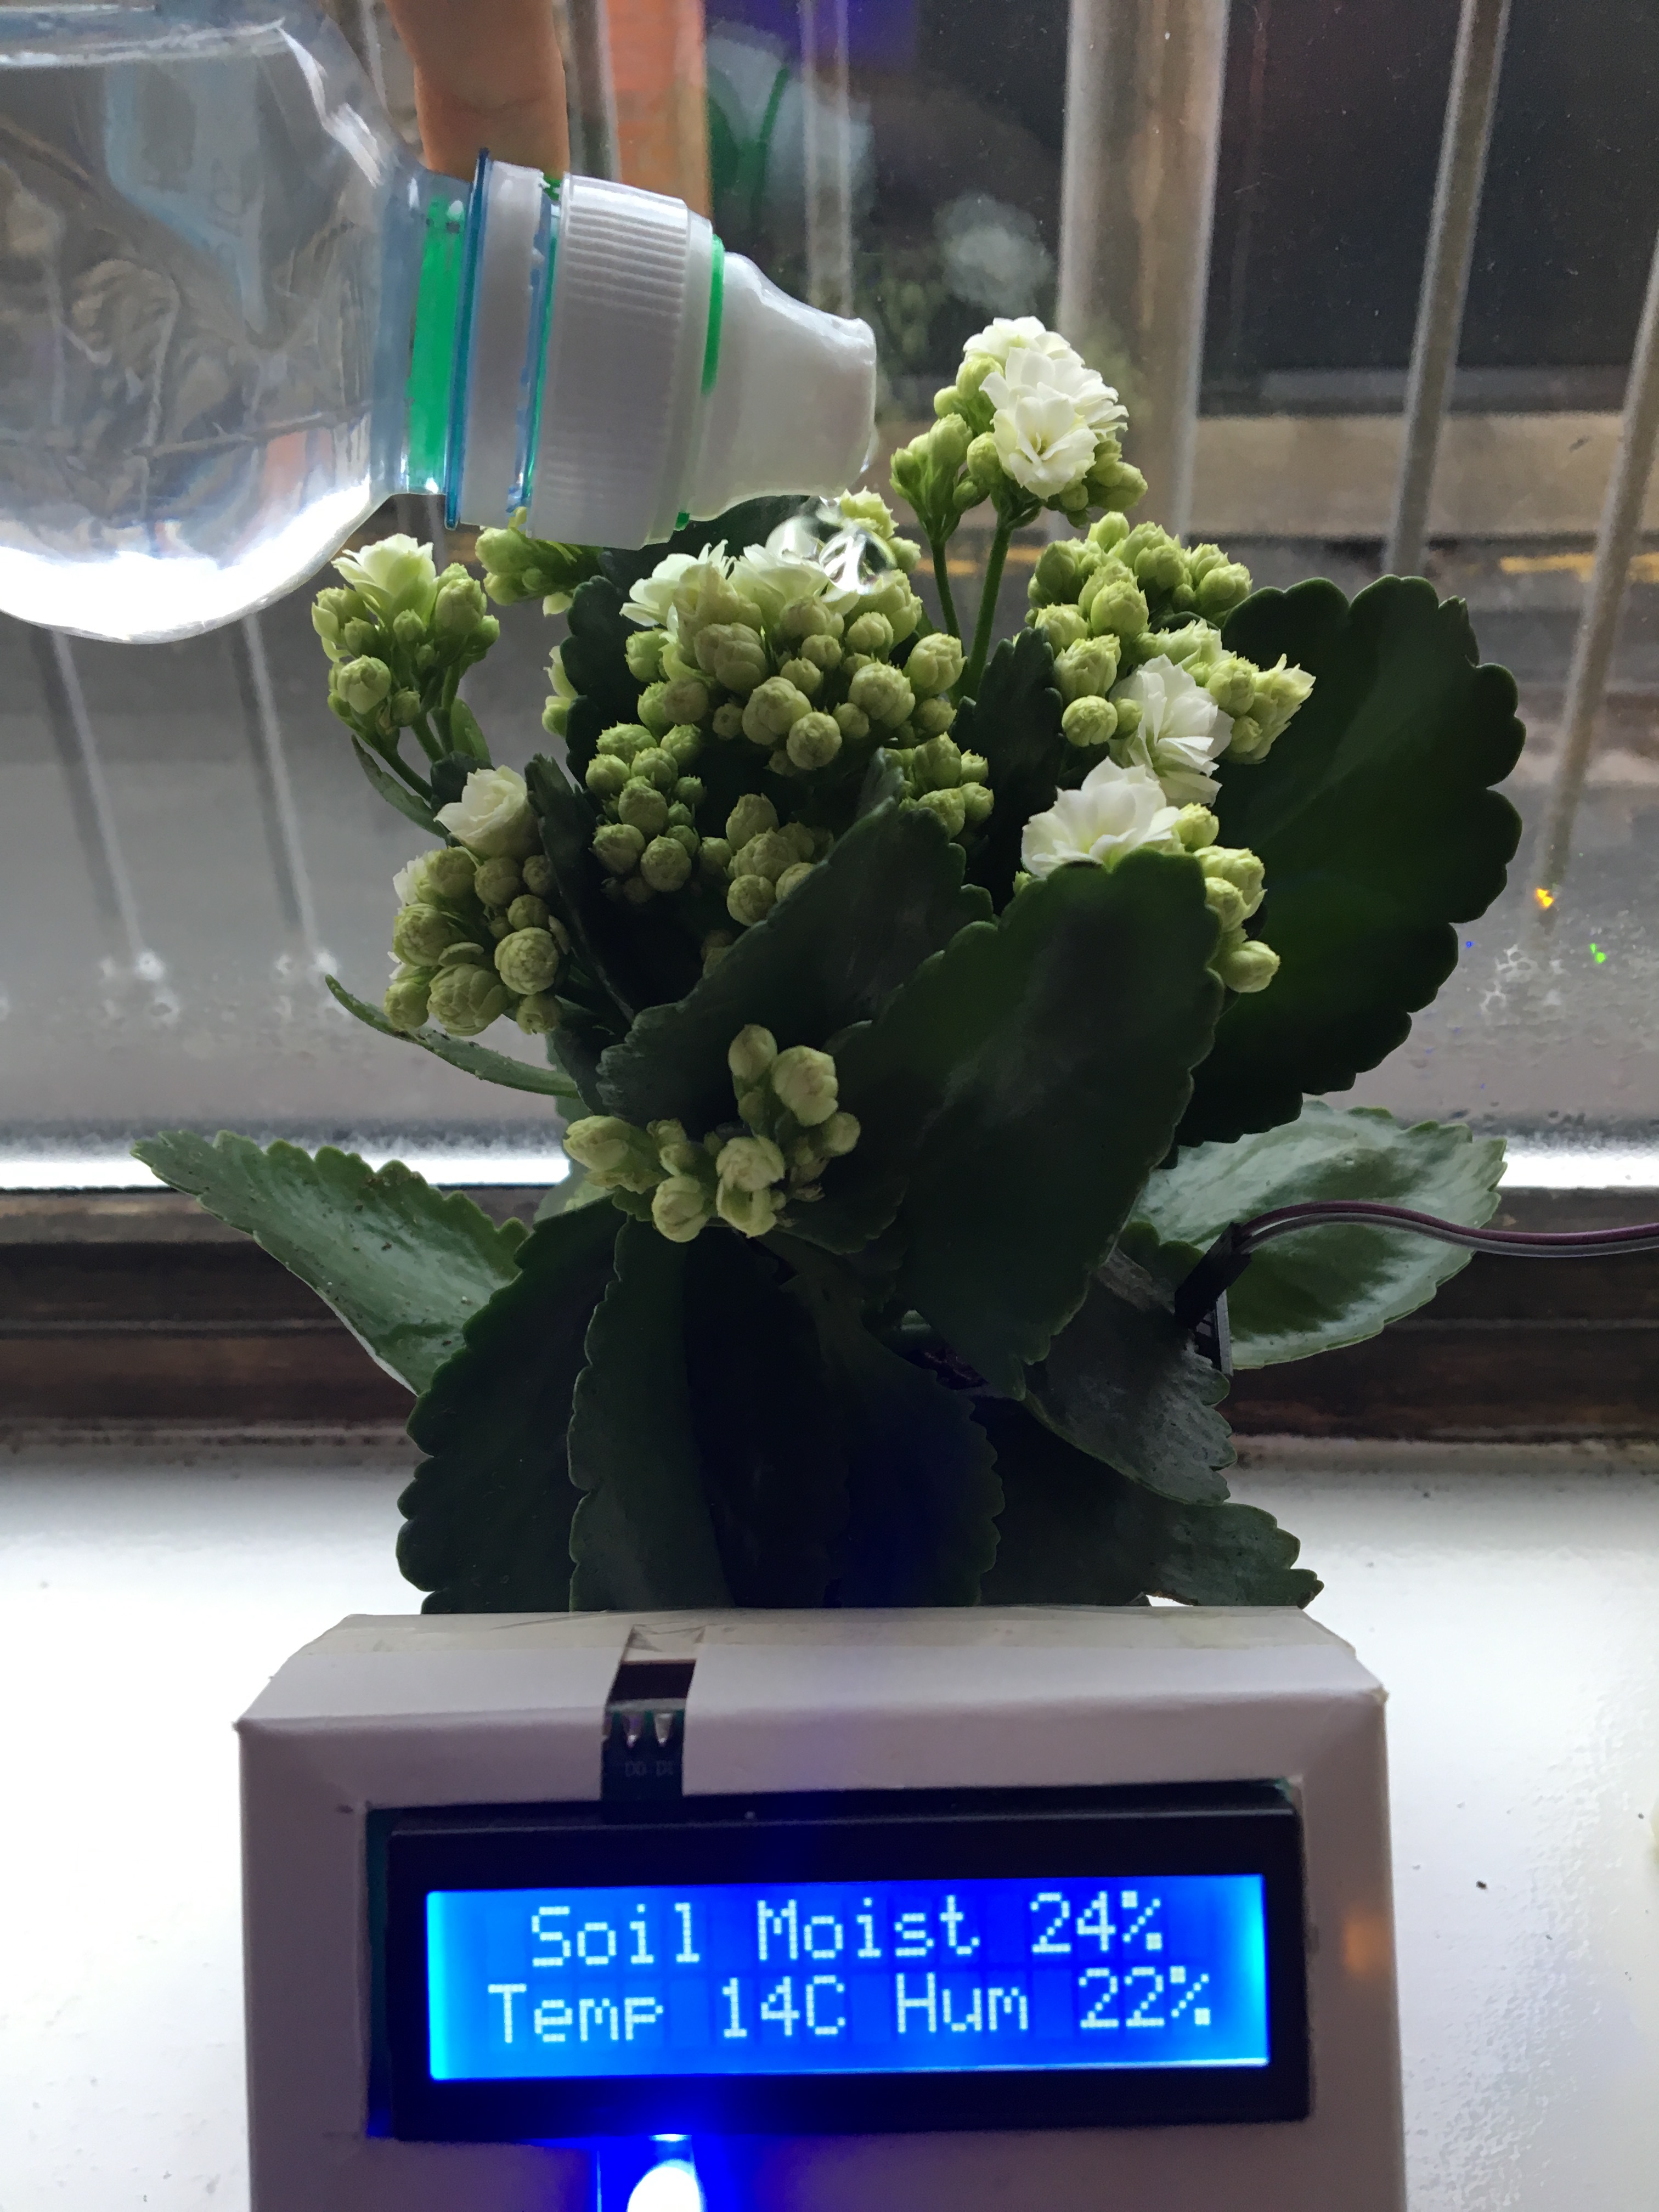
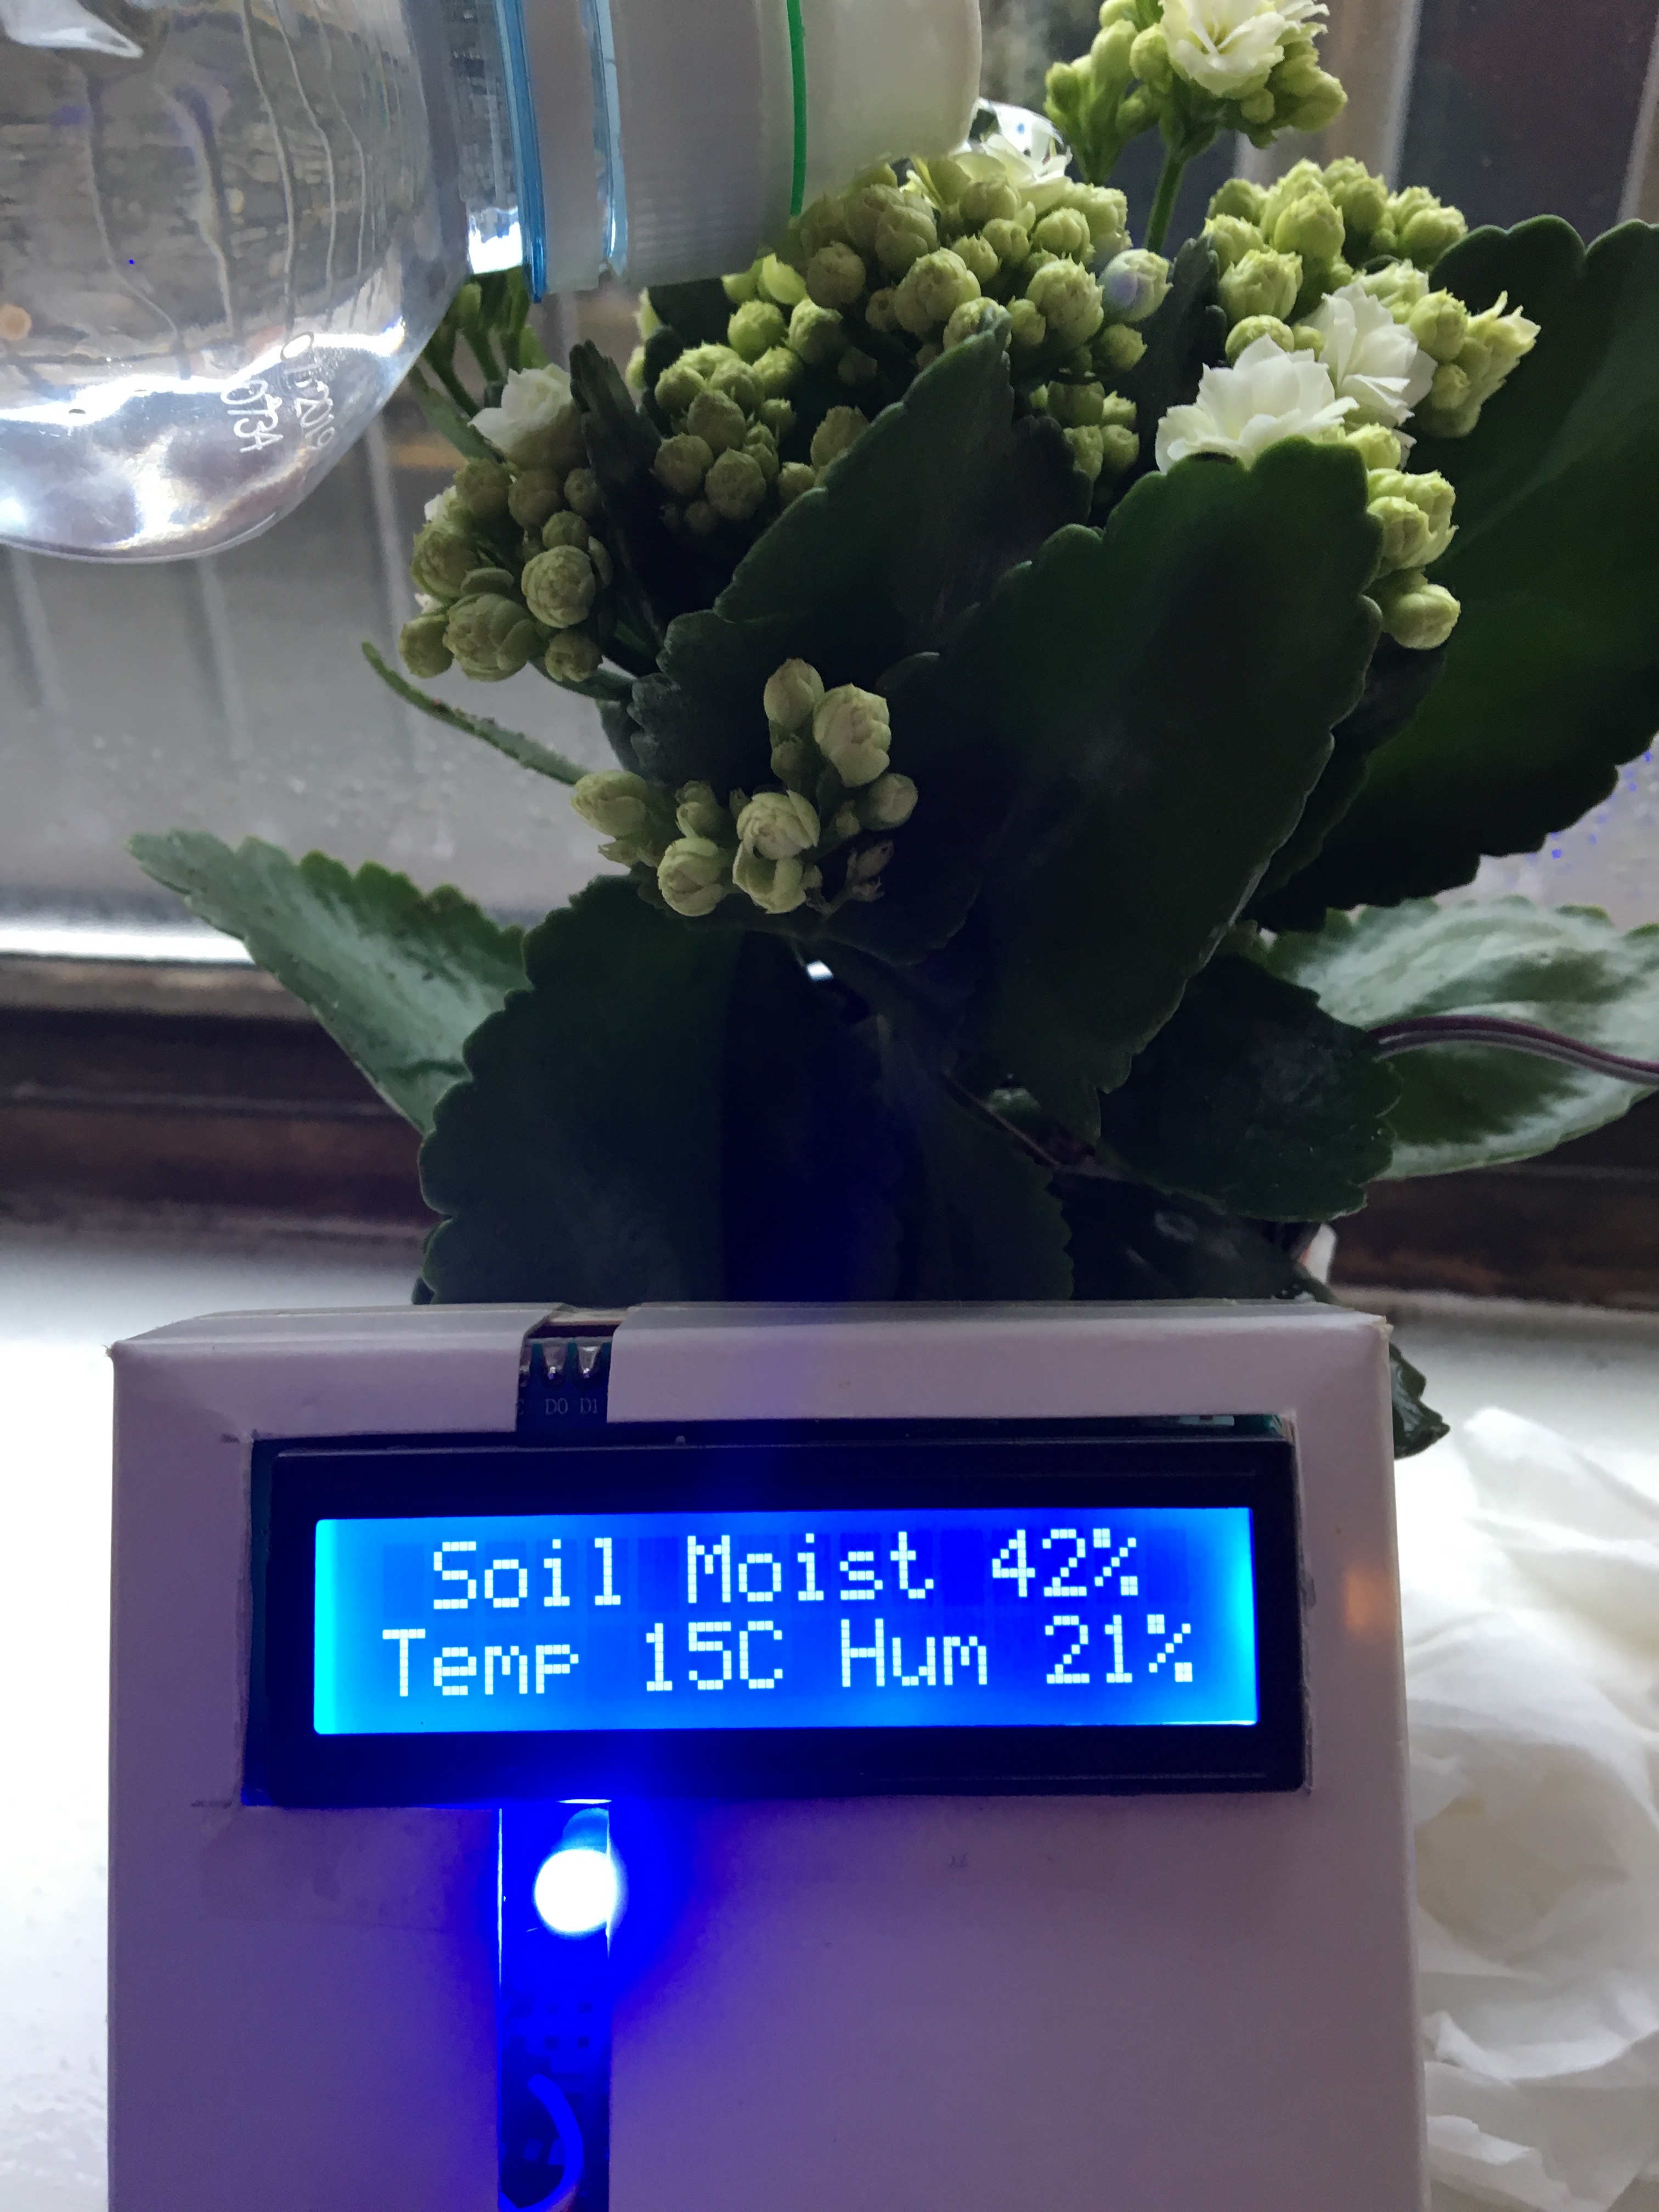
Both devices work on batteries, the receiver can be 20 or less meters away from the transmitter (provided nothing is blocking the path of the devices eg. doors) so you can monitor your plant from anywhere in your house. These are some pictures taken when watering the plant.
Botanical Health Telemetry
The FlowerPot Monitor is a smart IoT gardening tool that ensures your plants receive the optimal amount of water and light.
- Soil Impedance Analysis: Uses a specialized soil moisture sensor to monitor the water content. The Arduino identifies the "Wilting Point" and alerts the user when the soil is critically dry.
- Efficiency: To prevent sensor corrosion (electrolysis), the Arduino only powers the moisture sensor for 100ms every hour during the sampling phase.
Benefits
- Acknowledge your plant's current condition
- Acknowledge the plant's environmental conditions
Constructing the Project
Step 1: Required Apparatus
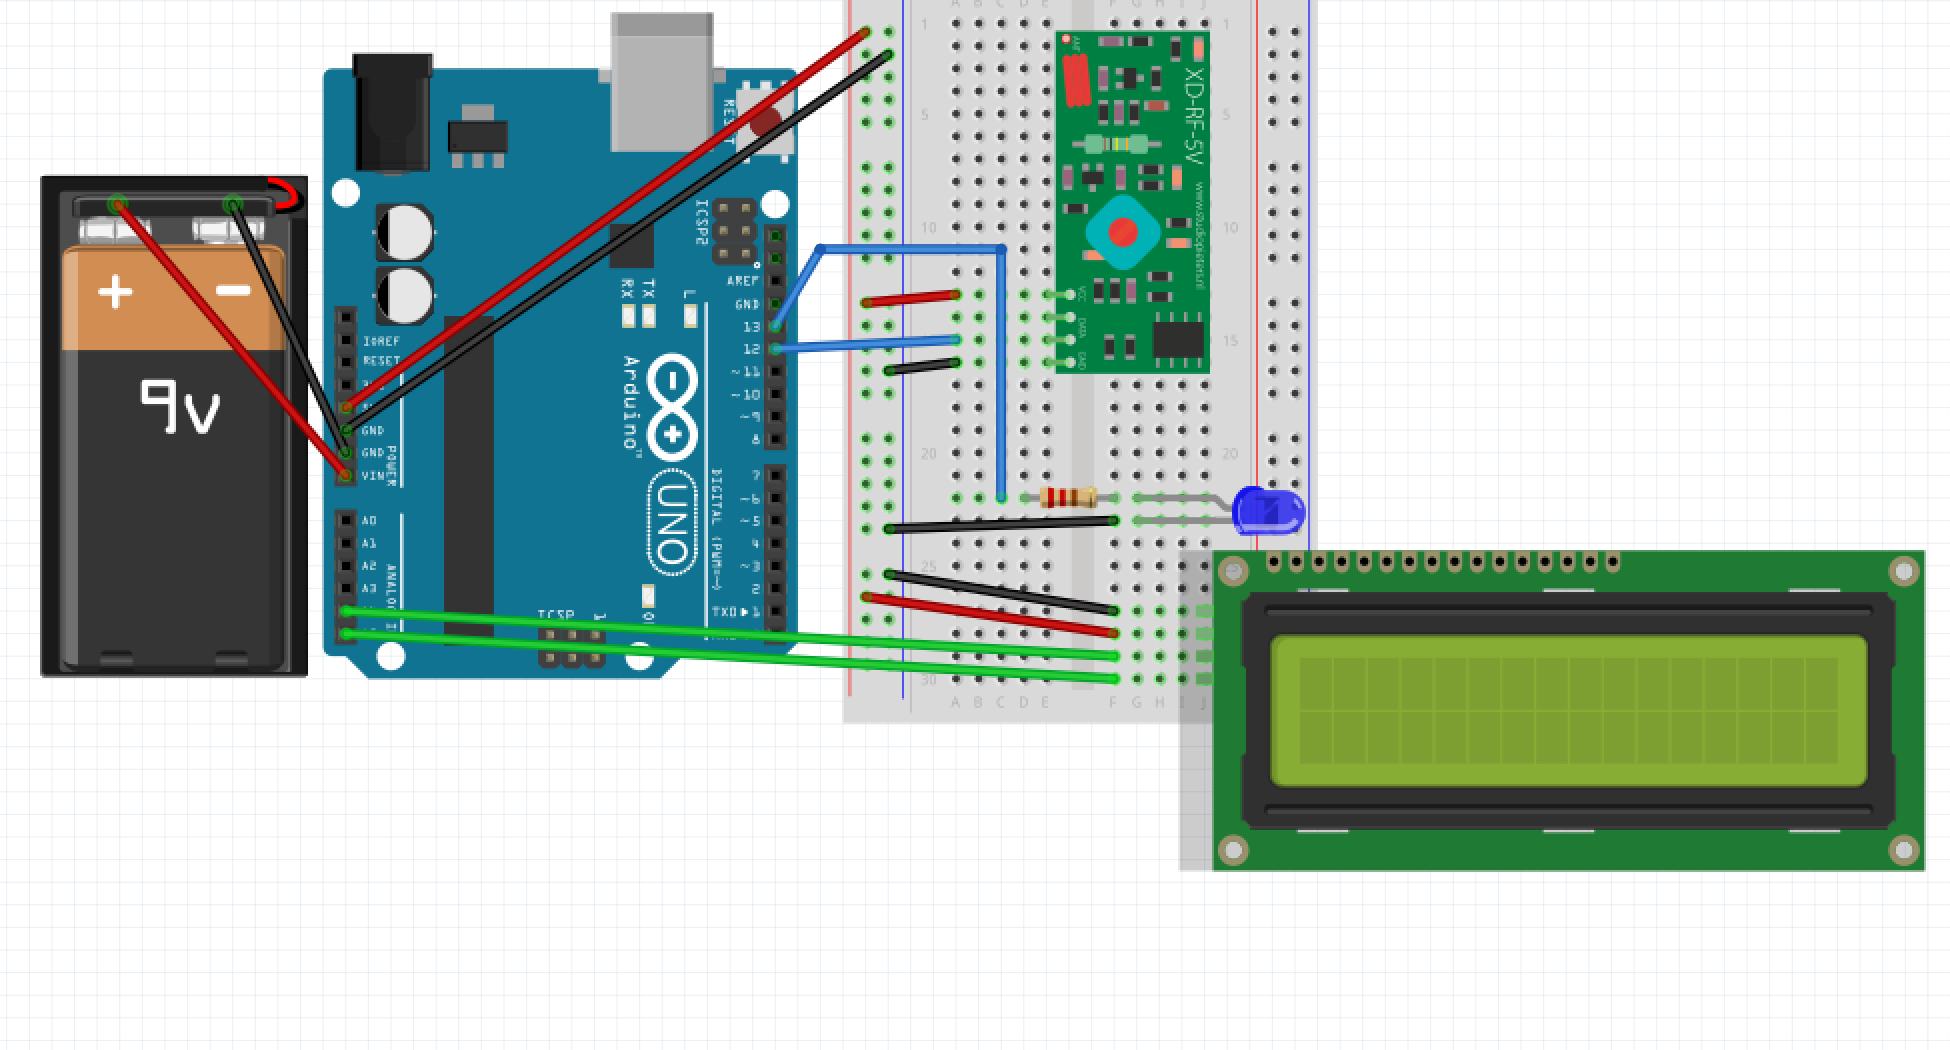
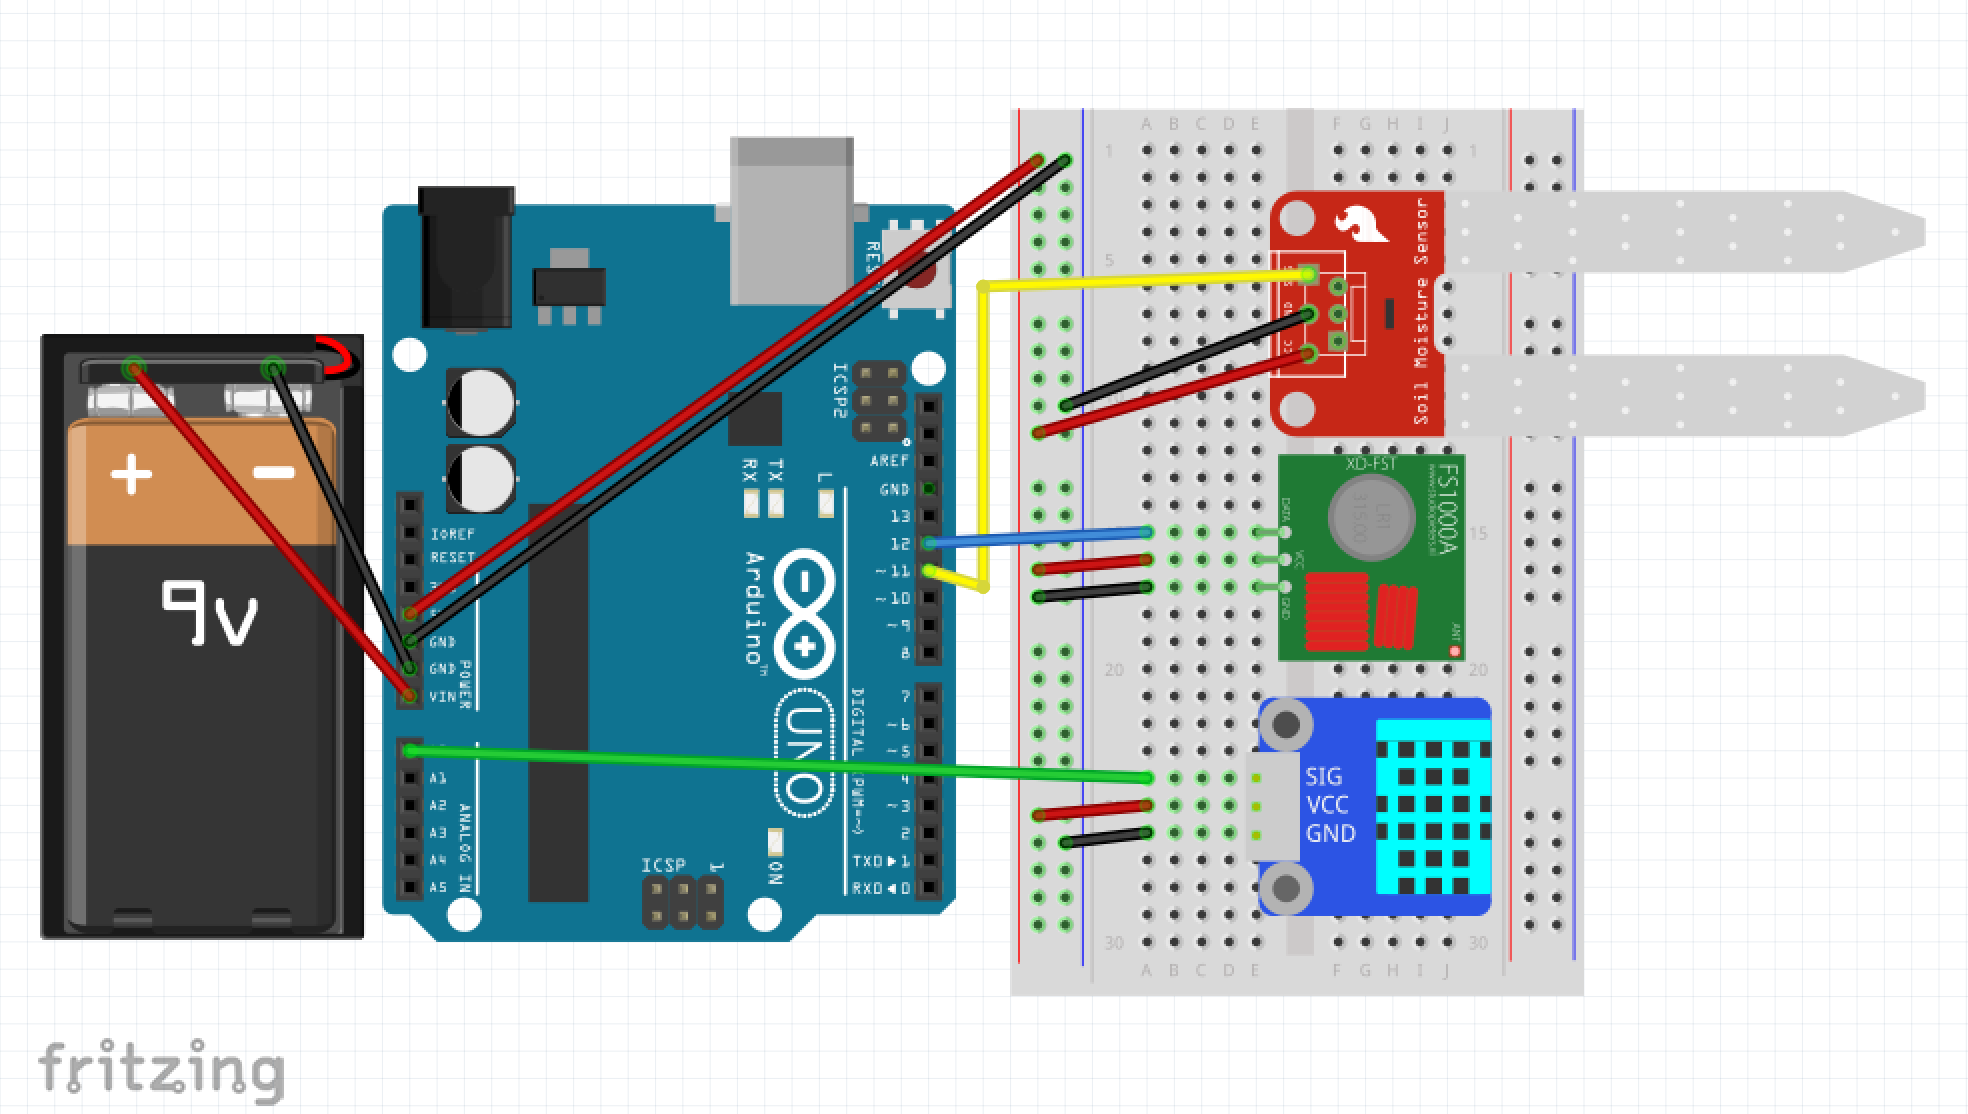
This project requires two circuits; one for the transmitter and one for the receiver.
For Receiver
- jumper wires
- 1, 433Mhz RF receiver
- 1, resistor (220Ω)
- 1, LED
- 1, I2C (16x2) LCD
- 1, 9v Battery
- 1, 9v Battery Holder
For Transmitter
- jumper wires
- 1, 433Mhz RF transmitter
- 1, DHT11 temperature and humidity sensor
- 1, Soil Moisture Sensor
- 1, 9v Battery
- 1, 9v Battery Holder
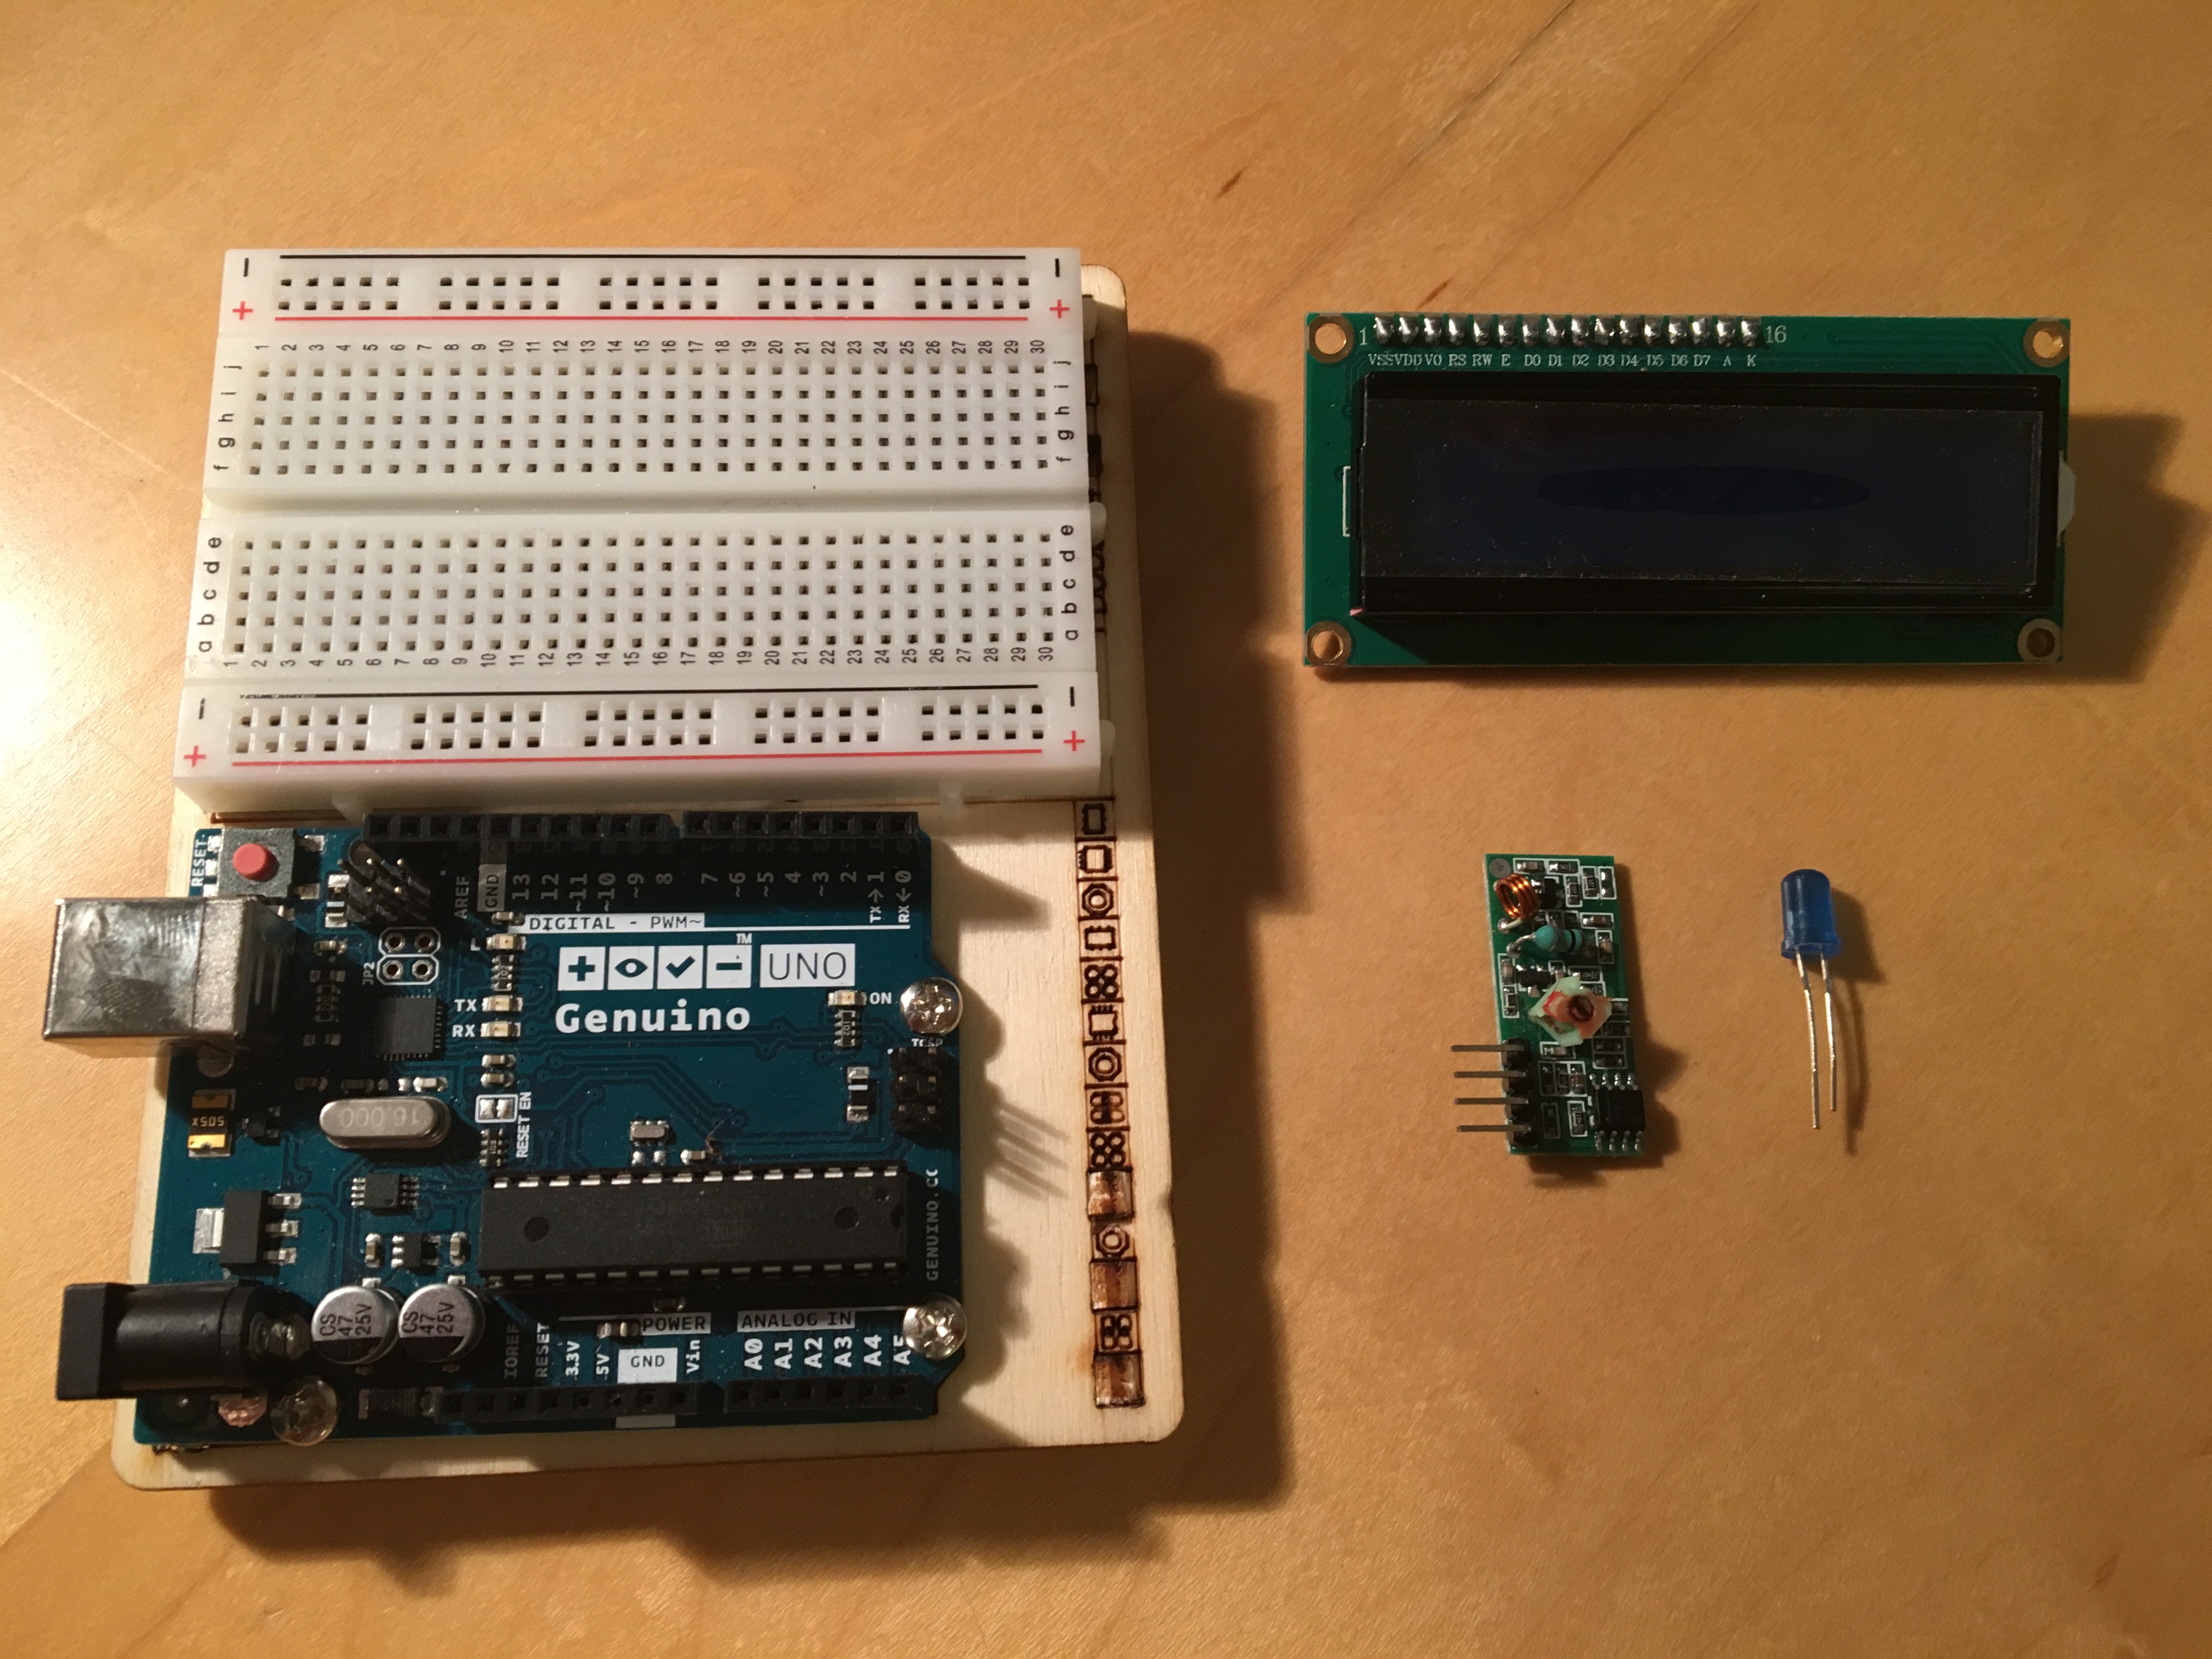
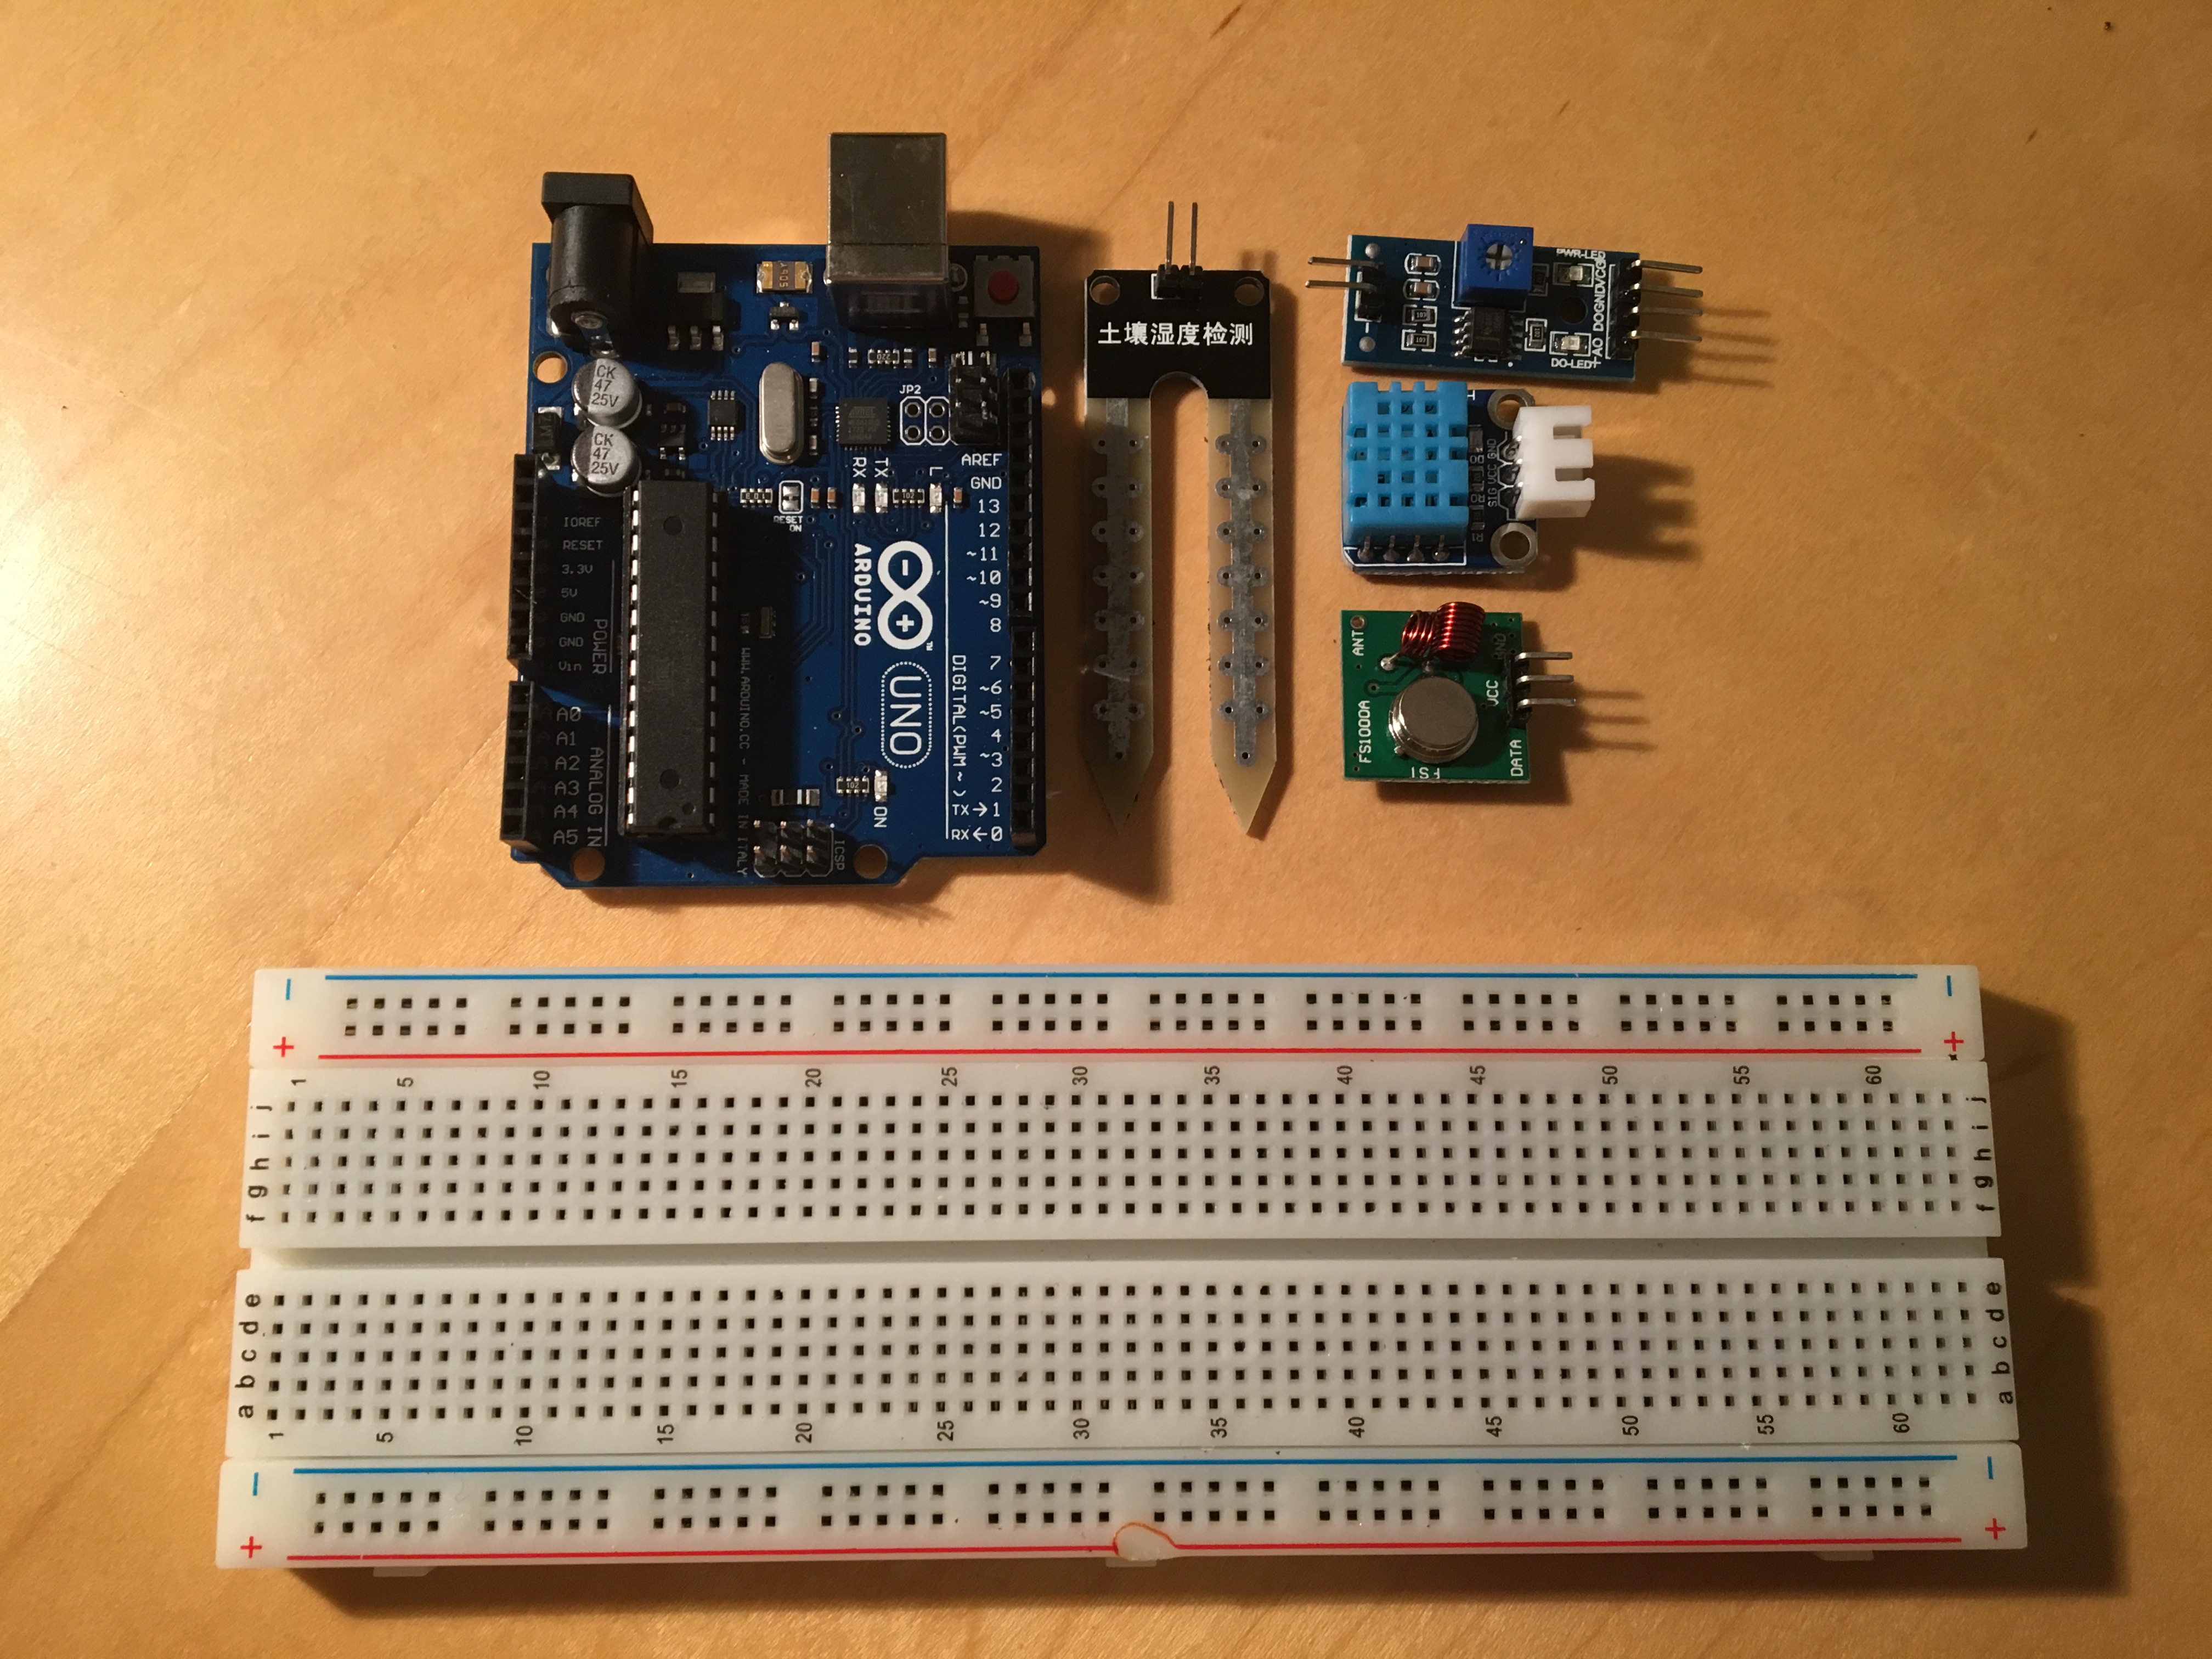
Step 2: Connecting the Circuit
Now we have to connect all the components together, I used a breadboard for both circuits (transmitter and receiver). For the receiver I used a Genuino Uno and the breadboard I received with the Genuino starter kit a while ago because it was fairly compact.
Step 3: Acknowledging the Code
This project consists of two different sketches; one for the receiver and the other for the transmitter. Both sketches consist of many functions, these are explained below.
- Read Values (receiver)
void readValues()
{
 uint8_t buf[VW_MAX_MESSAGE_LEN]; // create buffer where the data is received
 uint8_t buflen = VW_MAX_MESSAGE_LEN;
 if (vw_get_message(buf, &buflen)) // if we receive a message
 {
   for (int i = 0; i < buflen; i++)
   {
     data[i] = buf[i]; // store message
   }
   if(buflen == 4)
   {
     temperature = data[1]; // store temperature
     humidity = data[2]; // store humidity
     soilMoisture = data[3]; // store soil moisture
   }
 }
}
This loop will read the unit8_t variable that the transmitter sends and converts it into three variables: temperature, humidity and soil moisture.
- Display Temp, Hum and Display Soil Moisture (receive)
void displayTempAndHum()
{
 lcd.setCursor(0,1);
 lcd.print("Temp ");
 lcd.setCursor(5,1);
 lcd.print(temperature);
 lcd.setCursor(7,1);
 lcd.print("C");
 lcd.setCursor(9,1);
 lcd.print("Hum ");
 lcd.setCursor(13,1);
 lcd.print(humidity);
 lcd.setCursor(15,1);
 lcd.print("%");
}
void displaySoilMoisture()
{
 lcd.setCursor(1,0);
 lcd.print("Soil Moist ");
 lcd.setCursor(12,0);
 lcd.print(soilMoisture);
 lcd.setCursor(14,0);
 lcd.print("%");
}
These loops display the received and processed data on the LCD, the plant's soil moisture is displayed as a percentage (100 being fully liquid) as well as the plant's environment temperature and humidity.
- Read Temp and Hum and Read Soil Moisture (transmitter)
void readTempAndHum()
{
 chk = DHT.read11(11);
 temperature = DHT.temperature;
 humidity = DHT.humidity;
}
void readSoilMoisture()
{
 int sensorValue = analogRead(A0); // read the raw value
 soilMoisture = map(sensorValue,550,0,0,100); // map the received value
}
The transmitter will firstly read the values from the DHT11 temp and Hum sensor and the Soil Moisture sensor.
- Send Data (transmitter)
// Send these values
 valueToSend[1] = temperature; // send temperature
 valueToSend[2] = humidity; // send humidity
 valueToSend[3] = soilMoisture; // send soil moisture
 valueToSend[4] = 0; // this data does not represent anything
 vw_send((uint8_t *) valueToSend, 4); // send the message
 vw_wait_tx(); // Wait until the message is sent
This piece of code is part of the void loop, after the transmitter reads the values from the sensors, the micro controller packs all the data into a unit8_t variable and sends it via RF communication to the receiver. valueToSend[4] represents '0' because a timeout usually occurs with the last value and the receiver does not receive it.
Libraries
virtualWire - copyright (c) 2018 Mike McCauley GNU General Public Licence this library is in the public domain
wire - copyright (c) 2006 Nicholas Zambetti GNU Lesser General Public Licence this library is in the public domain
DHT - Author Rob Tillaart this library is in the public domain
liquidCrystal_I2C - author DFROBOT, posted on GitHub by fdebrabander
Setup
Ensure that the circuits are correctly wired, connect both devices (transmitter and Receiver) to a computer and upload the code below. Make sure that you upload the receiver code to the receiver board, if you have plugged both micro controllers to the computer via separate ports then change the usb port on your computer to the other board and upload the transmitter sketch. Now you are all set!
Final
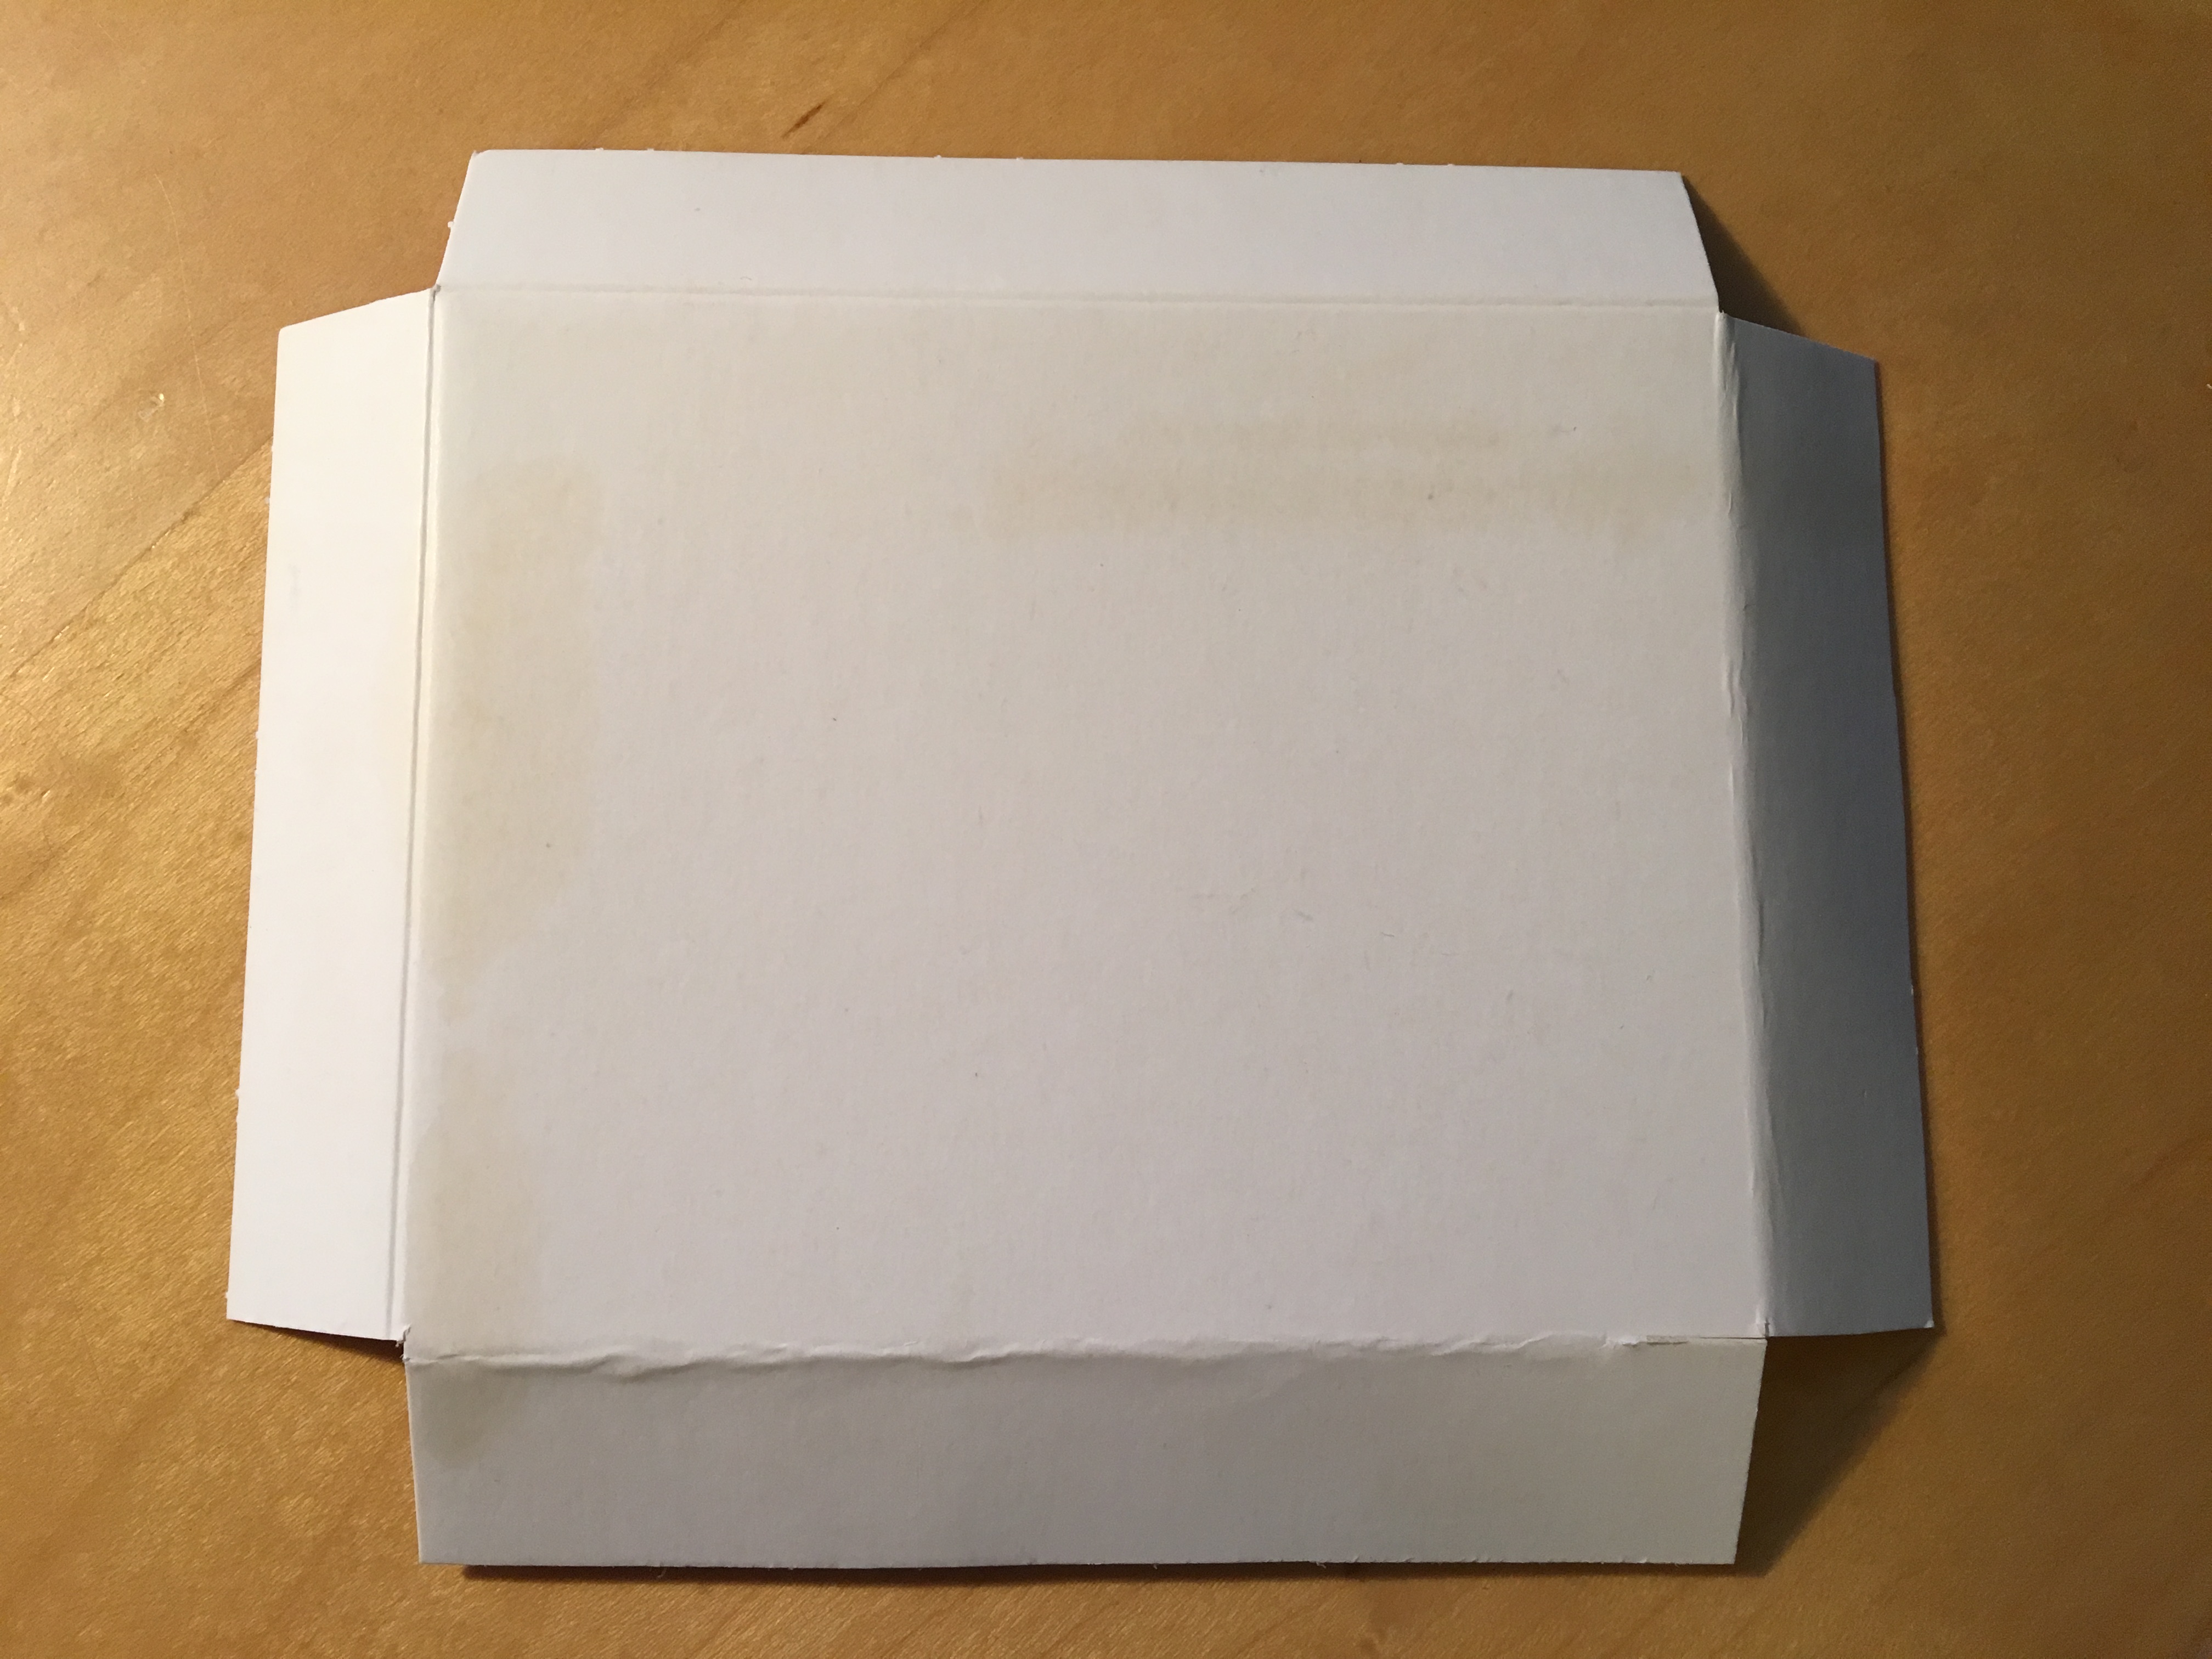
I have designed an enclosure for the receiver board out of cardboard, I decided that the transmitter does not need a cover as I do not mind some wiring beside my window. It is very easy to make this enclosure.
- Step 1: Required Apparatus
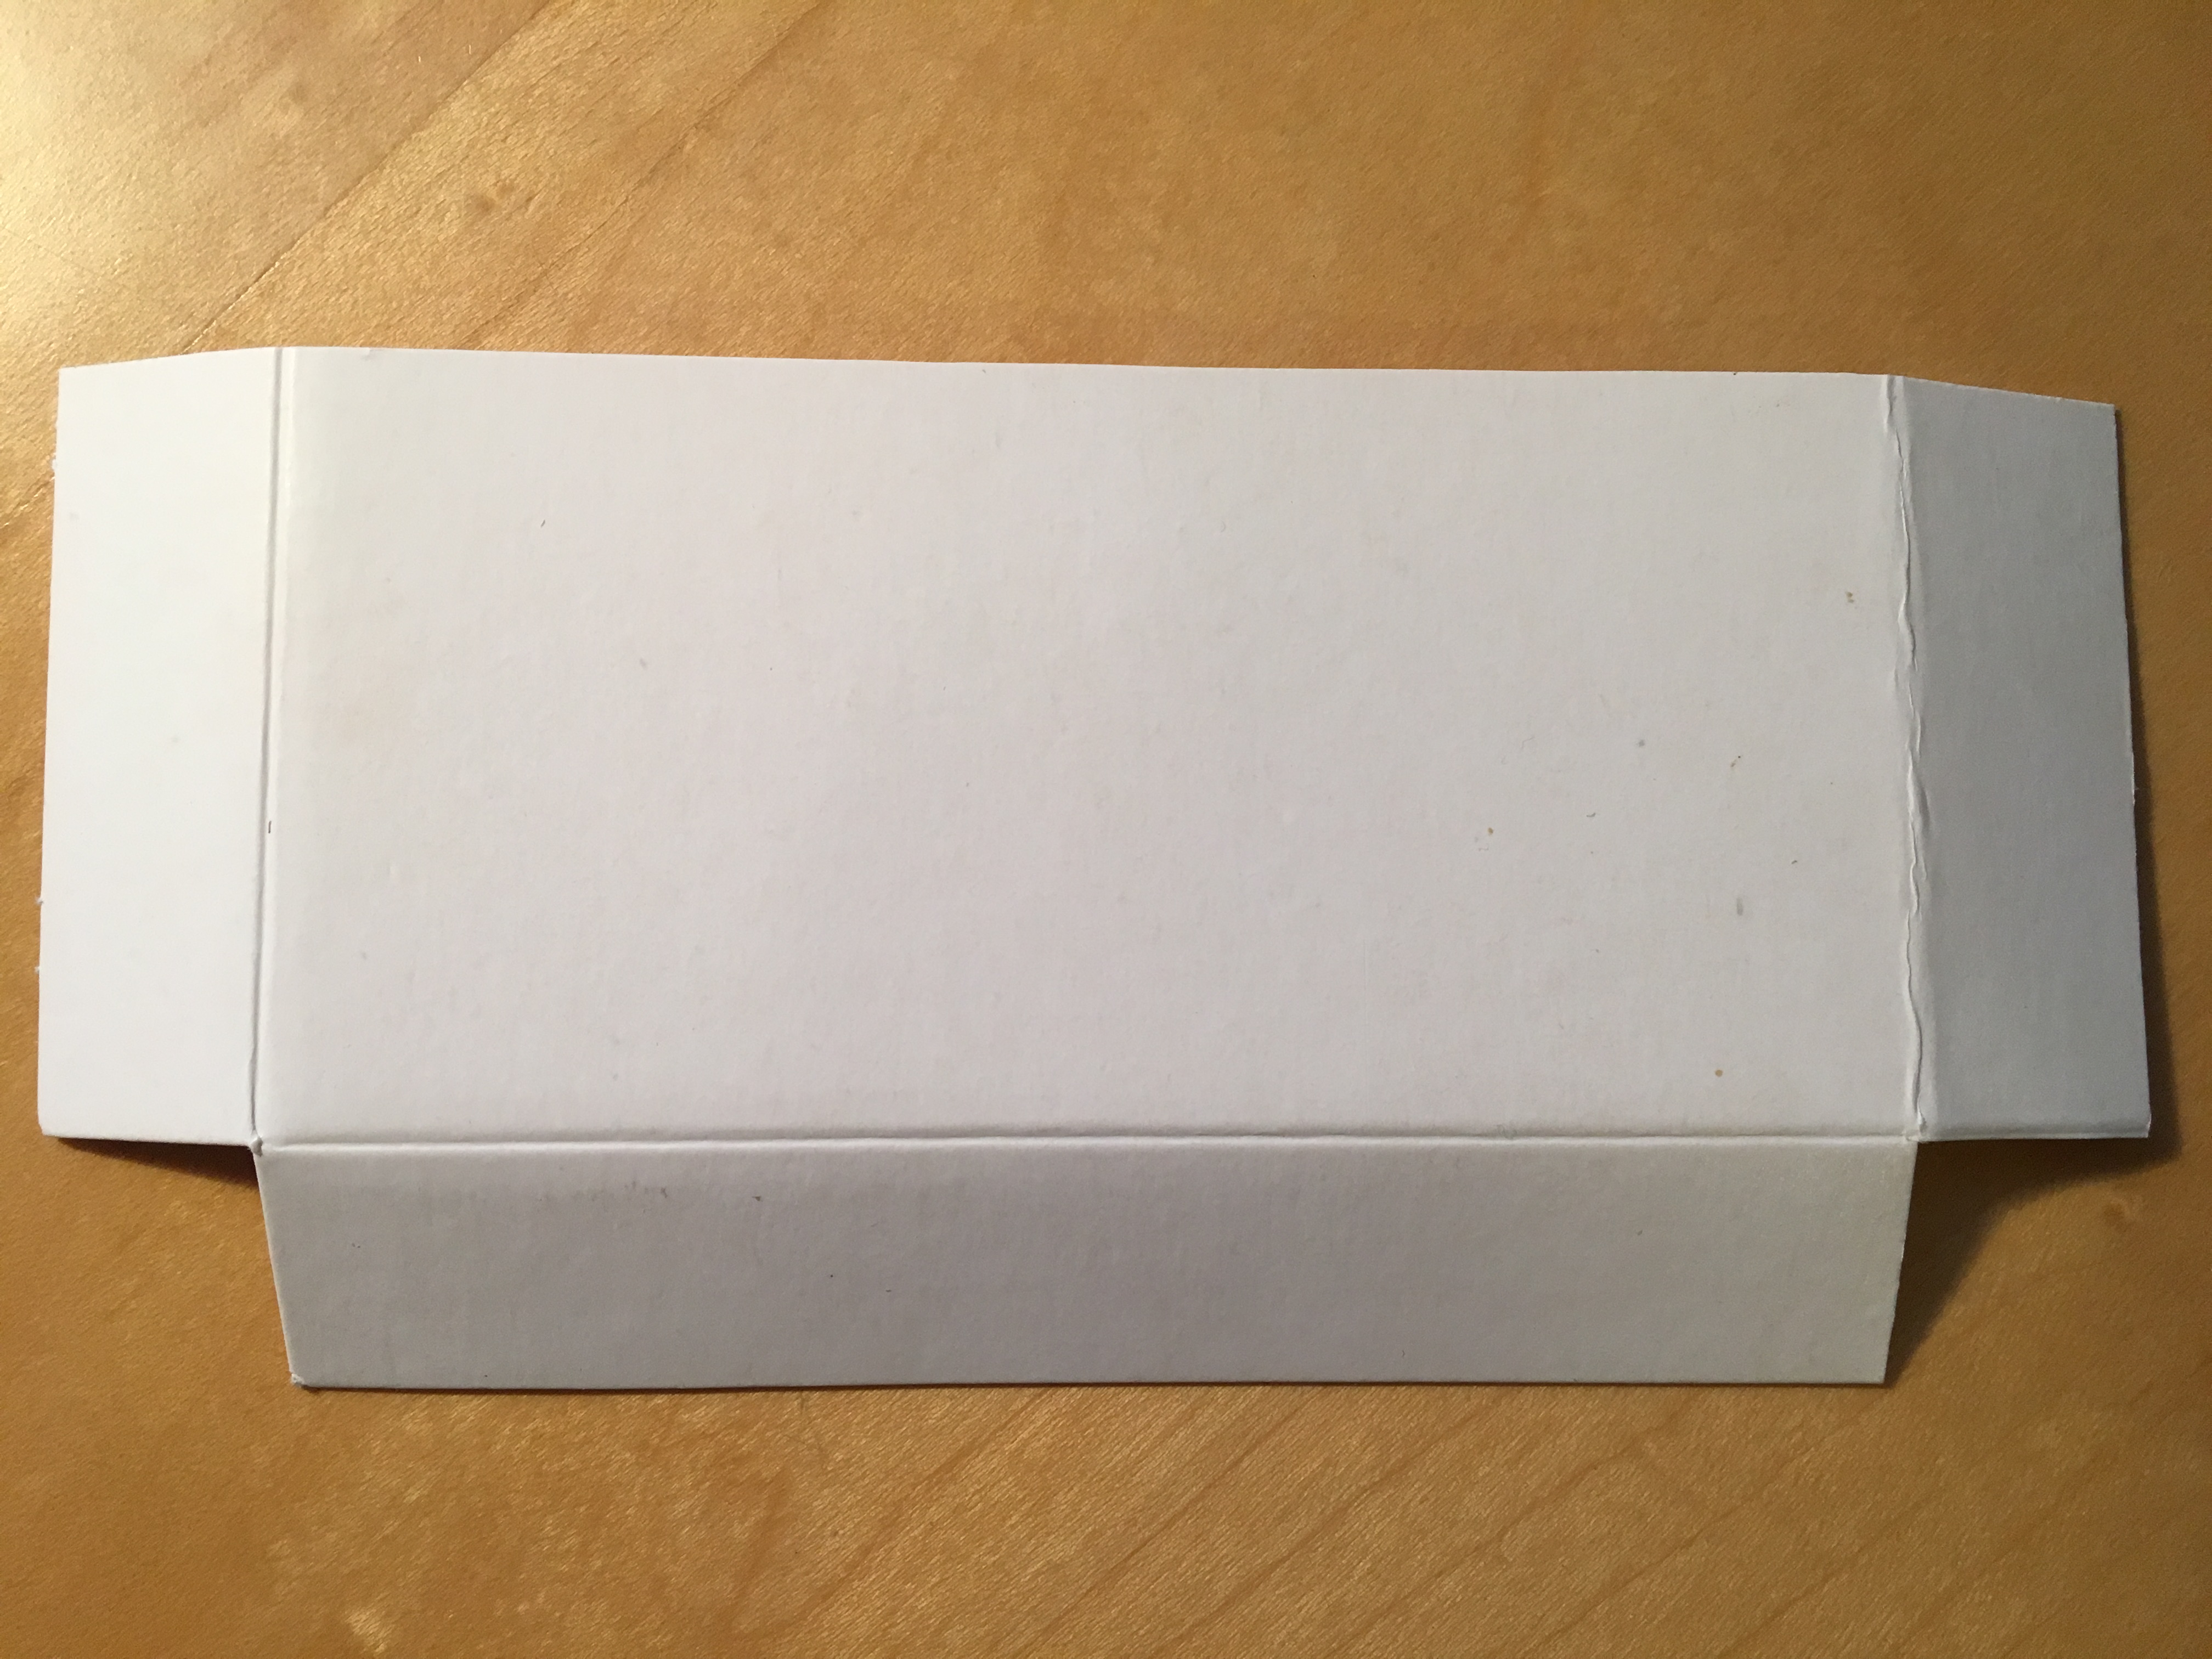
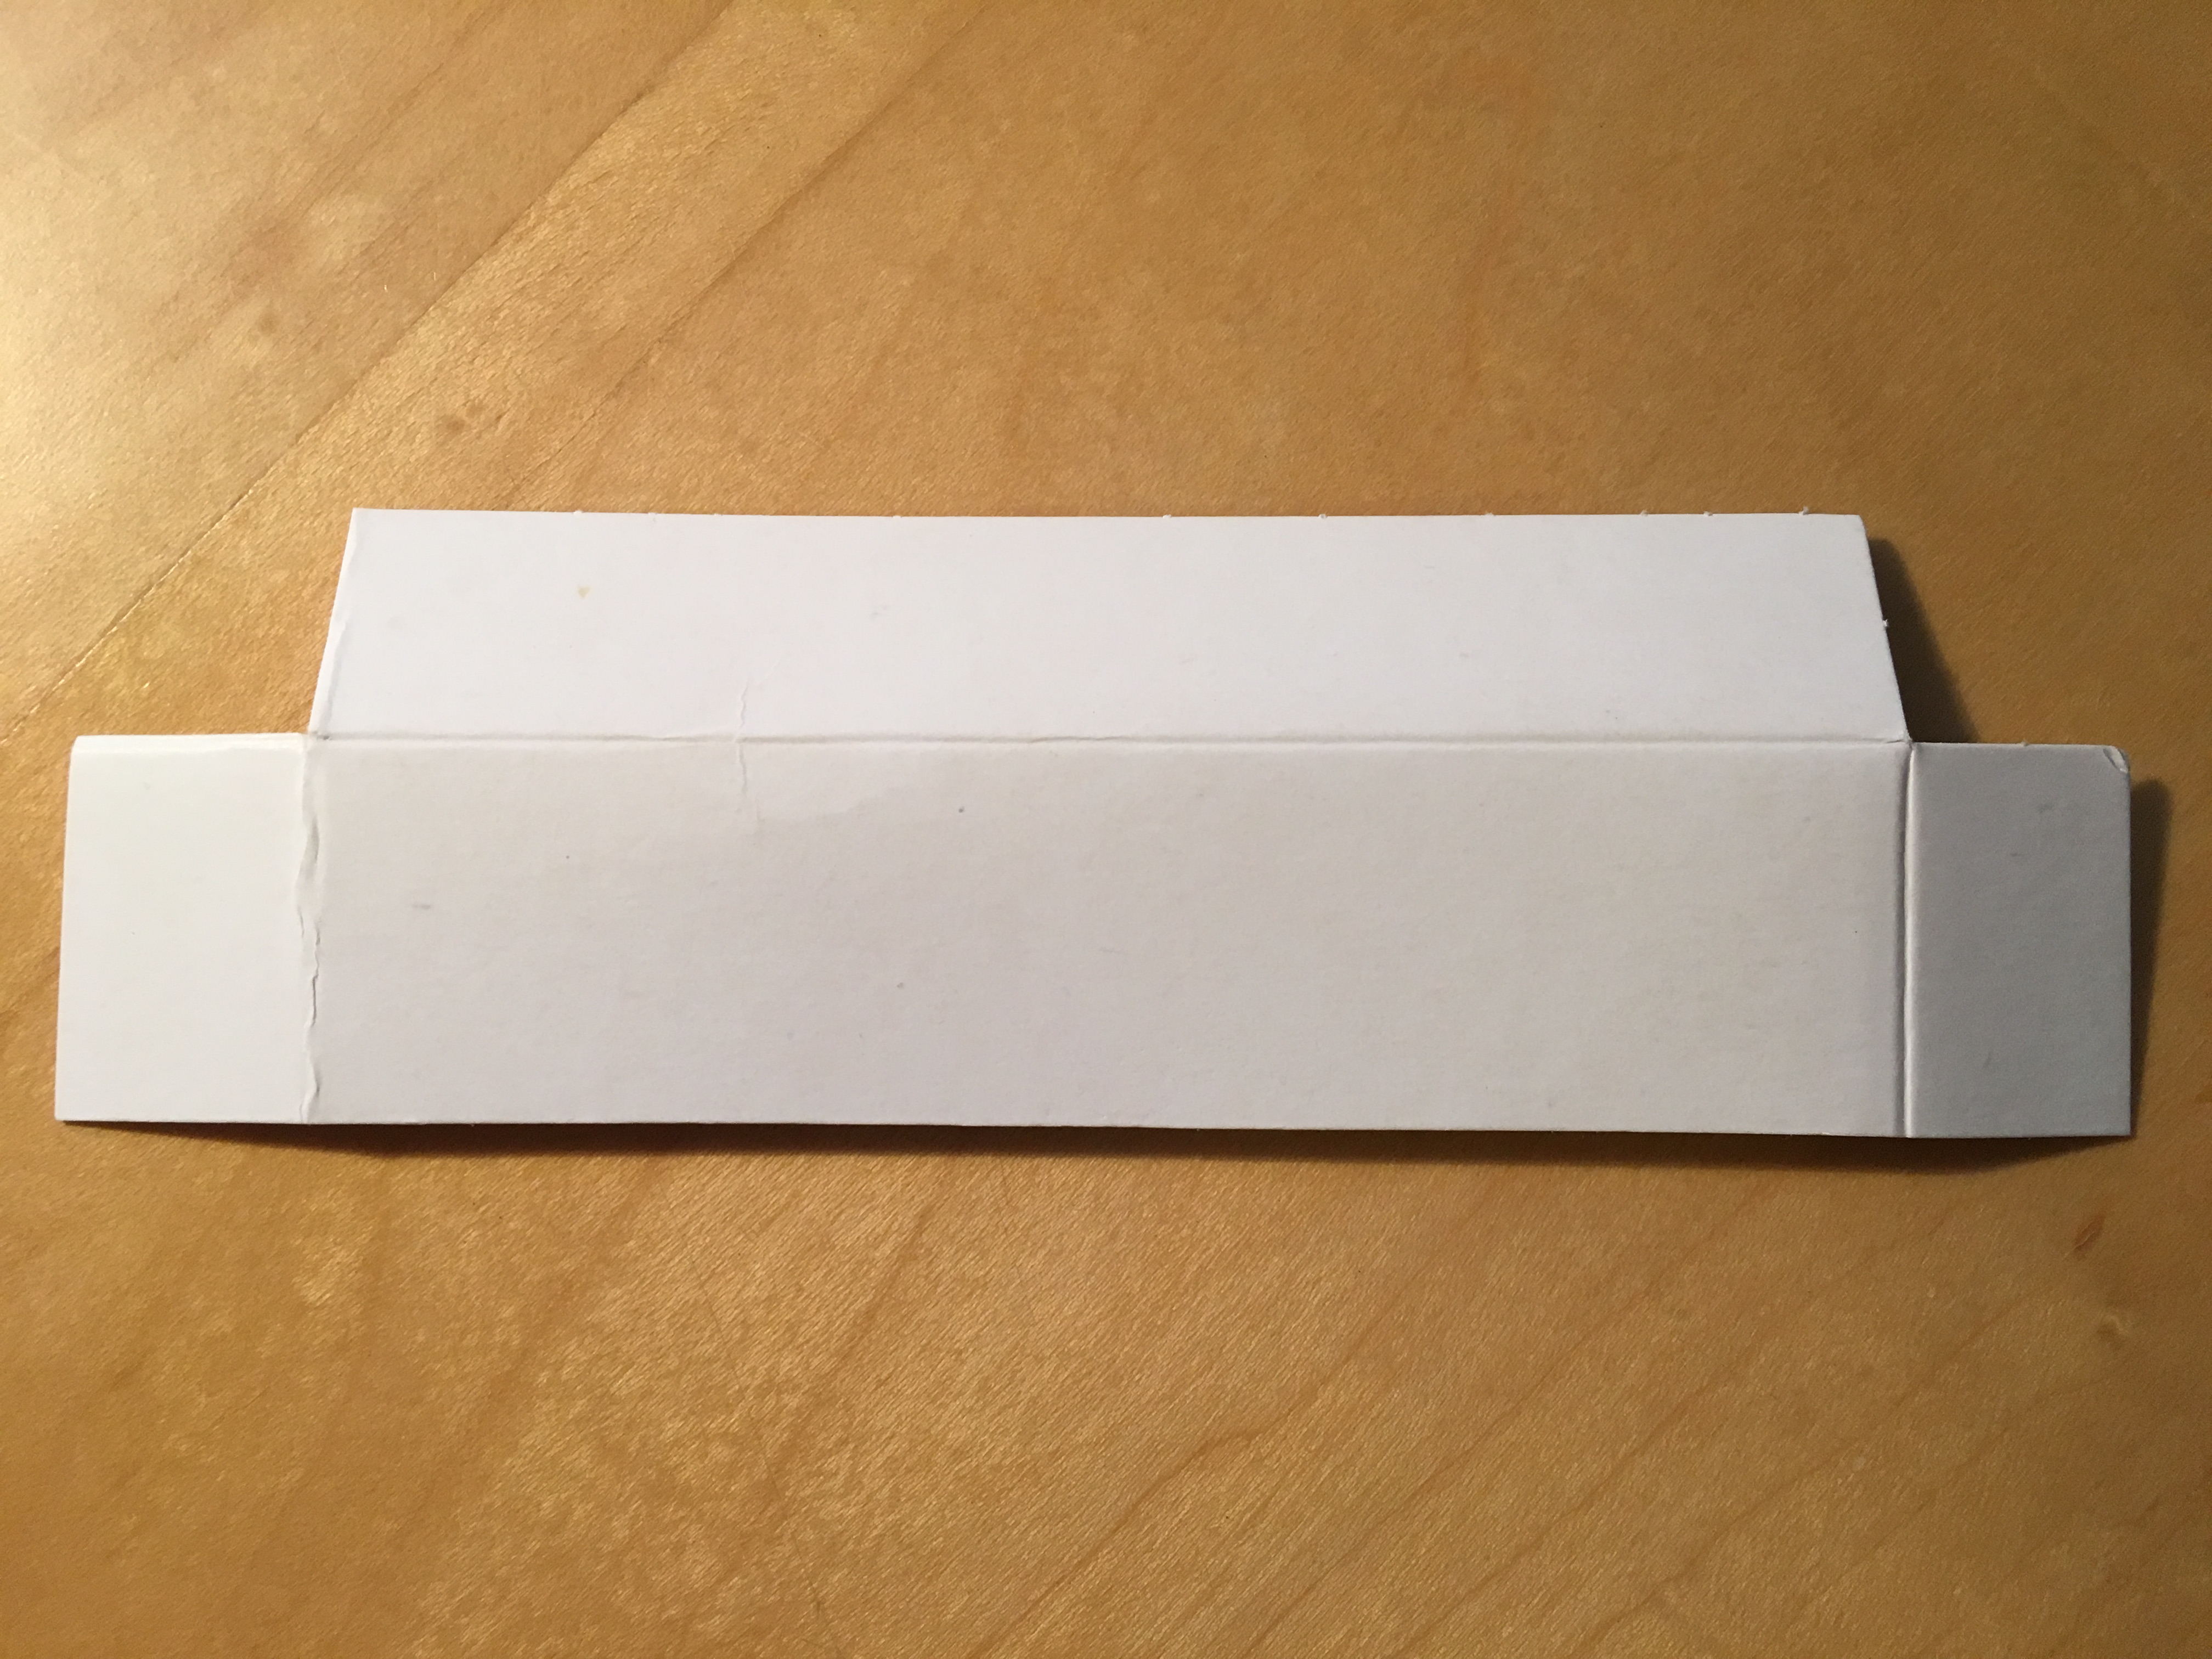
All you need for this enclosure is a scissors, some tape and a piece of thin cardboard, approximately 200mm by 180mm.
- Step 2: Shaping the Parts
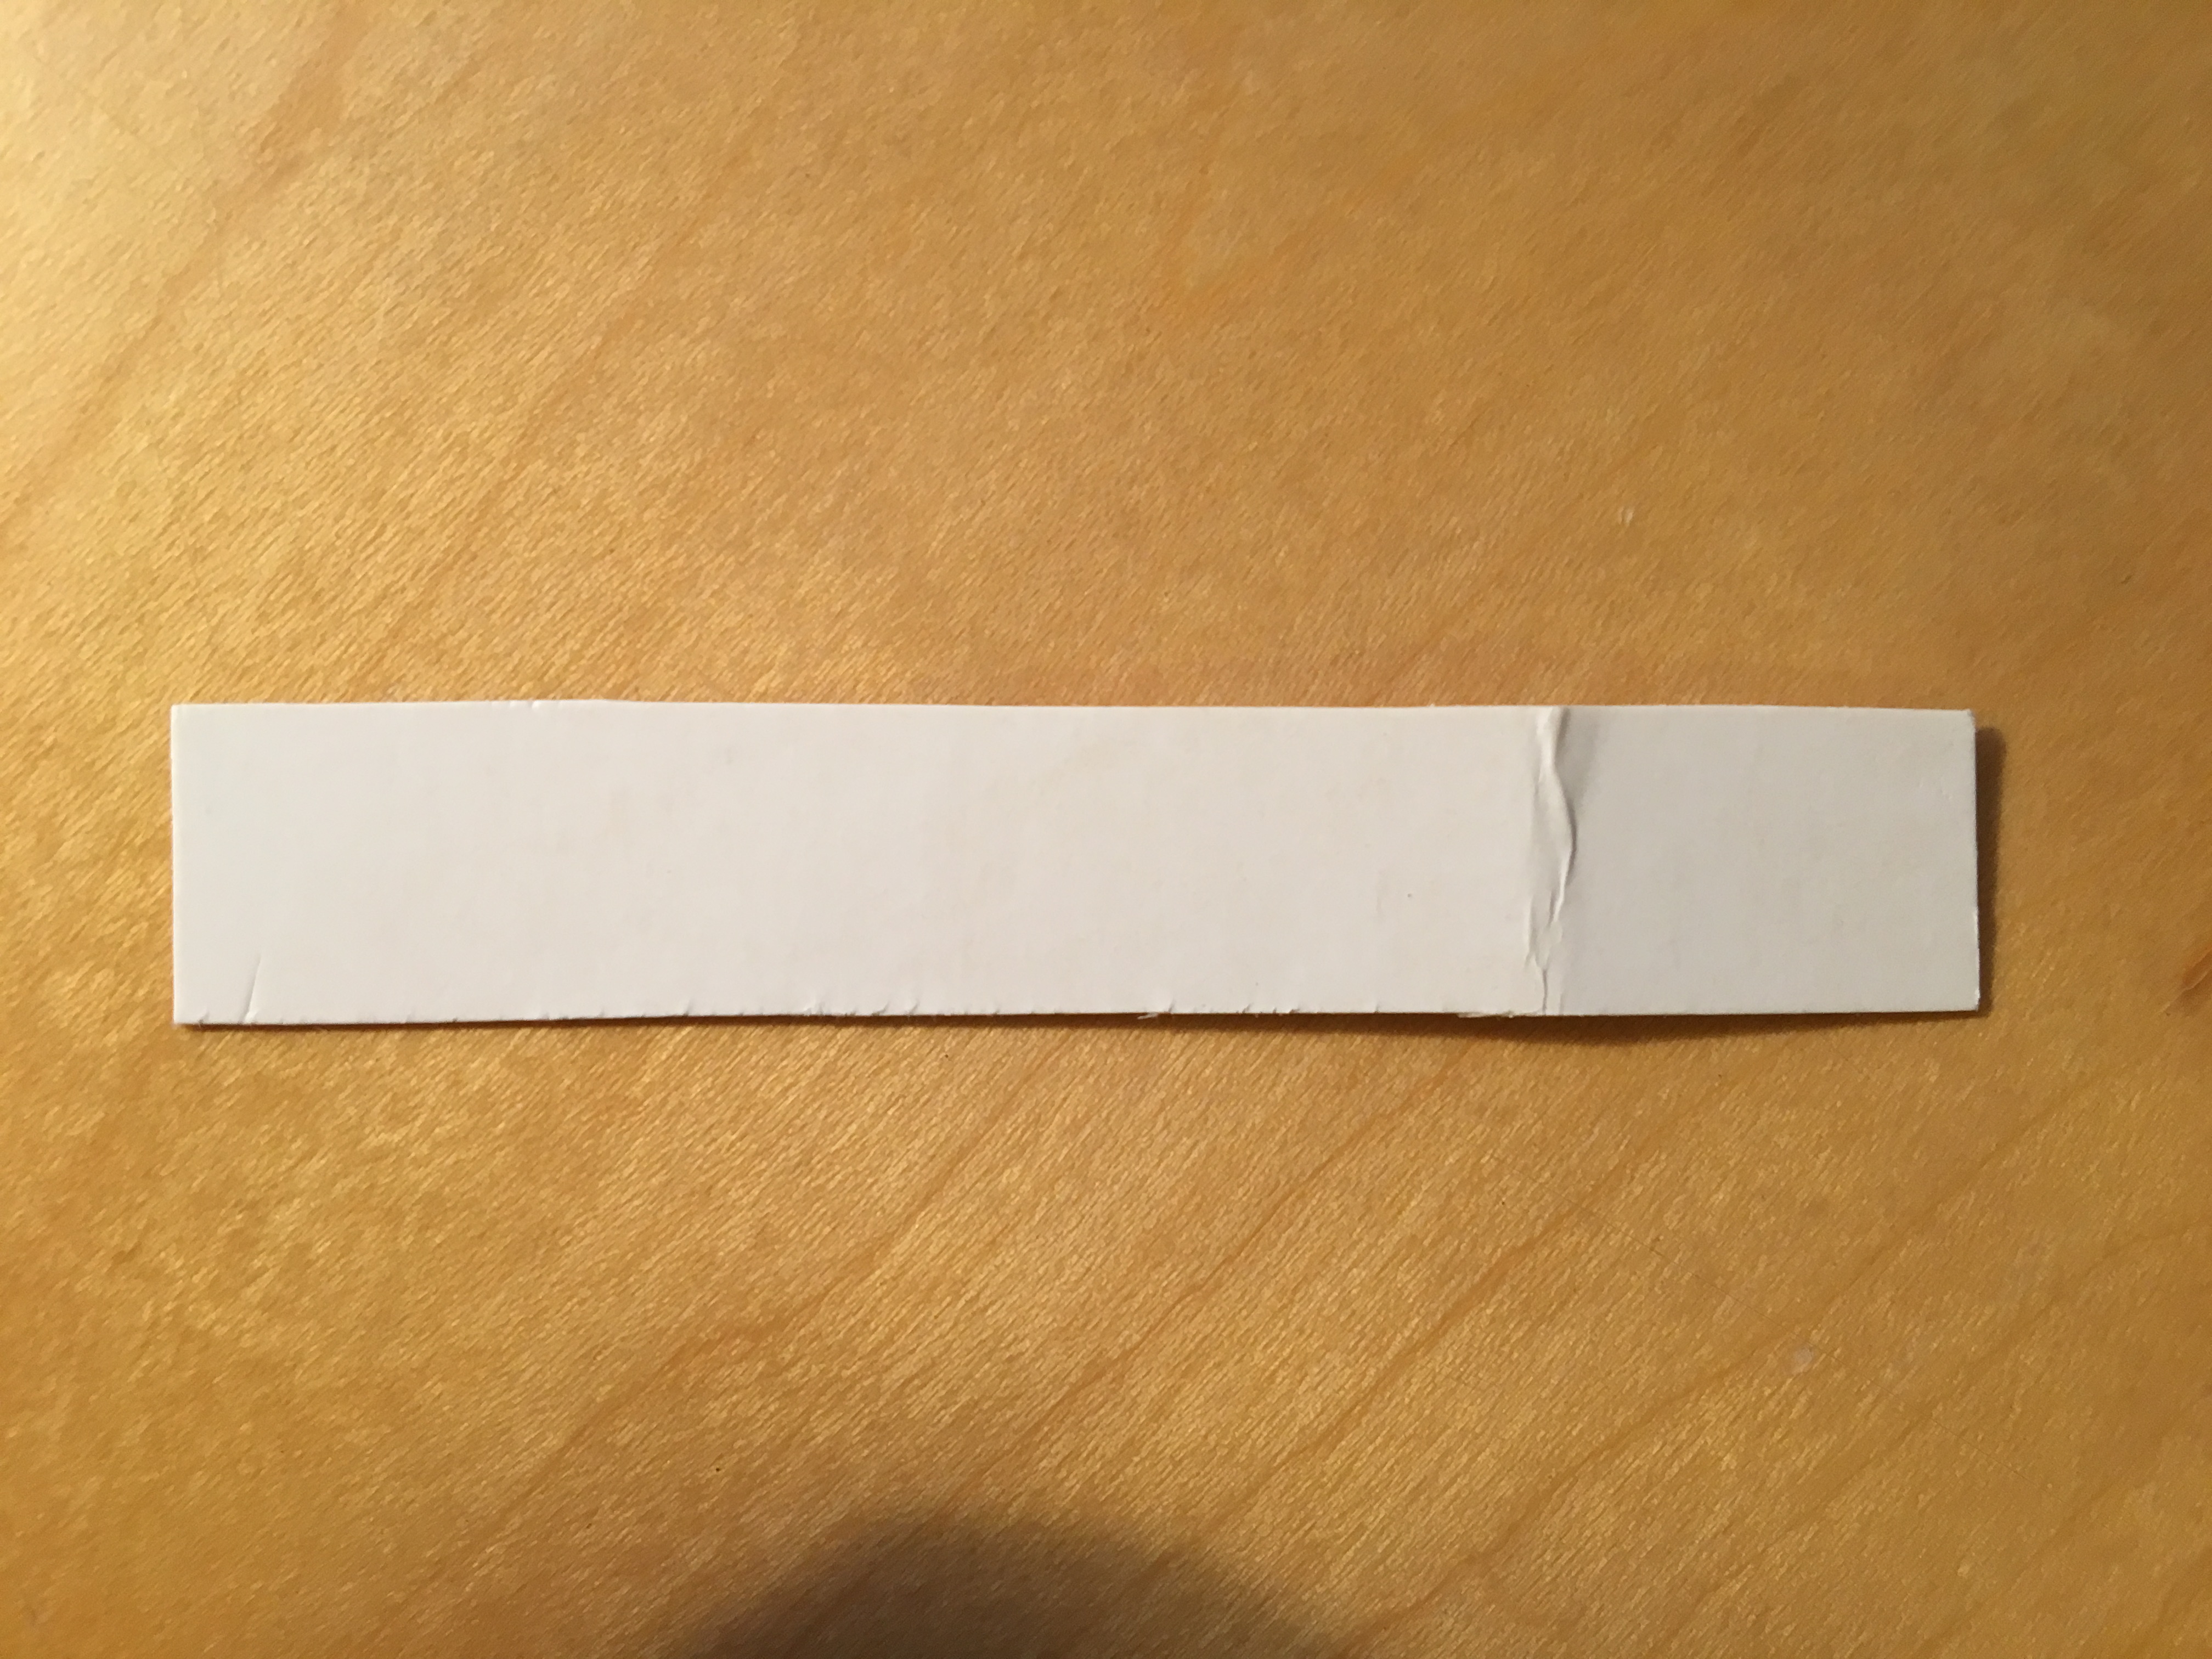
Following the diagram in the image below, shape the piece of cardboard into smaller pieces using a scissors or guillotine.
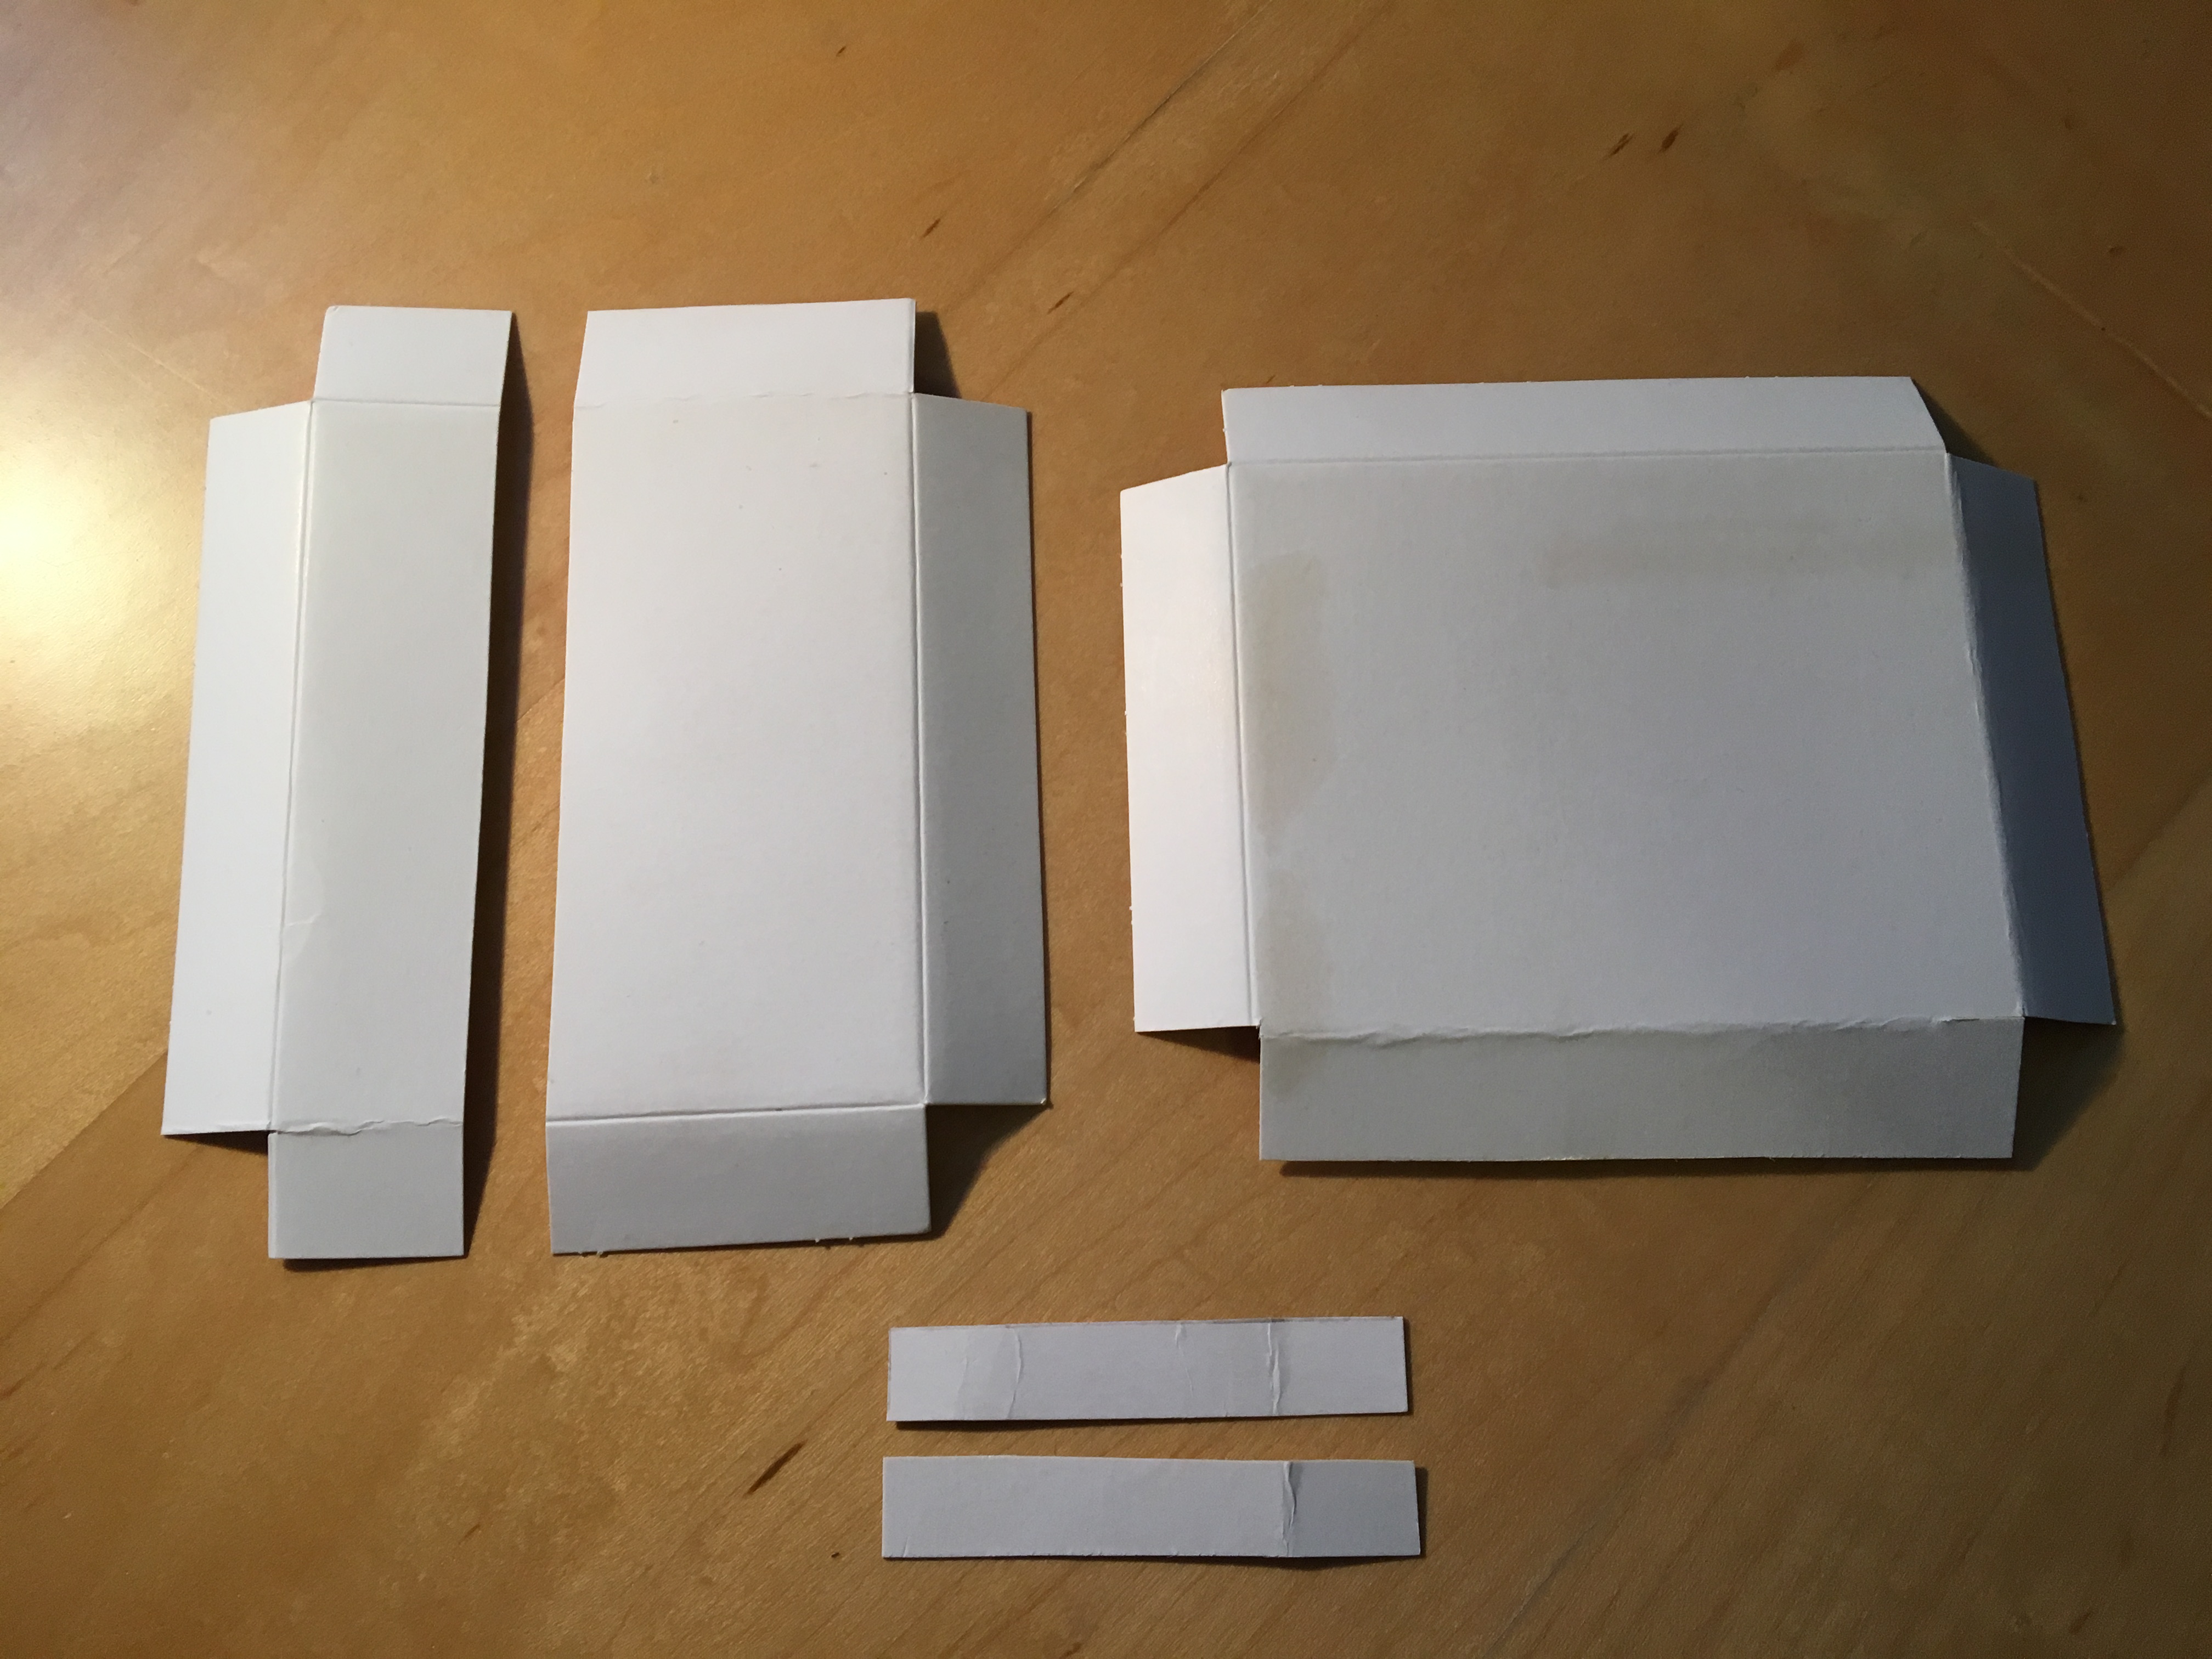
bottom piece

right cover

left cover

extras
ข้อมูล Frontmatter ดั้งเดิม
apps:
  - "1x Arduino Web Editor"
author: "andreiflorian"
category: "Sensors & Environment"
components:
  - "1x SparkFun Soil Moisture Sensor (with Screw Terminals)"
  - "1x LED (generic)"
  - "1x DHT11 Temperature & Humidity Sensor (4 pins)"
  - "1x 9 Volts Battery Box"
  - "1x 433Mhz RF transmitter"
  - "1x Jumper wires (generic)"
  - "1x Resistor 221 ohm"
  - "1x I2C 16x2 LCD"
  - "1x 433Mhz RF Transmitter"
  - "2x Arduino UNO"
  - "1x 9 Volts Battery"
description: "Monitor your precious plant wirelessly with FlowerPot monitor."
difficulty: "Intermediate"
documentationLinks: []
downloadableFiles:
  - "https://create.arduino.cc/editor/LightPro/e54e12ce-7548-4a89-991d-47b9cde07770"
  - "https://create.arduino.cc/editor/LightPro/a39c451a-a0a2-4061-8eb8-21d7bac2da1e"
  - "https://create.arduino.cc/editor/LightPro/a39c451a-a0a2-4061-8eb8-21d7bac2da1e"
  - "https://create.arduino.cc/editor/LightPro/e54e12ce-7548-4a89-991d-47b9cde07770"
encryptedPayload: "U2FsdGVkX19XrqwpZp25uktC2D4H38QzUYuvMOk0wD0lGVeKasZAUzn3XRlfF81M7N7yfQUVXSsc01rPH6oIFZRtUoyMlSGDz+uRwsKekp0="
heroImage: "https://cdn.jsdelivr.net/gh/bigboxthailand/arduino-assets@main/images/projects/flowerpot-monitor-997a64_cover.JPG"
lang: "en"
likes: 16
passwordHash: "c86a72baa6171cbaec00e527b446268720acc7bfa5f642e234676667898efa59"
price: 2450
seoDescription: "Wireless FlowerPot Monitor for plants. Track health using Arduino and Sensor for optimal growth. Your smart plant care solution."
tags:
  - "data collection"
  - "monitoring"
  - "garden"
title: "FlowerPot Monitor"
tools: []
videoLinks: []
views: 11868