Global Control: IoT Home Automation
The IoT Home Automation project takes your smart home beyond the living room. By using the ESP8266 or NodeMCU, you can connect your Arduino projects to the internet, allowing you to control them from any smartphone or computer.
The System Layers
- The Web Server: The ESP8266 hosts a tiny webpage. When you visit its IP address, you see buttons to control your home.
- The Command: Clicking a button on the webpage sends an HTTP request back to the ESP8266.
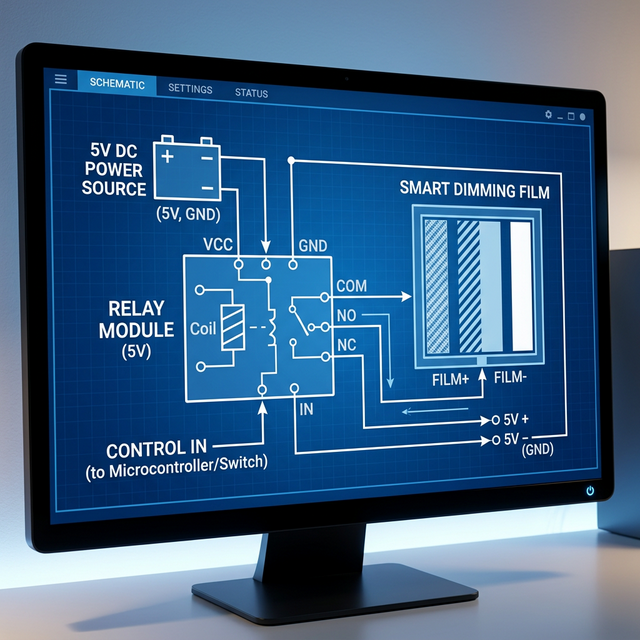
- The Action: The microprocessor interprets the request and triggers a Relay Module to turn a light ON or OFF.
- The Feedback: The webpage updates to show the current status of the devices.
Hardware Components
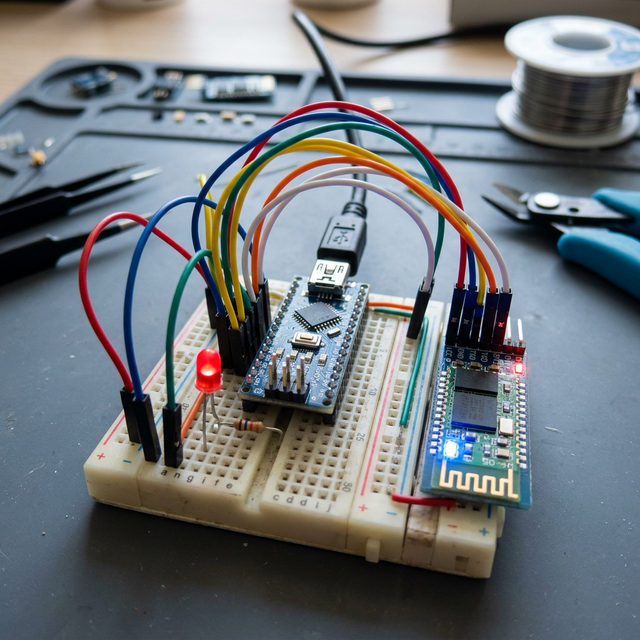
- ESP8266 / NodeMCU: The Wi-Fi-enabled brain.
- Relay Module (2-channel or 4-channel): To control real household appliances.
- Breadboard and Jumper Wires.
- A Smartphone or Laptop: To access the control dashboard.
Scaling Up
Once you master the basic web server, you can integrate with platforms like Blynk, Adafruit IO, or MQTT to create professional-grade, cloud-based home control systems with data logging and voice control (via Alexa or Google Assistant).