What the device is
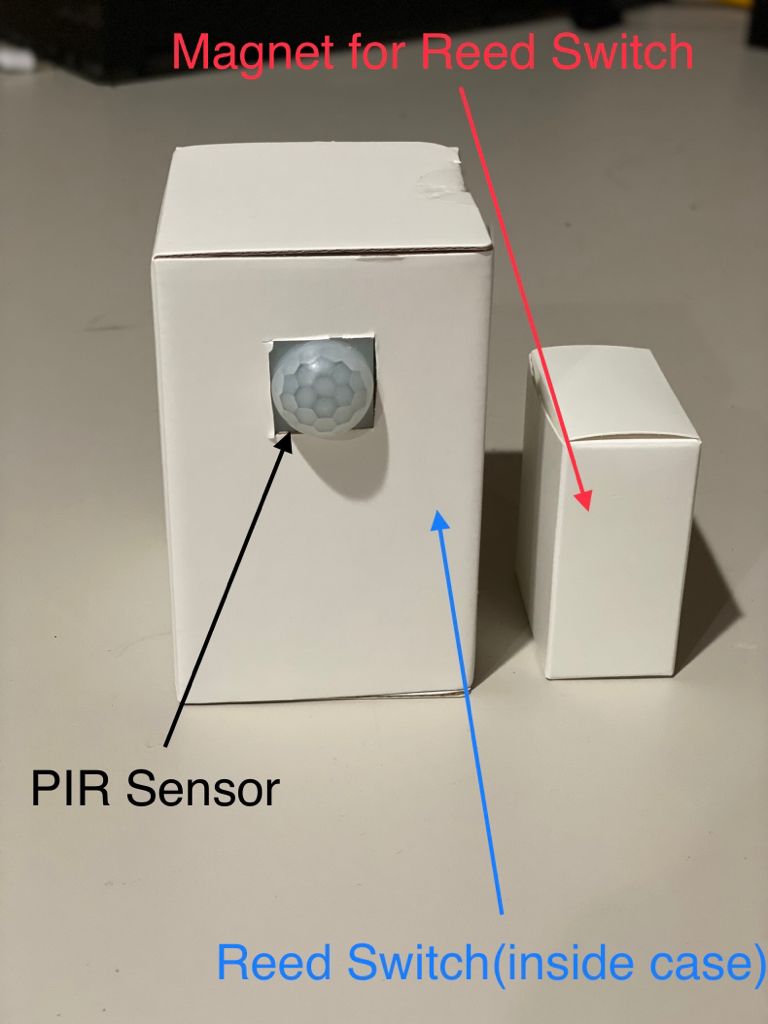
The use of WiFi and IoT in modern-day technology has become vital to making data more accessible. This project is a replica of a basic home security system. It detects motion using a Passive Infrared sensor (PIR sensor), and can also detect whether a door(or window) is open or closed with the help of a Reed Switch. The device transmits the data it detects to Adafruit Dashboard with the help of the Internet of Things(IoT) and the MQTT Protocol.
How the device was made
The creation of this device had three main components: hardware, software, and testing.
Hardware-Connectionsbetweensensorsandboards
Step 1: Acquire all materials that have been listed above.
Step 2: Wire the materials as per the schematic attached below. Here is a breakdown of the schematic:
ConnectionsbetweenESP8266NodeMCUandPIRSensor:
VCC (PIR Sensor) ---> 3V (NodeMCU)
OUTPUT (PIR Sensor) ---> D7 (NodeMCU)
GND (PIR Sensor) ---> G (NodeMCU)
Connections between ESP8266 NodeMCU and Reed Switch
GND (Reed Switch) ---> G (NodeMCU)
Output Pin (Reed Switch) ---> D6 (NodeMCU)
Note:youmayuseabreadboardpowersupplyandbatterytopowerthesystem
Step 3: After the hardware has been assembled, you may put it into a case for a better appearance.

Software-UsingAdafruitDashboard
Adafruit Dashboard is an online service provided by Adafruit that allows you to visualize data and control electric components from any well-known web browser with the help of charts, graphs, buttons, and switches. Creating and using these widgets is very simple as no custom code is required! Adafruit Dashboard was used to display data given from my home security system in this project.
To learn how to use Adafruit Dashboard, visit this link: https://learn.adafruit.com/adafruit-io-basics-dashboards/creating-a-dashboard
In this project, I have used two Stream Block widgets to display the data attained by the ESP8266 module.
Testing the system
The most important part of any device is testing to see if it works as desired! I used a magnet for the reed switch and did simple movements with my hand in front of the PIR Sensor in my testing procedure. The magnet was removed and inserted in front of the switch multiple times. The expected result for the reed switch was that every time the magnet was removed, the dashboard would display a message saying "Door Open". The expected result for the PIR sensor was that every time my hand moved in front of the sensor, the dashboard would display a message saying "Motion Detected". The outcomes can be seen below:
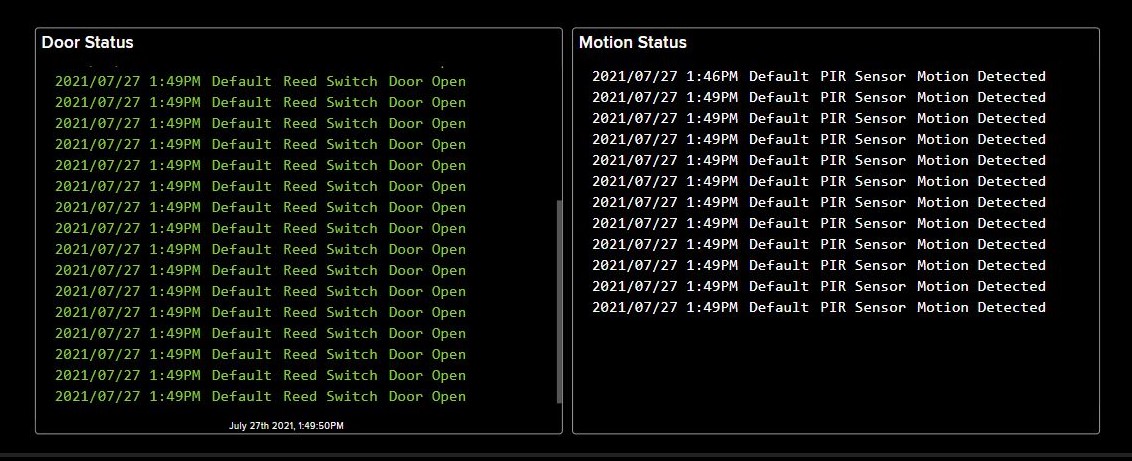
Every time motion was detected by the PIR sensor, it would send a message to the designated feed on the device's dashboard. The reed switch would also do the same whenever the magnet was removed from its proximity.
What could be added to make this system better?
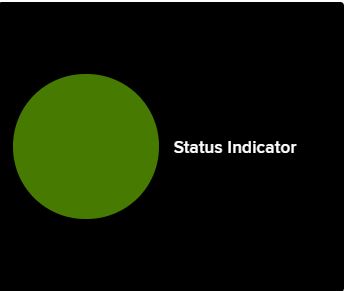
This project can be improved in many ways due to the number of resources available for it. For example, the range of detection for the motion sensor can be changed to better fit the needs of the user, and to make it more accessible, a component could be added to the hardware of the device to allow the user to do so. Adafruit Dashboard has many more widgets that could have been used in this project, such as the "Indicator" widget, which would return a color depending on the state of the reed switch.
Many changes could be made to this project to make it more helpful, and I hope to make these changes in the future!
Thank you for reading,
Sharvayu Chavan
EXPANDED TECHNICAL DETAILS
Cloud-Assisted Intrusion Detection
This project creates a professional-grade home security hub using the ESP8266 (NodeMCU) for wireless telemetry and remote monitoring.
- Multi-Sensor Zone Management: The system monitors a PIR motion sensor and multiple Magnetic Reed switches (for doors/windows). The Arduino code treats these as independent "Zones," allowing you to see exactly where an intrusion occurred.
- Adafruit IO Dashboard: The ESP8266 publishes sensor states to an Adafruit IO MQTT feed. This provides a live, real-time dashboard on your phone or PC, showing current security status and a history of triggered events.
Security Logic
- Armed/Disarmed States: Features a local override button or a virtual switch in the dashboard to arm or disarm the system. When armed and a sensor is tripped, the ESP8266 triggers a local siren and sends an instant push notification via IFTTT or Pushbullet.