Hello guys, today I will show you how to make your ultrasonic levitator using an Arduino Nano. It’s so easy to make and hope it will be useful for you g uys. If you have any question or suggestion, please feel free to comment in my youtube video and please don’t forget to like and subscribe to my YouTube channel.
Click here for full tutorial and source code.
Click hereto visit my Instagram.
Everything you needed for this project:
- Arduino Nano
- Motor driver L298N
- Ultrasonic Sensor Module (HC-SR04)
What is an ultrasonic levitator?
Acoustic levitation (also: Acoustophoresis) is a method for suspending matter in a medium by using acoustic radiation pressure from intense sound waves in the medium. Sometimes sound waves at ultrasonic frequencies can be used to levitate objects, thus creating no sound heard by the human ear, such as was demonstrated at Otsuka Lab while others use audible frequencies. There are various ways of emitting the sound wave, from creating a wave underneath the object and reflecting it back to its source, to using a (transparent) tank to create a large acoustic field.
What is an ultrasonic sensor?
As the name indicates, ultrasonic sensors measure distance by using ultrasonic waves.The sensor head emits an ultrasonic wave and receives the wave reflected back from the target. Ultrasonic Sensors measure the distance to the target by measuring the time between the emission and reception.
An optical sensor has a transmitter and receiver, whereas an ultrasonic sensor uses a single ultrasonic element for both emission and reception. In a reflective model ultrasonic sensor, a single oscillator emits and receives ultrasonic waves alternately. This enables the miniaturization of the sensor head.
How It Works: The Physics of Acoustic Manipulation
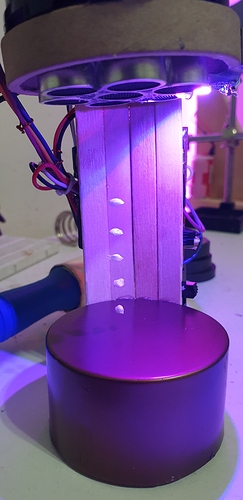
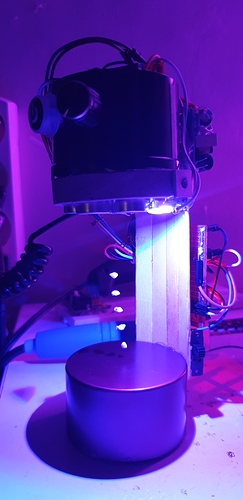
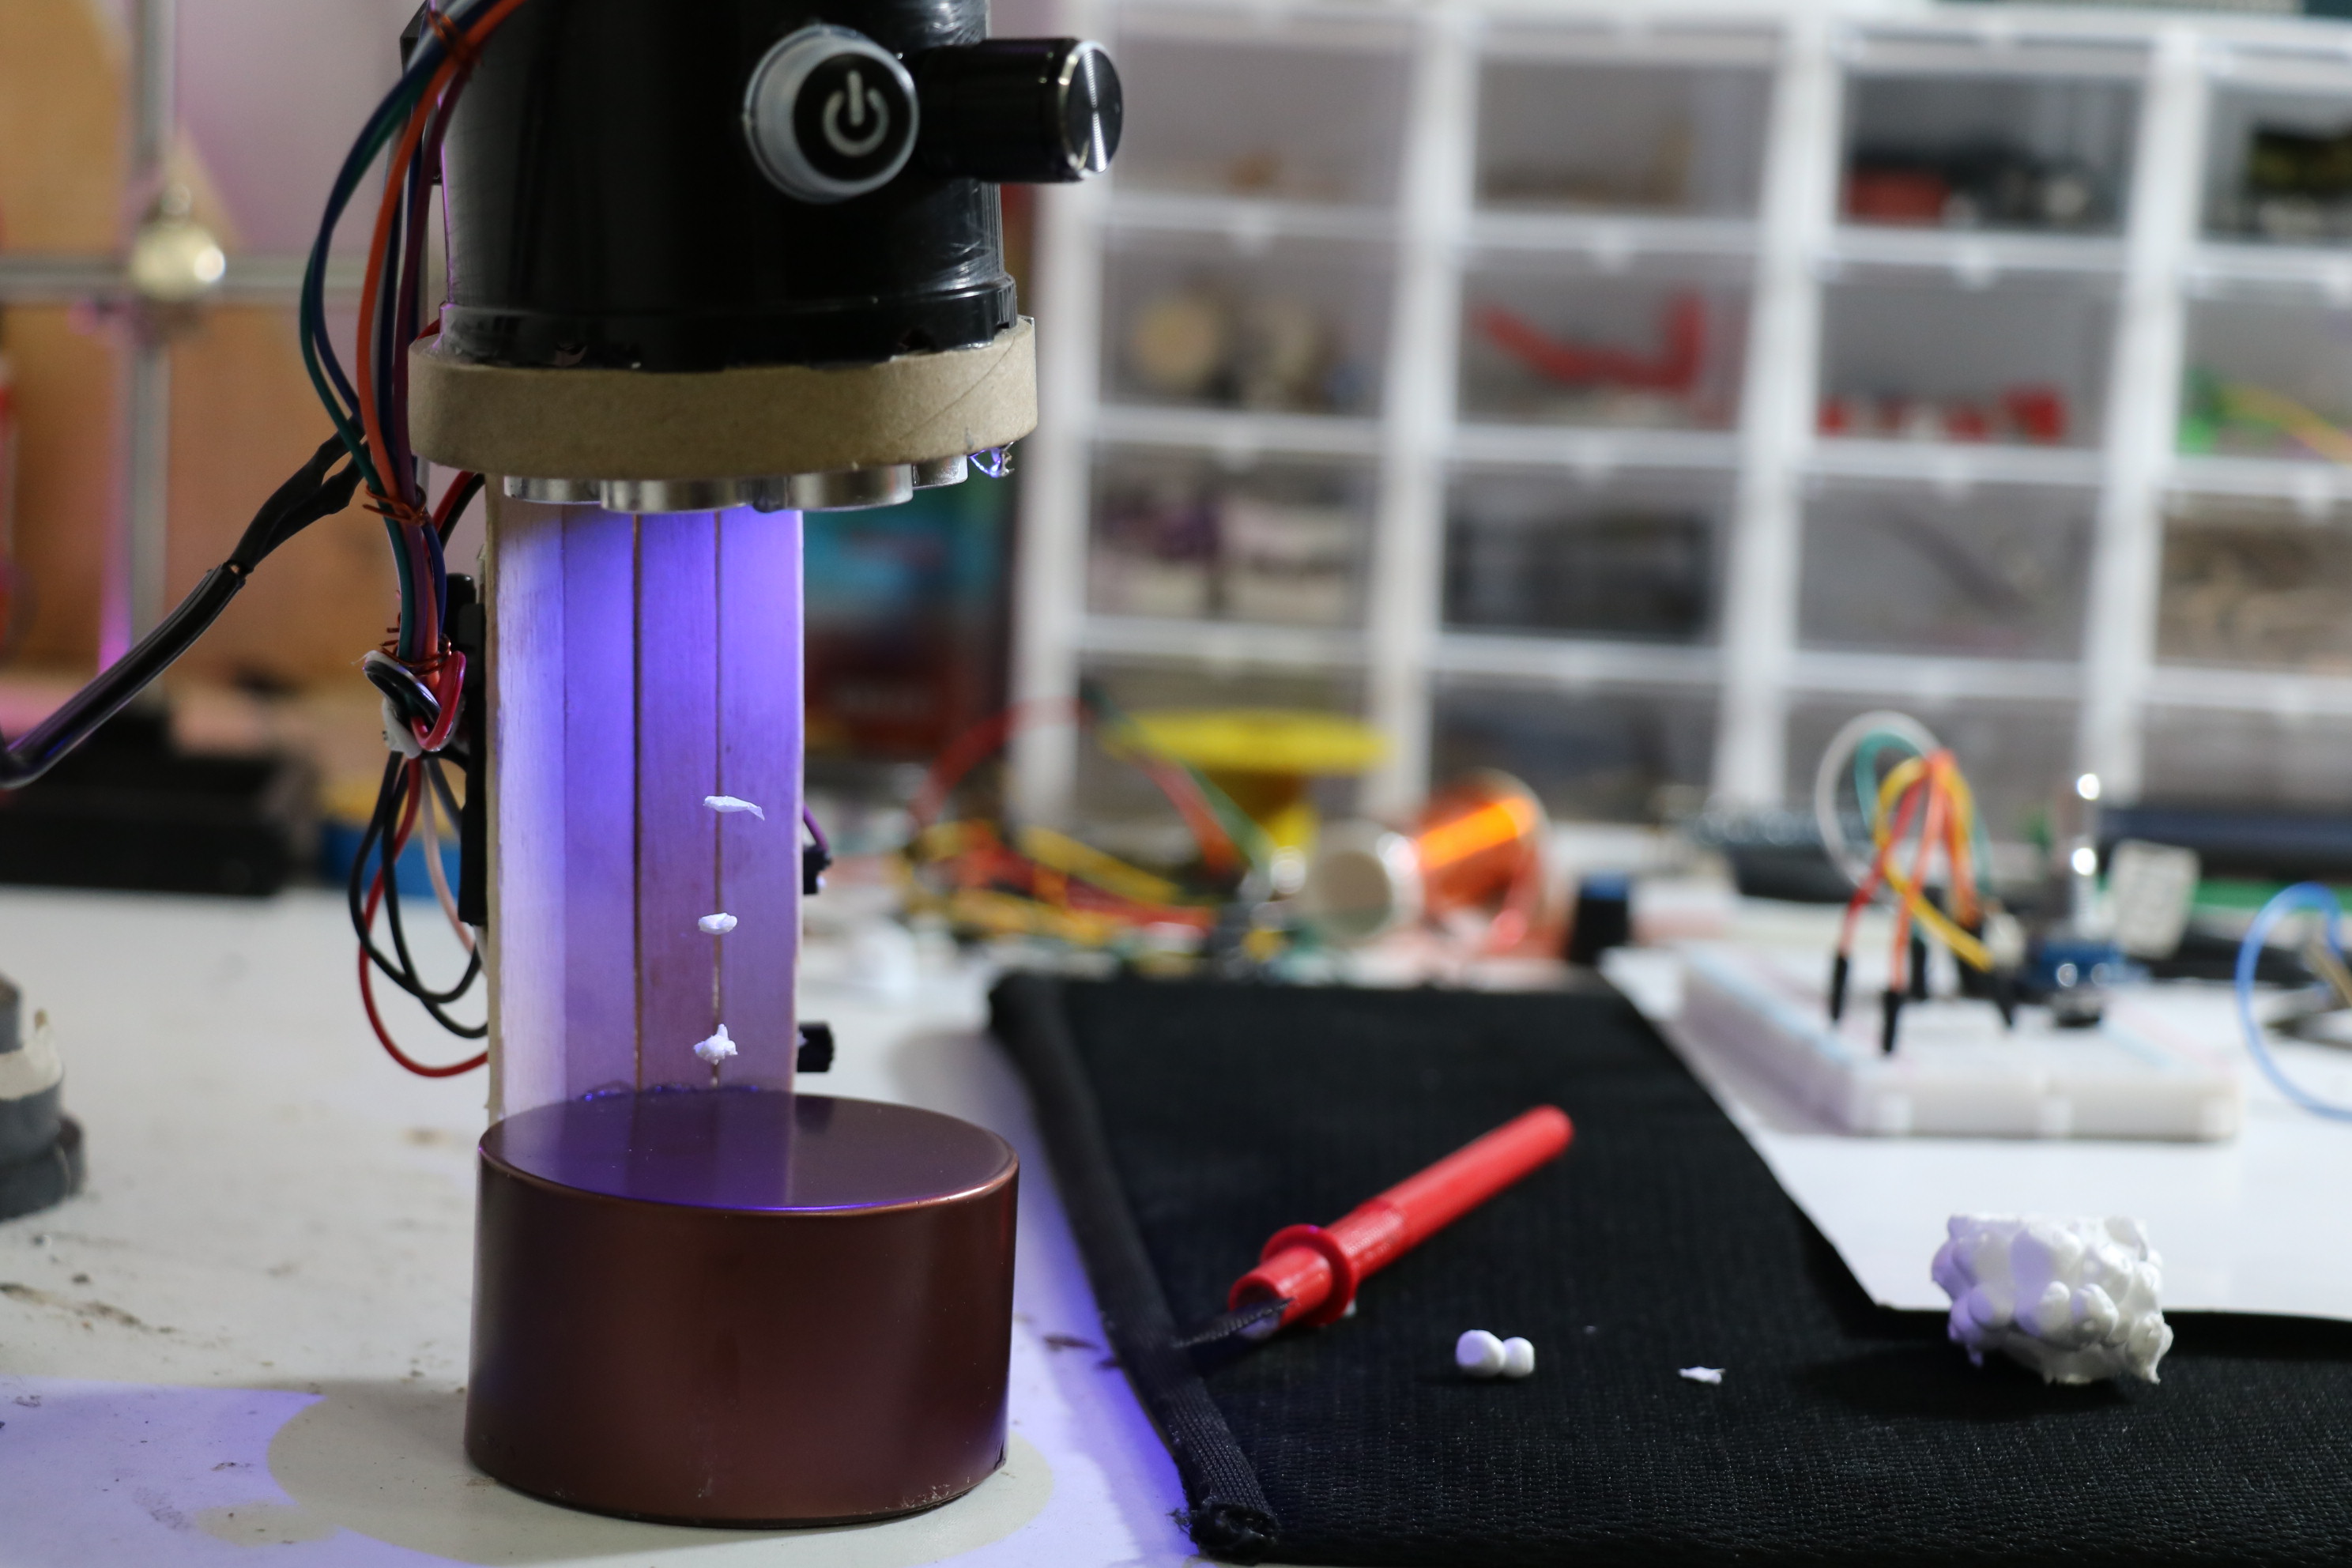
The Ultrasonic Levitator is pure, visible physics. It takes two cheap distance-measuring transducers and repurposes them. Instead of measuring sonar bounce-backs, the Arduino generates incredibly precise, out-of-phase hypersonic waves that create physical pressure nodes capable of literally lifting styrofoam beads or water drops into thin air.
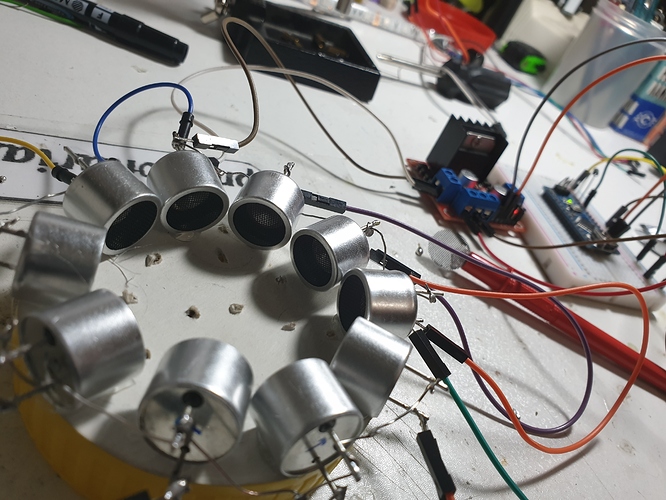
The Hardware Driver (L298N Frequency Math)
You cannot plug a transducer into an Arduino pin directly; you need a motor driver (L298N) acting as an incredibly fast amplifier.
- The Top Transducer points straight down. The Bottom Transducer points straight up. They are exactly aligned mathematically.
- The Arduino must output a perfect 40,000 Hertz (40kHz) square wave. Humans cannot hear this.
- The L298N amplifier takes that 5V tiny square wave and amplifies it massively from a power supply, slamming the two transducers exactly.
- The Standing Wave Physics: When the 40kHz sound wave travels downward and collides with the 40kHz sound wave traveling upward, they crash. They create High-Pressure and Low-Pressure physical floating "pockets" (nodes) inside the invisible air column!
Geometric Tolerances
The coding is simple; the physical tuning is grueling.
- The gap between the upper and lower transducers must be scientifically exact. It must correspond mathematically to the exact wavelength of 40kHz sound in air (roughly 8.5 millimeters).
- If the upper array is off by 2 millimeters, the nodes collapse, and the styrofoam bead drops to the table.
- You place a tiny foam bead with tweezers into the invisible air pocket. The acoustic radiation pressure from the sound waves physically traps the bead, holding it perfectly still against the force of Earth's gravity!
Components for Levitation
- Arduino Nano (Generating the 40kHz driver pulse using Timer registers).
- Two 40kHz Ultrasonic Transducers (Usually salvaged by ripping apart HC-SR04 sonar modules!).
- L298N Motor Driver Module (Used as a high-frequency acoustic amplifier).
- A highly rigid 3D-printed C-frame structure (Absolute rigidity is mandatory).
Final project: