Welcome to PicoFarmLED!
In this little guide we will go through setting up the PicoFarmLED panel with arduino.
PicoFarmLED panels are full spectrum LED panels perfect for plants and other usages like vivariums or fish tanks.
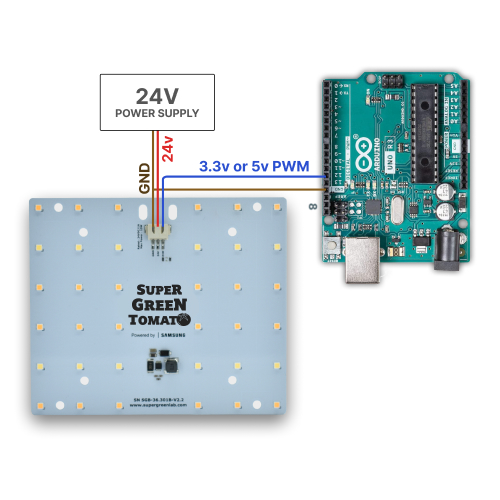
Since there is an on-board driver it can be powered with any 24v power supply (LED panels usually require a constant current power supply), and you can easily control the intensity through the PWM input without the need for the usual 10v dimming signal on most LED drivers.
Any arduino compatible board should work, just make sure it's either 3.3v or 5v with PWM output. Which is probably the case of 90% of them.
Project Perspective
This project is a sophisticated exploration of vertical farming and light-to-hardware interaction. By focusing on the essential building blocks—the specialized growing LEDs and an Arduino—you'll learn how to communicate and automate your indoor garden using a specialized software logic and a robust hardware setup.
Arduino Interfacing
Here's the basic schematic to control your PicoFarmLED panel from an arduino uno.
Technical Implementation: Growth Spectrums and Timing
The project reveals the hidden layers of simple farming-to-digital interaction:
- Optical Interface layer: The PicoFarmLED panel uses a specific ratio of Red and Blue LEDs to mimic the optimal photosynthetic spectrum for plants.
- Timing Logic layer: A Real-Time Clock (RTC) Module like the DS3231 can provide precise timekeeping, ensuring perfect 12/12 or 16/8 light cycles even during a power loss.
- Communication layer: Data is sent rhythmically from the Arduino to a Relay Module to switch the high-power circuit ON and OFF according to your plants' needs.
- Thermal Logic layer: An Aluminum Heat Sink provides high-performance cooling for the LED panel to ensure longevity and efficiency.
- Processing Logic layer: The Arduino code follows a specialized "sequential decoding" strategy: it requests and performs "Day" or "Night" modes for your indoor farm.
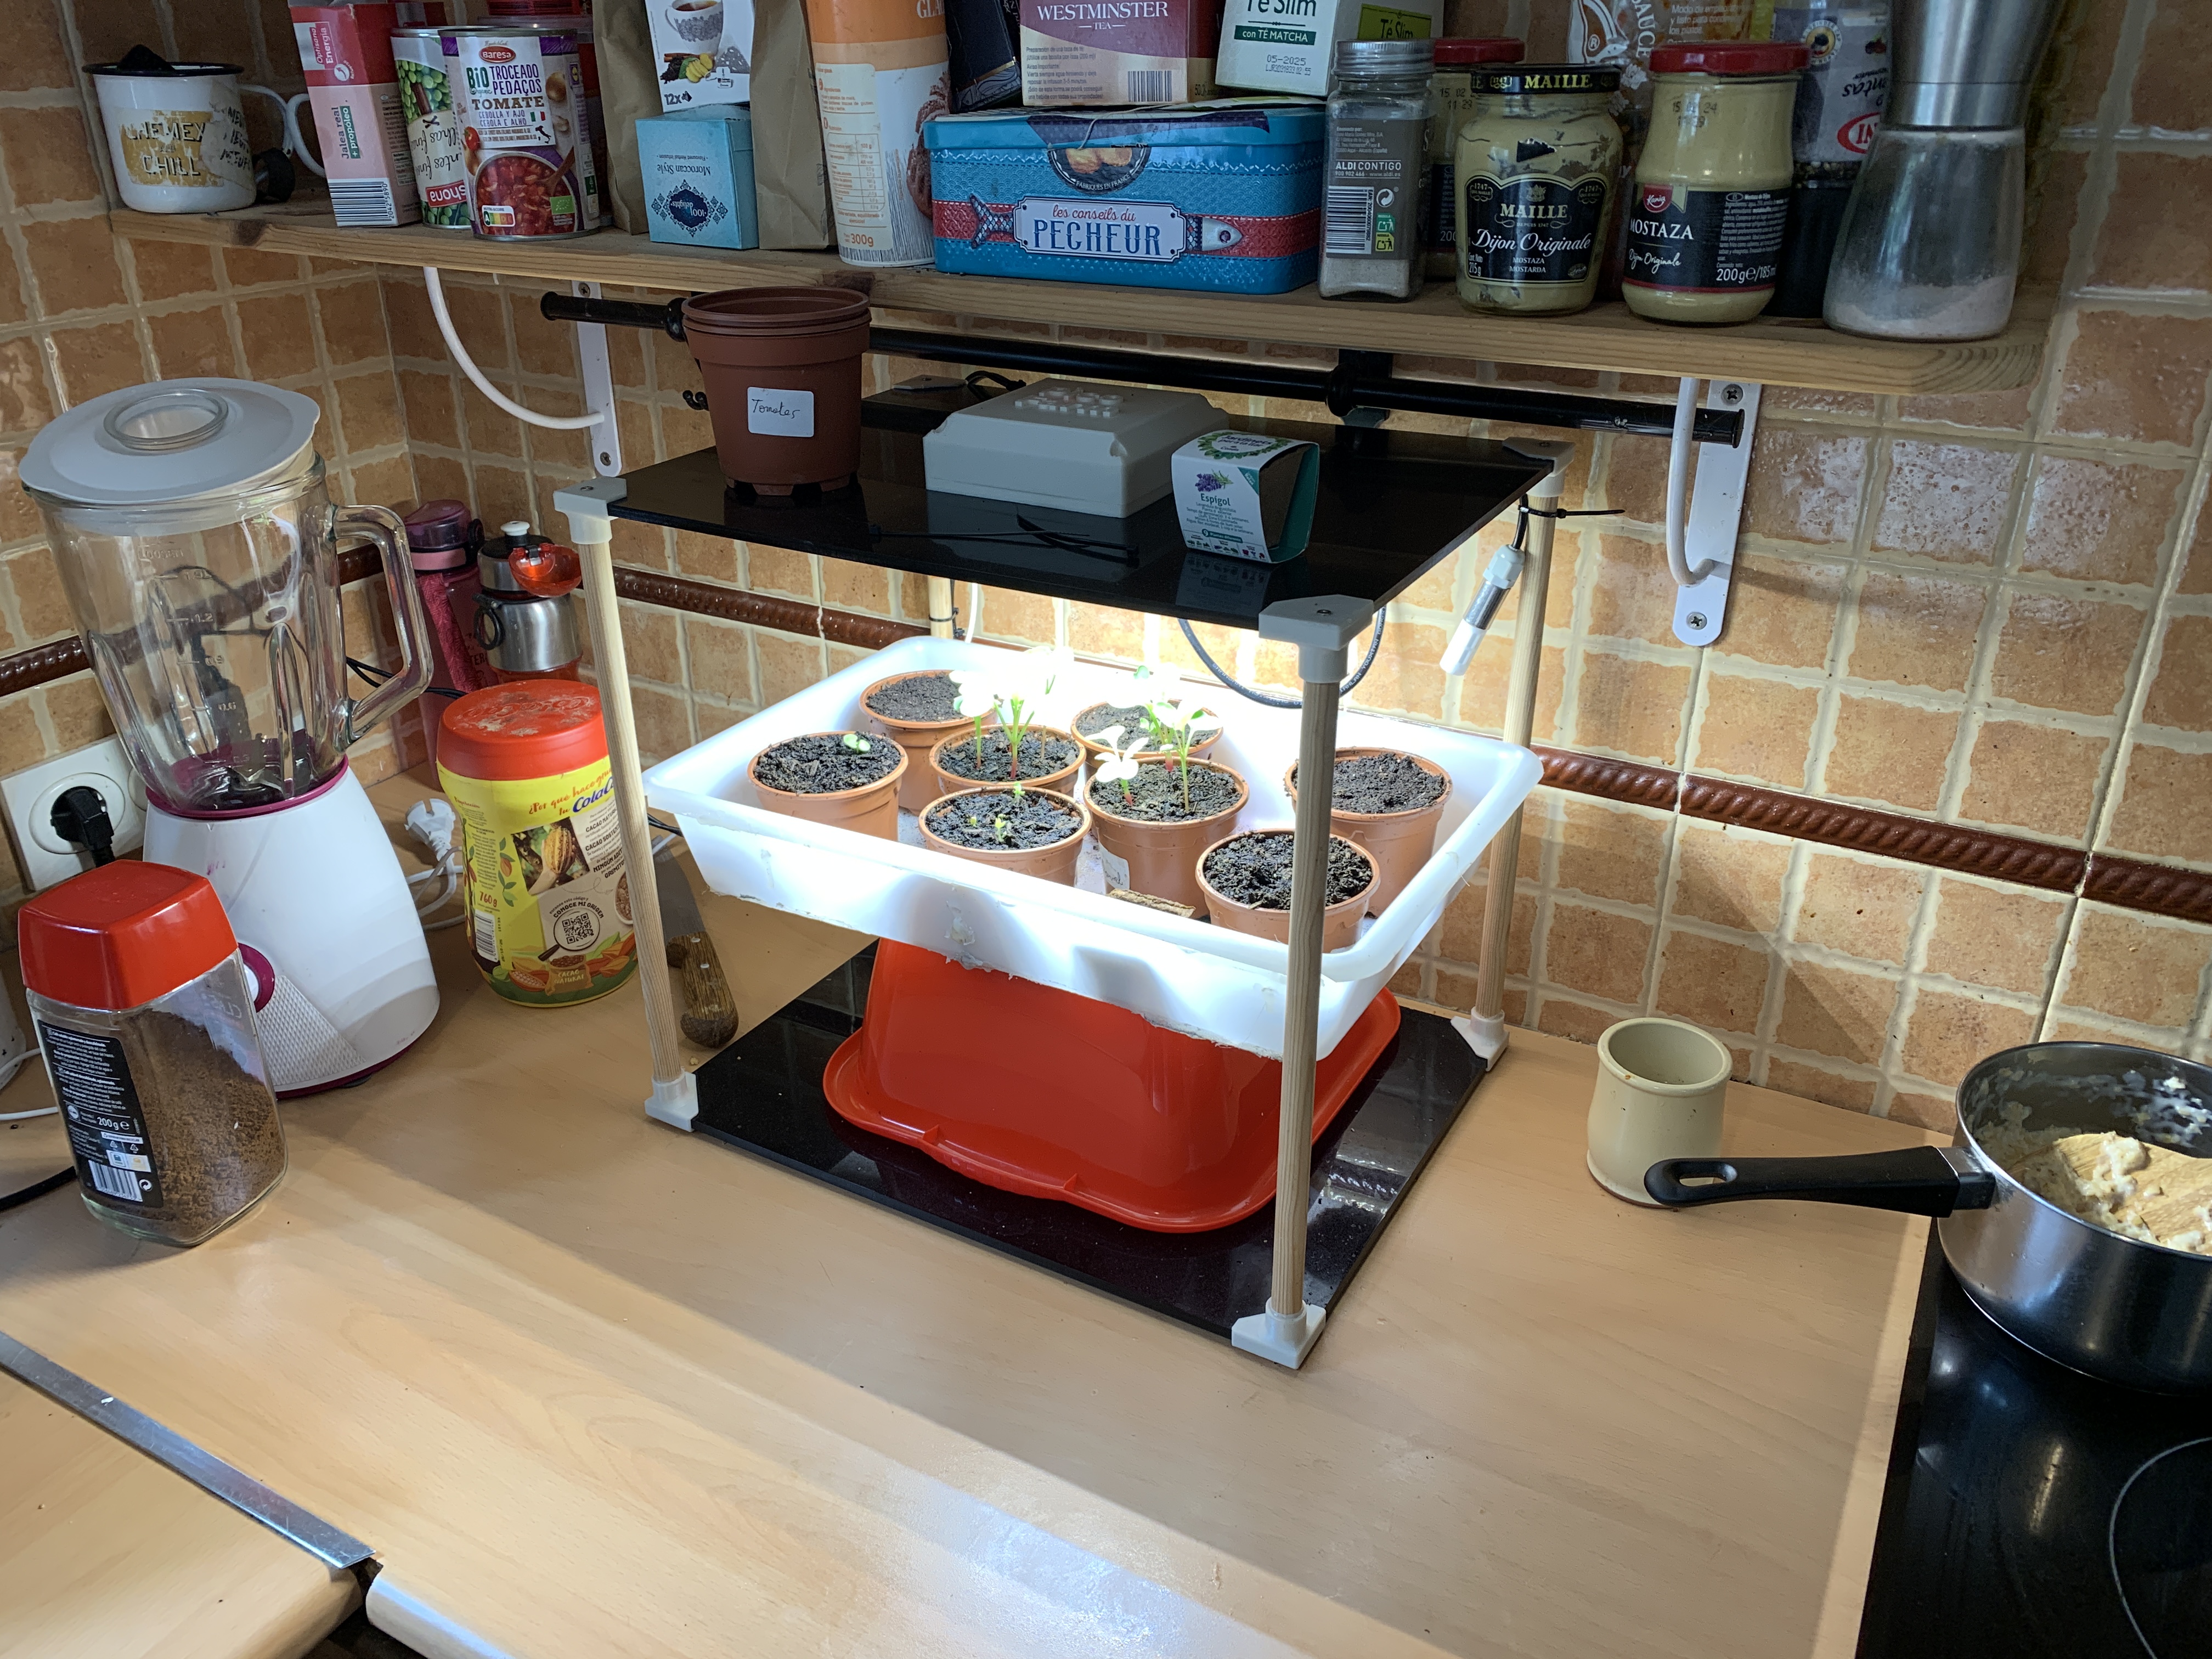
Hardware Infrastructure
- Arduino Uno: The "brain" of the project, managing the high-speed timing loops and coordinating the relay output tasks.
- PicoFarmLED Kit: Providing high-definition visual feedback for each plant's photosynthesis requirements.
- RTC DS3231 Module (Optional): Providing precise real-time clock and coordinate tasks for your farming schedule.
- 5V Relay Module: Effectively handles the high current and power needed for the LED panel while protecting the Arduino.
- Heat Sink: Effectively dissipates thermal energy for each of the high-power LED arrays.
- Micro-USB Cable: Use to program the Arduino and provides primary power for the controller.
The panel can then be controlled like any other LED, so the simplest sketch is just the blink LED example sketch:
void setup() {
     // initialize digital pin LED_BUILTIN as an output.
     pinMode(LED_BUILTIN, OUTPUT);
}
// the loop function runs over and over again forever
void loop() {
     digitalWrite(LED_BUILTIN, HIGH);  // turn the LED on (HIGH is the voltage level)
     delay(1000);                      // wait for a second
     digitalWrite(LED_BUILTIN, LOW);   // turn the LED off by making the voltage LOW
     delay(1000);                      // wait for a second
}
Check out the attached code to this guide for a slightly more advanced sketch that does progressive on/off cycles.
Home Farming and Interaction Step-by-Step
The LED farming process is designed to be very efficient:
- Initialize Hardware: Correctly mount the LEDs on the heat sink and connect the relay to the Arduino and the high-power PSU.
- Setup Timing Sync: In the
setup()function, initialize the I2C port for the RTC (if used) and the relay output pins. - Internal Dialogue Loop: The Arduino constantly performs checks (like reading the RTC) and updates the lights in real-time.
- Visual Feedback Integration: Watch as your plants automatically become a rhythmic visual signal, pulsing and growing under your custom light settings.
To go further
The picofarmled.com website also provides a firmware that allows to setup a mobile app compatible home farming setup with remote control and monitoring of temperature and humidity, but also a watering module and a co2 level control module among others.
Also checkout this free-to-download kitchen shelf that can easily be 3d printed and laser cut: 3d design document link
Future Expansion
- OLED Identity Dashboard Integration: Add a small OLED display to the control box to show "Uptime" and "Thermal Efficiency" (%) index.
- Multi-sensor Climate Sync Synchronization: Connect several more sensors (e.g. DHT22 for humidity or Soil Moisture sensors) to build a truly autonomous indoor farm.
- Cloud Interface Registration Support Synchronization: Add a WiFi module (ESP8266/ESP32) and link to a cloud dashboard to precisely control and track your farming habits from your smartphone wirelessly over WiFi.
- Advanced Velocity Profile Customization Support: Add a specialized PWM dimmer to manually adjust the LEDs' "Brightness" or "Spectrum Ratio" for different growth stages.
How to setup a PicoFarmLED DIY home farming LED panel with arduino is a perfect project for any electronics enthusiast looking for a more interactive and engaging agricultural tool!