There is this Personal Weather Station Project that you can build with the Arduino Oplà IoT Kit, which gathers temperature, humidity, pressure, and light data and streams that data to the Arduino Cloud. But I found that the temperature readings were highly imprecise. That's because the onboard temperature sensor on the IoT Carrier was influenced by the heat produced by the other components, such as the Arduino MKR Board, the OLED Screen, etc. So I tried to connect an external DHT 11 sensor through the pins of the Arduino, but they were already connected and busy with the IoT Carrier. But then I noticed the 2 Plug-and-Play Ports that were meant to connect the soil moisture and PIR Sensor. They were labeled A0 and A6. So I connected a cable to the A6 Port and attached 3 Jumper Wires to the end of that cable. Then I wired the DHT Sensor to these jumper wires, through a mini breadboard, making a mini DHT Module of some sort (see pictures or schematic in the download section).
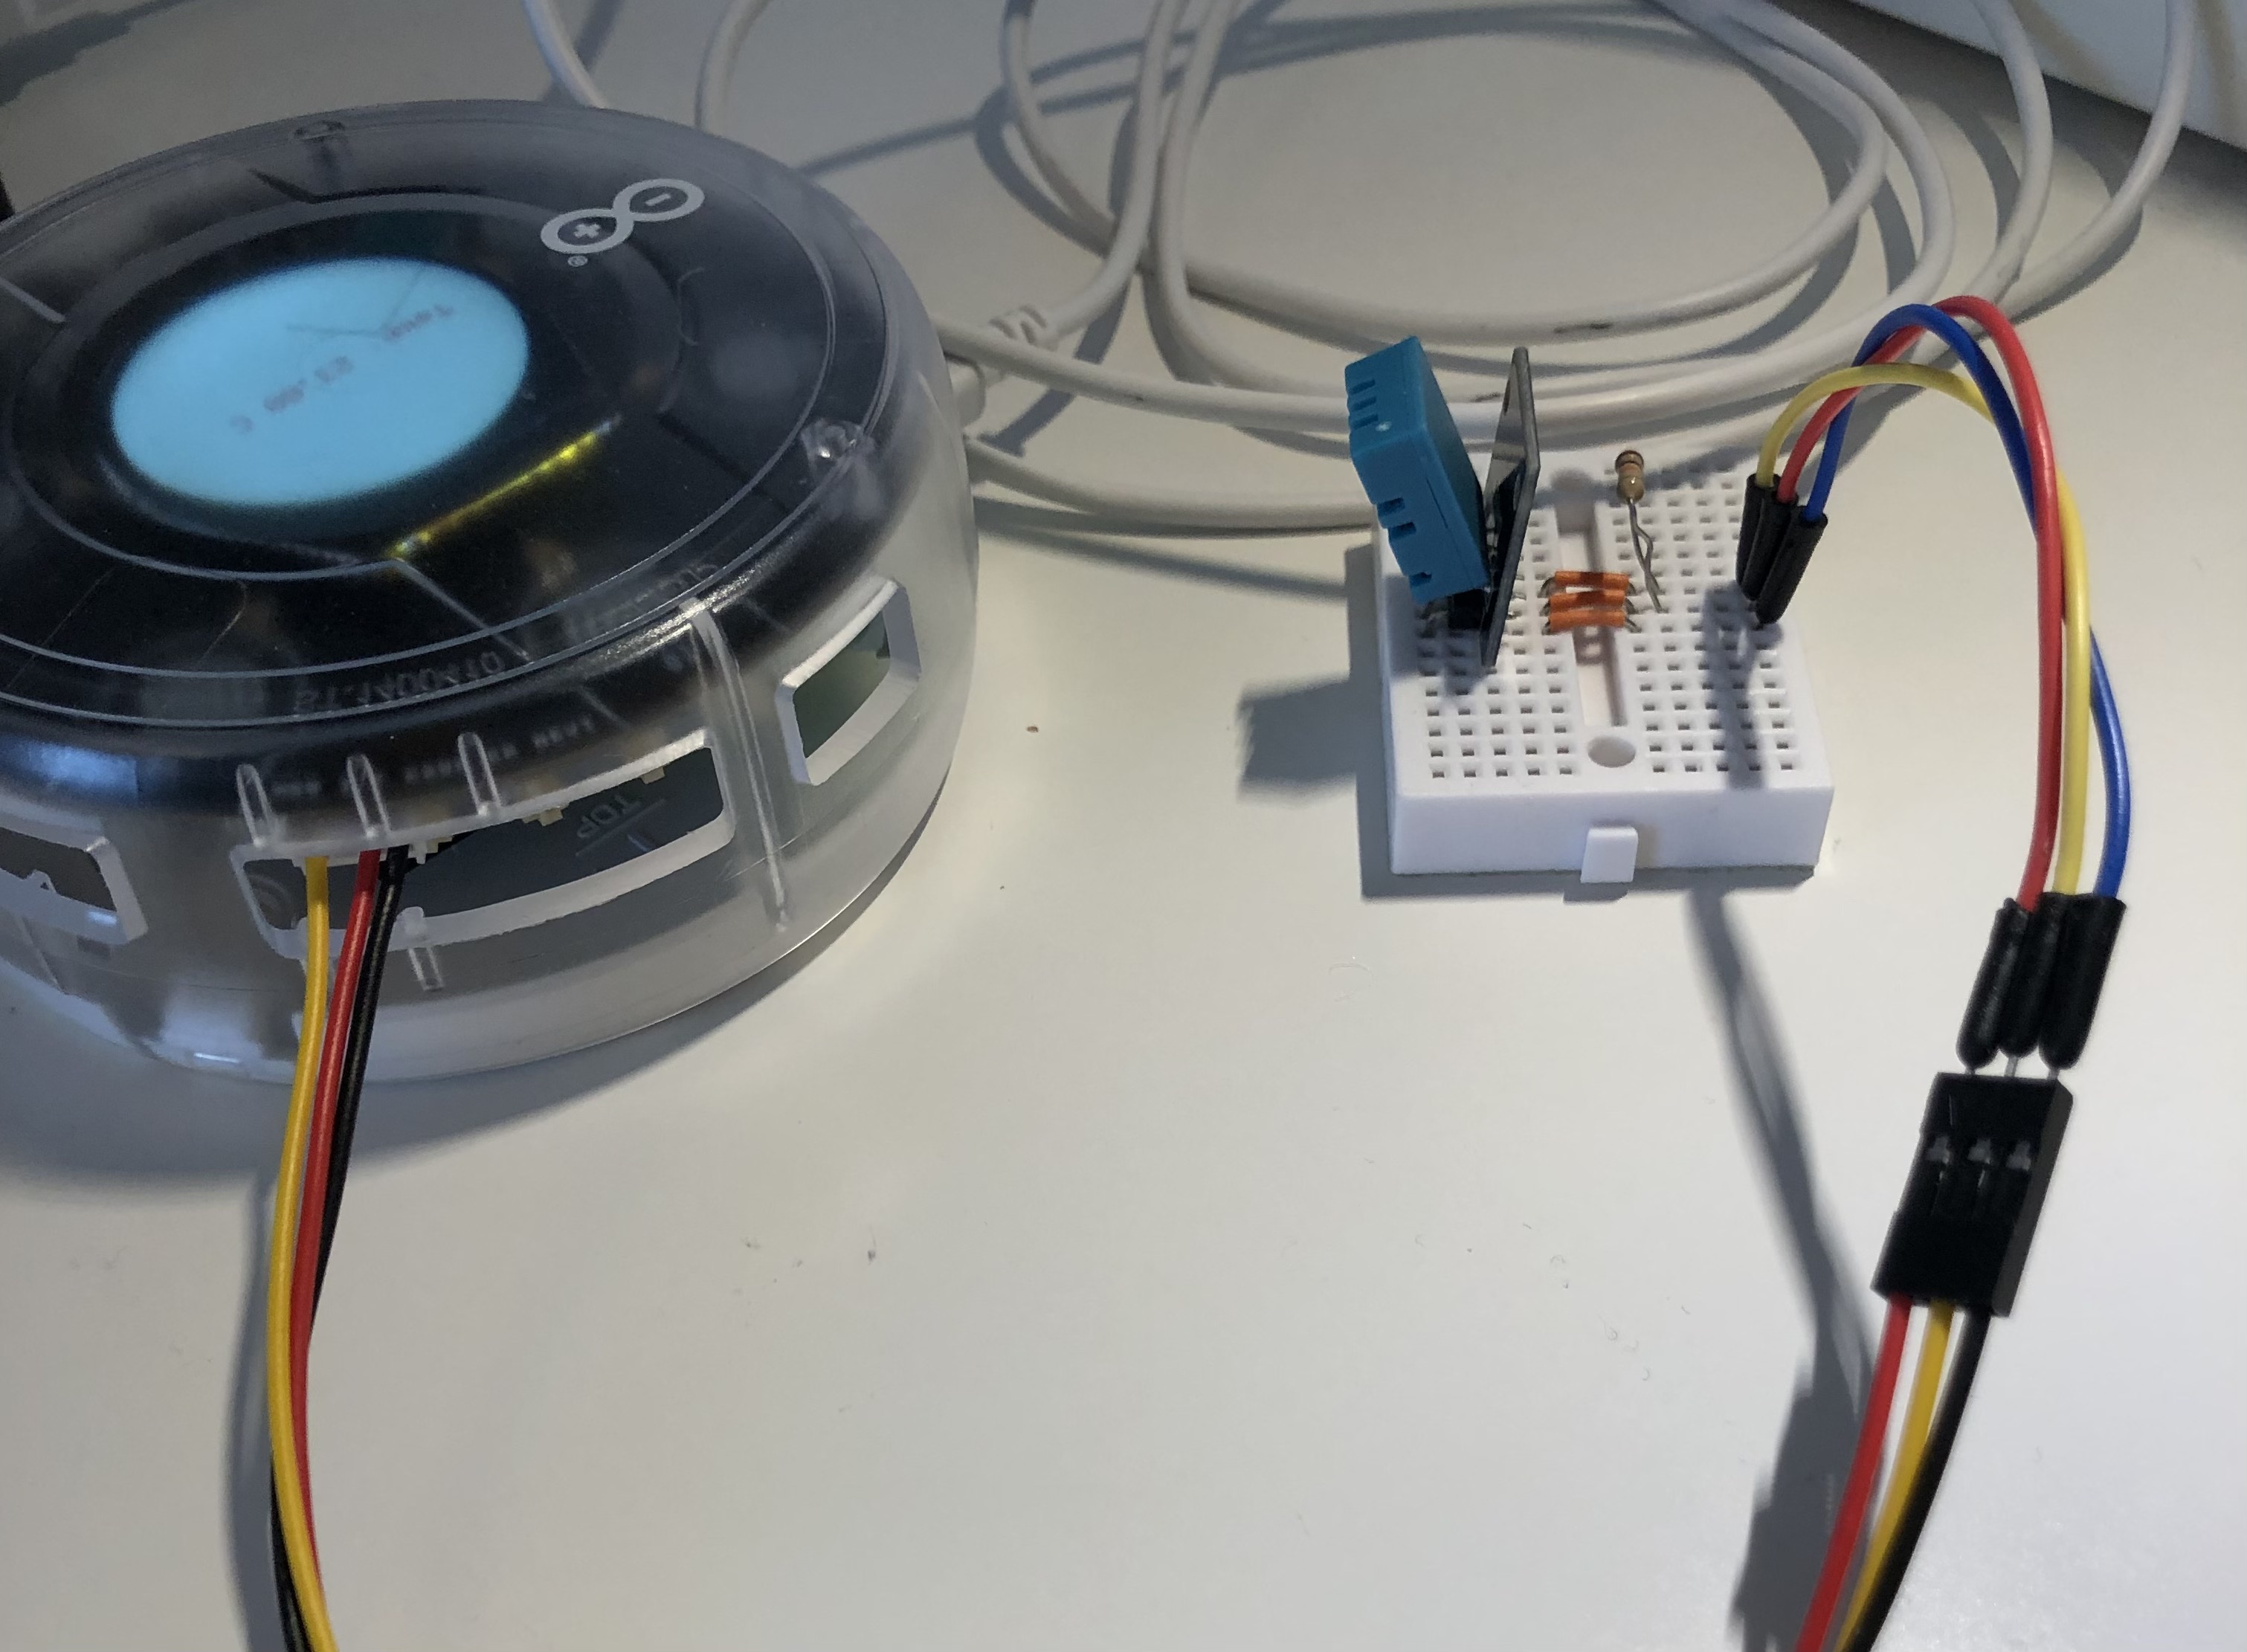
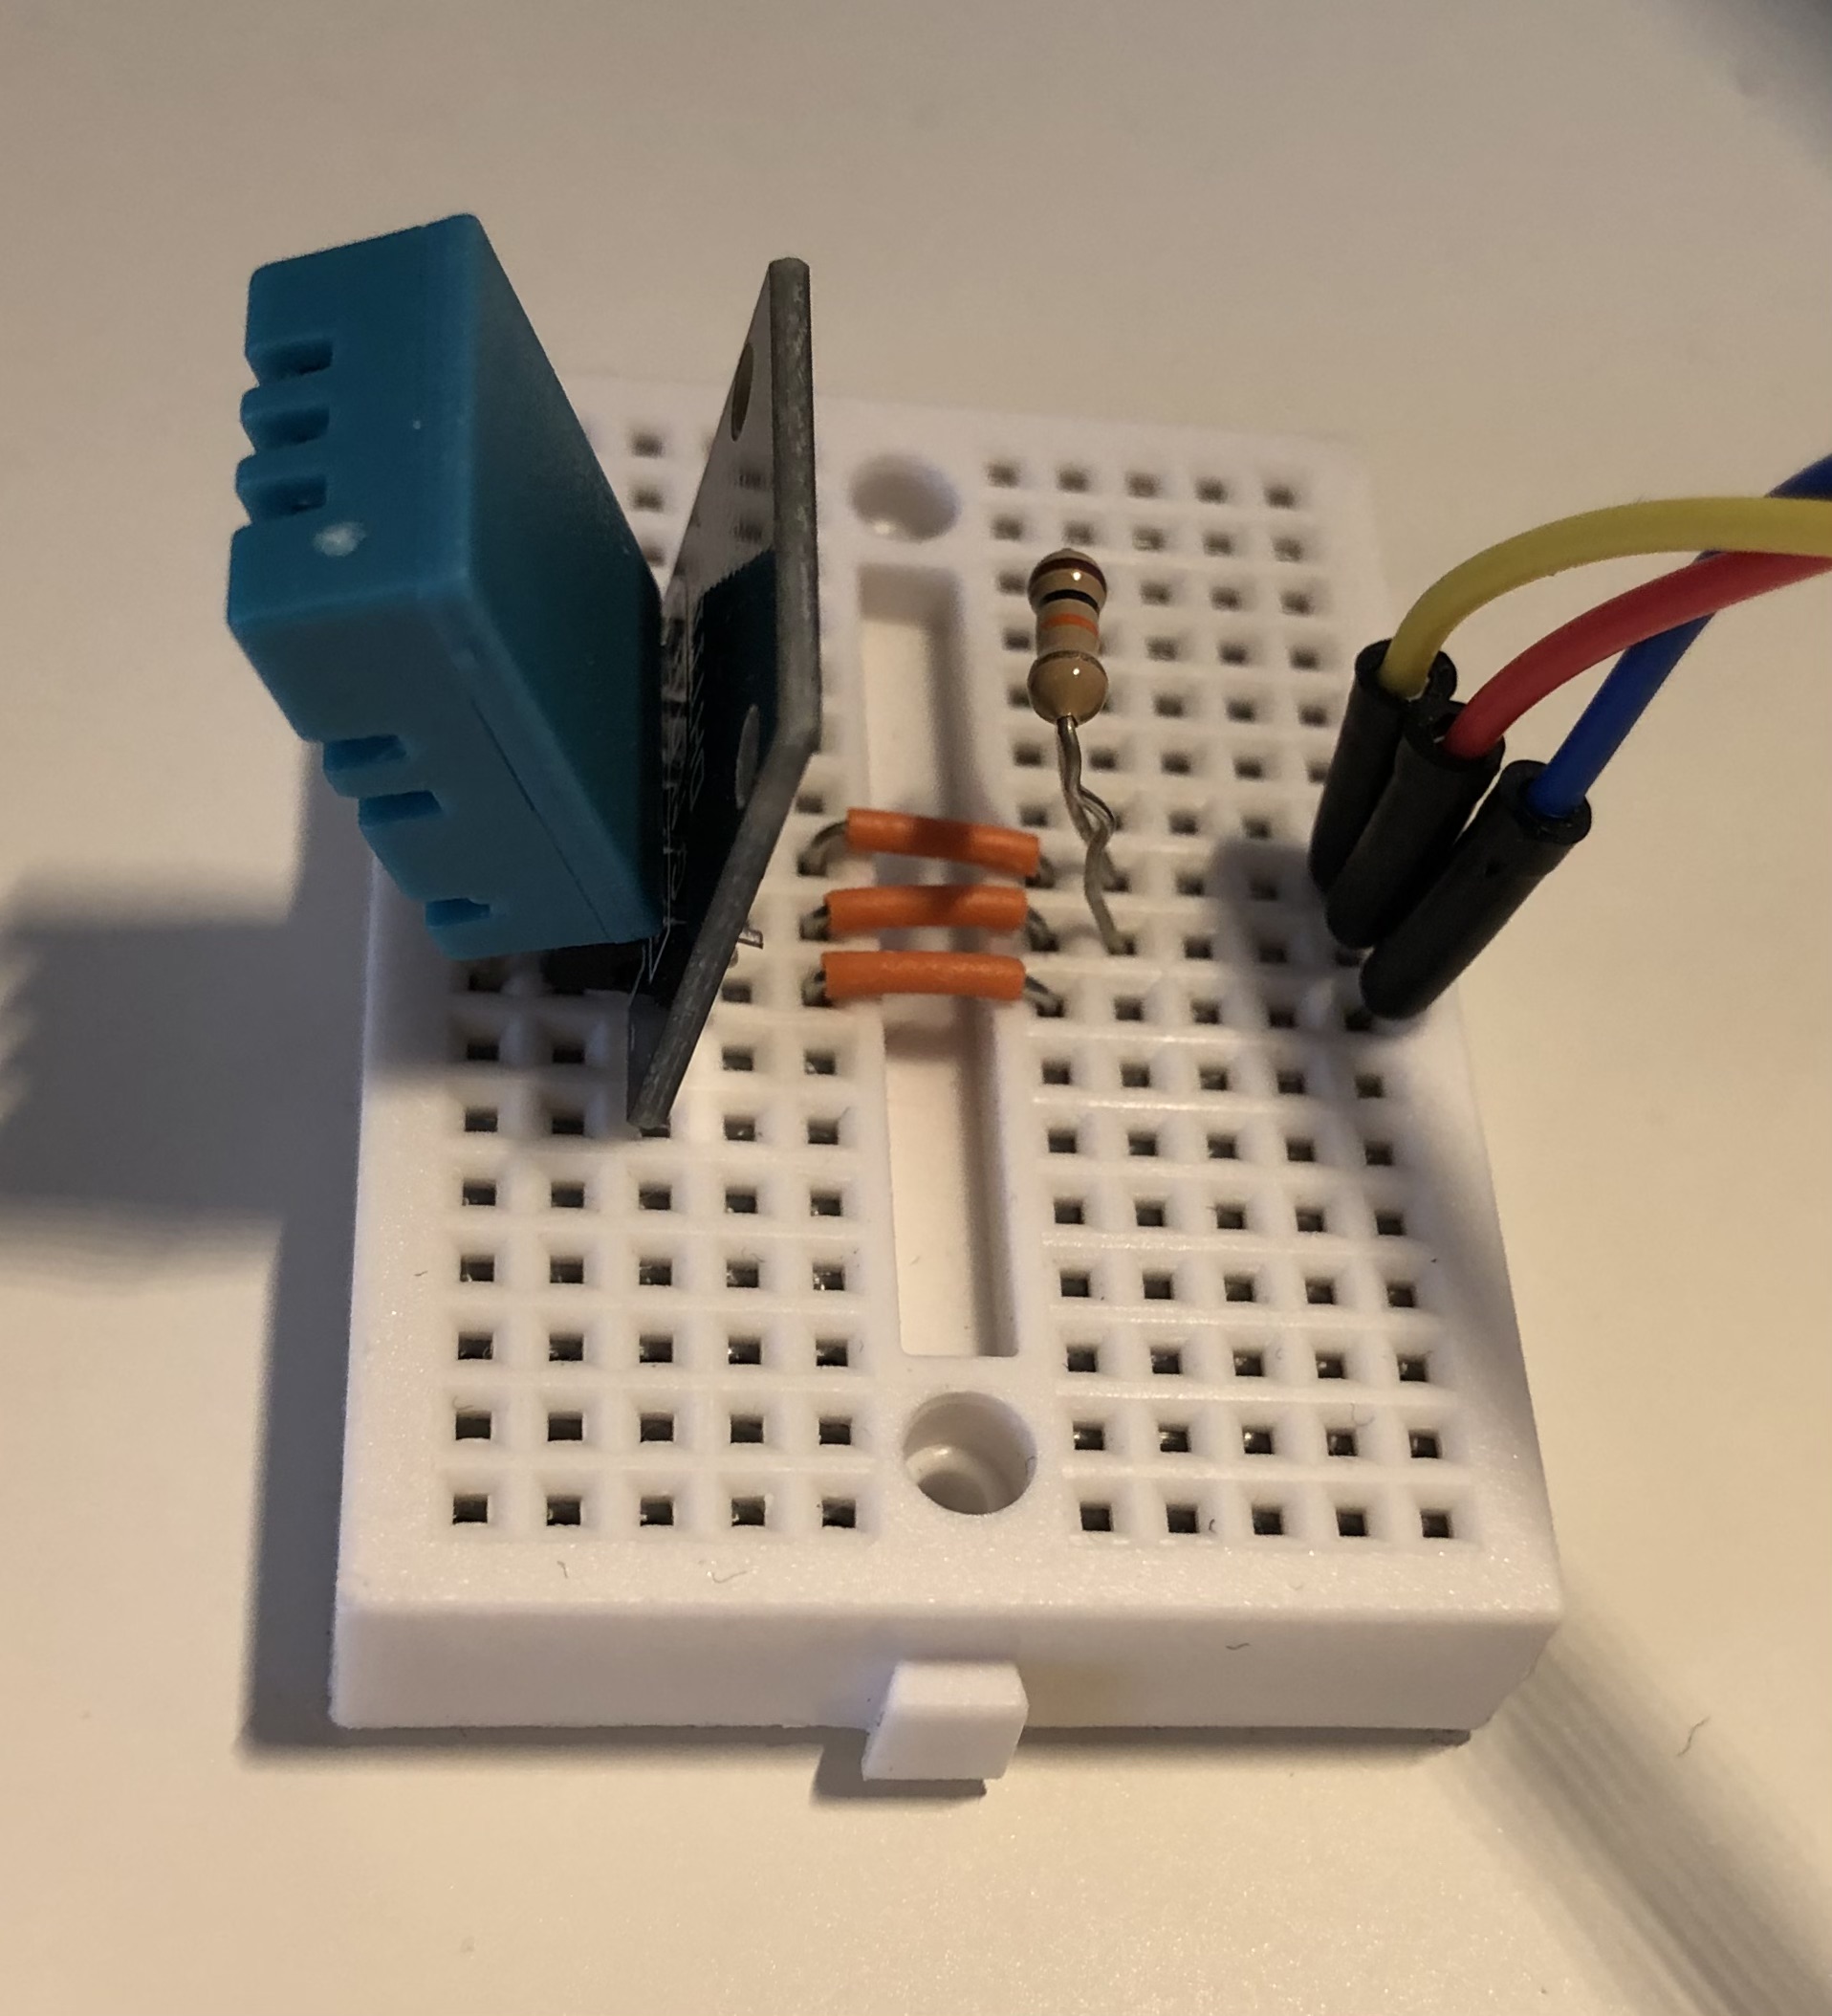
I bridged the VCC and S pins of the DHT(on a breakout board) with a 10kΩ resistor to stabilize the signal.
Note: If your DHT module is on a breakout board (like mine), then it's likely that it has a tiny built-in resistor labeled 103. That's a 10kΩ resistor! If your breakout board has it, then you're better off without that extra resistor on the breadboard. (I made a mistake in the picture!)
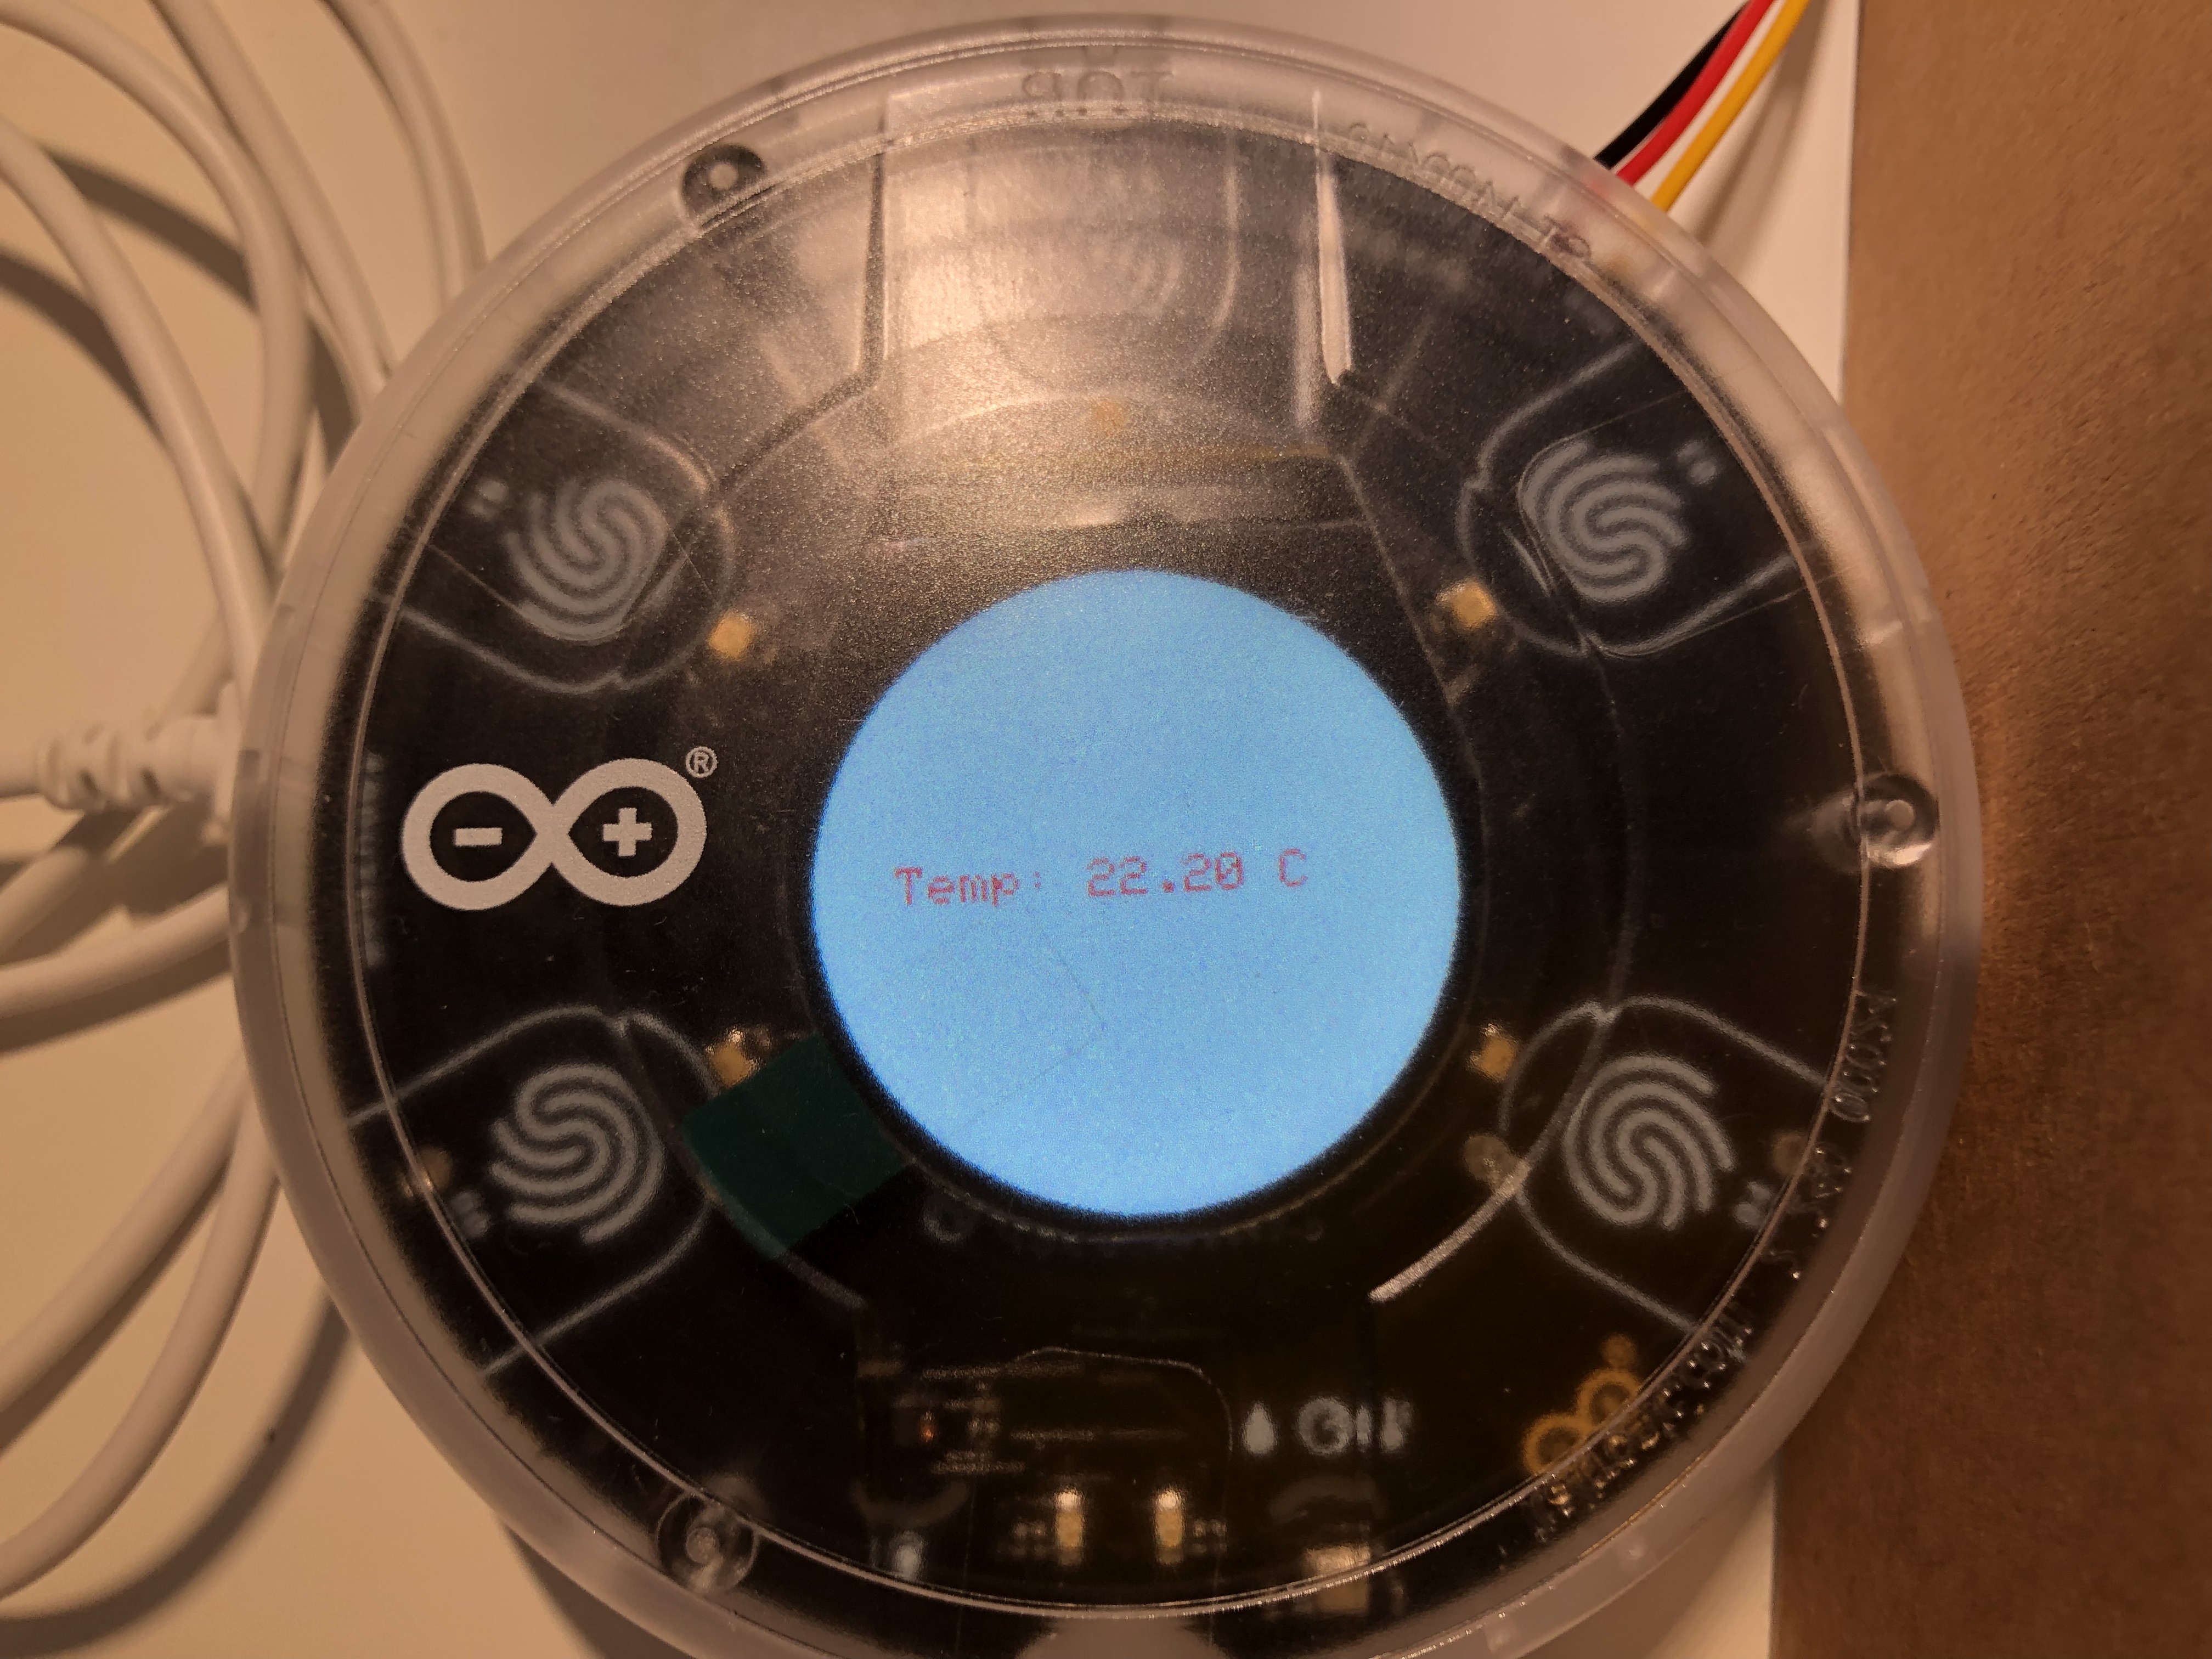
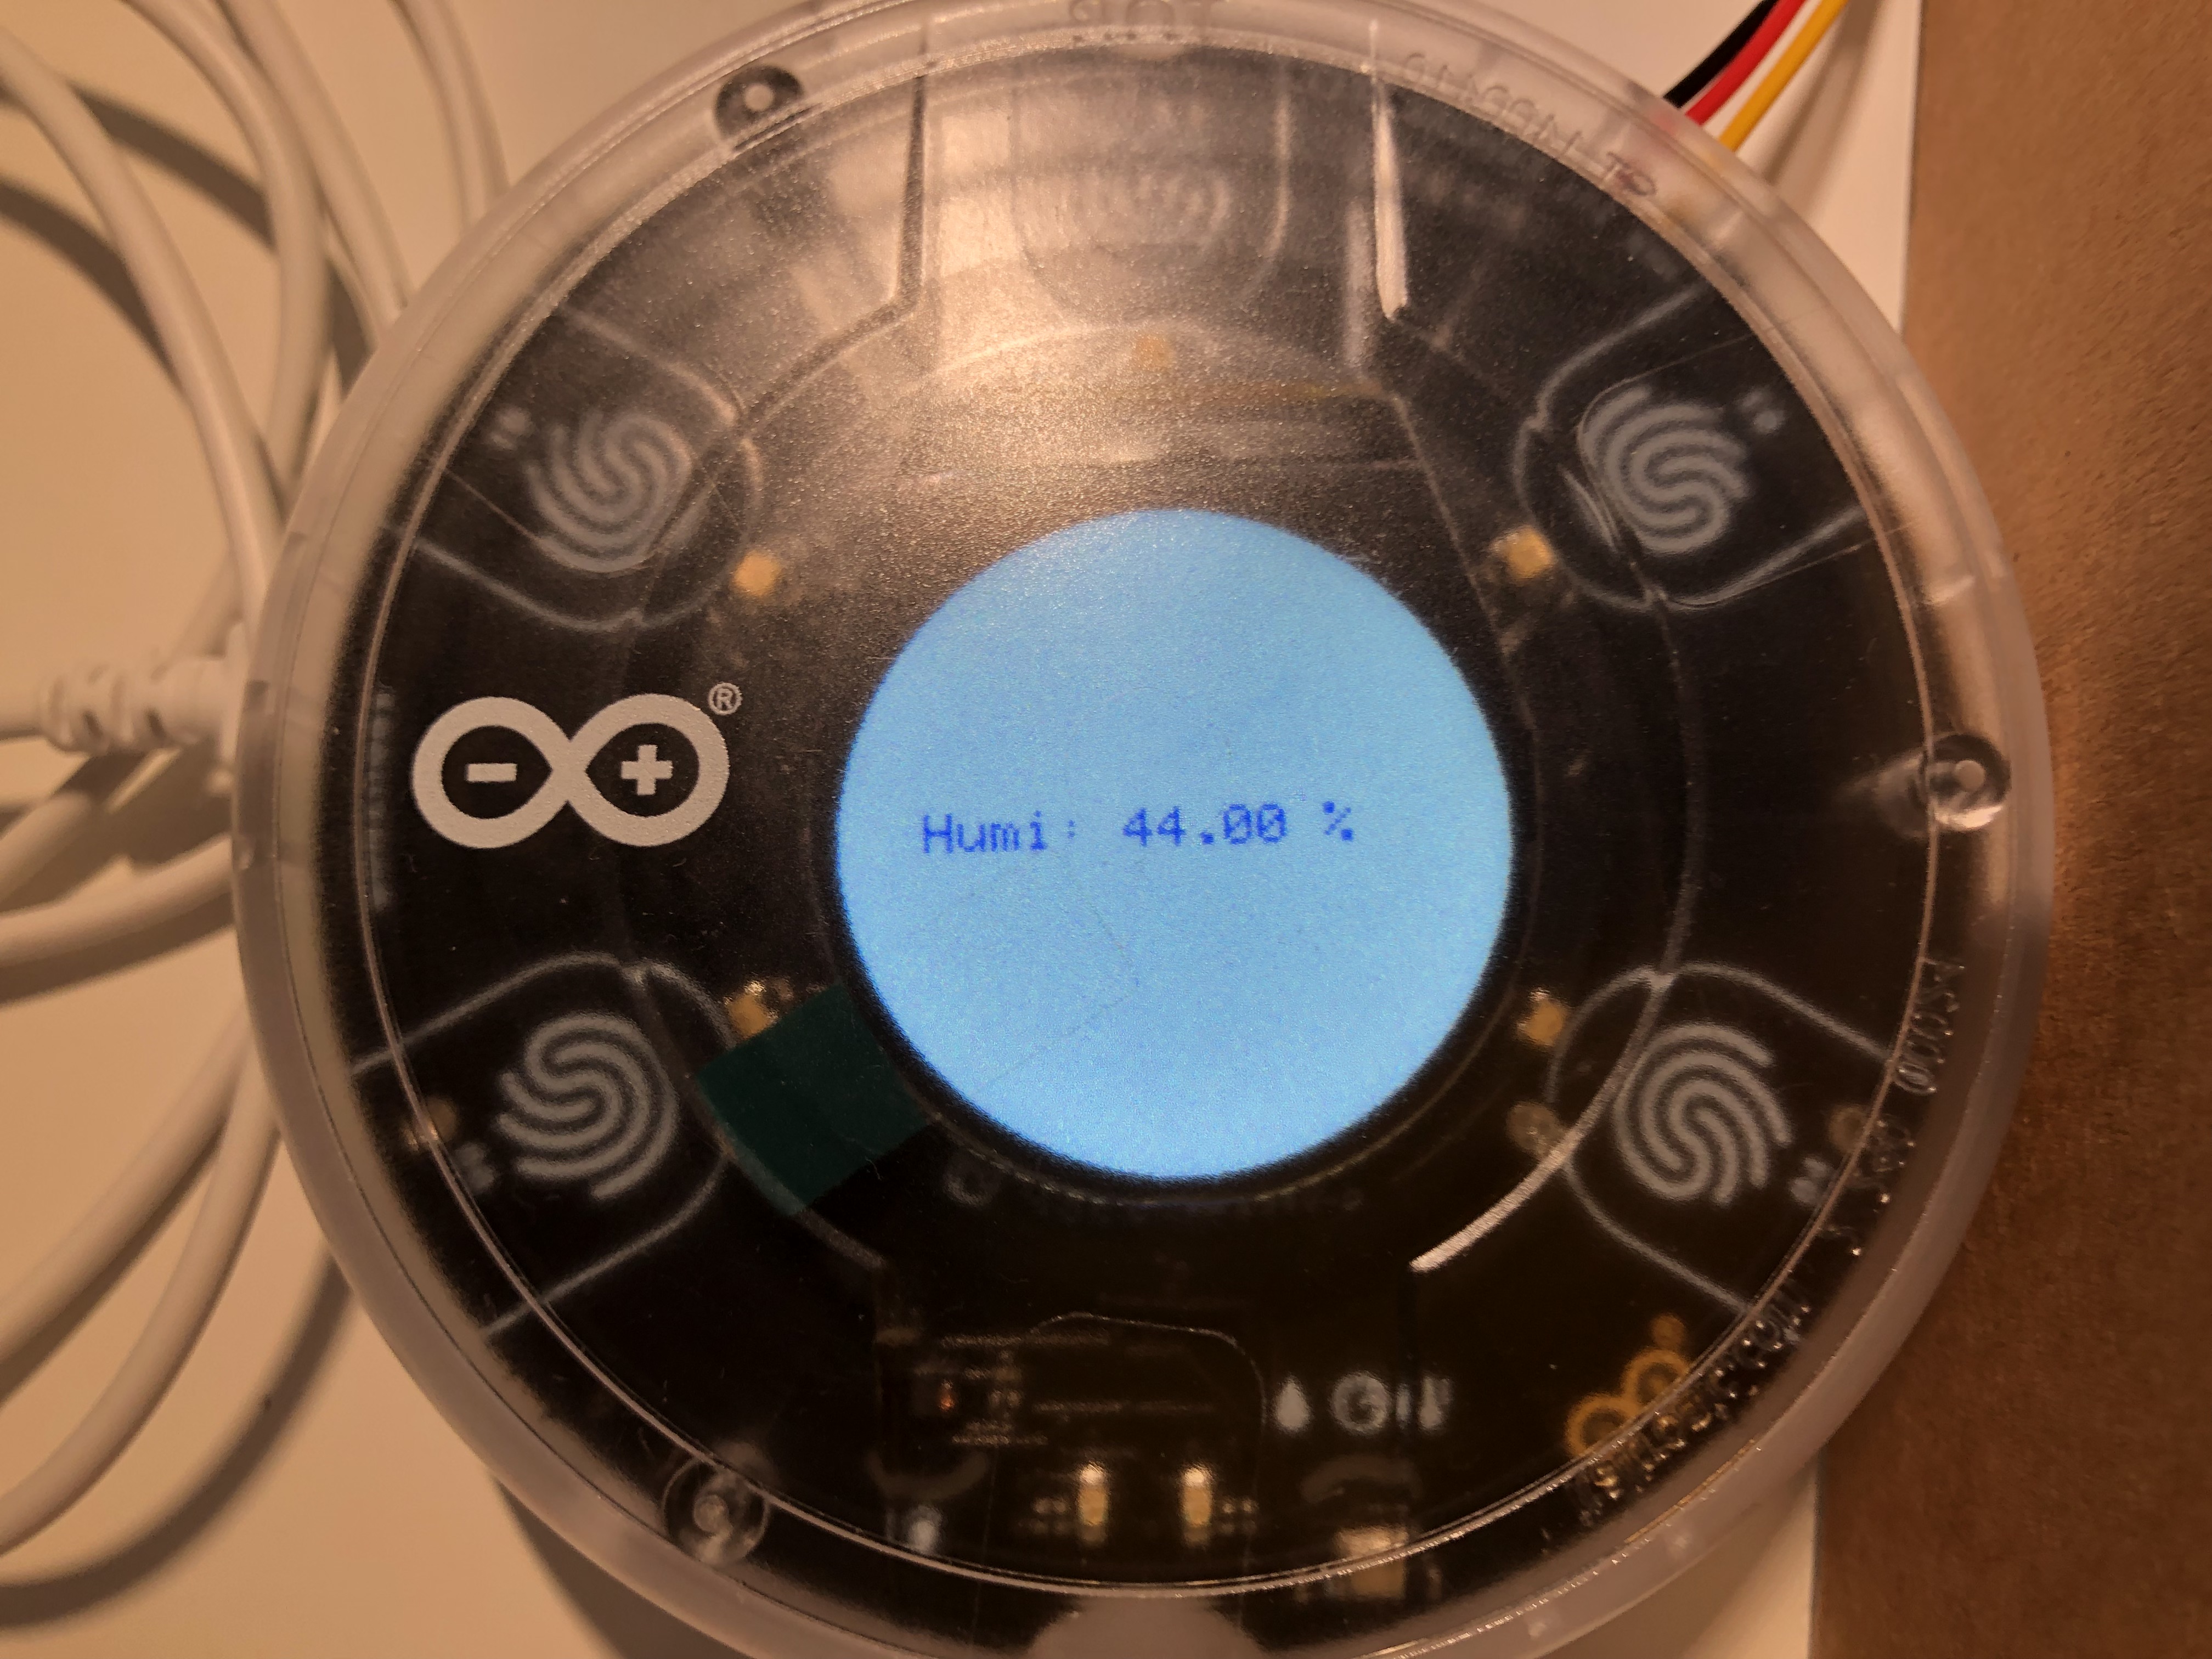
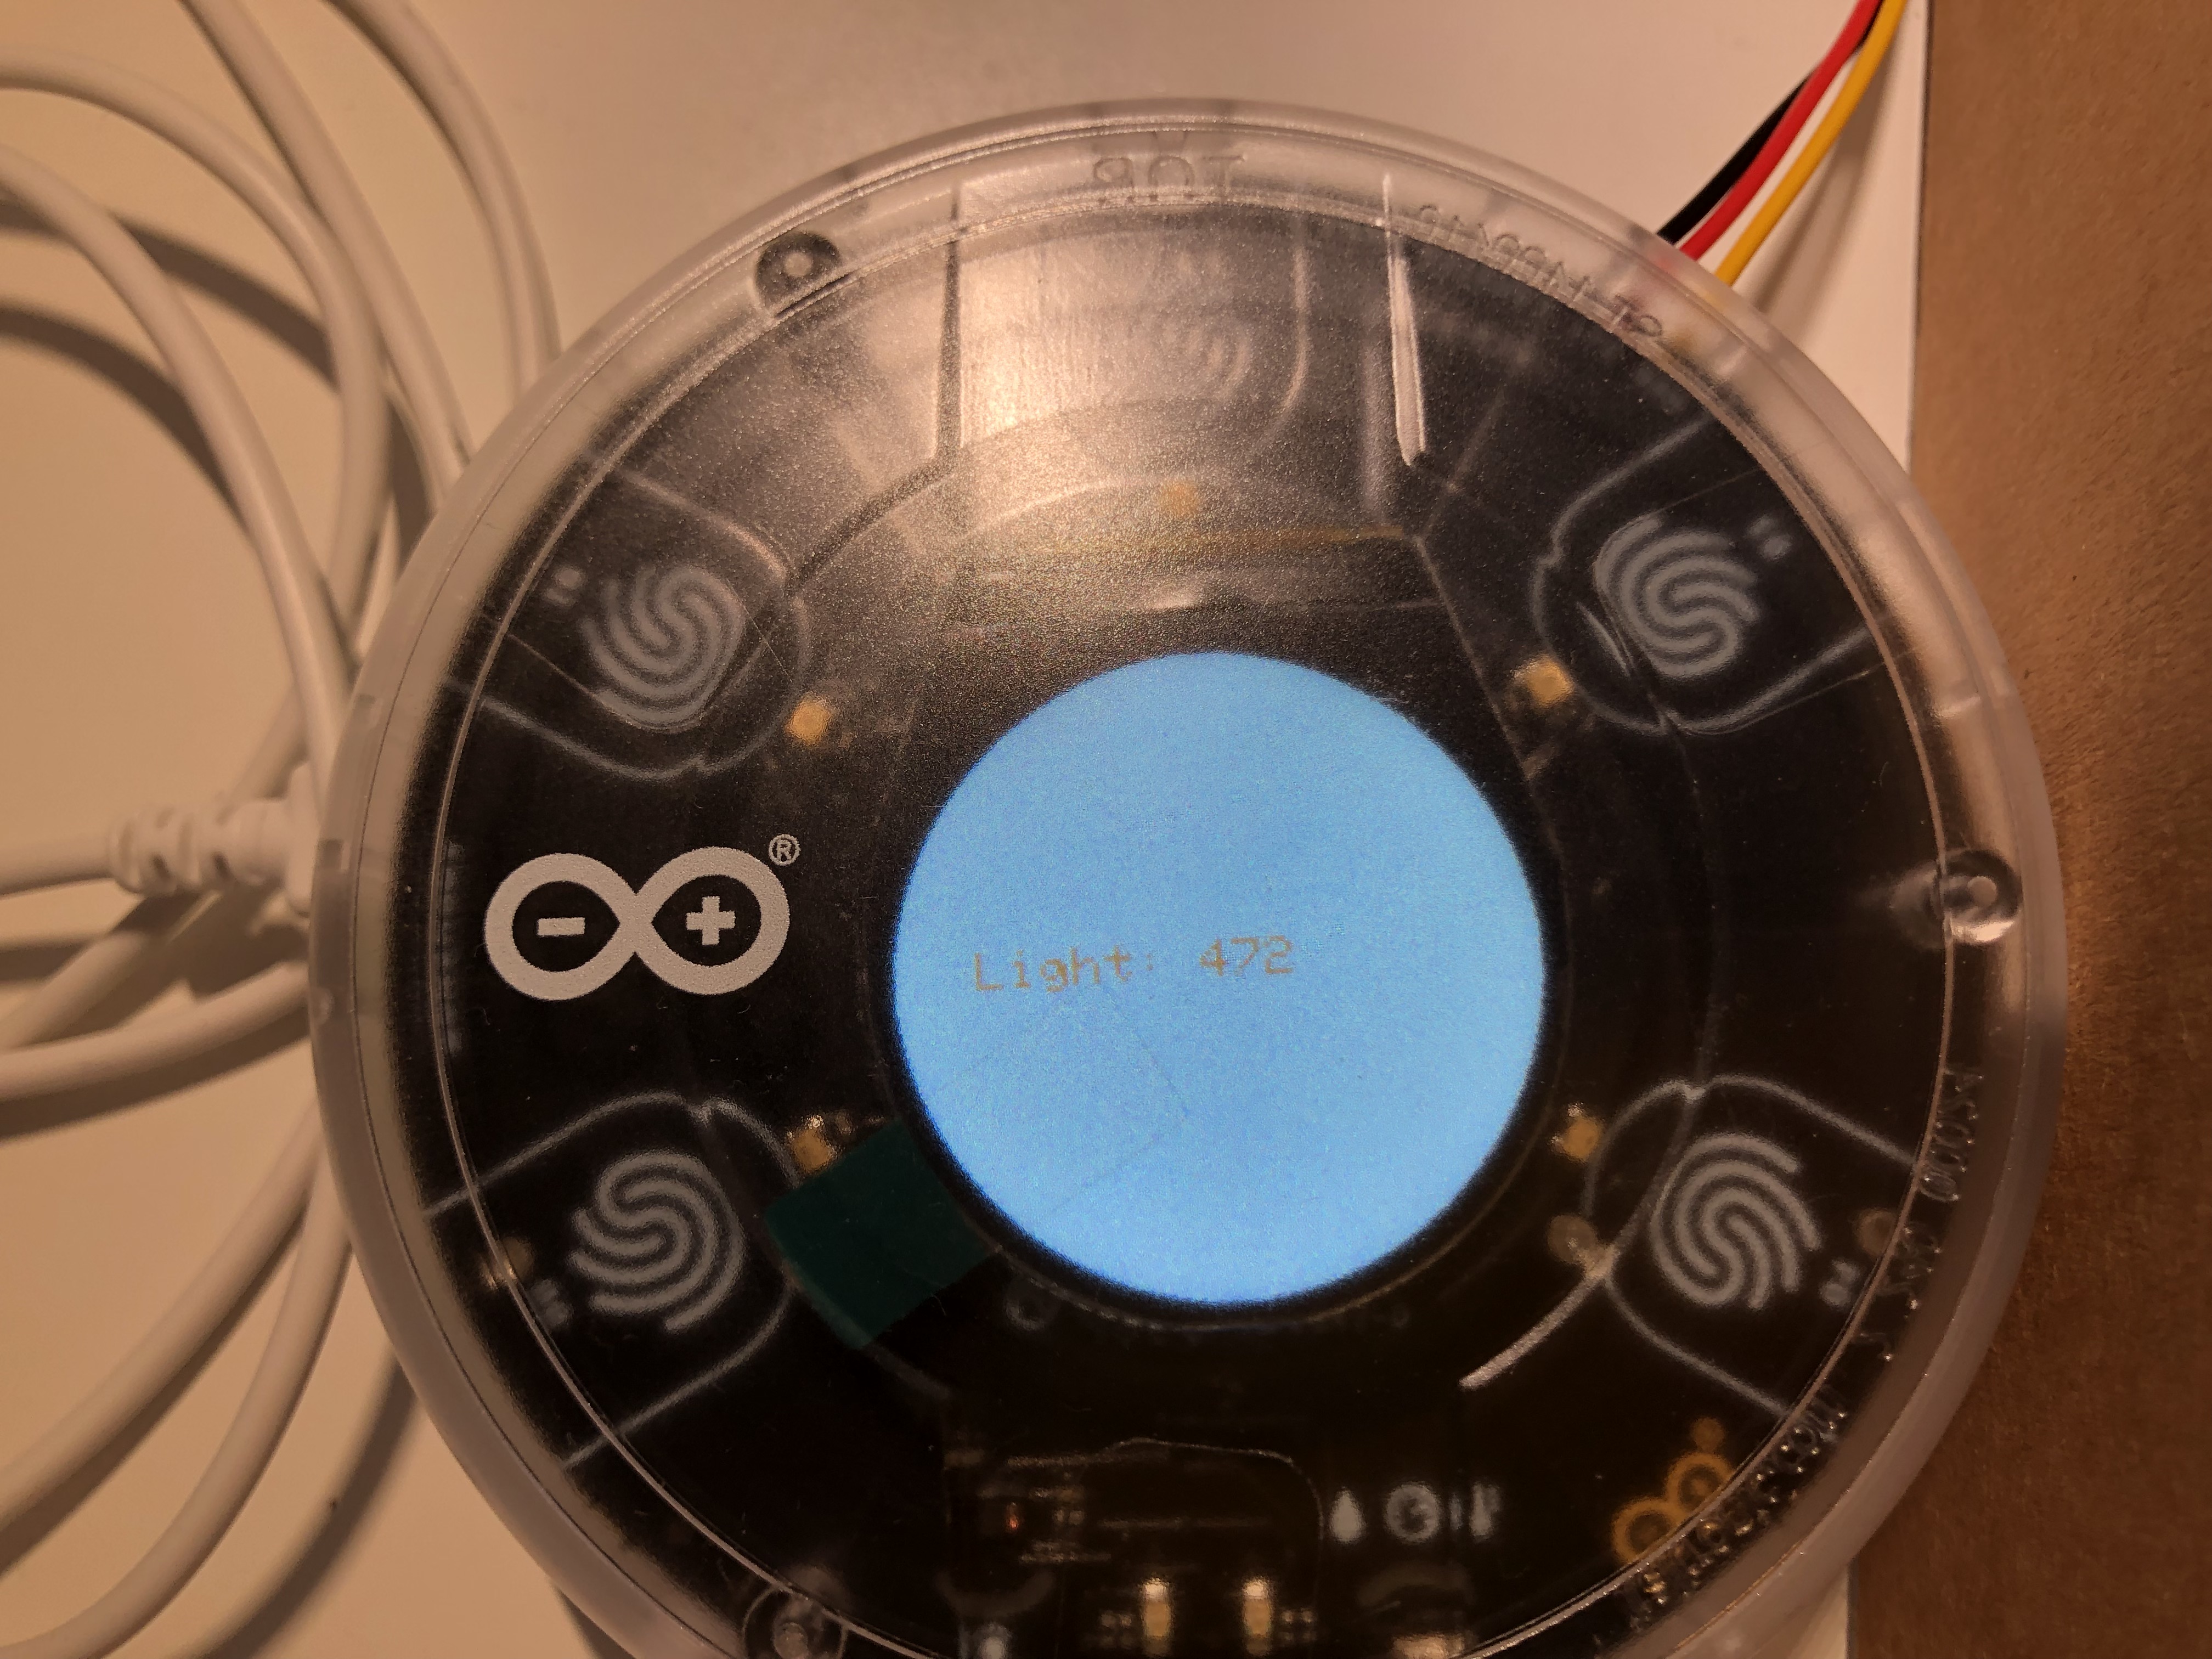
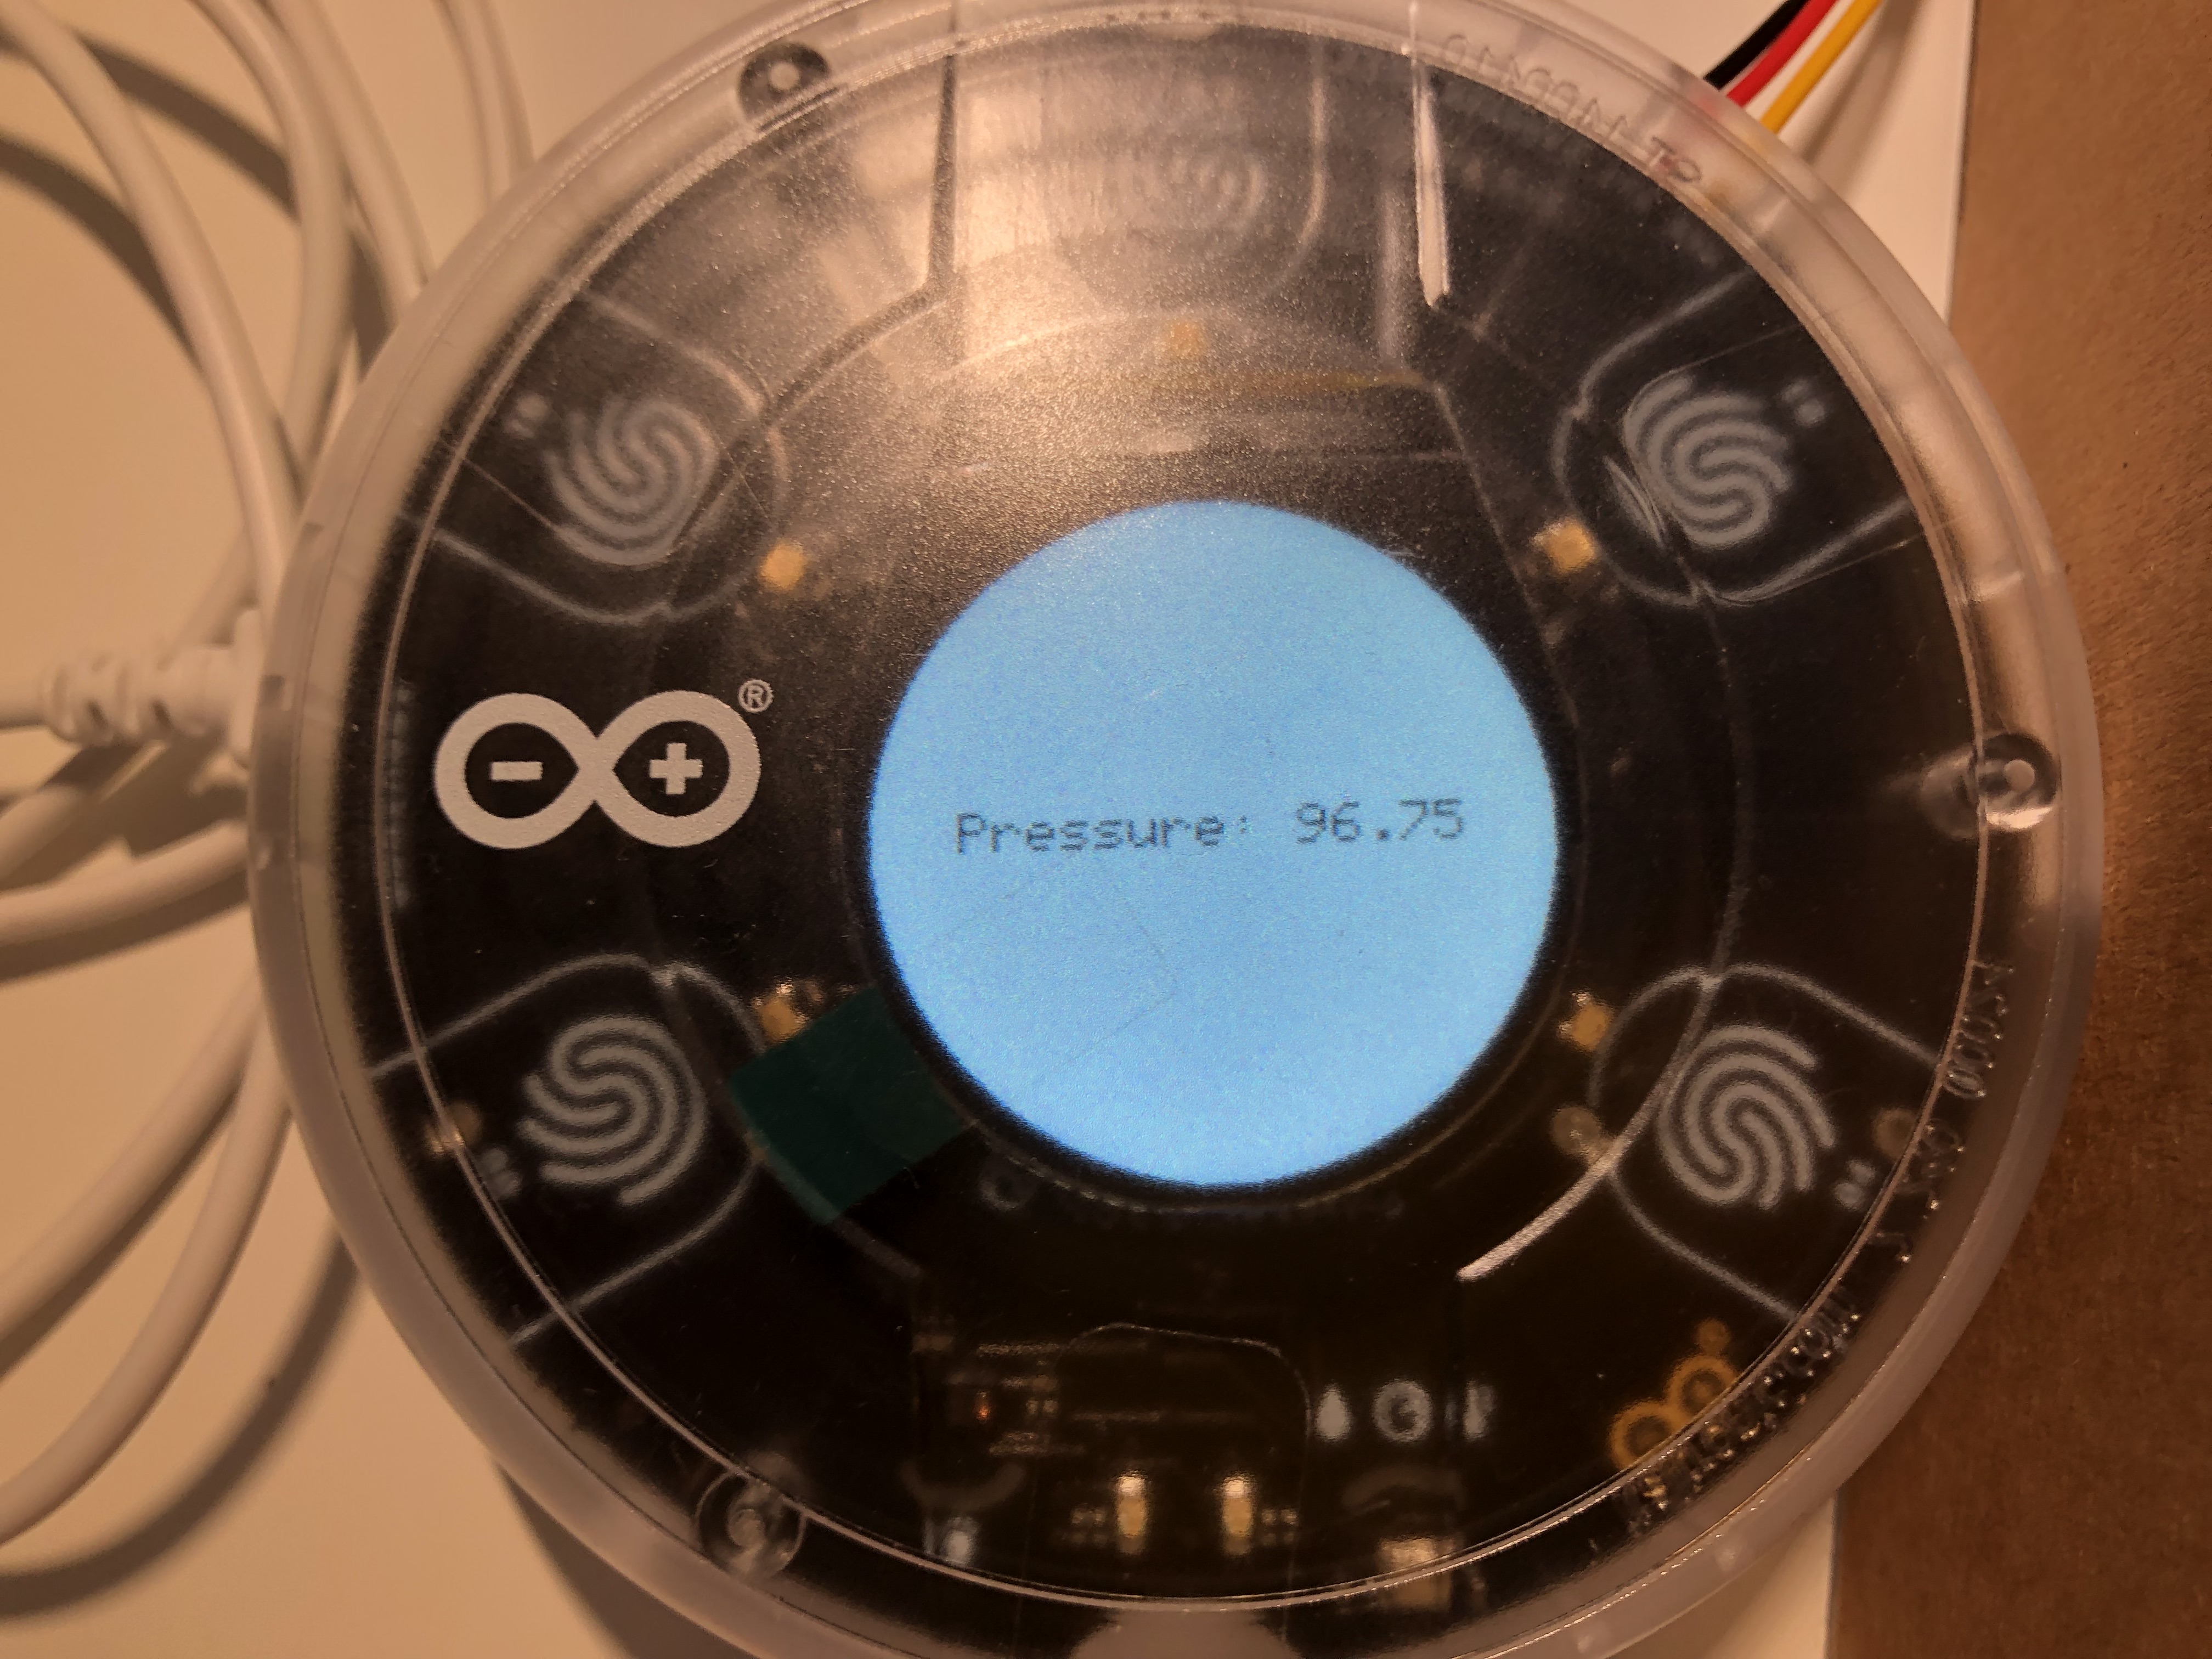
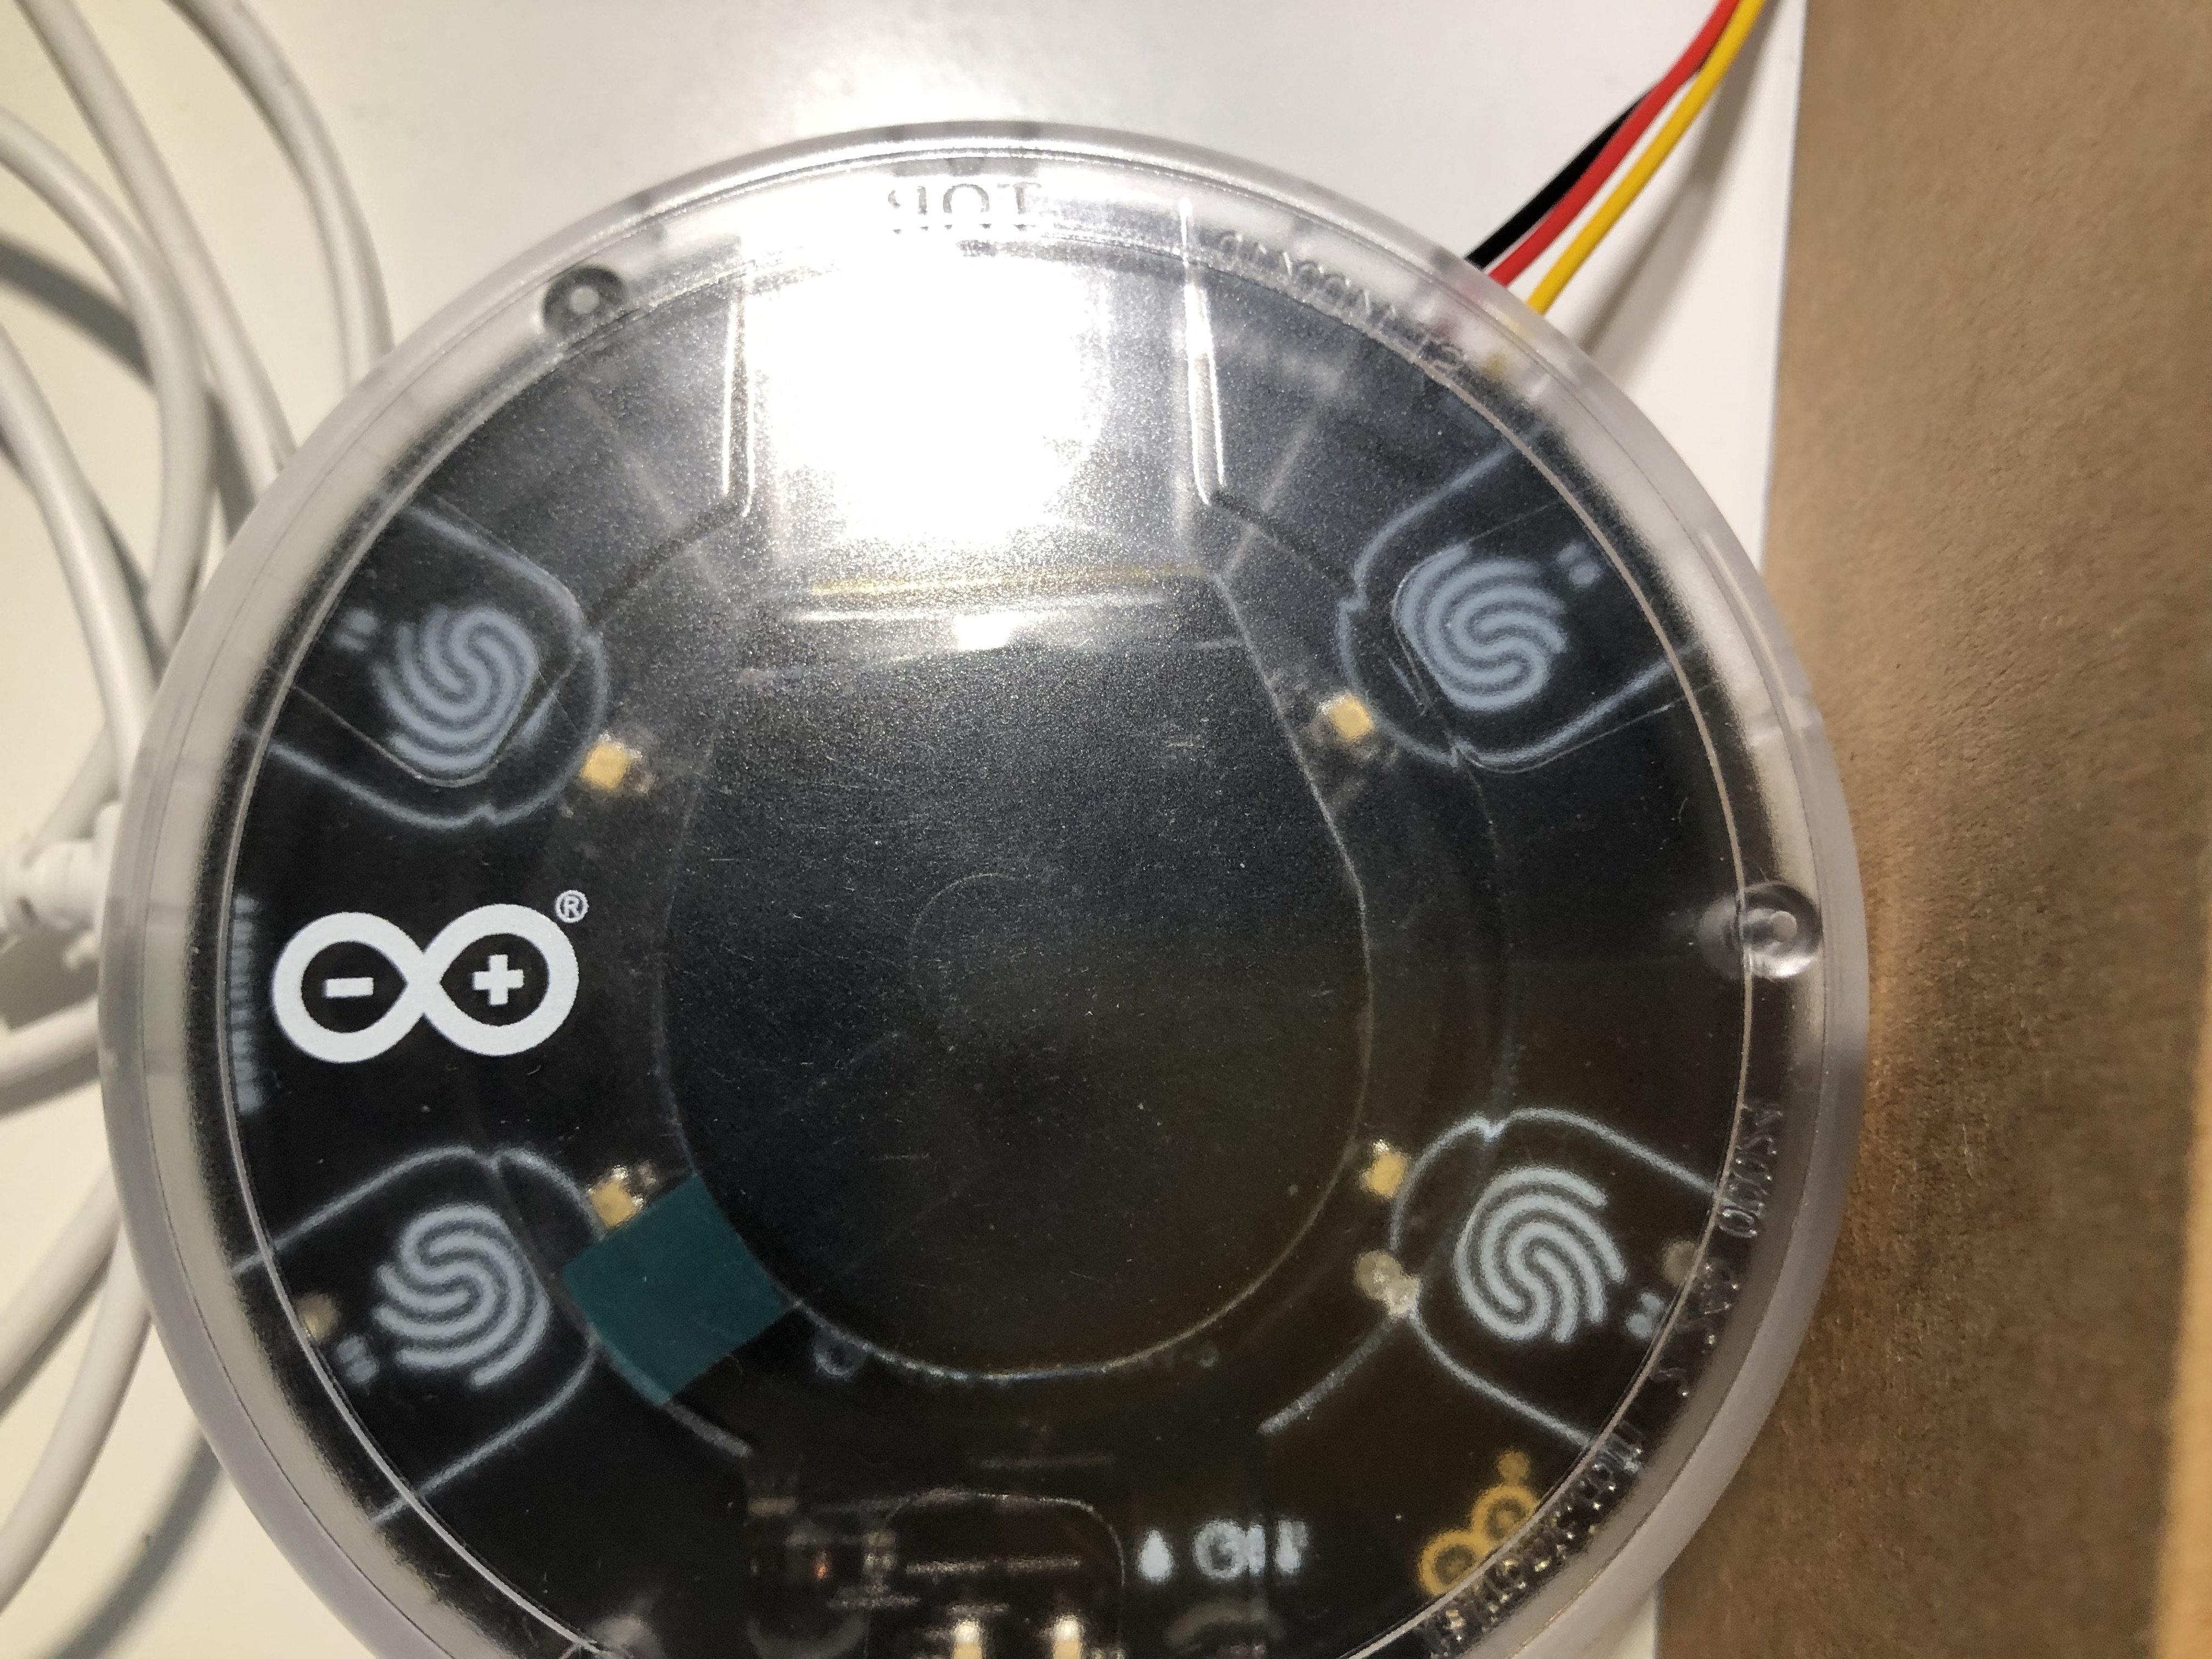
When the Arduino MKR Board gets connected to power, you can touch the various Buttons to show temperature, humidity, light, and pressure. If you touch button 04, the screen goes black and the backlight turns off to save energy. Unfortunately, there's no native turn-off backlight function, so I overwrote digital pin 3 on the MKR board, which was controlling the backlight in the setup function. Then I just used digitalWrite(3, LOW); to turn off the backlight and digitalWrite(3, HIGH); to turn the backlight back on.
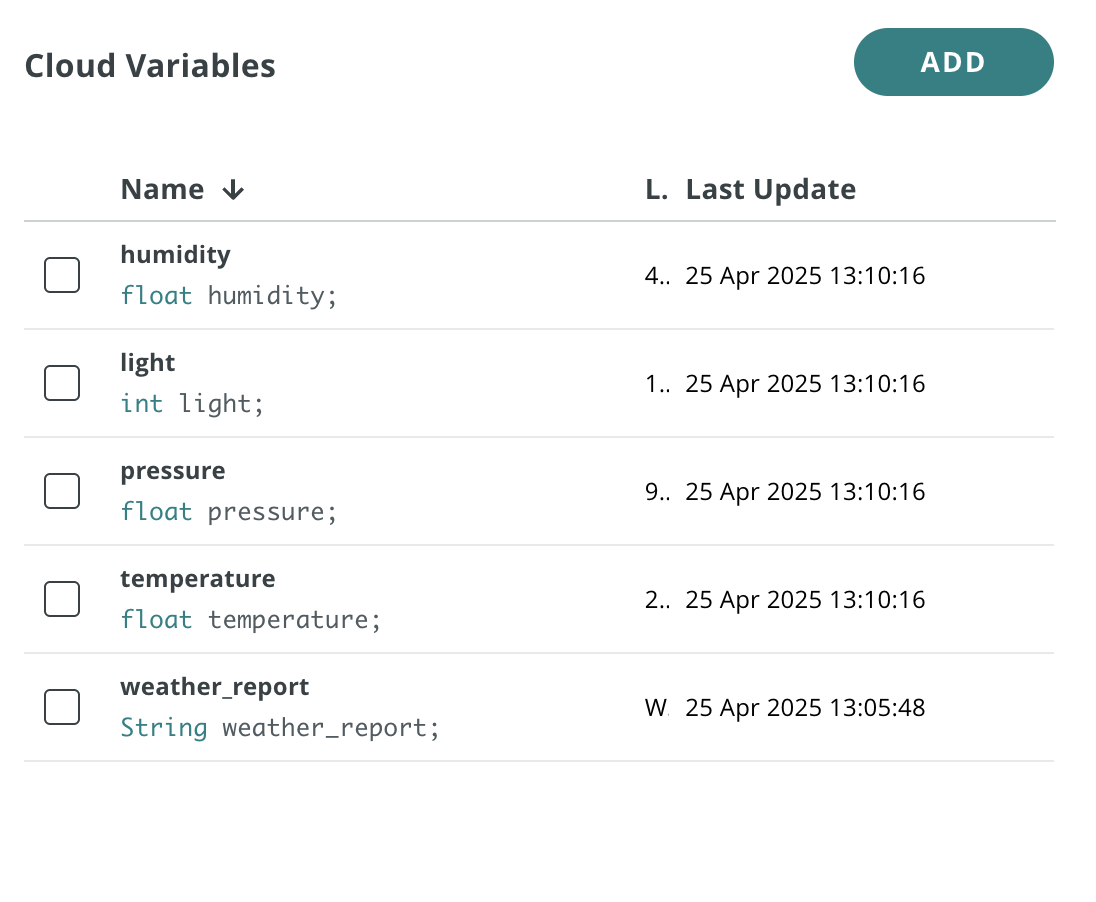
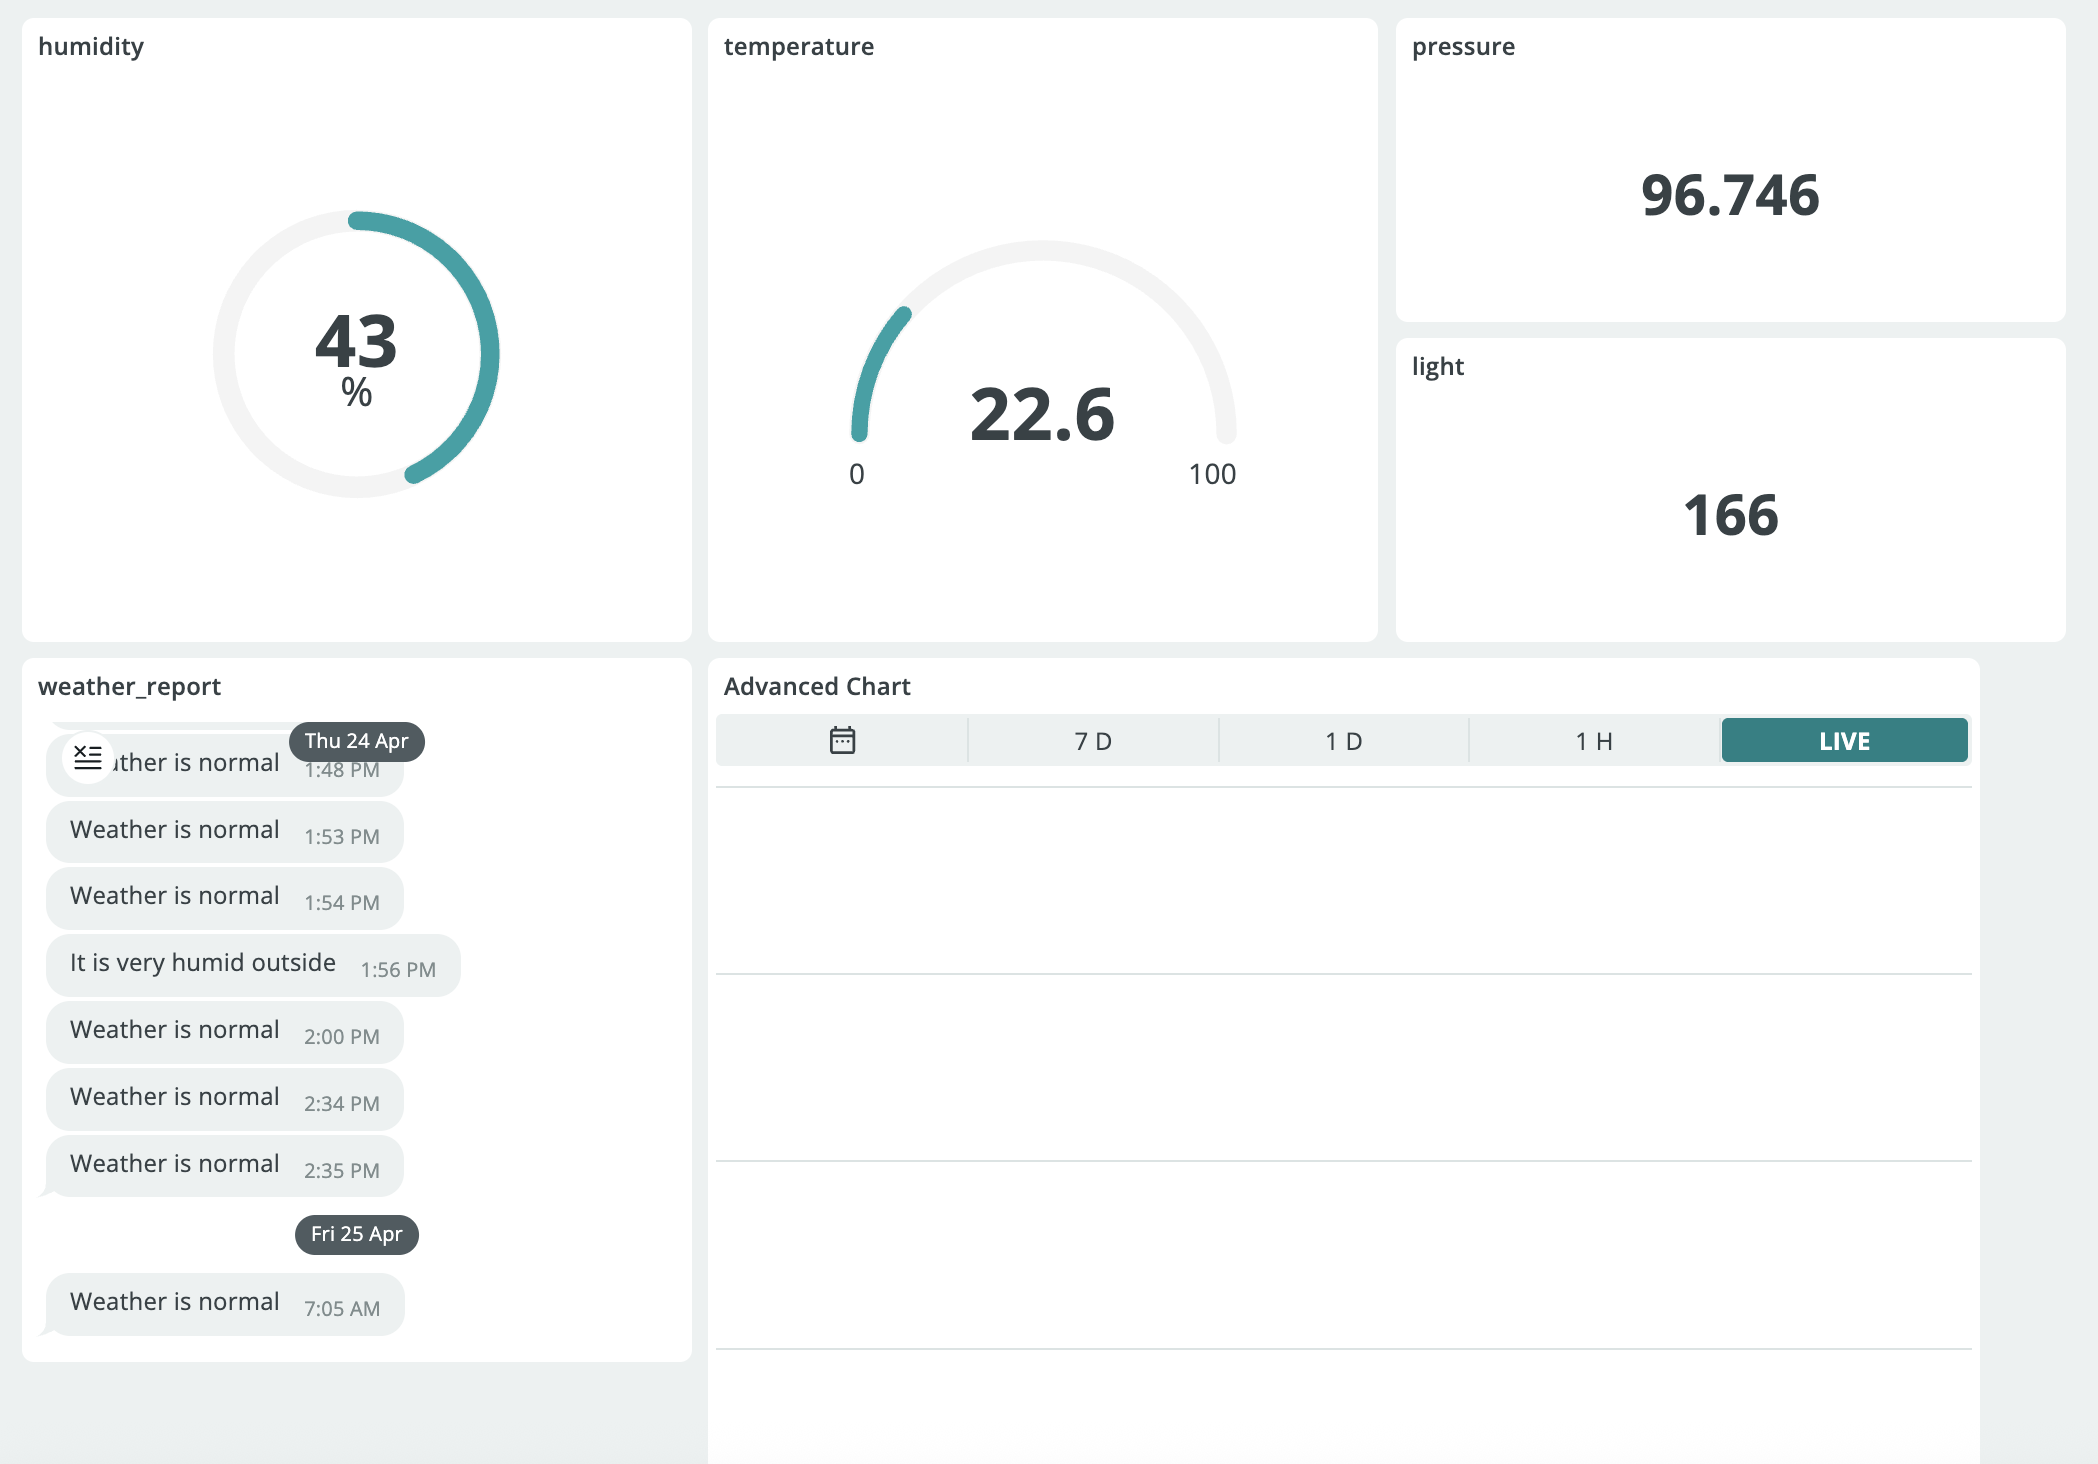
The code that's embedded below is what I've copied and pasted from my Arduino Cloud IDE. You'll first have to make a new IoT thing and assign the following Variables in the setup section: humidity, light, pressure, temperature. These variables need to be floats (except the light variable, which needs to be an integer), read-only, and periodic update policy of 1s. The last Variable you need to declare is the weather_report variable. It needs to be a string, read-only, and on change update policy.
You also need to associate an Arduino board and connect it to your network.
A sketch will then be generated based on these variables. Note: It's important not to completely delete that generated code and replace it with the code provided below. You'll instead have to copy individual snippets of the code provided below to paste into your code. (Make sure to set CARRIER_CASE = false; if you're planning to use the station outside its casing in the setup function) The last step is to upload the sketch to the Arduino (make sure you have the Arduino Create agent installed) and configure the Dashboard (see Dashboard Reference). The advanced chart contains the humidity, temperature, light, and pressure graphs.
Now, this is just a prototype. There is more potential to this project. You could turn the Breadboard-DHT module into a real and compact PCB module that you can connect directly with that Plug-and-Play cable, without needing these jumper wires. But making custom PCBs is far from my skill set. Feel free to iterate on this project and post your result to the Arduino Project Hub! (Just mention me there in the Project Description ;-) )
EXPANDED TECHNICAL DETAILS
Professional Grade Environmental Monitoring
An upgrade to the standard weather station, this version utilizes the Oplà IoT Kit for advanced data visualization and long-term logging.
- Integrated High-Resolution Display: Uses the Oplà's circular color screen to render live gauges for Barometric Pressure (hPa), Humidity (%), and UV Index.
- Arduino IoT Cloud Telemetry: Sends the data via WiFi to a personalized cloud dashboard. This allows the user to see historical "Weather Trends" and receive alerts on their phone if extreme conditions (like freeze or high UV) are detected.
Reliability
- Battery-Backed Operation: Includes logic for "Low Power Mode," allowing the station to run for days on a Li-Ion battery while still checking sensor values every 10 minutes.