This radio alarm clock has amazing sound given its size and works as a Bluetooth speaker as well. However, there are some issues that come with it:
- The illumination of the clock is too bright to have it close to where you sleep (remember, it's an alarm clock), there is no switch nor a possibility to dim it.
- The clock is not radio controlled, you have to set it manually.
- The alarm time is set in a 12 hour clock cycle. If you set it to 6 am, it will go off at 6 pm as well. I also wasn't able to set it very accurately, given the manual clock setting.
- The clock (and the alarm) is run by a battery, whereas the rest of the radio is run from a wall adapter.
And that is pretty much what the reviews say as well. In my case, I also encountered problems with the alarm going off in the middle of the night.
My concept consists of three basic improvements:
- get the exact time
- set the clock accordingly
- set an exact alarm time and make the alarm (the radio in this case) go off at that time
For setting an analog clock, I learned that the difficulty is to know which time the clock's hands are showing. One way to solve this when setting the clock after a restart, is to find a reference position like 12:00 and then count the steps onwards.
To set an exact alarm time, I decided to use the radio's snooze button and a display hidden behind the clock's face.
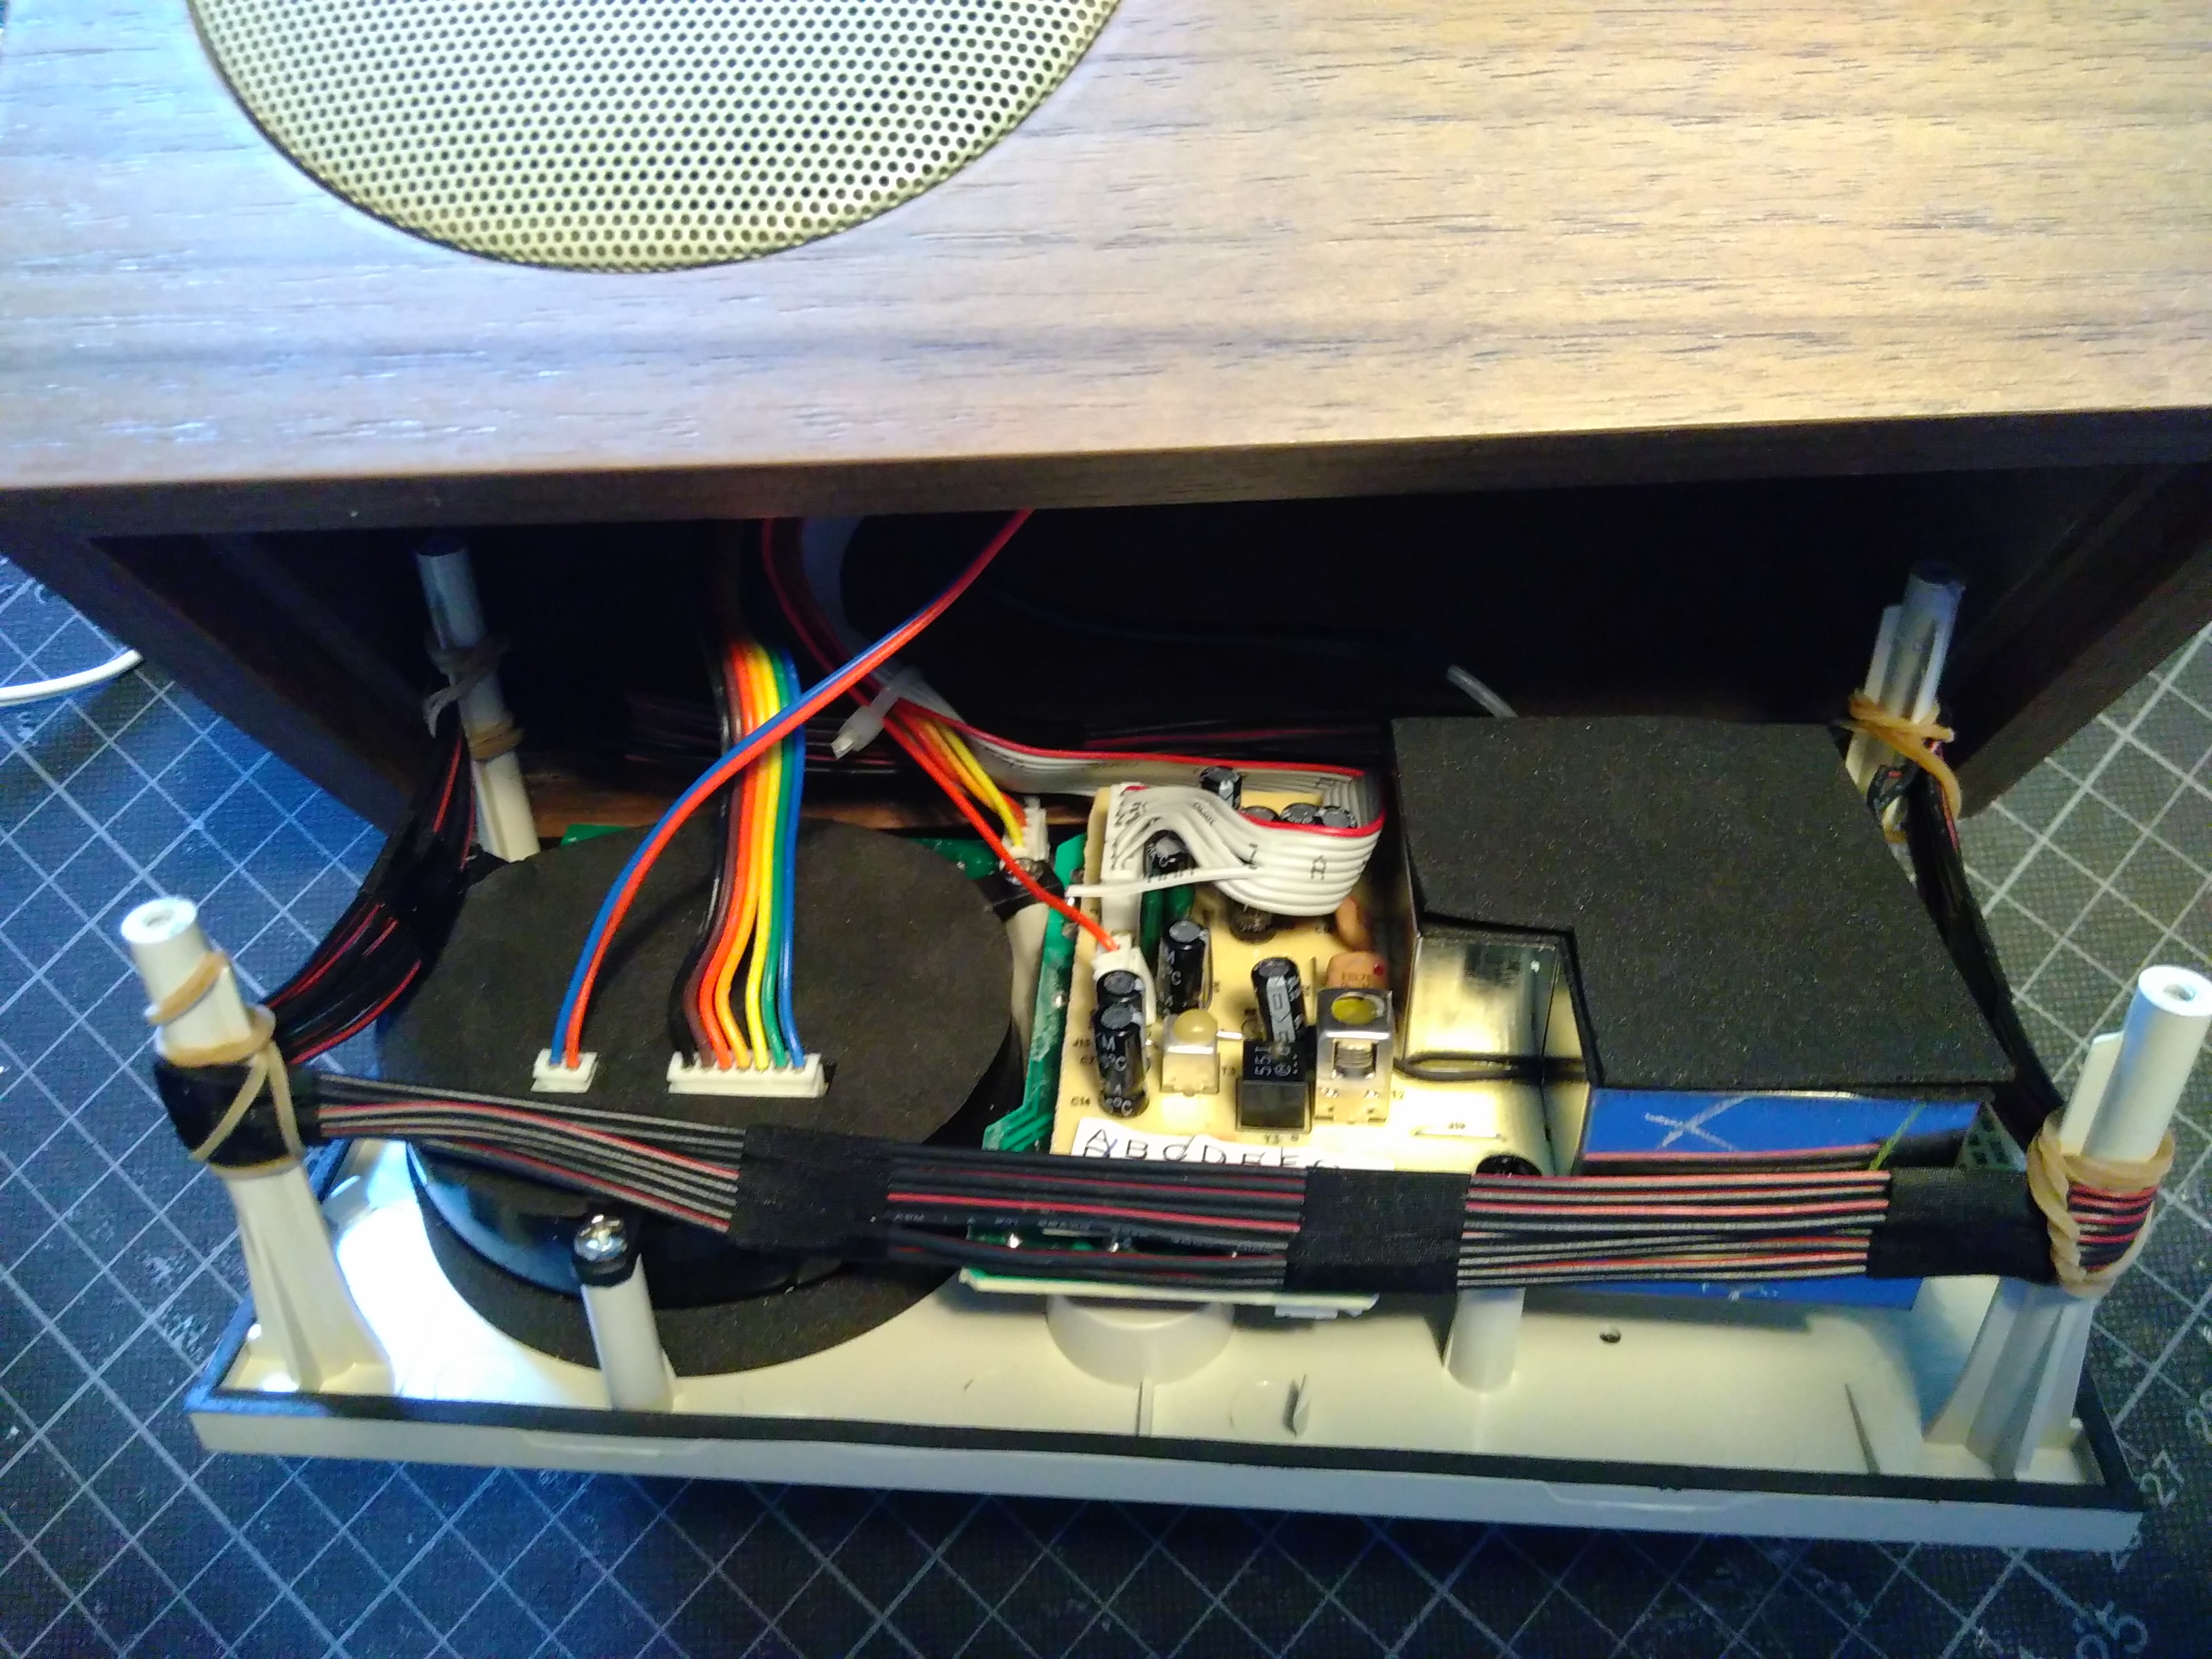
My first attempt was to use the original clock movement and add a "backpack" with an Arduino Nano, the Micro OLED and a DCF 77 receiver to get the exact time. Unfortunately, the reception of the DCF signal was insufficient once the components were put into the housing with all the wires from the radio around them. Also, I couldn't detect a reference position of the clock's hands by using the original movement's alarm. As mentioned above, the alarm going off at different times was part of the problem in the first place.
With a project that is always indoor, but especially after the Arduino IoT Cloud Public Beta was announced in February 2019, I decided to include WiFi connectivity to get the exact time.
What was then left to solve was finding a reference position of the clock's hands. Several attempts with hall sensors/magnetometers and magnets on the hands were ok but didn't quite achieve a result that would meet my expectations in terms of accuracy and repeatability. Thankfully, I received a sample of a clock stepper motor with an optoelectronic coupler integrated for reference detection after contacting manufacturers directly.
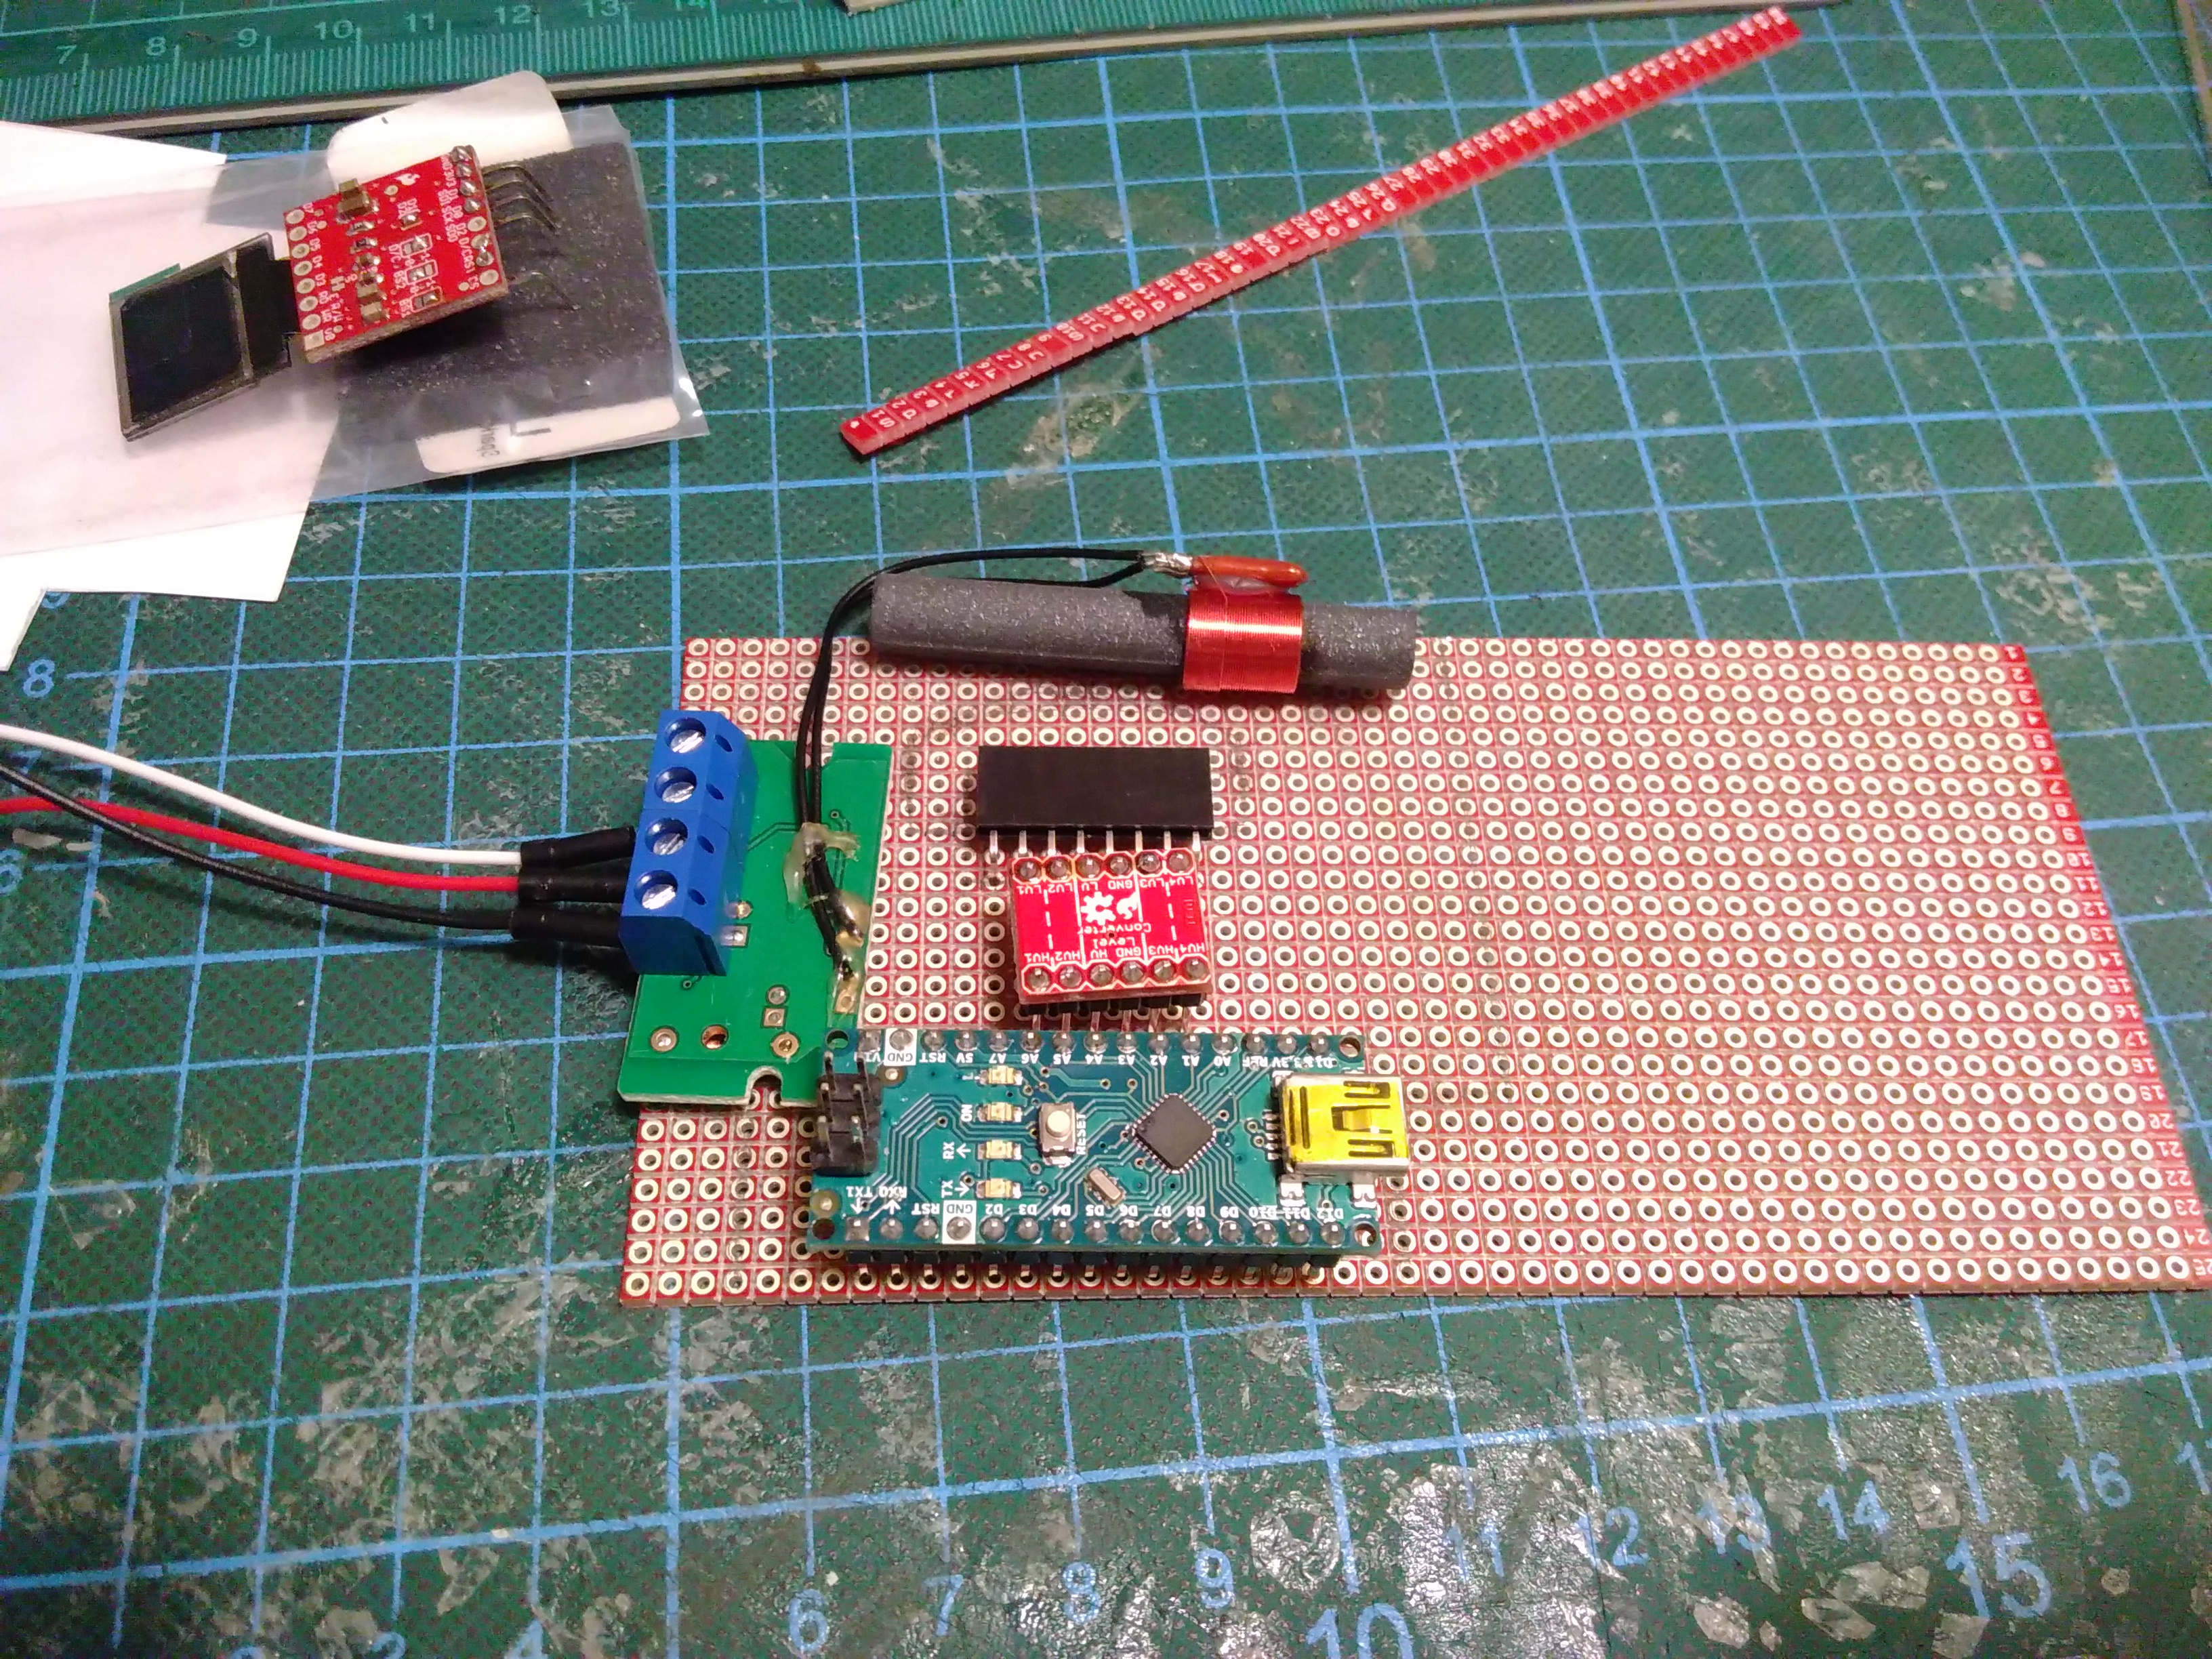
Finally, after the Arduino Nano 33 IoT was announced in May 2019, I replaced the MKR WiFi 1010 in my prototype with the Nano and its smaller form factor.
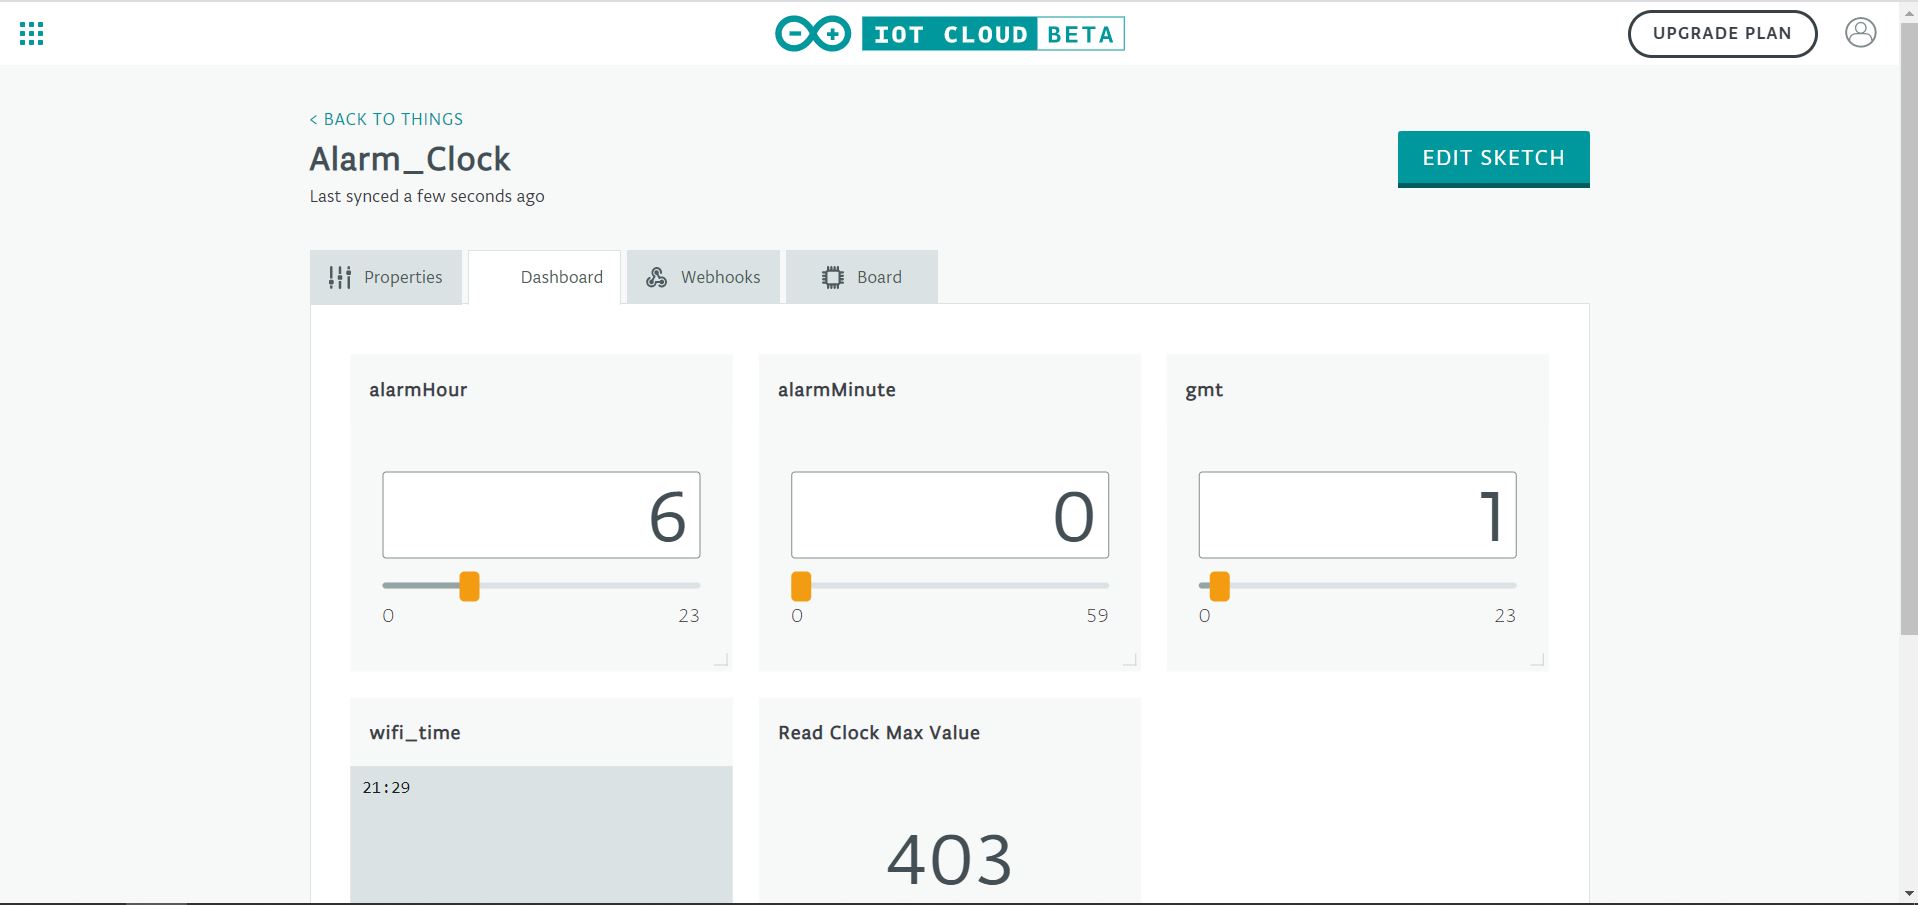
The alarm time (hour and minute) can be set using the snooze button or via the dashboard as claimed in the pitch.
This is my first hobby project with 3D-printed parts and my first ever custom PCB. Being a beginner to PCB design, Fritzing's easy to use PCB feature was very helpful.
EXPANDED TECHNICAL DETAILS
System Architecture
The heart of this smart clock is the Arduino Nano 33 IoT, which leverages the NINA-W102 module (ESP32-based) for WiFi connectivity. This allows the device to sync with NTP (Network Time Protocol) servers, ensuring the clock is always accurate without manual adjustment.
Electromechanical Integration
Unlike traditional clocks that use a simple oscillating quartz movement, this project uses a specialized clock stepper motor.
- Stepper Control: Driven by a TB6612FNG Dual Motor Driver, which allows for precise, discrete movements of the clock hands.
- Reference Detection: An integrated optoelectronic coupler acts as a home sensor. During startup, the clock rotates until the light beam is broken by a physical tab on the gears, establishing a "Zero" reference position (e.g., 12:00:00).
IoT Cloud Features
Through the Arduino IoT Cloud, the user can:
- Set Alarms: Update the alarm variables via a web or mobile dashboard.
- Sync Settings: Adjust GMT offsets and daylight savings settings over the air.
- Display Interface: The Micro OLED provides a hidden discrete display for showing the configured alarm time or connection status, improving the user interface over the original analog-only design.